Alerts is an Appspace feature that can enable system-wide alert broadcasts of important or critical messages such as weather warnings or emergency announcements across a network, immediately or at a scheduled time to target devices, via a channel. The alert broadcast will automatically take over the channel that is currently running on the device and display a full-screen message.
To configure an alert, you must first define your messaging categories and allocate color codes to them, i.e. Fire Alert, Emergency Evacuation Messaging, Service Expiry Notification, and such. You then create a messaging template and categorize it according to the messaging category you created.
Finally, you can broadcast the message across your network on a channel.
On the Alerts dashboard, you can:
- Create an alert category with a description and colour assigned to it.
- Create an alert template, assign a category to it, and attach an image or an Appspace card.
- Create broadcast messages targeted to all sites, a group of sites, or a single site.
- Sync broadcast messages to registered sites within Appspace.
- View active and scheduled broadcasts.
- Use the Broadcast Trigger API to generate a web handler based on the user’s selection of the site and broadcast template. Once configured, external systems utilize the API method call, in the form of a URL, to instruct Alerts to broadcast the selected template to the chosen site(s).
- Deactivate broadcasts currently in progress.
This article provides instructions to create and broadcast alerts. You can also trigger a broadcast using a custom URL on a web browser. Follow the instructions below to configure alerts:
Prerequisites
- Account Owner or Portal Administrator permissions required.
- Supported content:
-
- Images – JPEG, JPG, PNG, TIFF
- Cards – Alert card, Announcement card, Web View card
-
- Supported Appspace App devices.
Create an Alert Category
- Log in to the Appspace console.
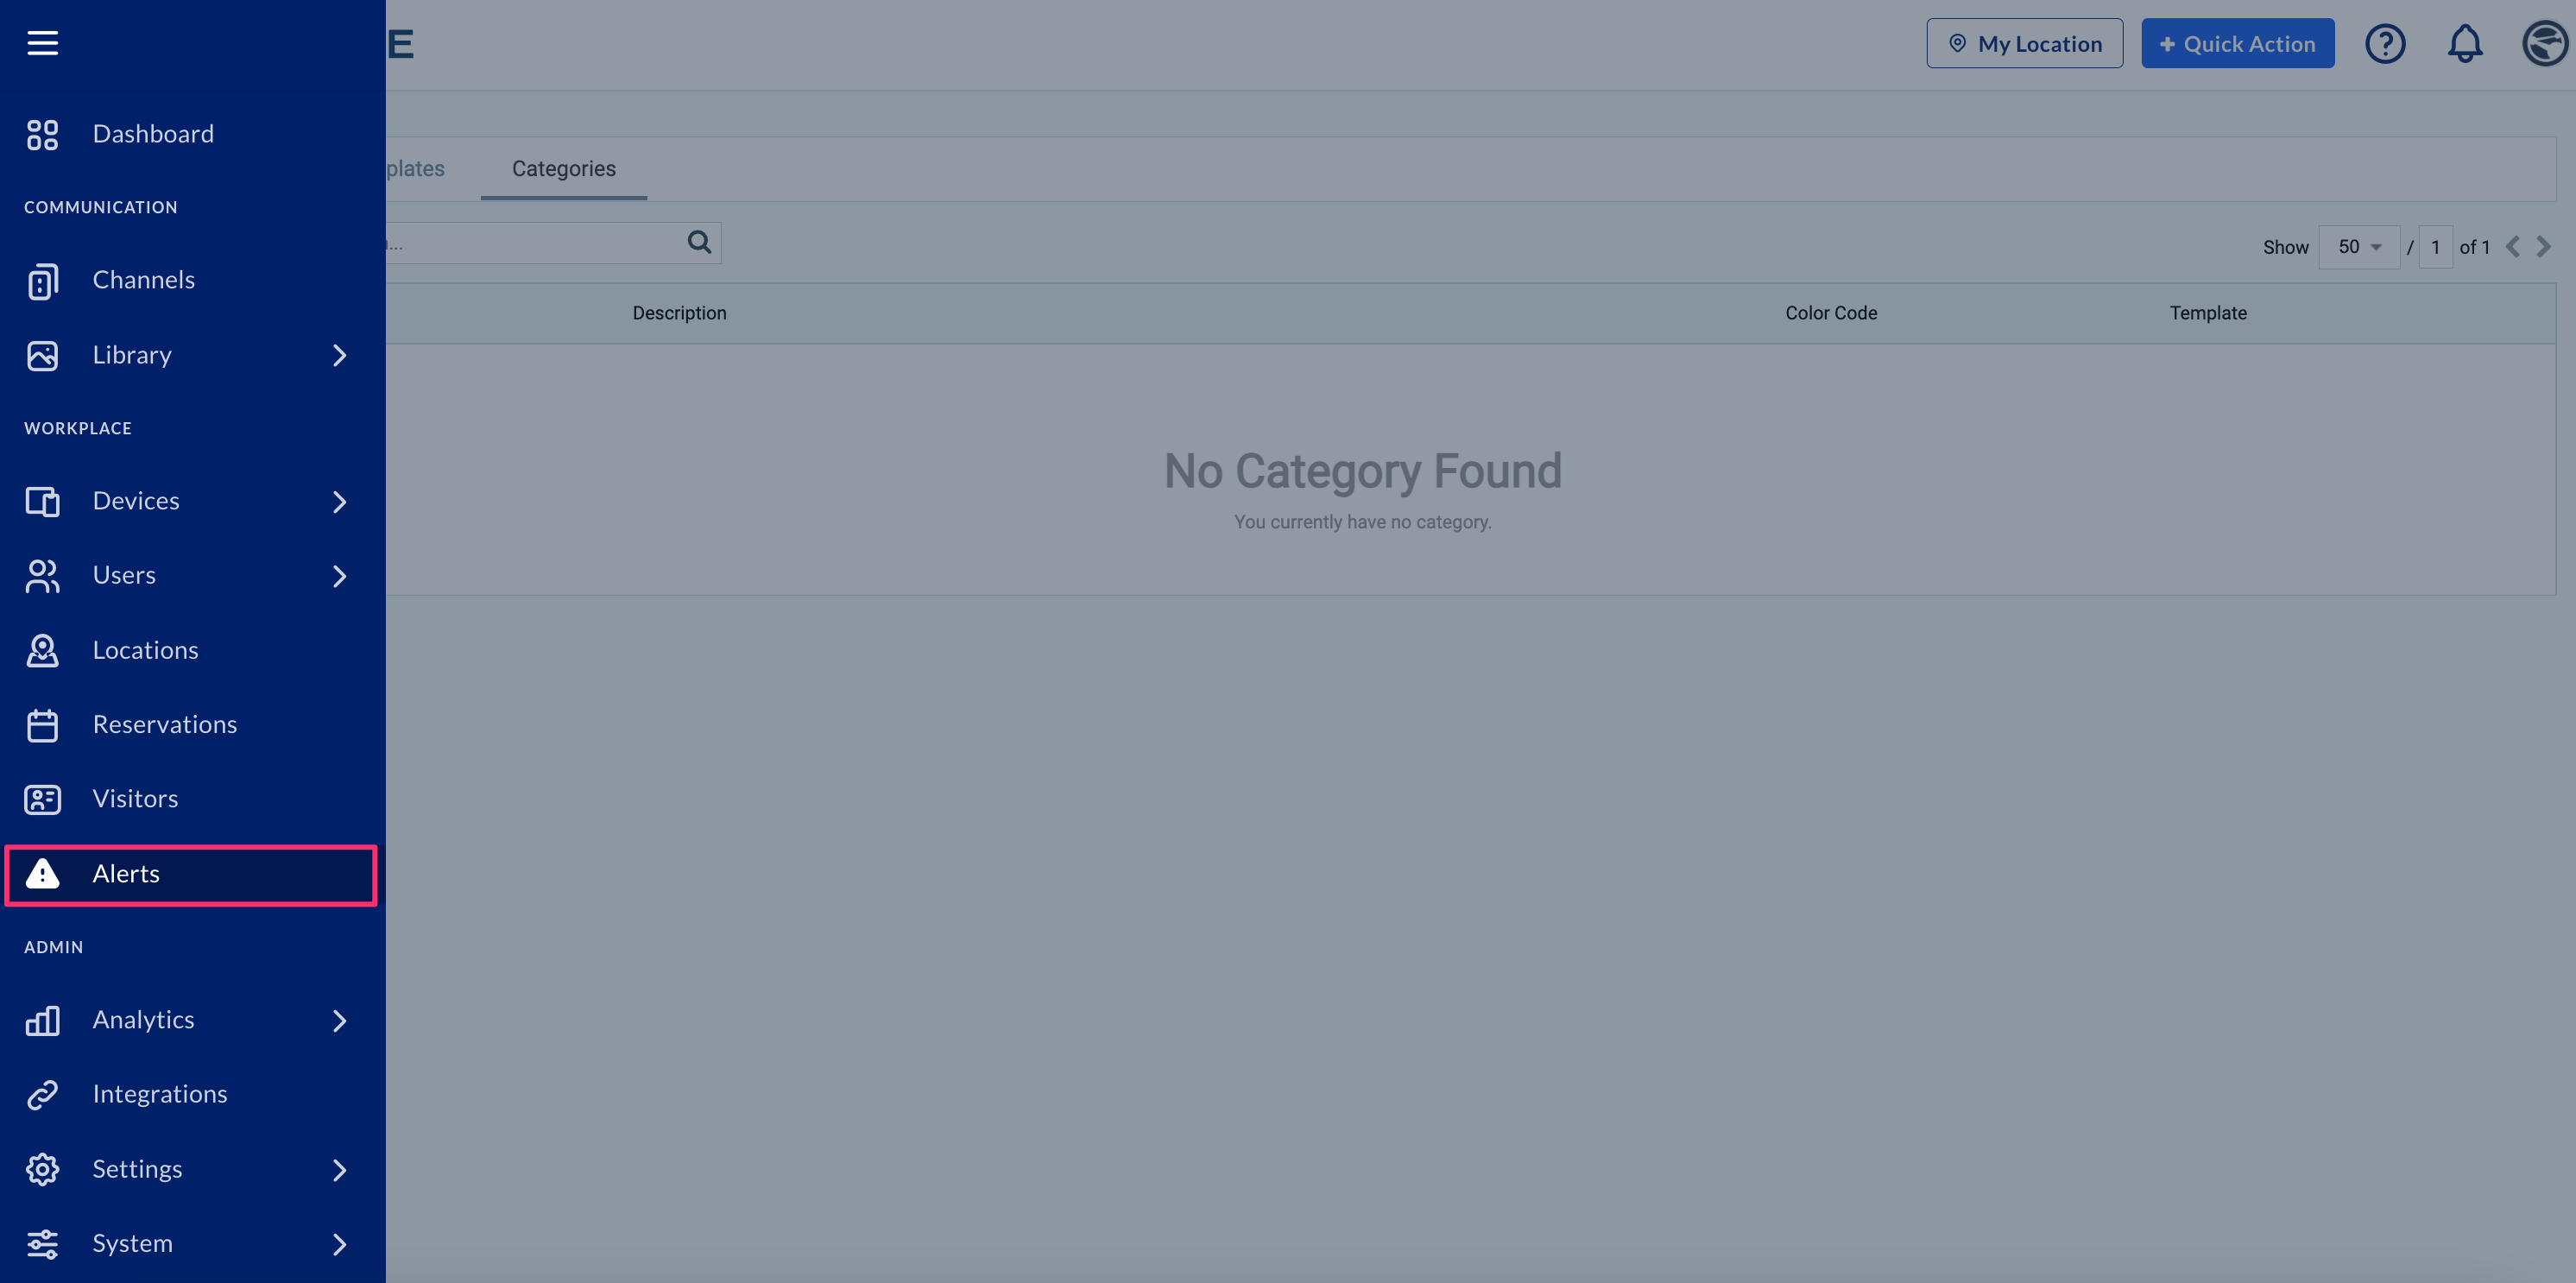
- Click the ☰ Appspace menu, and select Alerts.
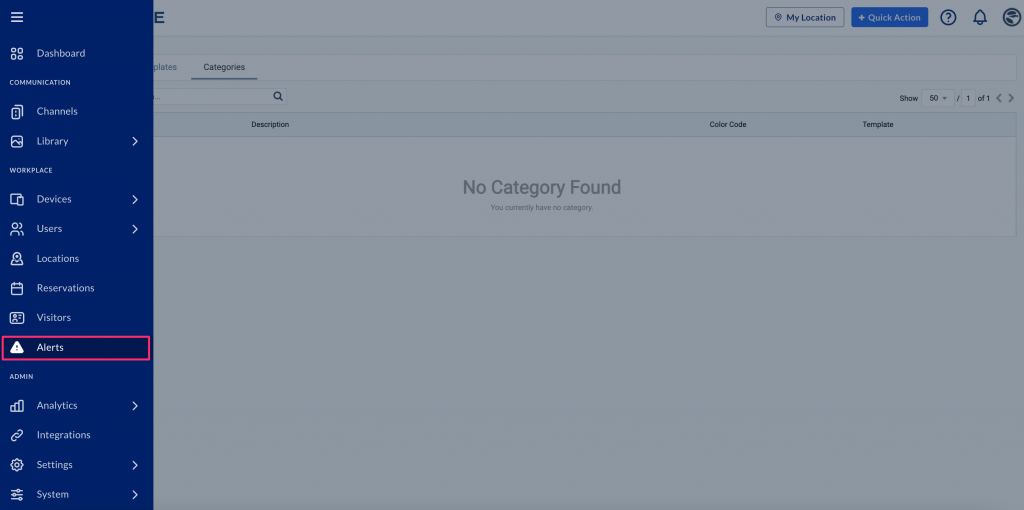
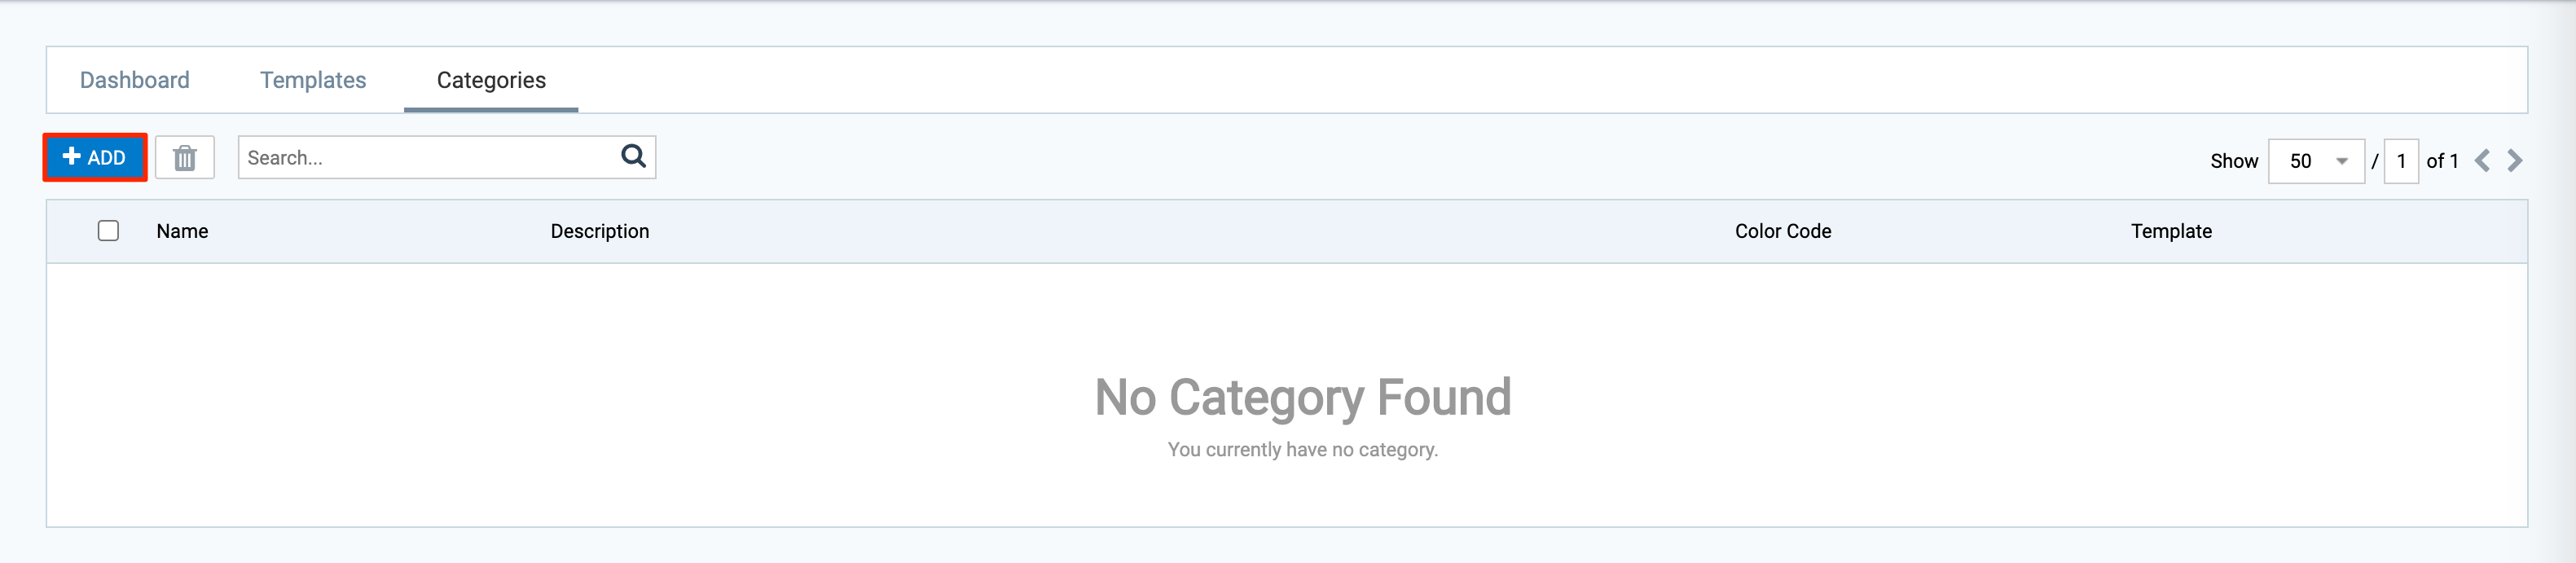
- Click the Categories tab, and click ADD.
 ImportantPlease do not use the word ‘Emergency‘ as a Category name.
 - Enter the Name, Description, and select the ColorCode for this alert category.
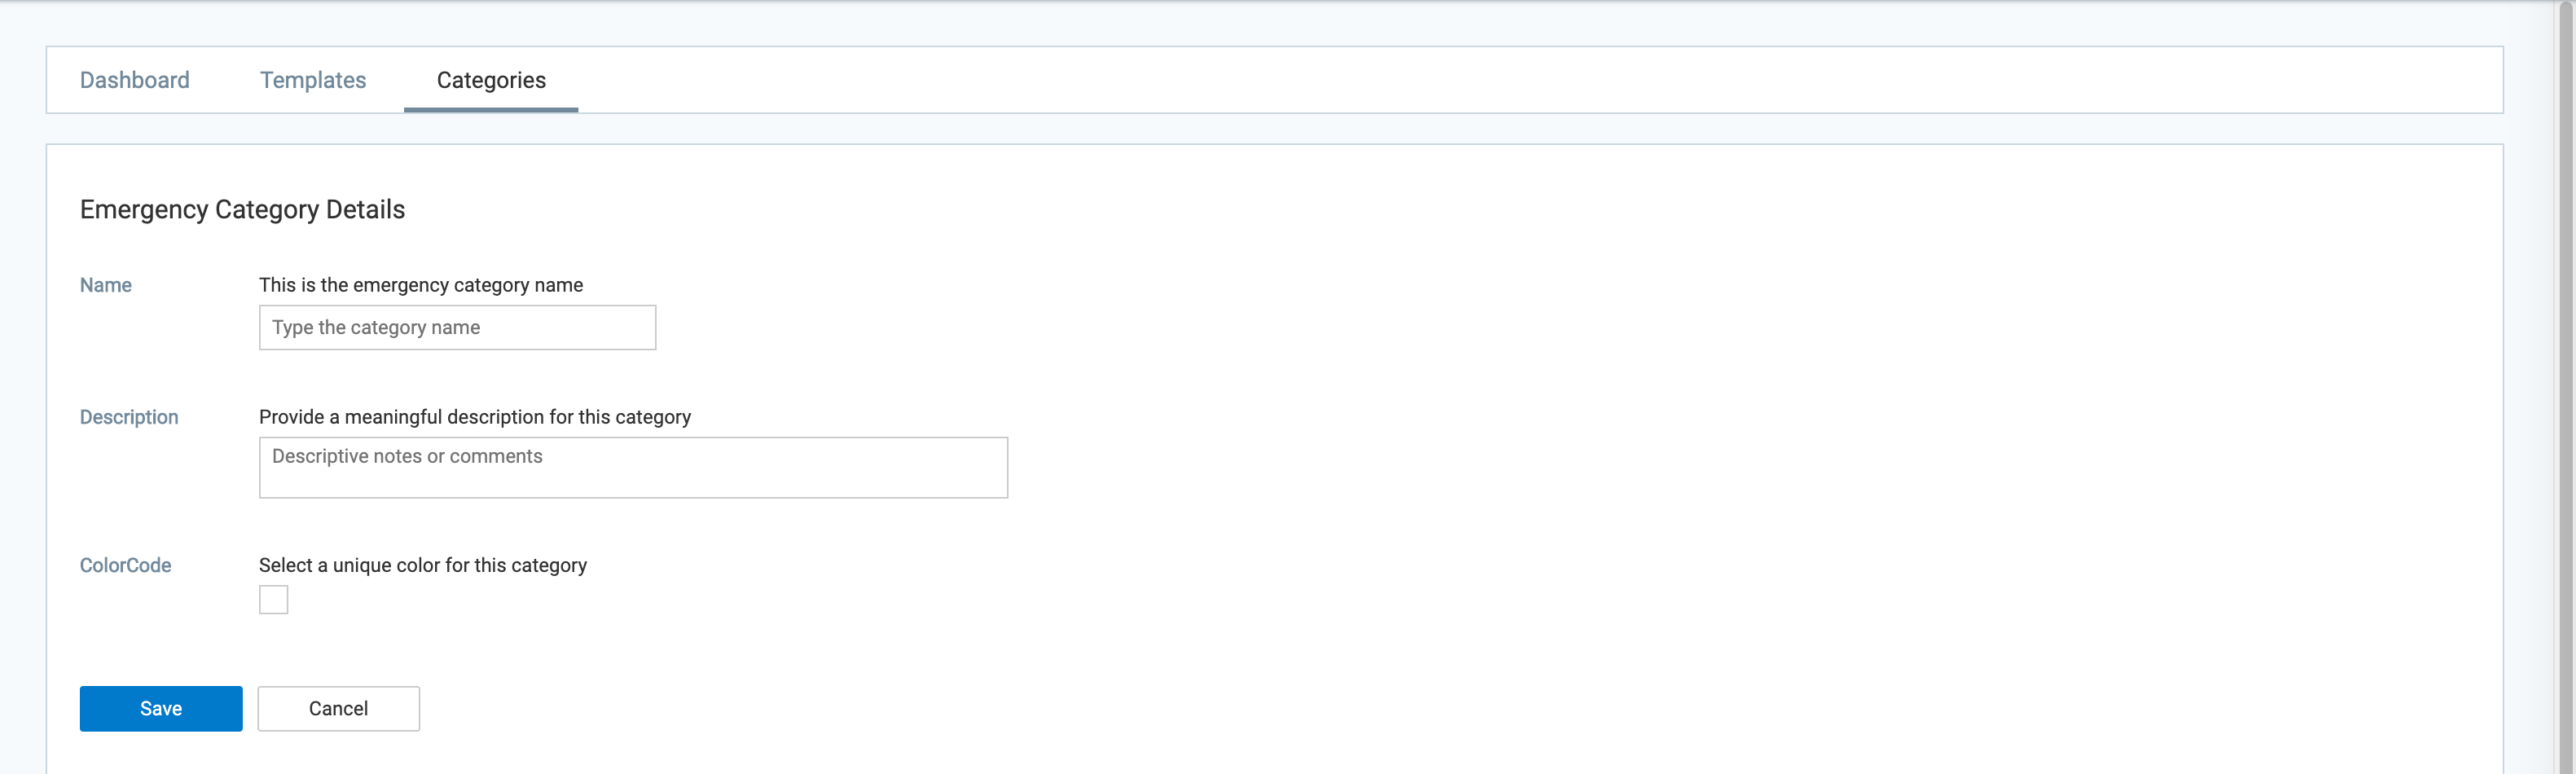
- Click Save, and proceed to the Create an Alert Template section below.
Create an Alert Template
- Log in to the Appspace console.
- Click the ☰ Appspace menu, and select Alerts.
- Click the Templates tab, and click ADD.
 ImportantPlease do not use the word ‘Emergency‘ as a Template name.
 - Enter the Name, and select a previously created category from the Category drop-down menu.
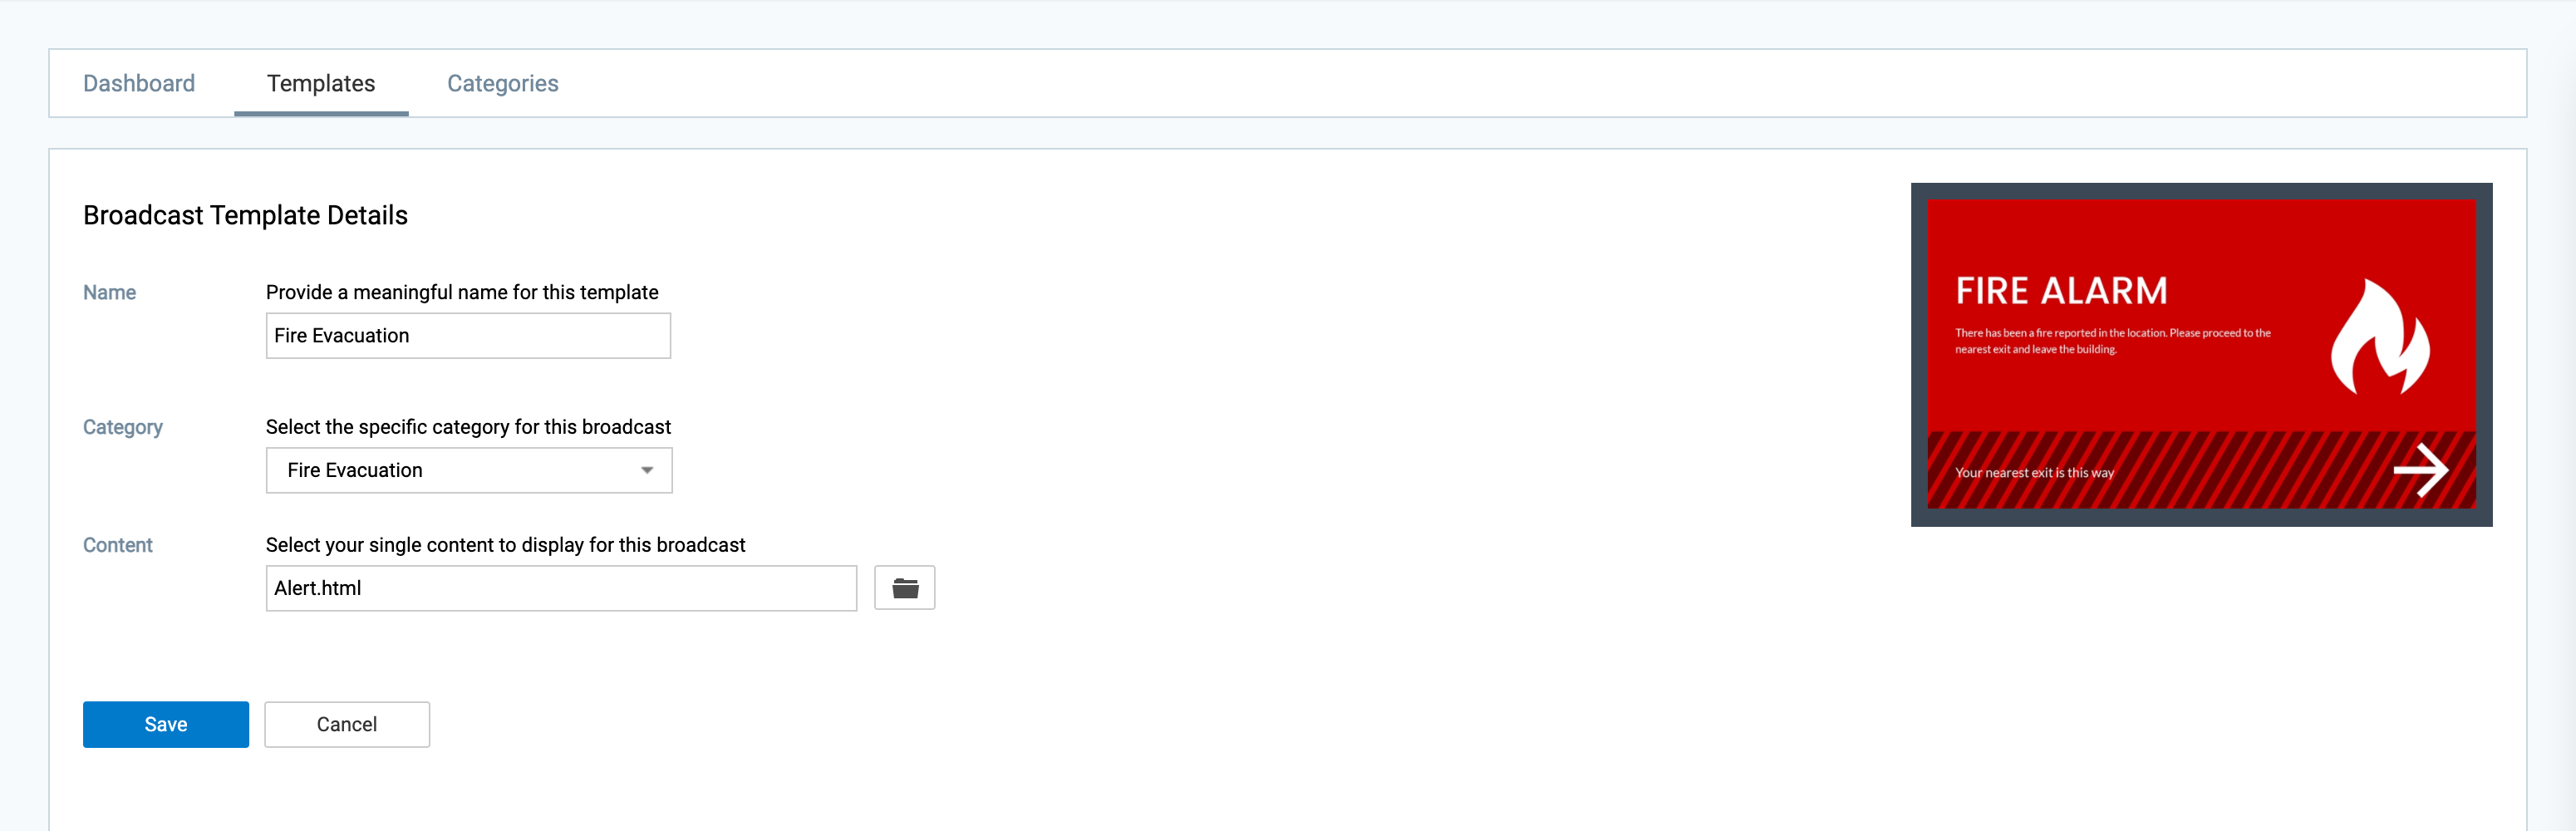
- Select an Alert card, Announcement card, or image from the library to be displayed in the broadcast.
NoteTo display alert messaging via cards, we recommend using the Alert Card. For more information and instructions on how to configure the Alert card, click the Cards: Display Alert Messaging article.
- Click Save, and proceed to Configure the Alert Broadcast Settings section below.
Configure Alert Broadcast Settings
- Log in to the Appspace console.
- Click the ☰ Appspace menu, and select Alerts.
- Click the Dashboard tab, and select AllSites, or a specific device group to broadcast the alert.
- Click the Broadcast icon.

- Select a previously created alert template from the Template drop-down menu.
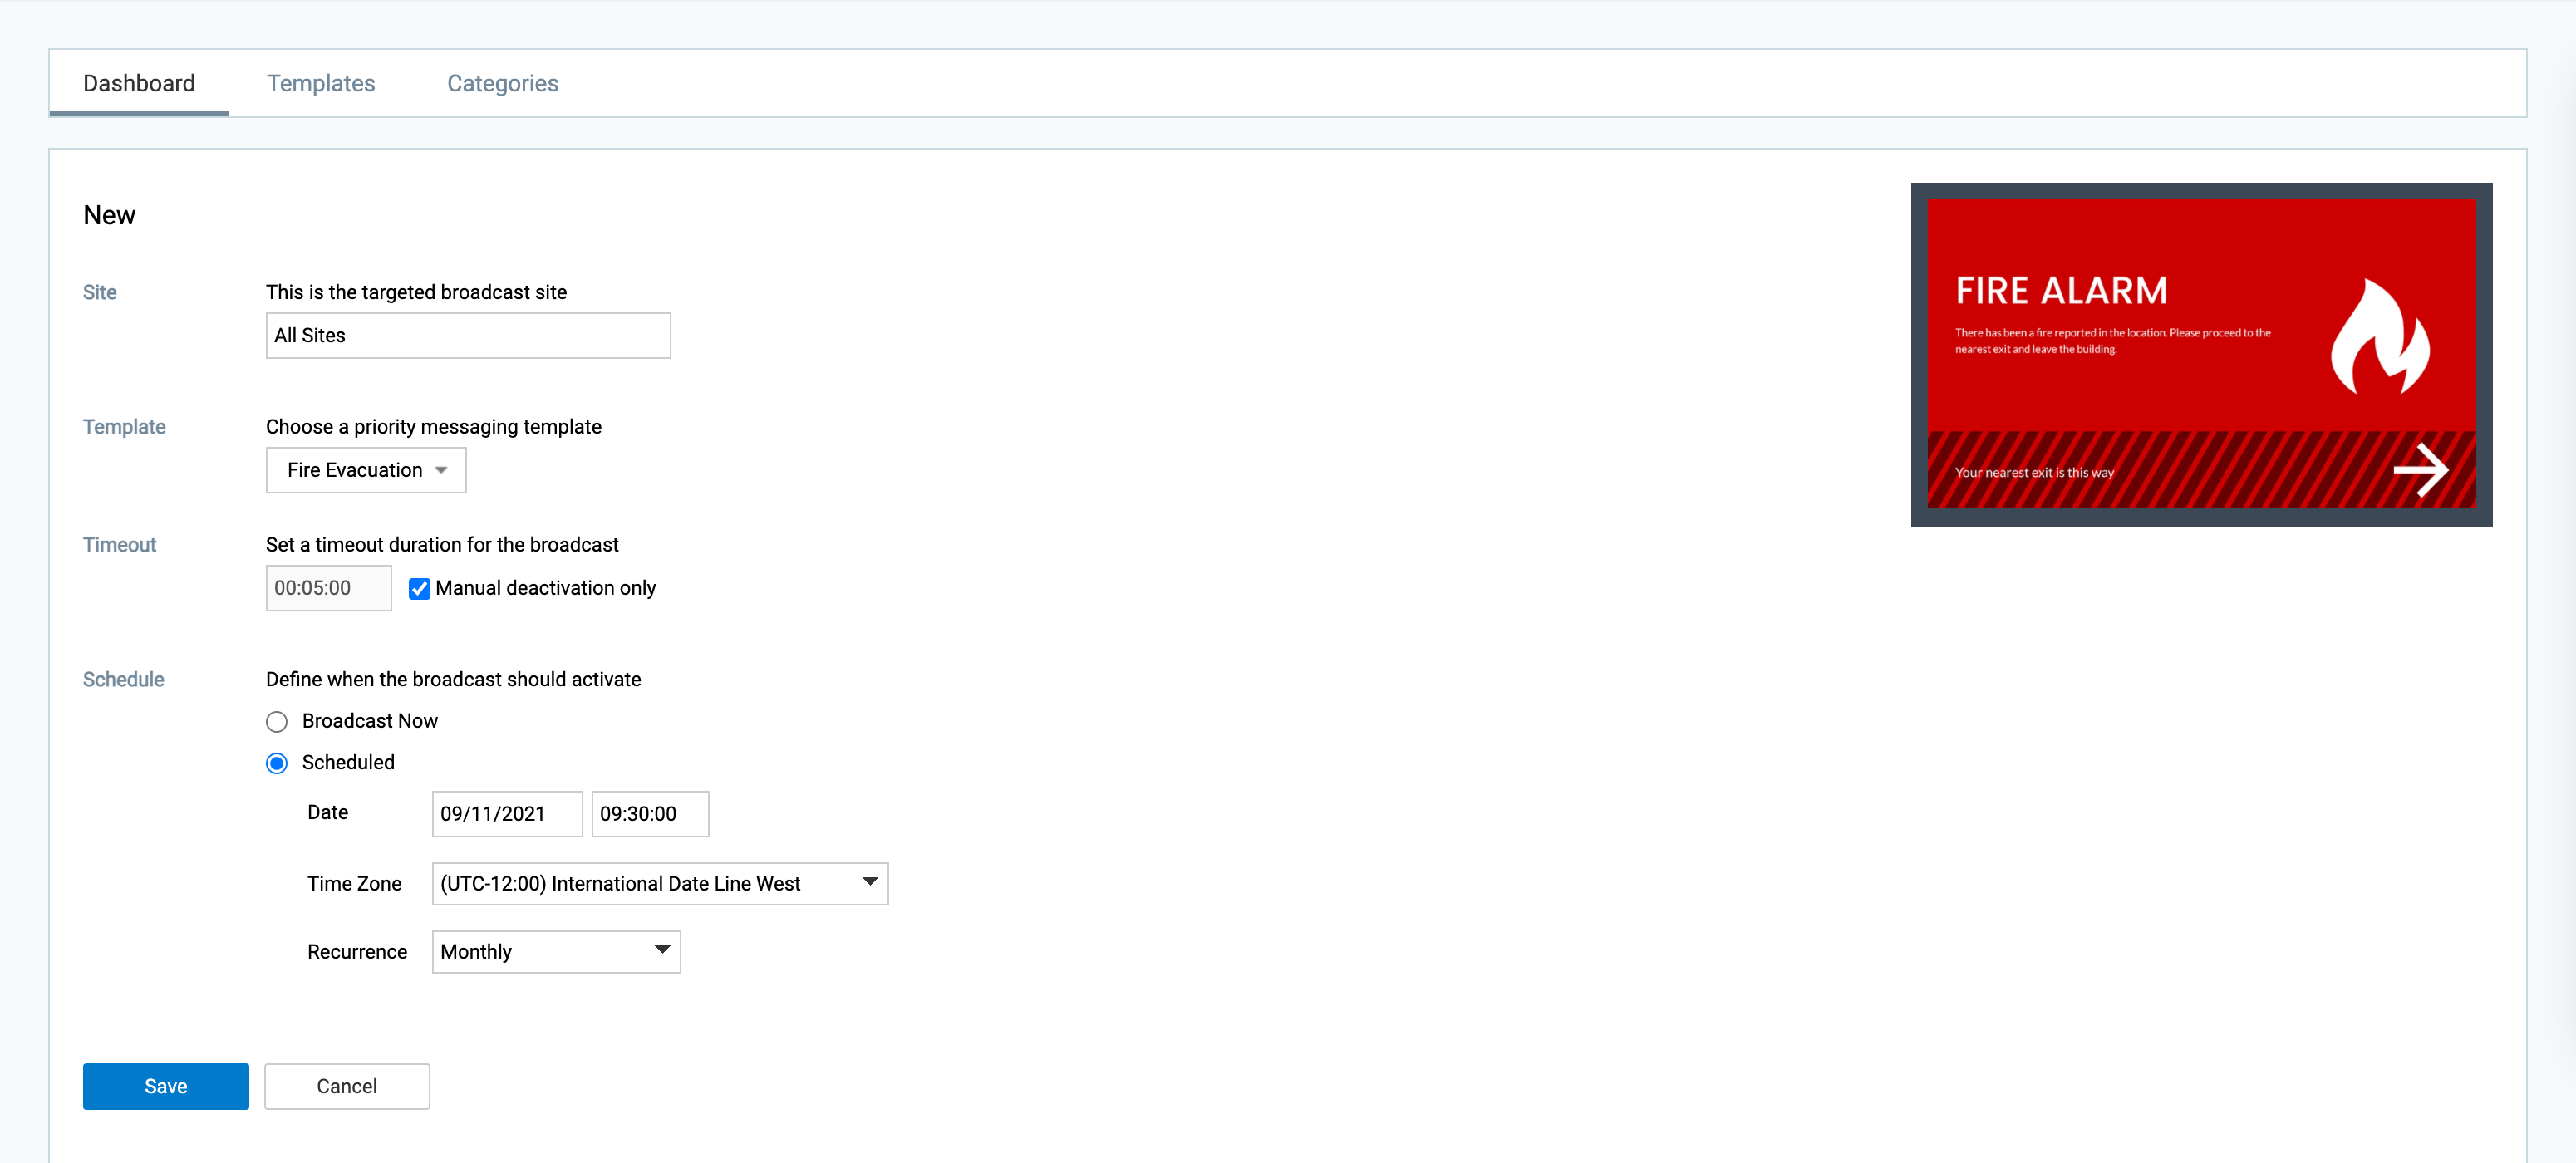
- Set the Timeout duration for the alert broadcast, or check the Manual deactivation only checkbox to ensure the alert broadcast is only deactivated by a user manually.
- Select the following alert broadcast actions when triggered:
- Broadcast Now – Broadcast the alert message immediately when triggered.
- Scheduled – Broadcast at a scheduled date and time, with a recurring option.
Assigned broadcasts on parent sites will also be saved to their child site(s). However, this inheritance will be over-ridden when a child site is assigned a different broadcast template altogether.
Create Broadcast Trigger URL
The Broadcast Trigger API is part of Alerts and is used to generate a web handler based on the user’s selection of the site and broadcast template. A resulting web handler will then be generated with the proper Site ID and Broadcast ID.
By selecting the Trigger icon on the target site containing a broadcast, it will automatically generate an API method call in the form of a URL. When an external system calls the API method, it will instruct Alerts to broadcast the selected template to the chosen site(s).
- Log in to the Appspace console.
- Click the ☰ Appspace menu, and select Alerts.
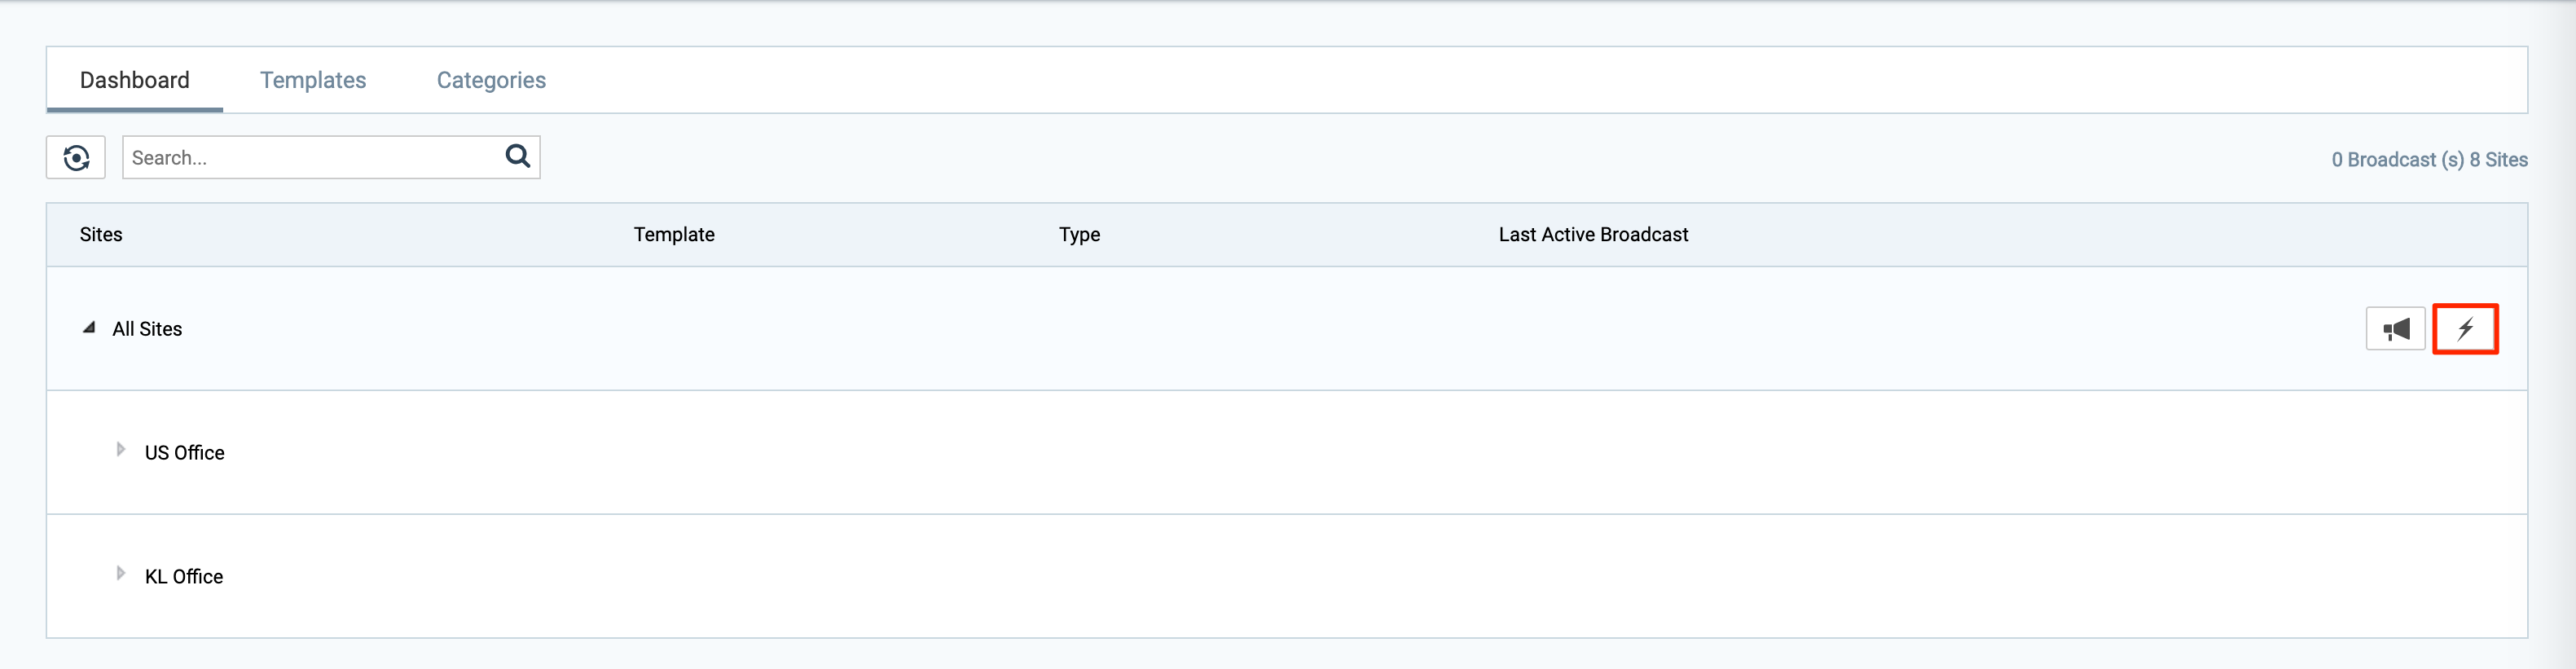
- Click the Dashboard tab, and select AllSites, or a specific device group to broadcast the alert.
ImportantThe Alerts Dashboard displays the group device structure, rather than the network structure, thus the Alerts broadcast message would be displayed on all devices within that device group.
- Click the Trigger icon.
- Select a previously created alert template from the Template drop-down menu.
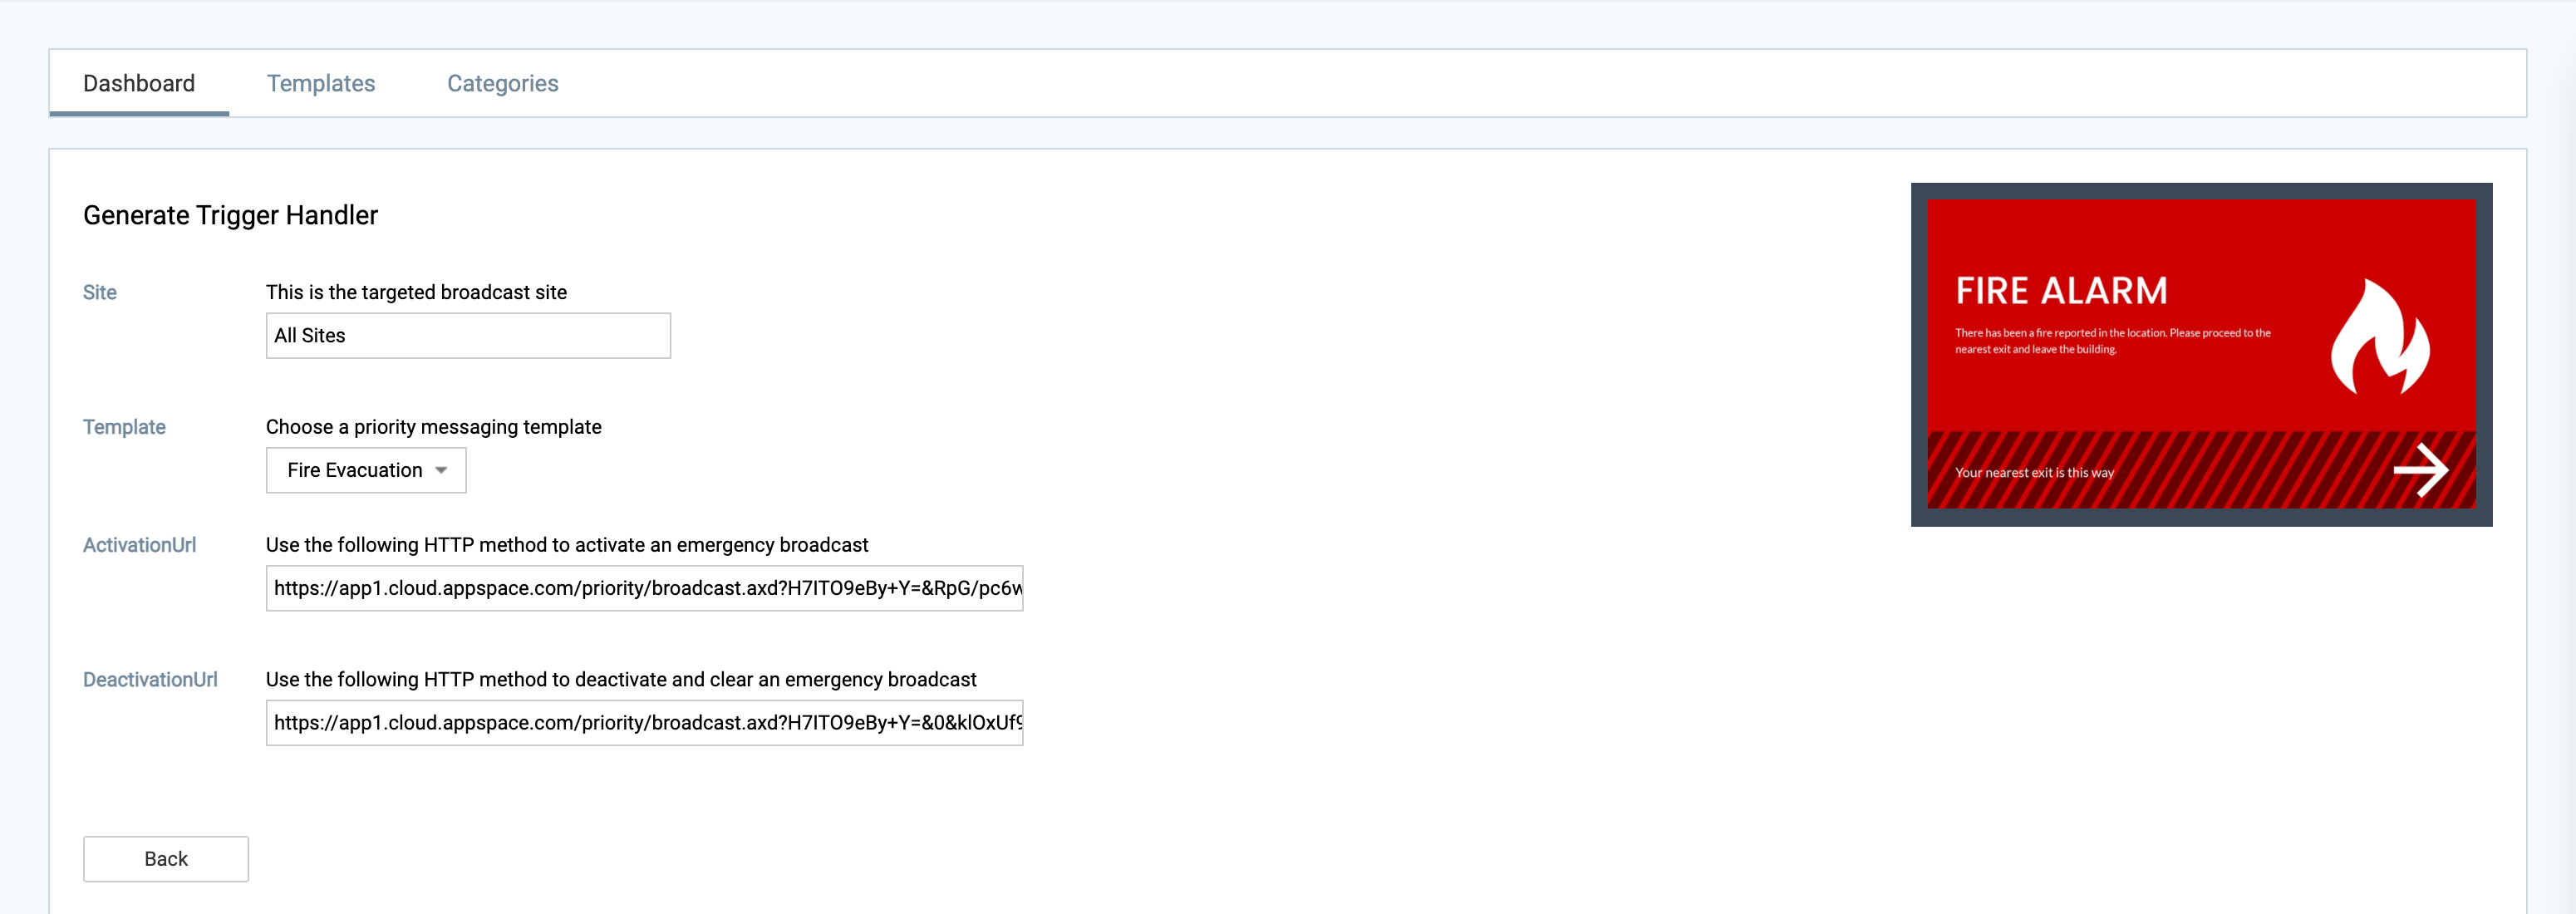
- Once selected, the ActivationURL and DeactivationURL will be generated, which can be used to activate or deactivate the alert broadcast via HTTP on a web browser.
- To activate the alert broadcast, copy and paste the ActivationUrl on a web browser.
- To deactivate the alert broadcast, copy and paste the DeactivationUrl on a web browser.
Was this article helpful?