The Web View card allows customers to easily display websites (HTML), including your corporate website, a company blog page, or a news portal. Match the web page display with the screen resolution and size, display the web page at a custom resolution and size, or custom crop the page and display only a section of the web page.
-
- Change colors, text, icons, and images to match corporate branding standards.
- Customize the layout to suit your corporate message and tone.
- Fully responsive, works on mobile devices, tablets, desktops, and digital signage.
- Category Type: Feed
- Content Category Type: Productivity & Engagement
- Tags: Dynamic, Web
Visit our Appspace Card Gallery to find the perfect card to deliver your message.
This article provides admins with instructions to create, configure, and customize the Web View card within the Library.
Prerequisite
- An Account Owner, Publisher, or Author permissions that have been assigned Platform User licenses.
Create and Configure Web View Card
Follow the instructions below to create and configure the Web View Card to display web content:
- Log in to your Appspace console.
- Click Library from the ☰ Appspace menu, and click the + CREATE button.
Alternative
- Click +Quick Action from the Appspace menu bar on the top right, and select Create Card.
- Select Feed from the templates panel, and click the Web View card.
NoteIf you are unable to locate the card, you may use the search bar, filters, or side panel to narrow down the content you’re looking for.
- Category Type: Feed
- Content Category Type: Productivity & Engagement
- Tags: Dynamic, Web
- Enter the Title of the card as this acts as the filename for the card content. This is a mandatory field and defaults to “Web View” if none is added.
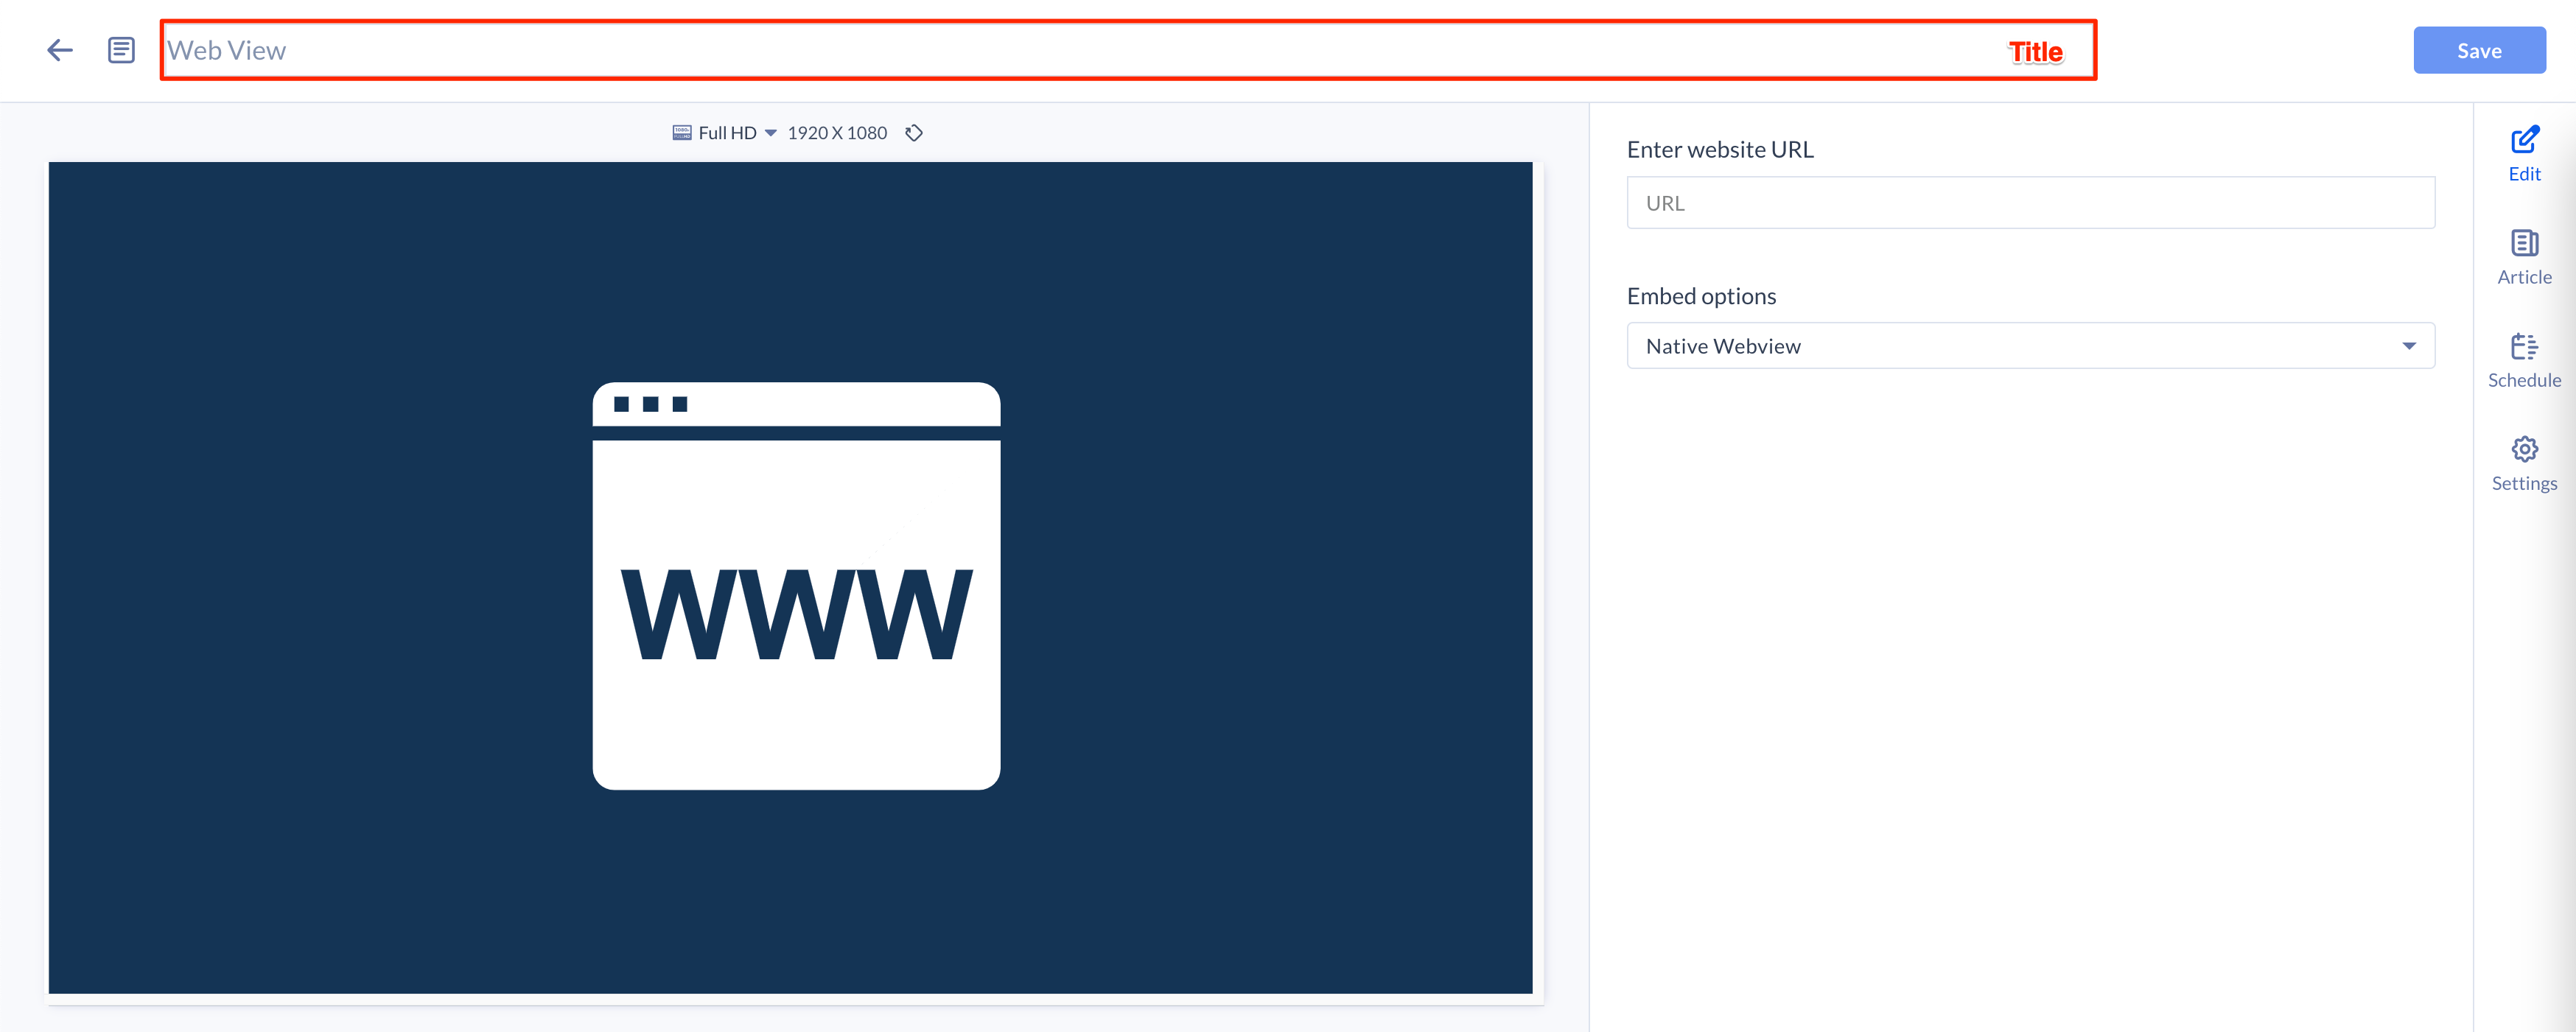
- In the Edit tab section:
- Enter the website URL in the address field.
ImportantPlease ensure the URL or web content to be displayed is not within an iframe, as it is not supported, and will not be displayed in the card.
- Select the desired Embed options:
- Native Webview (default) – Displays web pages directly from the source on the device’s web browser.
NoteThe background color will only be visible in editing mode and during device playback. In card preview and screenshot modes, the frameElement is inaccessible from the card, so the background will default to white.
- XHR Proxy – Display web pages that do not allow embedding, by utilizing the XMLHttpRequest (XHR) proxy to bypass certain web browser security settings.
- Proceed to configure the additional options.
- Basic Authentication – Display web pages requiring basic authentication.
- Proceed to enter the Username and Password used to authenticate the web page.
- Basic Authentication via XHR – Display web pages requiring basic authentication, by utilizing the XMLHttpRequest (XHR) proxy method.
- Proceed to enter the Username and Password used to authenticate the web page.
NoteThis option is not supported on BrightSign devices running BrightSignOS 8.0 and above.
- Proceed to enter the Username and Password used to authenticate the web page.
- Iframe – Displays web pages by utilizing basic embedding methods, thus may not work on websites such as social media sites that do not allow embedding.
- Proceed to configure the additional options.
- Native Webview (default) – Displays web pages directly from the source on the device’s web browser.
- Configure the following additional options when the XHR Proxy or Iframe embedding options are selected:
- Determine the Set website scaling:
- Fit to screen – Screen resolution.
- Custom size – Custom resolution.
- Set the website resolution width and height (pixels)
- Custom size with crop: – crop a particular section of the web page to be displayed.
- Set the website resolution width and height (pixels)
- Set the crop region (left, top, width, height)
- Configure the More customization options:
- Disable interactivity – Disables clicking or scrolling of the web page.
- Display while loading – Displays web pages before it is fully loaded, with certain elements loaded after the web page is displayed.
- Set the background color, or image for the card.
- Determine the Set website scaling:
- Enter the website URL in the address field.
- In the Article tab section: Optional.
- Include an Article or Caption to accompany the content when displayed on the Employee App and other social collaboration apps.
- Add a Referral Link to link more information to the content.
- In the Schedule tab: Optional.
- Add the content to a playlist channel by selecting the desired channel from the Add to channel dropdown menu, or leave it unassigned to be added at a later time.
- If the content is assigned to a channel, the SCHEDULING and DISPLAY PROPERTIES options are displayed. Refer to the Configure Content Playback Properties: Dayparting, Frequency, Scheduling, in a Playlist Channel article for detailed configuration instructions.
- Add the content to a playlist channel by selecting the desired channel from the Add to channel dropdown menu, or leave it unassigned to be added at a later time.
- In the Settings tab: Optional.
- The Name field will be auto-populated to match the Title of the content which will also act as the filename for the content. This is a mandatory field.
- Select the Content Category from the drop-down menu to match the focus of the message, or leave it at the default content category.
- Enter any relevant Tags for the content. (Optional)
- Select a folder for the content in the Library Location drop-down menu to change the default folder location.
- Select an expiry date for the content from the Auto Delete Content from Library drop-down menu. (Optional)
- Upload an image to be used as the Thumbnail for the content.
- Once done, click SAVE.
Configure Refresh on Network Recovery
Improvements to the Web View card ensure that in the event of a network interruption, the website displayed on the Web View card will be refreshed once the device has regained network connectivity, rather than display a blank white screen.
In order for this feature to work, the admin has to configure the card’s manifest.json file and ensure that the following property, “ReloadsOnReconnect” has been set to true: (false by default)
"ReloadsOnReconnect": true
Was this article helpful?