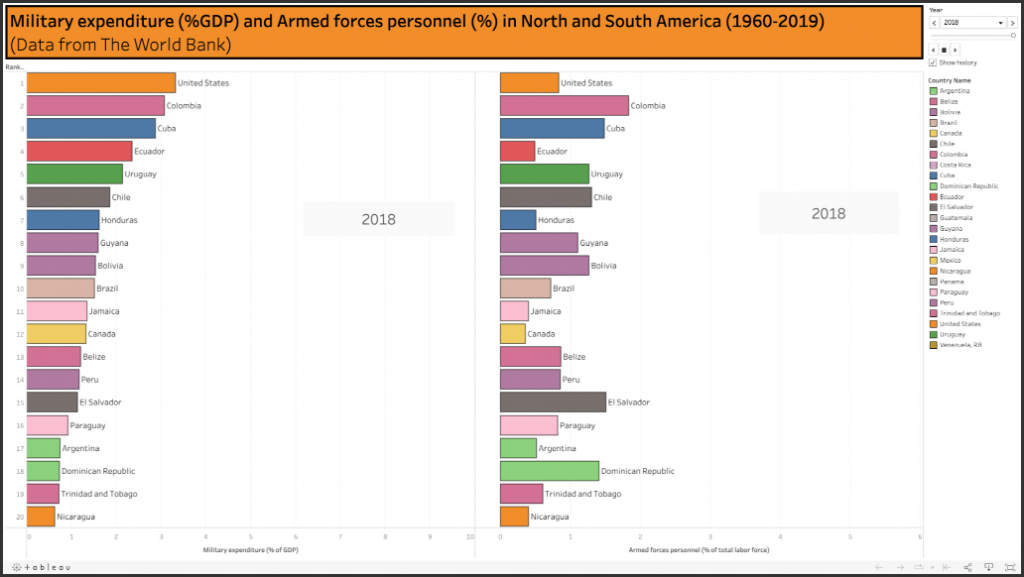
The Tableau card allows organizations to display dashboards from the Tableau visualization tool, which includes various custom data visualization charts. Tableau is a well-known platform for presenting data insights and visualization. Tableau is used to aggregate business intelligence data into dashboards since it can connect to a range of data sources.
The Appspace Tableau card will allow the configuration and display of Tableau’s public dashboards from a user’s Tableau Public account.
The following improvements are now available:
- Ability to render a Tableau card in full screen mode utilizing a public Tableau dashboard URL with a customized dashboard size option.
- Full screen rendering support across all resolutions.
- The existing Tableau Card now includes a Private Dashboard workflow, allowing users to embed private dashboards.
Prerequisites
-
- Appspace 8.1 and later.
- A Tableau Public account.
- Account Owner, Publisher, or Author role to create or edit cards in the Library.
- A Tableau Public account (for users who want to create a Tableau Public Dashboard Card).
- A Tableau Cloud account (for users who want to create a Tableau Private Dashboard Card).
- A Tableau Creator subscription plan.
- A Site Administrator Creator user role.
- Ensure your device is compatible. Refer to the Data & Charts table in the Supported Appspace Cards article for caveats.
- Current support is only for dashboards, we currently do not support reports at this moment.
- The Tableau dashboards are not very responsive so they should be created with the display canvas in mind.
- There are no styling options available for the dashboard on the card, as this is an embedded link. All styling should be done in the Tableau system.
Authenticate Tableau Account
Follow the instructions below to authenticate an Tableau service account with Appspace:
- Log in to the Appspace console.
- Click the ☰ Appspace menu, and click Integrations.
- Click the Passports tab, and click the +ADD button.
- Select the Tableau passport, and click Next.
- Follow the on-screen instructions to continue to configure the Tableau passport.
NoteYou may need to fill in the details as follows: you can obtain the token from the Tableau provider’s Settings > Connected Apps. For additional details on the Create a connected app, see the article Configure connected Apps with Direct Trust.
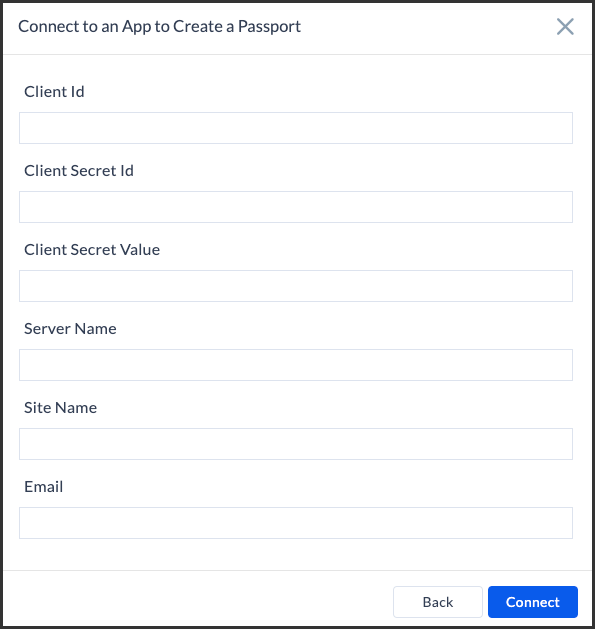
- Once done, click Connect.
- You may proceed to the Create and Configure Tableau Card section below.
Create and Configure Tableau Card
Follow the instructions below to display a Tableau dashboard:
-
- Log in to your Appspace console.
- To create this card, select one of the following options:
- Click +Quick Action from the Appspace menu bar on the top right, and select Create Card.
- Click Library from the ☰ Appspace menu, and select a library or folder you wish to create the content in. Click +CREATE, and select Card.
- To create and add the card directly to an existing channel, refer to Add Content to Playlist Channels.
- Select Data from the All Templates panel, and click Tableau.
ImportantIf you are unable to locate the content, try using either the Search bar, the Order by, or Filter icon to narrow down the content that you are looking for.
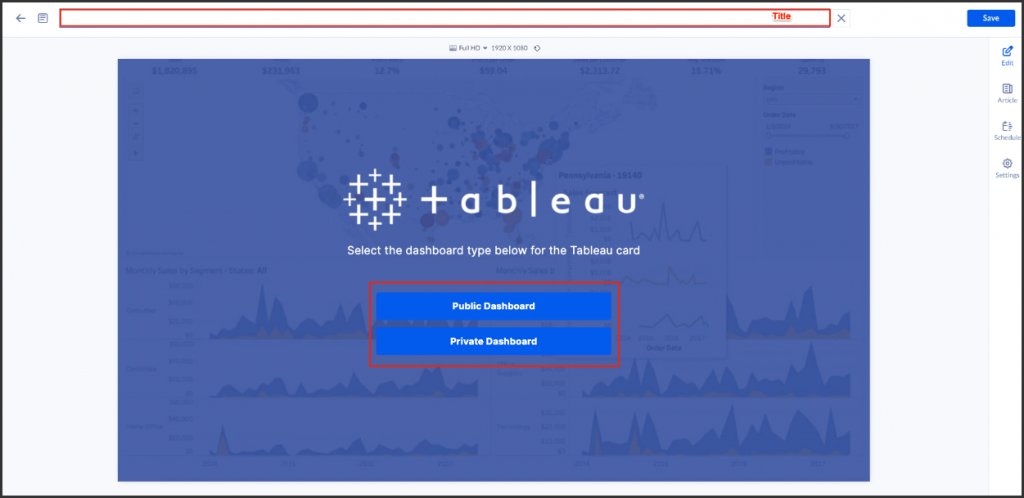
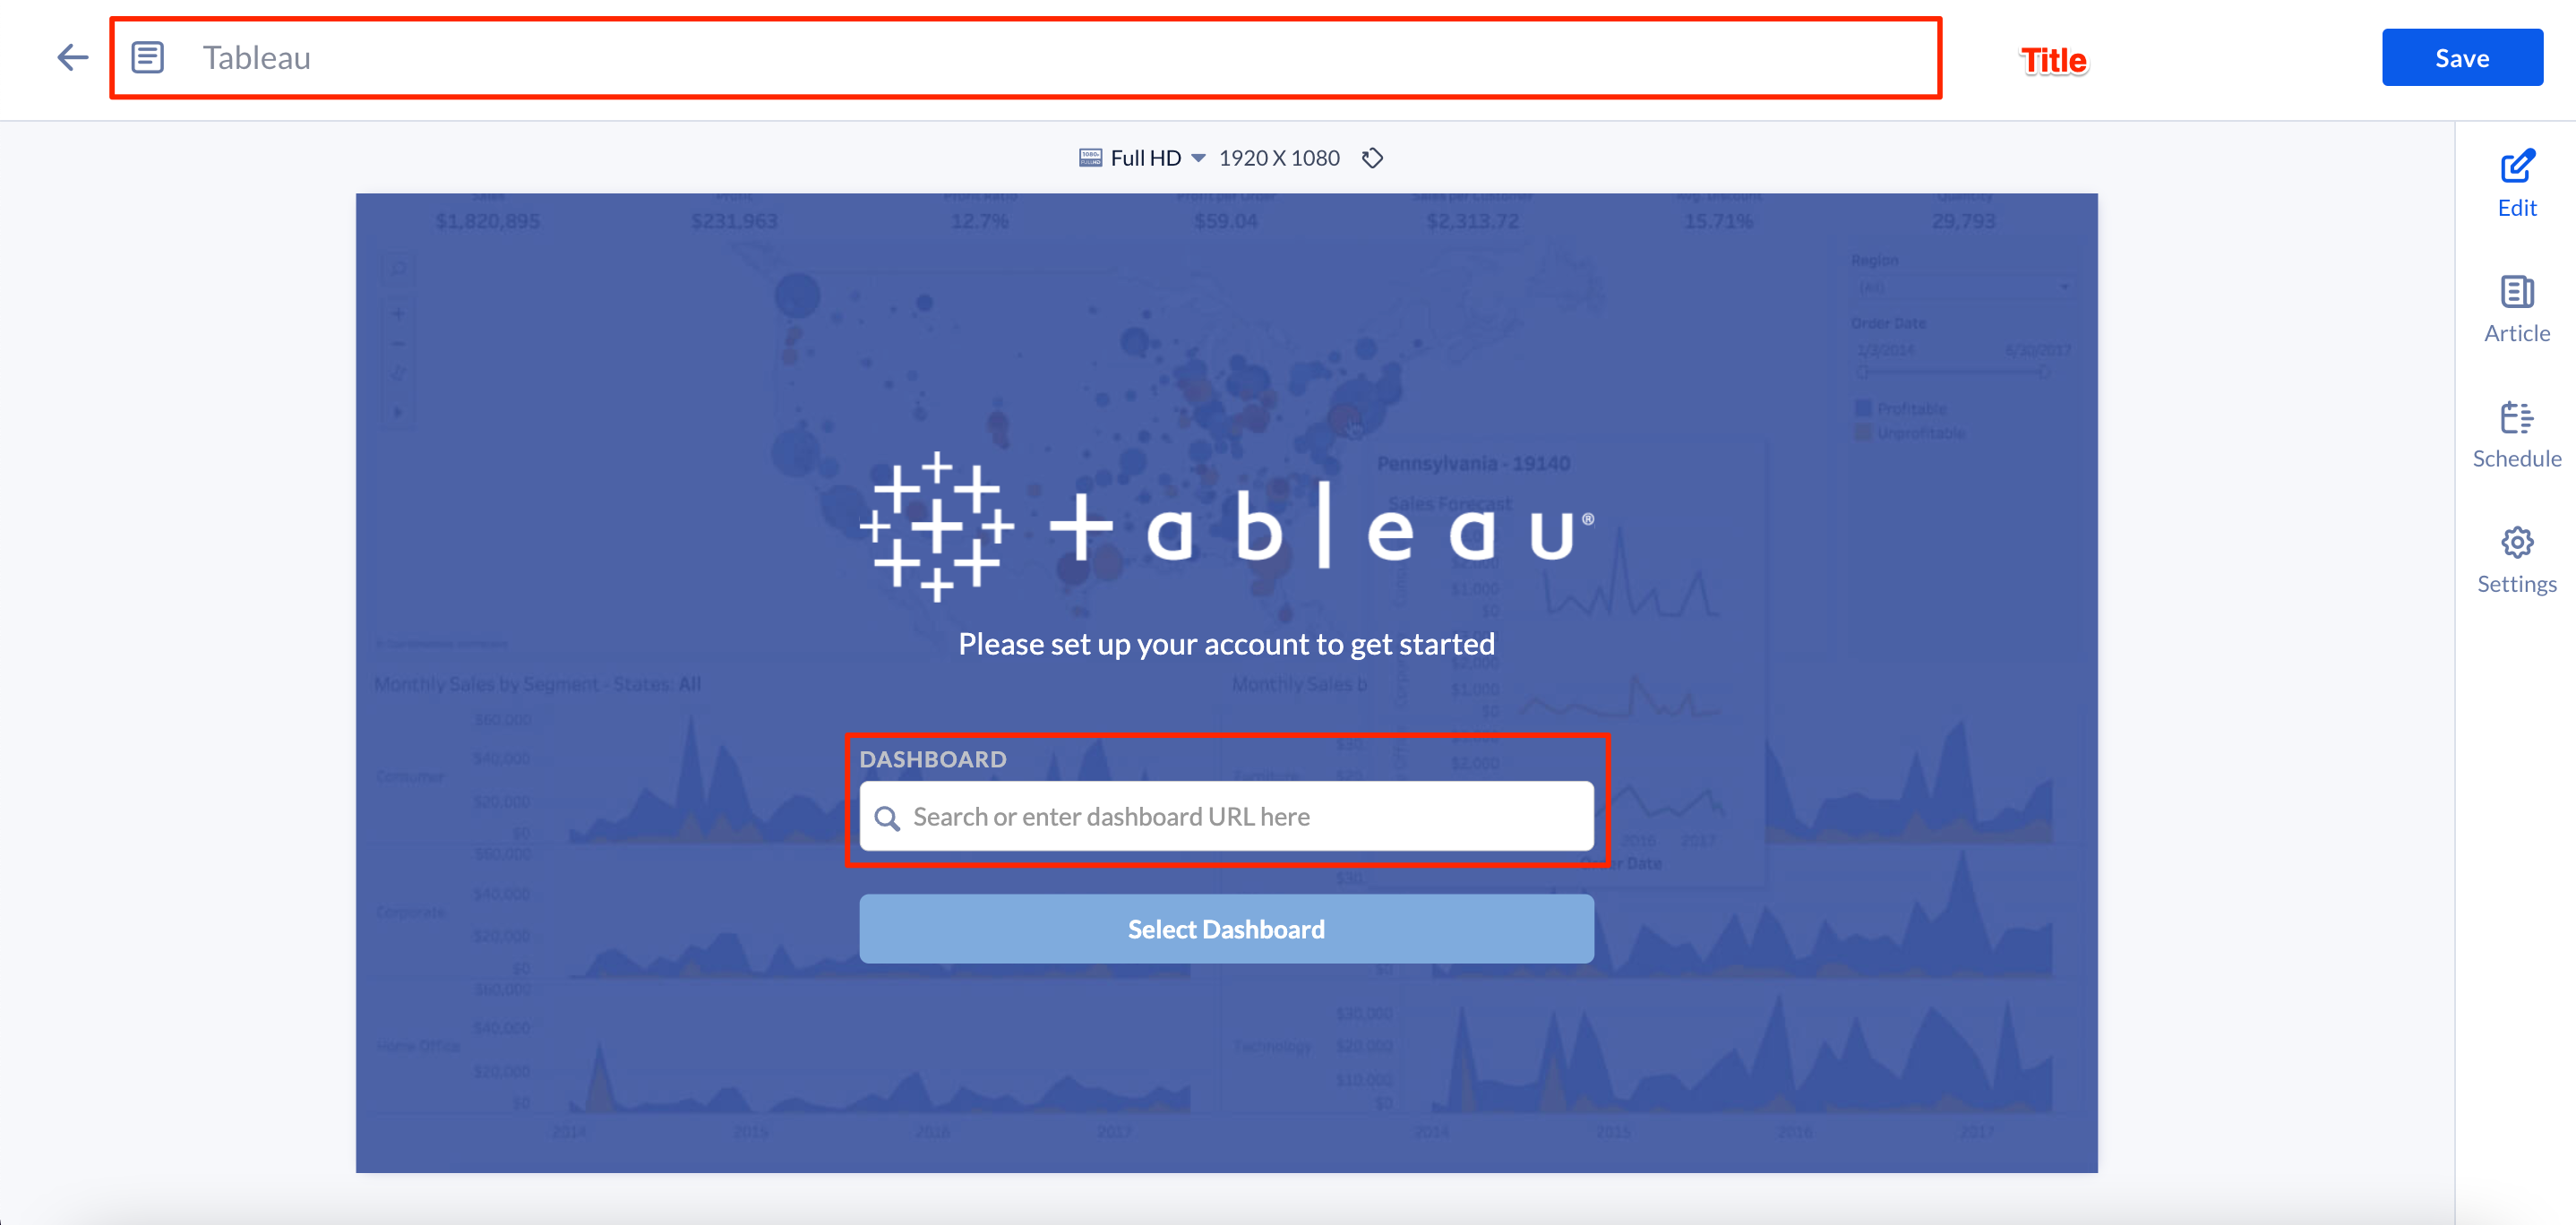
- Enter the Title of the content as this will also act as the file name for the content. This is a mandatory field.
-
In the Card section, you can choose between two options for creating a Tableau card: Public Dashboard and Private Dashboard.
- For Public Dashboard, in the DASHBOARD field, paste the dashboard URL, and hit enter.
ImportantEnsure the dashboard URL link is correct. You may see the following error messages:
- “This is an invalid URL. Please try again”– If you enter an invalid dashboard URL link, this message is displayed.
- “Dashboard not found”- This message is displayed when the dashboard does not exist, you do not have permissions to the dashboard, or a timeout has occurred.
- Once a dashboard is selected, you can preview the selected dashboard. You may also directly edit or change the dashboard URL on the top left of the preview window. The URL must be valid or an error will be displayed.

- For Private Dashboard, select the Tableau passport created earlier, or you may click the Set up a new passport to create one.
- You can either search for or choose your preferred dashboard within the SELECT DASHBOARD option.
- Once done click Select Dashboard.
NoteTo edit or alter a Private dashboard, you can do so by clicking on the pencil icon located on the dashboard.
- In the Article tab: This section may be skipped.
- Include an Article or Caption to accompany the content item when being displayed on mobile apps, tablets, and other social collaboration apps.
- Enter a Referral Link to link more information to the content.
- In the Schedule tab: This section may be skipped.
- You may add the content to a channel by selecting the channel from the Add to channel drop-down menu or leave it unassigned to be added later.
- When the content is assigned to a channel, the SCHEDULING and DISPLAY PROPERTIES options are displayed. Refer to the Configure Content Playback Properties: Dayparting, Frequency, Scheduling, in a Playlist Channel article for detailed configuration instructions.
- In the Settings tab, you may configure the following:
- The Name field will be auto-populated to match the Title of the content which will also act as the filename for the content. This is a mandatory field.
- Select the Content Category from the drop-down menu to match the focus of the message, or leave it at the default content category.
- Enter any relevant Tags for the content. (Optional)
- Select a folder for the content in the Library Location drop-down menu to change the default folder location.
- Select an expiry date for the content from the Auto Delete Content from Library drop-down menu. (Optional)
- Upload an image to be used as the Thumbnail for the content.
- Once done, click SAVE.
- Proceed to the edit section below to add the card to a channel, preview the card, or view analytics once available.
- To display the Tableau card content on a device, do the following:
- Assign the playlist channel from Step 6 above to an Appspace registered device. Follow the instructions in this Assign Channel to Device article.

Was this article helpful?