A public advanced channel is mapped to a static URL and the advanced channel saving function in Advanced Channel includes the HTML bootstrap into the app package, making it completely standalone and can now be hosted independently with all functionality intact.
This article provides the instructions to enable an advanced channel for public view.
Enable Public Channel
To enable public access to an advanced channel, please follow the instructions below.
-
Click Channels from the Appspace Menu navigation bar.
-
Select the desired advanced channel from the Channels tab.
-
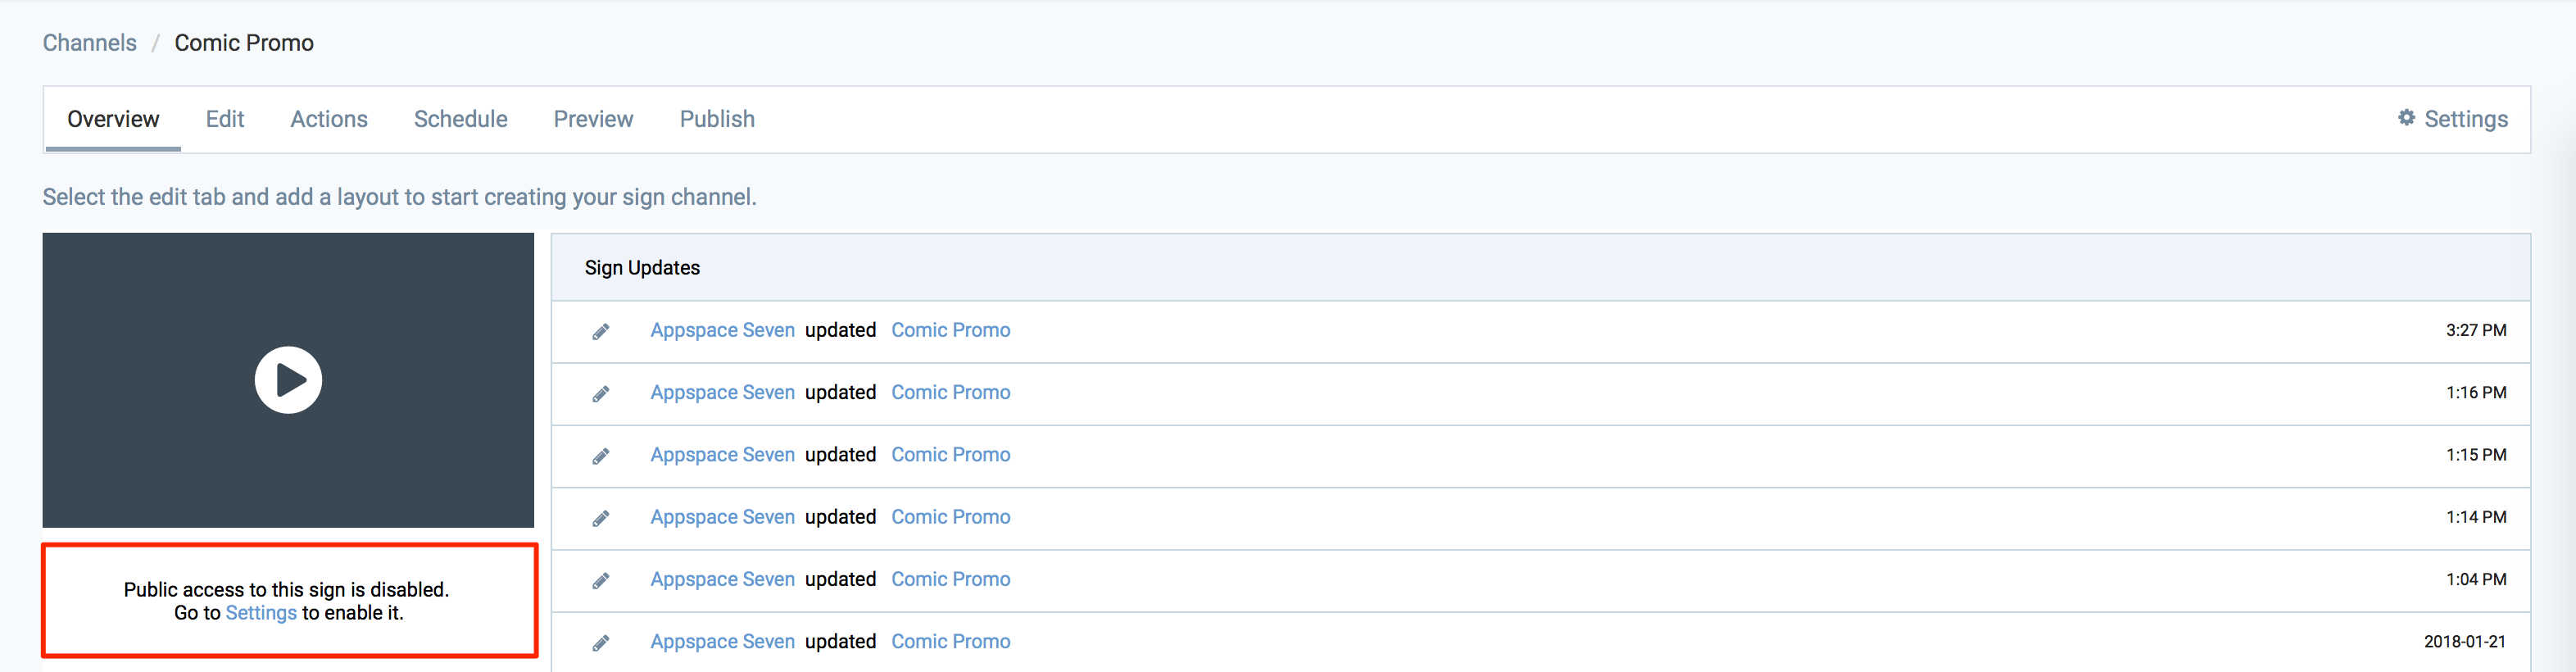
Click the Settings tab, or the Settings link beneath the preview.
-
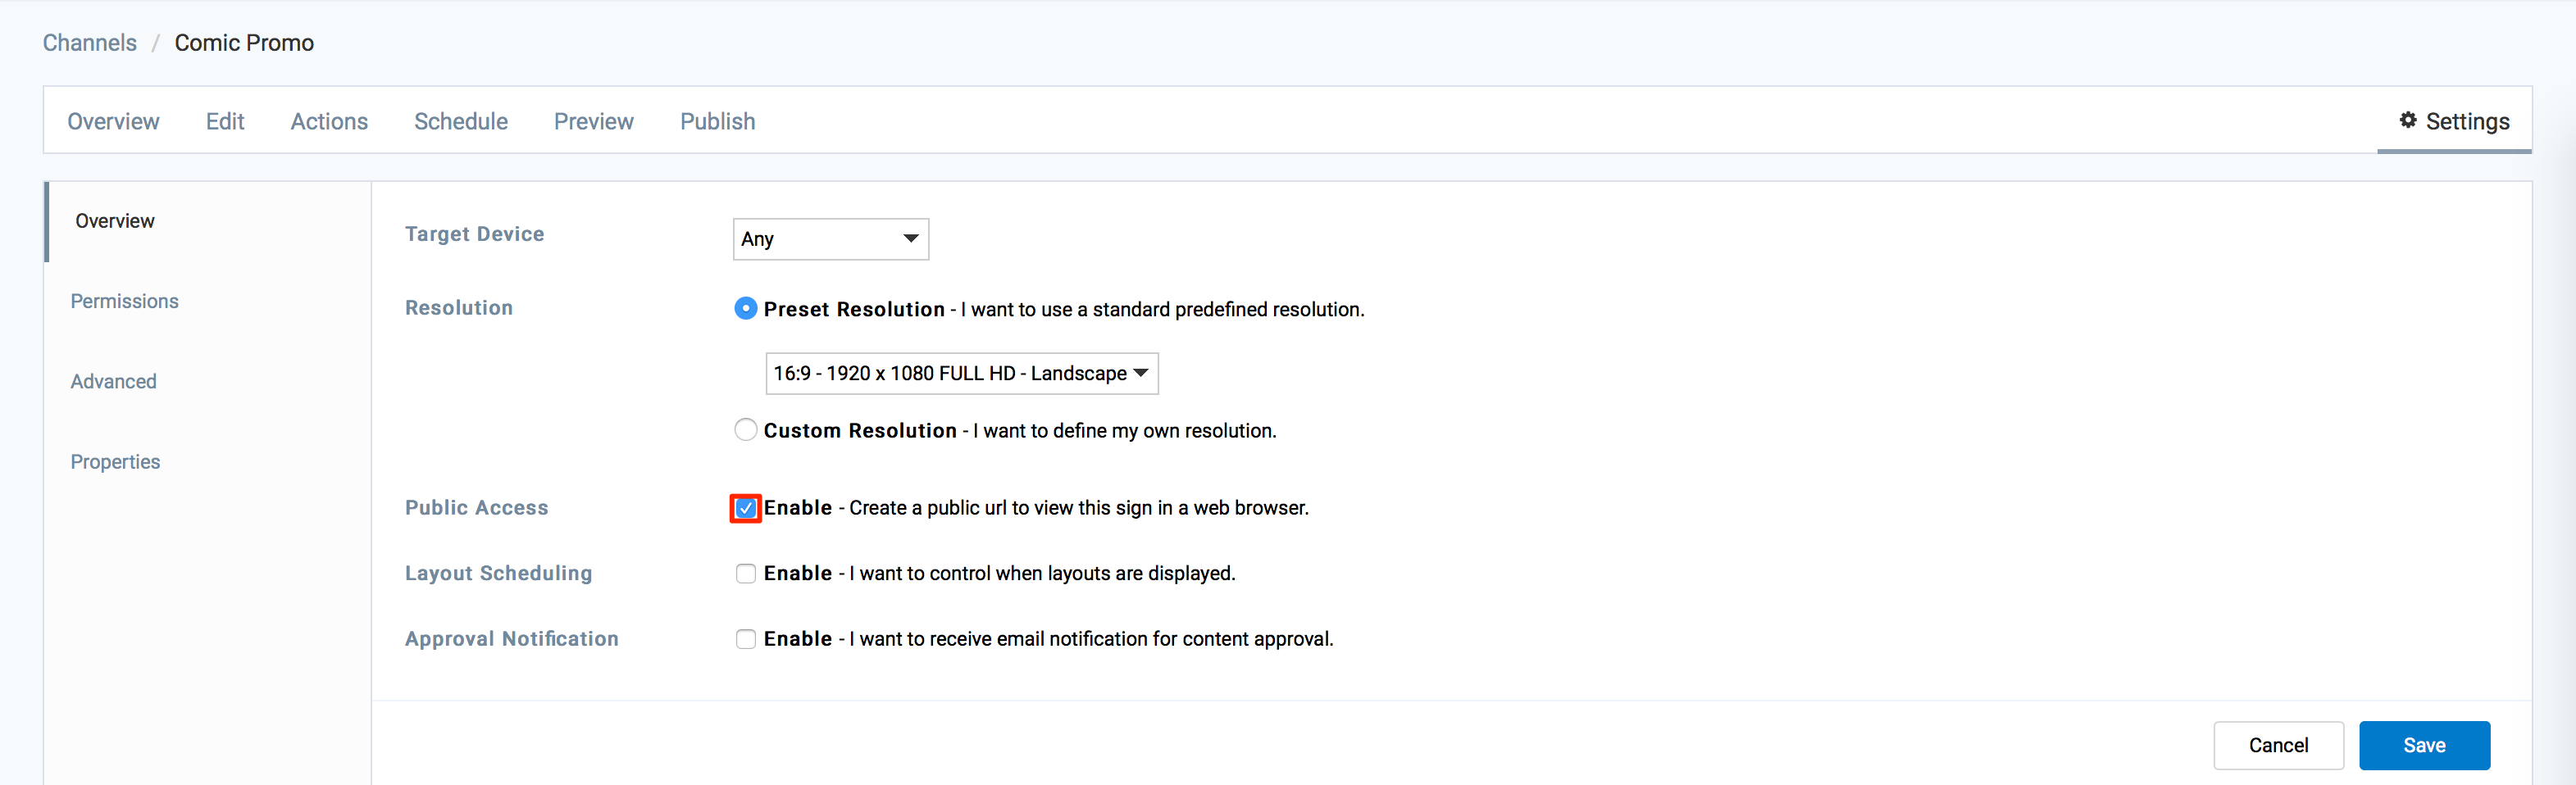
Check the Enable checkbox for Public Access, and click Save.
-
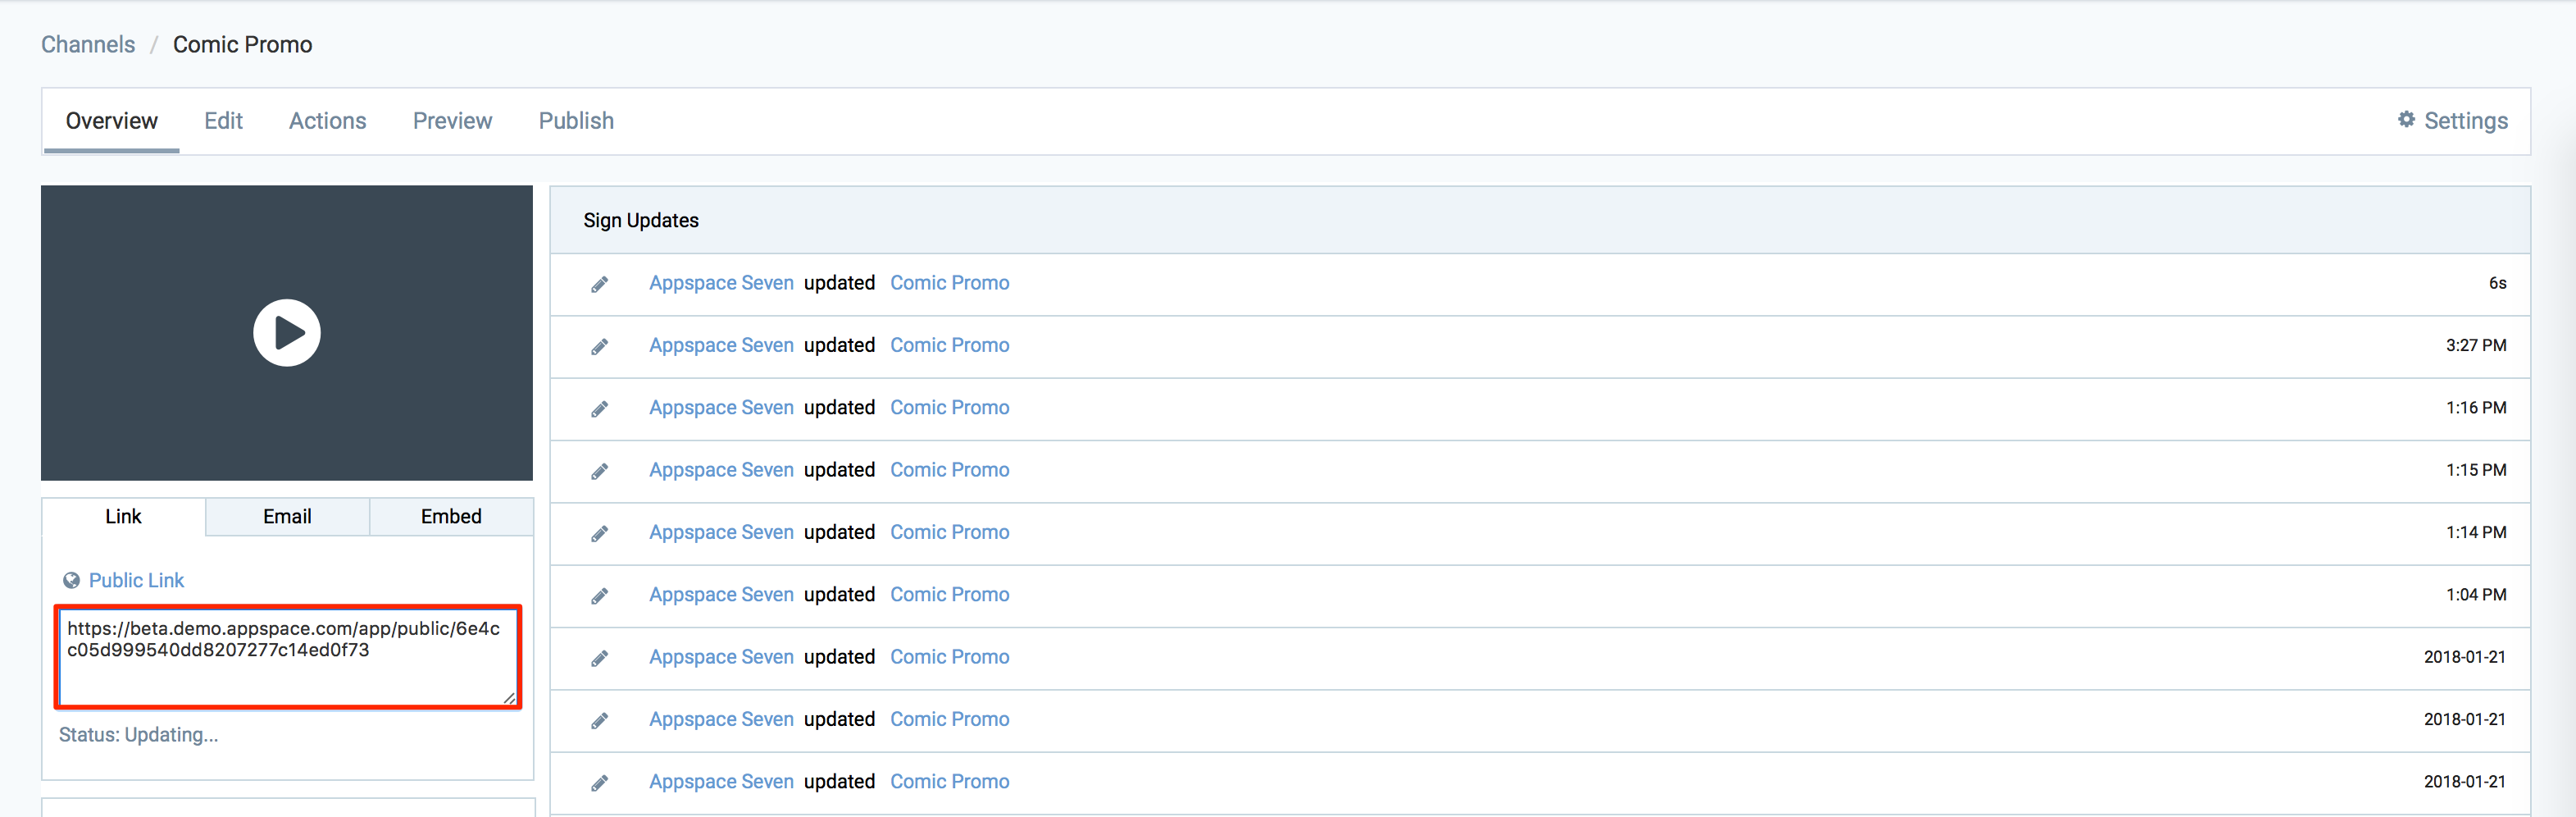
Click the Overview tab, and the Public Link is listed on the advanced channel page, and can be copied, emailed, or embedded to a website for public view.
View Public Channel
To view public advanced channels, please follow the instructions below.
-
Click Channels from the Appspace Menu navigation bar.
-
Select the desired advanced channel from the Channels tab.
-
Click the URL provided in Public Link, or copy the URL to a browser to view the advanced channel.
Disable Public Channel
To disable public advanced channels, please follow the instructions below:
-
Click Channels from the Appspace Menu navigation bar.
-
Select the desired advanced channel from the Channels tab.
-
Click the Settings tab, and click the Advanced page.
-
Uncheck the Enable checkbox for Public Access, and click Save to make changes.
-
The Public URL link for the advanced channel will be removed.
Deploy Public Channel to a Web Server
An alternative method to allowing public access to as advanced channel, is to host the advanced channels as a HTML website on a web server.
-
Export the advanced channel by following the Exporting Advanced Channel section in the Create Advanced Channel article.
-
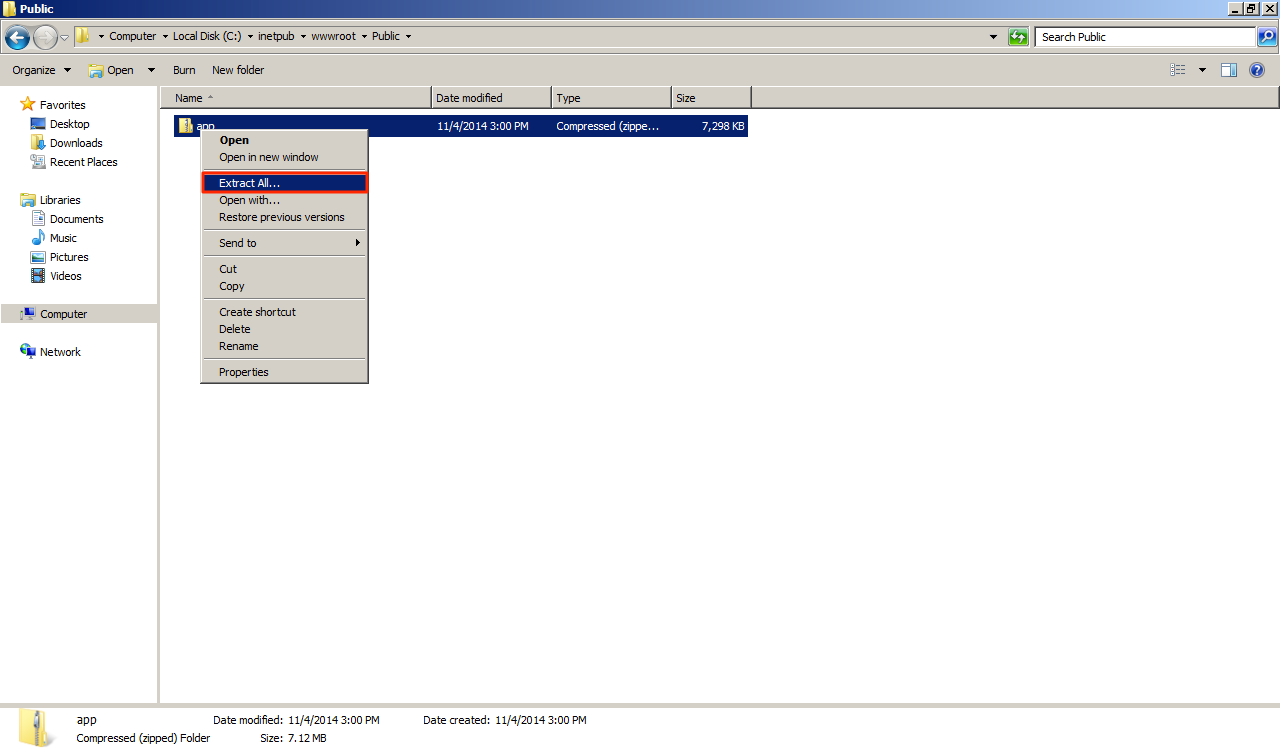
Login to the web server and advanced channel file from .aspkg to .zip, and extract the contents of the file to the folder on the web server.
-
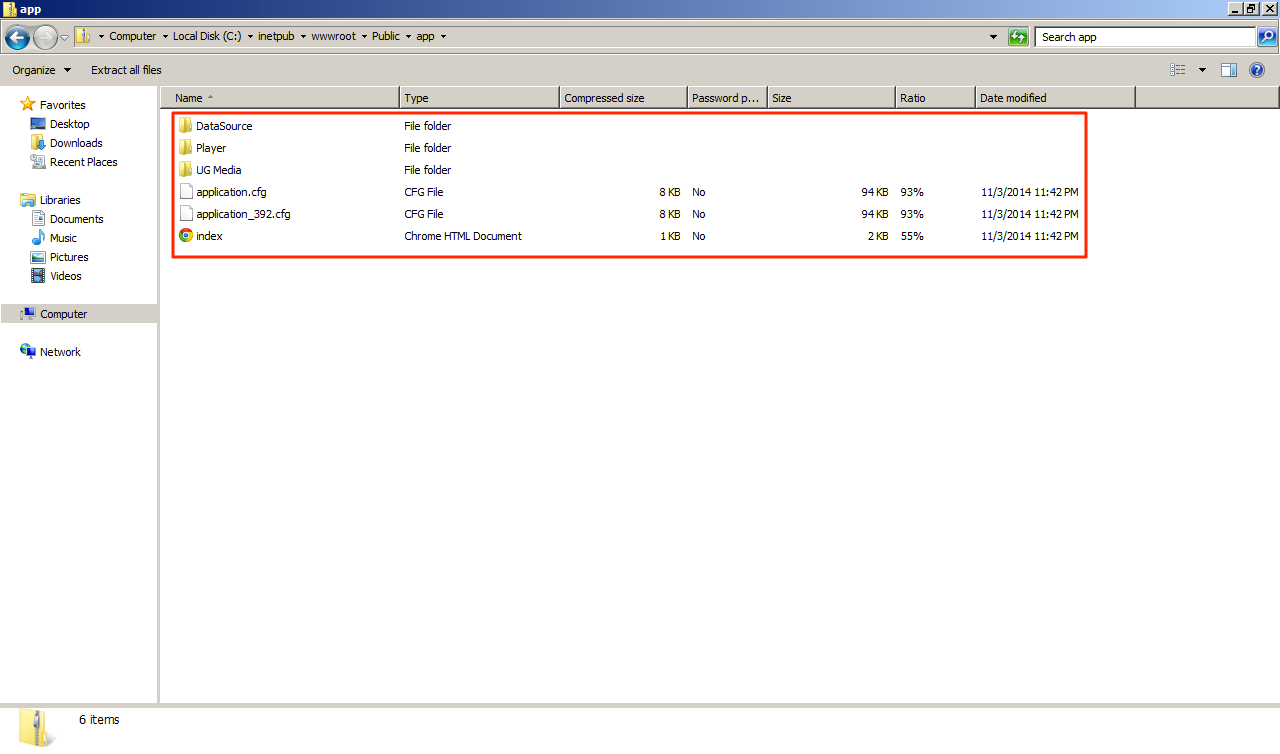
The contents of the extracted zip file folder are the following:
- DataSource folder
- Player folder
- UG Media folder
- application.cfg
- application_392.cfg
- index.html
-
Create a virtual directory on the web server pointing to the folder location of the advanced channel.

-
The advanced channel can now be accessed publicly on any HTML5 compatible device of browser, from the URL of the index.htm page of the Advanced Channel.
Was this article helpful?