The Beezy Stories card performs perfectly with the Appspace Intranet platform, which changes the way businesses communicate with each other. This new feature shows off the material of Appspace Intranet (Beezy) Stories, which changes how information gets spread. This combination greatly increases employee involvement and creates a lively work environment by making it easy to share important information, highlight accomplishments, and encourage teamwork. As an important part of the Appspace Intranet, Beezy Stories not only improves communication, openness, and community spirit, but it also has an easy-to-use design that can be changed to fit the needs of each company. This customized method not only improves the effectiveness of communication, but it also aligns corporate synergy, making it possible for operations to be unified and streamlined.

This article provides admins with instructions to create, configure, and customize the Beezy Stories card within the Library.
Prerequisite
-
- Account Owner, Publisher, or Author role to create or edit card in the Library.
- Account Owner or Publisher role to configure account authentication in Integrations > Passport.
Create and Configure Stories Card
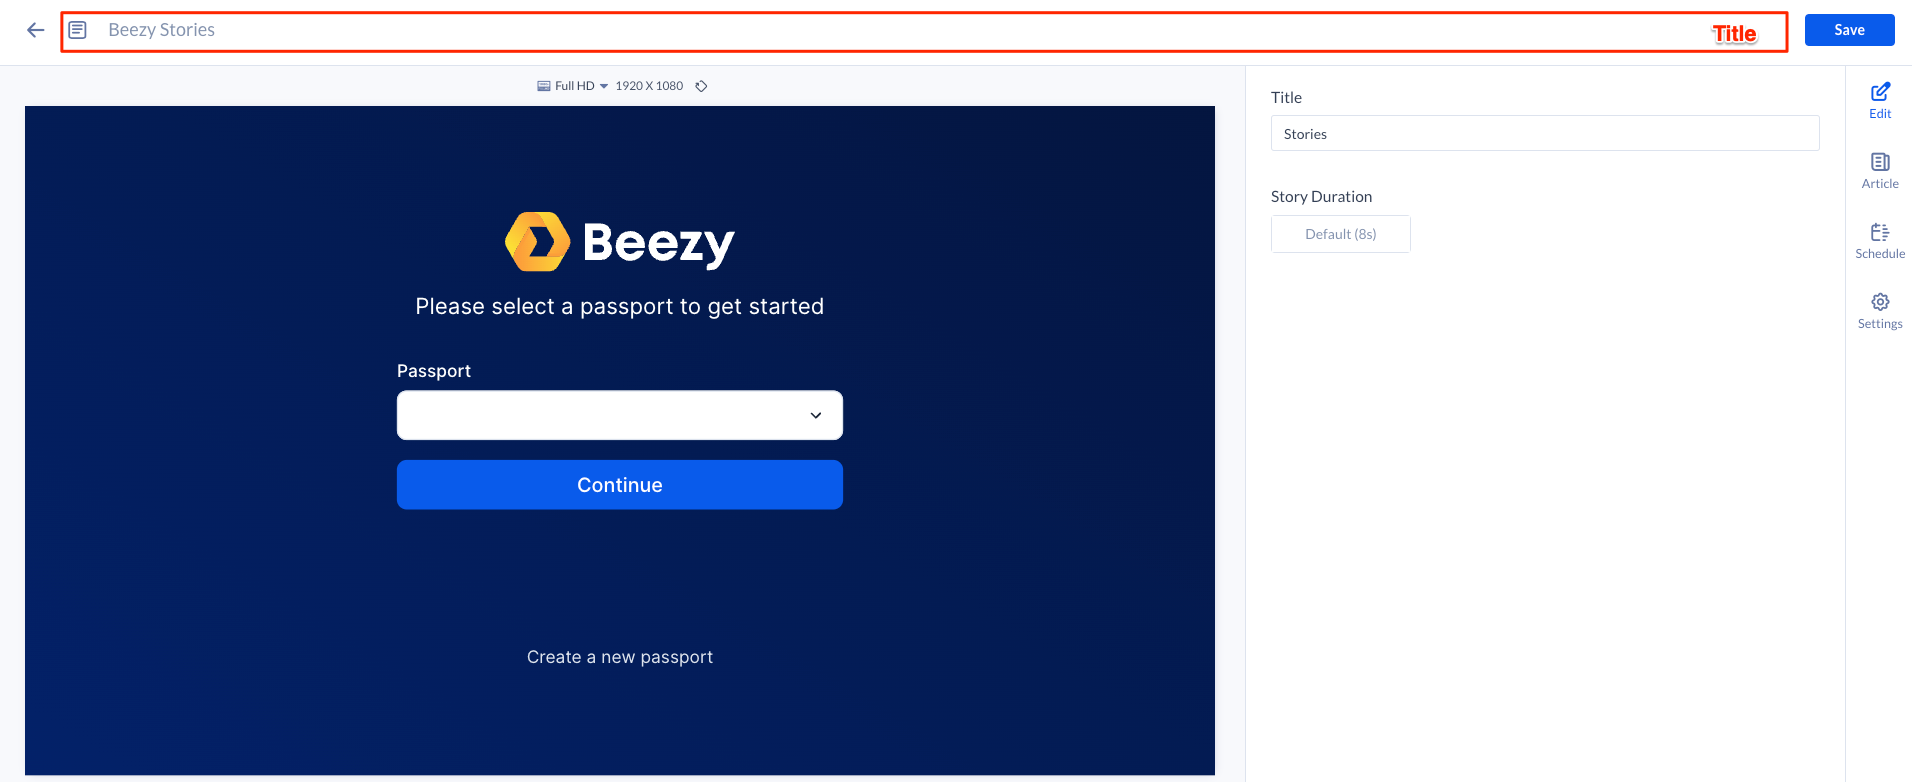
Follow the instructions below to create and configure the Stories Card:
- Log in to your Appspace console.
- Click Library from the ☰ Appspace menu, and click the + CREATE button.
Alternative
- Click +Quick Action from the Appspace menu bar on the top right, and select Create Card.
- Select Communication from the templates panel, and click the Beezy Stories card.
NoteIf you are unable to locate the card, you may use the search bar, filters, or side panel to narrow down the content you’re looking for.
- Category Type: Communication
- Content Category Type: N/A
- Tags: Intranet
- Enter the Title of the card as this acts as the filename for the card content. This is a mandatory field and defaults to “Stories Hero” if none is added.

- In the Edit tab section:
- Select the desired Passport.
- Select the type of Appspace Intranet posting from the drop-down menu:
- Source
- Channel – Displays content from a channel managed by Appspace Intranet. Under the Pick channels field, you can select multiple channel that the content will originate from.
- Story – Displays a content that is managed by Appspace Intranet. Paste the URL of the content into the Search by article URL field.
- Source
- Enter the Title to be displayed as a sub-header in the card.
- Click the Post Duration field to set the duration of each post displayed.
- In the Article tab section: Optional.
- Include an Article or Caption to accompany the content when displayed on the Employee App and other social collaboration apps.
- Include Caption to write a short summary about the content, or leave blank to have one auto-generated from the article.
- Add a Referral Link to link more information to the content.
- In the Schedule tab: Optional.
- Add the content to a playlist channel by selecting the desired channel from the Add to channel dropdown menu, or leave it unassigned to be added at a later time.
- If the content is assigned to a channel, the SCHEDULING and DISPLAY PROPERTIES options are displayed. Refer to the Configure Content Playback Properties: Dayparting, Frequency, Scheduling, in a Playlist Channel article for detailed configuration instructions.
- Add the content to a playlist channel by selecting the desired channel from the Add to channel dropdown menu, or leave it unassigned to be added at a later time.
- In the Settings tab: Optional.
- The Name field will be auto-populated to match the Title of the content which will also act as the filename for the content. This is a mandatory field.
- Select the Content Category from the drop-down menu to match the focus of the message, or leave it at the default content category.
- Enter any relevant Tags for the content. (Optional)
- Select a folder for the content in the Library Location drop-down menu to change the default folder location.
- Select an expiry date for the content from the Auto Delete Content from Library drop-down menu. (Optional)
- Upload an image to be used as the Thumbnail for the content.
- Once done, click SAVE.