This article provides the instructions to create a passport to establish an authentication request and integrate Appspace with supported third-party platforms, applications, or services, to display external content and private data.
Appspace has created a framework that leverages standard technologies to create long-lived, authenticated, and secure, connections to these third-party systems. Each integration requires an initial connection to be established with the third-party system. These connections are stored in a virtual passport in Appspace and can be used until the third-party system revokes or cancels the integration. Each system establishes and manages these connections differently.
Appspace currently supports third-party integrations with the following:
- Google and Office 365 calendar providers for our Space Reservations system.
- Slack, Webex Teams, Workplace from Meta, and Microsoft Teams enterprise messaging apps for team communications.
- Salesforce, Power BI, Zoom, Webex, Meta’s Facebook & Instagram, and Twitter, via our dedicated cards to display data visualization charts and various status report dashboards, recordings, and social media posts respectively.
Prerequisites
- An Appspace user account with Premium user licenses.
- Account Owner role in Appspace.
- A service account for the third-party system authentication.
- To create a Google calendar passport, Google calendar permissions need to be configured first.
Create Passport
Follow the instructions below to create a passport:
- Log in to your Appspace console.
- Click the ☰ Appspace menu, and select Integration.
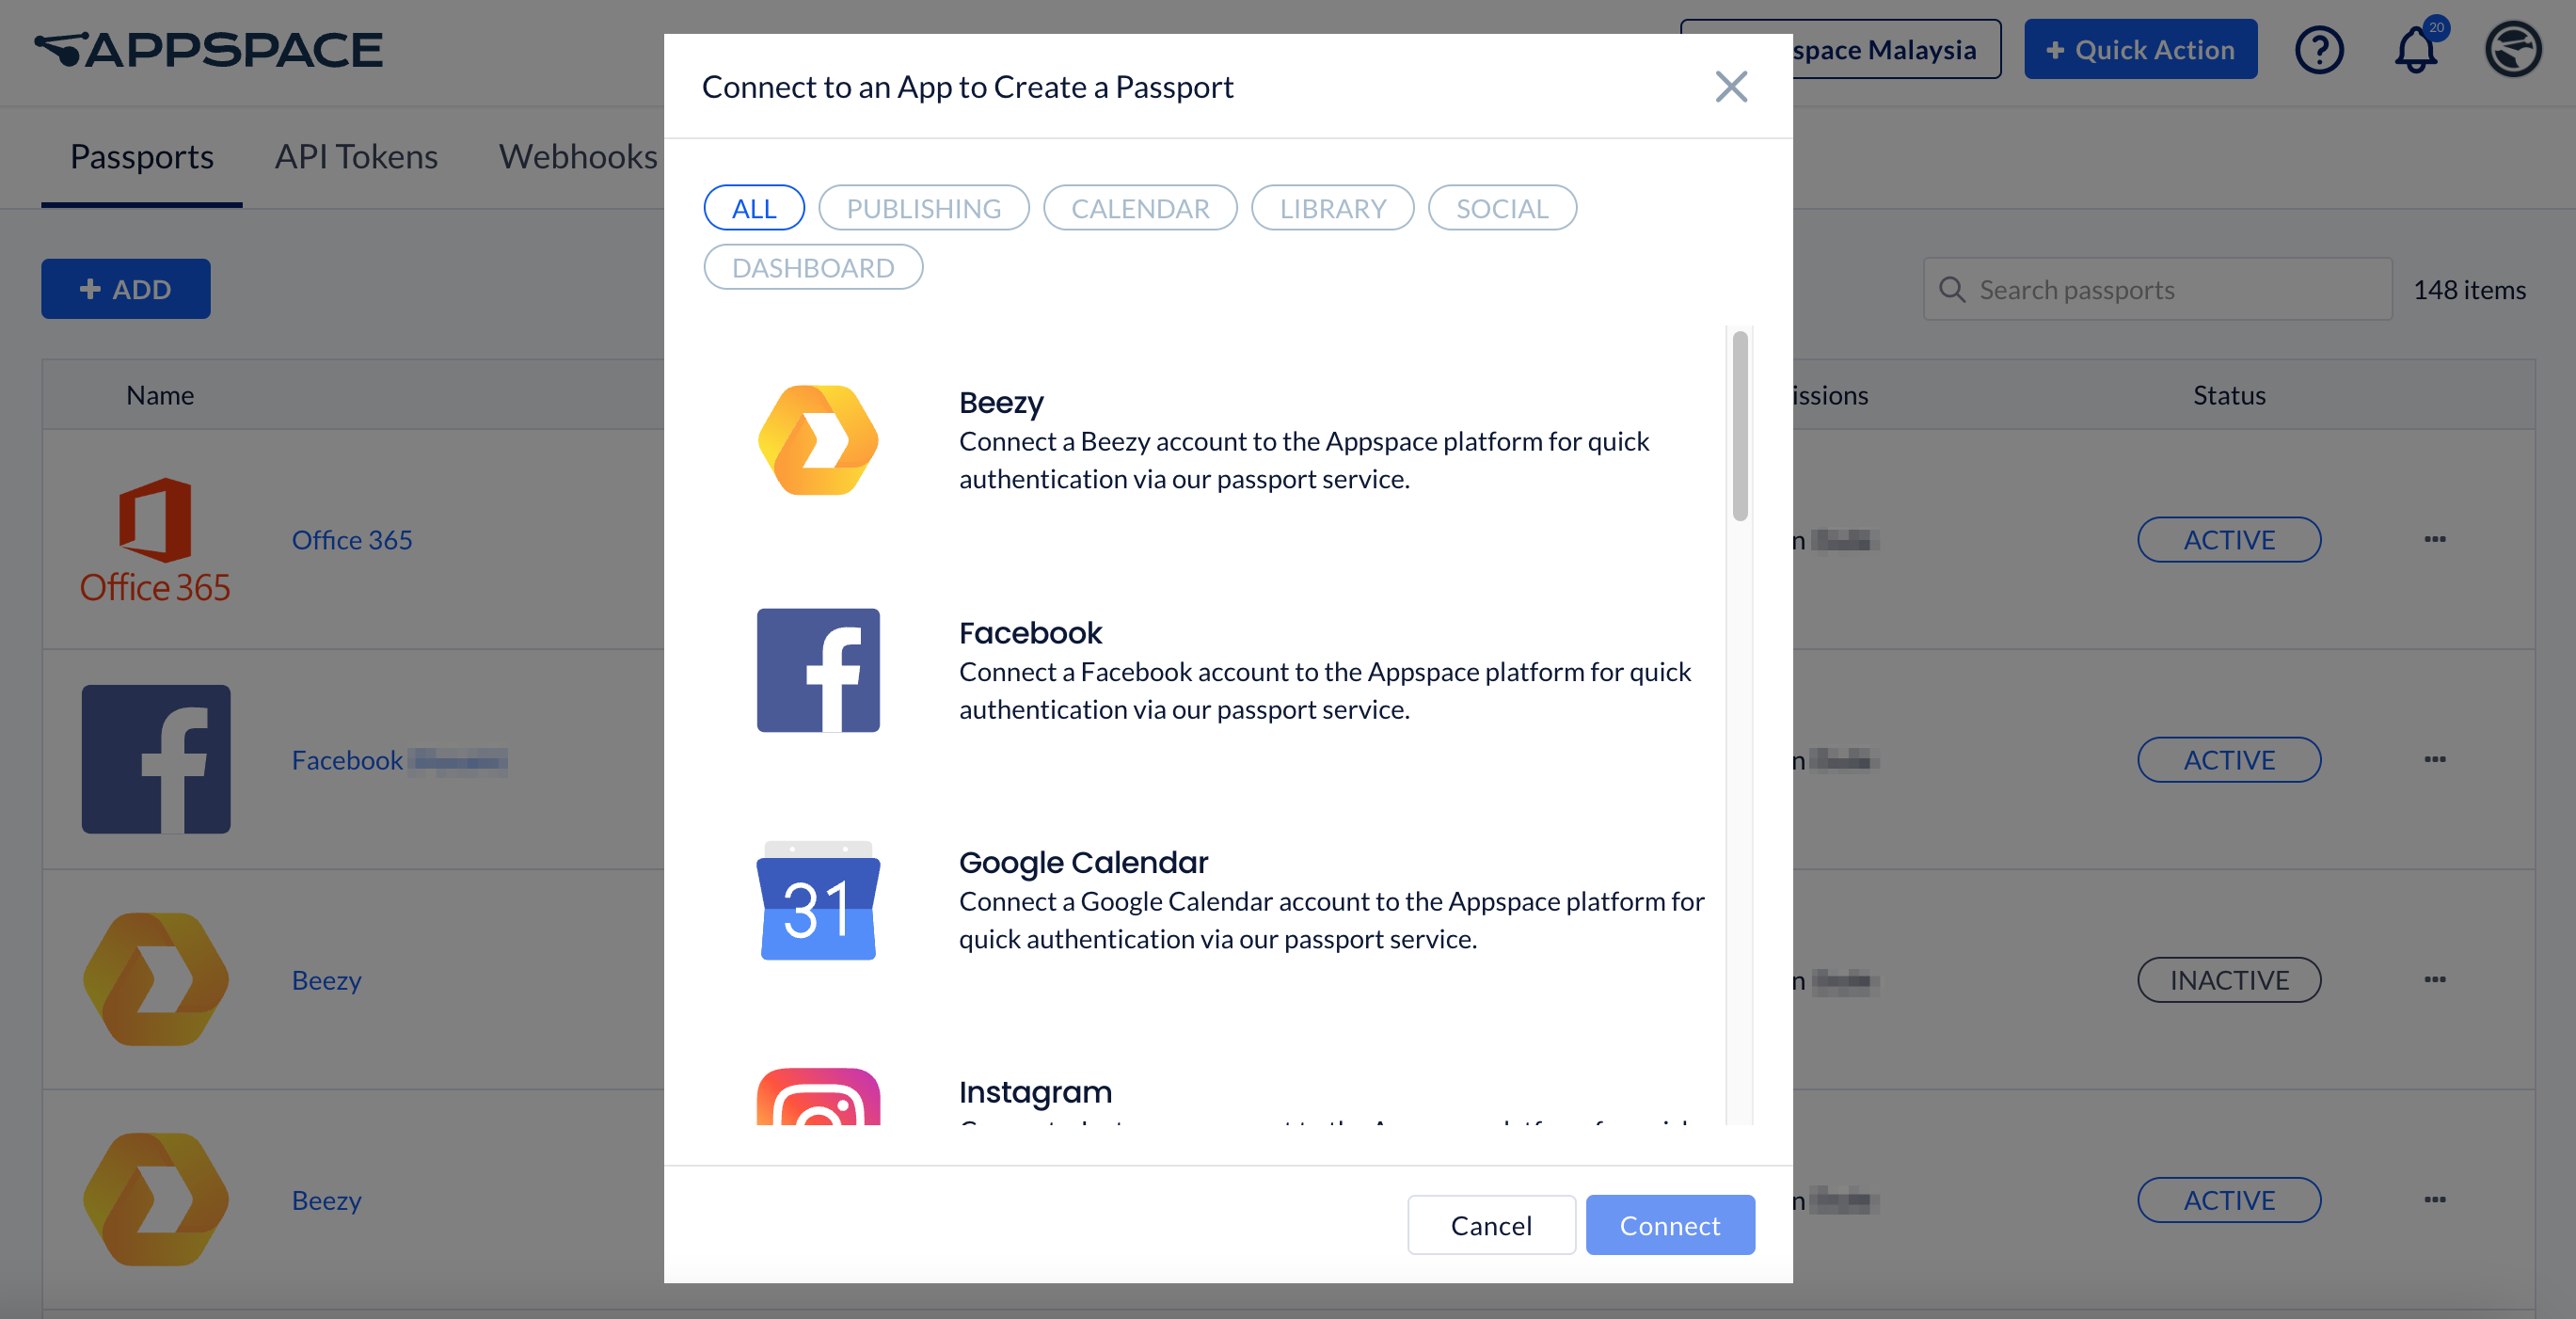
- Select the Passports tab and click the +ADD button.
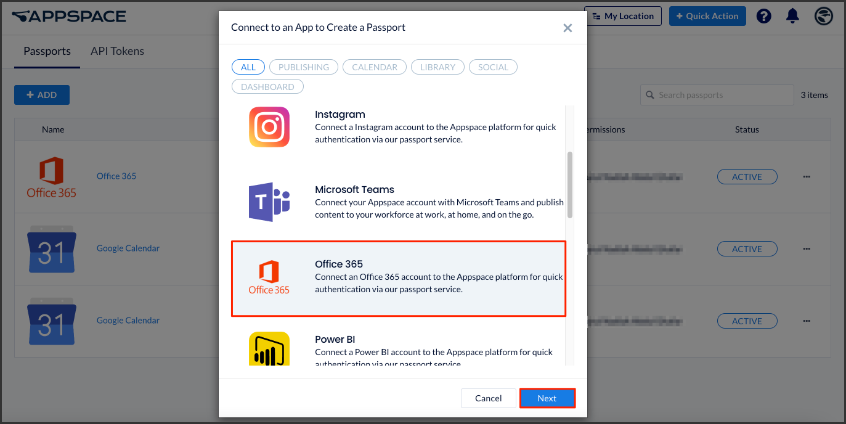
- In the Connect to an App to Create a New Passport window, click your desired provider. You may click a tag to filter results.
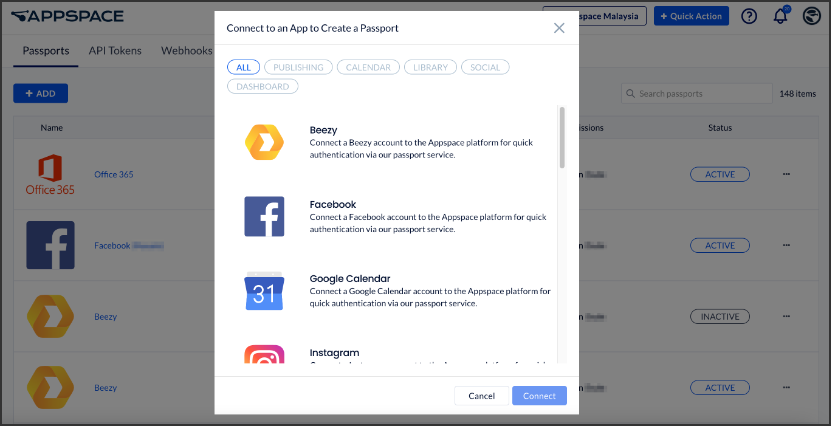
-
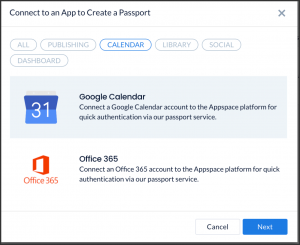
- If choosing a calendar provider, please refer to the sections below:
- If choosing any other passport, continue to Step 5 below or refer to individual articles for configuration instructions.
-
- Click Connect and follow the on-screen instructions for the provider you chose.
- Proceed to authenticate the passport, and grant permissions to access the account. You may be required to sign in with your third-party application credentials if you are currently signed out.
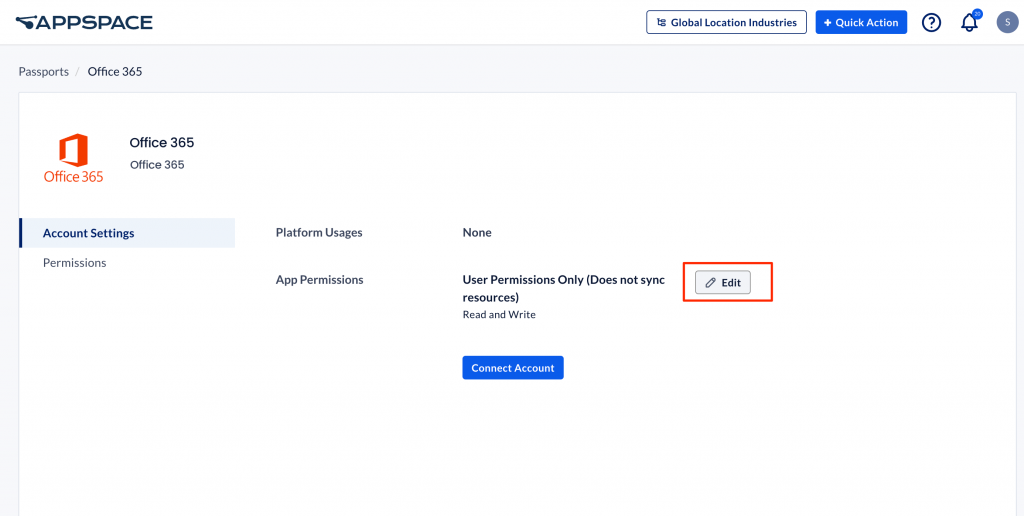
- Once authenticated, in the Account Settings tab, you may perform the following actions:
- Change the name of the passport, by entering a different name in the Name field.
- View the Account ID of the passport.
- View the App Permissions granted to the passport.
- View and refresh the Status of the passport.
- Remove the passport, by clicking the Remove Account button.
- In the Permissions tab, you may grant the following users or user groups permissions to view or edit this passport configuration at any time:
- Enter and select the user(s) or user group(s) from the drop-down list, or click the Find users or user groups link, and select the desired user(s) or user group(s). Proceed to grant either Can Manage or Can View permissions by clicking the Select permissions drop-down menu.
- You may also view or remove the user(s) or user group(s) that have already been granted permissions, by clicking the delete icon.
Configure Google Calendar Passport
- Select the Google Calendar calendar provider passport, and click Next:
- Select the required permissions for the calendar provider passport as described below:
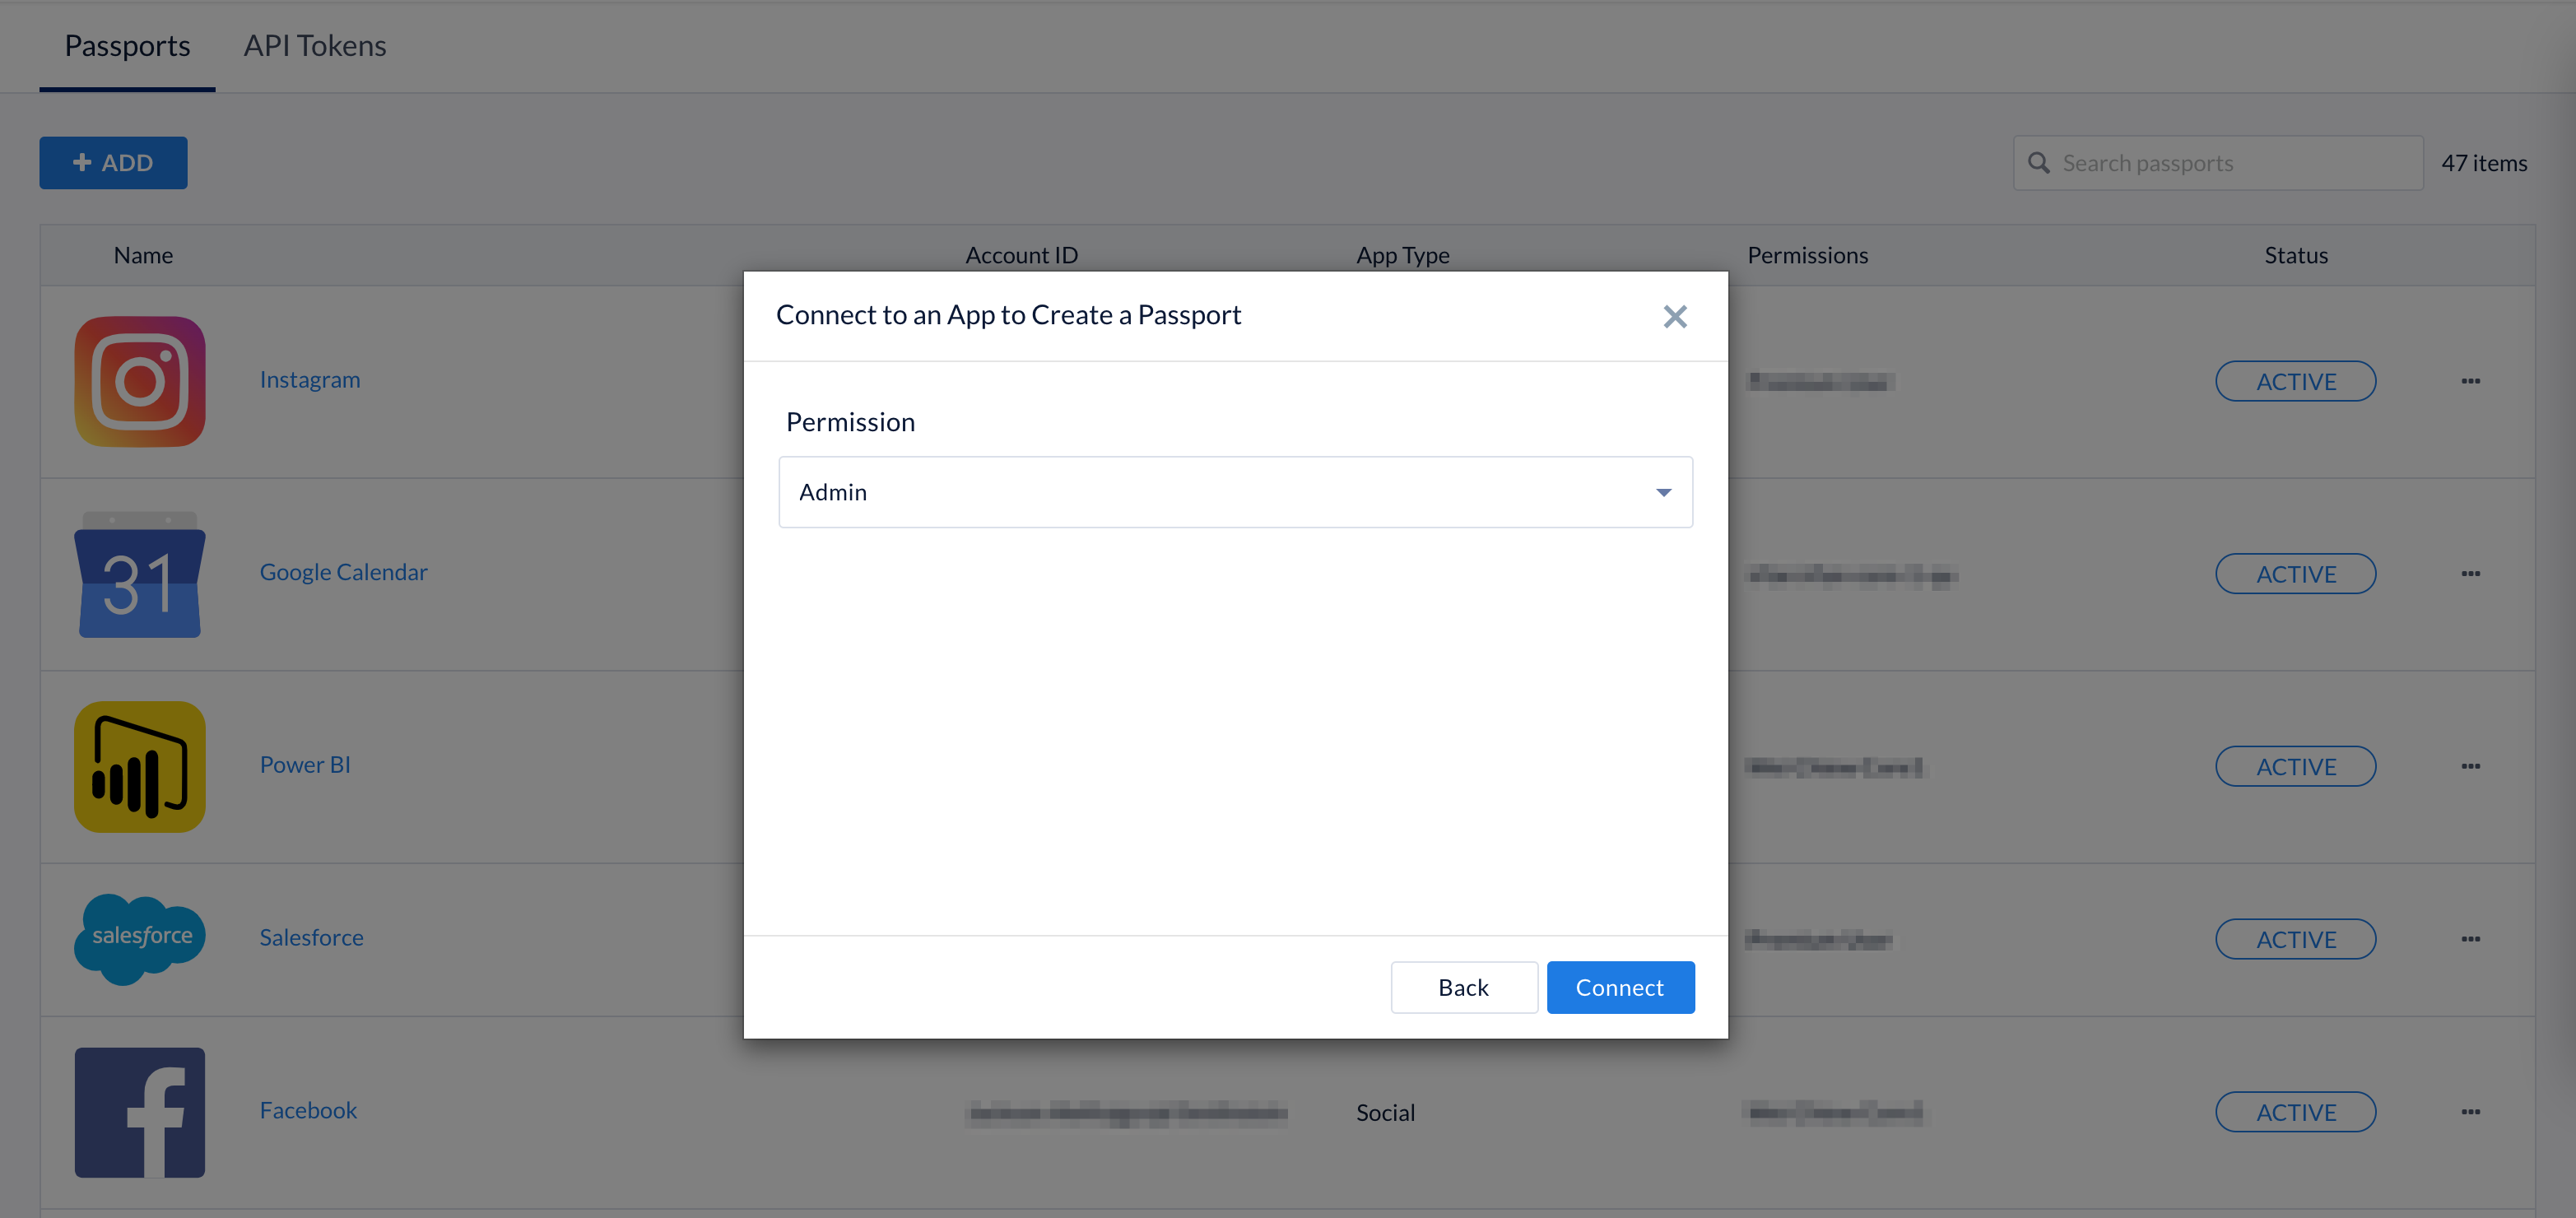
- Admin – Admin permission gives Appspace access to GSuite calendar resources based on the permissions of the service account you use to authorize the passport. This will require the service account to be added as a full delegate to each calendar resource needed to sync the information from and to Appspace and G Suite.
- Basic – Basic permission uses the user permission model and is very similar to the Admin Permission option, however, this option only includes access to users’ calendars based on delegated access to each user’s calendar.
- Click the Connect button and follow the on-screen instructions.
- Return to Step 6 in the Create Passport section above.
Configure Office 365 Calendar Passport
- Select the Office 365 calendar provider passport, and click Next:
- Select the required permissions for the calendar provider passport, as described below:
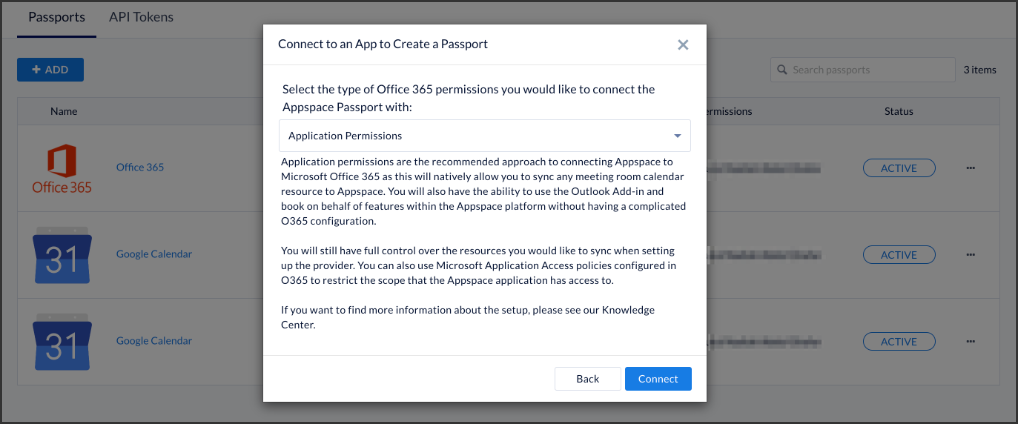
- Application Permissions – Application permissions are the recommended approach to connecting Appspace to Microsoft Office 365 as this will natively allow you to sync any meeting room calendar resource to Appspace. You will also have the ability to use the Outlook Add-in and book-on-behalf features within the Appspace platform without having a complicated O365 configuration.
You will still have full control over the resources you would like to sync when setting up the provider. You can also use Microsoft Application Access policies configured in O365 to restrict the scope that the Appspace application has access to.
NoteApplication permissions enable apps to run without a signed-in user present, allowing it to run in the background. An administrator account however is needed to just authenticate this passport and the permissions.
- Delegated Permissions – Delegated permission gives Appspace access to Microsoft Office Calendar Resources based on the permissions of the service account you use to authorize the passport. This will require the service account to be added as a full delegate to each calendar resource needed to sync the information from and to Appspace and Office 365. This can include Meeting Room Calendars as well as possibly users’ calendars if utilizing the Outlook Add-in and book-on-behalf feature.
- User Permissions Only (Does not sync resources ) – User permissions uses the delegated permission model and is very similar to the Delegated Permission option. But this option only includes access to users’ calendars based on delegated access to each user’s calendar. Use this option if you want a dedicated passport for the Outlook Add-in and book-on-behalf. NoteFor more information on the passport permission types, between Delegated (Admin and Basic user) and Application permissions, please visit the Permissions and consent in the Microsoft identity platform here: https://docs.microsoft.com/en-us/azure/active-directory/develop/v2-permissions-and-consent#request-the-permissions-in-the-app-registration-portal
- Application Permissions – Application permissions are the recommended approach to connecting Appspace to Microsoft Office 365 as this will natively allow you to sync any meeting room calendar resource to Appspace. You will also have the ability to use the Outlook Add-in and book-on-behalf features within the Appspace platform without having a complicated O365 configuration.
You will still have full control over the resources you would like to sync when setting up the provider. You can also use Microsoft Application Access policies configured in O365 to restrict the scope that the Appspace application has access to.
- Click the Connect button and follow the on-screen instructions.
- Return to Step 6 in the Create Passport section above.

Edit/Update Office 365 Calendar Passport Permissions
Once you have created an Office 365 passport and started using it with the Appspace reservations system, the Room Booking card, or the Schedule Board card, you may choose to edit or update the passport permissions.
Appspace has put in place a mechanism to prevent erroneous deletion or downgrade of the delicate Office 365 passport permissions, to prevent erratic calendar provider behavior that could affect your workspace, room, or desk reservations that have already been configured.
Before you attempt to edit your permissions, please see the following:
|
Permissions |
Action |
Supported |
Impact |
|
|
From |
To |
|||
| User | Application | Upgrade | Yes | Full application permission capabilities that allow you to sync any meeting room calendar resource to Appspace. |
| User | Delegated | Upgrade | Yes | Full delegated permission capabilities giving Appspace access to Microsoft Office Calendar Resources based on the permissions of the service account you use to authorize the passport. |
| Delegated | Application | Upgrade | Yes | You may now have more rooms available for booking. Those that were previously not available to Appspace reservations due to the restricted permissions, now become available as a resource. |
| Application | Delegated | Downgrade | Yes | The account used with this passport needs to have delegated permissions to all resources that were previously synced with Appspace via application-wide permissions.
After the switch, there is at least a 15-minute sync time, before which these resources are rendered as not reservable. If a user tries to make a reservation before the sync, they would still see the room listed, but will not be able to reserve that resource; a “Your Reservation was unsuccessful” error message is displayed. Alternatively, you could trigger a manual resync which will be quicker.Resources with correct delegated permissions before the switch will have no problems in being reserved, at any time. |
| Application | User | Downgrade | No | Selecting to update a passport to “User Permission Only” from a passport that previously had “Delegated/Application” permissions will result in an error.
The permission will not be updated, however, the passport needs to be reauthenticated. Refresh your browser to see the Connect Account button. |
| Delegated | User | Downgrade | No | Selecting to update a passport to “User Permission Only” from a passport that previously had “Delegated/Application” permissions will result in an error.
The permission will not be updated, however, the passport needs to be reauthenticated. Refresh your browser to see the Connect Account button. |
To edit a passport, do the following:
- Click the ☰ Appspace menu, and select Integration.
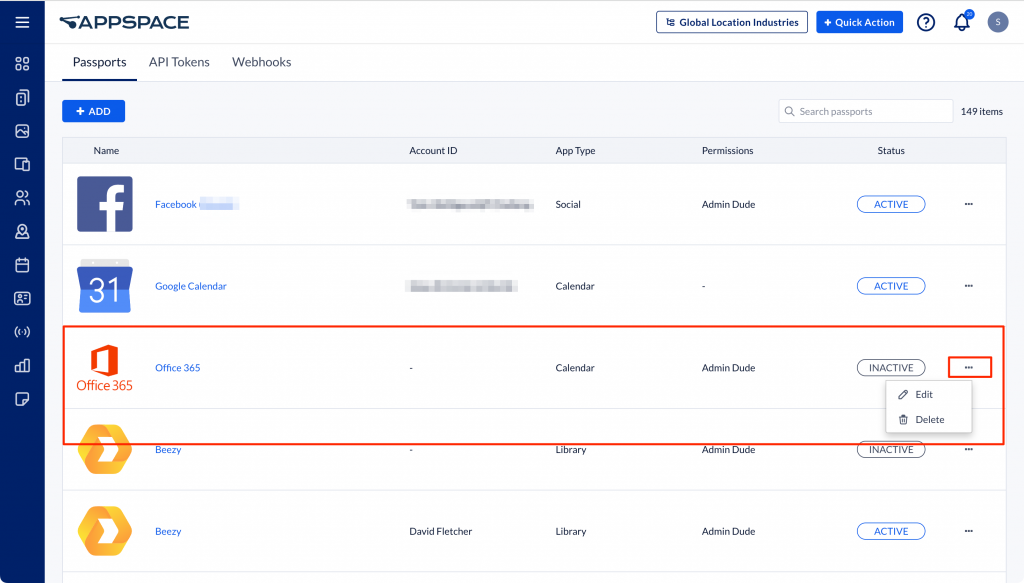
- Select the Passports tab
- Click the ellipsis next to your preferred passport, and click Edit.
- Under Account Settings, click the Edit button next to App Permissions.
- Select your desired permissions in the Edit Passport Permissions window and click Save.

- Click OK in the confirmation dialog box. Your permissions will be updated.
Delete Office 365/Google Calendar Passport Permissions
Appspace has also put in place a background check for the deletion process of calendar-based passports. If a calendar passport is being used by any resources configured for use in the Appspace Reservations system, then an error is displayed preventing the deletion and preserving all existing resource configuration.
To delete a passport, do the following:
- Click the ☰ Appspace menu, and select Integration.
- Select the Passports tab.
- Click the ellipsis next to your preferred passport, and click Delete.
- Click OK in the confirmation dialog box.
Was this article helpful?