The Webex Room Navigator is an accessory that integrates with your existing Webex room device to provide room scheduling features. The Webex Room Navigator comes in two versions, a table-stand unit or a wall-mounted unit, both with the ability to run the Appspace PWA in order to display the Room Schedule card.
This article provides the instructions to configure the Webex Room Navigator to pair with Webex room devices.
Prerequisites
Cisco Webex
- An active Webex Control Hub admin account. NoteAppspace Private Cloud customers please contact your Appspace Customer Success Managers to enable support for Webex Control Hub on your private cloud.
- Supported Webex device running the latest Webex Room OS firmware, and configured to the Webex Control Hub.
- The following supported Webex devices running the latest Webex Room OS, and have been added to the Webex Control Hub:
- Webex Room Navigator – Support information: https://www.cisco.com/c/en/us/support/collaboration-endpoints/webex-room-navigator/series.html
- Webex Room Devices – Room Kit, Room Kit Mini, Room Kit Plus, Room Kit Pro. NotePlease refer to our Supported Devices & Operating Systems article for specifications. Every registered Webex device will consume one Appspace ID each.
Appspace
- An active Appspace account, with sufficient Device IDs.
- Account Owner or Location Admin roles in Appspace.
- It is recommended that the device clock is set to automatically retrieve time from a Network Time Protocol (NTP) server, with the correct time zone, in order for it to sync correctly with the Appspace server. Note
- Appspace cloud servers by default retrieve time from an NTP server. If an Appspace on-premises server is used, ensure the server time is automatically retrieved by an NTP server.
-
Appspace has updated the time zone configurations, which now include time zones other than GMT. This enables users with daylight savings to adjust the time accordingly.
For more information, please refer to the Appspace 7.1-ac.8 Release Notes.
- Please ensure your network is configured to allow Appspace Approved URLs and the relevant network ports.On your proxy server, ensure our approved URLs are listed in the ‘How to set up networks with SSL content filters’ section in the following article: https://support.google.com/chrome/a/answer/3504942#sslinspection.
Configure the Webex Room Devices
Follow the instruction below to configure the Webex room device before pairing the Webex Room Navigator accessory:
- Log in to your Webex room device’s web interface (via device IP address) with your Admin credentials.
- Navigate to Settings > Configurations from the menu, to configure the following settings:
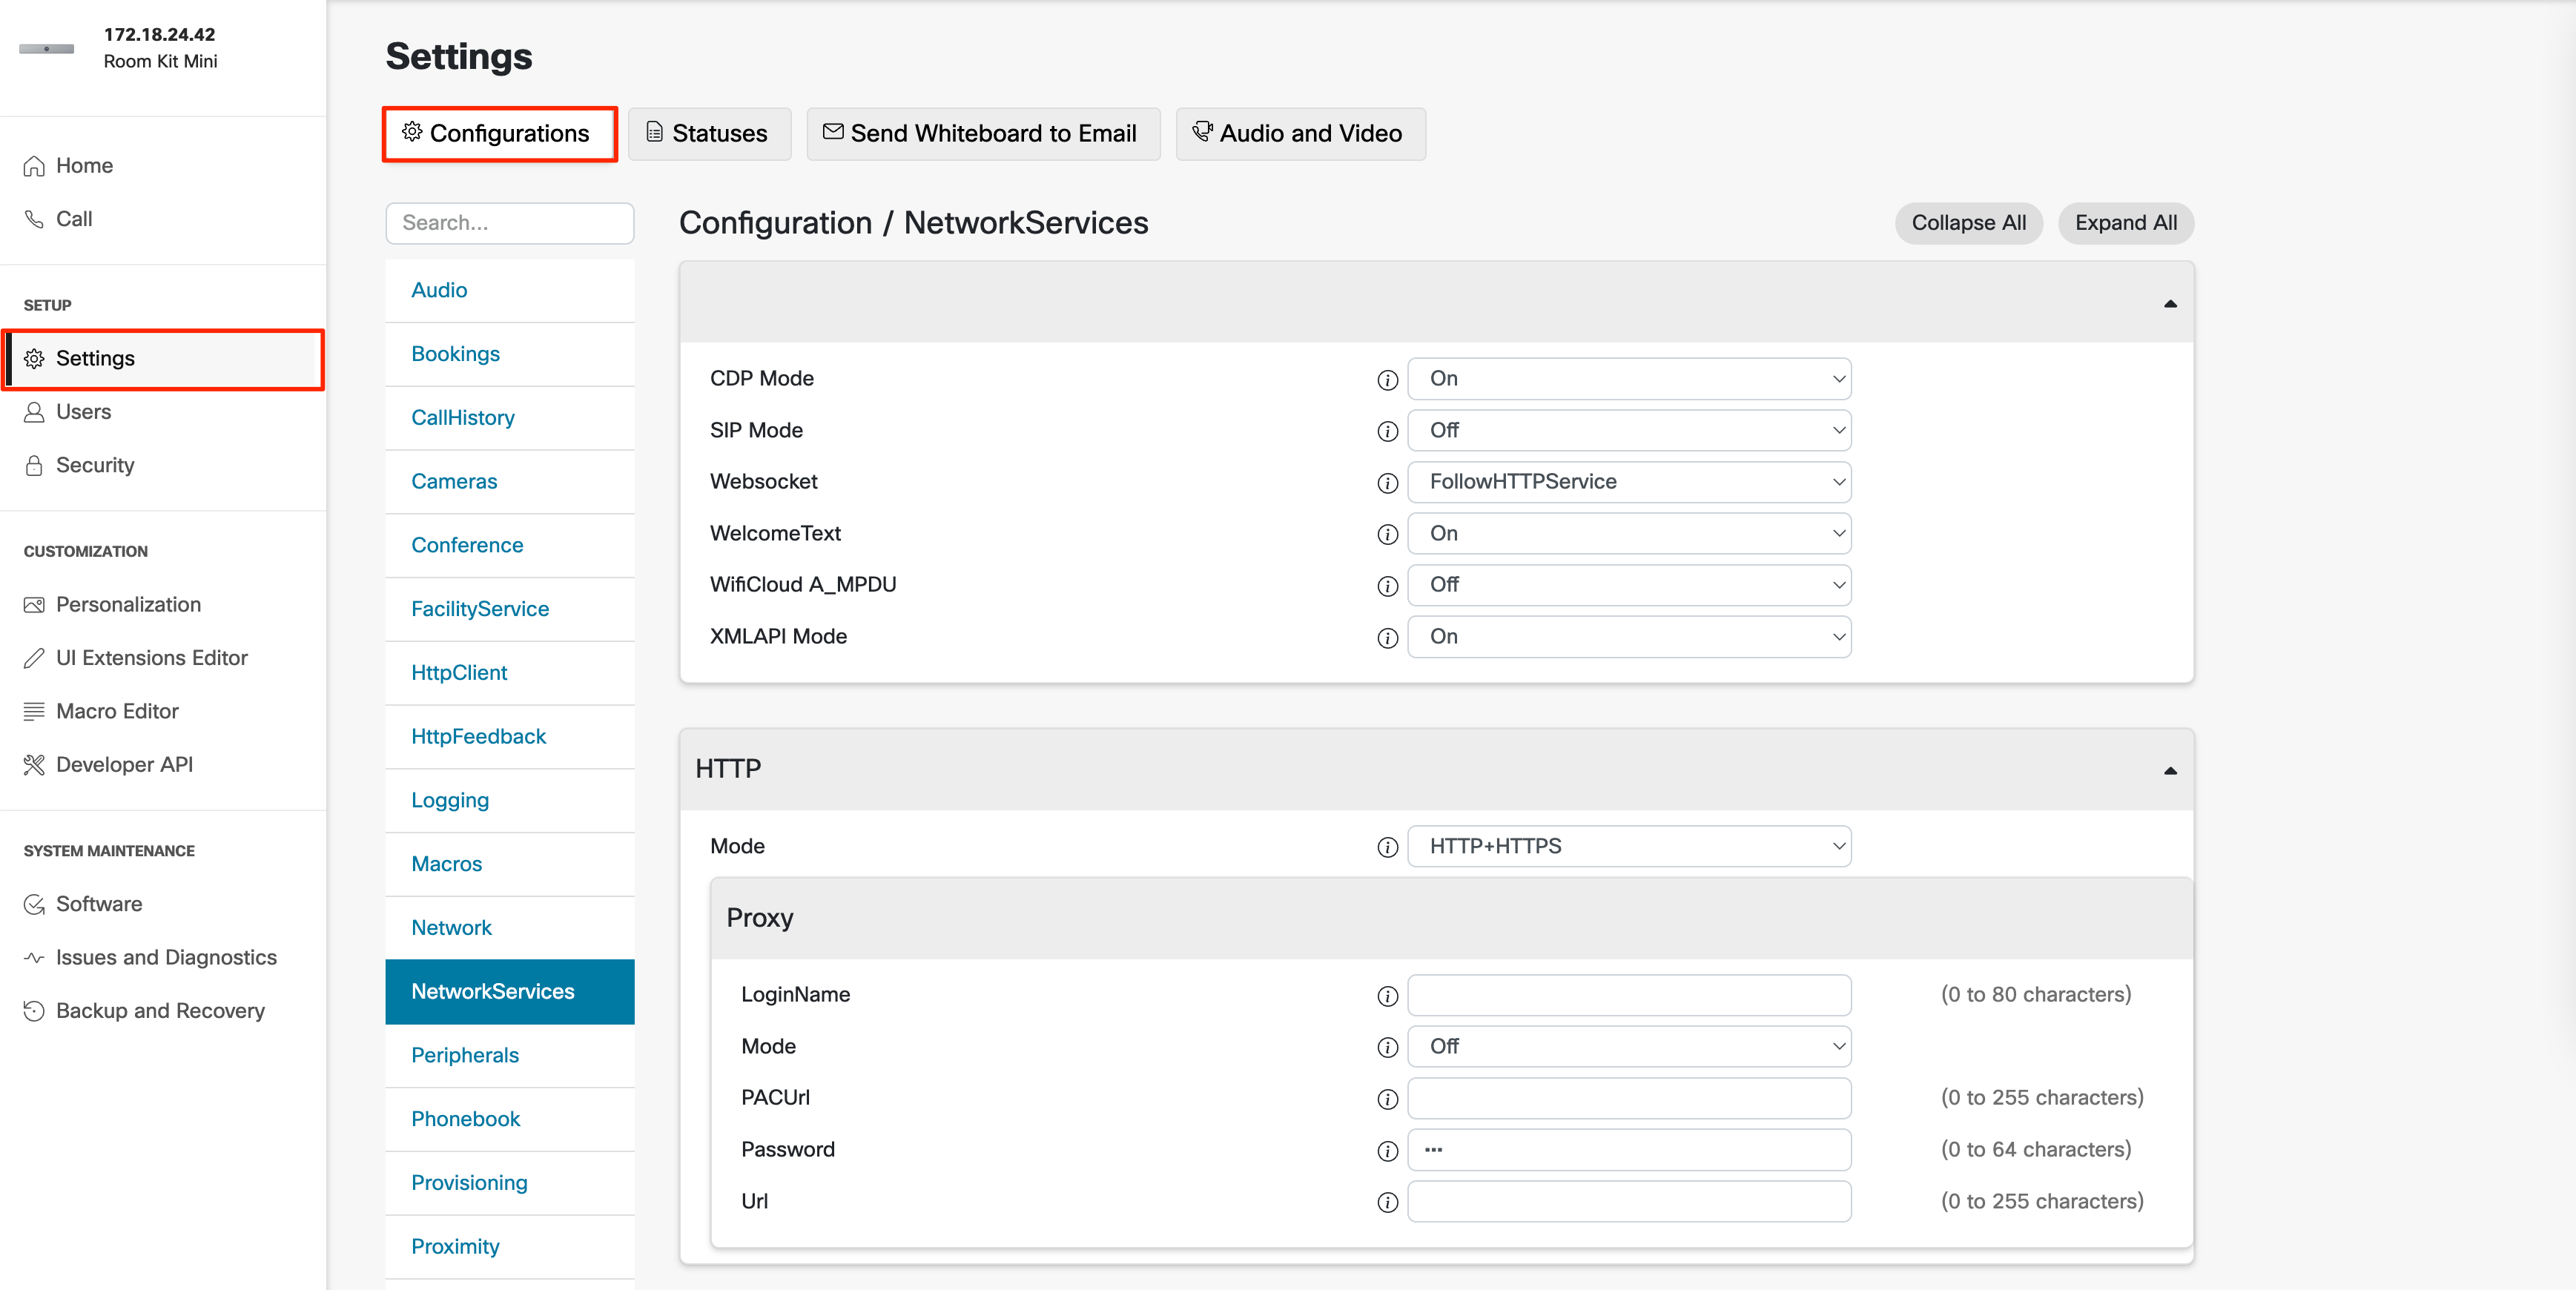
- In the NetworkServices tab section:
- Set the Websocket setting to FollowHTTPService from the drop-down menu.
- Set the HTTP > Mode setting to HTTP+HTTPS from the drop-down menu.
- In the UserInterface tab section:
- In the HomeScreen Peripherals WebApp URL field, enter the Appspace App PWA URL of your Appspace deployment:
- Appspace Public Cloud: https://cloud.appspace.com/app/?registrationmode=passive
- Appspace Private Cloud: https://<customer>.cloud.appspace.com/app/pwa/?registrationmode=passive
- In the HomeScreen Peripherals WebApp URL field, enter the Appspace App PWA URL of your Appspace deployment:
- In the WebEngine tab section:
- In the Features > XAPI Peripherals AllowedHosts Hosts field, enter the domain URL of your Appspace deployment domain URL.
- Appspace Public Cloud: cloud.appspace.com
- Appspace Private Cloud: <customer>.cloud.appspace.com
- In the Features > XAPI Peripherals AllowedHosts Hosts field, enter the domain URL of your Appspace deployment domain URL.
- In the Security section:
- Set the XAPI Websocket APIKey Allowed setting to True from the drop-down menu.
This is only required if the web app will use the device API.
- Set the XAPI Websocket APIKey Allowed setting to True from the drop-down menu.
- In the NetworkServices tab section:
- Once configured, proceed to the section below to pair the Webex Room Navigator device.
Pair the Webex Room Navigator
Follow the instructions below to pair the Webex Room Navigator accessory to your Webex room device:
- Ensure the Webex Room Navigator device has been factory reset. NoteFactory Reset:
- You might need to perform a factory reset in order to pair the Room Navigator with a different room device or to configure it as a controller.
- When the Room Navigator is in Room booking mode, a factory reset option can be found by pressing and holding (5-6 seconds) on the room name in the upper-left corner of the screen.
- When you tap Factory Reset, you will be asked to confirm your selection before the Room Navigator will be restored to factory settings.
- Proceed to pair the Webex Room Navigator device with your configured Webex Room series device, by following the instructions in the Connecting a touch controller to Cisco Webex Boards and Room Series devices article here: https://help.webex.com/en-us/article/fqm3au/Connecting-a-touch-controller-to-Cisco-Webex-Boards-and-Room-Series-devices.
- Once successfully paired, follow the on-screen instructions of the first-time setup wizard, and select Persistent Web App to launch the Appspace App.
- Proceed to register the Appspace App by following the instructions in the Register a device article.
- In Step 6 of the registration process, select the Administrators can select a single channel option for the Channel selection mode.
- Assign the playlist channel with the Room Schedule card.
Was this article helpful?