This article provides the instructions to import and register Crestron devices that are managed by Crestron XiO Cloud, an advanced device registration method ideal for bulk-registering devices in your local network.
Prerequisites
- An Appspace App supported device installed and configured with the Appspace App.
- An active Appspace account, with sufficient Device IDs to register the device.
- Account Owner or Network Administrator privileges in Appspace.
- Crestron XiO Cloud account.
-
By default, the Crestron XiO option is disabled. To enable the Crestron XiO option, navigate to Networks in the Appspace console and insert the following network property: feature.registration.crestronxio = true
Import and Register Devices with Crestron XiO Cloud
- Log in to the Appspace console.
- Launch the device registration page via one of the following methods:
- Click the Quick Actions menu and select Register a Device.
- Go to the Device Registration widget on the Dashboard.
- Click the ☰ Appspace menu, select Devices, and click the Add button in the Devices tab.

- In the Register a New Device window, click the advanced device registration link.
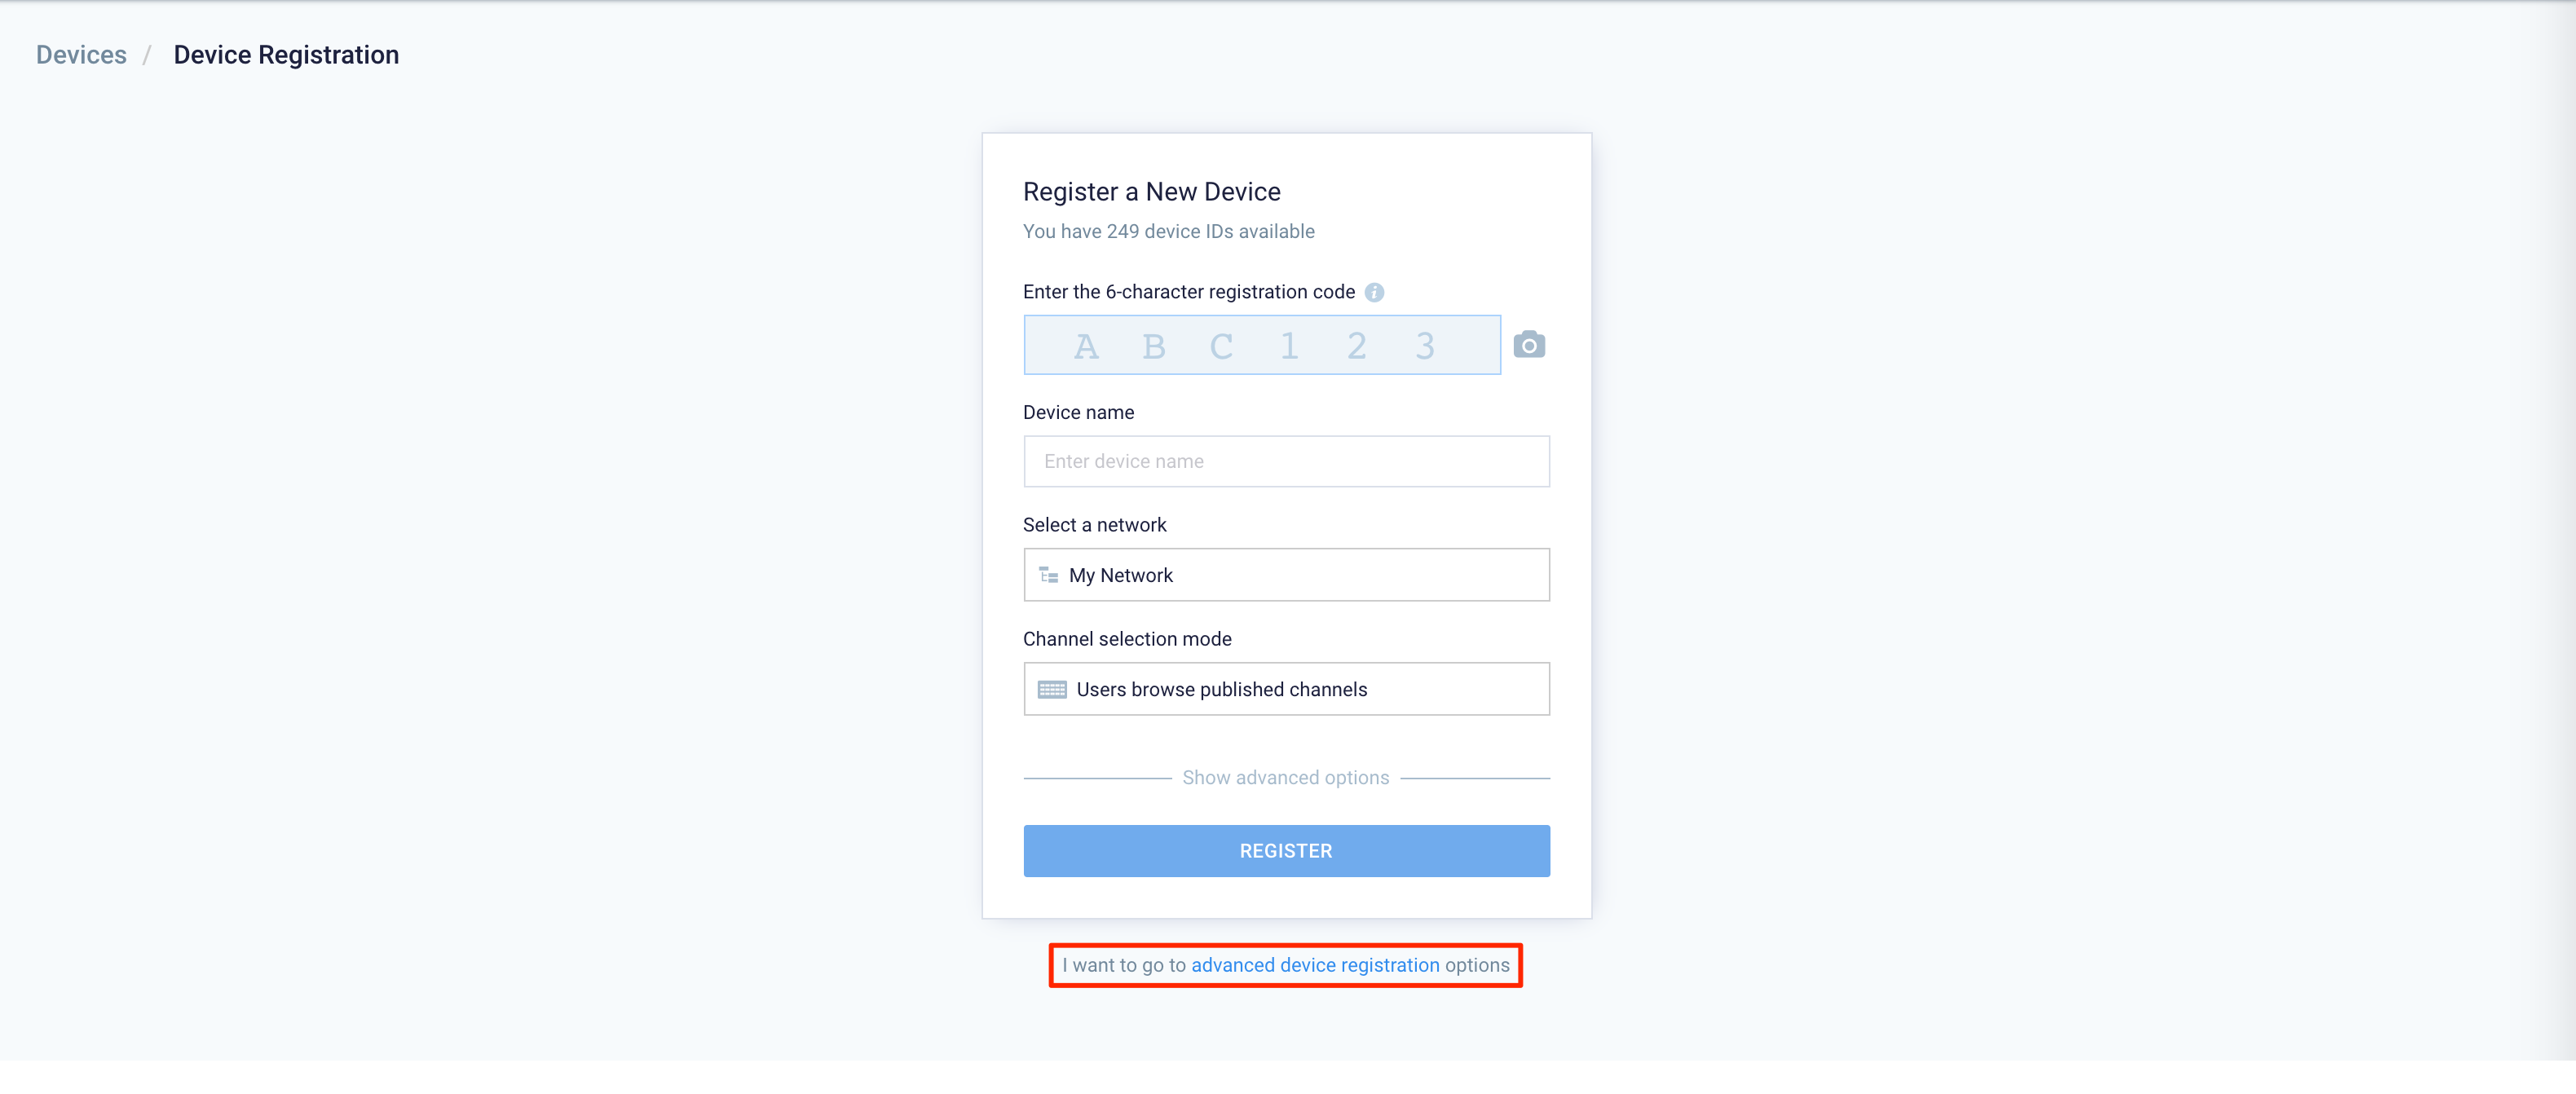
- In the Configure Advanced Registration window, select Crestron XiO for the Deployment method drop-down menu.
- Enter the Crestron Account credentials (Account ID and Subscription Key), and click the Authenticate button.
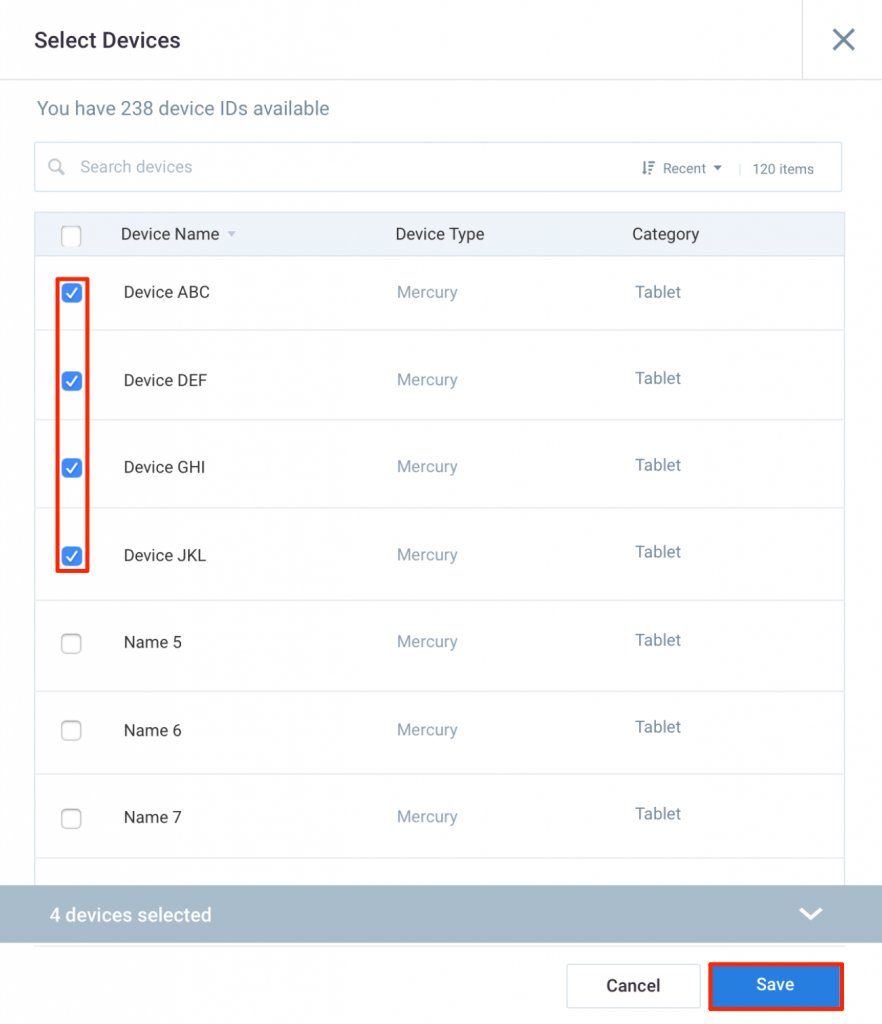
- Once successfully authenticated, click the Browse XiO devices button, and select the desired Crestron devices to import, and register to Appspace. Once devices have been selected, click Save.
- Proceed to Select a network. If a network has not been created, you may skip this step and assign a network later.
- In the Channel selection mode field, select one of these playback options and assign a channel (if already created):
- Users can browse published channels – this is the interactive mode or channel browsing mode, ideal for TVs or displays with touch-screen, or with a mouse/keyboard attached.
- Channels will autoplay sequentially – this option is currently available only for playlist channels. Channels with autoplay based on the playlist sequence or any scheduling or dayparting settings configured.
- Administrators can select a single channel – ideal for signage, you may select either a playlist channel, an advanced channel or a live channel. However to select a channel here, the channel must already be created prior to this registration. If the channel has not been created, you may skip this step and assign a channel later.

- Click the Save button.
- Back in the Register a New Device window, click Show advanced options and enter:
- Device description – type a brief description for the device such as its location or its function.
- Device group – select an exiting device group. Skip this step if there is no device group created. You may assign a device group later.
- Device tag – select from exiting tags or type in new tags.
- Click the Register button to begin importing and registering the Crestron devices on the Appspace console.
Was this article helpful?