The Zoom Recordings card is built using the new Appspace integration with third-party systems that leverages standard technologies to create long-lived, authenticated, and secure connections. The Zoom Recordings card allows users with a Zoom account to access and display a recording of their Zoom Meeting (such as conference calls or town hall meetings), ideal for keeping the workforce, in the office or working remotely, well informed.
An initial connection must be established between Appspace and a Zoom service account, which is then stored in a virtual passport in Appspace and can be used until the service account revokes or cancels the integration. The passport will allow the card to establish a connection with the third-party system at runtime.
Apart from displaying the Zoom Meeting recording, the following customizations, features, and functionality are available for the Zoom Recording card:
- Display only one Zoom Meeting recording on the card at any one time.
- Customize the Zoom Meeting recording display ratio.
With the introduction of Content Categories in Appspace 8.0 ac.22, the Zoom Recording card template is assigned with the Productivity & Engagement content category.
This article provides instructions to create, configure, and customize the Zoom Recording card.
Prerequisites
- Appspace App 2.21 and later.
- A Zoom account with access to Zoom Meetings recordings.
- Ensure your device is compatible. Refer to the Supported Appspace Cards article.
- Account Owner, Publisher, Editor, or Content Producer (Author) role to add or edit content in Library.
We are currently working on a patch to fix these CSS issues and will be releasing it as soon as possible.
Authenticate Zoom Meetings Account
Follow the instructions to authenticate a Zoom Meeting service account with Appspace.
- Log in to the Appspace console.
- Click the ☰ Appspace menu, and then click Integrations.
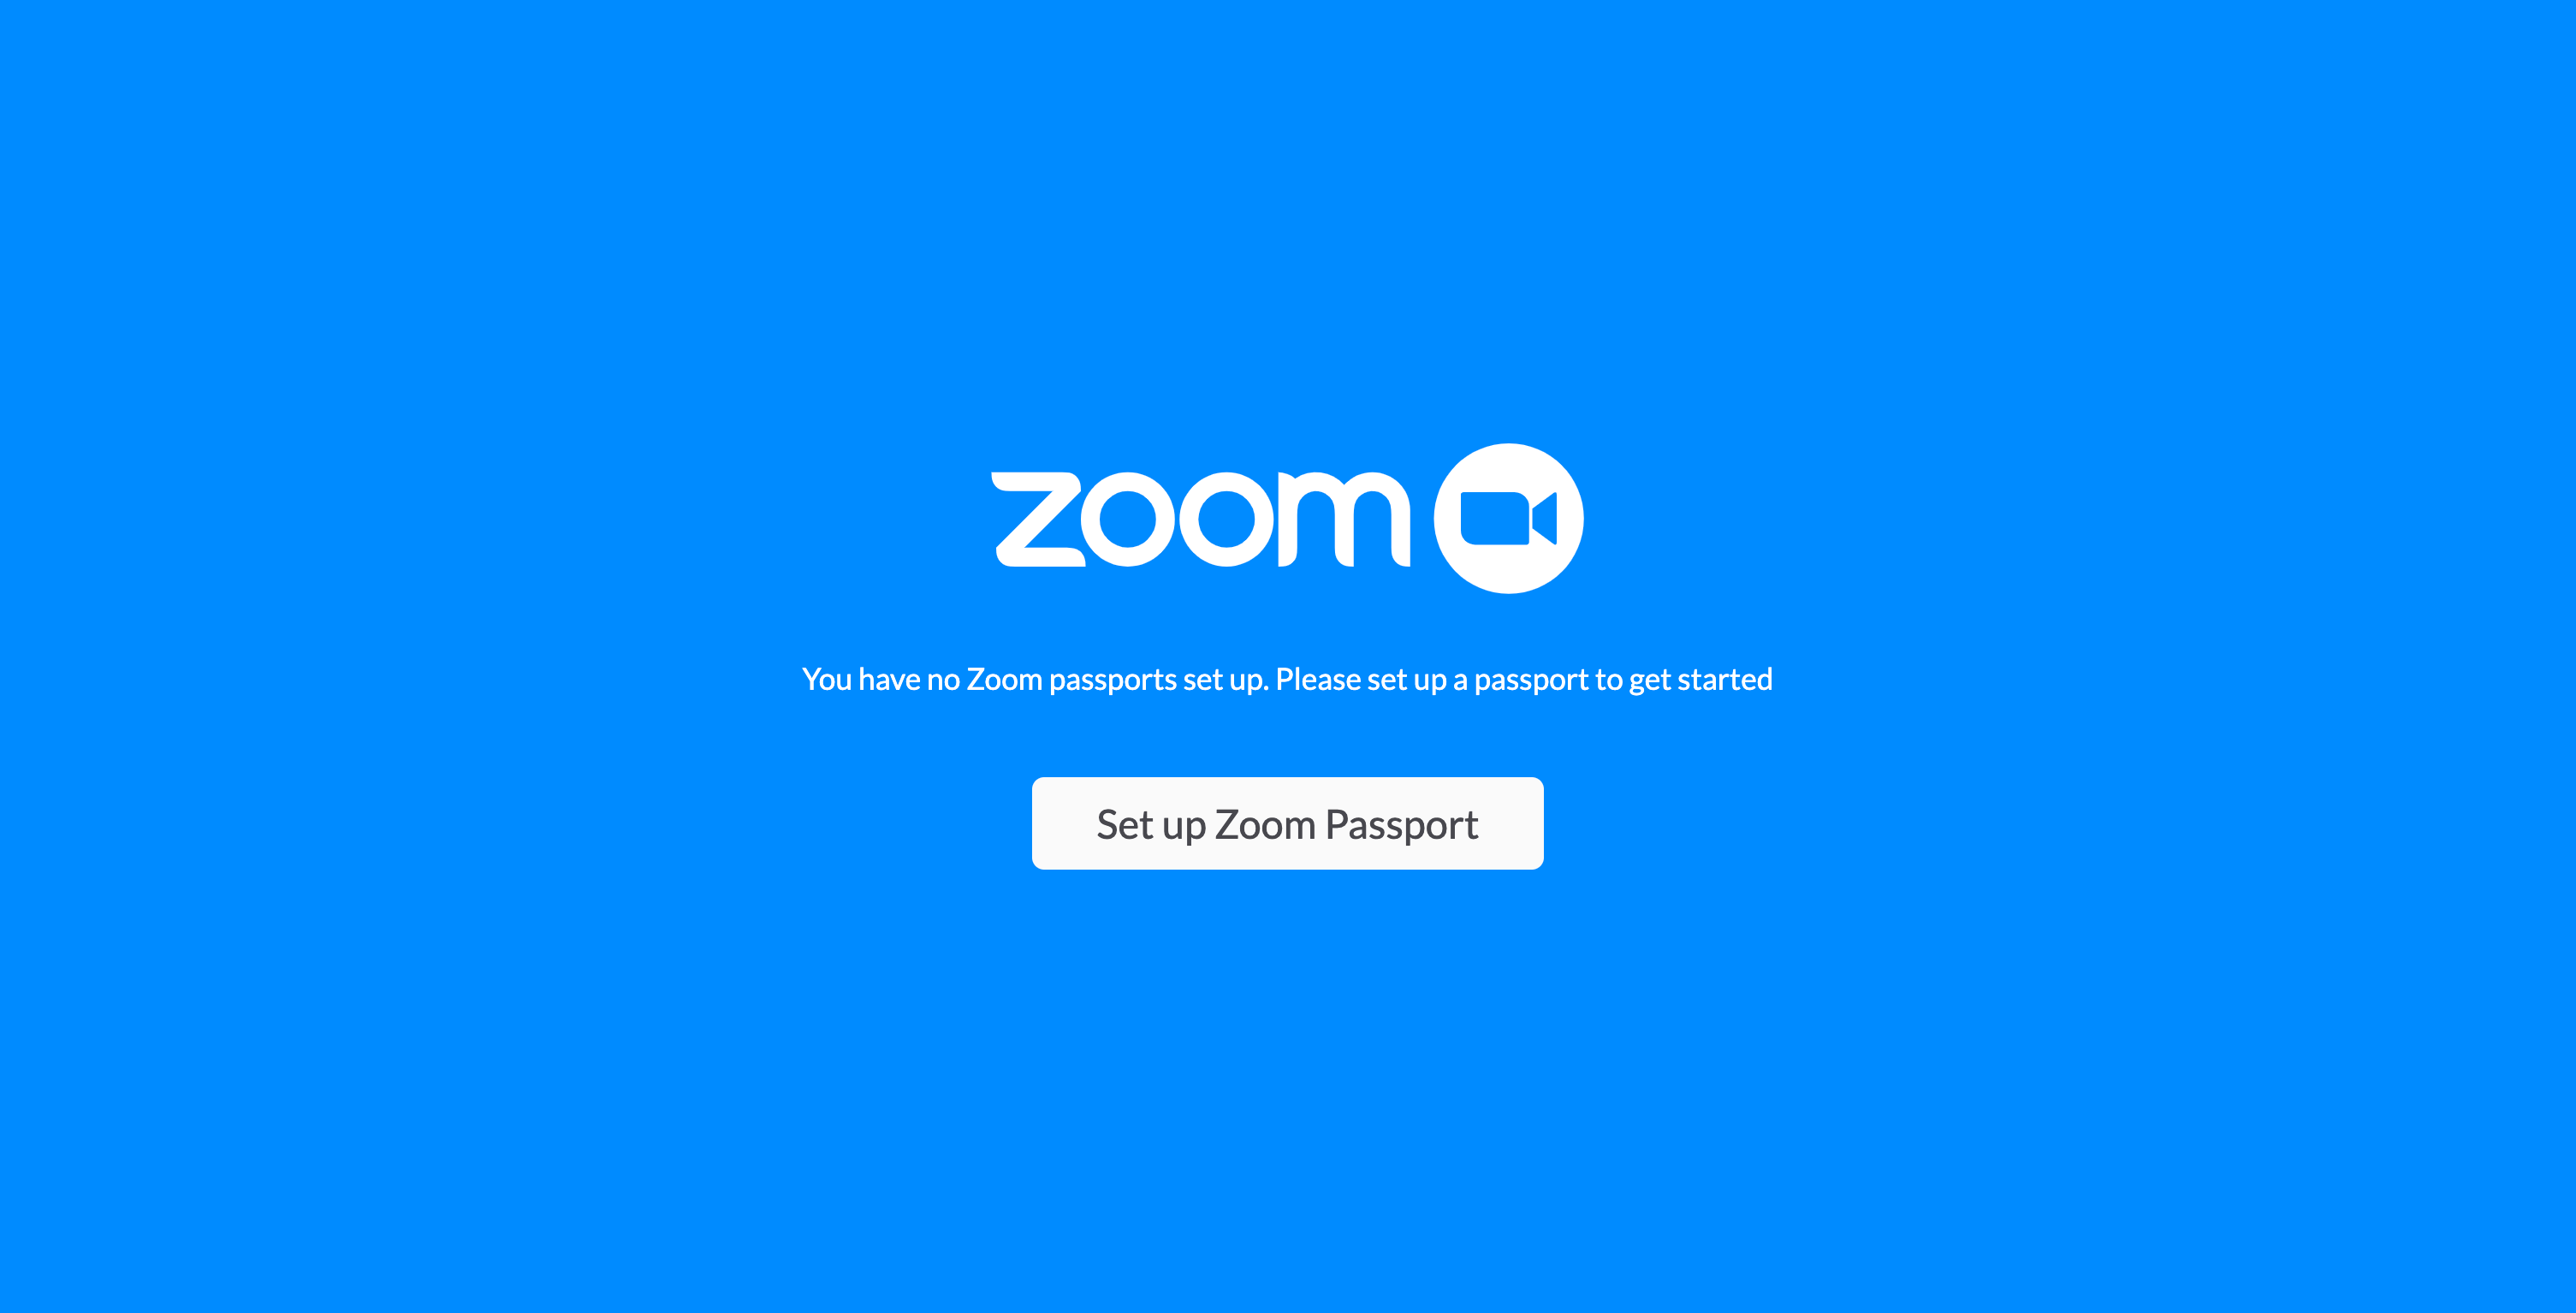
- Click the Passports tab, and click the +ADD button.
- Select the Zoom Meetings passport, and click CONNECT. Proceed to authenticate the passport, and grant permissions to access the Zoom Meetings account. You may be required to sign in with your Zoom Meetings credentials if you were currently signed out.
- Once successful, continue to configure the Facebook passport.
- In the Account Settings tab, you may perform the following actions:
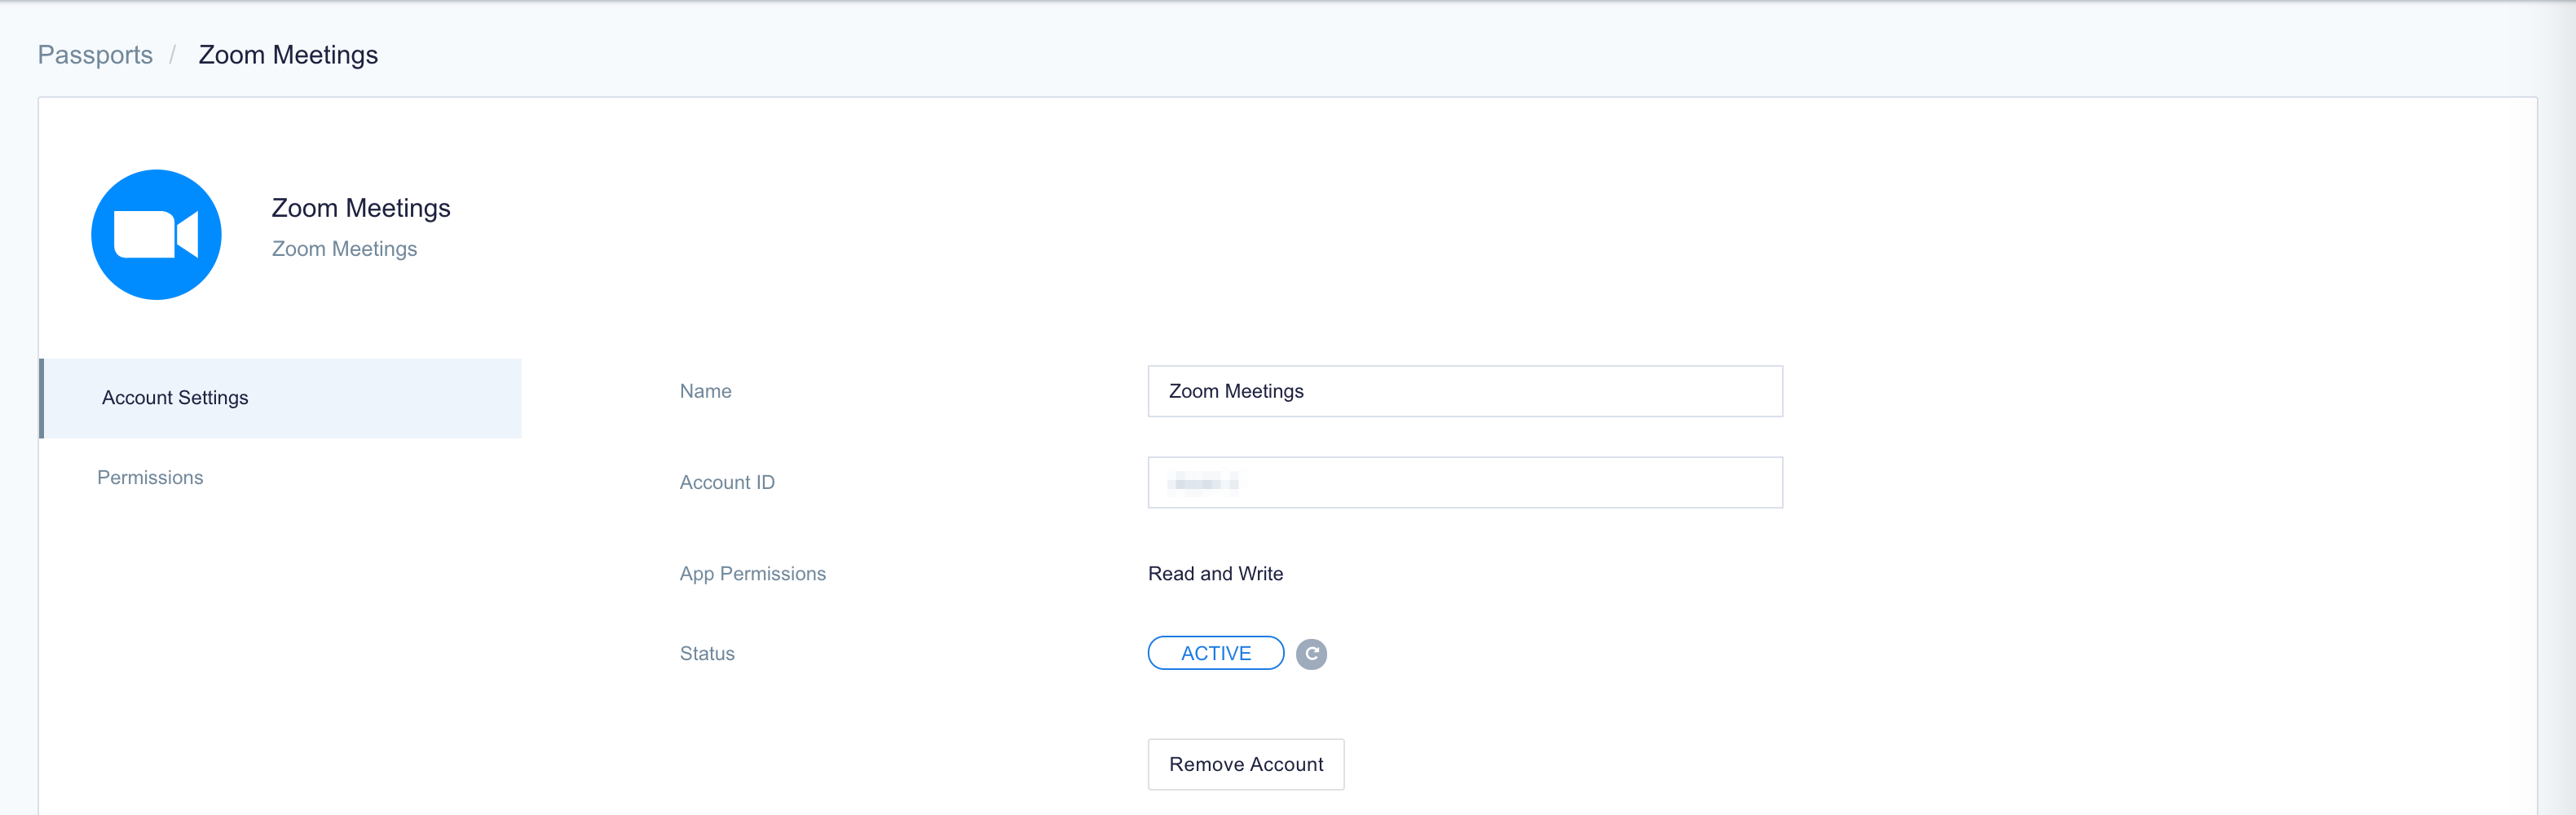
- Change the name of the passport, by entering a different name in the Name field.
- View the Account ID of the passport.
- View the App Permissions granted to the passport.
- View and refresh the Status of the passport.
- Remove the passport, by clicking the Remove Account button.
- In the Permissions tab, you may grant the following users or user groups permissions to view or edit the passport:
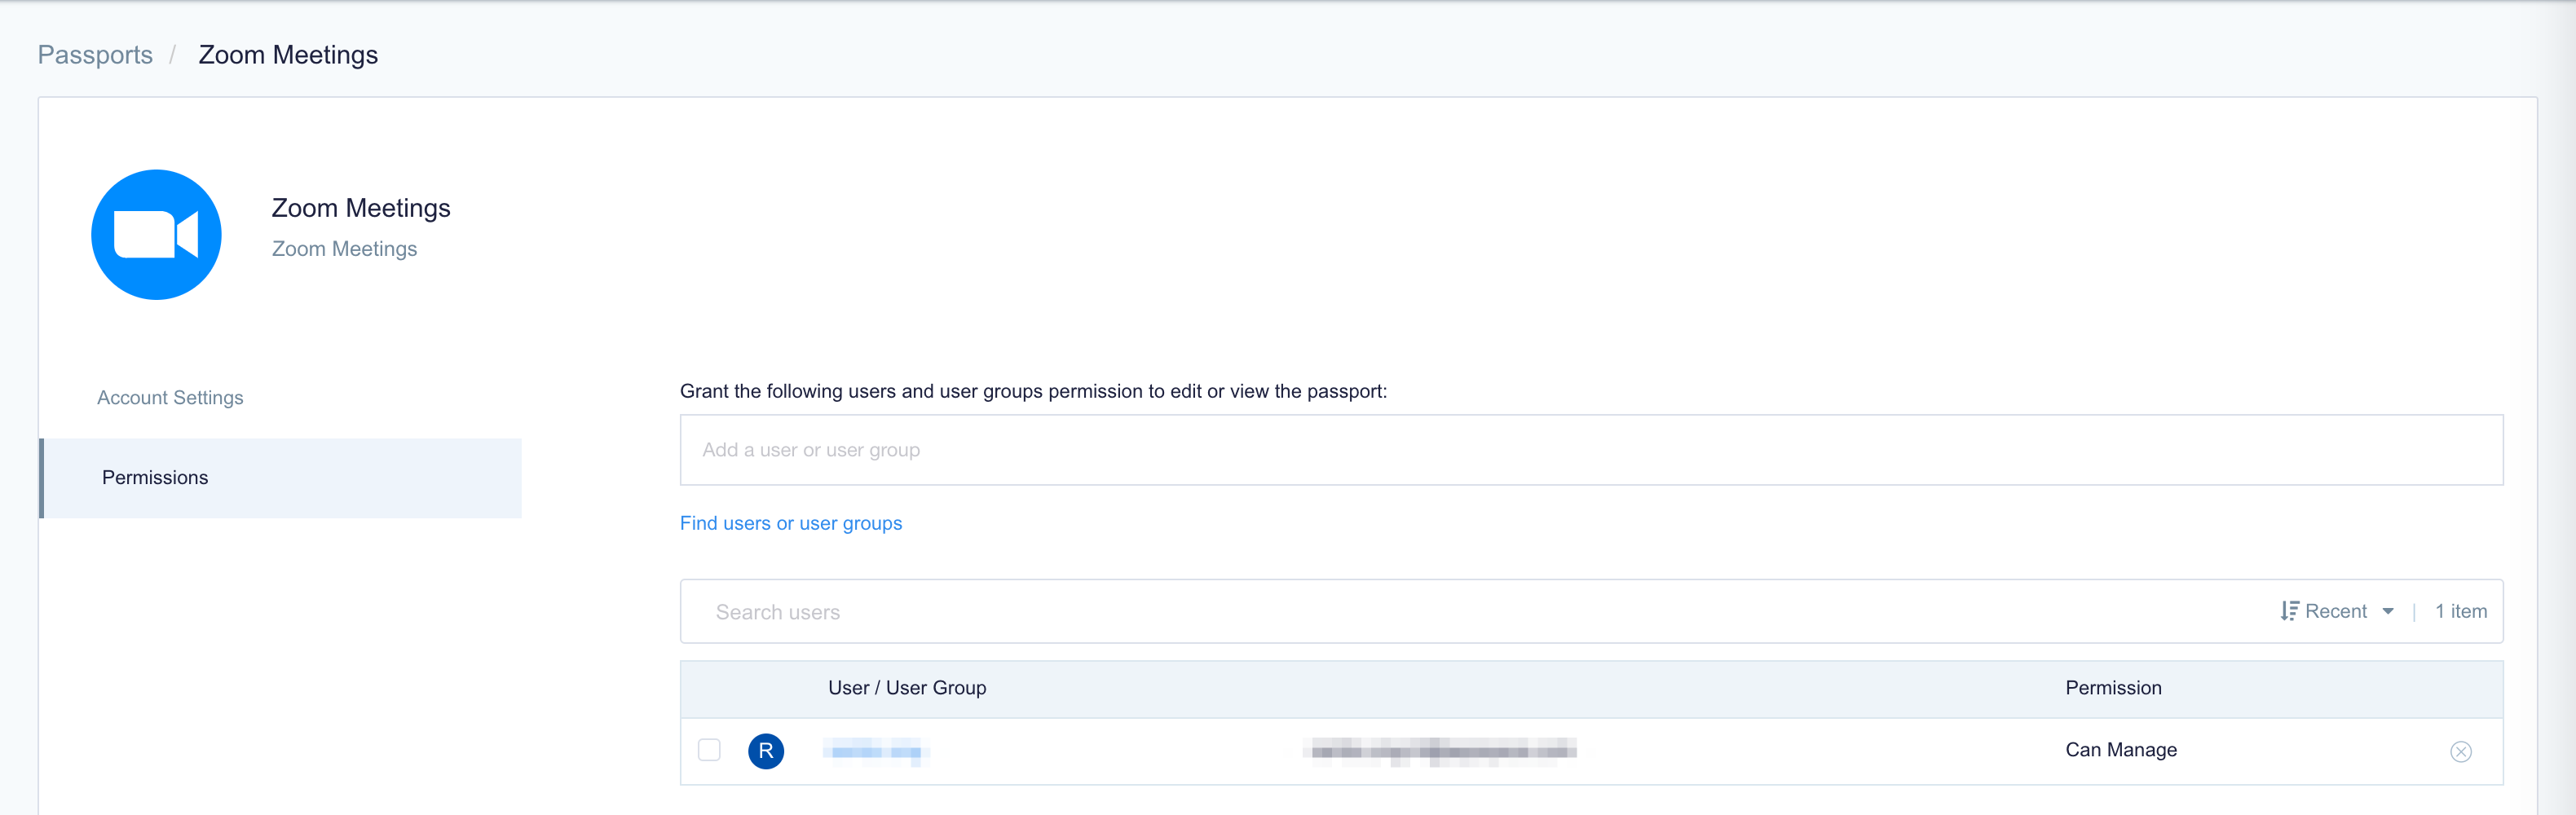
- Enter and select the user(s) or user group(s) from the drop-down list, or click the Find users or user groups link, and select the desired user(s) or user group(s). Proceed to grant either Can Manage or Can View permissions by clicking the Select permissions drop-down menu.
- You may also view or remove the user(s) or user group(s) that have already been granted permissions, by clicking the delete icon.
- You may proceed to the Create and Configure Zoom Recordings Card section below.
Create and Configure Zoom Recordings Card
The instructions below allow you to display a Zoom recording.
- Log in to your Appspace console.
- To create this card, select one of the following options:
- Click +Quick Action from the Appspace menu bar on the top right, and select Create Card.
- Click Library from the ☰ Appspace menu, and select a library or folder you wish to create the content in. Click +CREATE, and select Card.
- To create and add the card directly to an existing channel, refer to Add Content to Playlist Channels.
- Select Feeds from the All Templates panel, and select the Zoom Recordings card. ImportantIf you are unable to locate the content, try using either the Search bar, the Order by, or Filter icon to narrow down the content that you are looking for.
- Enter the Title of the content as this will also act as the filename for the content. This is a mandatory field.
- Select the Zoom Meeting passport created earlier, and search for the Zoom Meeting you wish to display.
Alternatively, click the Browse Files button to display all the Zoom recordings available to you, which you can select from. You may view the recordings in list or grid view. Only a single recording can be selected and streamed at a time. The selected recording is then saved to the card.
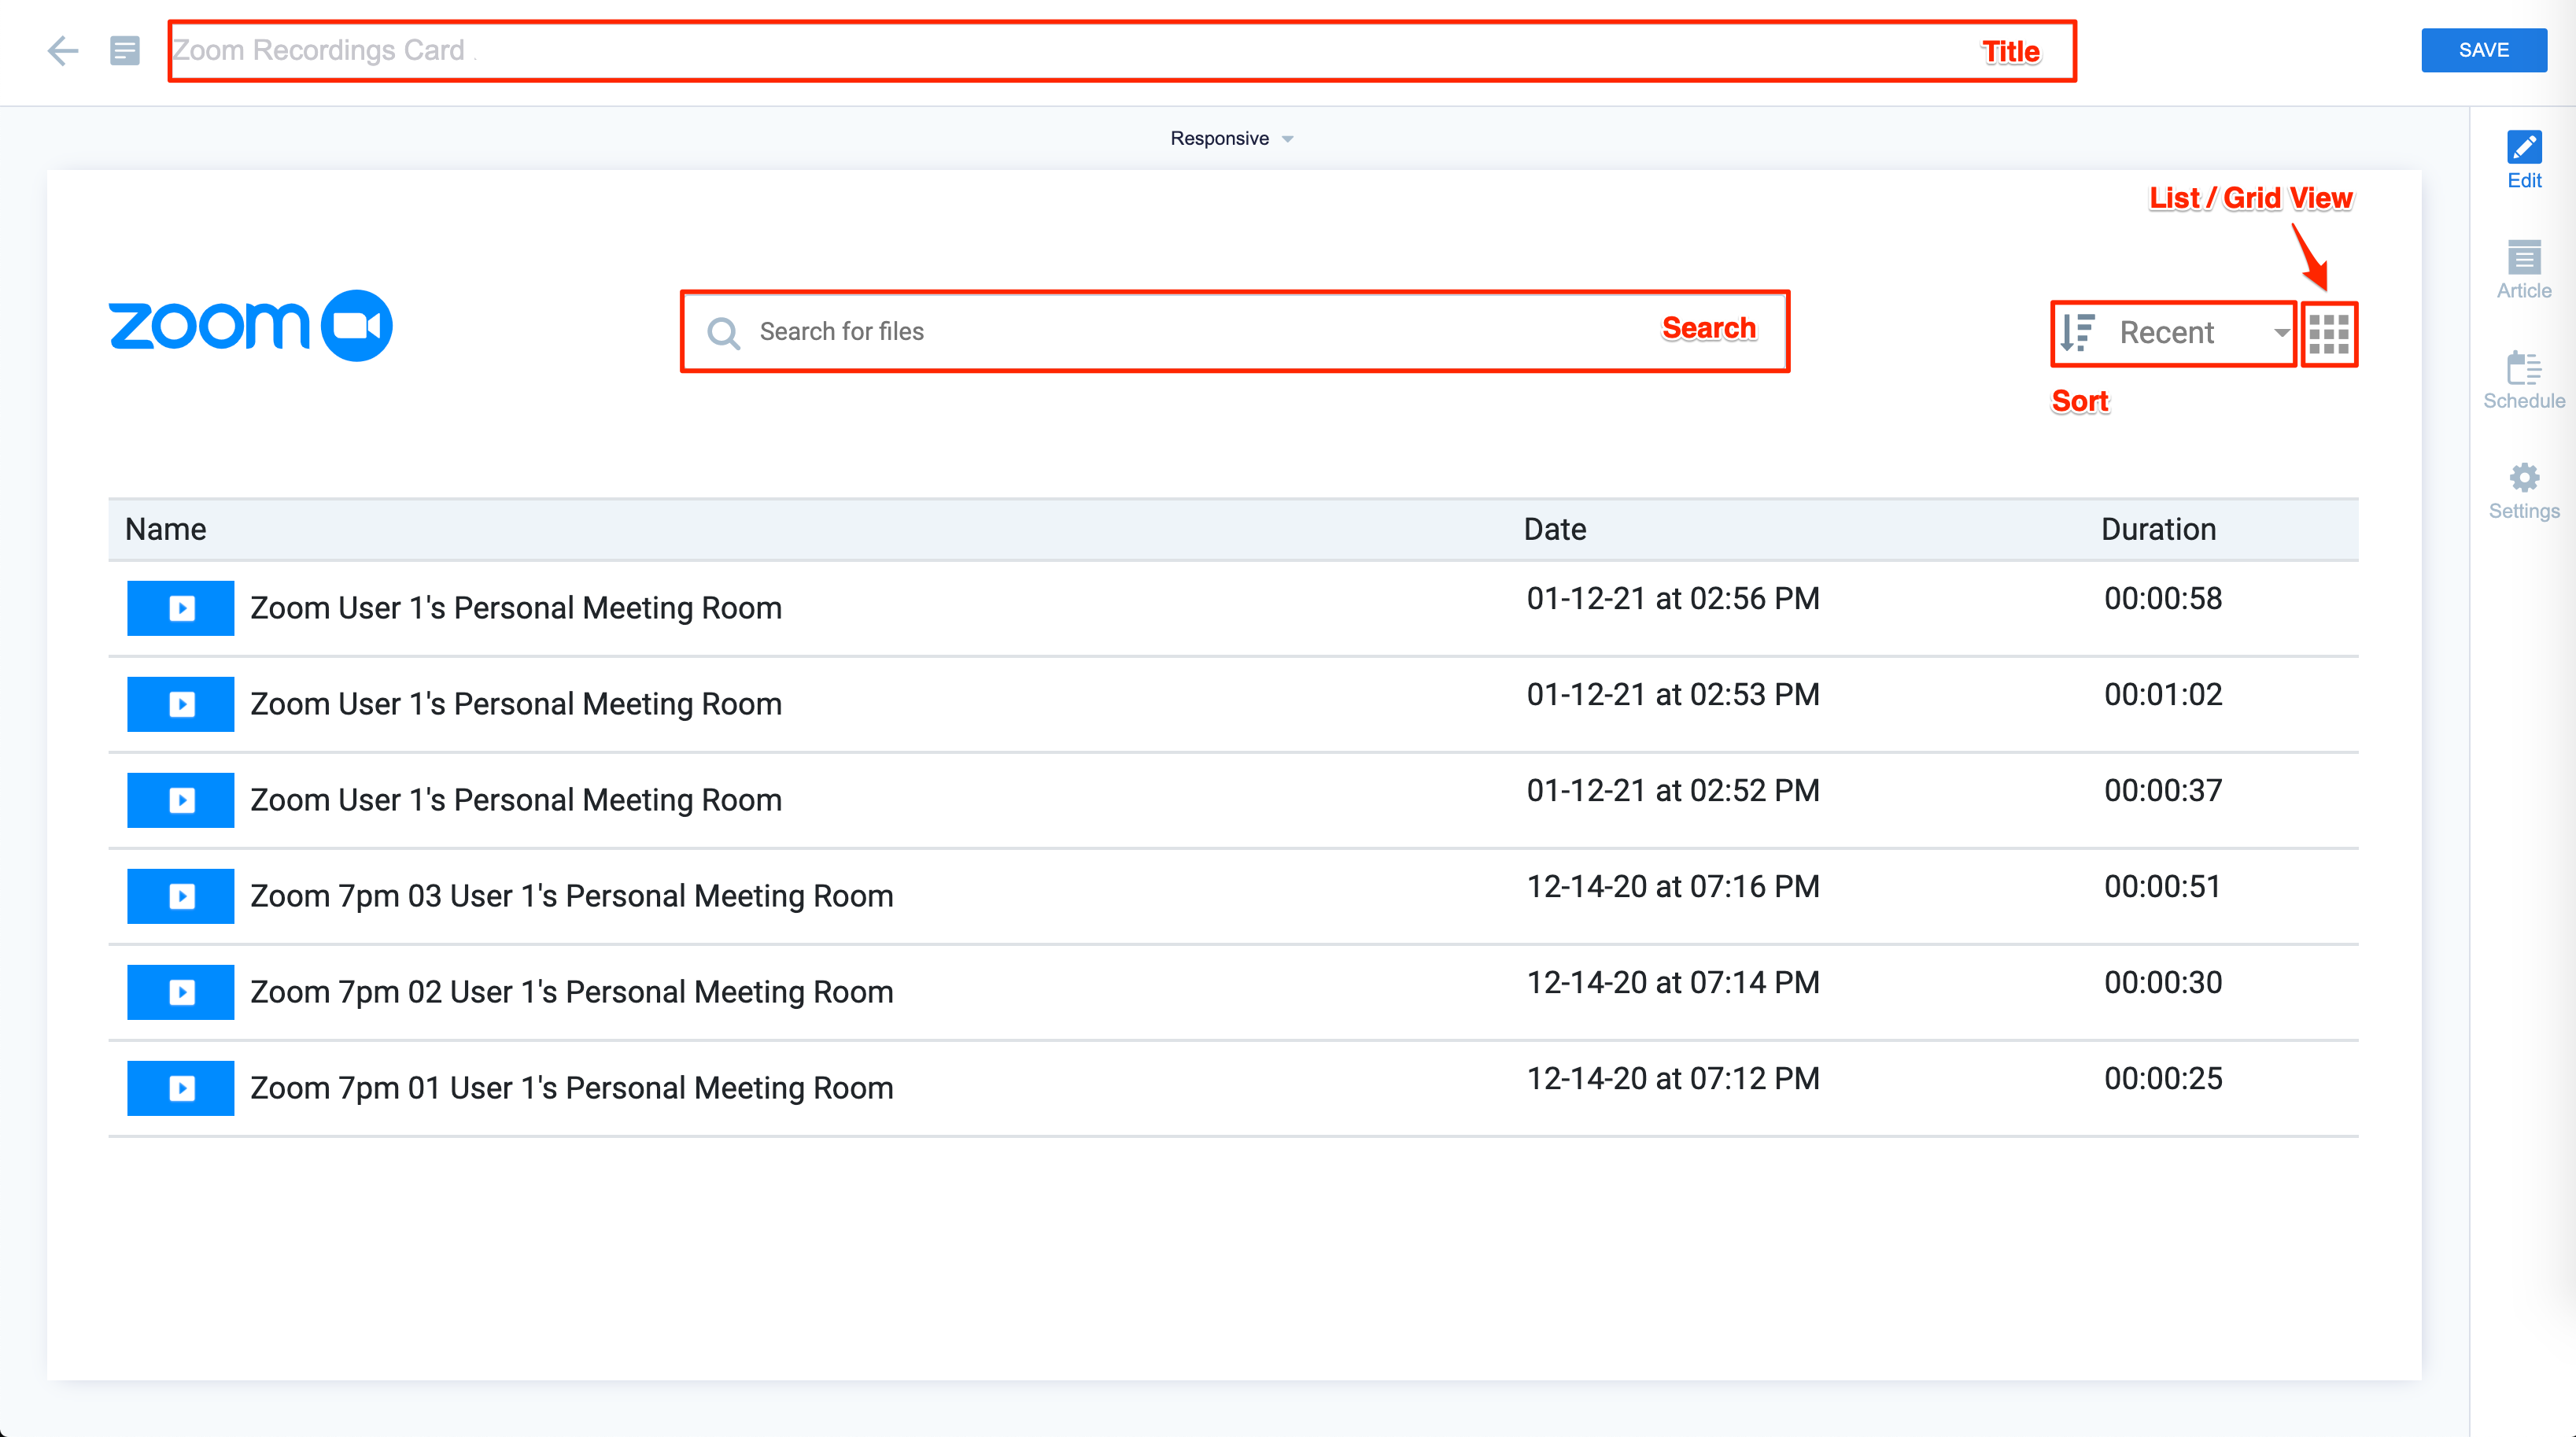
NoteThe Zoom Passport will be automatically selected if there is only one Zoom Meeting passport created in your Appspace account. If multiple Zoom Meeting passports have been created, you will be given an option to select the desired Zoom Passport.
When browsing or searching for Zoom Meeting recordings, you may enter a keyword in the search bar, or sort the recordings either by date or name. - In the Edit tab:
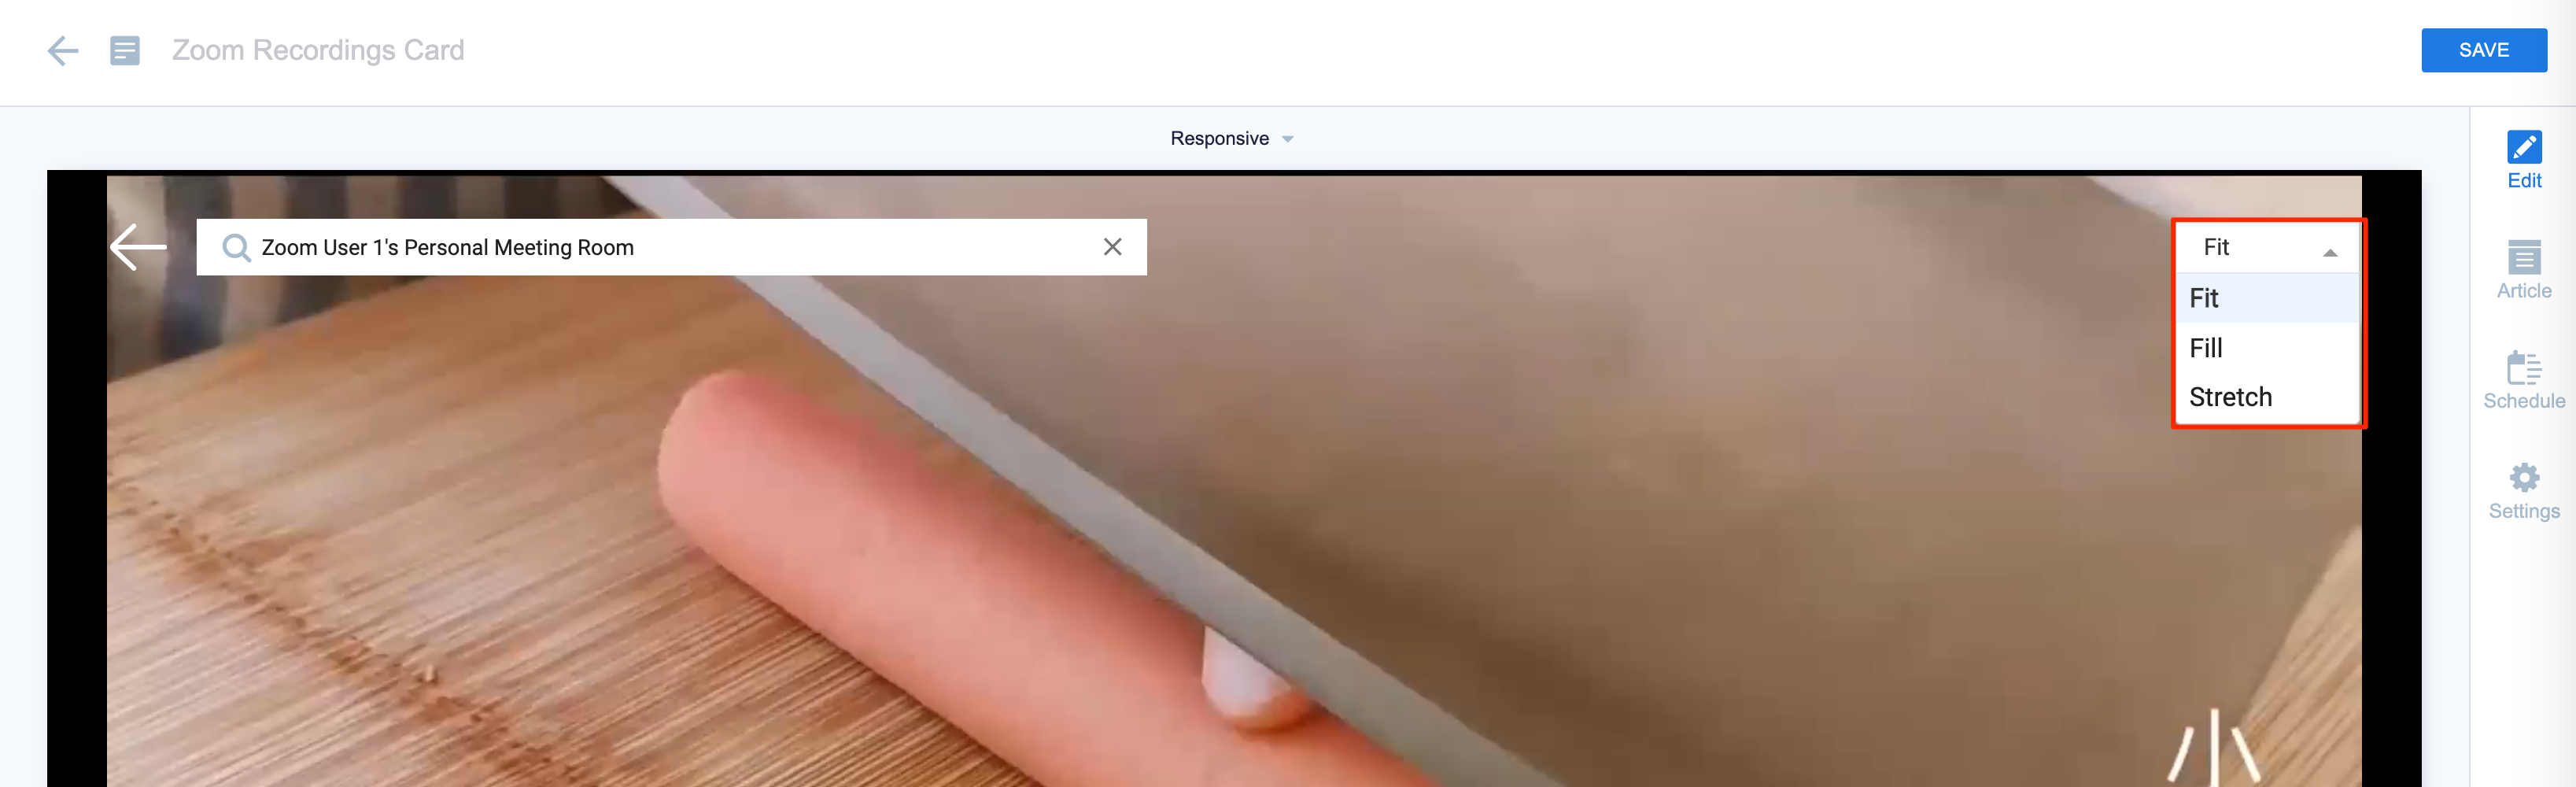
- Select the Zoom Meeting recording display ratio:
- Fit
- Fill
- Stretch
- Select the Zoom Meeting recording display ratio:
- In the Article tab:
- Include an Article or Caption to accompany the content item when being displayed on mobile apps, tablets, and other social collaboration apps.
- Enter a Referral Link to link more information to the content.
- In the Schedule tab:
- You may add the content to a channel by selecting the channel from the Add to channel drop-down menu, or leave it unassigned to be added later.
- When the content is assigned to a channel, the SCHEDULING and DISPLAY PROPERTIES options are displayed. Refer to the Configure Content Playback Properties: Dayparting, Frequency, Scheduling, in a Playlist Channel article for detailed configuration instructions.
- In the Settings tab:
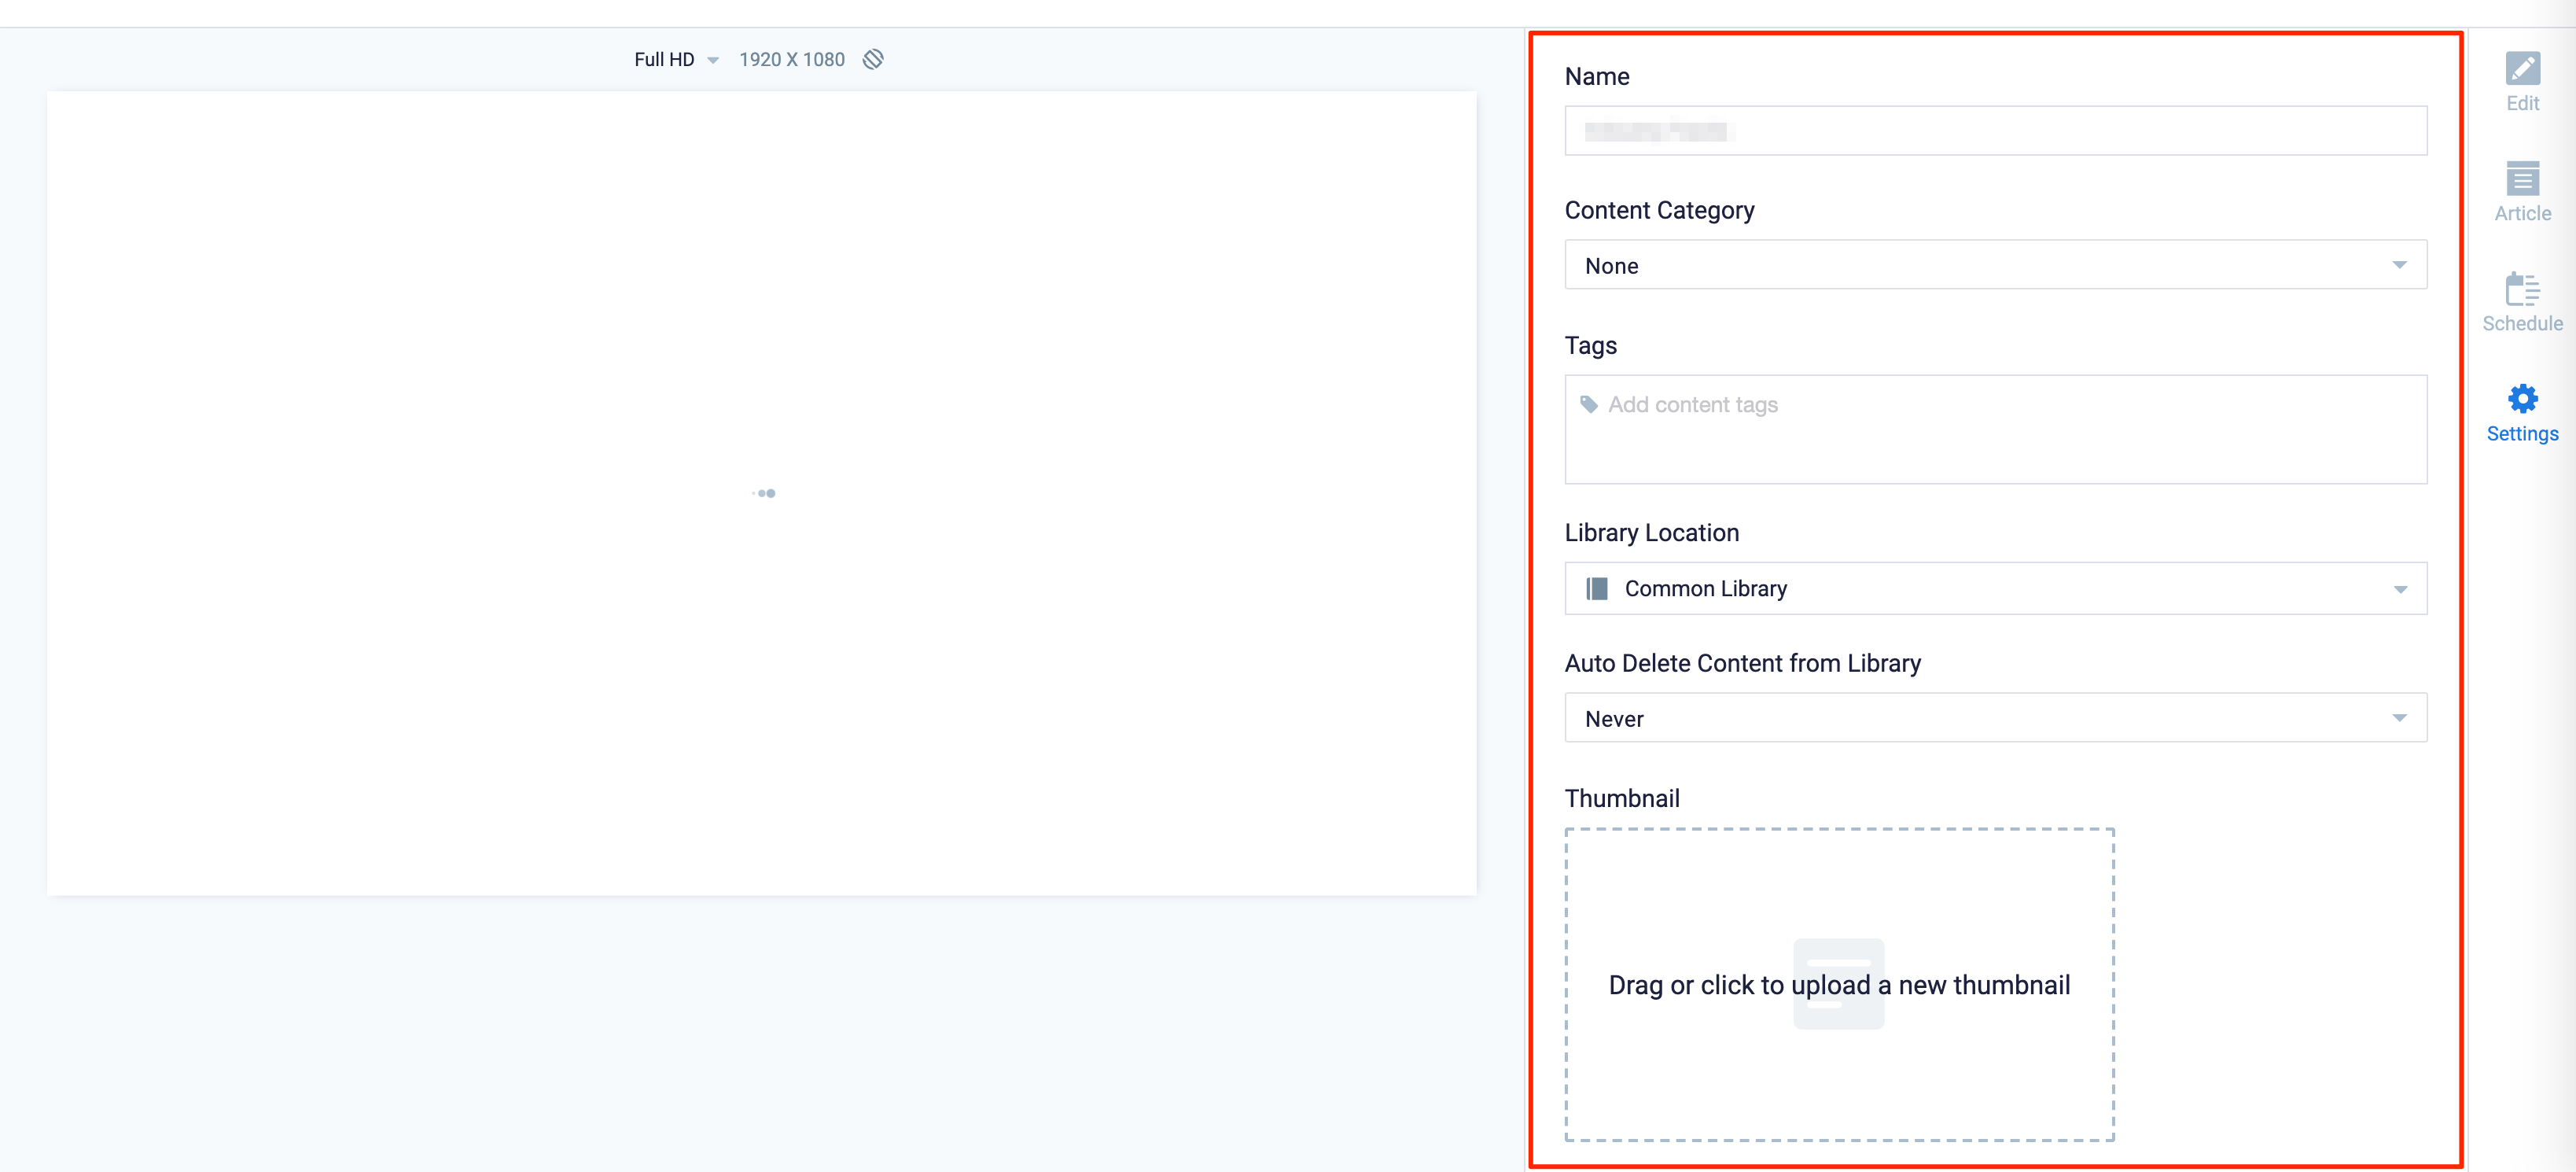
- The Name field will be auto-populated to match the Title of the content which will also act as the filename for the content. This is a mandatory field.
- Select the Content Category from the drop-down menu to match the focus of the message, or leave it at the default content category.
- Enter any relevant Tags for the content. (Optional)
- Select a folder for the content in the Library Location drop-down menu to change the default folder location.
- Select an expiry date for the content from the Auto Delete Content from Library drop-down menu. (Optional)
- Upload an image to be used as the Thumbnail for the content.
- Once done, click SAVE.
Edit Zoom Recordings Card
The instructions below show you how to edit a Zoom Recordings card.
- Log in to the Appspace console.
- Click Library from the ☰ Appspace menu, and select a library or folder containing the content you wish to edit.
- Select and click the Zoom Recording card to edit, and select the desired tab to edit or view.
- In the Edit, Article, and Settings tabs:
- You may edit the content the same way as it was configured. For detailed instructions on how to do this, please refer to the Create and Configure section above.
- In the Preview tab:
- Preview how the content is displayed on your device.
- In the Channels tab:
- You may add the content to a channel by selecting the channel from the Add to channel drop-down menu, or leave it unassigned to be added later.
- When the content is assigned to a channel, the SCHEDULING and DISPLAY PROPERTIES options are displayed. Refer to the Configure Content Playback Properties: Dayparting, Frequency, Scheduling, in a Playlist Channel article for detailed configuration instructions.
- In the Analytics tab:
- View the individual content analytics in this tab. For more information, please refer to the Individual Content Analytics section of the Analytics article.
- In the Edit, Article, and Settings tabs:
- Once done, click SAVE.
Was this article helpful?