The second step to enable Local Entities is to go to the Editorial Settings menu.
Now the first section will be Local entities (selected by default), and in the following screen, first of all, please read the manual, click on the checkbox, and then click on “Enable local entities” button:
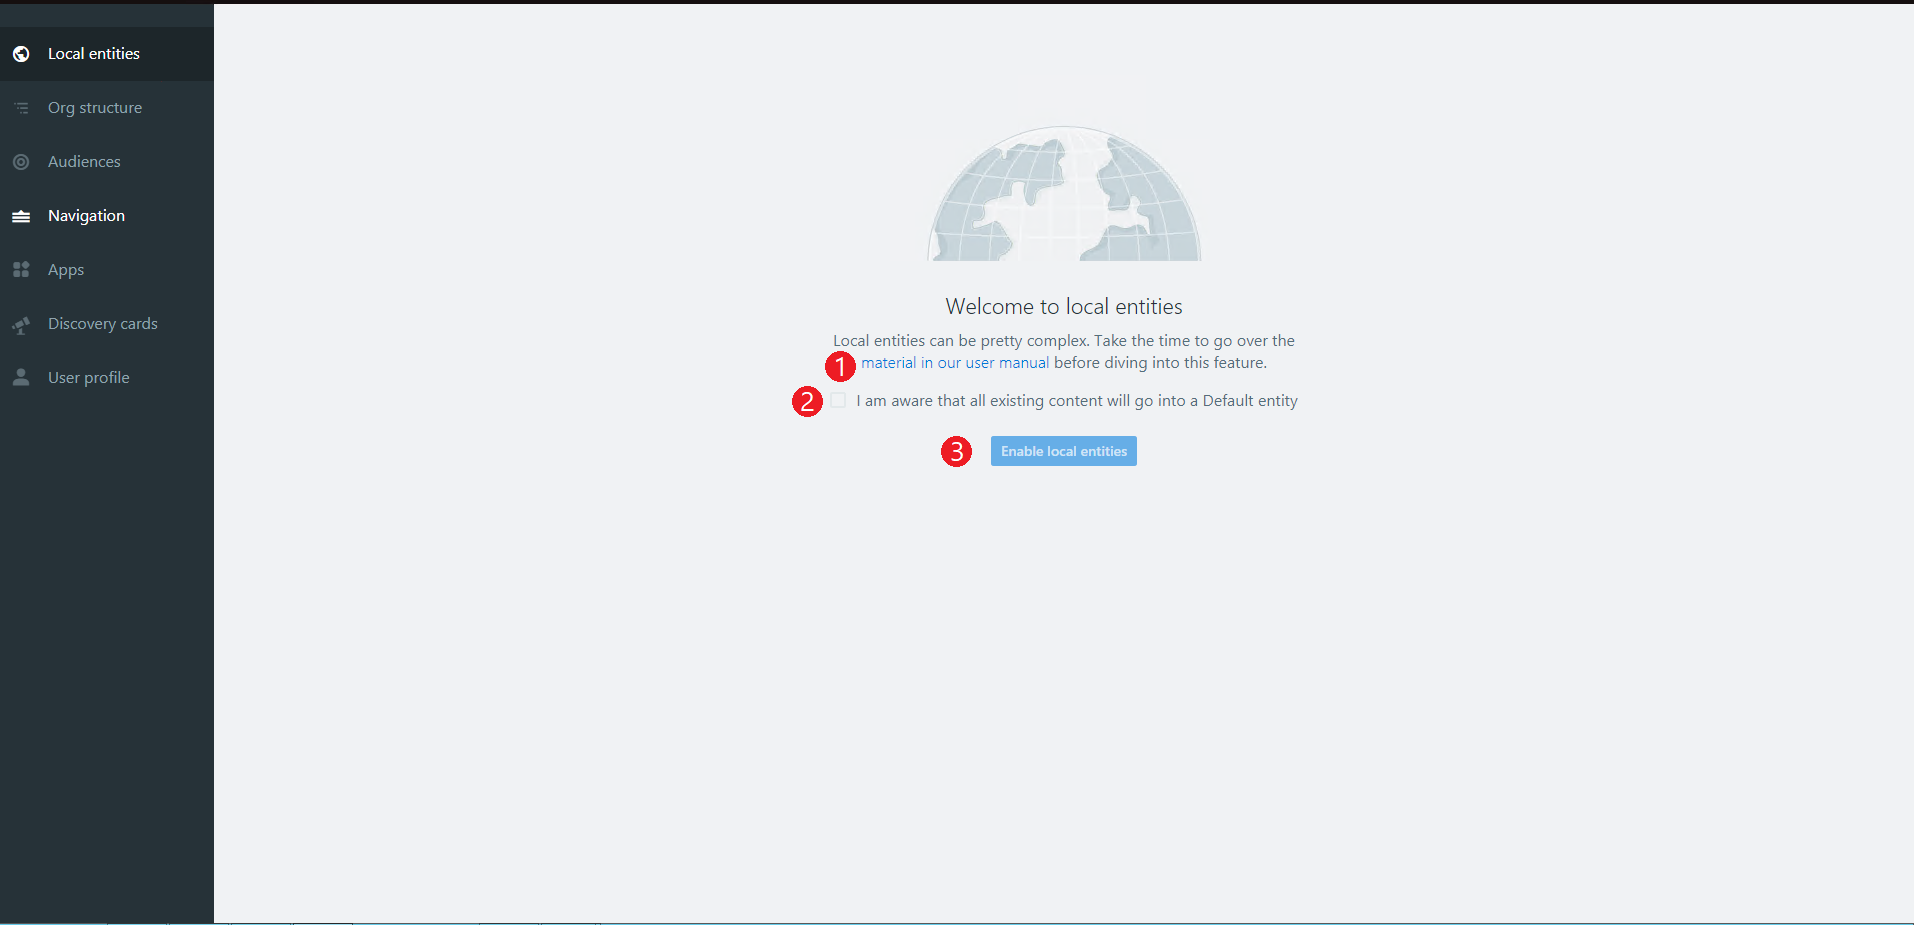
After these set of actions, you have done an irreversible action.
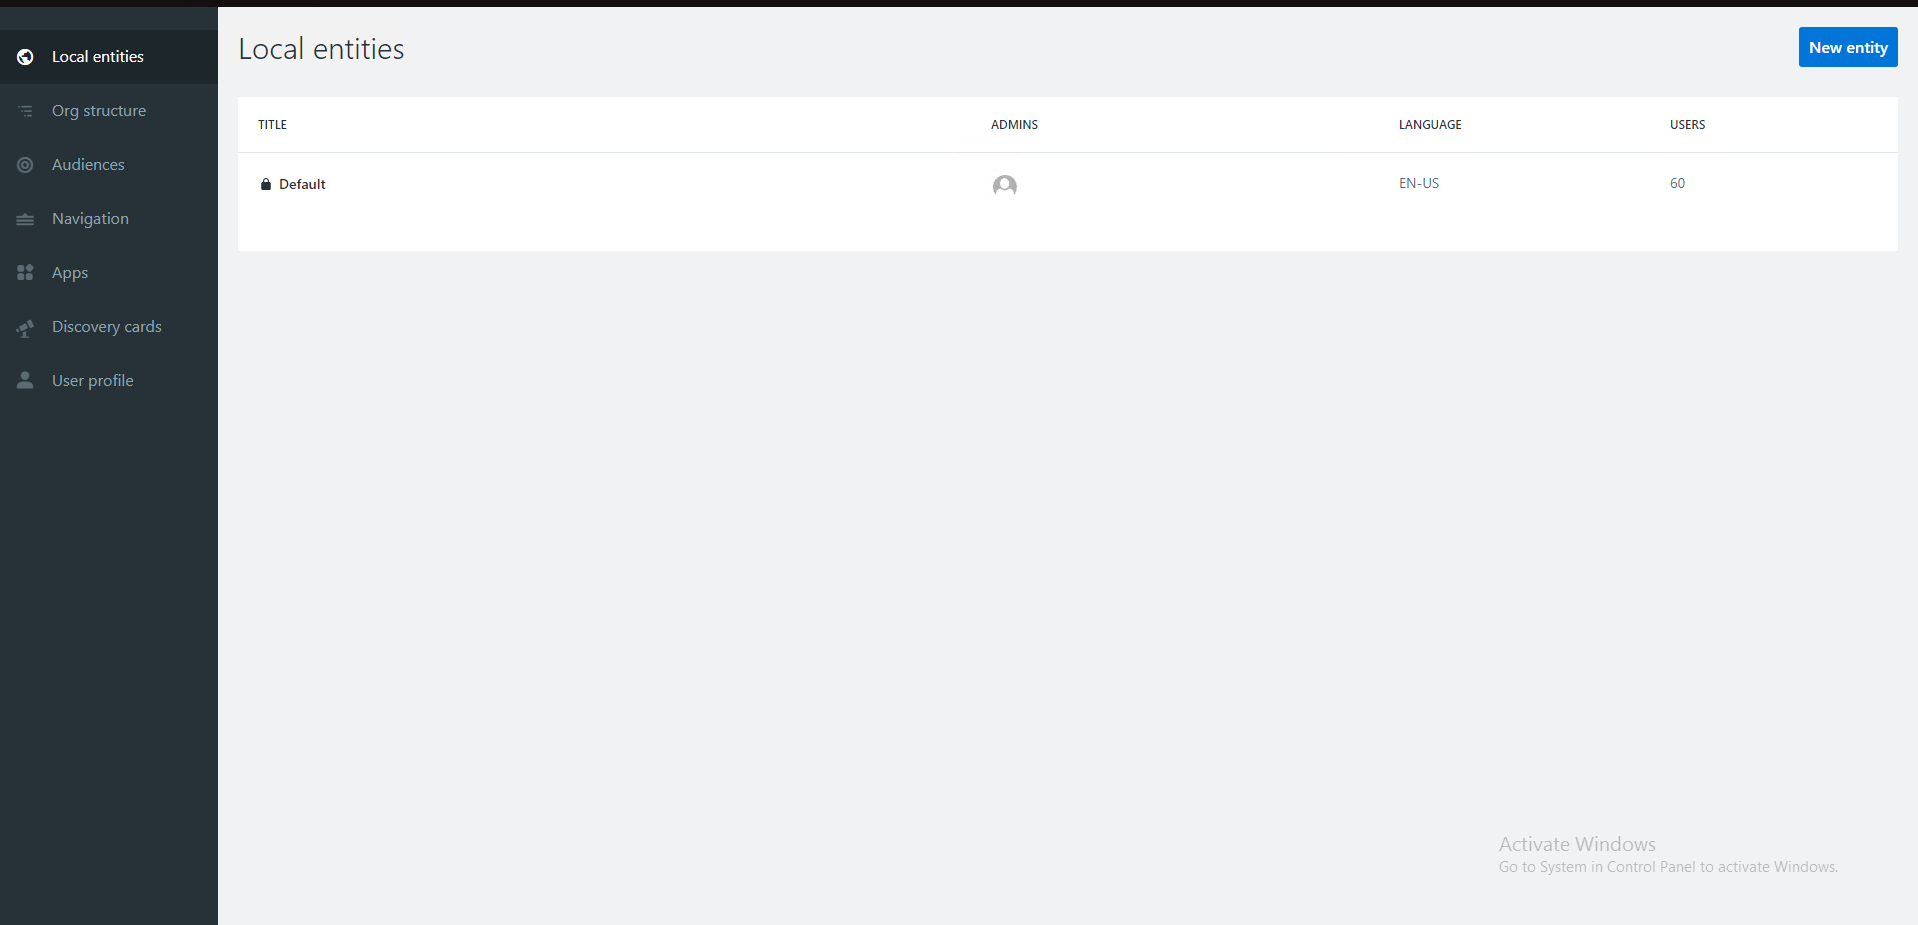
After clicking the button, the grid of ‘Local entities’ will appear with the Default entity already created.
For the Default entity, the admins will be all the users set in Administrators accounts and Community manager accounts. And the users will be all the current users in the system.
If we know that any of the users in Administrators or Community manager accounts will be a Local Admin of a future Local Entity, we need to delete them from the Administrators or Community manager accounts otherwise they will become administrators of the Default entity.
A Local Entity Admin DO NOT require high privileges like Site Collection Administrator.
After enabling Local Entities the users that were Community managers will not manage Apps. So the only one that can manage Apps from that moment will be Global Admins.
The following created entities will appear in this grid by creation order.
Was this article helpful?