This article provides the instructions to register devices via Google CDM (Chrome Device Management), an advanced device registration method ideal for bulk-registering devices in your local network. This method is specifically for Chrome users utilizing Google CDM. Once you have CDM configured, the network policy file in place will automatically register in bulk all Chrome devices in your network.
Note
- This feature is available for all Chrome OS-based devices. Once you configure Google CDM, the device will be automatically registered with no user intervention upon reboot. For device configuration instructions prior to registration, please refer to: Configure Chrome OS devices with Google Chrome Device Management (CDM).
- This feature is not available for ChromeOS Flex devices.
Prerequisites
- An Appspace App supported device installed and configured with the Appspace App.
- An active Appspace account, with sufficient Device IDs to register the device.
- Account Owner or Network Administrator privileges in Appspace.
- A Google CDM account.
Register Device via Google CDM
- Log in to the Appspace console.
- Launch the device registration page via one of the following methods:
- Click the Quick Actions menu and select Register a Device.
- Go to the Device Registration widget on the Dashboard.
- Click the ☰ Appspace menu, select Devices, and click the Add button in the Devices tab.

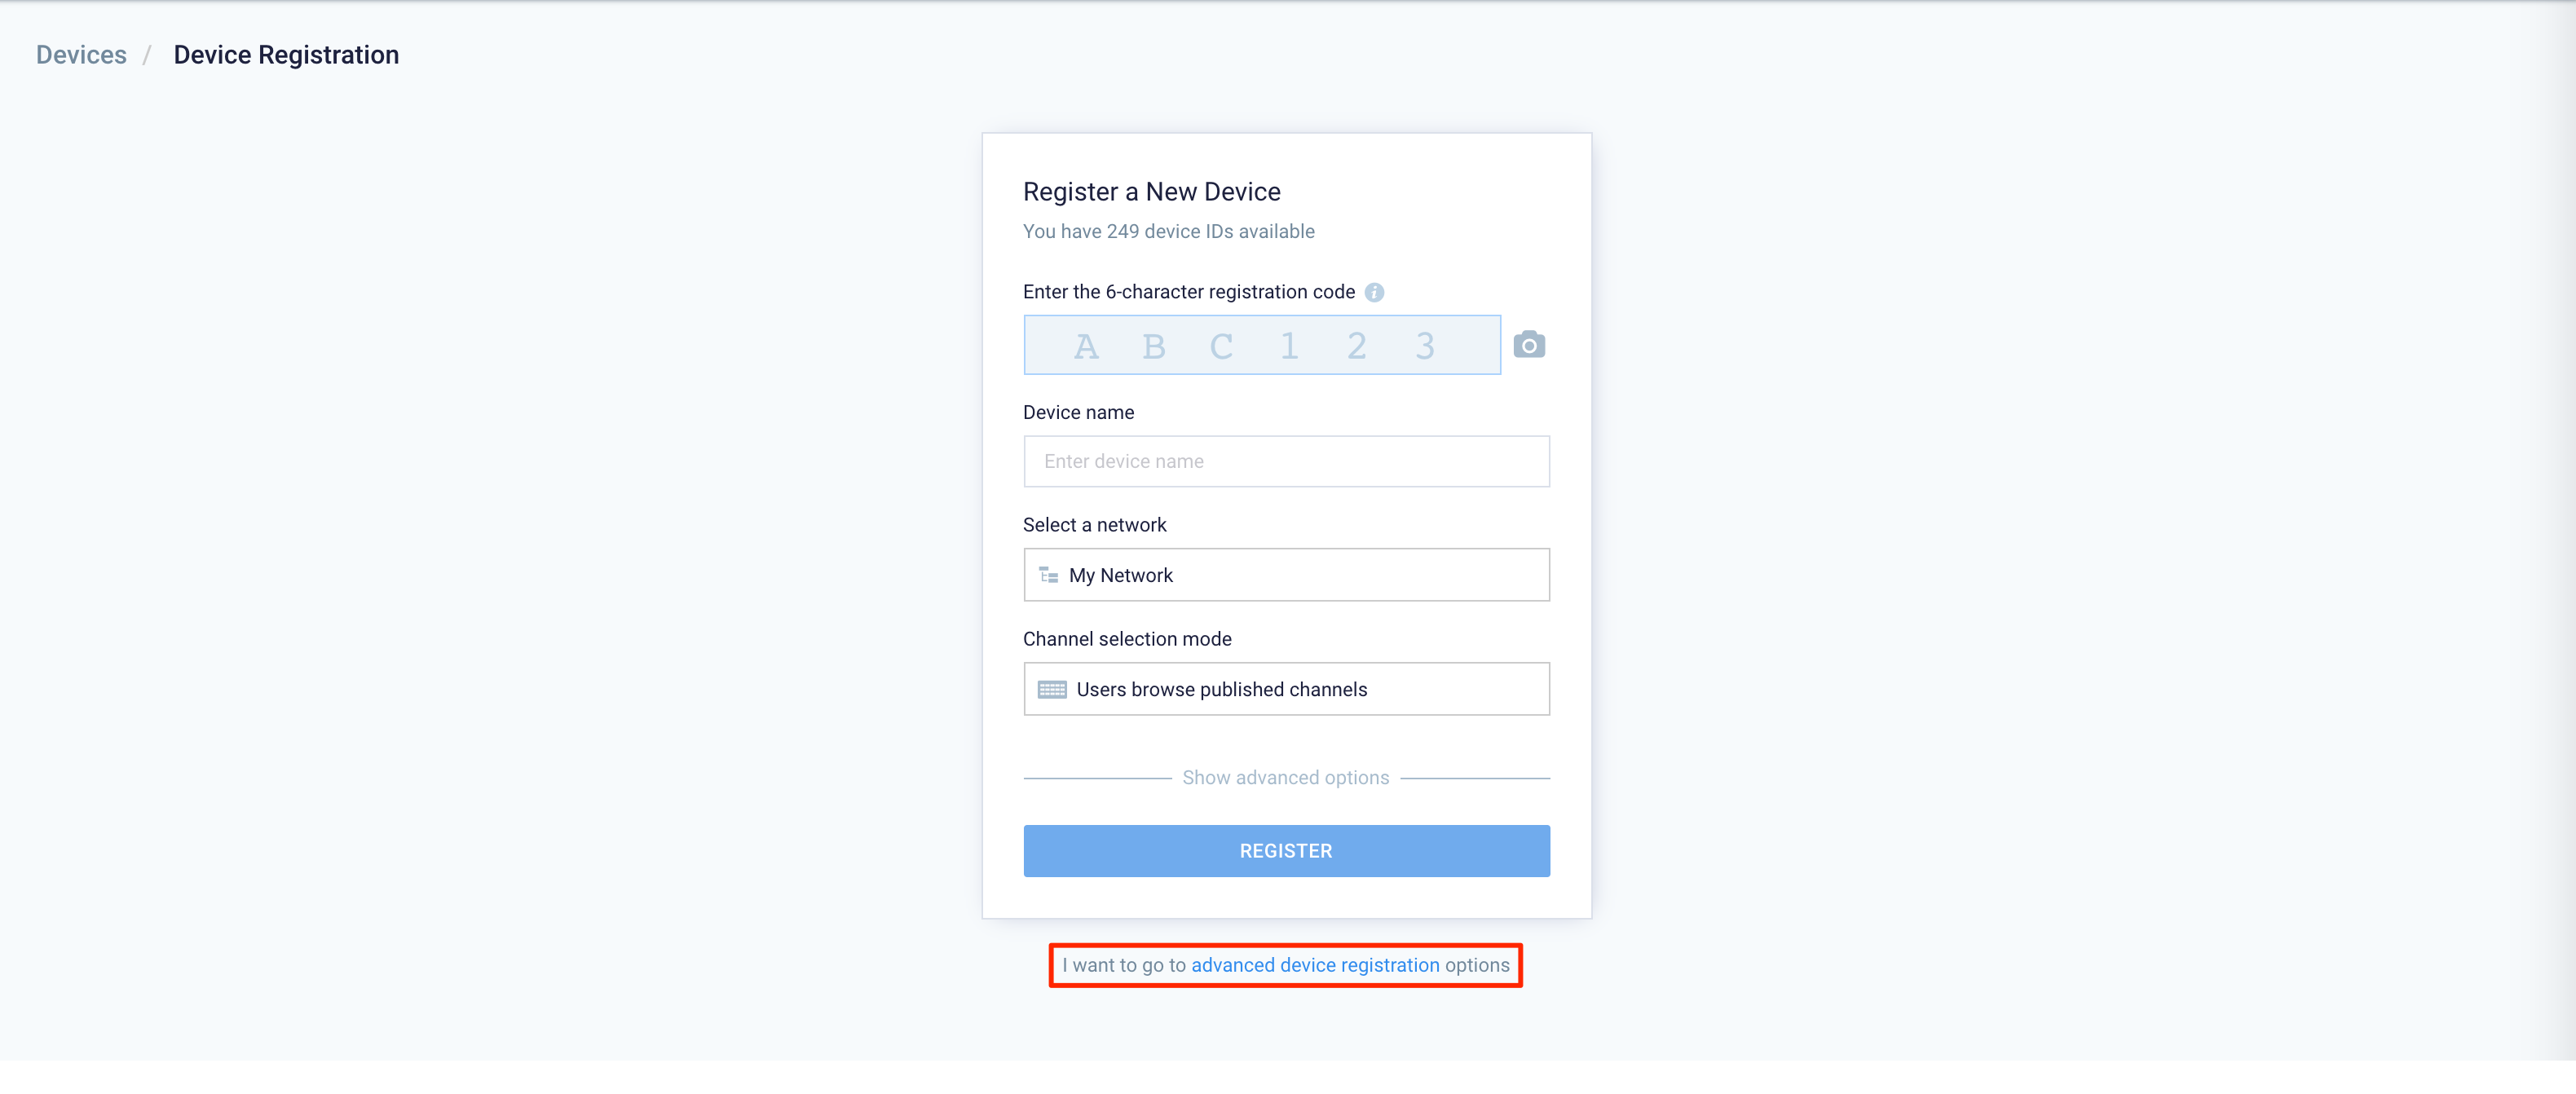
- In the Register a New Device window, click the advanced device registration link.
- In the Configure Advanced Registration window, select Chrome CDM Policy for the Deployment method drop-down menu.
- Proceed to Select a network. If a network has not been created, you may skip this step and assign a network later.
- In the Channel selection mode field, select one of these playback options and assign a channel (if already created):
- Users can browse published channels – this is the interactive mode or channel browsing mode, ideal for TVs or displays with touch-screen, or with a mouse/keyboard attached.
- Channels will autoplay sequentially – this option is currently available only for playlist channels. Channels with autoplay based on the playlist sequence or any scheduling or dayparting settings configured.
- Administrators can select a single channel – ideal for signage, you may select either a playlist channel, an advanced channel or a live channel. However to select a channel here, the channel must already be created prior to this registration. If the channel has not been created, you may skip this step and assign a channel later.

- Click the Save button.
- Back in the Register a New Device window, click Show advanced options and enter:
- Device description – type a brief description for the device such as its location or its function.
- Device group – select an exiting device group. Skip this step if there is no device group created. You may assign a device group later.
- Device tag – select from exiting tags or type in new tags.
- Click the DOWNLOAD POLICY FILE button, to download the policy.json file to your default download folder.
- Log in to your Google Admin console.
- In the Admin Console click Device Management > Chrome management > App Management.
- Search and select Appspace App.

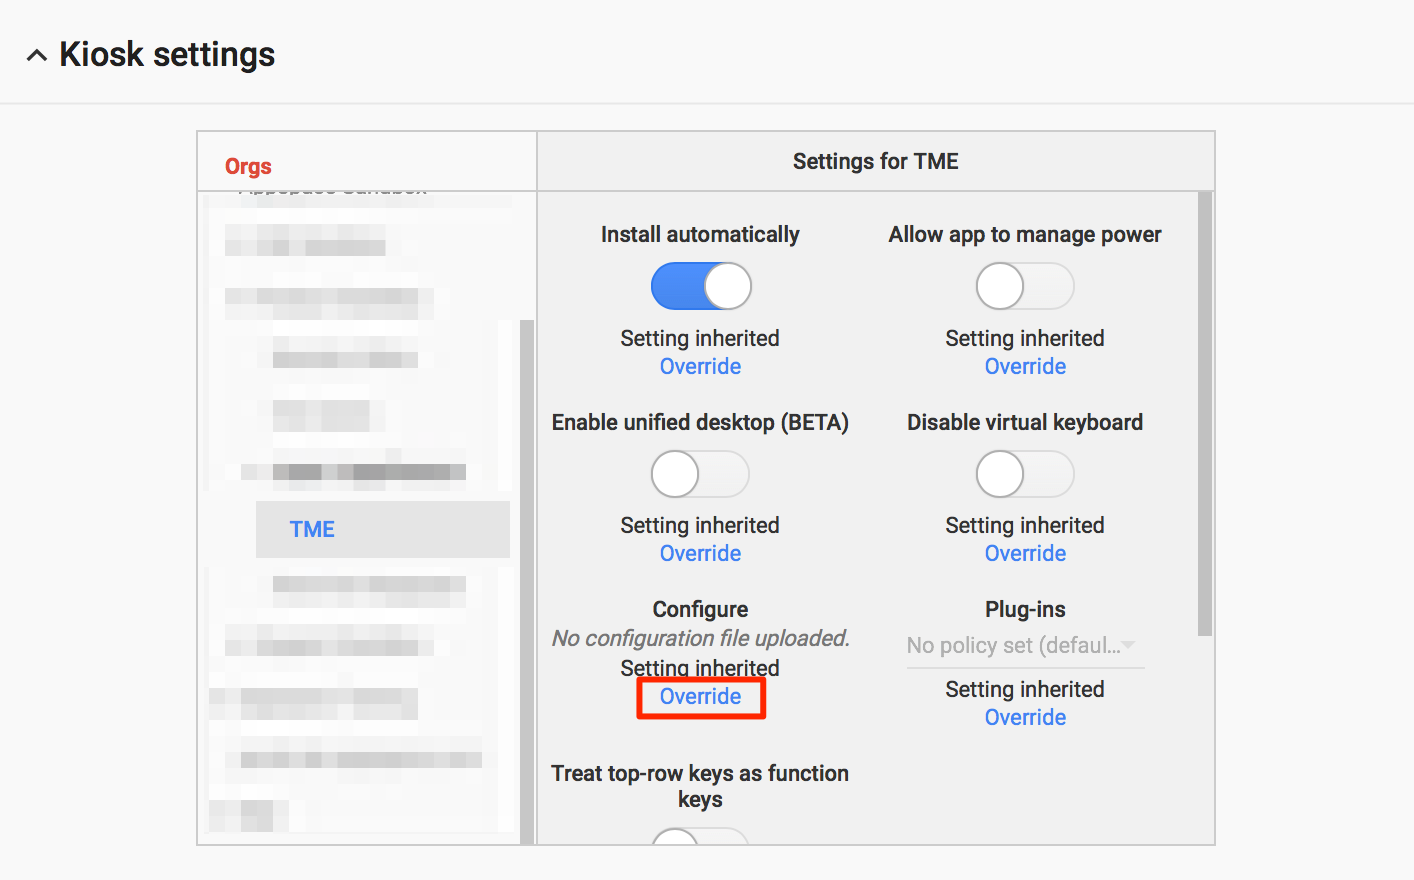
- Click the Kiosk Settings and select the organization the Appspace App device is located.
- In the organization’s Settings section, click the Override link under Configure.
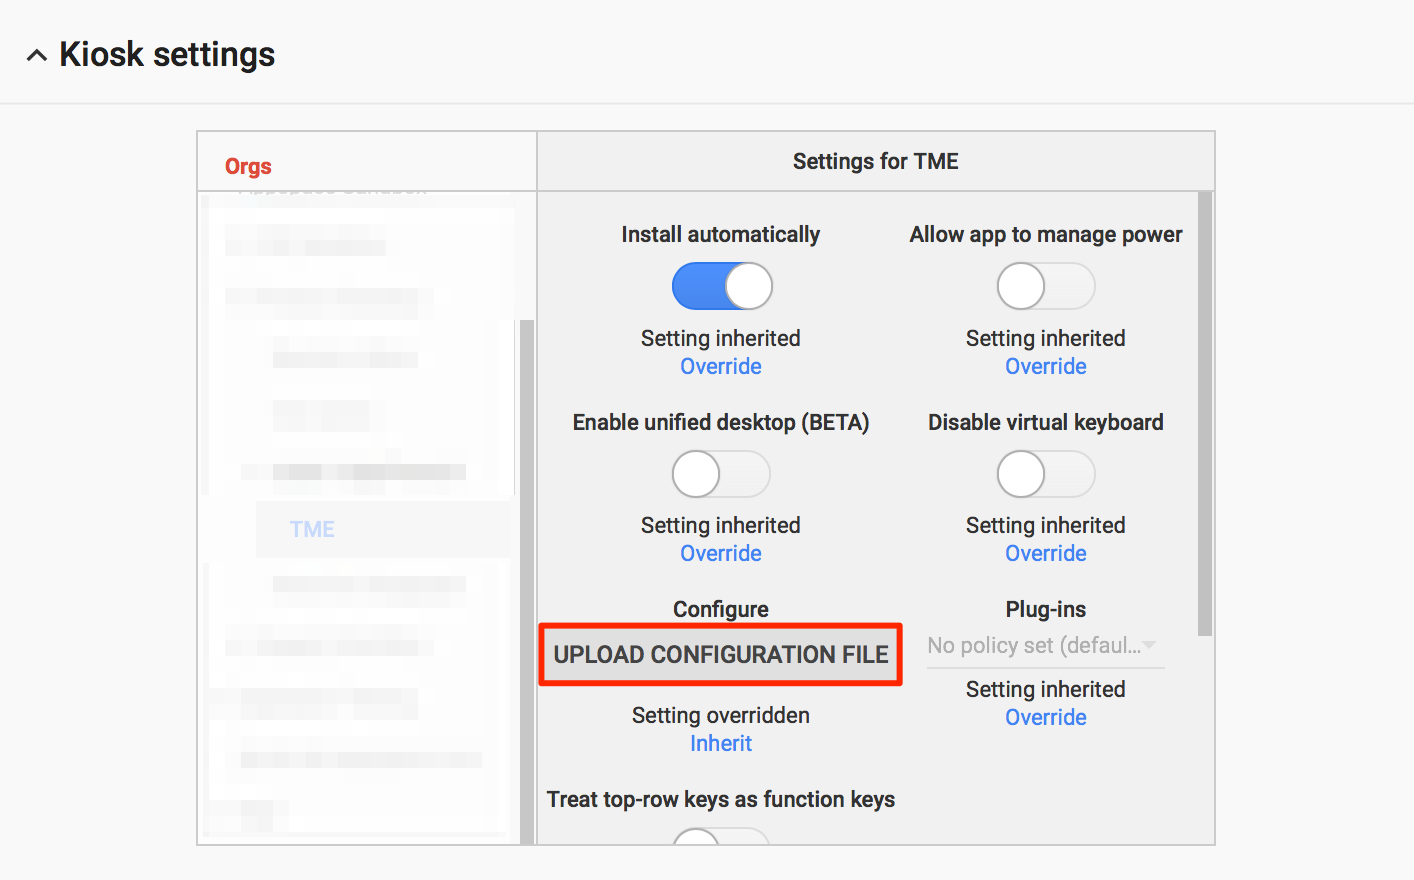
- Click the UPLOAD CONFIGURATION FILE button, and select the Policy.json file from the default downloads folder. Click Save.
- Unregistered devices connected to your local area network will now be automatically registered by the Appspace App when it detects the local policy file on the network.
Was this article helpful?