This article provides instructions to enable the Single Sign-On (SSO) feature for Appspace On-Prem.
With SSO, Appspace On-Prem accounts can now be configured to integrate with Security Assertion Markup Language (SAML) 2.0 compliant identity providers, allowing for seamless and secure connections using a single set of credentials, simplifying username and password management. When you login to Appspace, your credentials are authenticated by the identity provider, and a SAML assertion is sent to Appspace via the web browser to allow the login access to Appspace.
Appspace provides the following two additional seamless SSO configuration options for users on an external IdP:
- Pass-through authentication
Note
See Introduction to Configuring SSO with Appspace for more information.
What’s in this article:
Prerequisites
Pass-through Authentication
- An Identity Provider that is SAML 2.0 compliant.
- IdP metadata, or the SSO URL and x.509 certificate.
- Appspace account with Account Owner credentials to configure SSO settings.
Enable Single Sign-On (SSO)
- Navigate to System > Configuration from the Appspace menu, and click the Authentication tab.
- In the Global SSO Configuration section, select the Enable radio button to view additional SSO configurations.
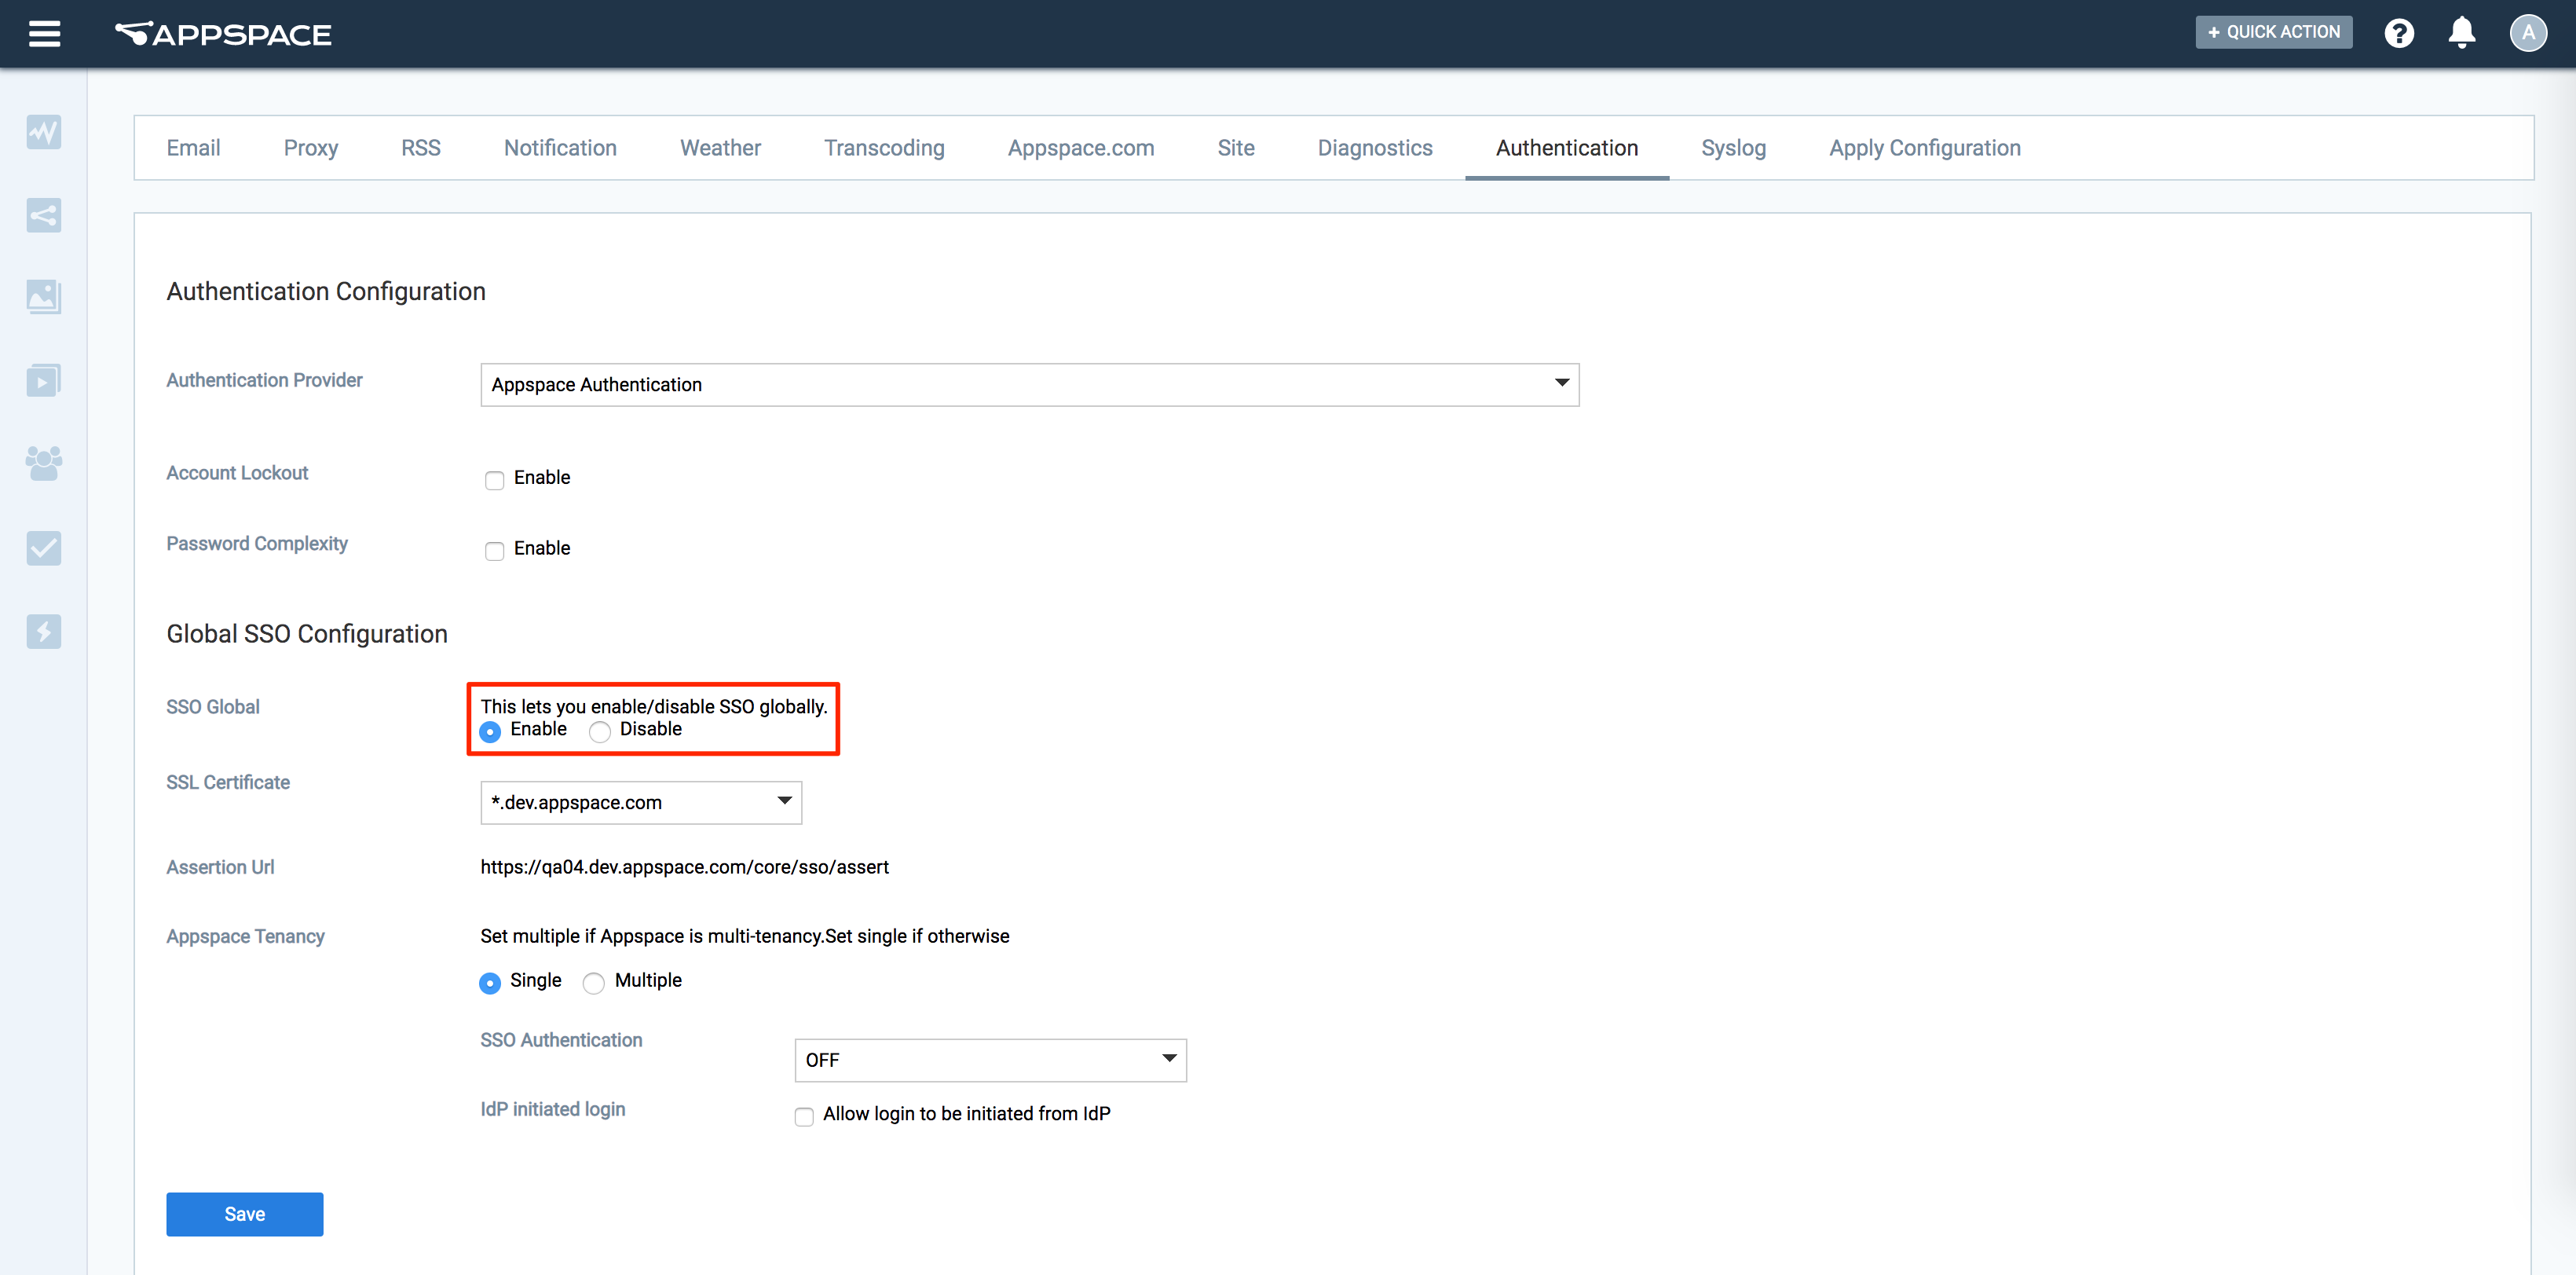
- Select the desired SSL Certificate from the drop-down menu. The SSL Certificate drop-down menu is automatically populated with all valid SSL certificates installed on the Appspace server.
- In the Appspace Tenancy section, select your Appspace deployment:
- Single Tenancy
- Select the Single option, and proceed to configure the SSO Authentication.
- Multi Tenancy
- Select the Multiple option, and click Save and confirm the settings.
- Click the Click Here link in the notification message displayed at the top of the page.
- You’ll be re-directed to the Apply Configuration tab, where you’ll be required to enter in your Windows Server credentials, and click Apply to finish applying the settings to the system.
- Click Yes to confirm, and restart your Appspace server.
- Navigate back, and for each tenanted account, navigate to Account > SSO, and configure the SSO Authentication.
- Single Tenancy
- Select the desired SSO Authentication method:
- Optional – Users can login with their Single Sign-On credentials, or their Appspace credentials.
- Required – Users must log in with Single Sign-On credentials.
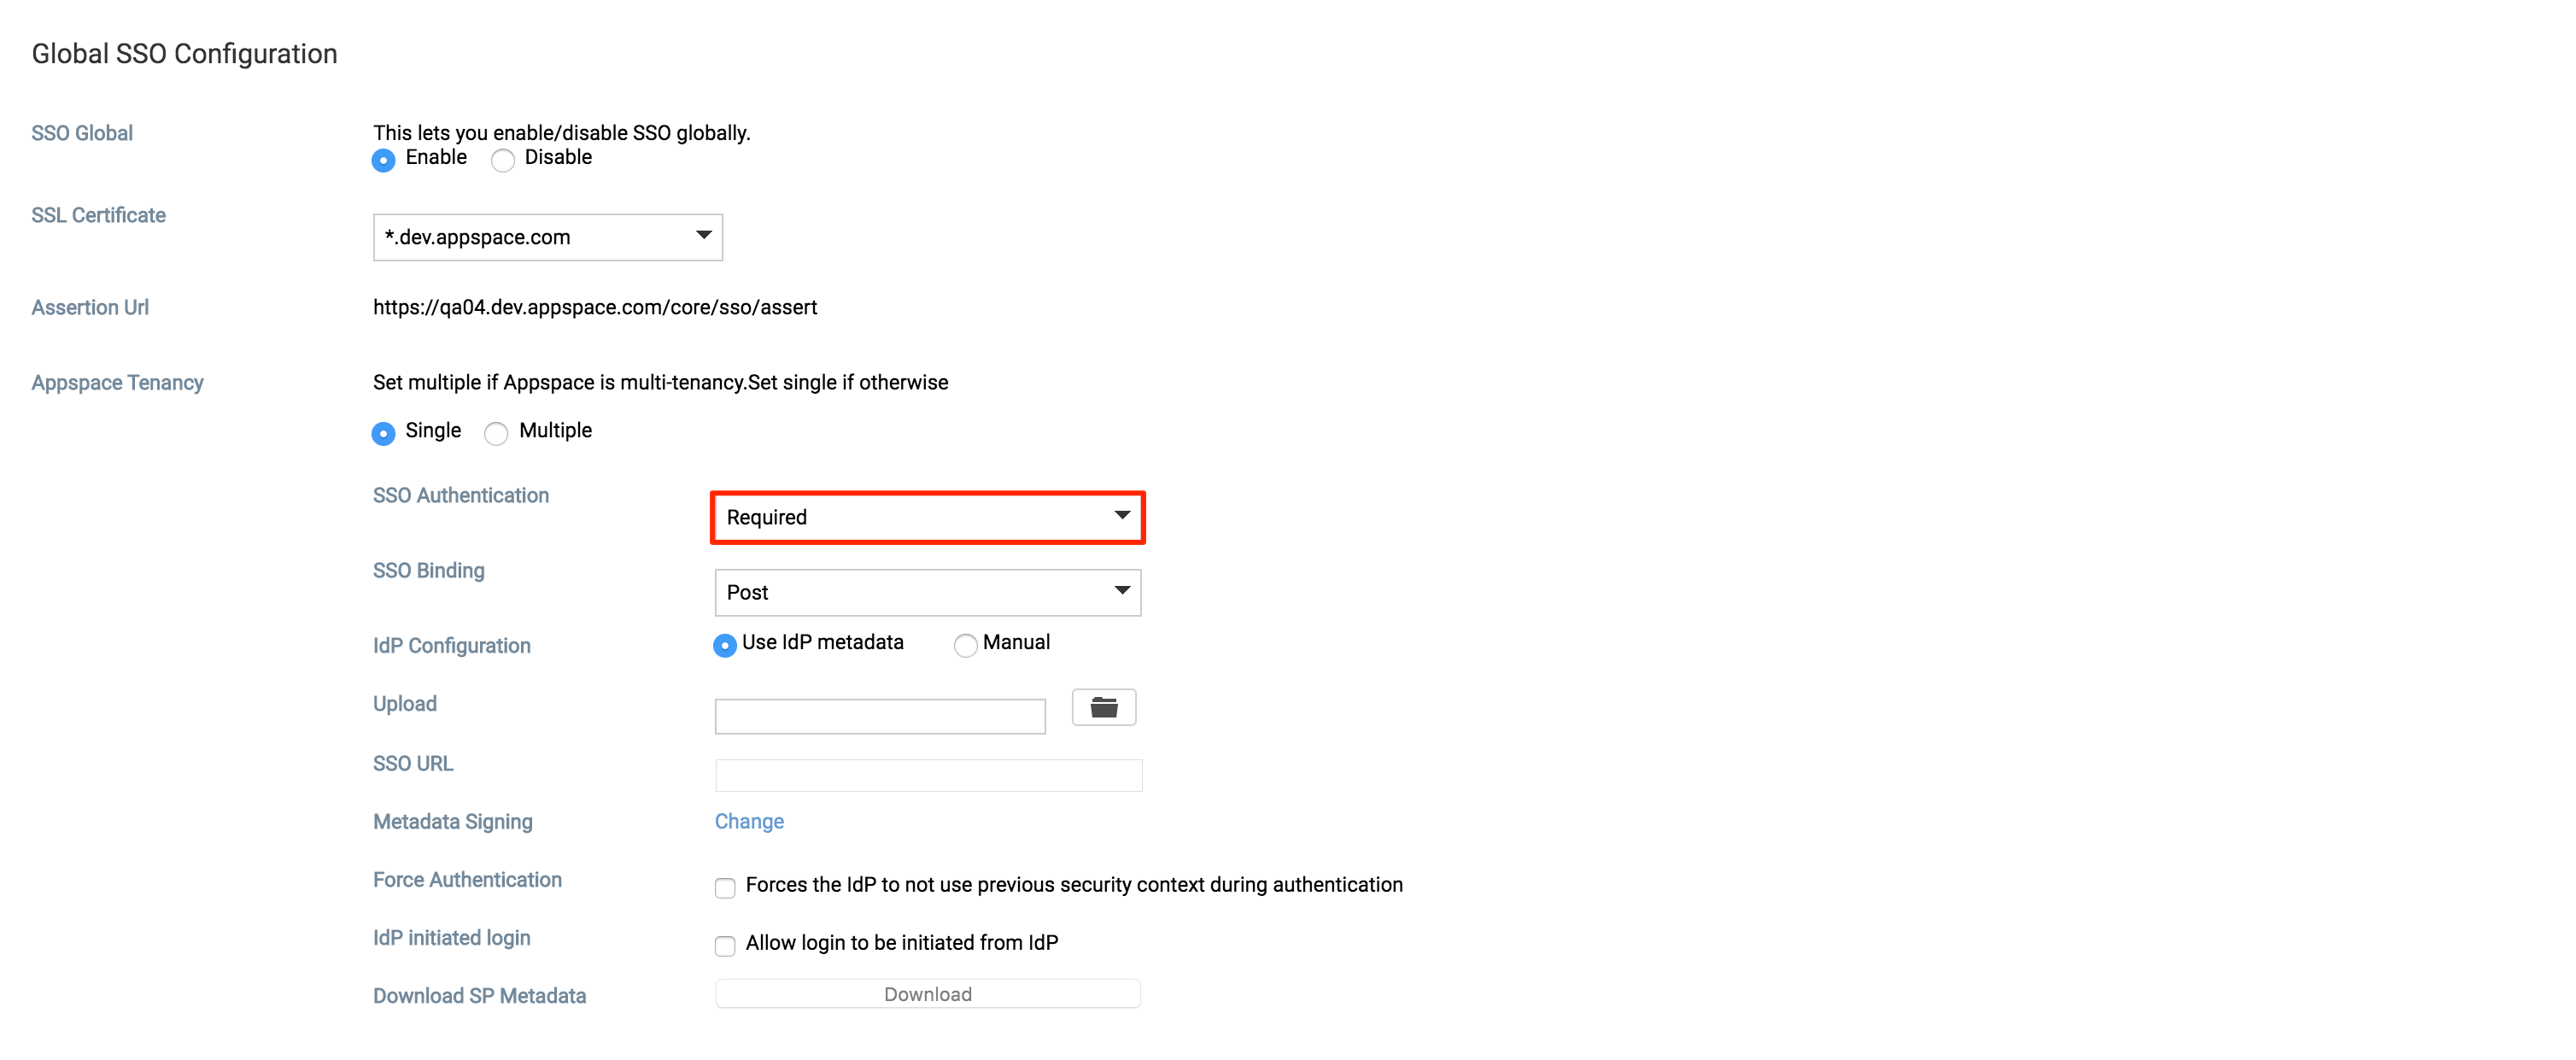
- Select the desired SSO Binding method:
- Post – SSO details will not be passed through a query string but will be passed using the POST method. For this method to work, you must ensure that the Identity Provider has direct access to the Appspace server.
- Redirect -Users will be redirected to the Identity Provider. SSO details will be passed in a query string with “?SAMLRequest=……” as part of the URL.
- Select the desired IdP Configuration:
- Use IdP Metadata (default)
- Select the Use IdP Metadata option, and upload the IdP metadata XML file. Once uploaded, the SSO URL path is displayed.
- Manual
- Select the Manual option, and enter in the SSO URL and the X.509 Certificate details.
- Use IdP Metadata (default)
- Click the Metadata Signing Change link, and select Enable or Disable encryption when generating the Service Provider metadata file.
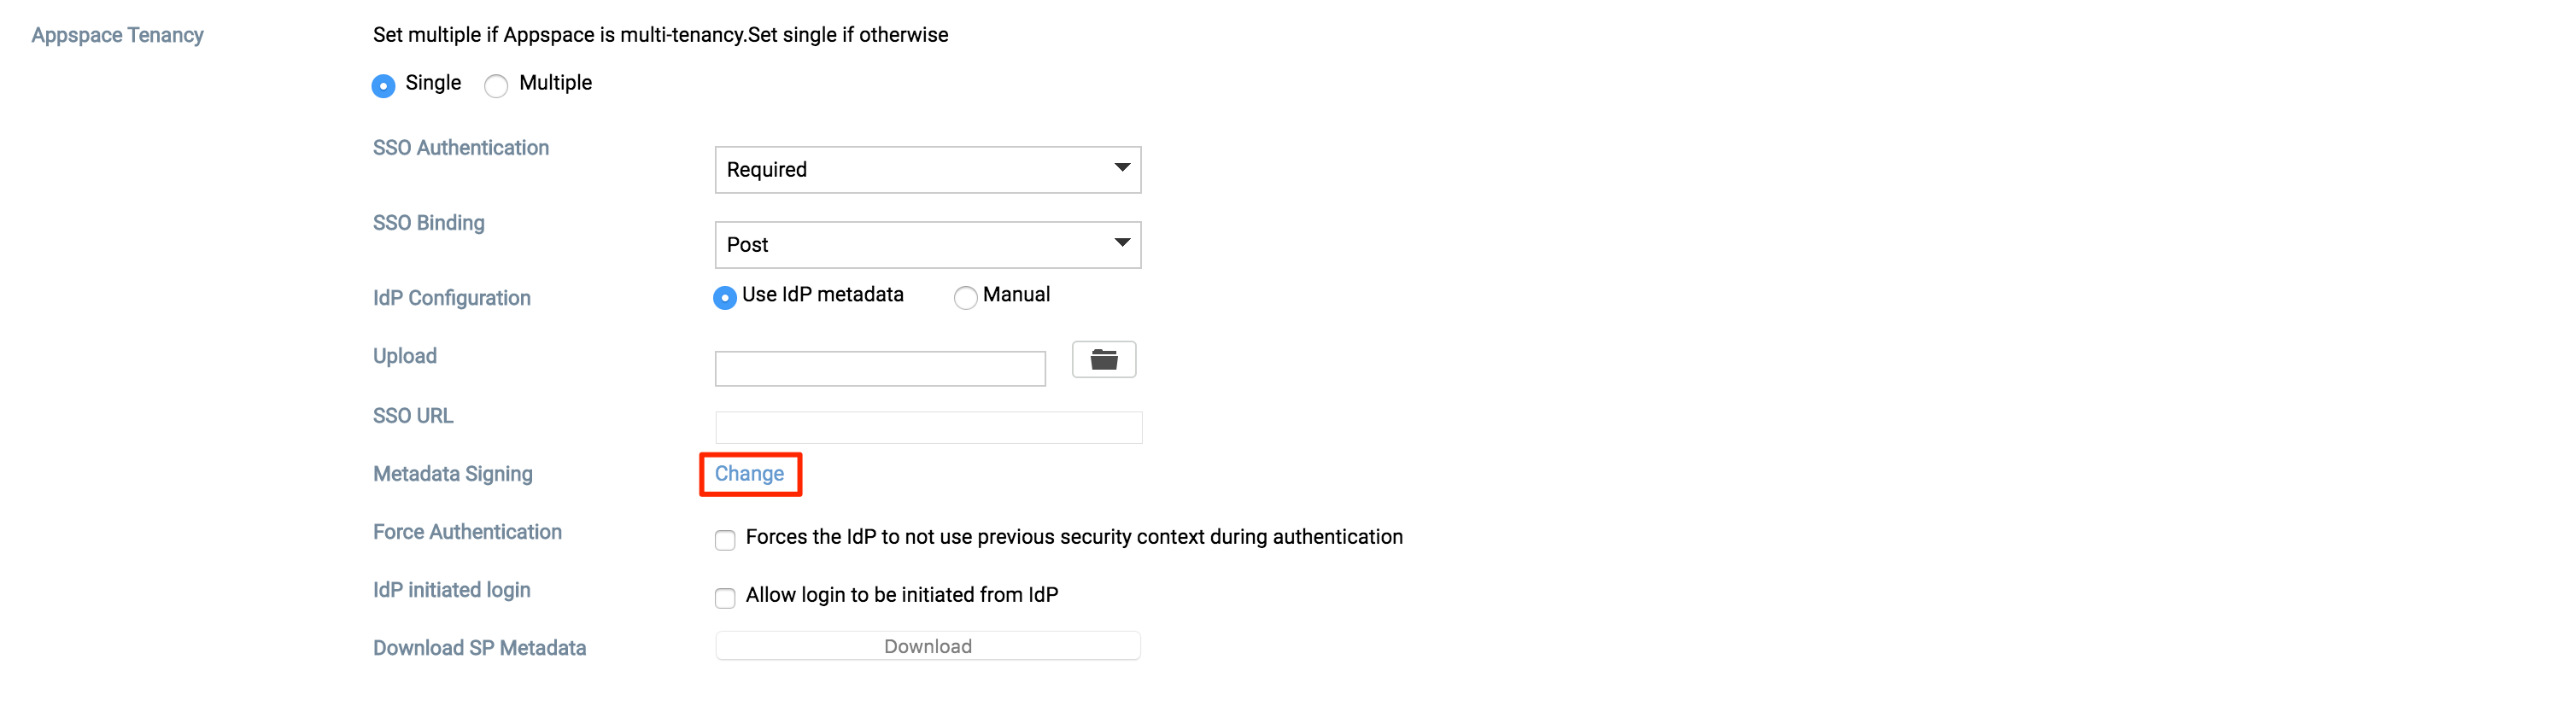
- Optionally, you may enable the following features by checking the checkbox:
- Force Authentication – this feature forces the IdP to not use previous security context during authentication.
- IdP initiage login – this feature allows logins to be initiated from the IdP.
- Pass-through Authentication – this feature is ideal for on-prem deployments, allowing you to utilize an external IdP so that your users can access channels through the Appspace App without using Premium User IDs.
- Click Save and confirm settings.
- Click the Click Here link in the notification message displayed at the top of the page.
- You’ll be re-directed to the Apply Configuration tab, where you’ll be required to enter in your Windows Server credentials, and click Apply to finish applying the settings to the system.
- Click Yes to confirm, and restart your Appspace server.
- Once the Appspace server has restarted, navigate back to the Authentication tab, and download the Service Provider metadata file.
- Copy and paste the Service Provider metadata file to the required location of your IdP server.
Disable Single Sign-On (SSO)
- Navigate to System > Configuration from the Appspace menu, and click the Authentication tab.
- In the Global SSO Configuration section, select the Disable radio button.
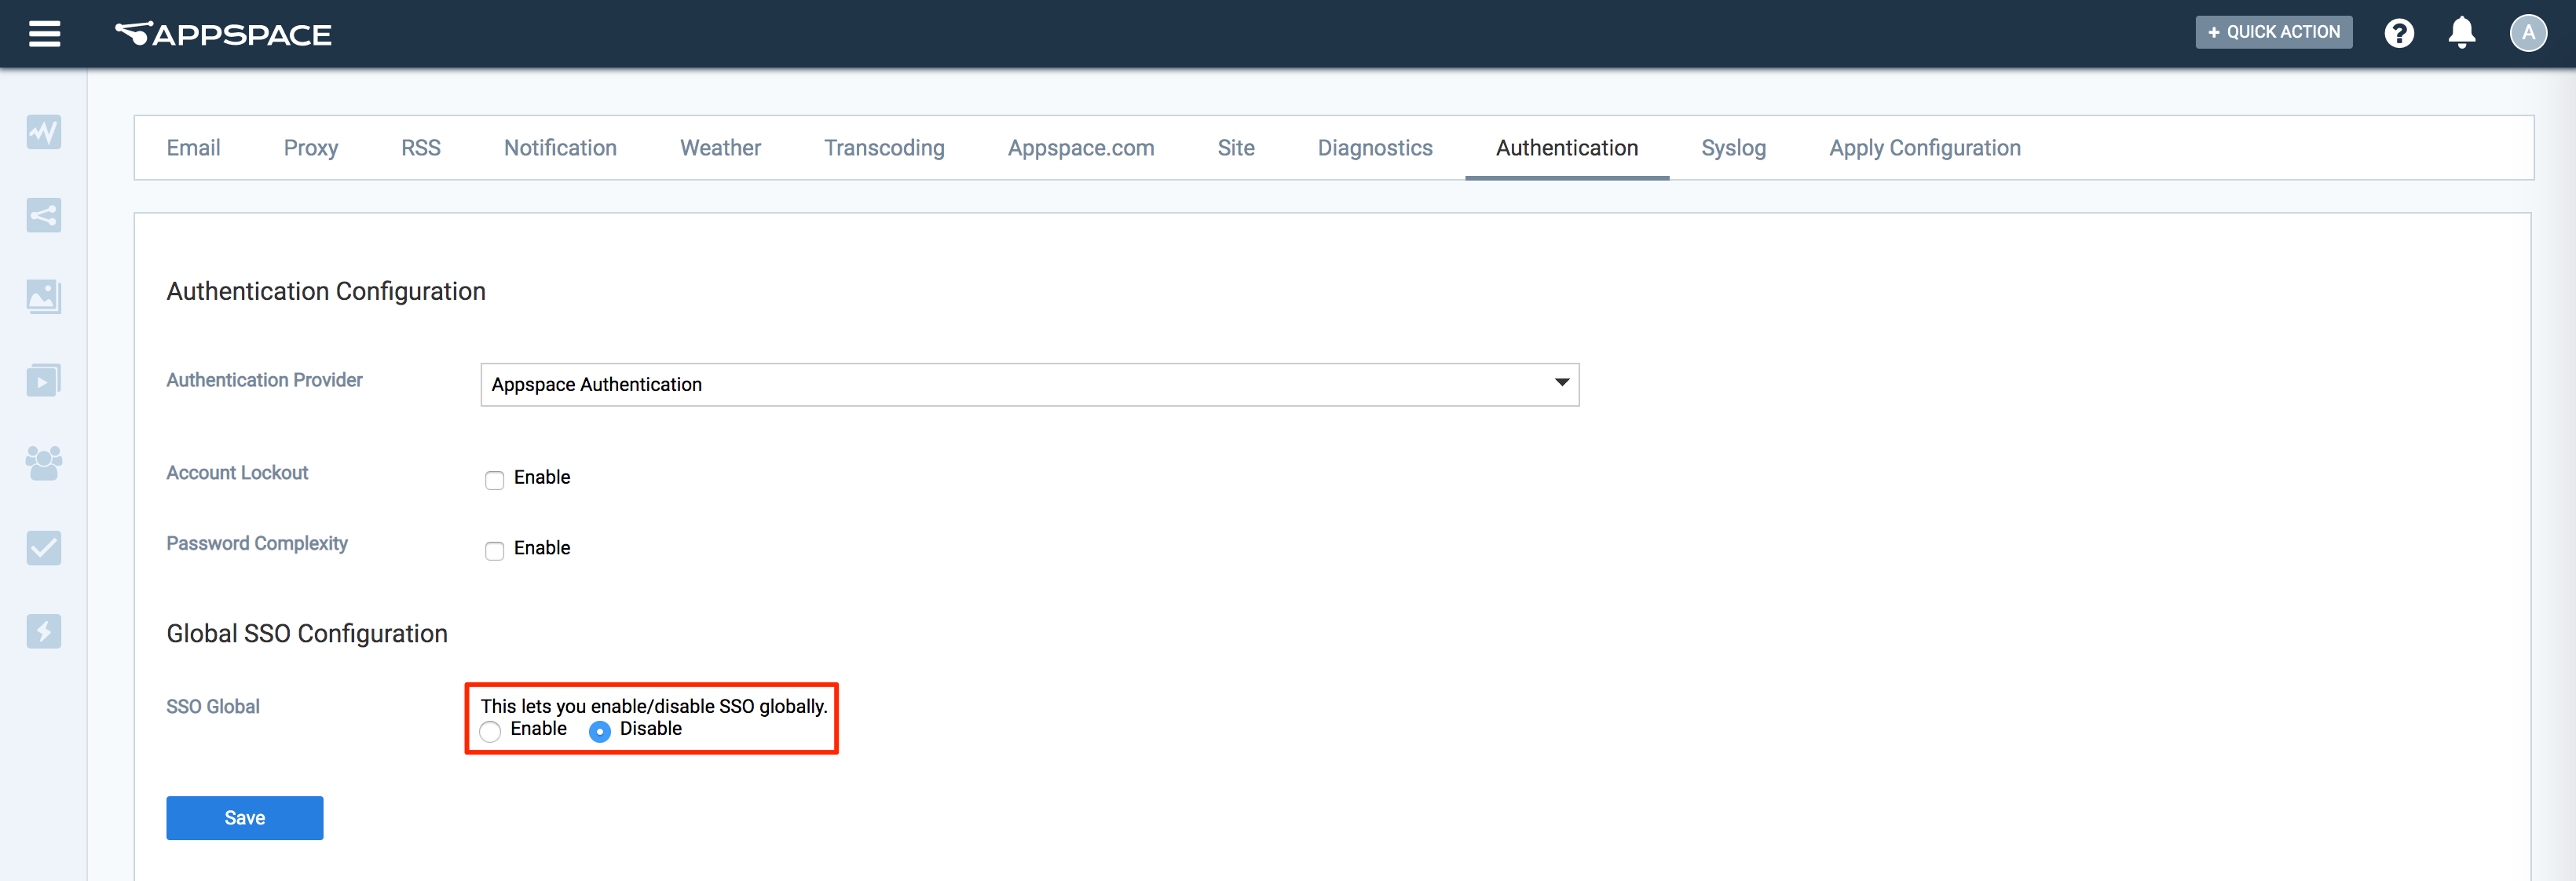
- Click Save and confirm settings.
- Click the Click Here link in the notification message displayed at the top of the page.
- You’ll be re-directed to the Apply Configuration tab, where you’ll be required to enter in your Windows Server credentials, and click Apply to finish applying the settings to the system.
- Click Yes to confirm, and restart your Appspace server.
Was this article helpful?