This article provides the instructions to install and configure the MySQL database service with MySQL Workbench for Appspace on-prem.
Prerequisite
- Download MySQL 8.x: https://dev.mysql.com/downloads/mysql/
Important
- Links to the installation instructions on the provider’s website are provided.
- Please ensure you take note of and complete the specific configuration required for each application, described in each step below.
- Please right-click each installer file and select Run as Administrator to install.
Install and Configure MySQL Server
Follow the instructions below to install and configure the MySQL Server with MySQL Workbench:
Warning
- SQL passwords should NOT contain shell metacharacters such as ! # ’ ” ` & ; or spaces.
- The database credentials CANNOT be changed once Appspace has been installed.
- The database user account must NOT be deleted once Appspace has been installed.
- Install MySQL 8.x on your server, as outlined in the Installing MySQL on Microsoft Windows guide here: https://dev.mysql.com/doc/refman/8.0/en/windows-installation.html
- Ensure the following configuration settings are made:
- Select the Custom option on the Choosing a Setup Type window, and click Next to continue.
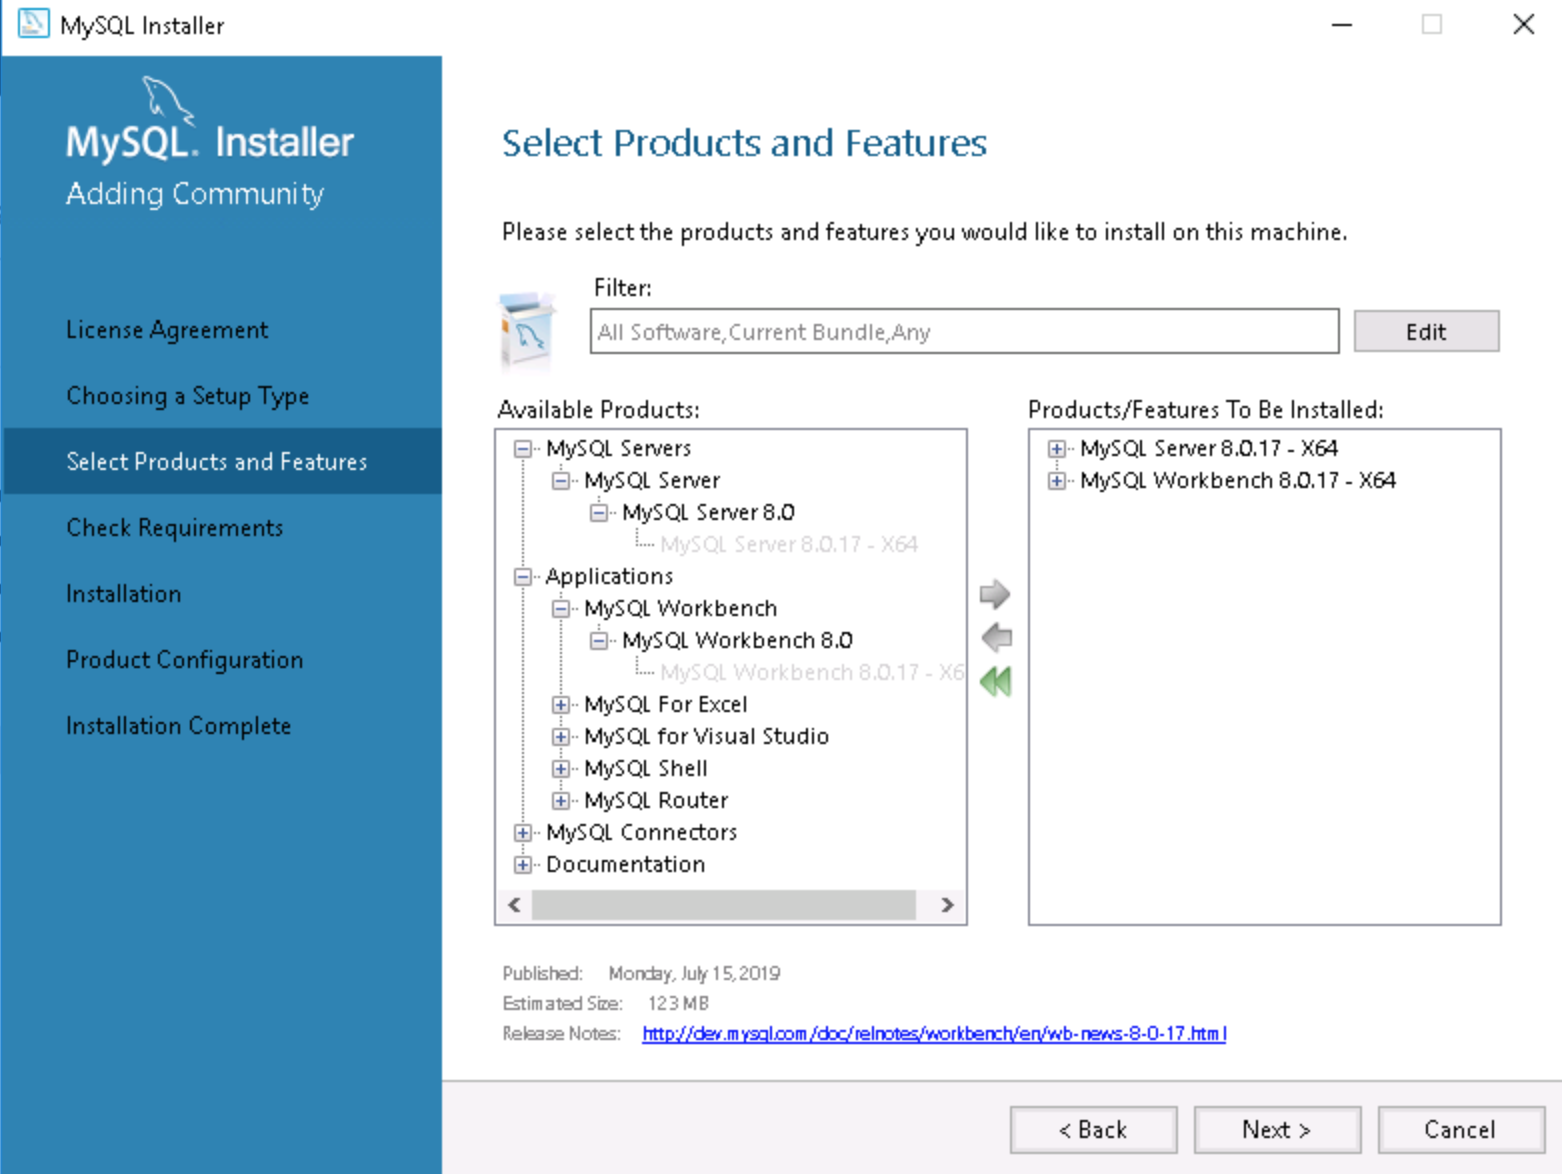
- On the Select Products and Features window, ensure the following options are selected, and moved under the Products/Features To Be Installed section.

- MySQL Server 8.x (x64 version)
- MySQL Workbench CE 8.0.x (x64 version) WarningOnly select these 2 options. Leave all the other options unchecked. It is important to make sure that the other options (such as MySQL Connectors) are NOT selected during the MySQL installation.
- In the Group Replication window, select the Standalone MySQL Server/Classic MySQL Replication option.
- In the Type and Networking window, do the following:
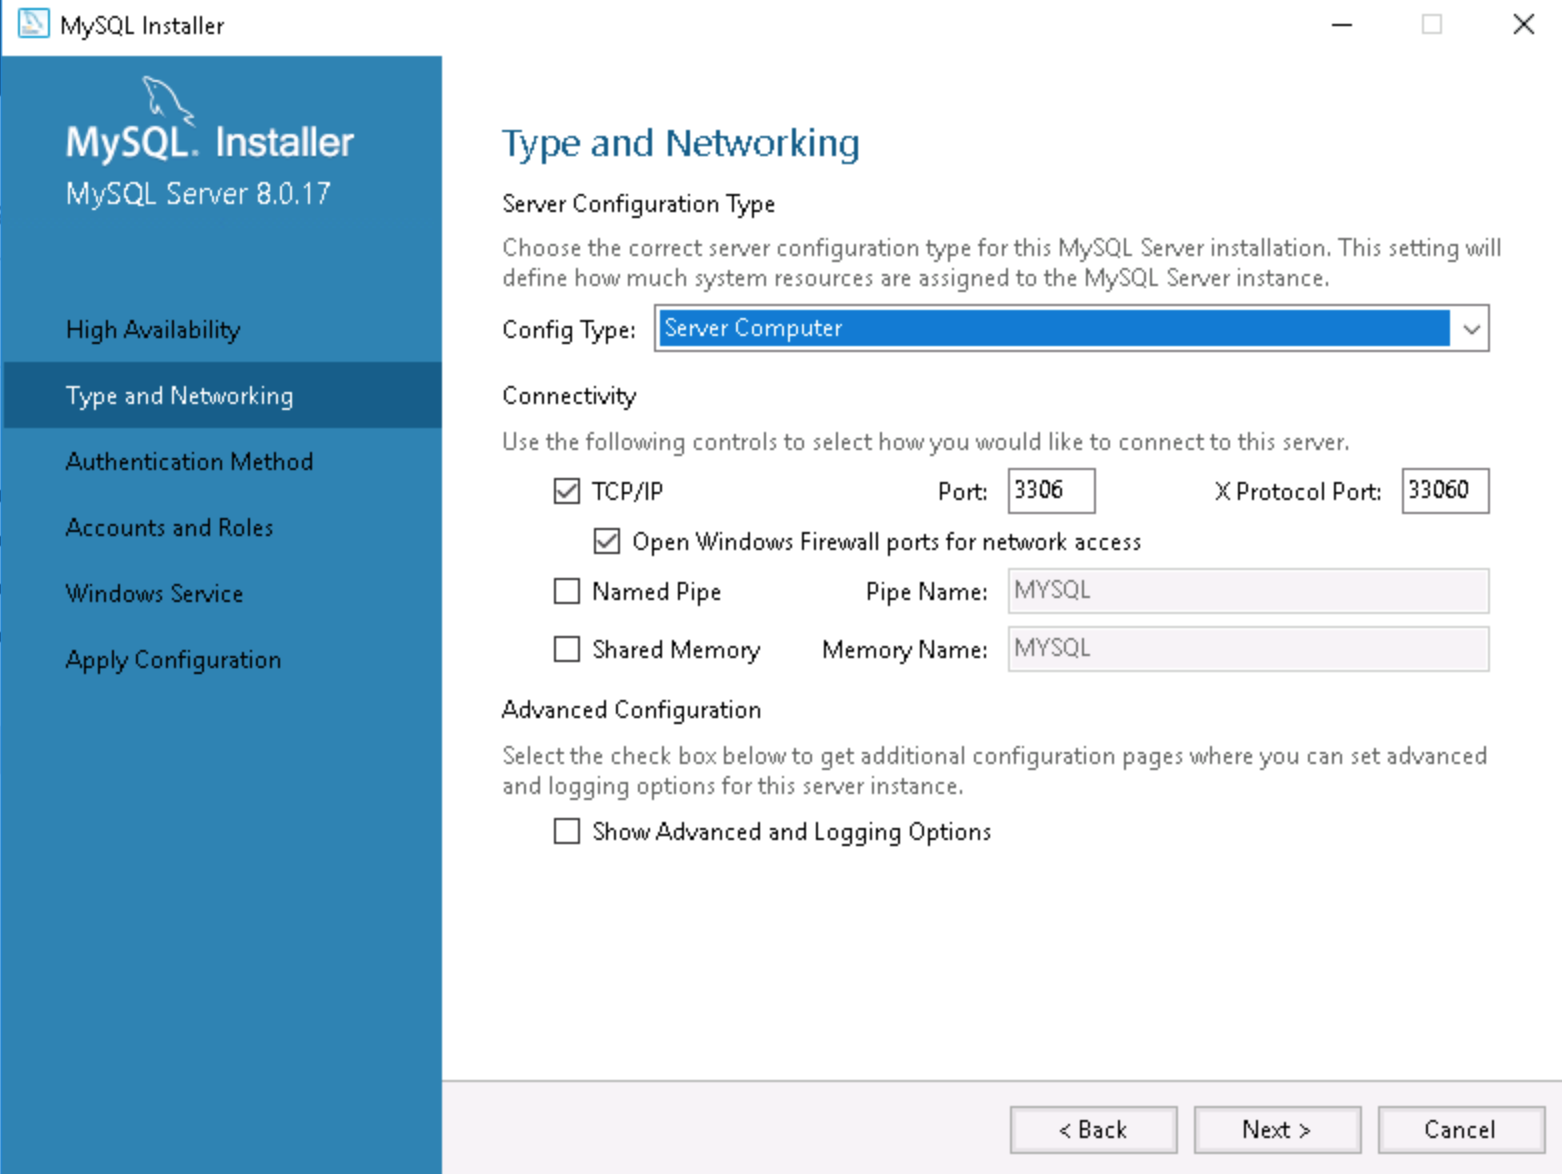
- Select Server Machine from the Config Type drop-down menu.
- Under Connectivity, check the TCP/IP checkbox, and set the Port Number to 3306.
- Check Open Firewall port for network access.
- Check Show Advanced and Logging Options.
- In the Authentication Method window, select the Use Legacy Authentication Method (Retain MySQL 5.x Compatibility) option.
- In the Accounts and Roles window, enter in the MySQL Root Password. WarningSQL passwords should NOT contain shell metacharacters such as ! # ’ ” ` & ; or spaces.
- Proceed to configure the MySQL Workbench by following the instruction in the next section below.
Configure MySQL Workbench
Warning
Ensure the SQL root password created during installation has been granted System Administrator privileges in Windows before proceeding.
Follow the instructions below to configure MySQL Workbench:
- Launch the MySQL Workbench from the desktop.
- Click the Local instance MySQL80 button, and click Connect to begin the configuration process.
- When prompted, enter in the MySQL server root password which was created during the MySQL installation process. Optionally, you may check the Save password in vault check box. Click OK to continue.
- In the Navigator pane, click Options File under the INSTANCE section to access the Administration – Options File tab.
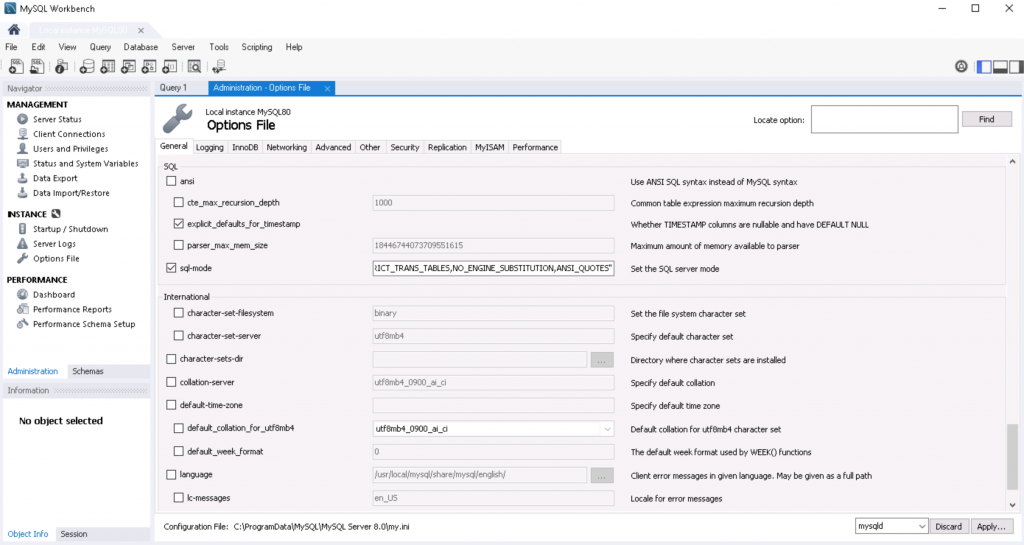
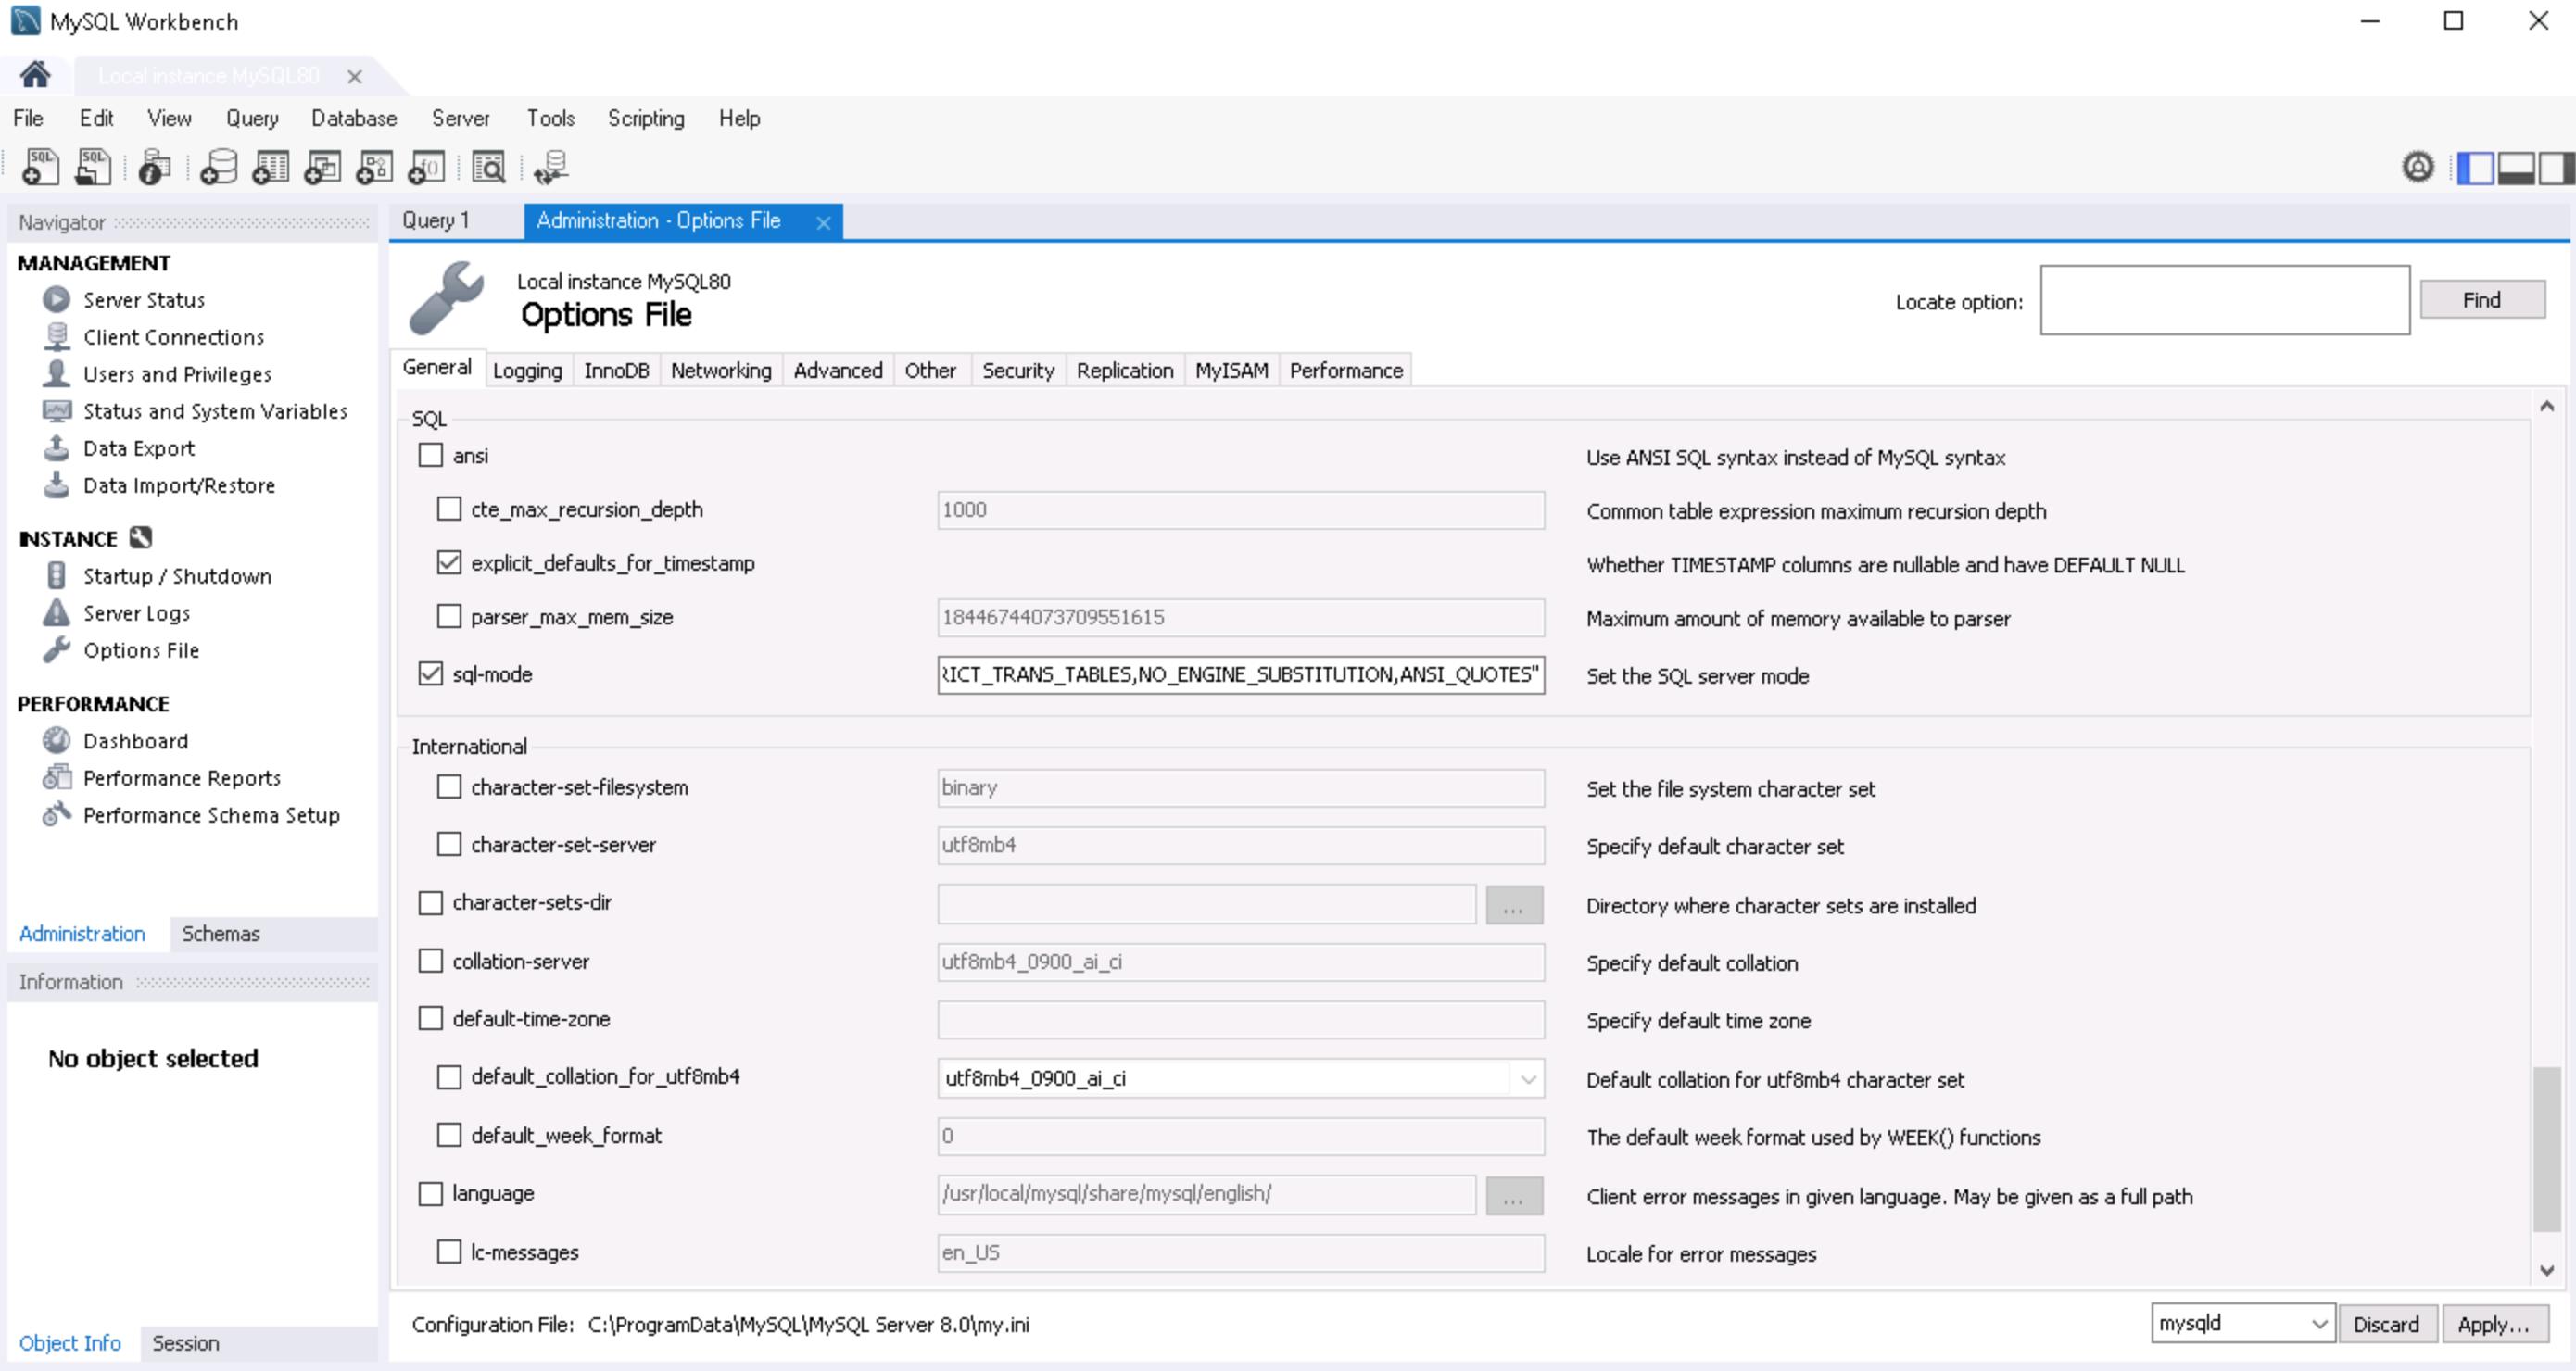
- Click the General tab, and scroll down to the SQL section.
- Edit the sql-mode text field by adding the following to the existing string (before the closing quotation marks): ,ANSI_QUOTES
 WarningEnsure the comma is added, and do NOT leave any blank spaces.
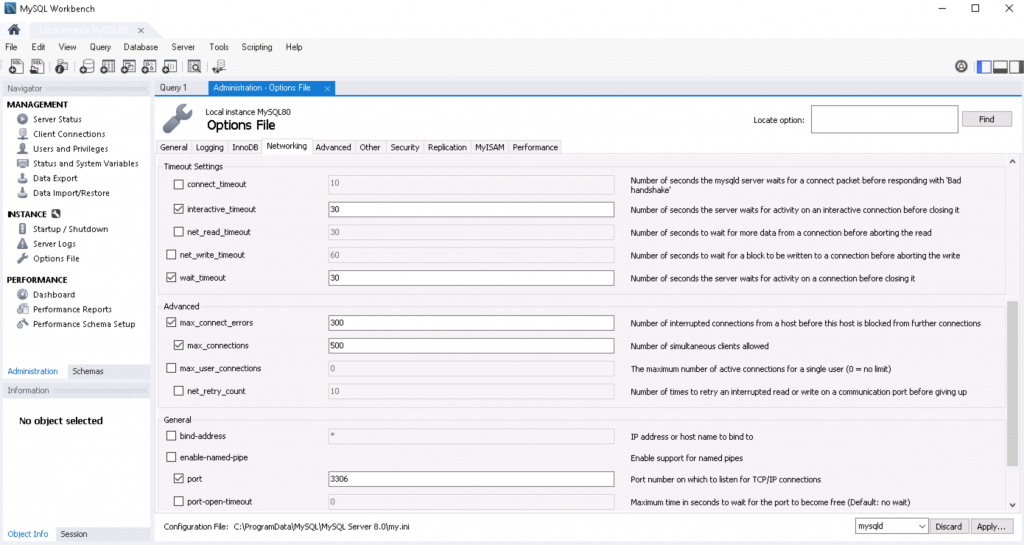
 - Click the Networking tab, and scroll down to the Timeout Settings and Advanced sections. Check the following check boxes, and set its values as stated:
- interactive_timeout, set the value at 30.
- wait_timeout, set the value at 30.
- max_connect_errors, set the value at 300.
- max_connections, set the value at 500.
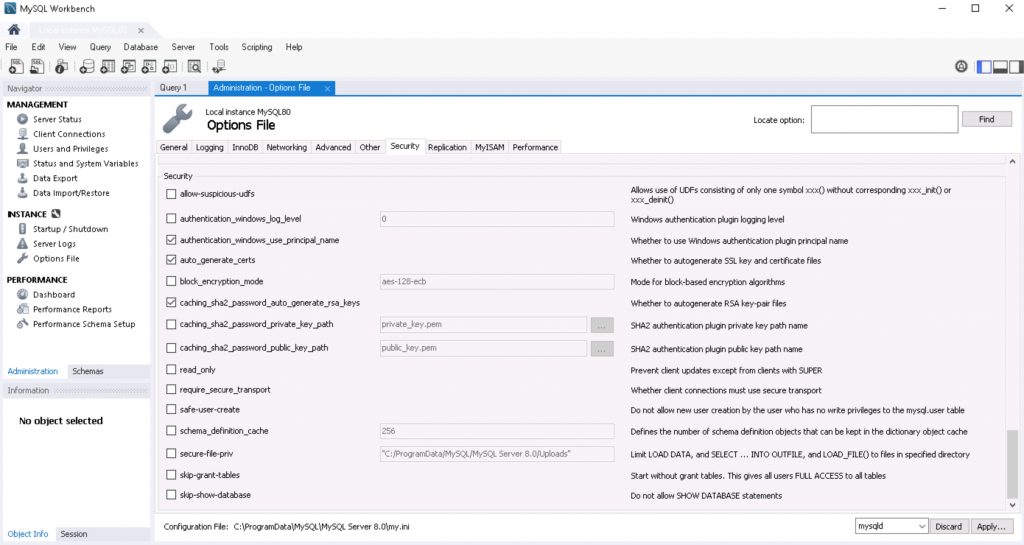
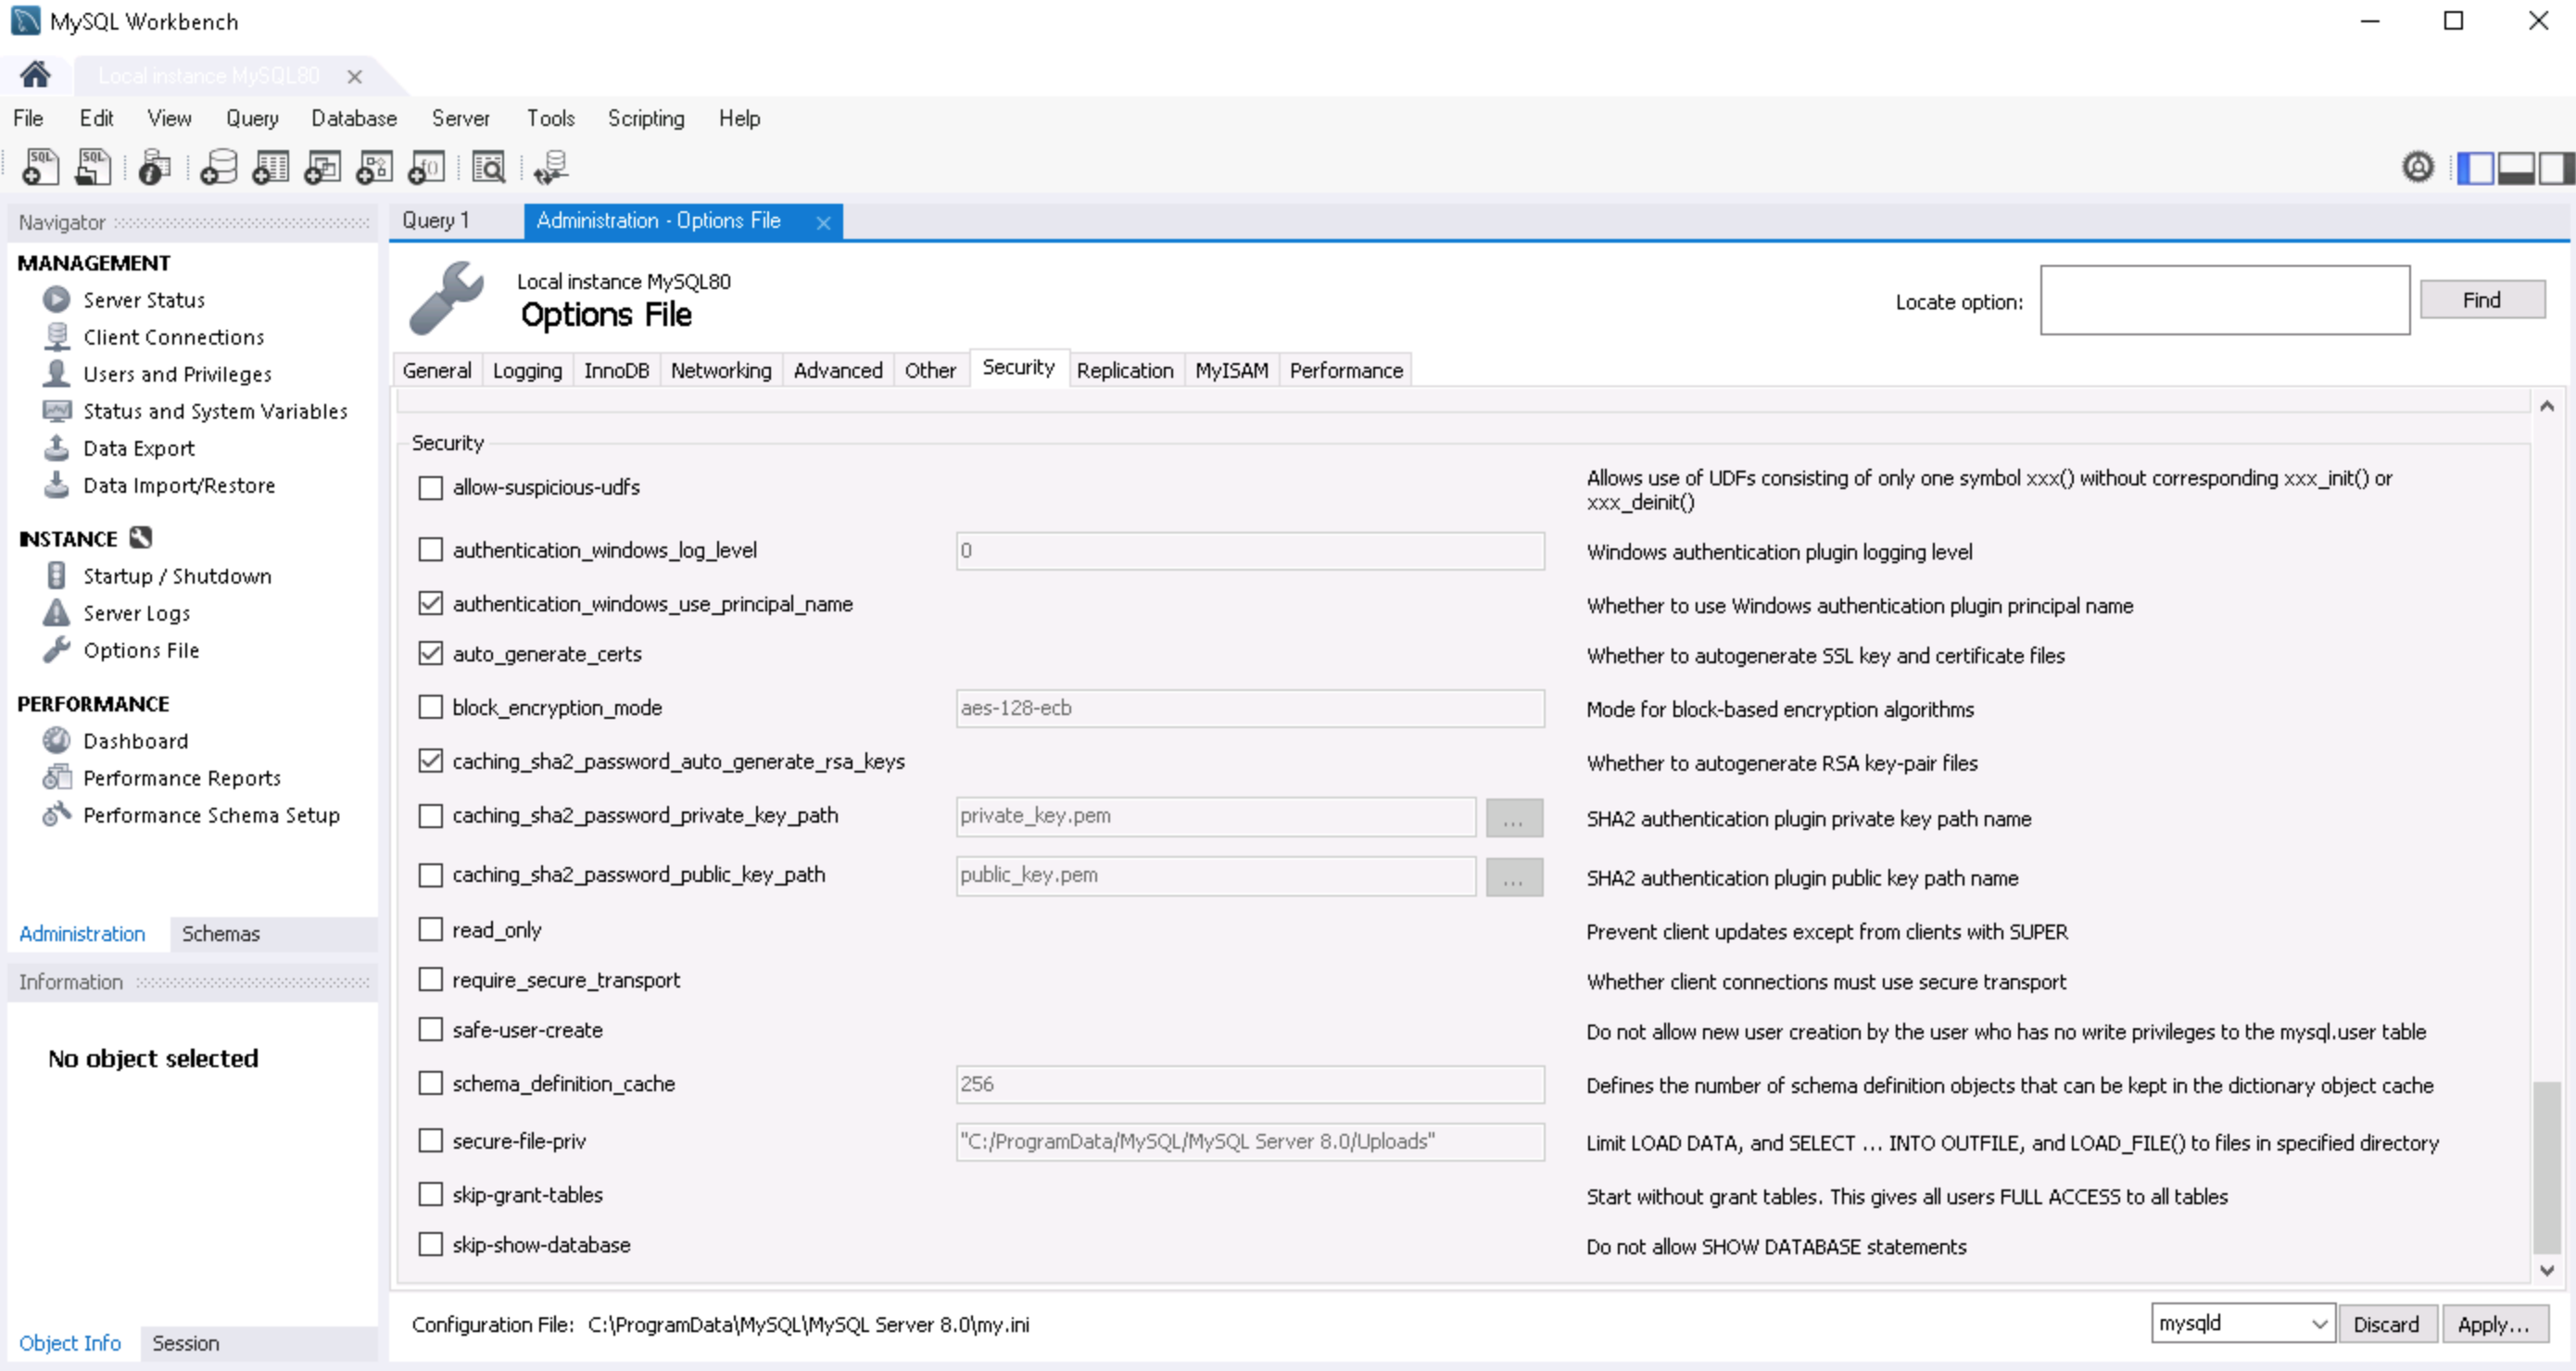
- Click the Security tab, and uncheck the secure-file-priv option in the Security section.
- Click Apply once all configurations have been done.
- The Apply Changes to MySQL Configuration File window is displayed, and lists all the configurations that were just made. Click Apply to confirm the changes.
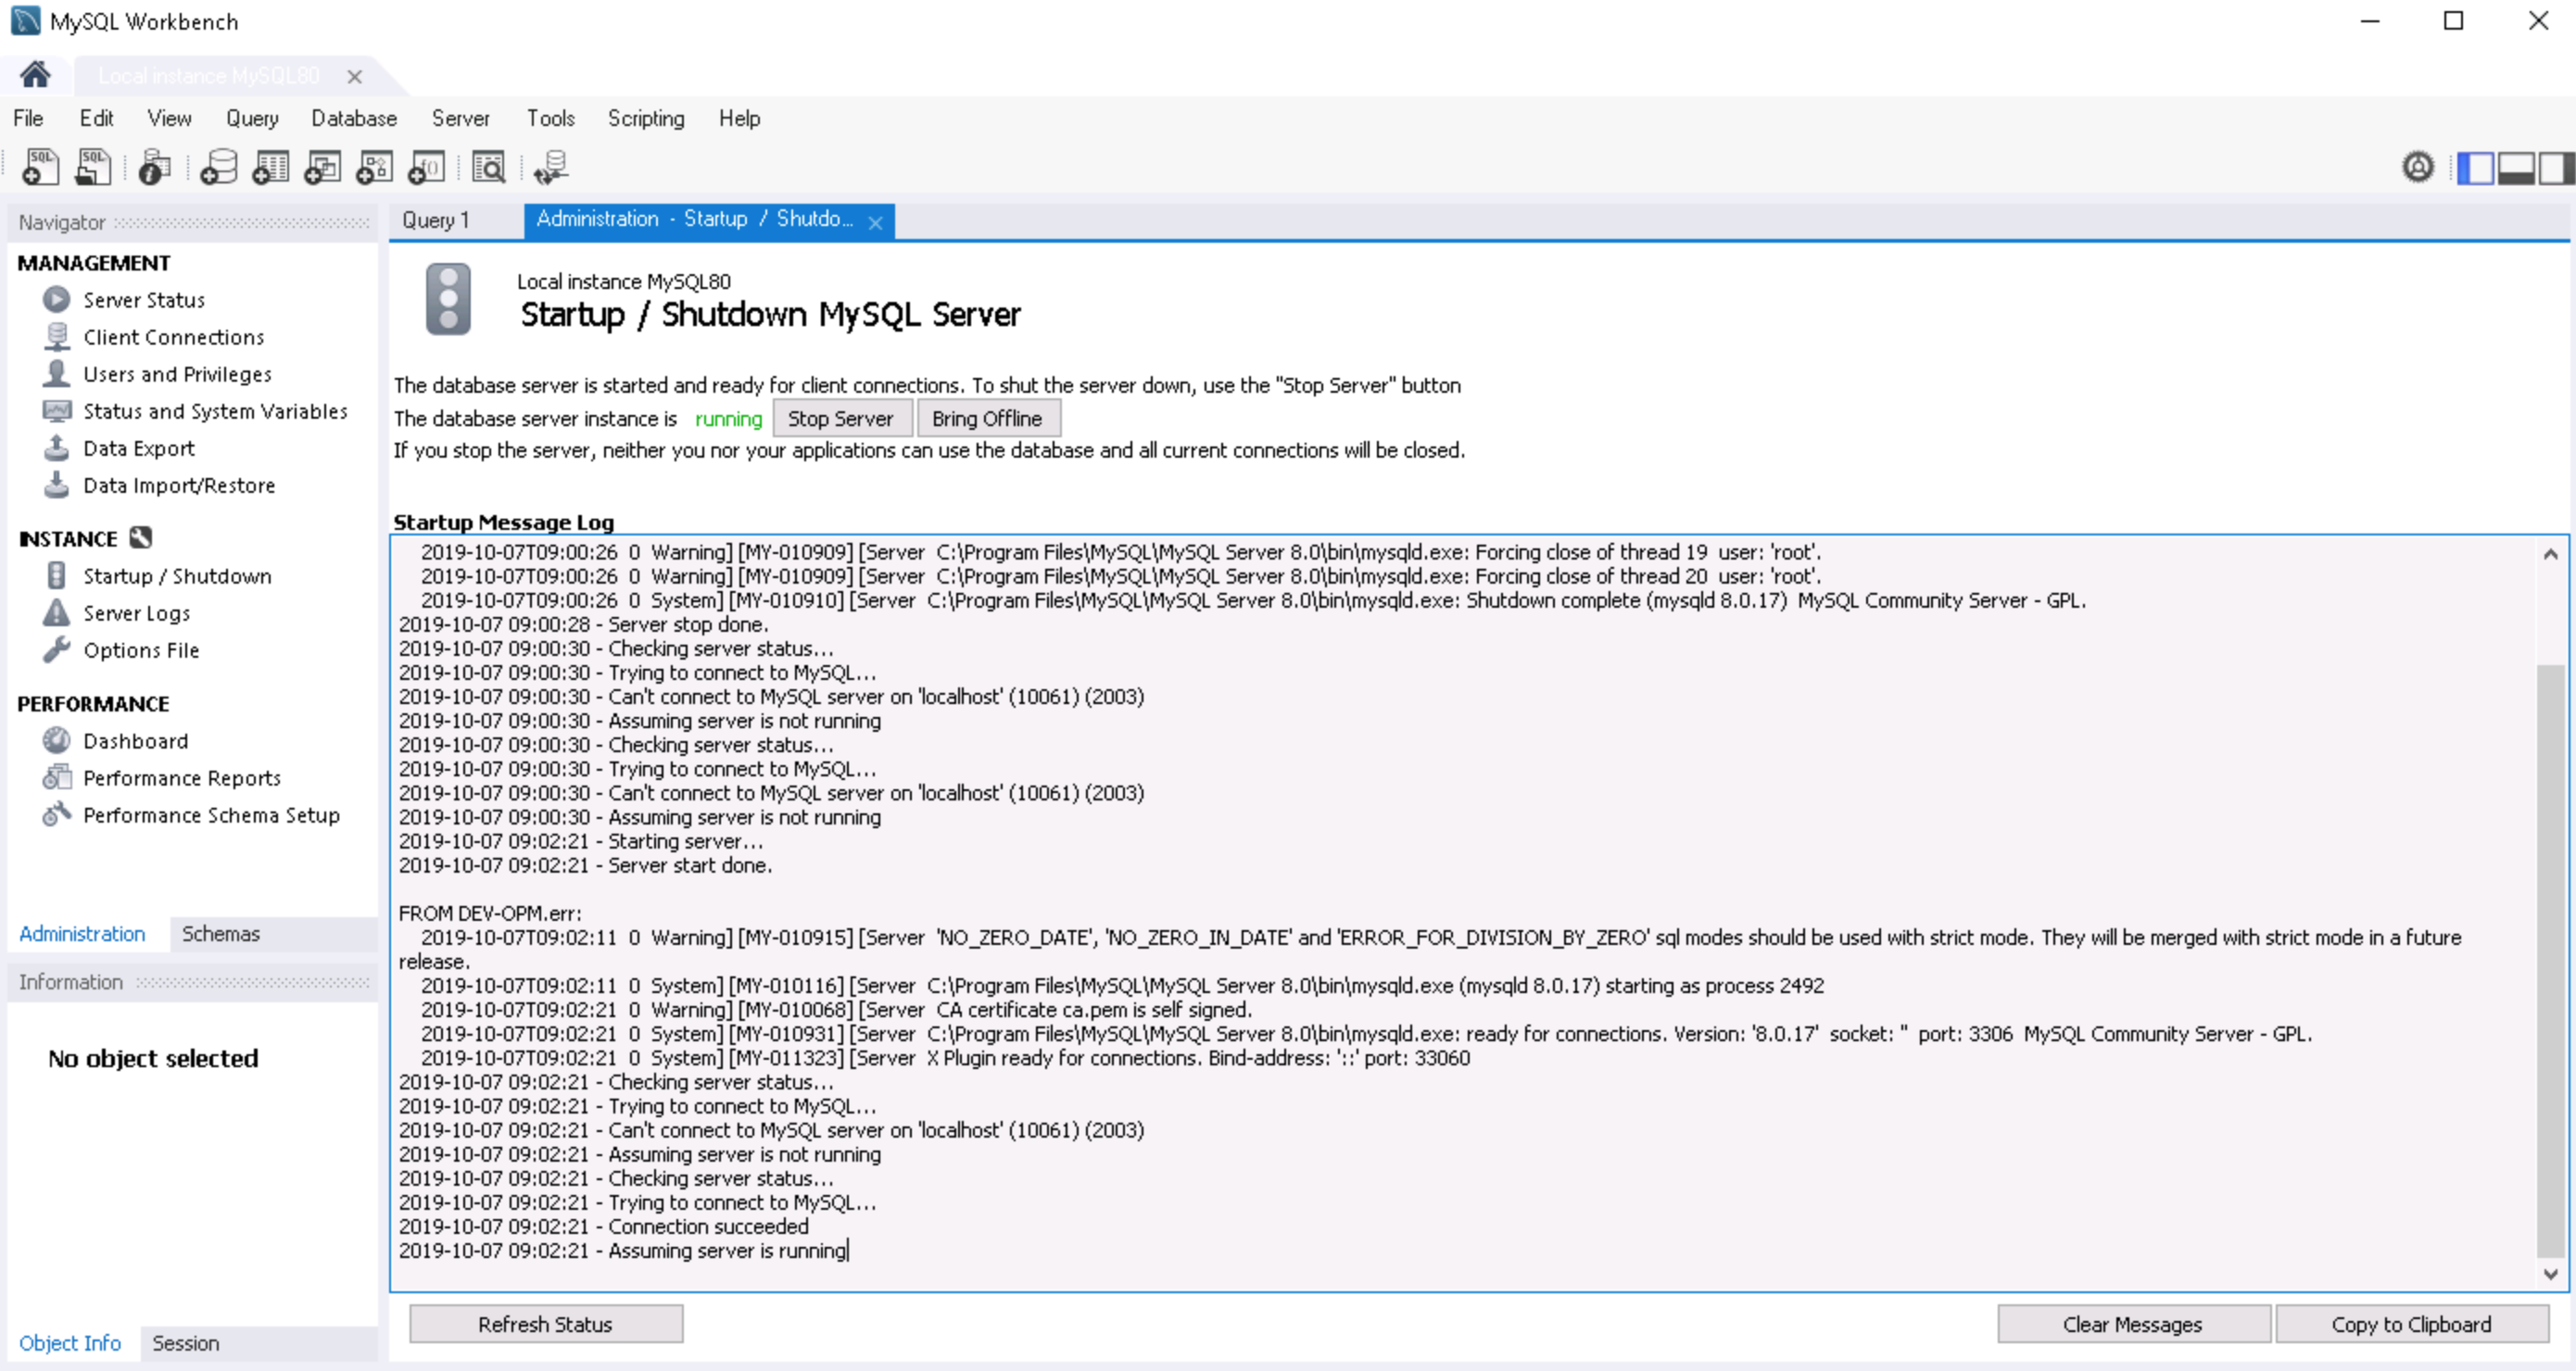
- In the Navigator pane, click Startup / Shutdown under the INSTANCE section to access the Administration – Startup / Shutdown tab. The database server instance is status should display running. Click Stop Server to stop the MySQL server.
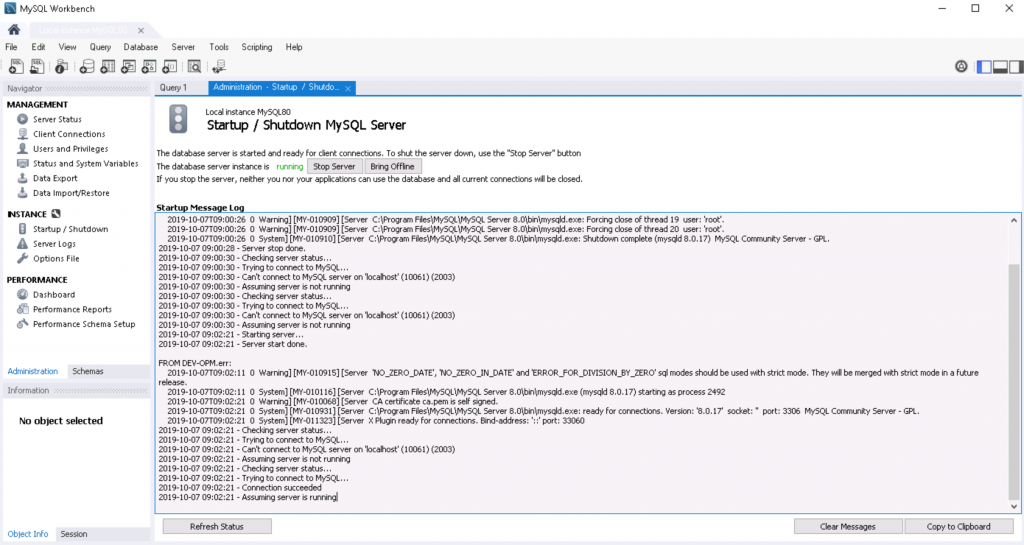
- Once The database server instance is status displays stopped, it can be confirmed that the MySQL server has shutdown.
- Click Start Server to restart the MySQL server.

Next Steps: Proceed back to the Configure Folder Permissions section in the Appspace On-prem installation article.
Was this article helpful?