Appspace SharePoint Intranet Stories is a news creation and publishing tool for internal comms that offers powerful visual, social, and editing features to bring company news, updates, and announcements to life. A combination of text, photos, and videos can be used to present internal updates as magazine articles which encourages employees to respond and share. The scheduling, approval, and pipeline of news are managed within a workflow system and articles can be published in multiple languages, company-wide, or tailored to specific audiences, plus it’s mobile-first letting you catch up on company news while on the move.
This article provides instructions to create and manage Stories on the Appspace SharePoint Intranet .
Prerequisites
- Author permissions.
Navigation Layout and Interface
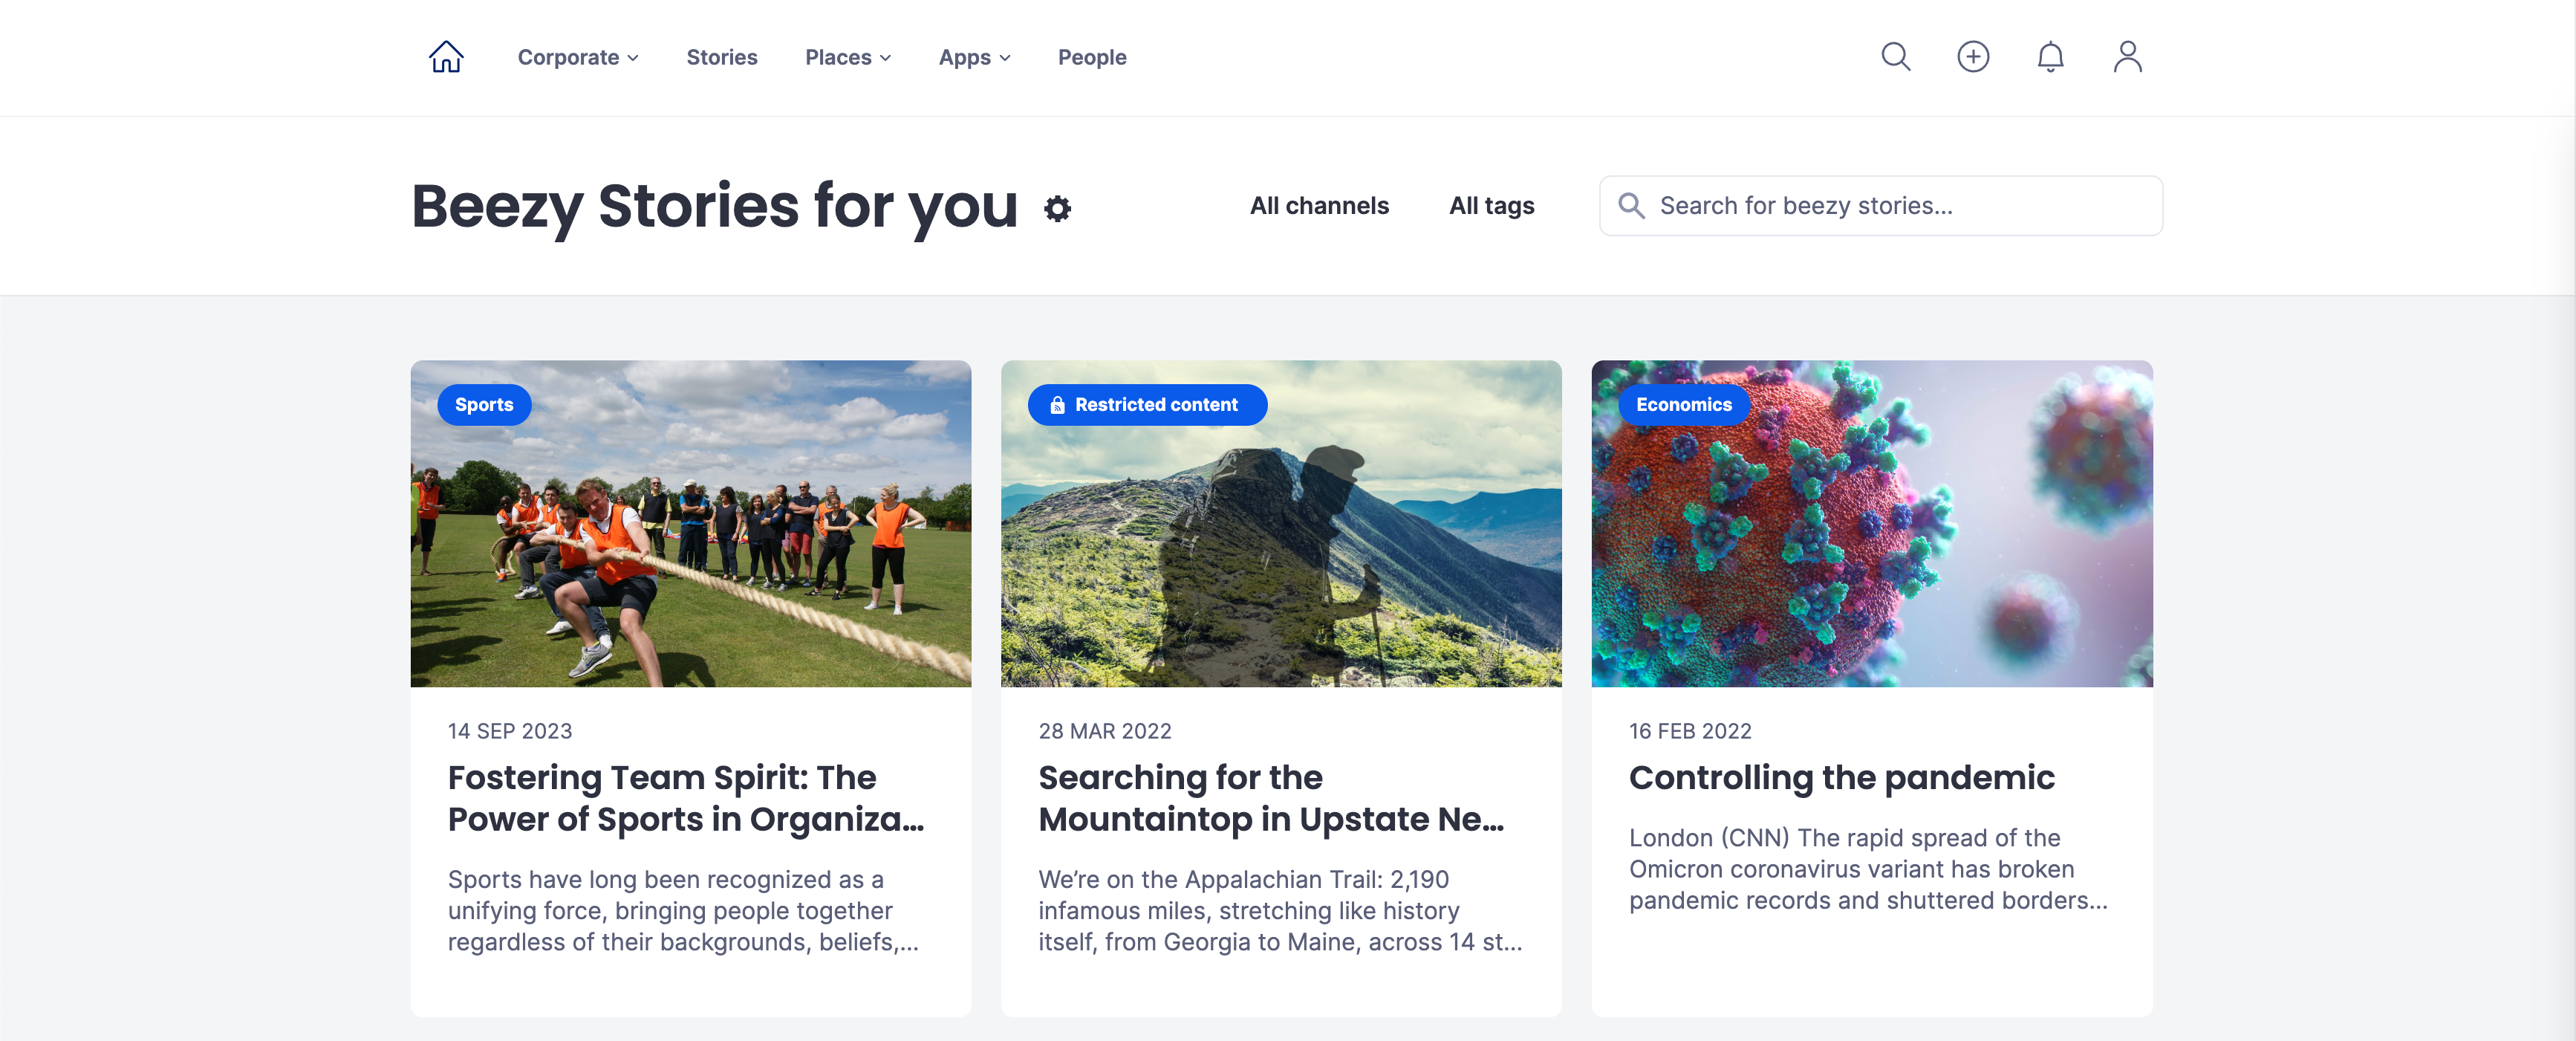
The below illustrates the Stories dashboard and Stories article page on the Appspace SharePoint Intranet Platform.
Stories Dashboard Interface
To access the Stories dashboard, navigate to User Profile > Manage Stories.
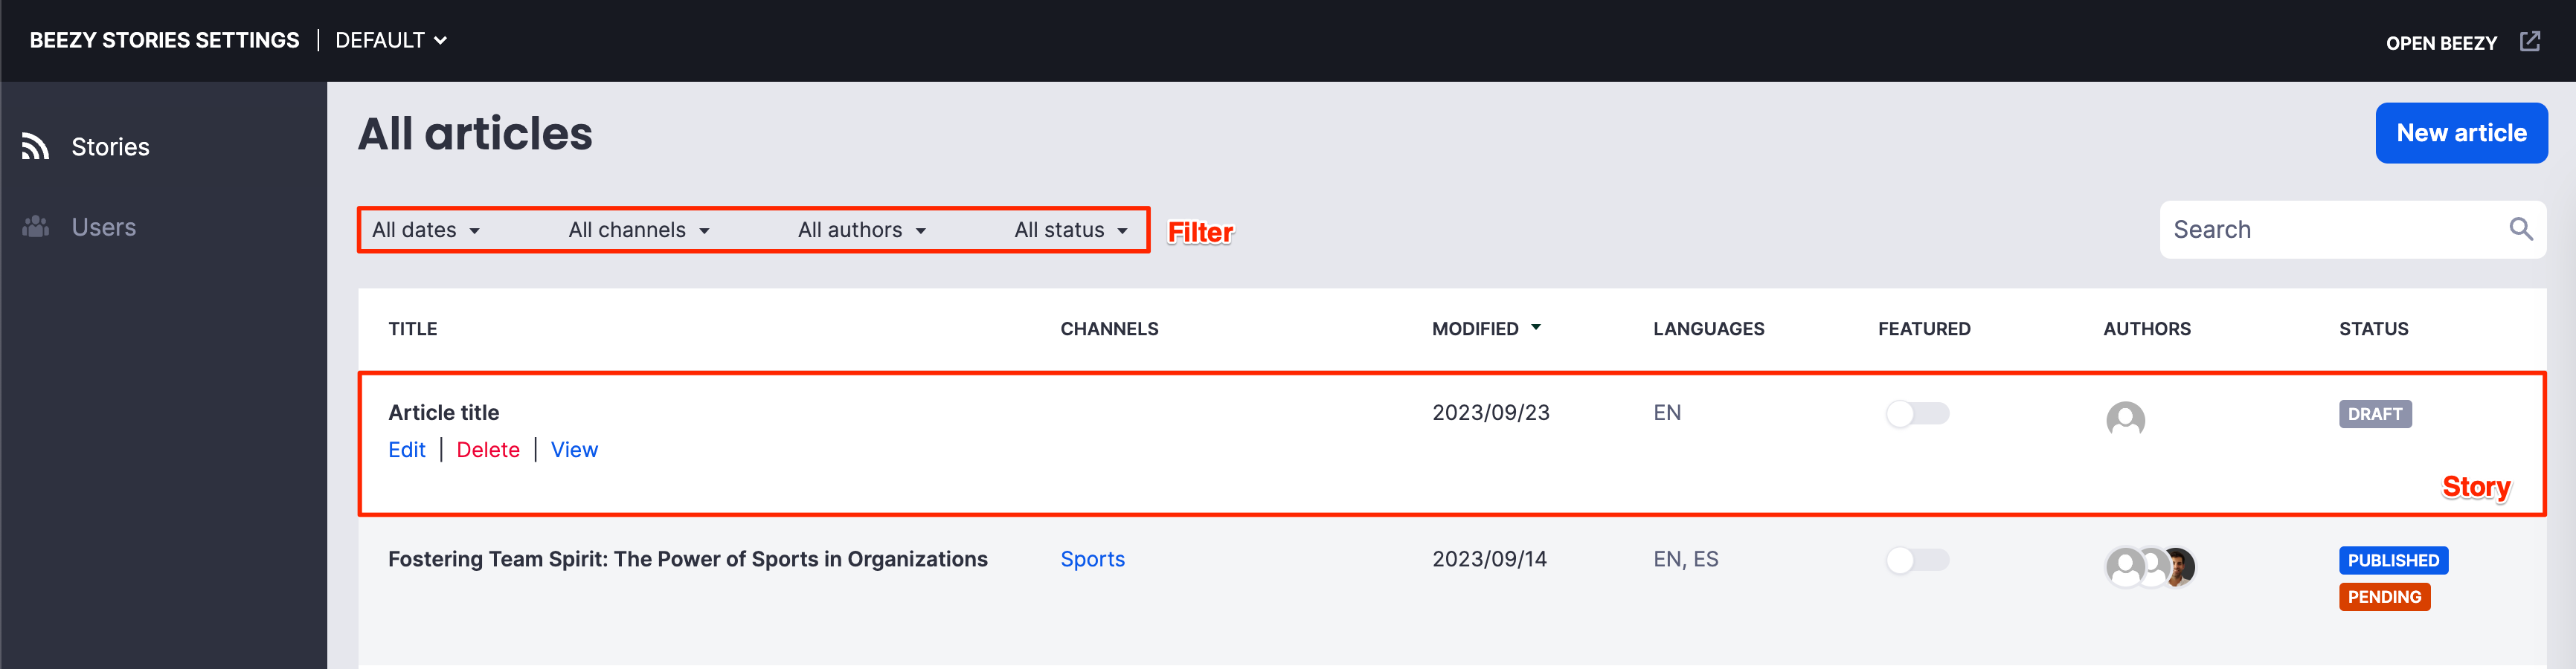
Article Filters – Displays story articles based on the following filters.
- All dates
- All channels
- All authors
- All status
Stories Interface
To access the Stories dashboard, navigate to User Profile > Manage Stories > New article.
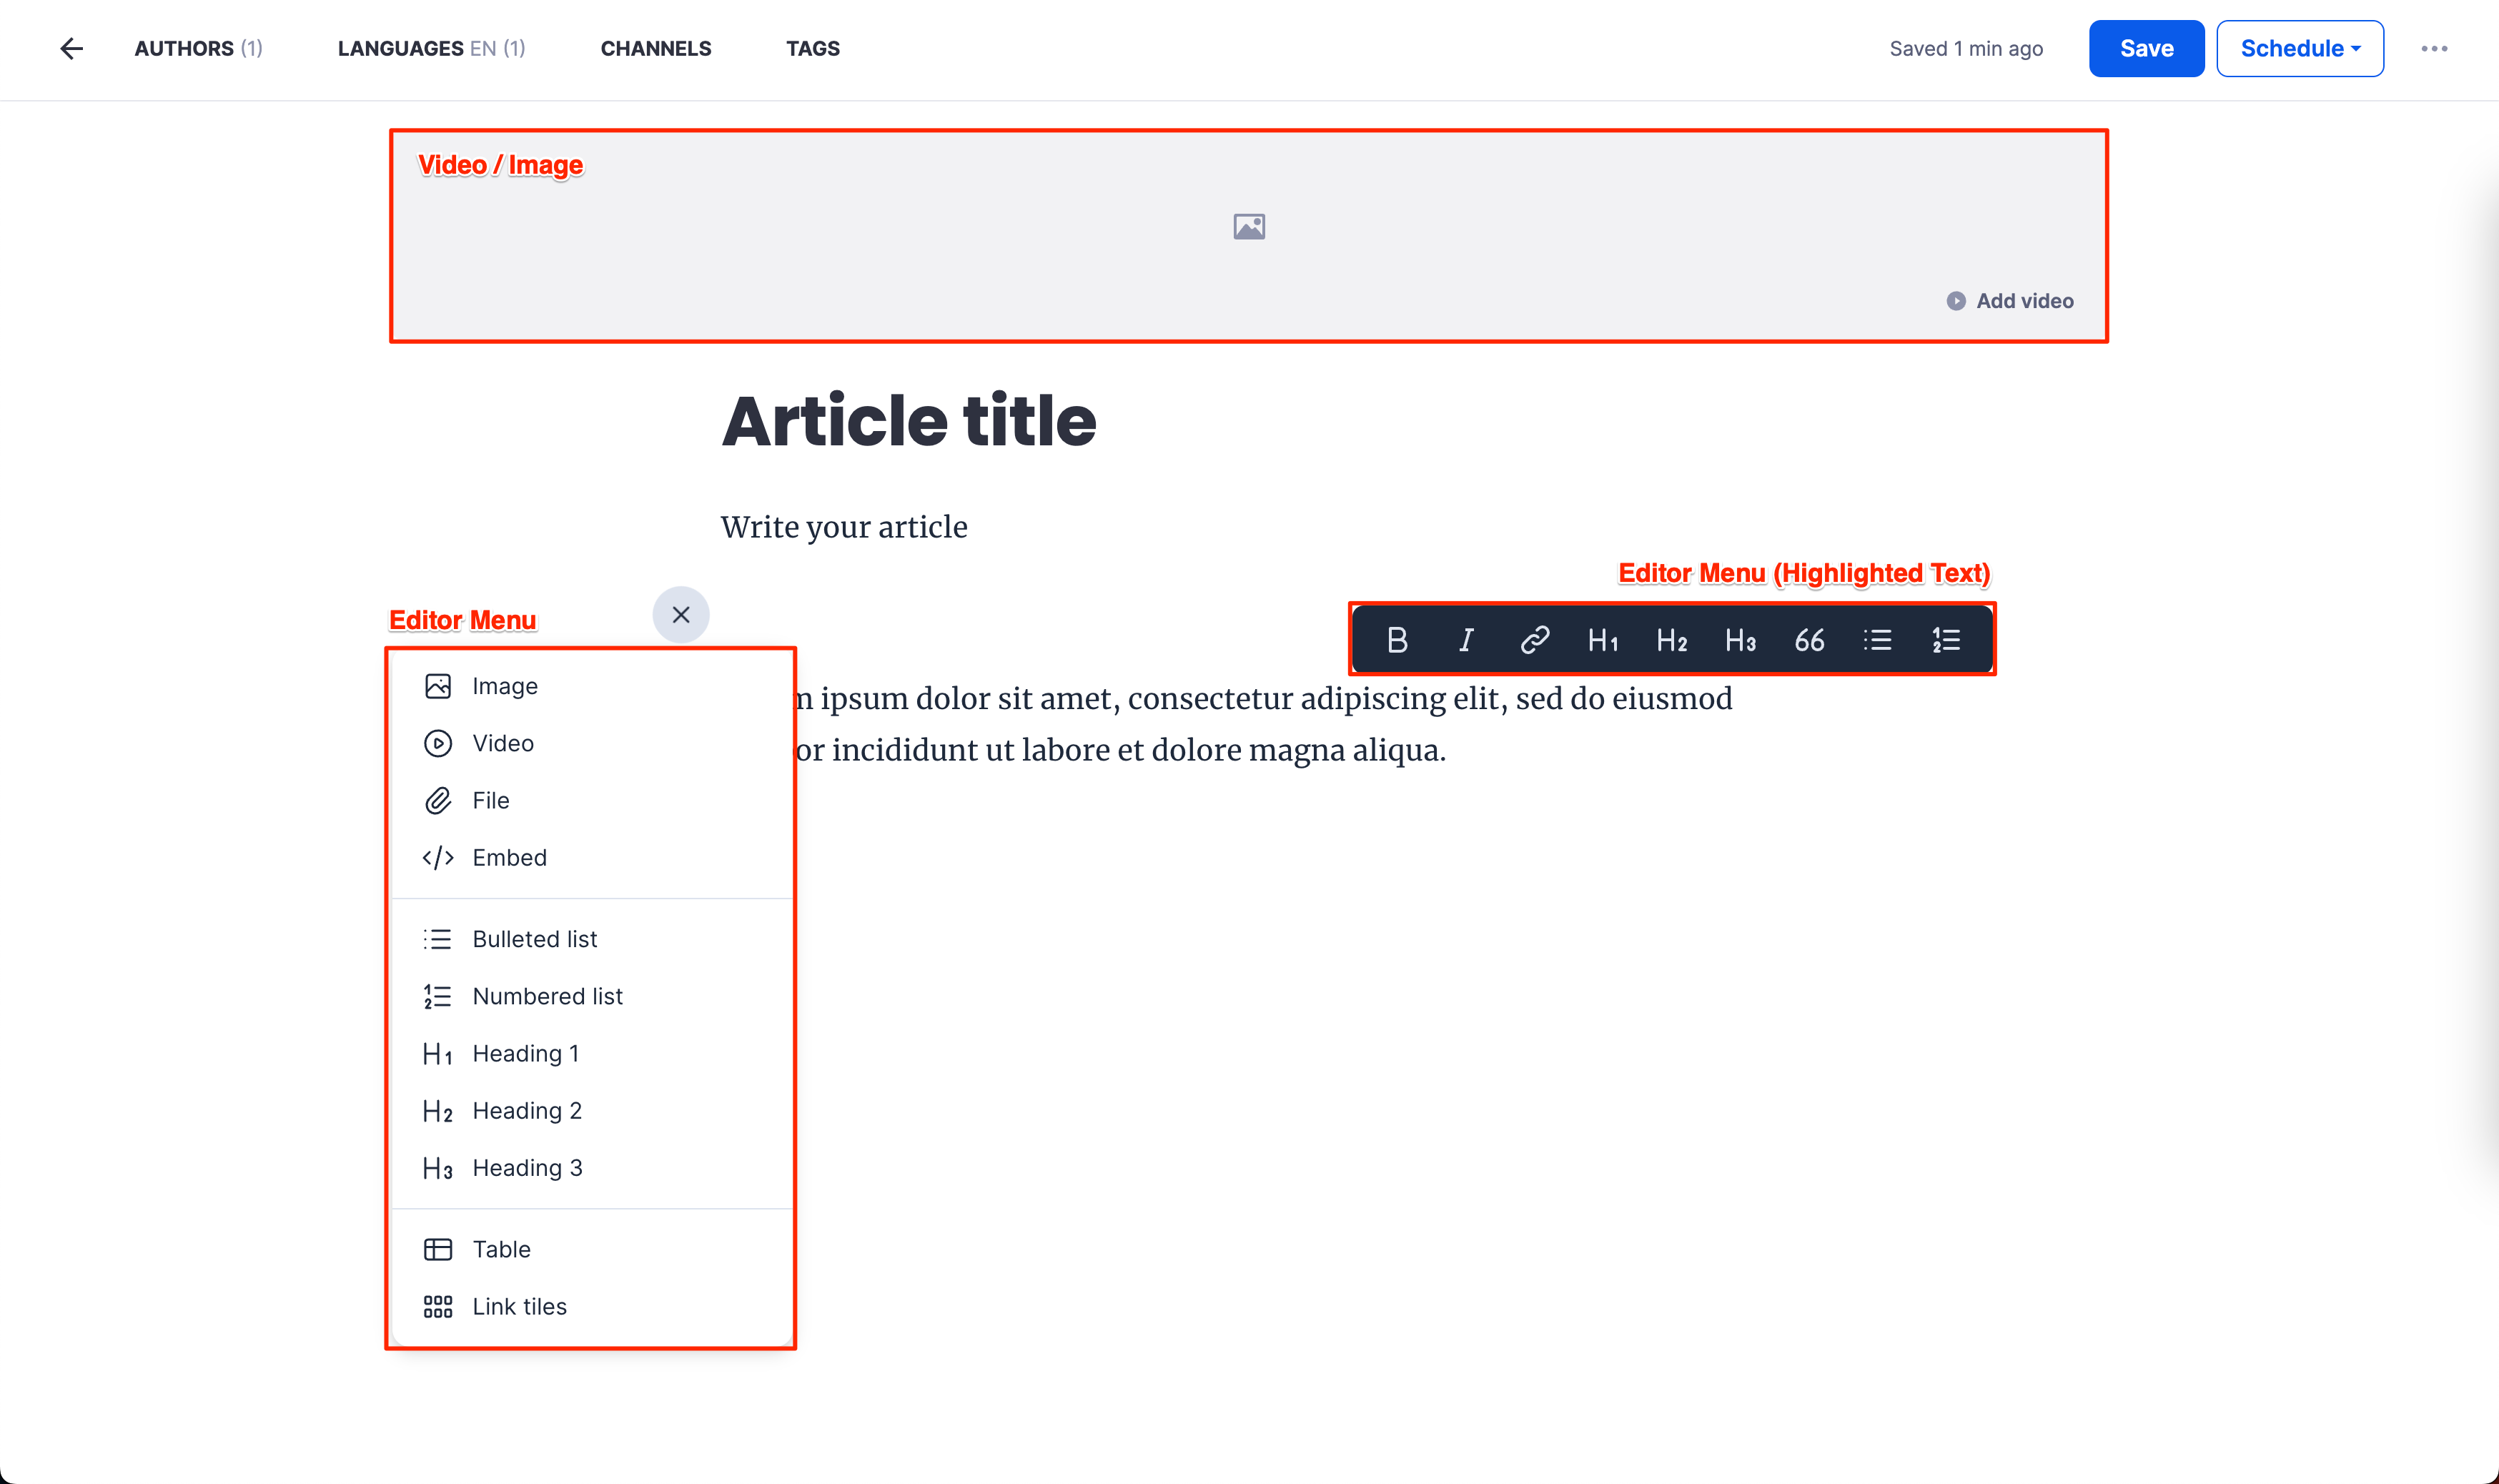
Top Navigation Bar
- Authors – Select the authors for the article, ensuring only permitted users are able to make changes to the article.
- Languages – Select the languages the article is written in, supporting multilingual stories in 20 different languages.
- Channels – Select channels the article is published on, allowing managers to publish to targeted teams, departments, or groups.
- Tags – Select tags for the article, allowing for easier discoverability and organization
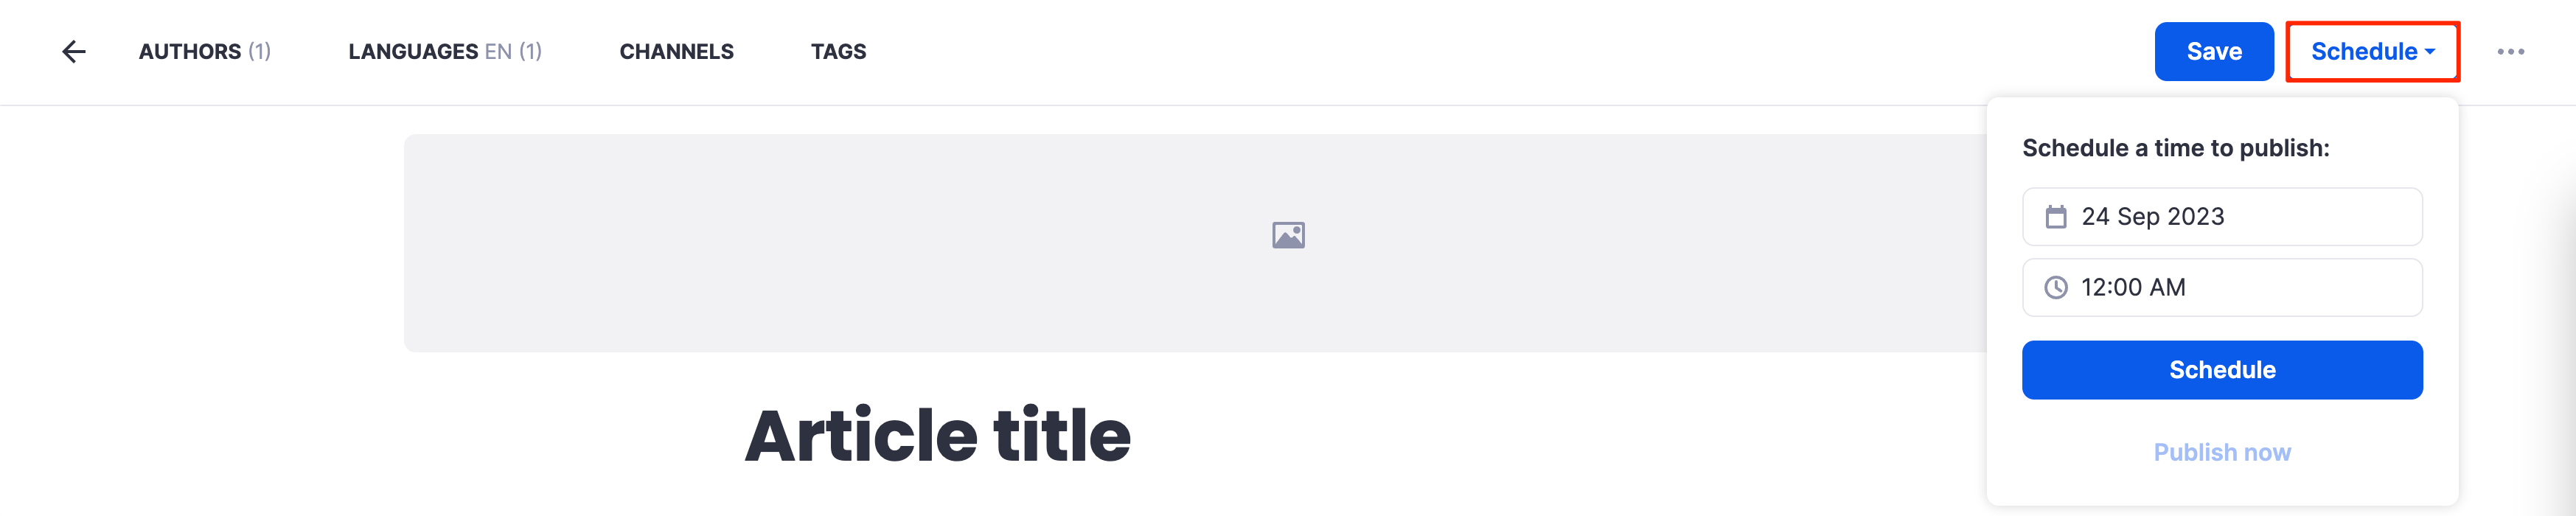
Schedule button – Schedule or instantly publish when the article is available to users, taking into account the different time zones of global teams (available in 30 min time slots).
Ellipsis
- Comments – Allow comments on the article
- Likes – Allow likes on the article.
- Features – Make the article a Featured Story on the homepage.
- Request Approval –
- Delete
Editor Menu – The text editor contains various text and design tools to create an article. For a full list of text editor features, please refer to our Intranet Text Editor Features article.
Create a Story
Writers are able to create Stories and assign them to channels they have Author permissions.
Follow the instructions below to create a Story.
- Click your User Profile, and click Manage Stories.

- In the Beezy Stories Settings page, click the New article button to create a new story;
or select an existing article and click Edit. - Configure the following options:
- Authors – Select the authors that have permissions to edit the article.
- Languages – Select the languages the article will be written in.
- Channels – Select the channel the story is published to.
- Tags – Select the tags for the article.
- Upload an image or video for the article Image / Video Banner.
- Enter the Article Title, and begin writing your article.
- Once the article has been written, click Save.
NoteStories are automatically saved as drafts periodically when being edited (if configured), otherwise Writers will need to save manually.
- Optionally, you may click the ellipsis to configure the following:

- Comments (Enabled by default) – Toggle to disable comments on the article.
- Likes (Enabled by default) – Toggle to disable comments on the article.
- Featured – Toggle to enable the article to be featured.
- Preview
- Request approval – Add a reviewer to the article for approval and feedback.
- Delete
- Click the Schedule button to schedule a time to publish the article, or click Publish now to immediately publish the article to the intranet platform.
NoteA published story can be displayed on the Hero component by an Editor with administrative permissions.
- Once done, click Save and click the Back button to return to the Stories dashboard.
Manage Stories
Writers are also able to overlook and manage the Stories dashboard, but are limited to the following:
- Managing their own stories.
- Managing stories they have been assigned as authors.
- Managing stories of channels they have been assigned as authors.
- Deleting stories of channels they have been assigned as authors.
Follow the instructions below to manage Stories.
- Click your User Profile, and click Manage Stories.
- In the Beezy Stories Settings page, select the desired story article to manage and select one of the following actions:
- Edit
NoteEditing a story article after its published will modify the order of how the story is displayed on the Hero, Stories for you, Channel and Tag detail views.
- Delete
- View
- Featured
- Edit
Was this article helpful?