Personalize an Appspace instance
This article provides the instructions to customize and personalize your Appspace instance, as follows:
Cloud and On-Prem
- Default time zone – Users can set the default time zone to display date and time in the Appspace instance.
- Custom website logo – Administrators can customize the Appspace logo with the company or product logo.
- Background header color – Administrators can customize the Appspace header with a custom brand color.
On-prem only
- Custom domain – Administrators can set up their own Appspace subdomain or use a custom domain.
- Custom sign in page – Administrators can create a custom login page for Appspace users to sign in.
Personalize Cloud or On-Prem Instance
The Instance Settings page allows you to personalize the account for cloud and on-prem instances such as custom logo header, header background color, time zone, API key, and Google Analytics Tracking ID.

In an on-prem instance, you will have the following fields, which are hidden from a cloud account:
- Appspace Domain - Administrators can set up their own Appspace subdomain or use a custom domain.
- Custom Sign In Page - Administrators can create a custom login page.
- Custom Logo Header - Administrators can change the logo in the header to use their own custom company or product logo.
Personalizing Appspace
Important
Appspace 7 is only available in English, and does not support multiple languages. If you choose any other language, it will default back to English. The Language field in the UI is scheduled to be removed soon.
This article provides the instructions to customize and personalize your Appspace instance, as follows:
Cloud and On-Prem
- Default time zone – Users can set the default time zone to display date and time in the Appspace instance.
- Custom website logo – Administrators can customize the Appspace logo with the company or product logo.
- Background header color – Administrators can customize the Appspace header with a custom brand color.
On-Prem only
- Custom domain – Administrators can set up their own Appspace subdomain or use a custom domain.
- Custom sign in page – Administrators can create a custom login page for Appspace users to sign in.
Default Time Zone
Click Admin > Settings from the Appspace Menu navigation bar, and click the Instance Settings tab.
Select the desired time zone from the Time Zone drop-down menu.

Click Save once done.
Custom Website Logo
Click Admin > Settings from the Appspace Menu navigation bar, and click the Instance Settings tab.
Click the Custom Logo Header browse button, and select the custom logo image file.

Note
The recommended image resolution is 80px (W) x 40px (H).
Click Save once done.
Background Header Color
Click Admin > Settings from the Appspace Menu navigation bar, and click the Instance Settings tab.
Click the Header Background Color color picker, and select the desired color for the header background.
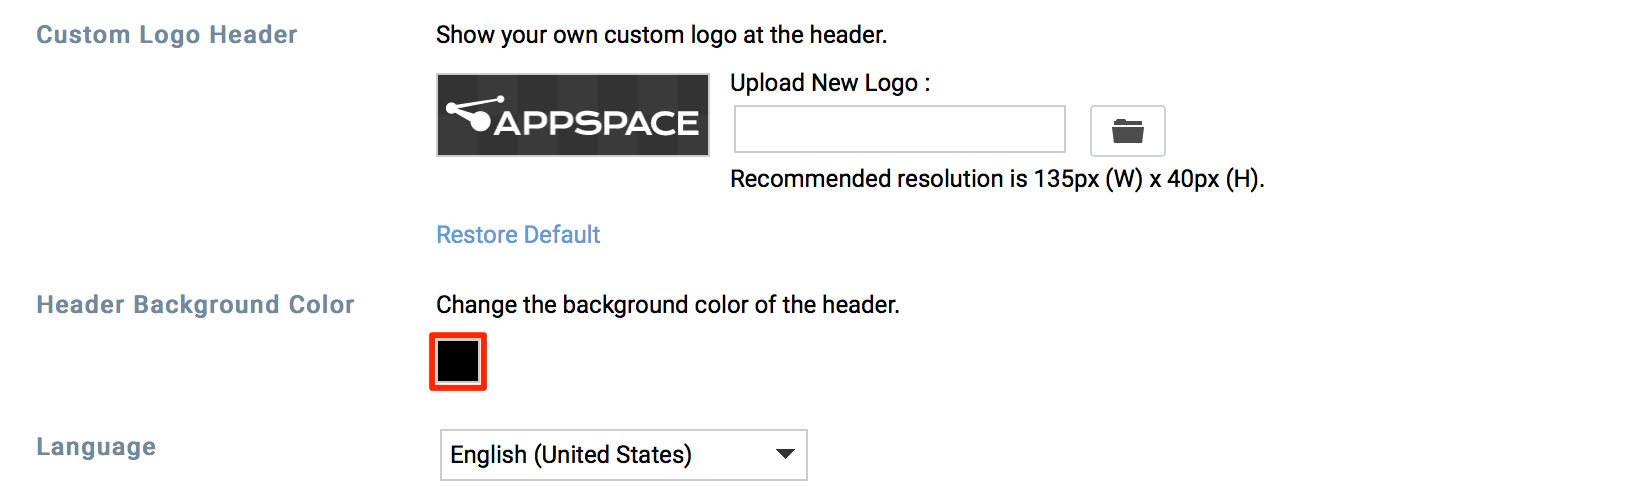
Click Save once done.
Important
The personalizations below are only available on Appspace on-prem deployments.
Custom Domain
Click Admin > Settings from the Appspace Menu navigation bar, and click the Instance Settings tab.
In the Appspace Domain section, select the desired domain option to be used.
Default
Appspace Domain
- Select the Appspace Domain option, and enter in the desired subdomain.
Your Custom Domain
- Select the Your Custom Domain option, and enter in the custom domain URL.
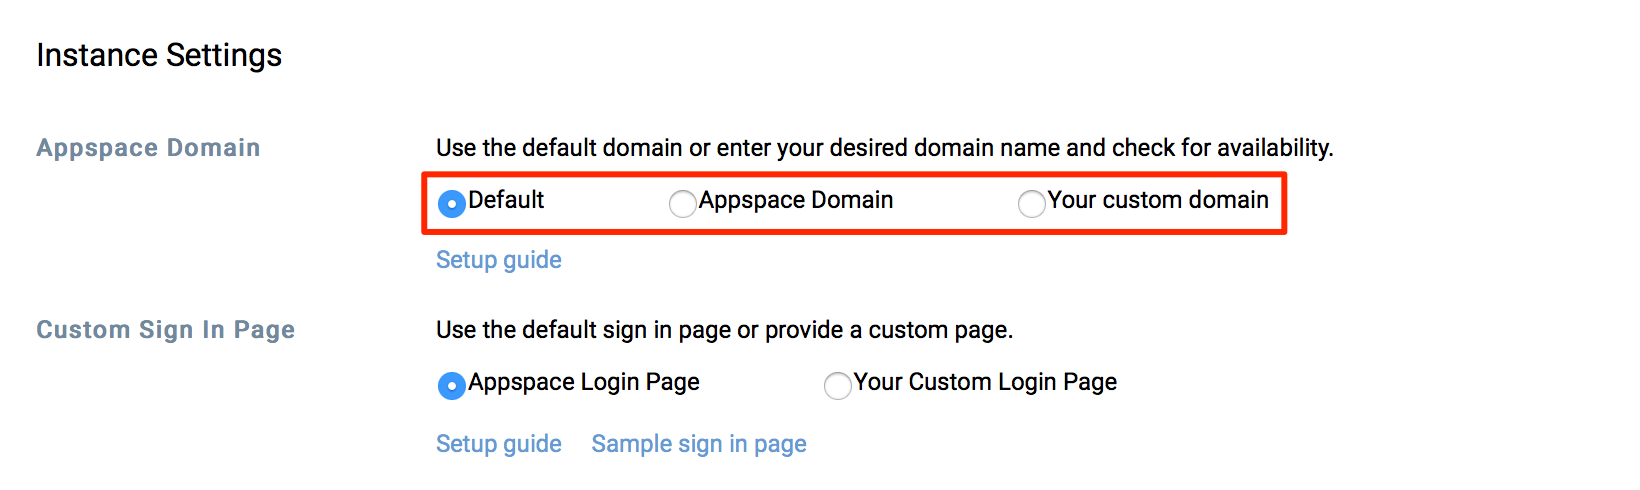
Click Save once done.
Custom Sign In Page
Create a custom sign in page.
To create the page, the login form must have the username and password HTML text inputs with the following names:
<input type=”text” name=”nexuslogin” id=”nexuslogin” />
<input type=”password” name=”nexuspassword” id=”nexuspassword” />
The login form must post to Appspace login page URL, for e.g. “http://appspace.nexusondemand.com/app/login.aspx”. After the custom login page is created, upload it to your public server.
The following is a sample custom login page and the associated HTML code behind it.
<html>
<head>
<title>My Custom Login Page</title>
</head>

<body>
<div id=”stylized” class=”myform”>
  <form id=”form” name=”form” method=”post” action=”http://appspace.nexusondemand.com/app/login.aspx”>
    <h1>Your custom login page</h1>
    <p>your company details here</p>

    <label>Username <span class=”small”>your appspace login</span> </label>
    <input type=”text” name=”nexuslogin” id=”nexuslogin” />
    <label>Password <span class=”small”>your appspace password</span> </label>
    <input type=”password” name=”nexuspassword” id=”nexuspassword” />
    <button type=”submit”>Login</button>
  </form>
</div>
</body>
</html>
Click Admin > Settings from the Appspace Menu navigation bar, and click the Instance Settings tab.
In the Custom Sign In Page section, select Your Custom Login Page, and enter in the custom login page URL.
Click Save once done.