Setting content expiry
By default, content added to the Library do not have an expiration date set.
You can now manage your library bandwidth by deleting unused content in a scheduled manner, either by:
setting an expiry date individually to each content, or
enabling automatic content deletion for unallocated or any content based on age for a user group library. However, when any age option is selected, content to be deleted will be selected from the date it was created or uploaded to the Library.
Once you set an expiry date to your content, an Appspace background agent runs daily to check for content items with expiry dates. The agent then proceeds to delete these content at midnight (UTC) on the set date(s).
When a content item has been deleted, it will no longer be allocated to any channel. All user and system actions related to this feature are logged in the user activity log in Reports.
This article provides the instructions to:
Warning
Please note that content deletion is permanent and deleted content cannot be recovered.
Set Expiry Date to Individual Content
To set an expiry date to one content item (at a time), follow the instructions below:
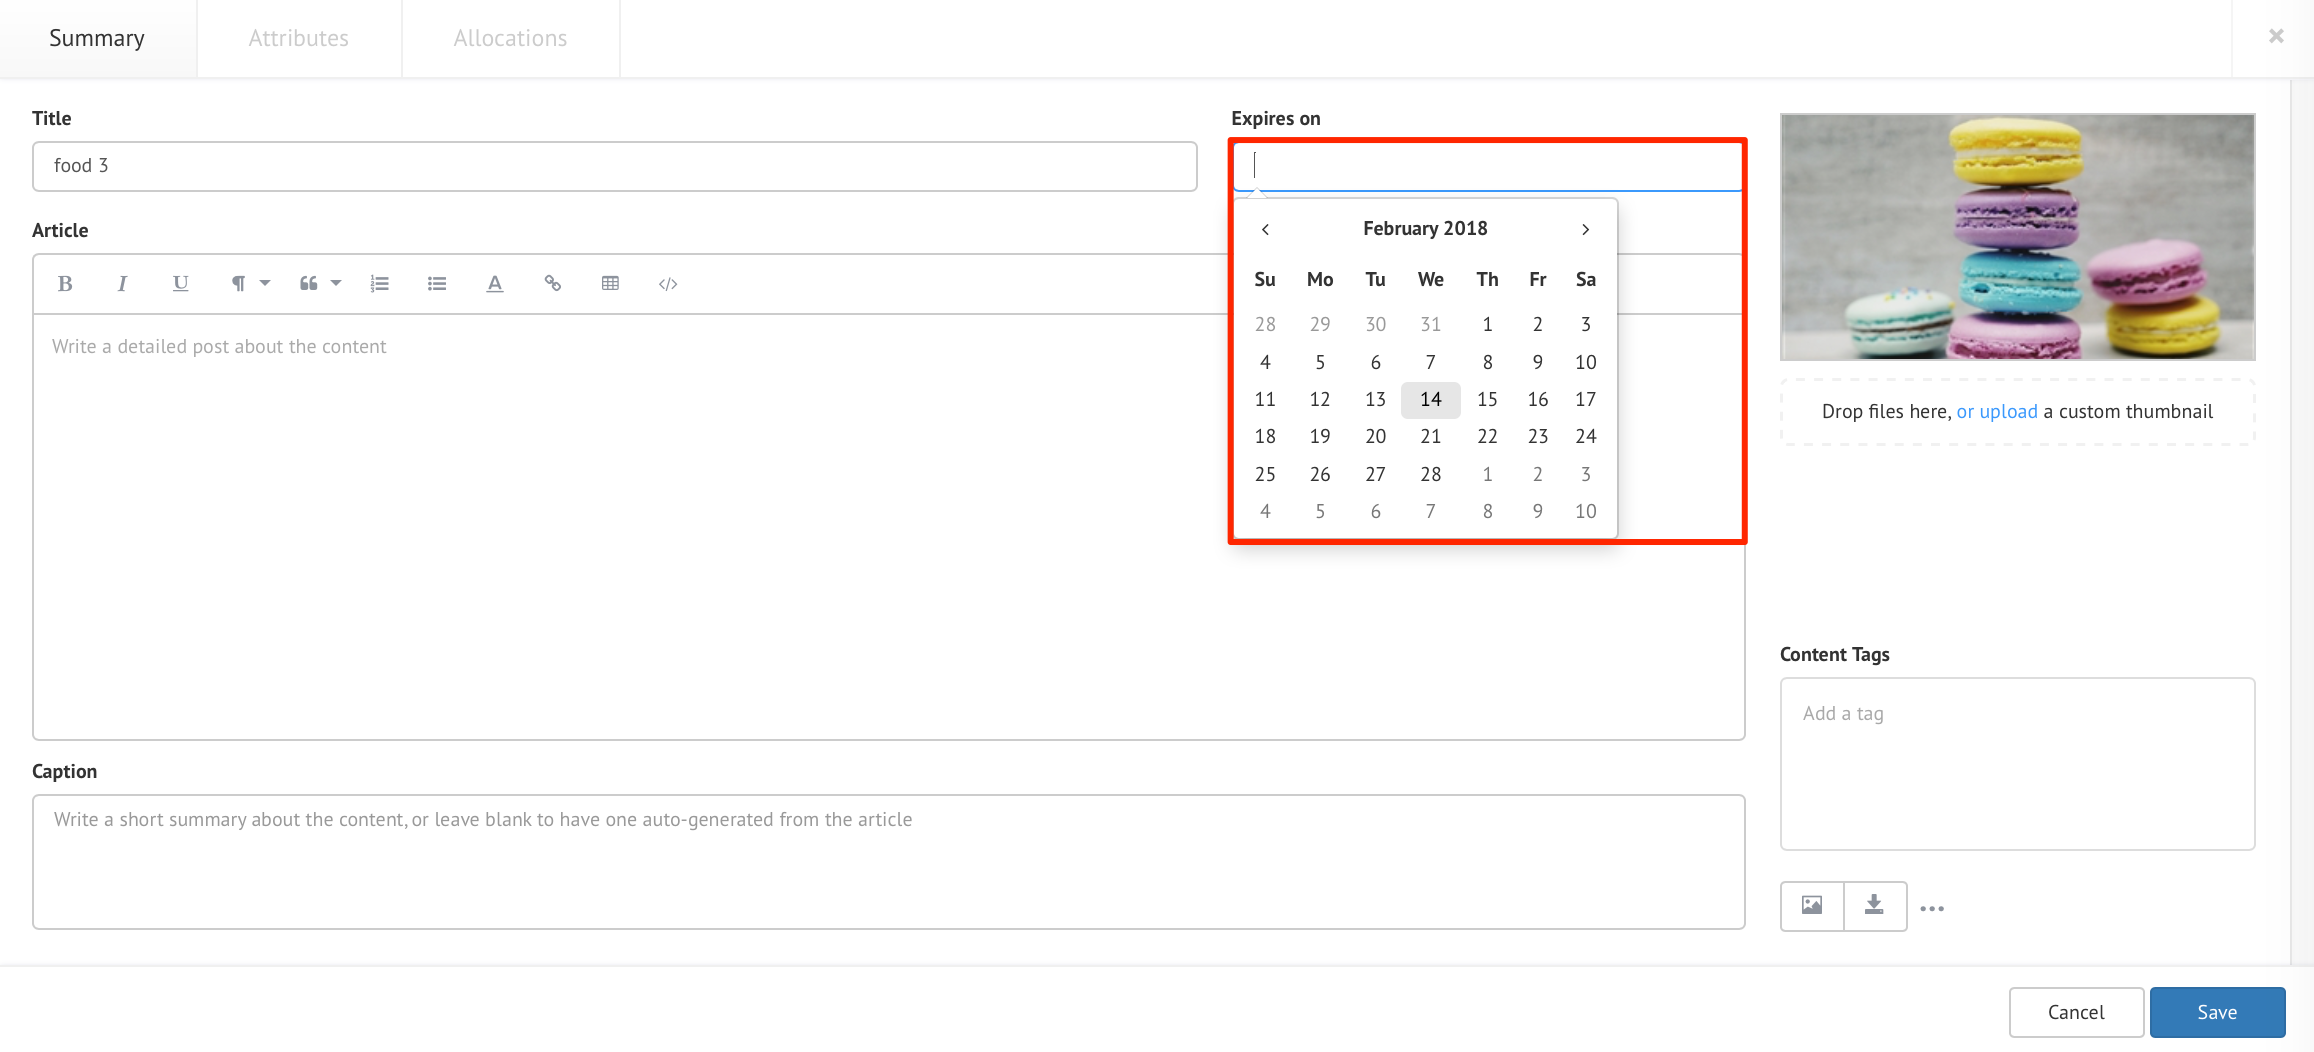
In Library, navigate to the desired content in the folder, and double-click the content to launch the content properties window.
In the Summary tab, click the Expires on text field and select the expiry date on the calendar displayed. Click Save once done.
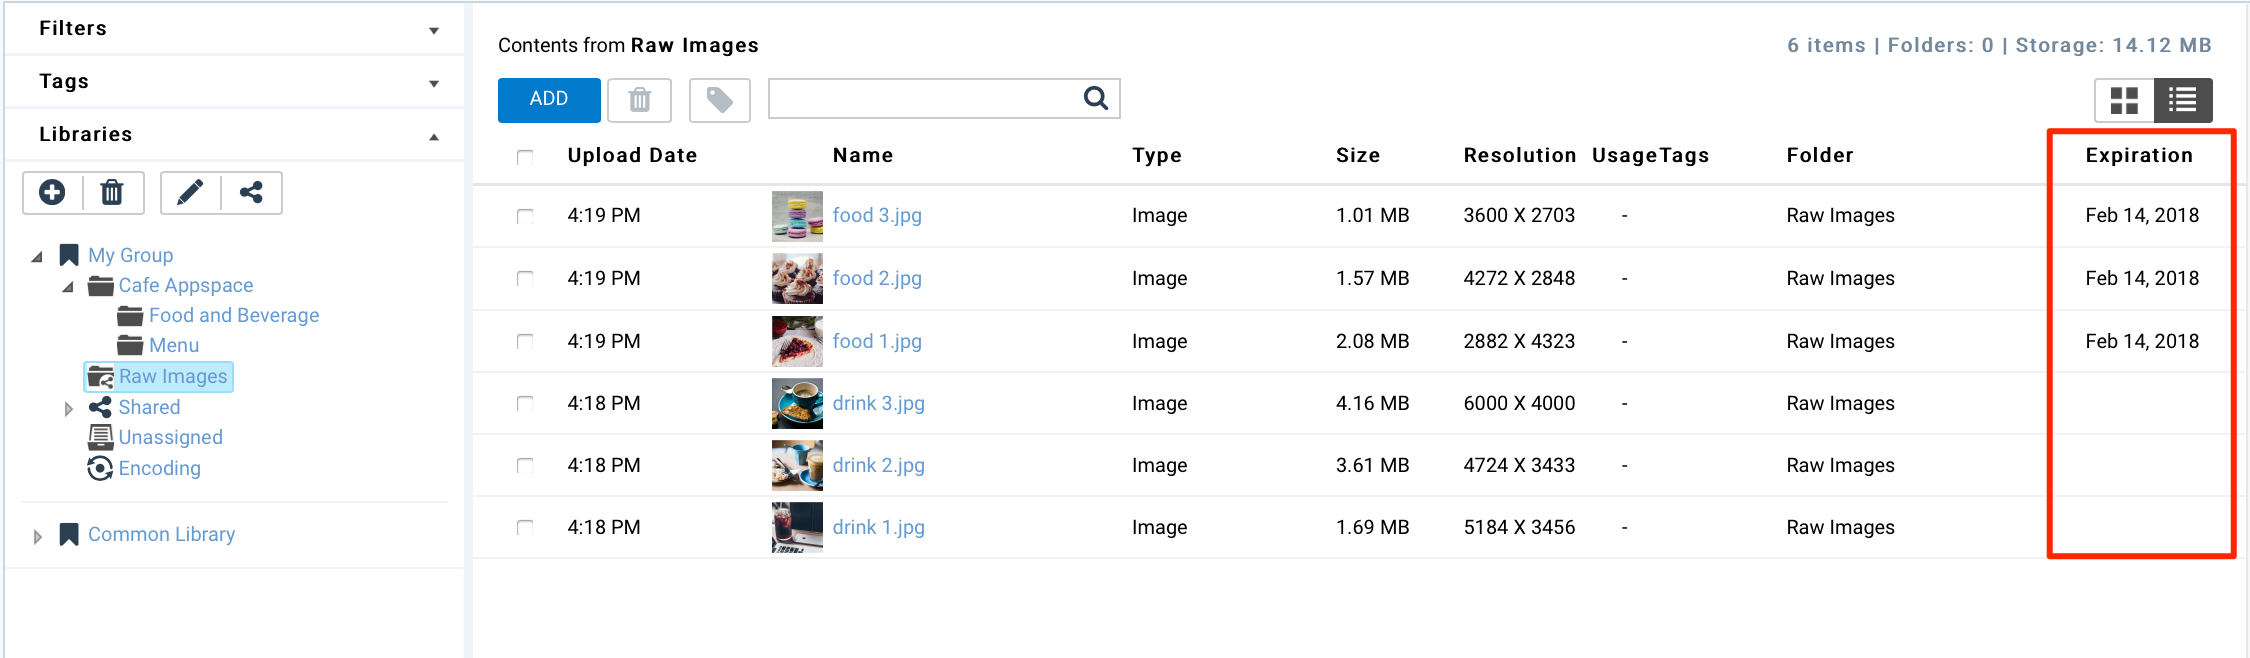
The expiry date is displayed next to the content item when viewing your Library in list view, or in the Content Properties window when you double-click the content item in icon view.
Note
To view the expiry dates of all content items within the folder, click the list view icon and click the Expiration column header to sort the expiry dates in ascending or descending order.
To view content items with expiry dates with filters applied:
Click the Filters arrow on the left pane.
Select the desired filter (by week, month, or a custom date) from the Expire by drop-down menu. Content items with the filtered expiry dates are displayed.

Note
To remove the expiry date, simply delete the set date from the Expires on text field in the content properties window, and click Apply.
Adding content with expiry date to an advanced channel (sign)
What you need to know about adding content items with expiry dates to a sign:
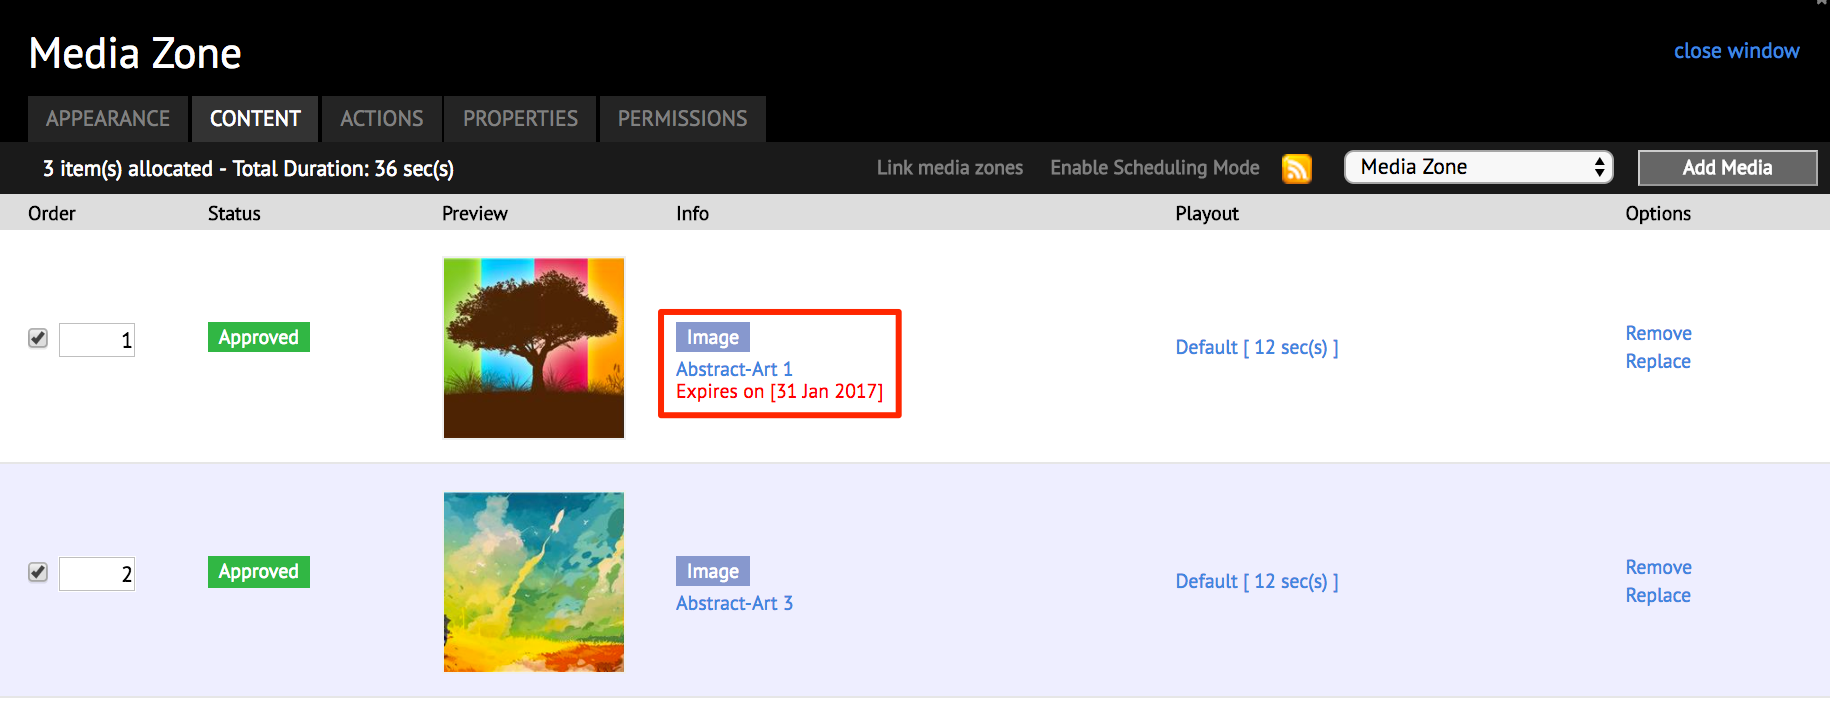
After a content item with an expiry date is added to a sign, the expiry date is displayed next to the content item in the playlist.
Once a content item is deleted on the set expiry date, the content item will no longer appear in any sign.
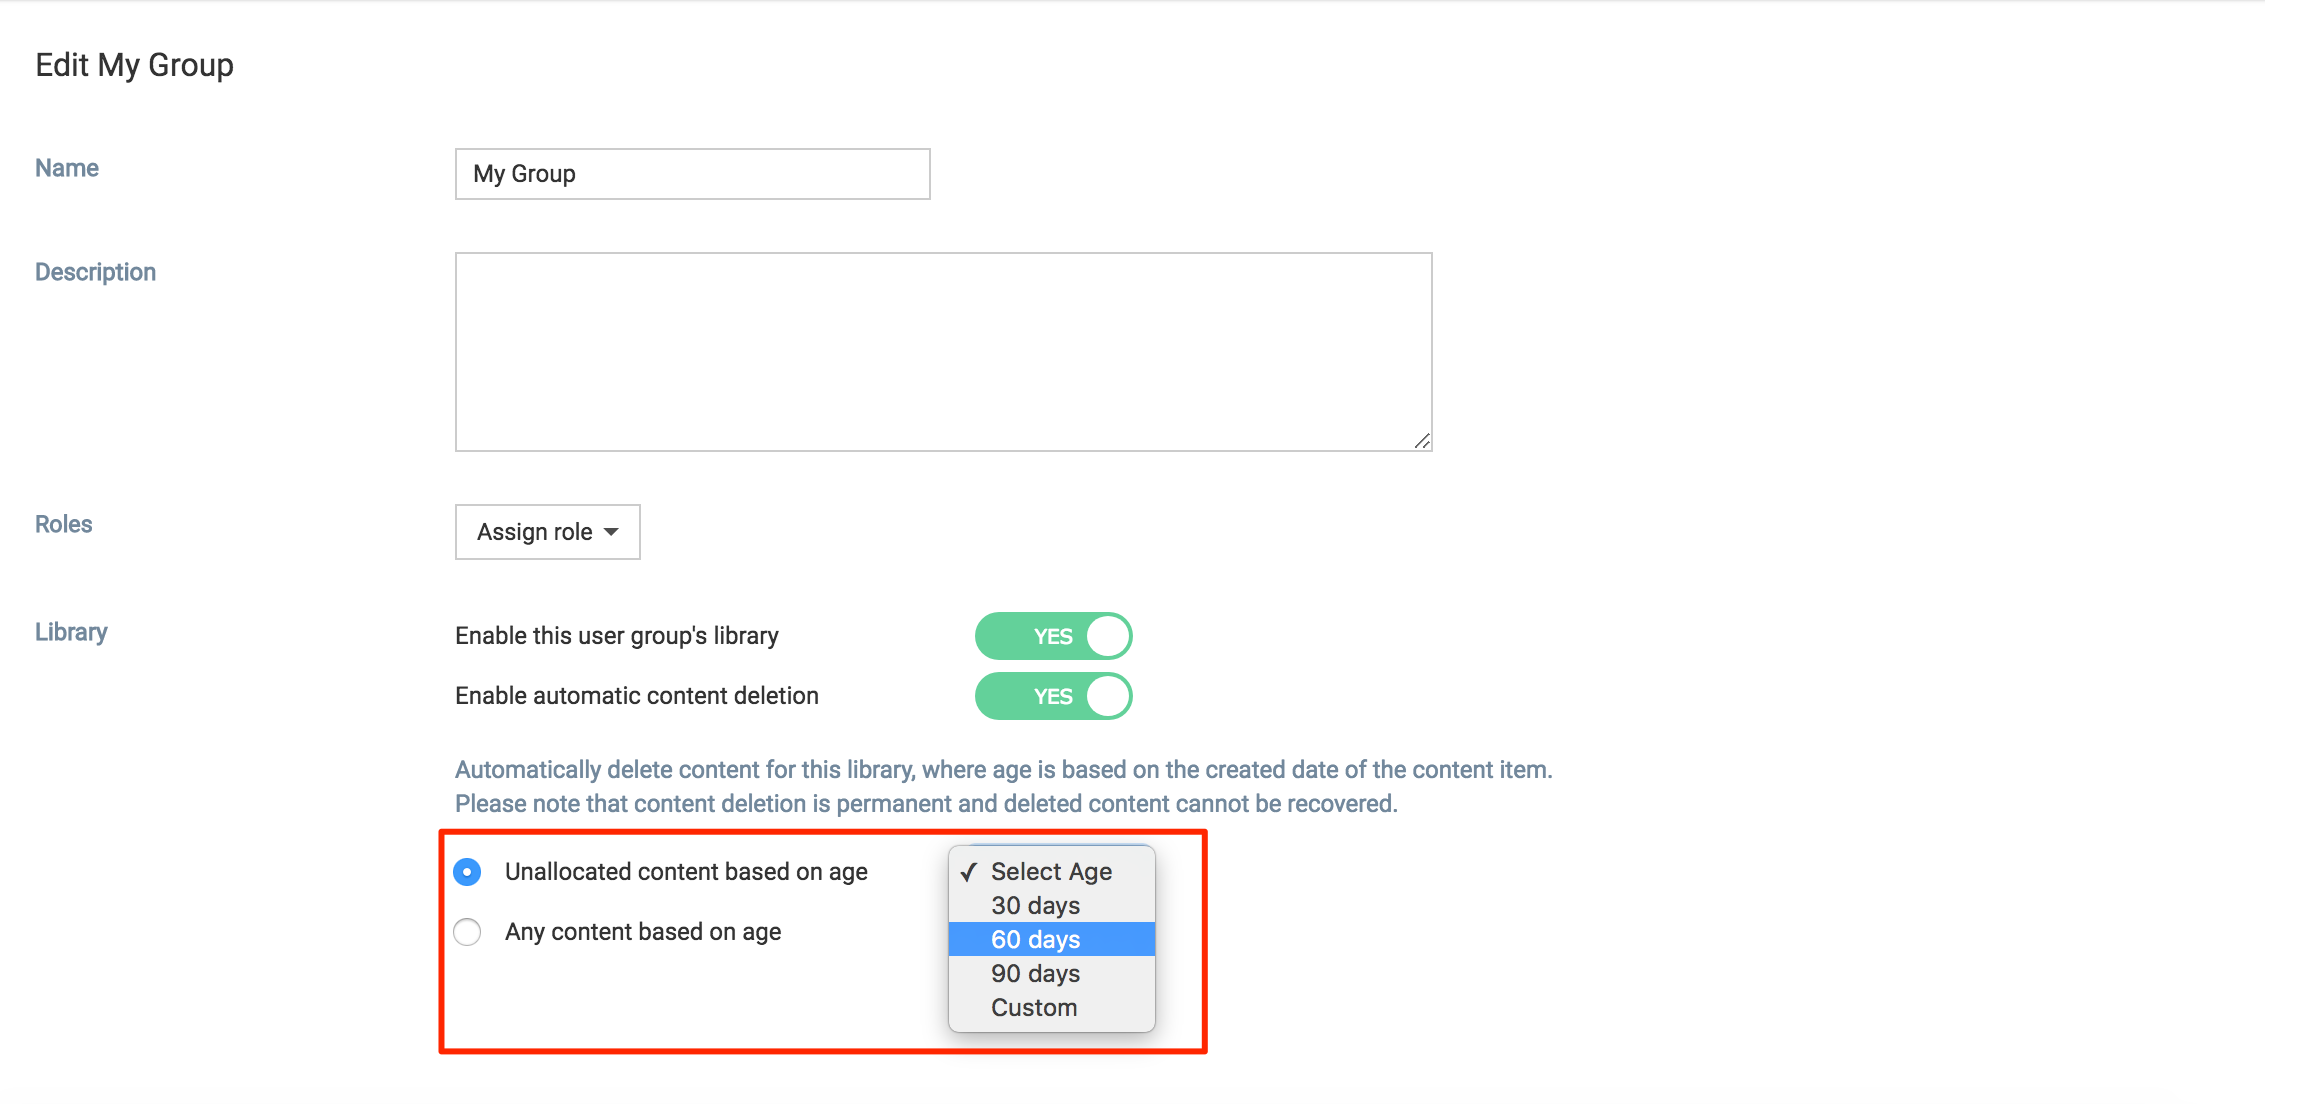
Enable Automatic Content Deletion in User Group Library
Warning
Any age option selected here will select and delete all content from the date it was created or uploaded to the Library, unless if the individual content already has an expiry date set to it. This setting will be saved permanently for the user group library unless it is changed.
To delete content in a user group library based on age, follow the instructions below:
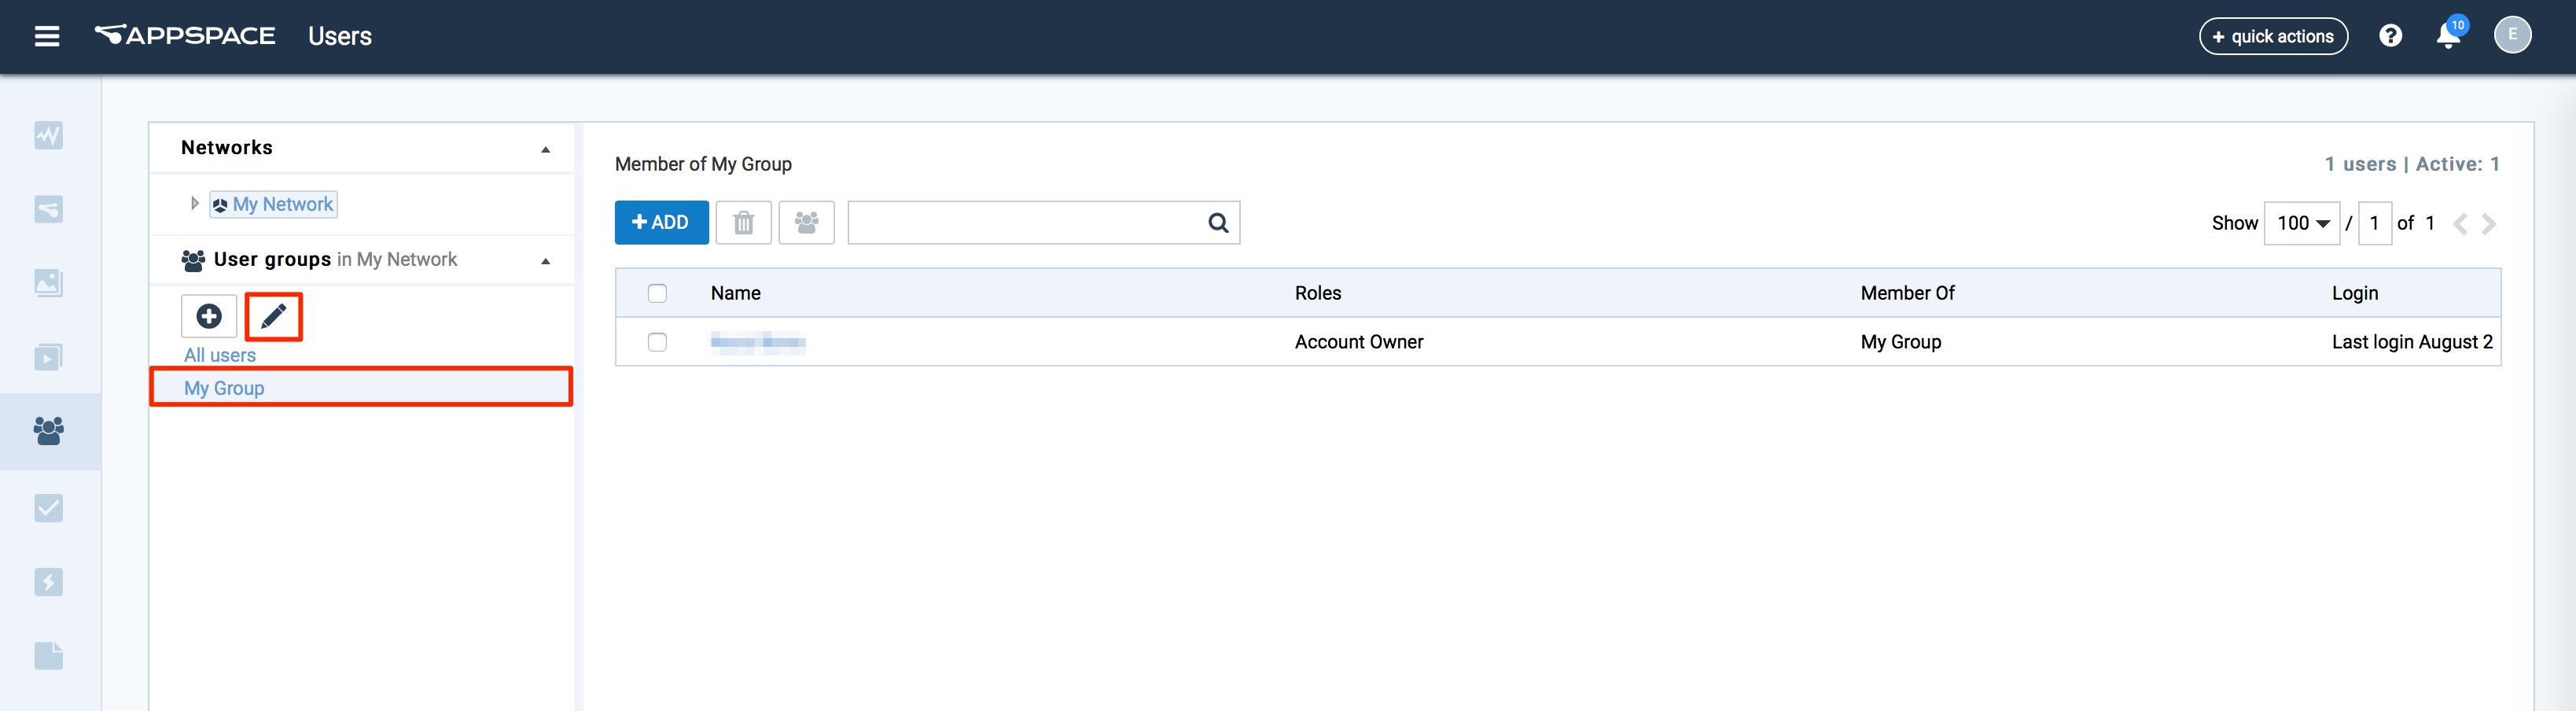
Navigate to Users from the Appspace menu.
Select a user group and click the Edit button.
Slide the Enable automatic content deletion to YES.
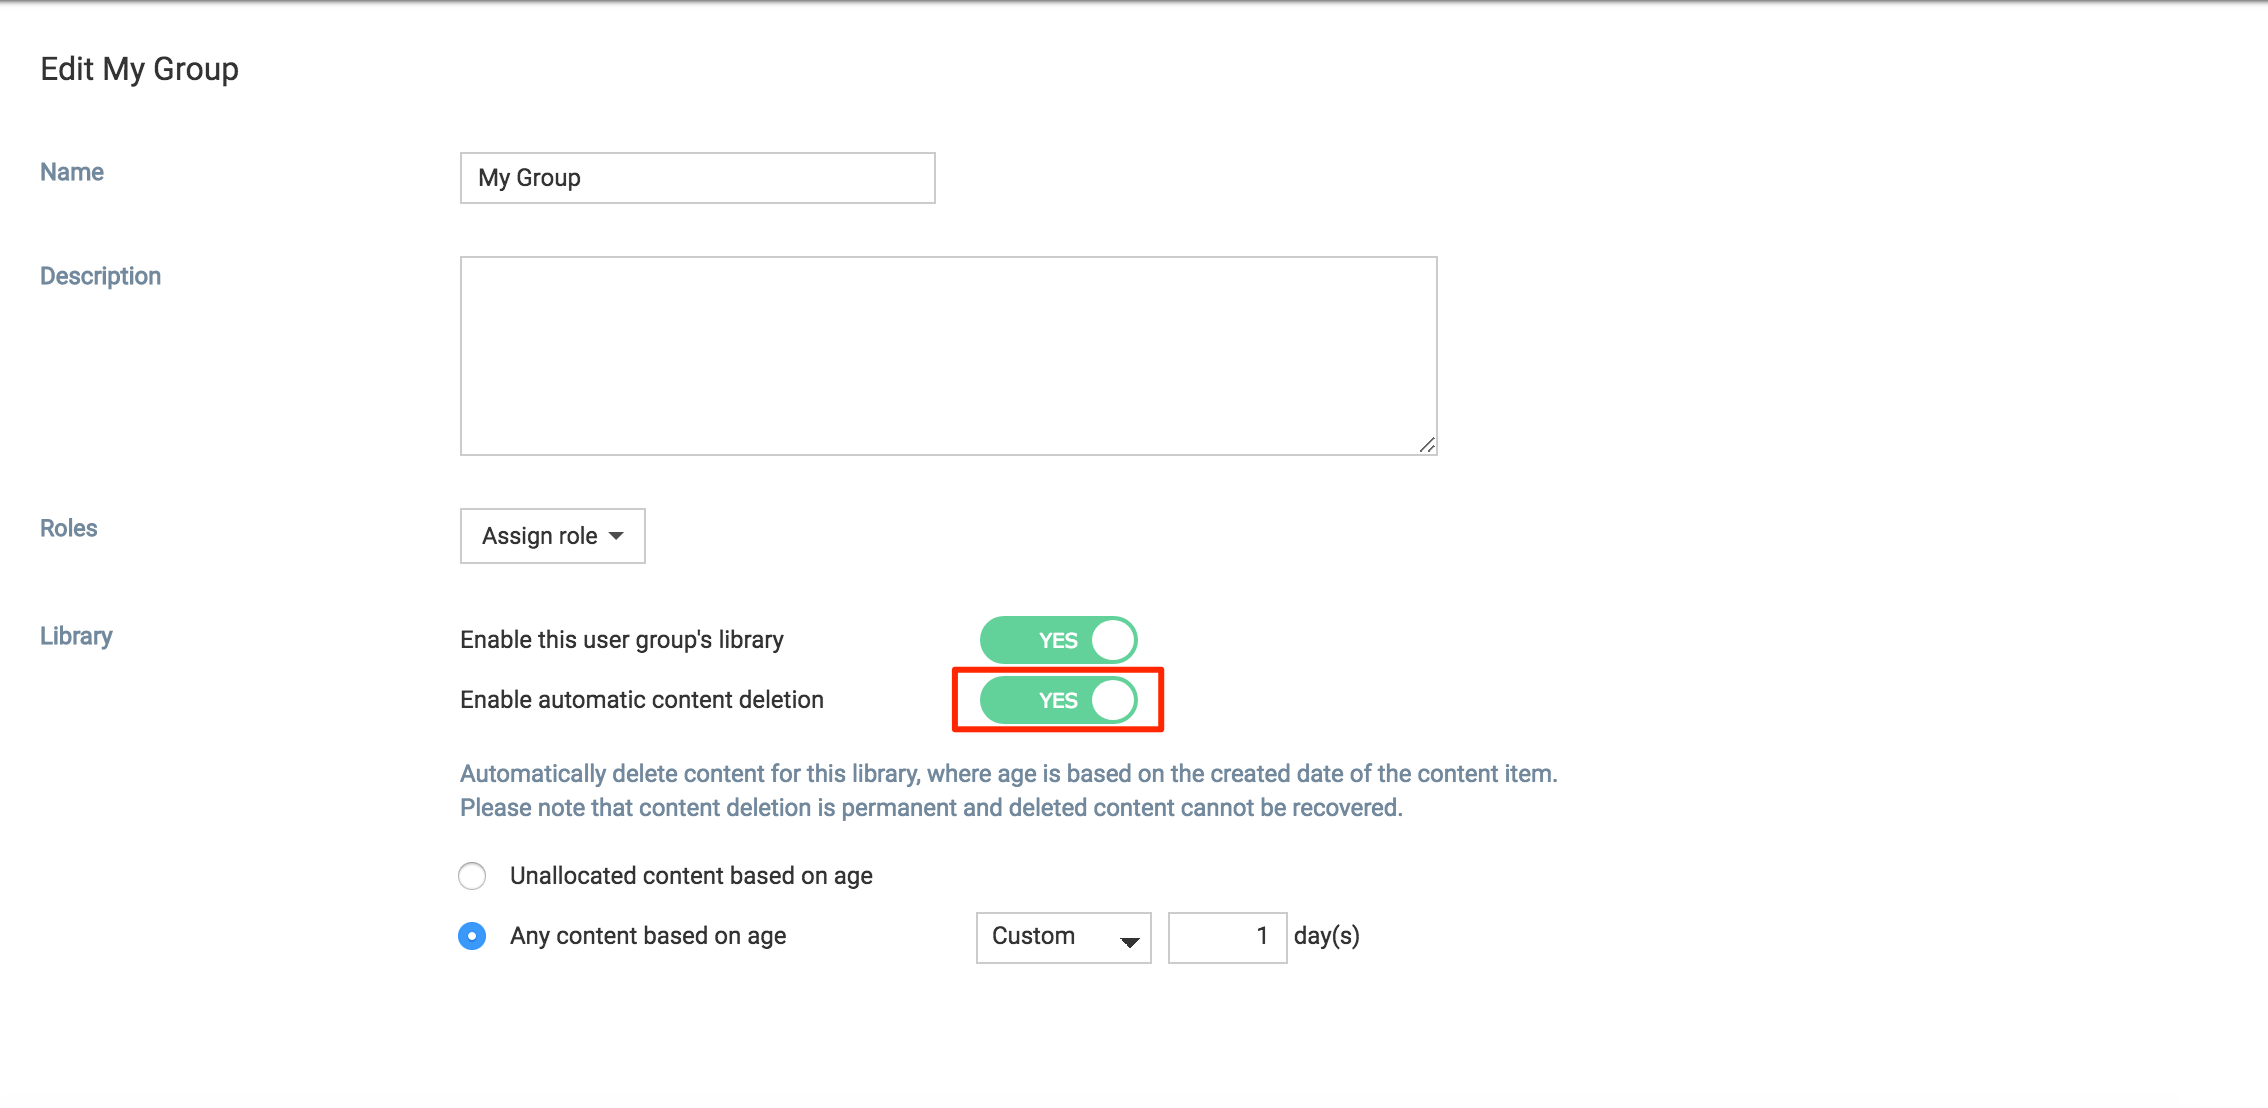
Select the desired content deletion option for the user group’s library, and select the desired time frame from the drop-down menu:
- Unallocated content based on age
- Any content based on age
Important
- Content Age is based on the created date of the content.
- Content Custom Age is defined from 1 - 365 days from created date.
- Content items that have been set with individual expiry dates take precedence, over user group library expiry dates.
- Content added to cards that have been updated, will be considered as new content.
Click Save once complete.