Adding tag rules to content in advanced channels
Tag rules provide a quick and simple way of targeting content playback to specific groups of players running the same app. By using player tag rules, content managers can filter playback of content in a media zone widget. Tag rules can be applied to a specific content file in a playlist or schedule. If no tags are selected, the content will playback on all players.
Tag rules can be applied to:
- Individual Content Items within a Playlist
- Playlists
- Layouts
This article provides the instructions to add, edit, and manage device tags within Networks.
- Tagging Individual Content Items Within a Playlist
- Untagging Individual Content Items Within a Playlist
- Tagging Scheduled Playlists
- Untagging Scheduled Playlists
- Tagging Scheduled Layouts
- Untagging Scheduled Layouts
Prerequisite
- You must turn on Automatic Sync. Content tagging, and layout tagging will not function when Automatic Sync is set to OFF in a sign.
- Players must be tagged first, before you tag content. Refer to Managing player tags.
Tagging Individual Content Items Within a Playlist
Click Channels from the Appspace Menu navigation bar, and click the Channels tab.
Select the desired advanced channel.
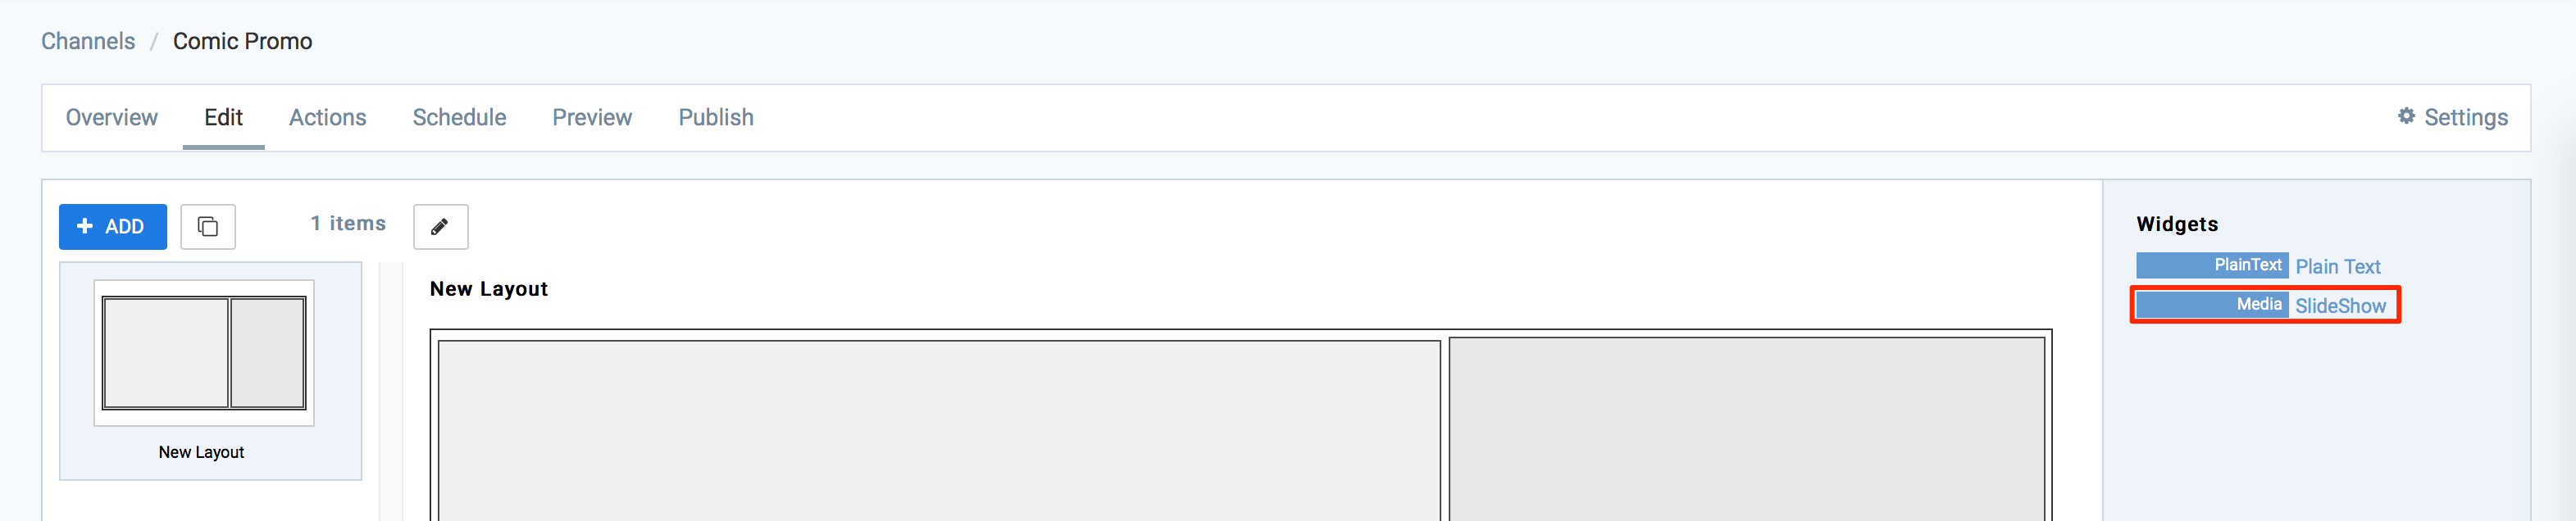
Click the Edit tab, and click the desired Media zone widget to access the widget properties.
Click the CONTENT tab, and click the content name link to access the content properties.
Click the Playout Properties tab, and click the Click here to add tag rules link to display the Tag Rules page.
Select the desired tag, and the associated players are displayed in the main pane. To apply the selected tag to the playlist, click APPLY.
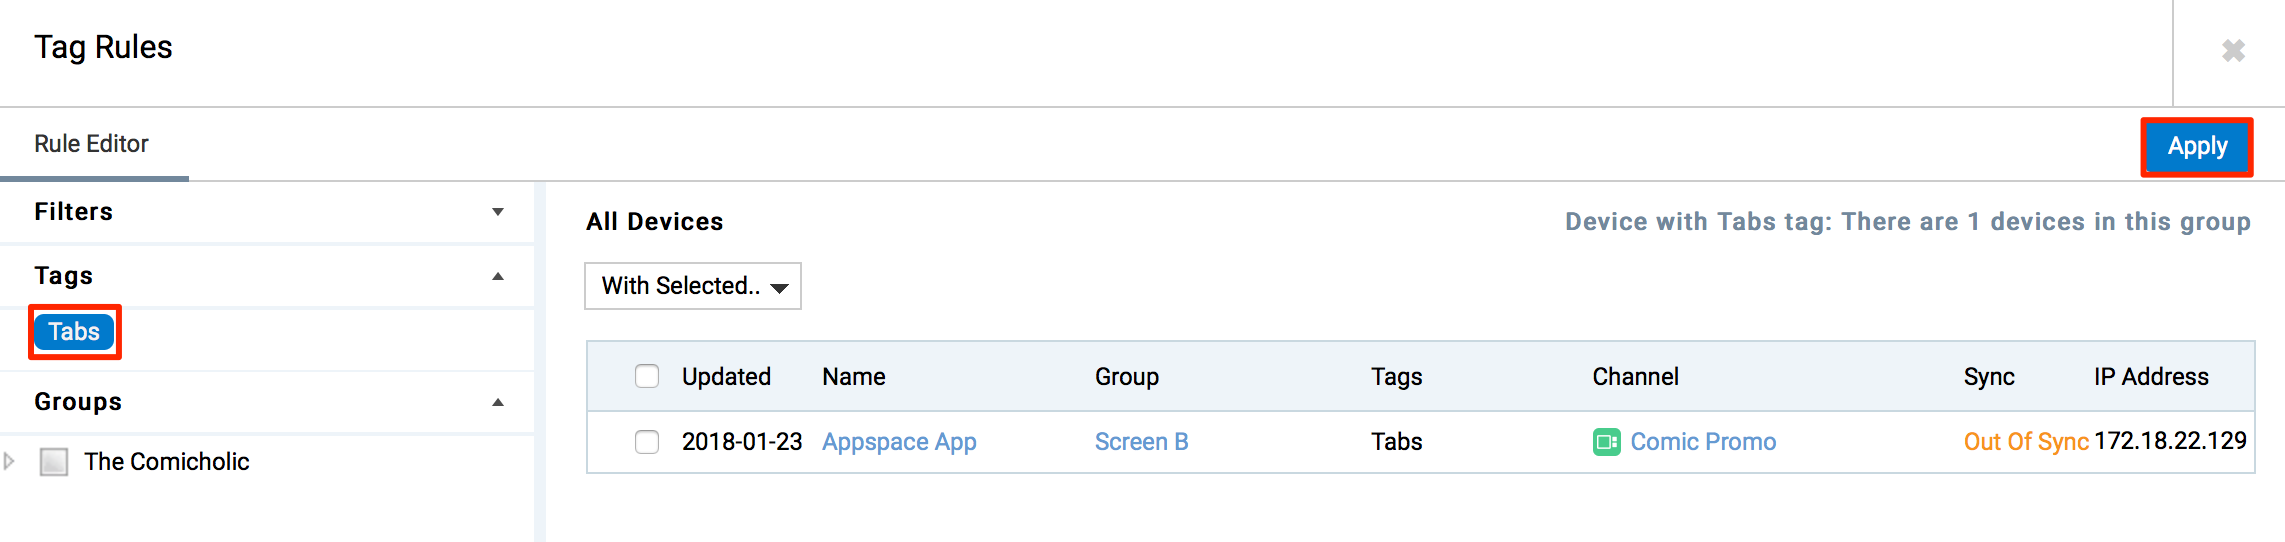
Some main sections of the Tag Rules page are
- Filters – Used to view players associated with the current sign, or sign with linked media zones.
- Mode – Logical operator when selecting more than 2 tags.
- Tags – List of available tags.
- Groups – Allows filtering of device groups.
Click Save on the Playout Properties tab.
Untagging Individual Content Items Within a Playlist
Click Channels from the Appspace Menu navigation bar, and click the Channels tab.
Select the desired advanced channel.
Click the Edit tab, and click the desired Media zone widget to access the widget properties.
Click the CONTENT tab, and click the content name link to access the content properties.
Click the Playout Properties tab, and click the Click here to add tag rules link to display the Tag Rules page.
Deselect the desired tag, and click APPLY.
Click Save on the Playout Properties tab.
Tagging Scheduled Playlists
Note
Playlist Scheduling must be enabled.
Click Channels from the Appspace Menu navigation bar, and click the Channels tab.
Select the desired advanced channel.
Click the Edit tab, and click the desired Media zone widget to access the widget properties.
Click the CONTENT tab, and click the desired schedule to access its playlist.
Click the More Options link.
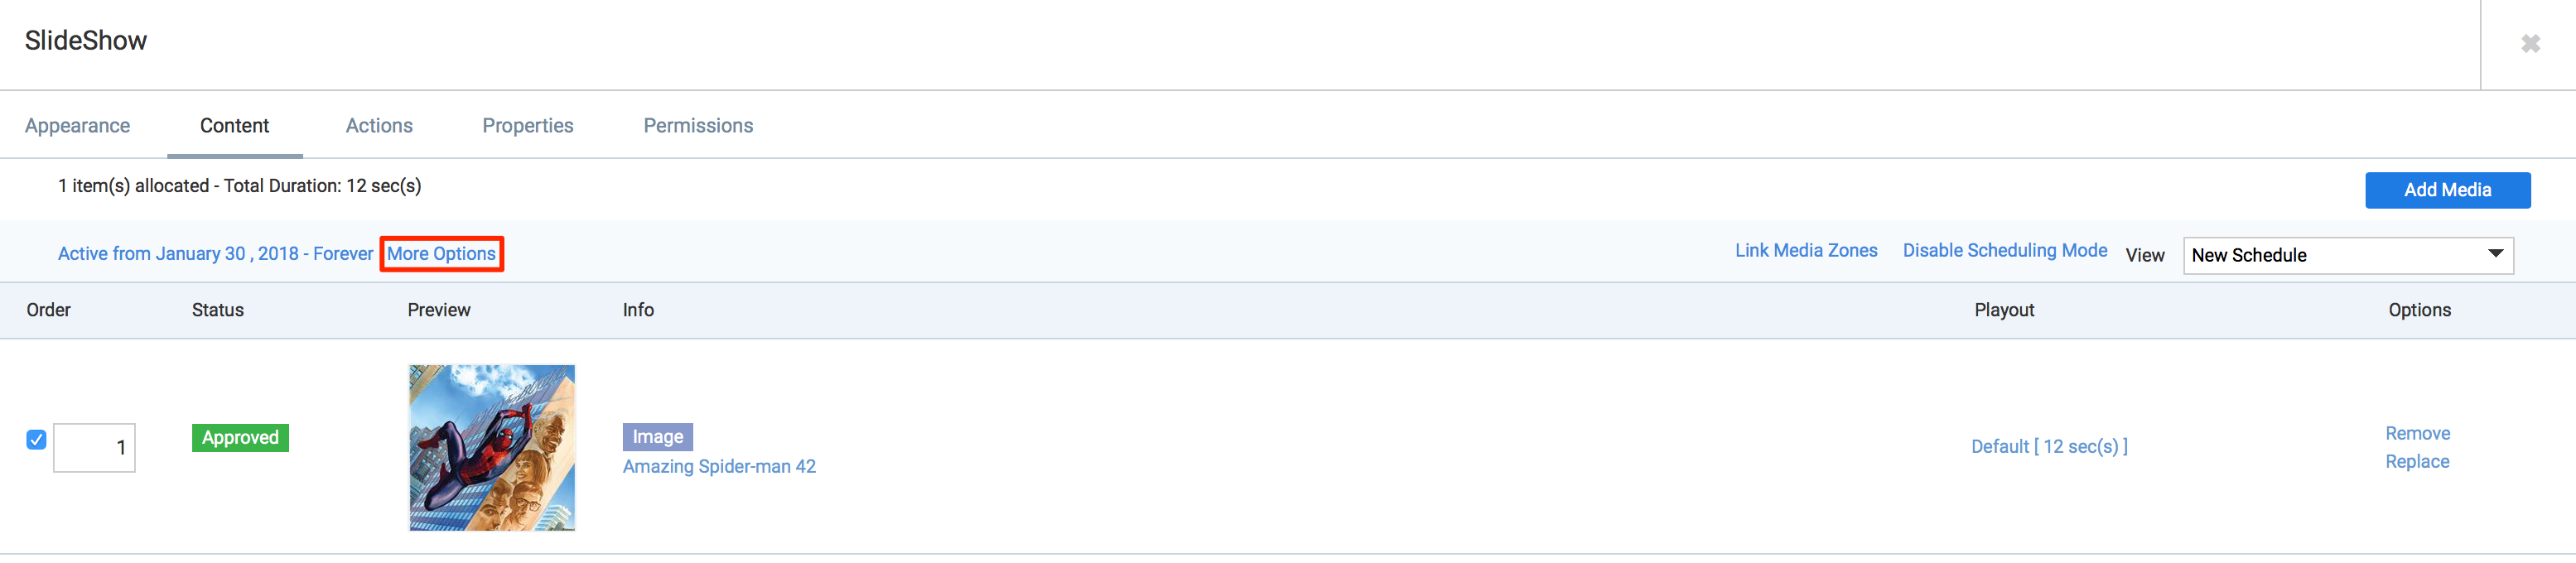
In the Schedule page, click the Click here to add tag rules link to display the Tag Rules page.
Select the desired tag, and the associated players are displayed in the main pane. To apply the selected tag to the playlist, click APPLY. Click APPLY again at the Schedule page.
Some main sections of the Tag Rules page are
- Filters – Used to view players associated with the current sign, or sign with linked media zones.
- Mode – Logical operator when selecting more than 2 tags.
- Tags – List of available tags.
- Groups – Allows filtering of device groups.
Untagging Scheduled Playlists
Click Channels from the Appspace Menu navigation bar, and click the Channels tab.
Select the desired advanced channel.
Click the Edit tab, and click the desired Media zone widget to access the widget properties.
Click the CONTENT tab, and click the desired schedule to access its playlist.
Click the More Options link.
In the Schedule page, click the Click here to add tag rules link.
Deselect the desired tag, and click APPLY. Click APPLY again at the schedule page.
Tagging Scheduled Layouts
Note
Layout Scheduling must be enabled.
Click Channels from the Appspace Menu navigation bar, and click the Channels tab.
Select the desired advanced channel.
Click the Schedule tab and click the desired layout schedule.
Click the More Options link.
In the Schedule page, click the Click here to add tag rules link to display the Tag Rules page.
Select the desired tag, and the associated players are displayed in the main pane. To apply the selected tag to the playlist, click APPLY. Click APPLY again at the Schedule page.
Some main sections of the Tag Rules page are
- Filters – Used to view players associated with the current sign, or sign with linked media zones.
- Mode – Logical operator when selecting more than 2 tags.
- Tags – List of available tags.
- Groups – Allows filtering of device groups.
Untagging Scheduled Layouts
Click Channels from the Appspace Menu navigation bar, and click the Channels tab.
Select the desired advanced channel.
Click the Schedule tab, and click the desired layout schedule.
Click the More Options link.
In the schedule page, click the tag link to display the Tag Rules page.
Deselect the desired tag, and click APPLY. Click APPLY again at the schedule page.