Install Appspace App on Cisco IEC
Important
On June 19, 2017, Cisco announced that it would no longer develop or support the Interactive Experience Client 4650 (IEC) device. Instead, Cisco partner Moderro would take over the management and support of the solution.
Customers who wish to experience the benefits of the next evolution of the Appspace App may use the Appspace Progressive Web App available via all browsers. However, please contact Moderro for information and support.
If purchasing devices from Cisco, please note that we support these new Cisco Collaboration Endpoints.
Warning
These instructions are no longer applicable.
This article provides the instructions to configure and register Cisco Interactive Experience Client (IEC) devices for Appspace.
Prerequisites
The device must meet the manufacturer’s minimum hardware and technical specifications, as well as the Appspace App’s minimum requirements. Please refer to Appspace App requirements.
Ensure the device has been licensed and registered with the Cisco Interactive Experience Manager (IEM).
Ensure the device has been installed with the latest firmware (v 2.3.4b or higher).
An active Appspace account, with sufficient Device IDs to register the device.
An active Internet connection.
It is recommended that the device clock is set to automatically retrieve time from a Network Time Protocol (NTP) server, with the correct time zone, in order for it to sync correctly with the Appspace server.
Note
Appspace cloud servers by default retrieve time from a NTP server. If an Appspace on-premises server is used, ensure the server time is automatically retrieved by a NTP server.
Please ensure your network is configured to allow Appspace whitelist URLs and the relevant network ports.
On your proxy server, whitelist the hostnames listed in the ‘How to set up networks with SSL content filters’ section in the following article: https://support.google.com/chrome/a/answer/3504942#sslinspection.
Configuring Cisco IEC for Cloud
Important
The device must be licensed and registered with Cisco Interactive Experience Manager platform.
On your web browser, navigate to the Cisco Interactive Experience Manager (IEM) platform via https://iem.ciscoiservices.com, and log in with your Cisco IEM credentials.
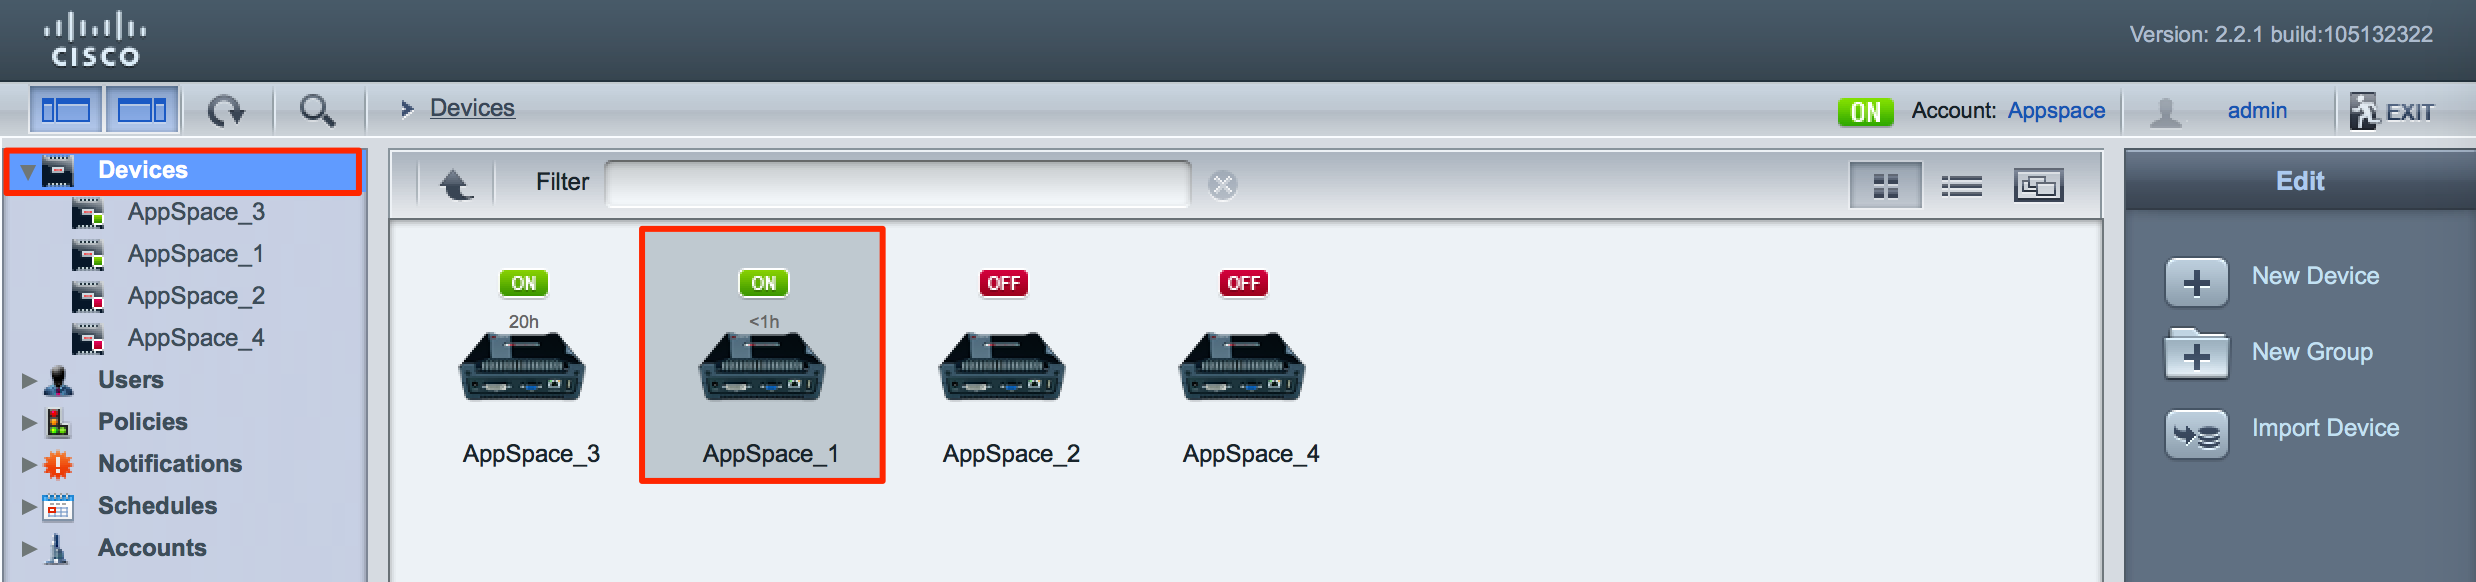
Click Devices in the navigation tree, and double-click the Cisco IEC device to configure.
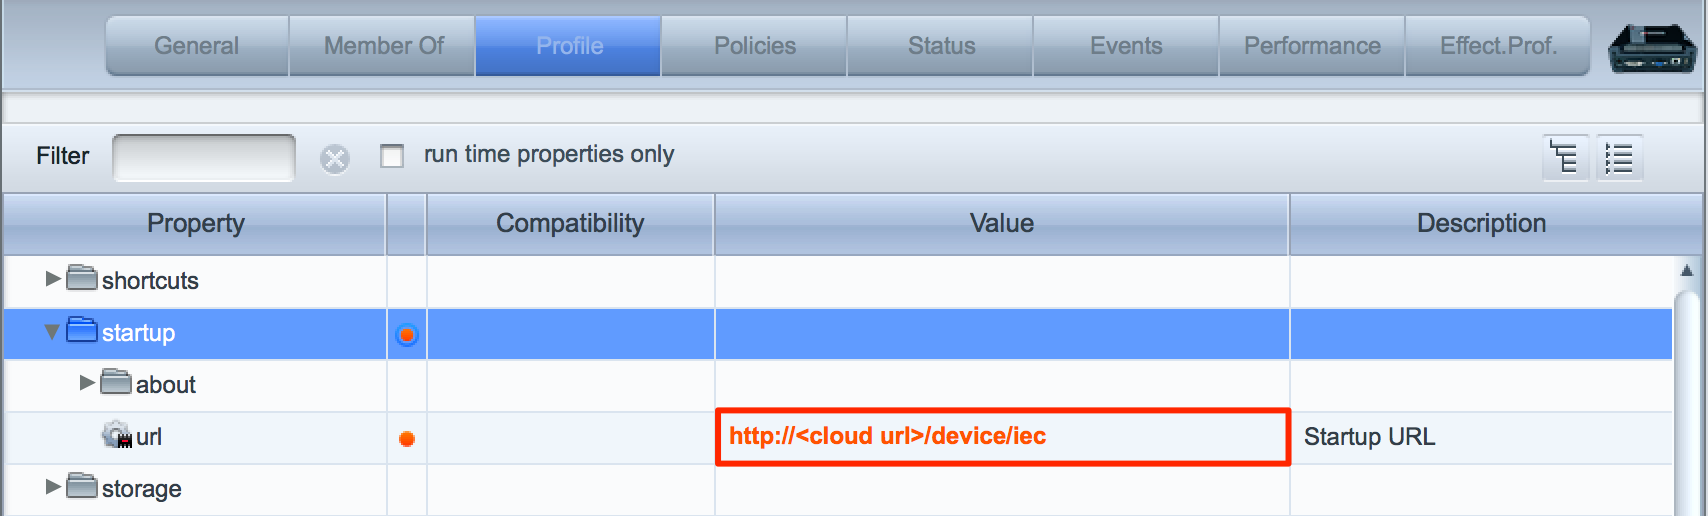
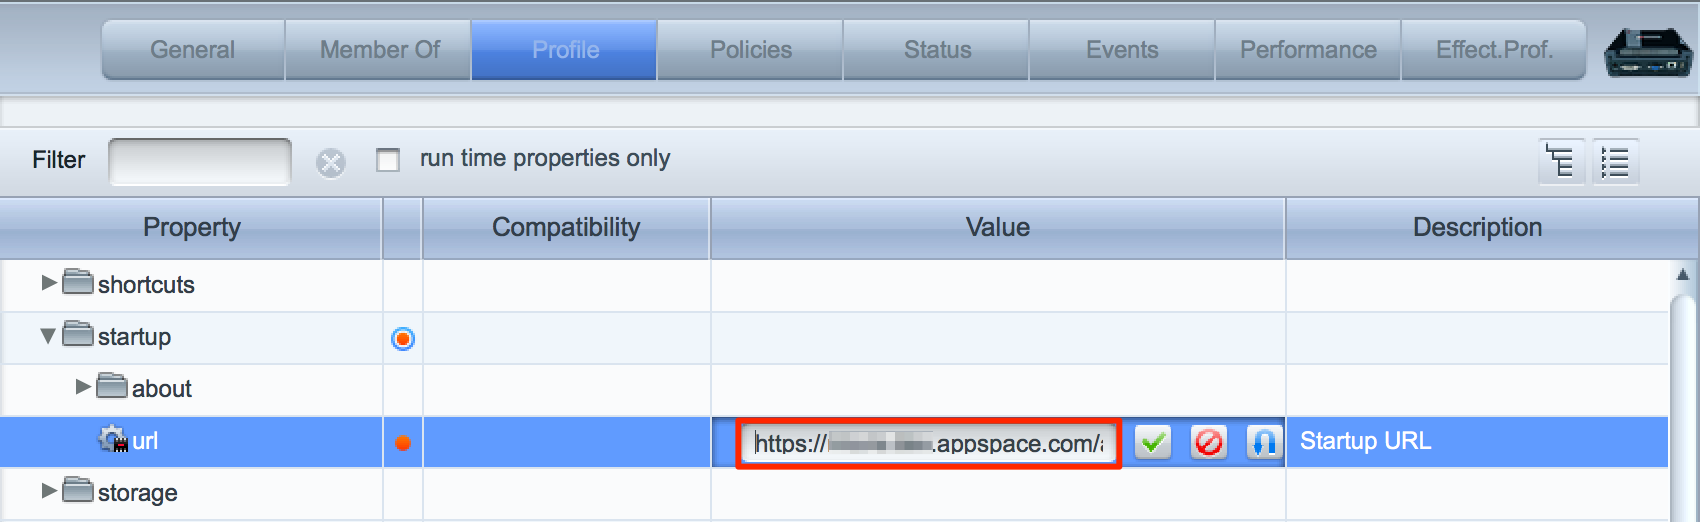
Click the Profile tab, and navigate to the browser > startup > url property.

Enter in the IEC URL path as the url value, as follows: https://<Appspace Cloud URL>/device/iec
The IEC URL path is determined by your Appspace Cloud server URL.
Example: https://app1.cloud.appspace.com/device/iec
Note
To determine the Appspace Cloud URL, log in to your Appspace Cloud account and look at the URL on your address bar. Part of the URL, as highlighted in the image below, would be your Appspace Cloud URL path.

Set the values for the following properties as per the table below:
Property Value browser > cache > media > clear true browser > cache > media > enabled true browser > cache > web > clear true browser > cache > web > enabled true 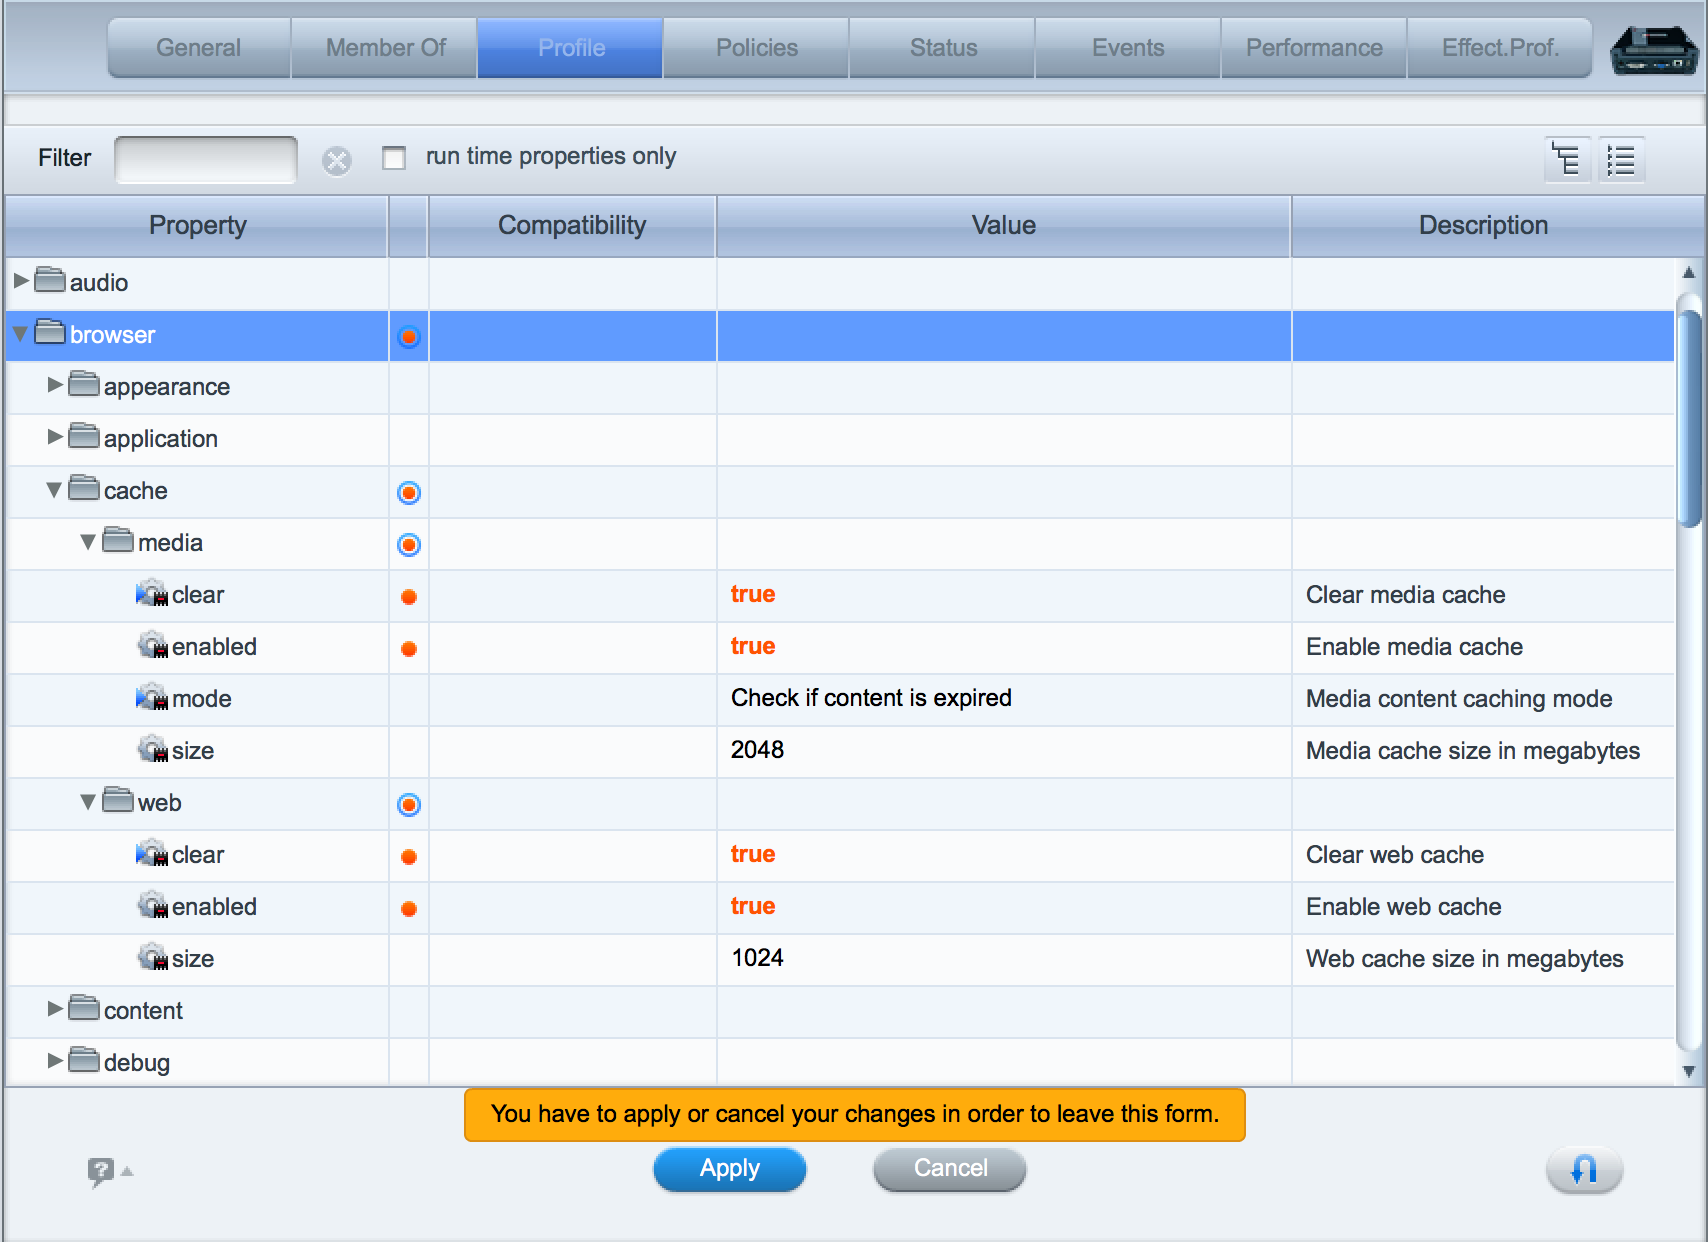
Click Apply to save settings, and the device will start loading the Appspace App.
Configuring Cisco IEC for On-Premises
Important
The device must be licensed and registered with Cisco Interactive Experience Manager platform.
Login to your Appspace Cloud account.
Click System > Downloads from the Appspace Menu navigation bar.
Download the Appspace App for Cisco IEC package (appspaceapp.zip) and save it on your computer.
Login to your Appspace On-Premises account.
Click System > Deployments from the Appspace Menu navigation bar.
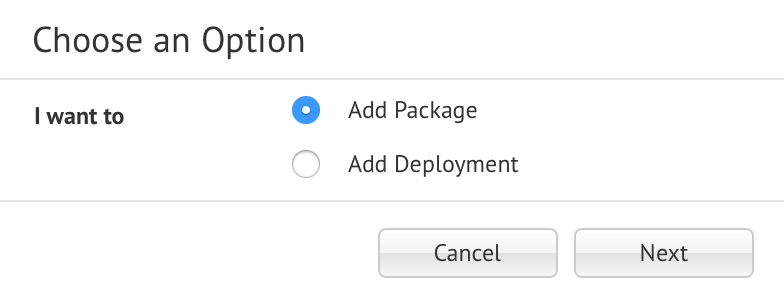
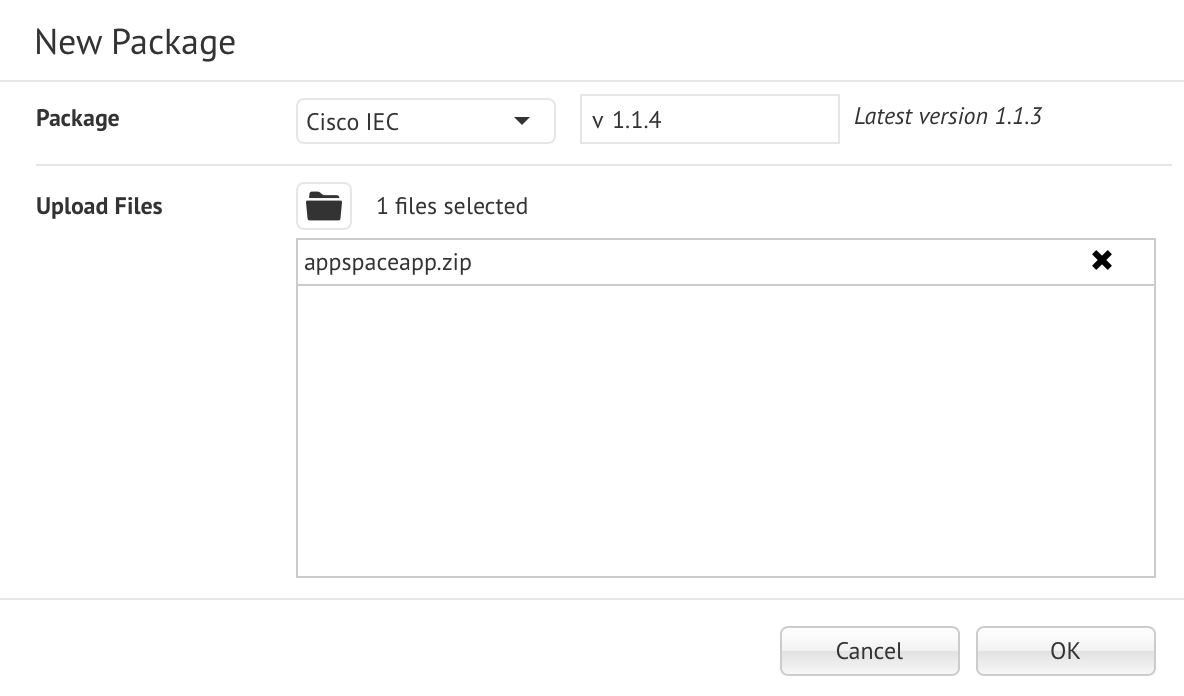
Select the desired network, and click the Add Package/Deployments button.

Select Add Package, and click Next.
In the Package drop-down menu, select Cisco IEC, and enter in the version of the package.
Click the Upload button, and upload the appspaceapp.zip file downloaded in Step 2.
In the Deployments page, select the desired network, and select Deployments & packages in the View by drop-down menu. Enter in Cisco IEC in the search bar to filter the results.

Click on the latest Cisco IEC Package.

In the Package Information page, copy the Package URL.

On your web browser, navigate to the Cisco Interactive Experience Manager (IEM) platform via https://iem.ciscoiservices.com, and log in with your Cisco IEM credentials.
Click Devices in the navigation tree, and double-click the Cisco IEC device to configure.
Click the Profile tab, and navigate to the browser > startup > url property.
Paste the IEC URL path from Step 10 above as the url value.
Set the values for the following properties as per the table below:
Property Value browser > cache > media > clear true browser > cache > media > enabled true browser > cache > web > clear true browser > cache > web > enabled true
Click Apply to save settings, and the device will start loading the Appspace App.
-