The Appspace integration with Vimeo empowers corporations with the ability to leverage their valuable repository of engaging video content stored in Vimeo across digital signage platforms. By utilizing the Appspace Vimeo Card, organizations can effortlessly display their curated videos, enhancing the corporate visual identity and captivating their target audience with a sophisticated and impactful brand experience. This seamless integration enables corporations to maximize the effectiveness of their communication efforts and elevate their overall brand presence in the corporate landscape.
With the introduction of Content Categories in Appspace 8.x, the Vimeo Card can be found under the Culture & Values content category when creating a card.
Visit our Appspace Card Gallery to find the perfect card to deliver your message.
This article provides instructions to create, configure, and manage the Vimeo Card.
Features released in Vimeo Card 1.2.0
- The Vimeo card now allows users to showcase Vimeo videos, choosing the number of items to display per playback cycle, with the card showing the corresponding number of videos from the showcase. Additionally, users can determine the playback sequence by selecting from three options: Default, which plays videos in order; Shuffle, which randomizes playback; and Release Time, which plays videos from newest to oldest based on their publishing time. These features provide greater flexibility and control over how Vimeo content is presented.
Prerequisite
- An Account Owner, Publisher, Editor, or Author role with a Platform User license.
- Supported Device for display or on the Employee App. Please refer to our Supported Appspace Cards article for compatible devices.
- Please note that only public Vimeo videos are supported on the Vimeo Card in this release. Private Vimeo videos and collections are not supported in this release.
Create and Configure Vimeo Card
Follow the instructions below to create and configure the Vimeo Card:
- Log in to the Appspace console.
- Click Library from the ☰ Appspace menu, and select the desired library or folder to create the content in.
Alternative Action
- Quick Action: Click + Quick Action from the Appspace top navigation bar, and select Create Card.
- Via Playlist Channel: Follow the instructions in the Add Content to Playlist Channels article.
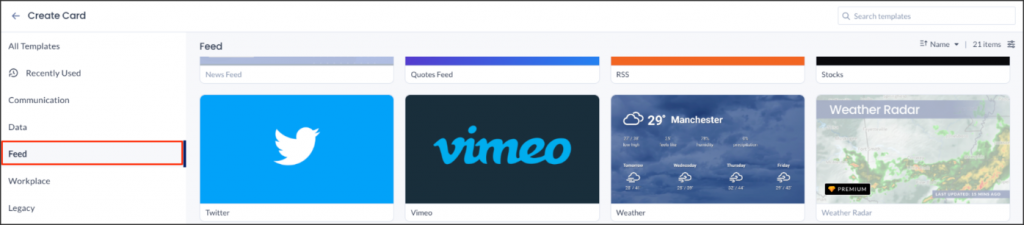
- Click + CREATE, and select the Vimeo Card from the Feed filter.
- Enter the Title of the card content, as this also serves as the content filename within the Library. This is a mandatory field.

- In the Edit tab, you may do the following:
- For Public Vimeo:
- In the Vimeo URL field, enter the URL of the Vimeo video.
- Once the Vimeo video loads successfully, you may perform the following configurations by clicking the respective icons:
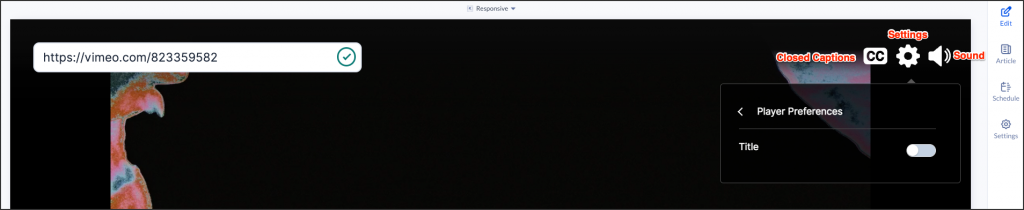
- Closed Captioning – Click the Close Captions icon. The Close Captions icon only appears if the Vimeo video contains closed captioning and subtitles.
- Subtitles – Switch the toggle to Enable or Disable (default) subtitles.
- Language – Select the subtitle language that is automatically populated in the drop-down menu.
- Settings – Click the Settings (Gear) icon
- Player Preferences – Switch the toggle to Enable or Disable (default) the Title
- Sound – Click the Sound (Speaker) icon to Enable (default) or disable audio.
- For Vimeo Showcase:
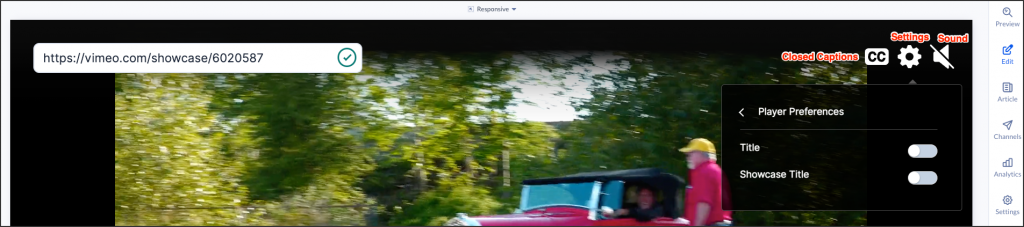
- In the Vimeo URL field, enter the URL of Vimeo Showcase.
- Once the URL is validated, you will be directed to the video selection screen where you can choose from the available videos.
- To showcase all videos, click Play all and then tick or untick the video thumbnails.
- In the Edit tab, you may also configure the following settings:
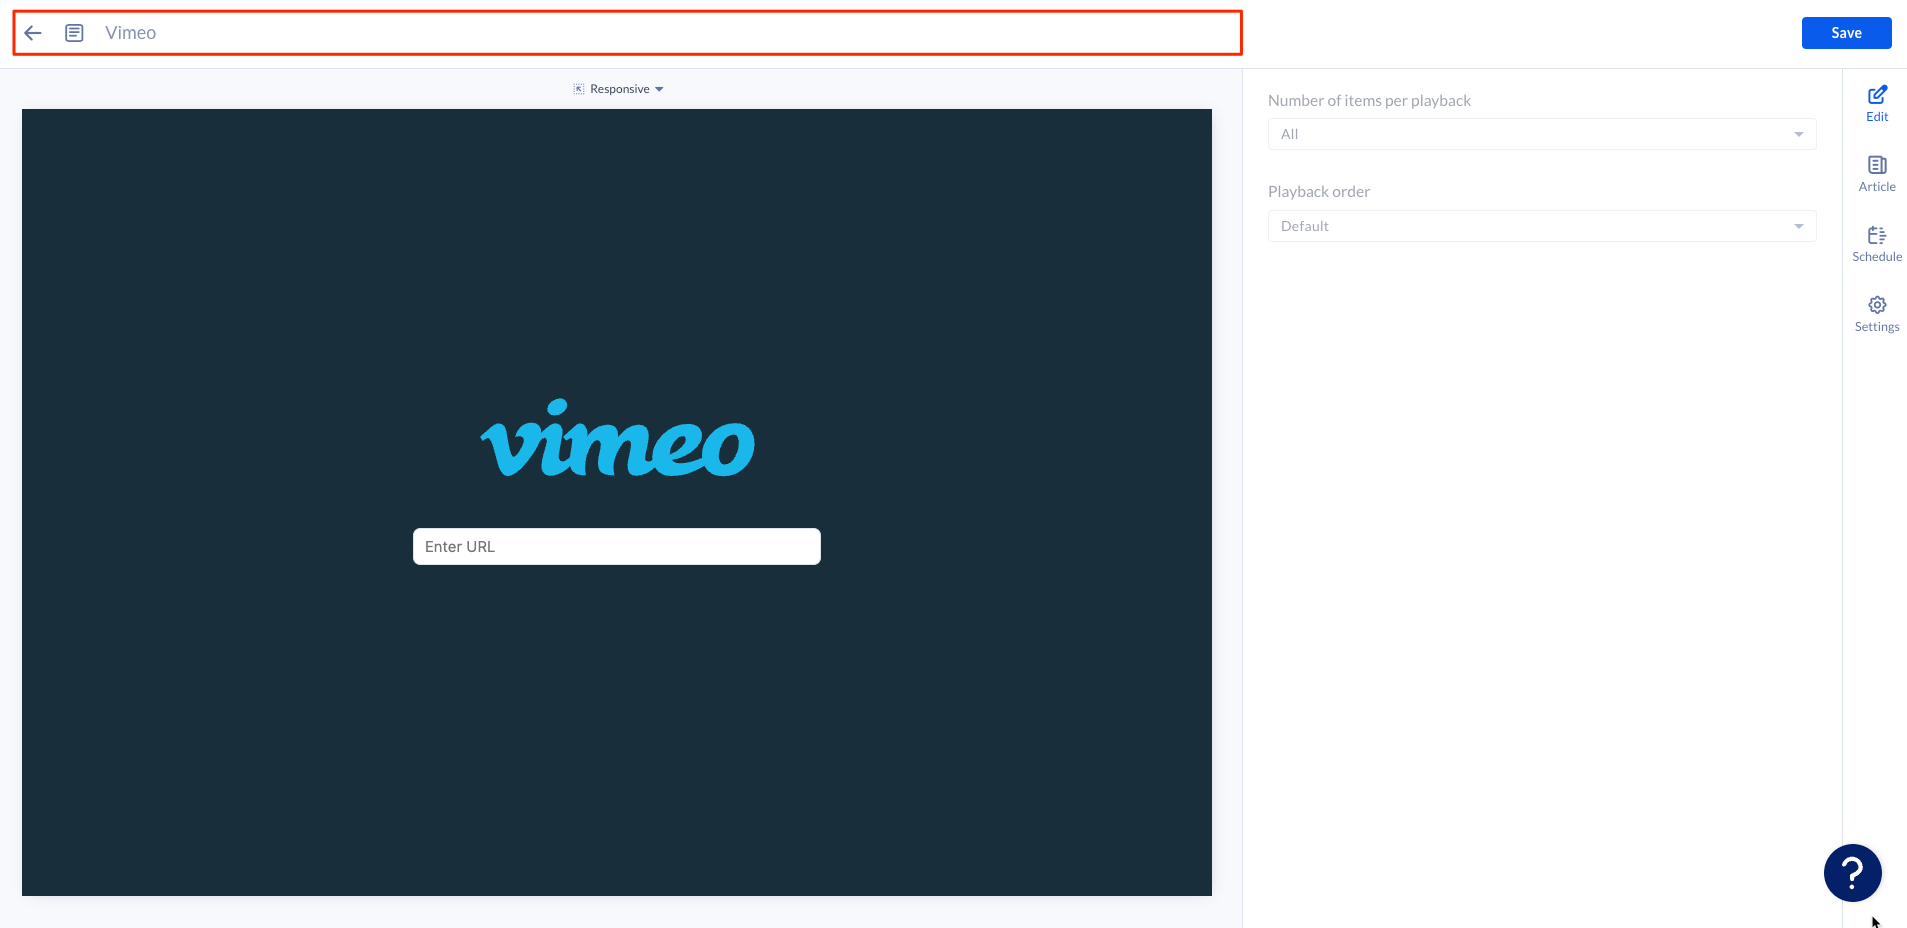
- Number Of Items Per Playback – Choose the number of items to display per playback cycle, with the card showing the corresponding number of videos from the showcase.
- Playback Order – Determine the playback sequence by selecting from Default (plays videos in order), Shuffle (randomizes playback), and Release Time (plays videos from newest to oldest based on publishing time) options.
- Once done, click Next.
- Once the Vimeo video loads successfully, you may perform the following configurations by clicking the respective icons:
- For Public Vimeo:


-
-
-
- Closed Captioning – Click the Close Captions icon. The Close Captions icon only appears if the Vimeo video contains closed captioning and subtitles.
- Subtitles – Switch the toggle to Enable or Disable (default) subtitles.
- Language – Select the subtitle language that is automatically populated in the drop-down menu.
- Settings – Click the Settings (Gear) icon
- Player Preferences – Switch the toggle to Enable or Disable (default) the Title and the Showcase Title.
- Sound – Click the Sound (Speaker) icon to Enable (default) or disable audio.
- Closed Captioning – Click the Close Captions icon. The Close Captions icon only appears if the Vimeo video contains closed captioning and subtitles.
-
-
- In the Article tab: (Optional)
- Include an Article or Caption to accompany the card content when being displayed on the Employee App, or other social collaboration apps.
- Enter a Referral Link to link the card content to more information.
- In the Schedule tab: (Optional)
- Select a playlist channel from the Add to channel drop-down menu to add the card content to a playlist channel.
- Please refer to the Configure Content Playback Properties article to configure the SCHEDULING and DISPLAY PROPERTIES options that are displayed once the card content has been added to a playlist channel.
- In the Settings tab: (Optional)
- The Name field will be auto-populated with the Title of the card content, which also represents the filename of the content within the Library.
- The Content Category displays the focus of the card content. Optionally, you may select a new content category from the drop-down menu to match the current focus of the card content.
- The Tags field displays all relevant content tags associated with the card content. Optionally, you may add or delete content tags based on the current card content.
- The Library Location drop-down displays the current location of the card content within the Library. Optionally, you may select a different folder location for the card content.
- The Auto Delete Content from Library drop-down menu allows you to set an expiry date for the content.
- Upload a Thumbnail image for the card content that is displayed in the Library.
- Once done, click SAVE.
- In order to display the Vimeo Card, proceed to add the card to a playlist channel, and publish the playlist channel.
Was this article helpful?