This article provides instructions to publish content via channels to the web, users (Appspace Employee App), devices (TVs, tablets, Webex boards, etc.), enterprise messaging apps, or even a browser. Simply publish to the web for public access, a browser for quick previews, your Appspace user account to view on mobile devices, or simply publish to any device/TV for all other experiences.
- When a channel is published to the web, a public link to the channel is accessible by anyone via a browser. Users do not need an Appspace account to view the channels. This method is recommended for quickly sharing content with remote workers or clients, or can be used for demo purposes. Channels viewed via the web link will be streamed, incurring bandwidth overhead, and thus we recommend using this option prudently.
- Similarly, a device registered and installed with the Appspace App for Devices (Appspace App), which consumes one device license, will display all channels published to the device. A device will be able to play a single channel only, or multiple channels and channel groups where audiences may use a remote control or touch screen (where applicable) to browse multiple channel content.
- A user or an employee with an Appspace public/private cloud account will be able to view channels published to them via the Appspace App for employees (Appspace Employee App) either via our portal or via smartphones and tablets as they sign in with their user accounts, with a premium user license applied. Users can browse all content from multiple channels and channel groups published to them.
- Appspace users may now publish content directly to Enterprise Messaging Apps. Based on the publishing settings, users may then view the content article (description) either in the chat window, click on a referral link, or view the content on the Appspace Employee App portal (public/private cloud only) via a link on the post. First-time users accessing the portal will be automatically signed in with viewing access if they have SSO with Just-In-Time turned on. Existing users must sign in with their Appspace credentials.
- Turn your browser into a device by running Appspace App directly from your browser, allowing you to simulate and experience first-hand how your channel is displayed. Improvements can be made on the fly, and concepts learned can be applied to more powerful devices when used during production deployment. The browser is registered as a device and will consume one Device ID.
What’s in this article:
Prerequisites
- One of the following existing channels:
- Account Owner or Publisher role in Appspace to publish channels. NoteFor more information on the Publisher role or publishing permission in channels, please refer to Introduction to User Licenses & Roles in Appspace 8.0 article. To provide someone else publishing or editing permissions to any channel under your purview, see the Configure Channel Publishing Permissions article.
Publish Content to Web
Follow the instructions below to publish a channel to the web, makes the channel viewable to the public through a URL on a web browser:
- Click Channels from the Appspace menu, and select the desired channel you wish to publish.
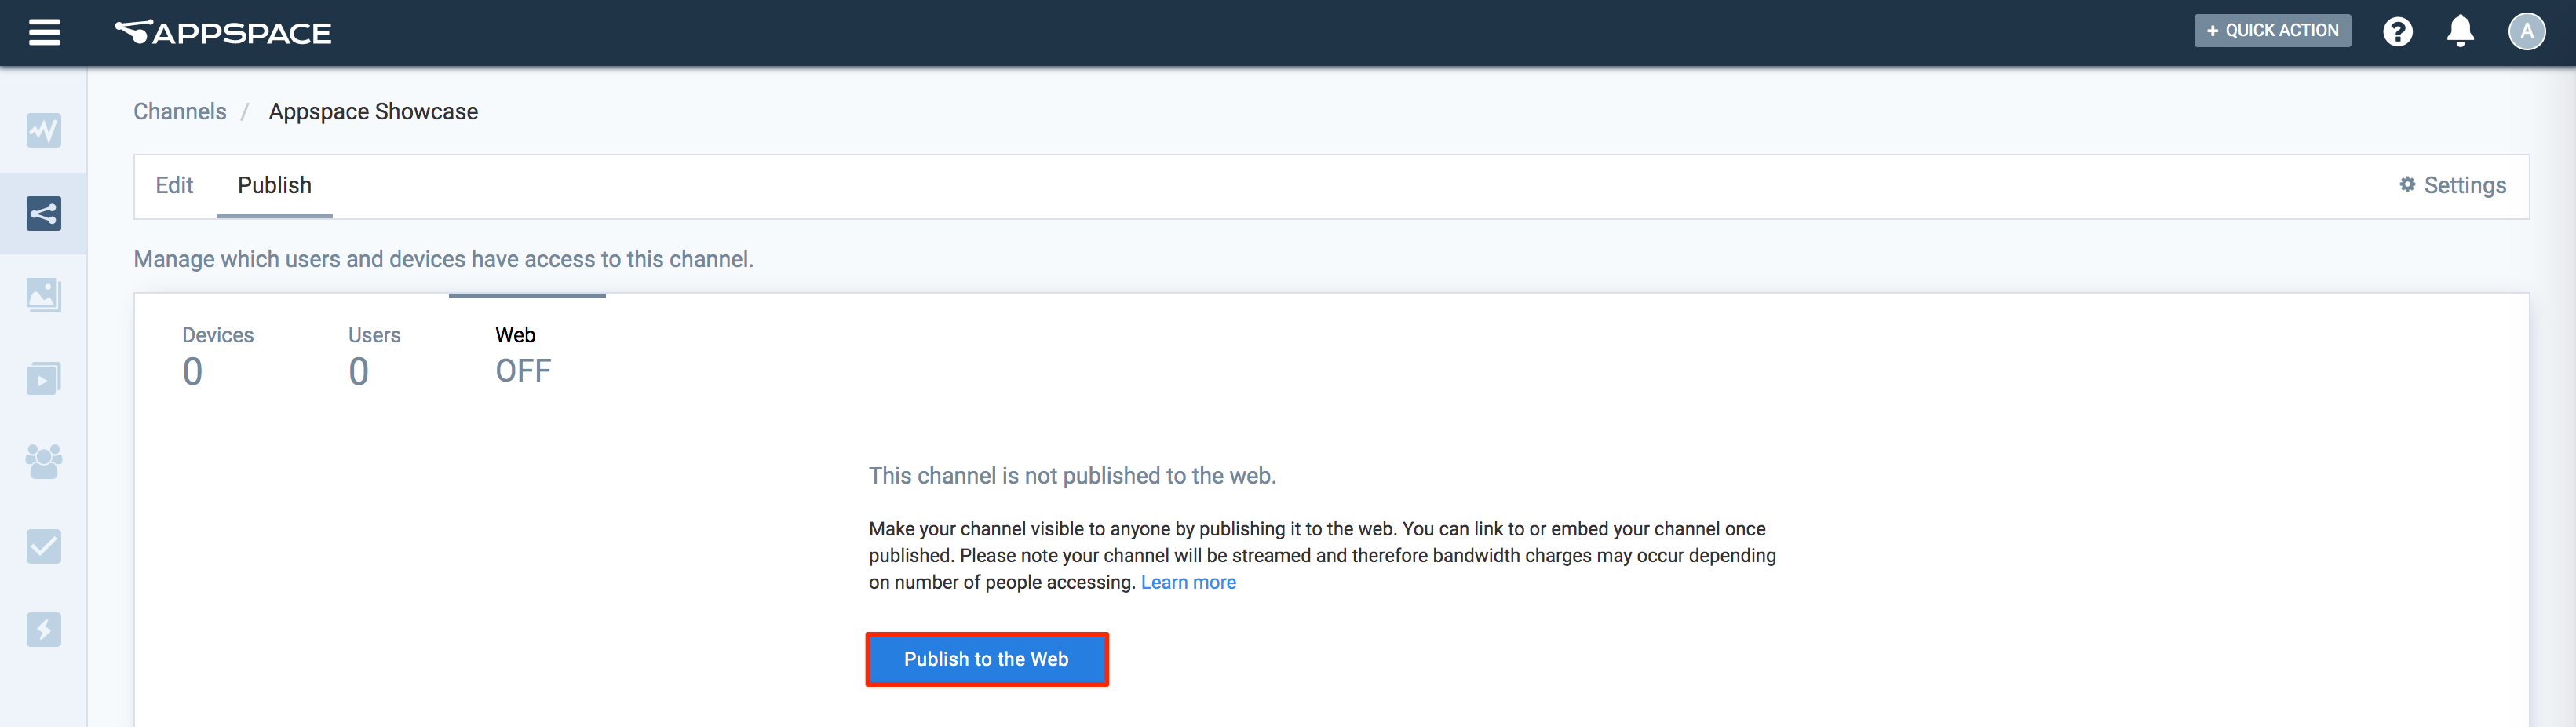
- Select the Publish tab, and click the Web sub-tab.
- Click the PUBLISH TO THE WEB button.
- Click the Copy button of either URL Link or Embed code.
- If you chose:
- Link: Share the link, or paste the link on a browser to view the channel.
- Embed: Insert the iFrame code into an existing HTML page, for easy viewing in an intranet.
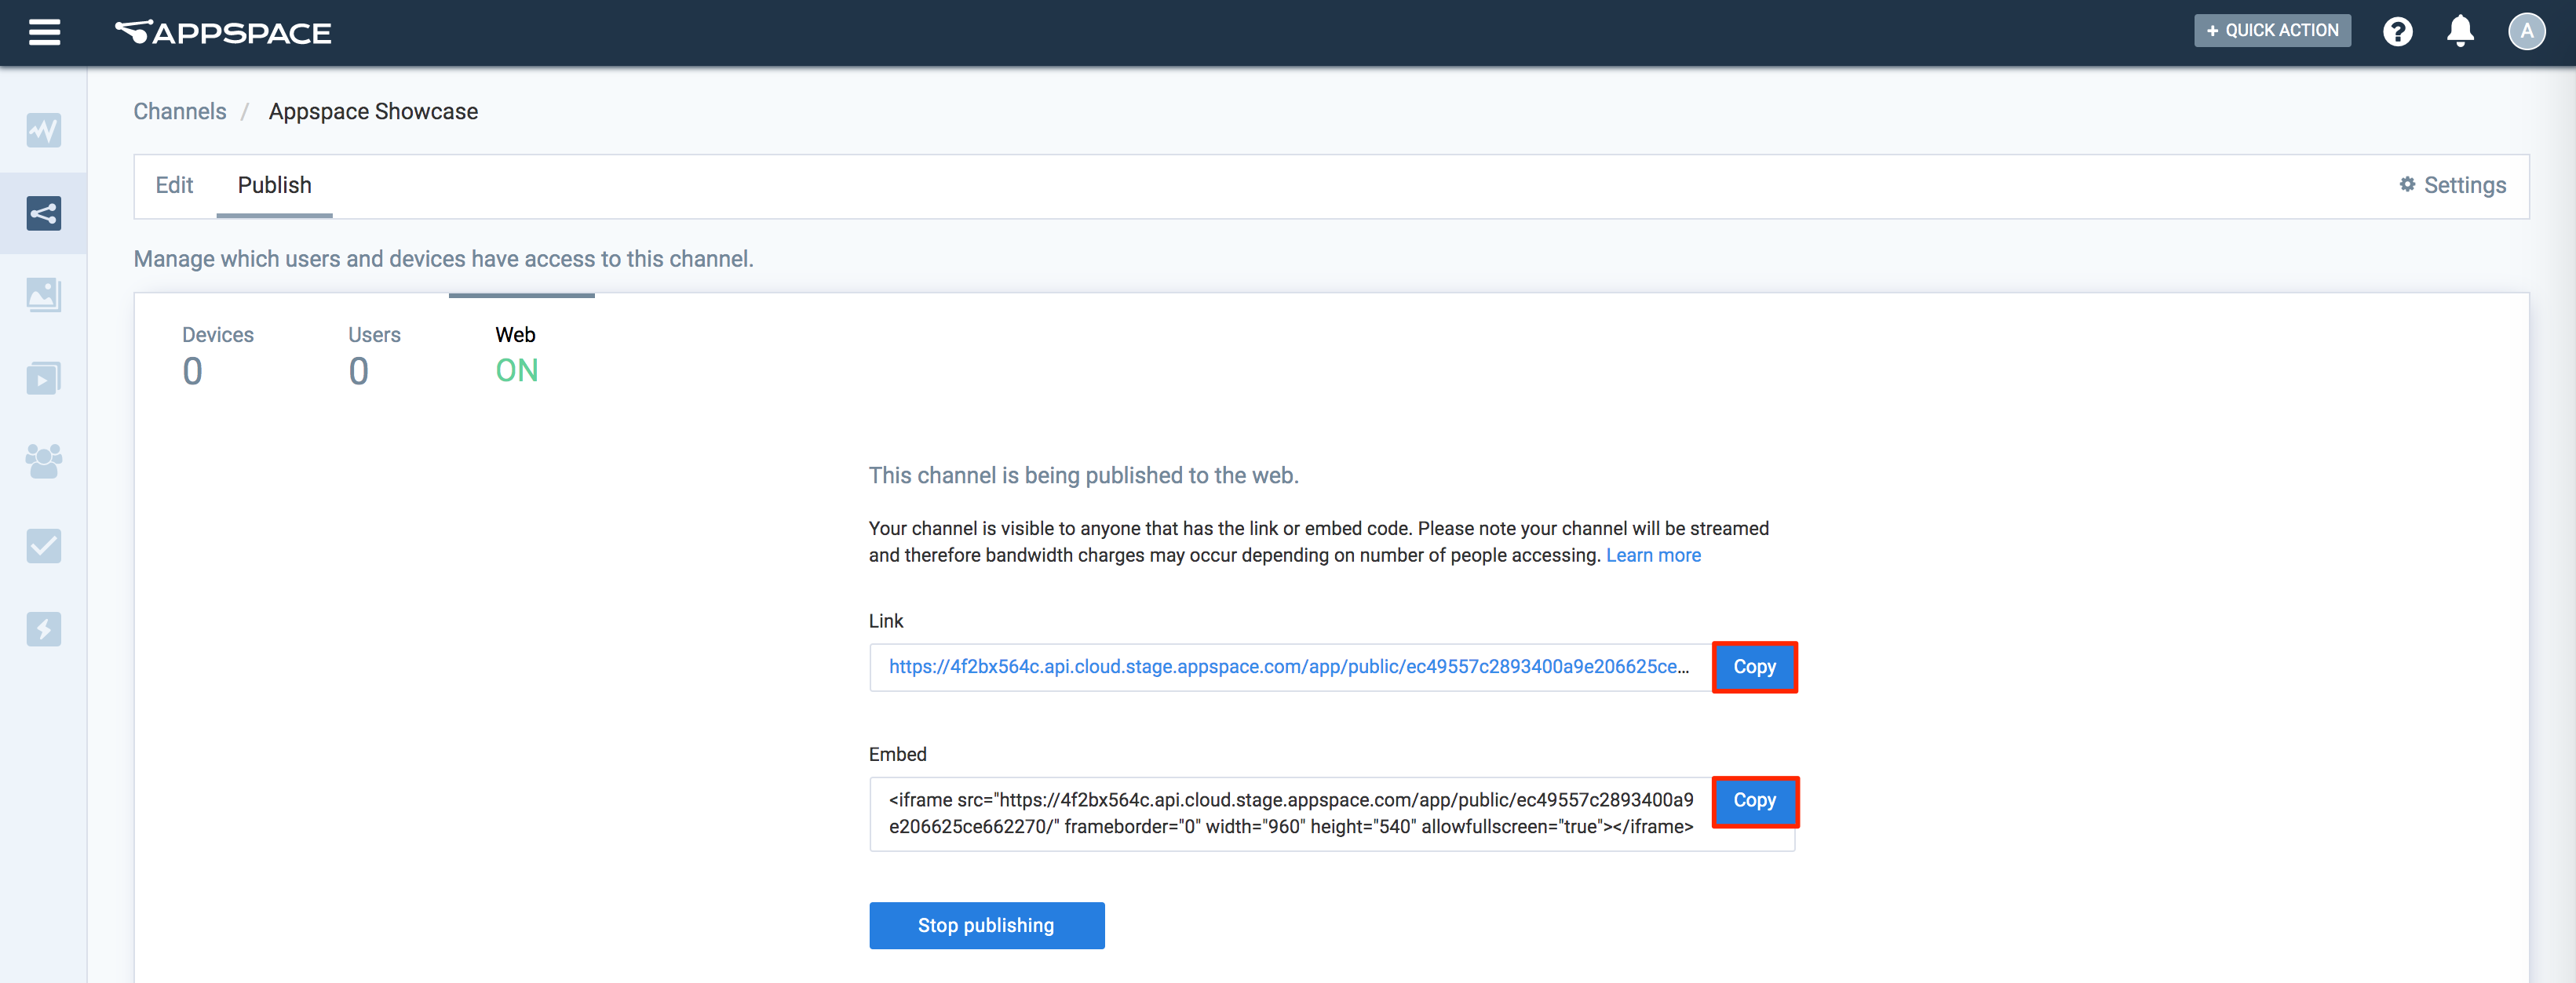
- Your channel is ready for public access. Anyone with the URL may view the channels.
- Once the channel is no longer needed to be publicly available, you may click on the Stop Publishing button to stop sharing, and to save bandwidth utilization.
Publish Content to Enterprise Messaging Apps
Follow the instructions below to publish a playlist channel to a chat room in enterprise messaging platforms such as Slack, Webex Teams, and Microsoft Teams.
- Select Channels from the ☰ Appspace menu, and select the desired playlist channel
- Click the Publish tab, and click the Apps sub-tab.
- Click the Publish to an App button, and select the enterprise messaging app integration account and the chat room you wish to publish to.

- Once done, click Save, and click the Edit tab.
- Click the enterprise messaging app integration icon, and click Post to All Apps to publish the content to the chat room.
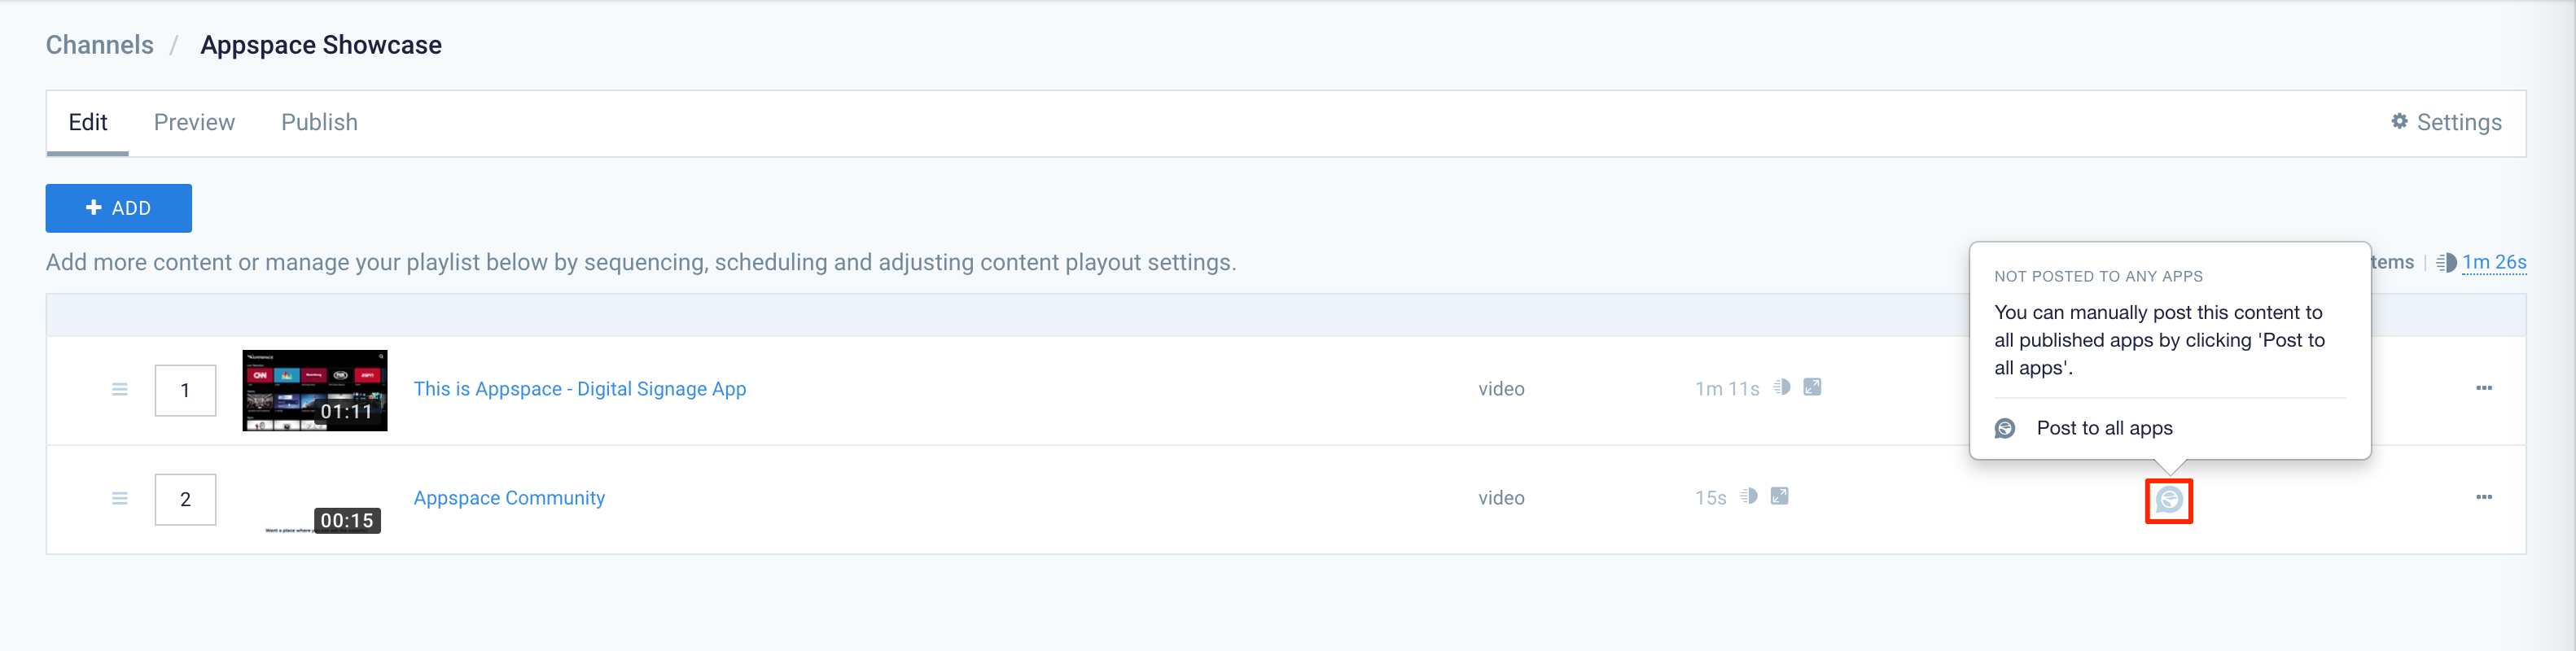
- Any content added to the playlist channel after this will be automatically posted to the chat room.
- You will be able to read the content article either directly in the chat window, or via a link to the Appspace Employee App.NotePublishing settings and post behaviour for each app must be configured during configuration. prior to publishing any content.
Publish Content to Devices
Follow the instructions below to publish a channel to individual devices, device groups, or devices in an entire network, so that only devices registered with the Appspace App will be able to display the published channel:
- Click Channels from the Appspace menu, and select the desired channel you wish to publish.
- Click the Publish tab, and click the Devices sub-tab.
- Type a device name, or click the Find Devices link to select devices, device groups, or a network of devices. Click Add.
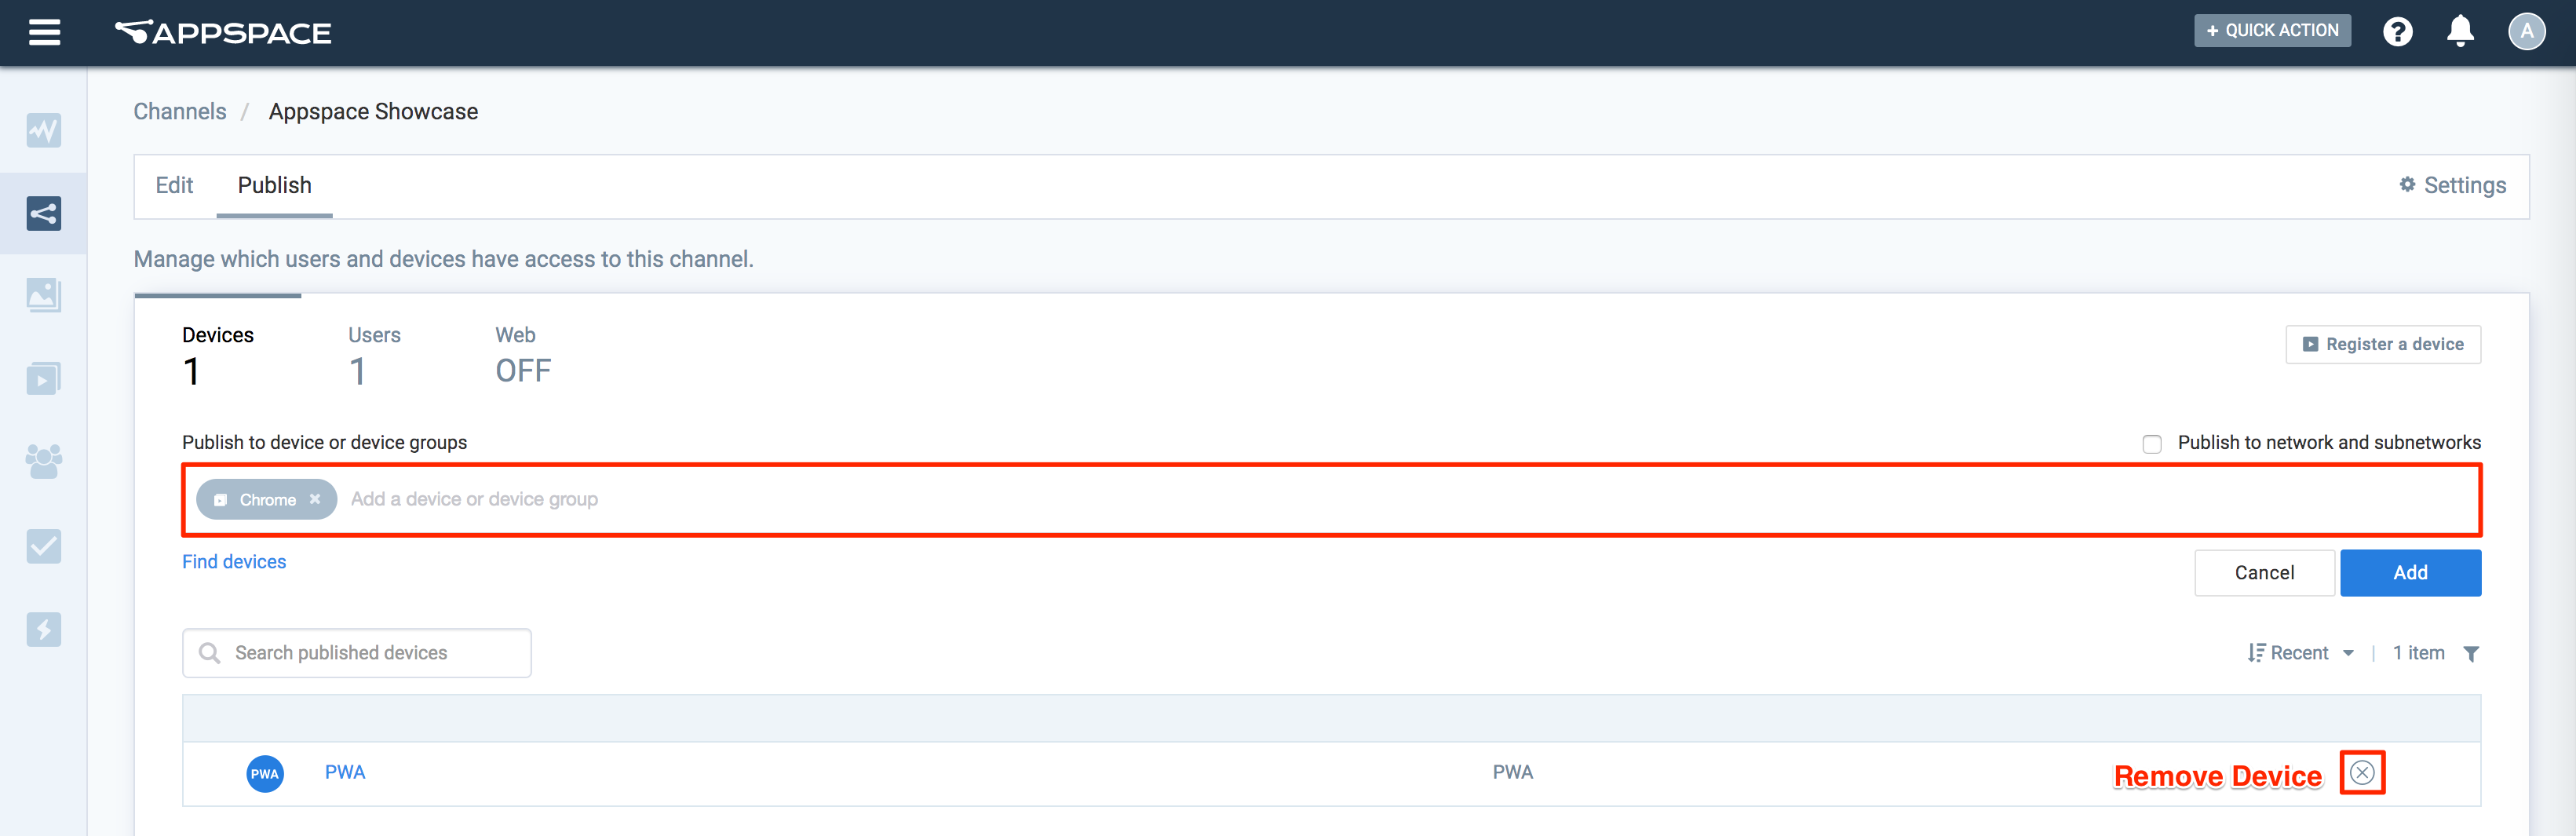 NoteThe Publish to network and subnetworks check-box is only available to Account Owners or Content Administrators of the network, who can publish the channel to the networks they have access to, by checking the check-box, and clicking the PUBLISH TO ALL button in the confirmation dialog box.
 - The channel will be published to the selected devices, device groups, and networks, and will now be displayed on the selected device(s).
If you wish to disable the inherited settings, slide the slider to NO.

Publish Content to Users (Employees) and Email
-
-
- The Employee App features are only available on Appspace public/private cloud 8.0 and later. These features are not supported on 8.0 on-prem.
- The Email tab is currently behind a feature flag and not available to the public.
-
Follow the instructions below to publish a channel to users and their email addresses, so that only registered Appspace users would be able to browse and view the channel on their emails and the Appspace Employee App, either via the portal on a web browser, or a mobile device.
-
- Click Channels from the Appspace menu, and select the desired channel you wish to publish.
- Click the Publish tab, and click the Users sub-tab.
- Select Audience on the left-panel.
- Under Publish to user or user groups, enter in, or click the Find Users link to select user(s) or user group(s). Click Add.
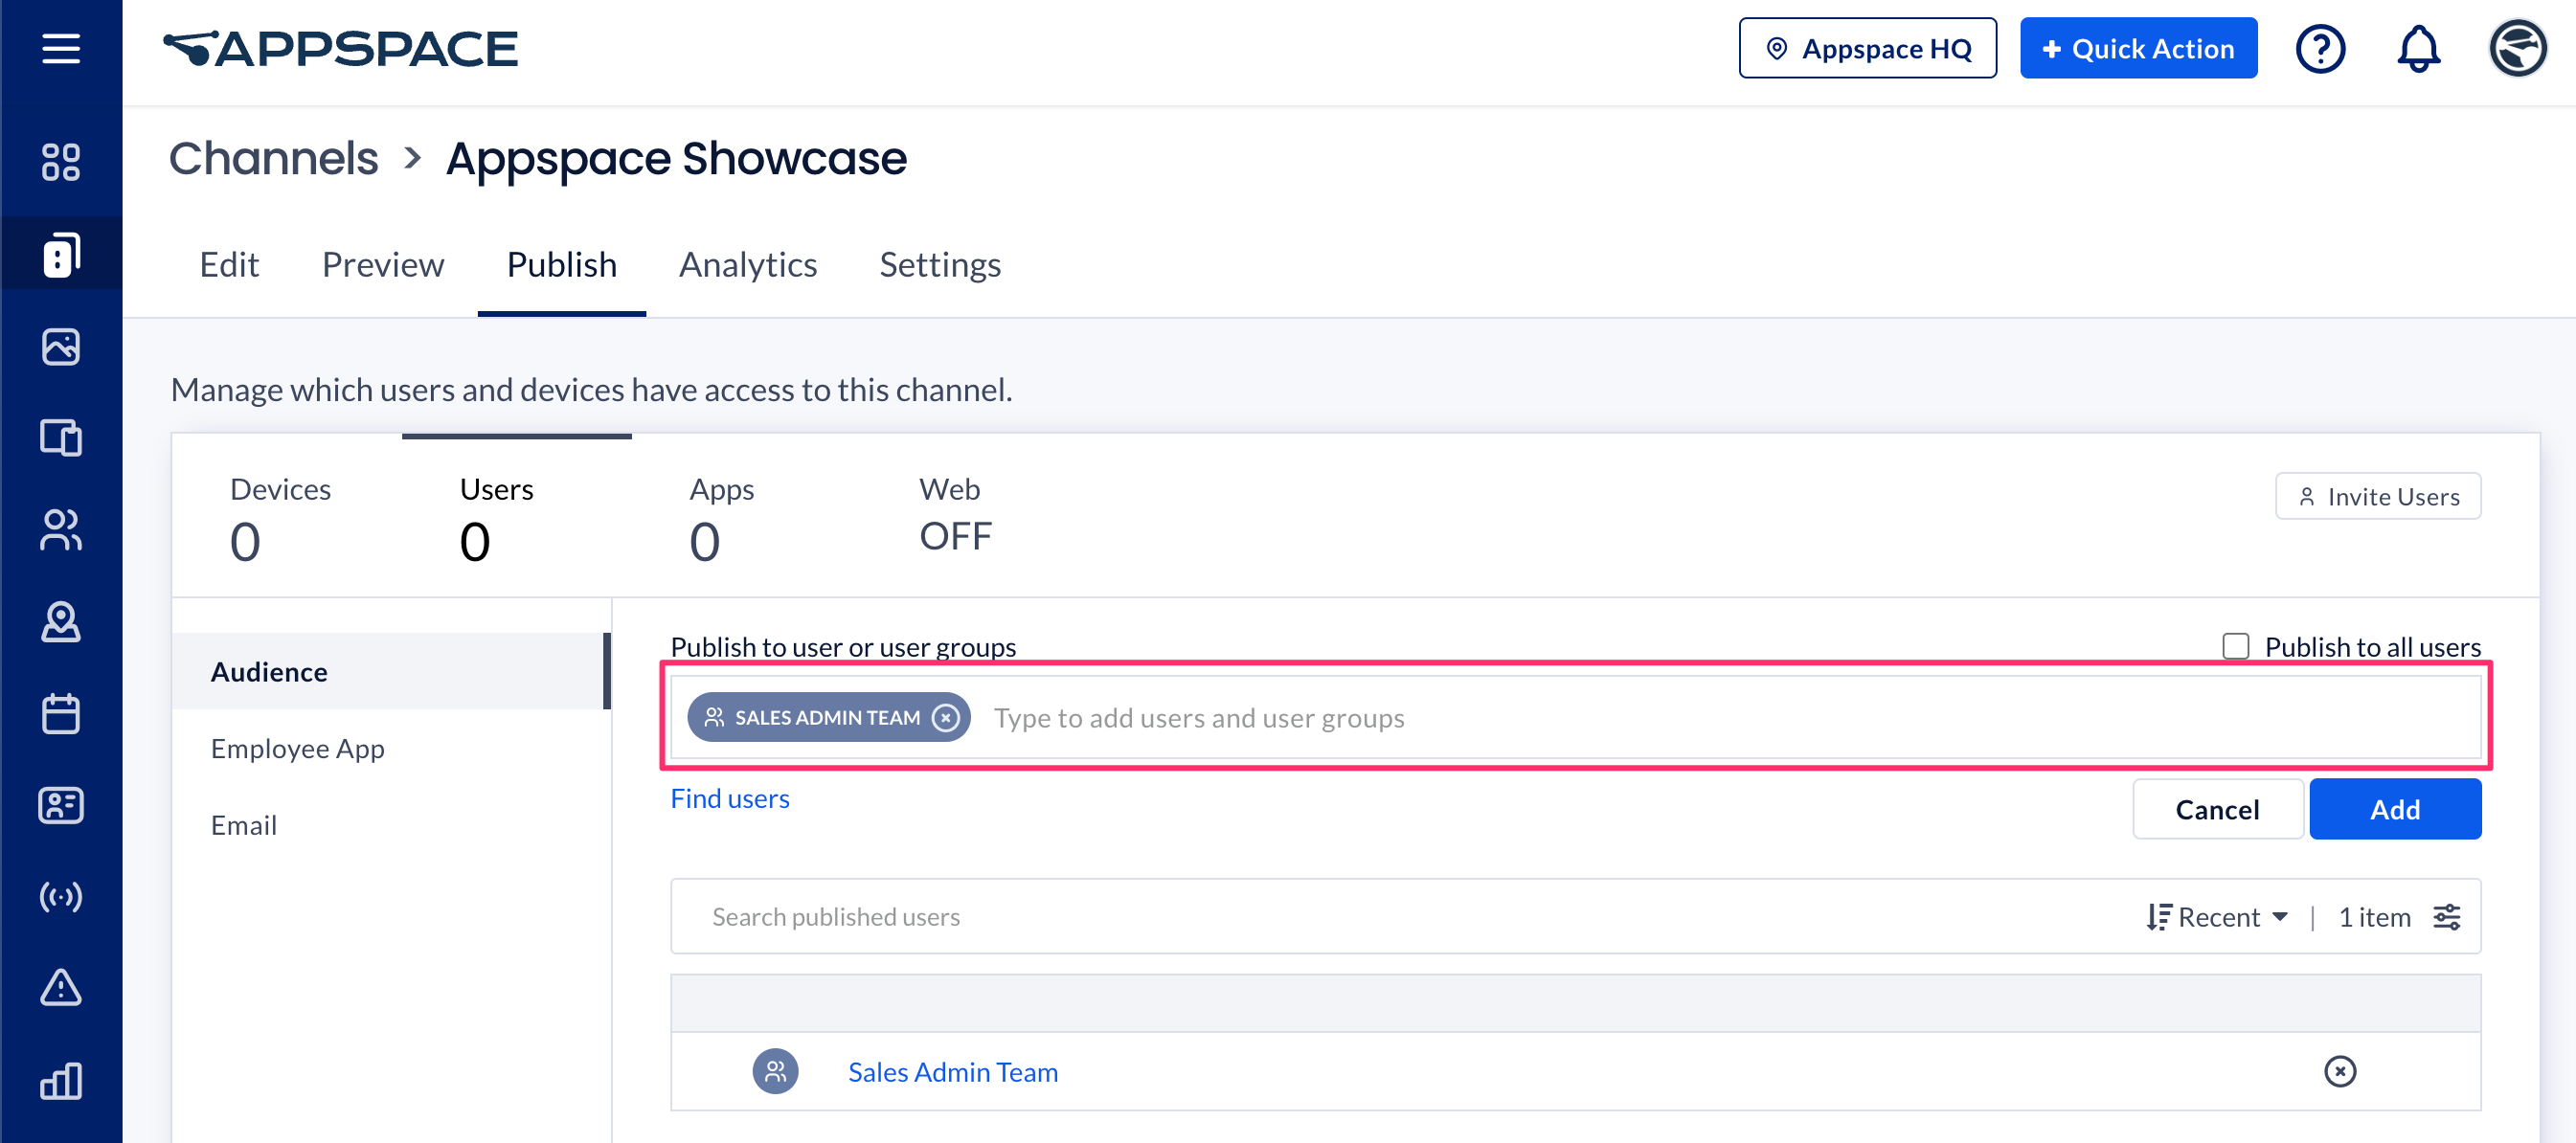 NoteThe Publish to all users check-box is only available to Account Owners or Publishers of the location, who can publish the channel to the location they have access to, by checking the check-box, and clicking the PUBLISH TO ALL button in the confirmation dialog box.
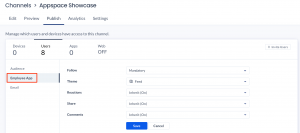
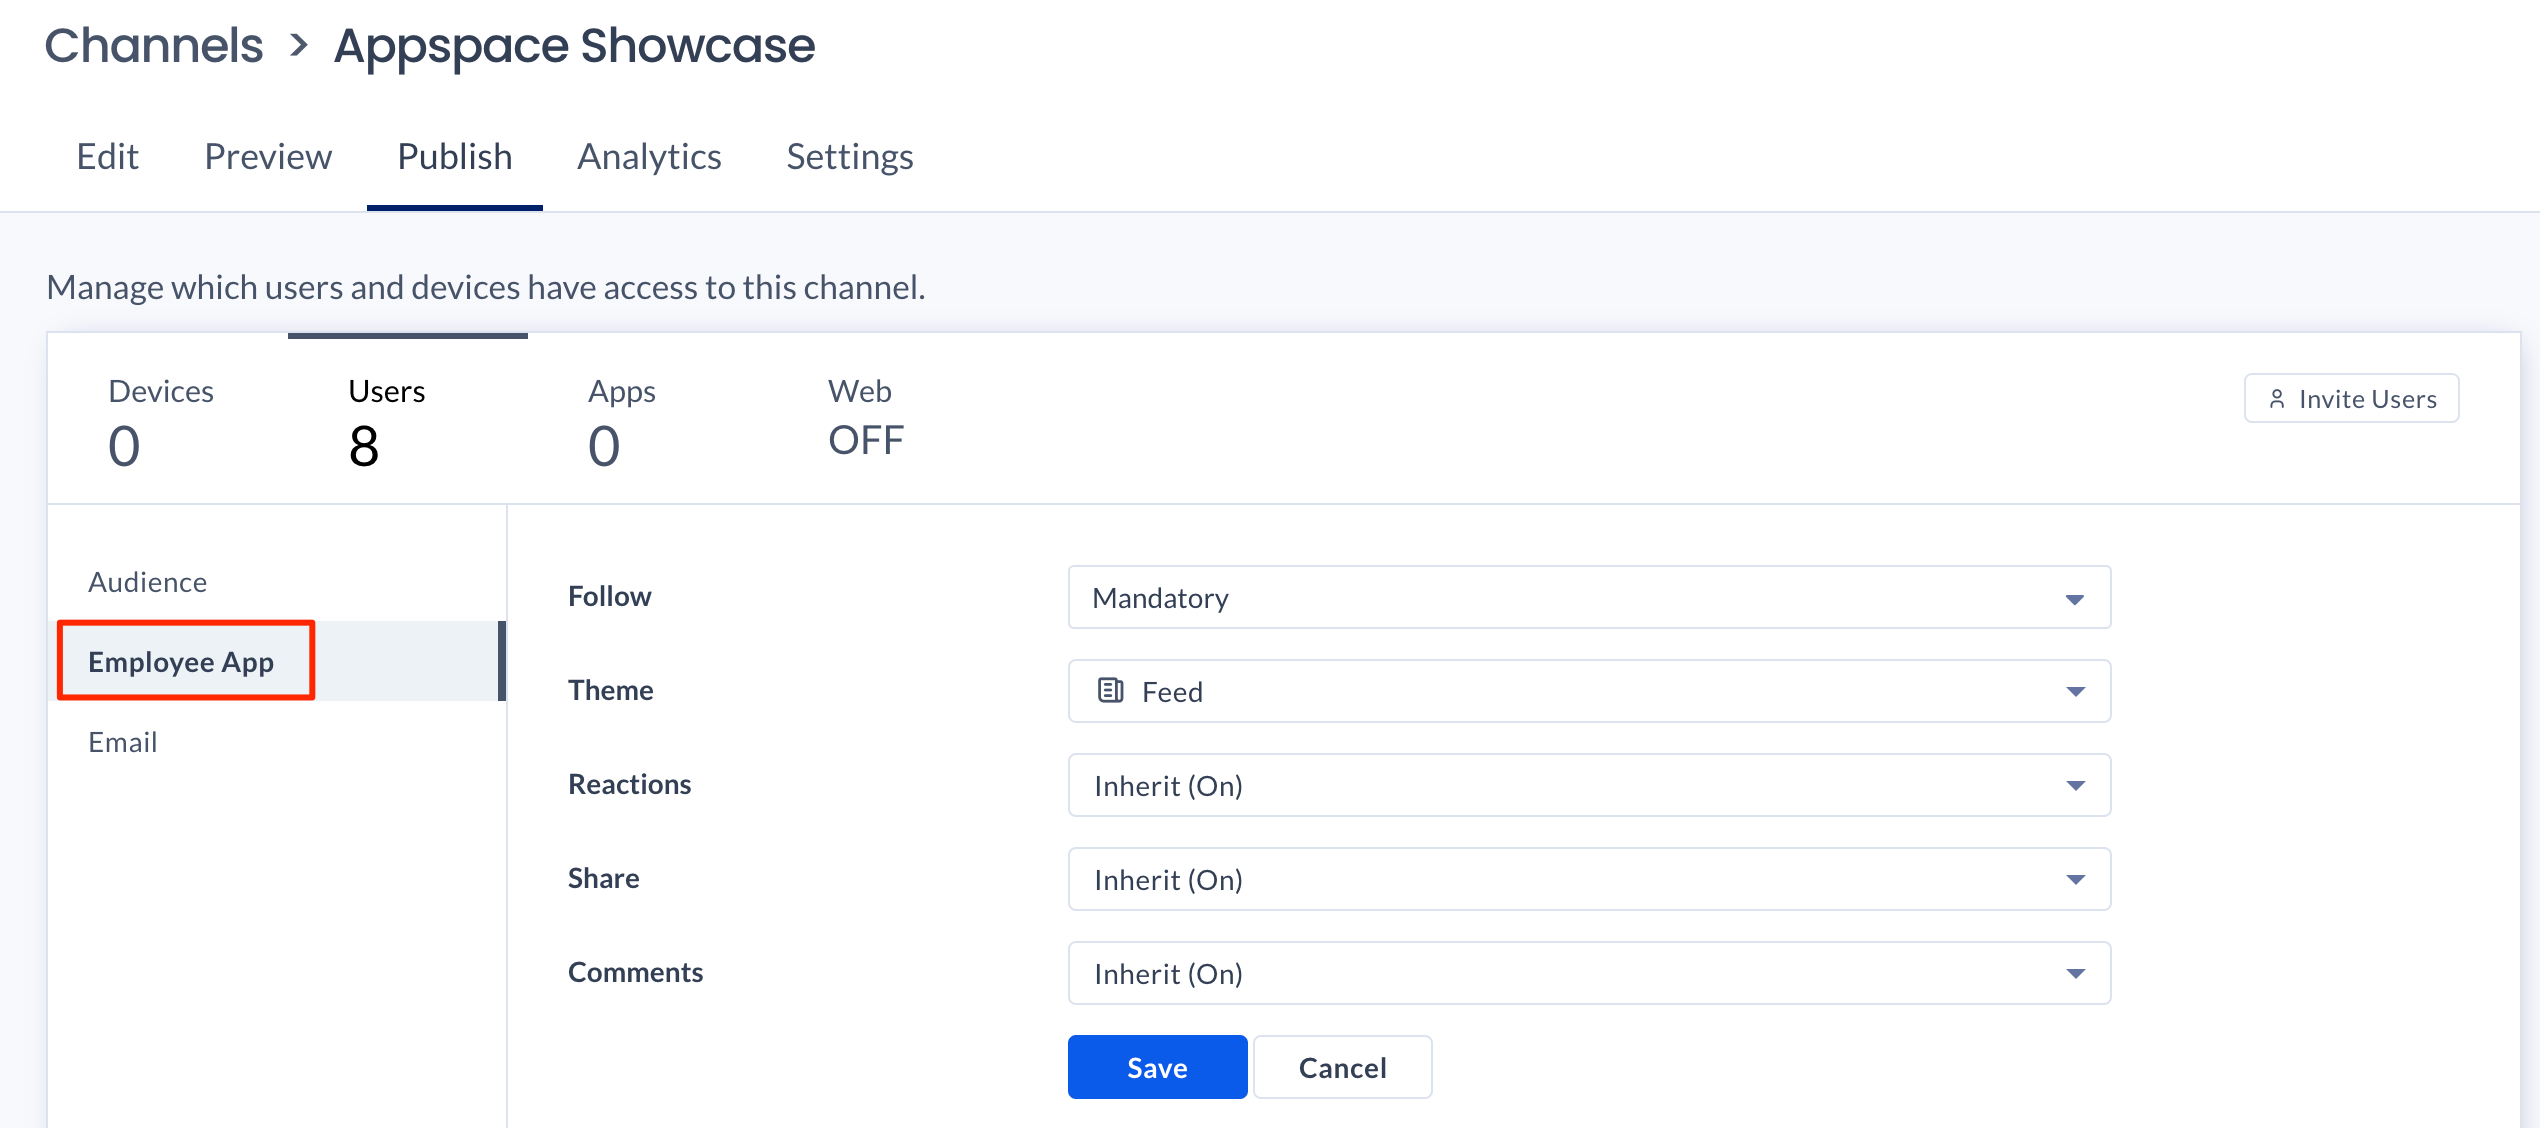
 - Click Newsfeed on the left-panel.
- Select the Follow options for user subscriptions:
- Mandatory – Following the channel content feed is mandatory and unfollowing is not allowed.
- Opt-Out – Users are following the channel content feed by default but can optionally unfollow.
- Opt-In – Users are not following the channel content feed by default but can optionally follow.
- Select the Theme you wish to publish the channel with:
-
- Feed (default) – The channel content will be displayed in a feed. All content within the channel will be listed, allowing users to select specific content for viewing.
- Carousel – Content within the playlist channel will be played in a loop, similar to how it will be viewed during device playback. This feature is only applicable to playlist channels.
-
- The channel will be published to the selected users and user groups.
- Users may now browse their content on their email or the Appspace Employee View via the portal or mobile app.
If you wish to disable the inherited settings, slide the slider to NO.

Publish Content to Email
Follow the instructions below to publish channel content to users’ emails, based on the users selected earlier in the Audience tab (you can directly specify users if you select On-Demand). Only email addresses of registered Appspace users are able to receive the published channel contents and links to view the channel on the Appspace Employee App, either via the portal on a web browser, or a mobile device (if the email is opened on mobile).
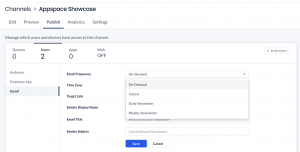
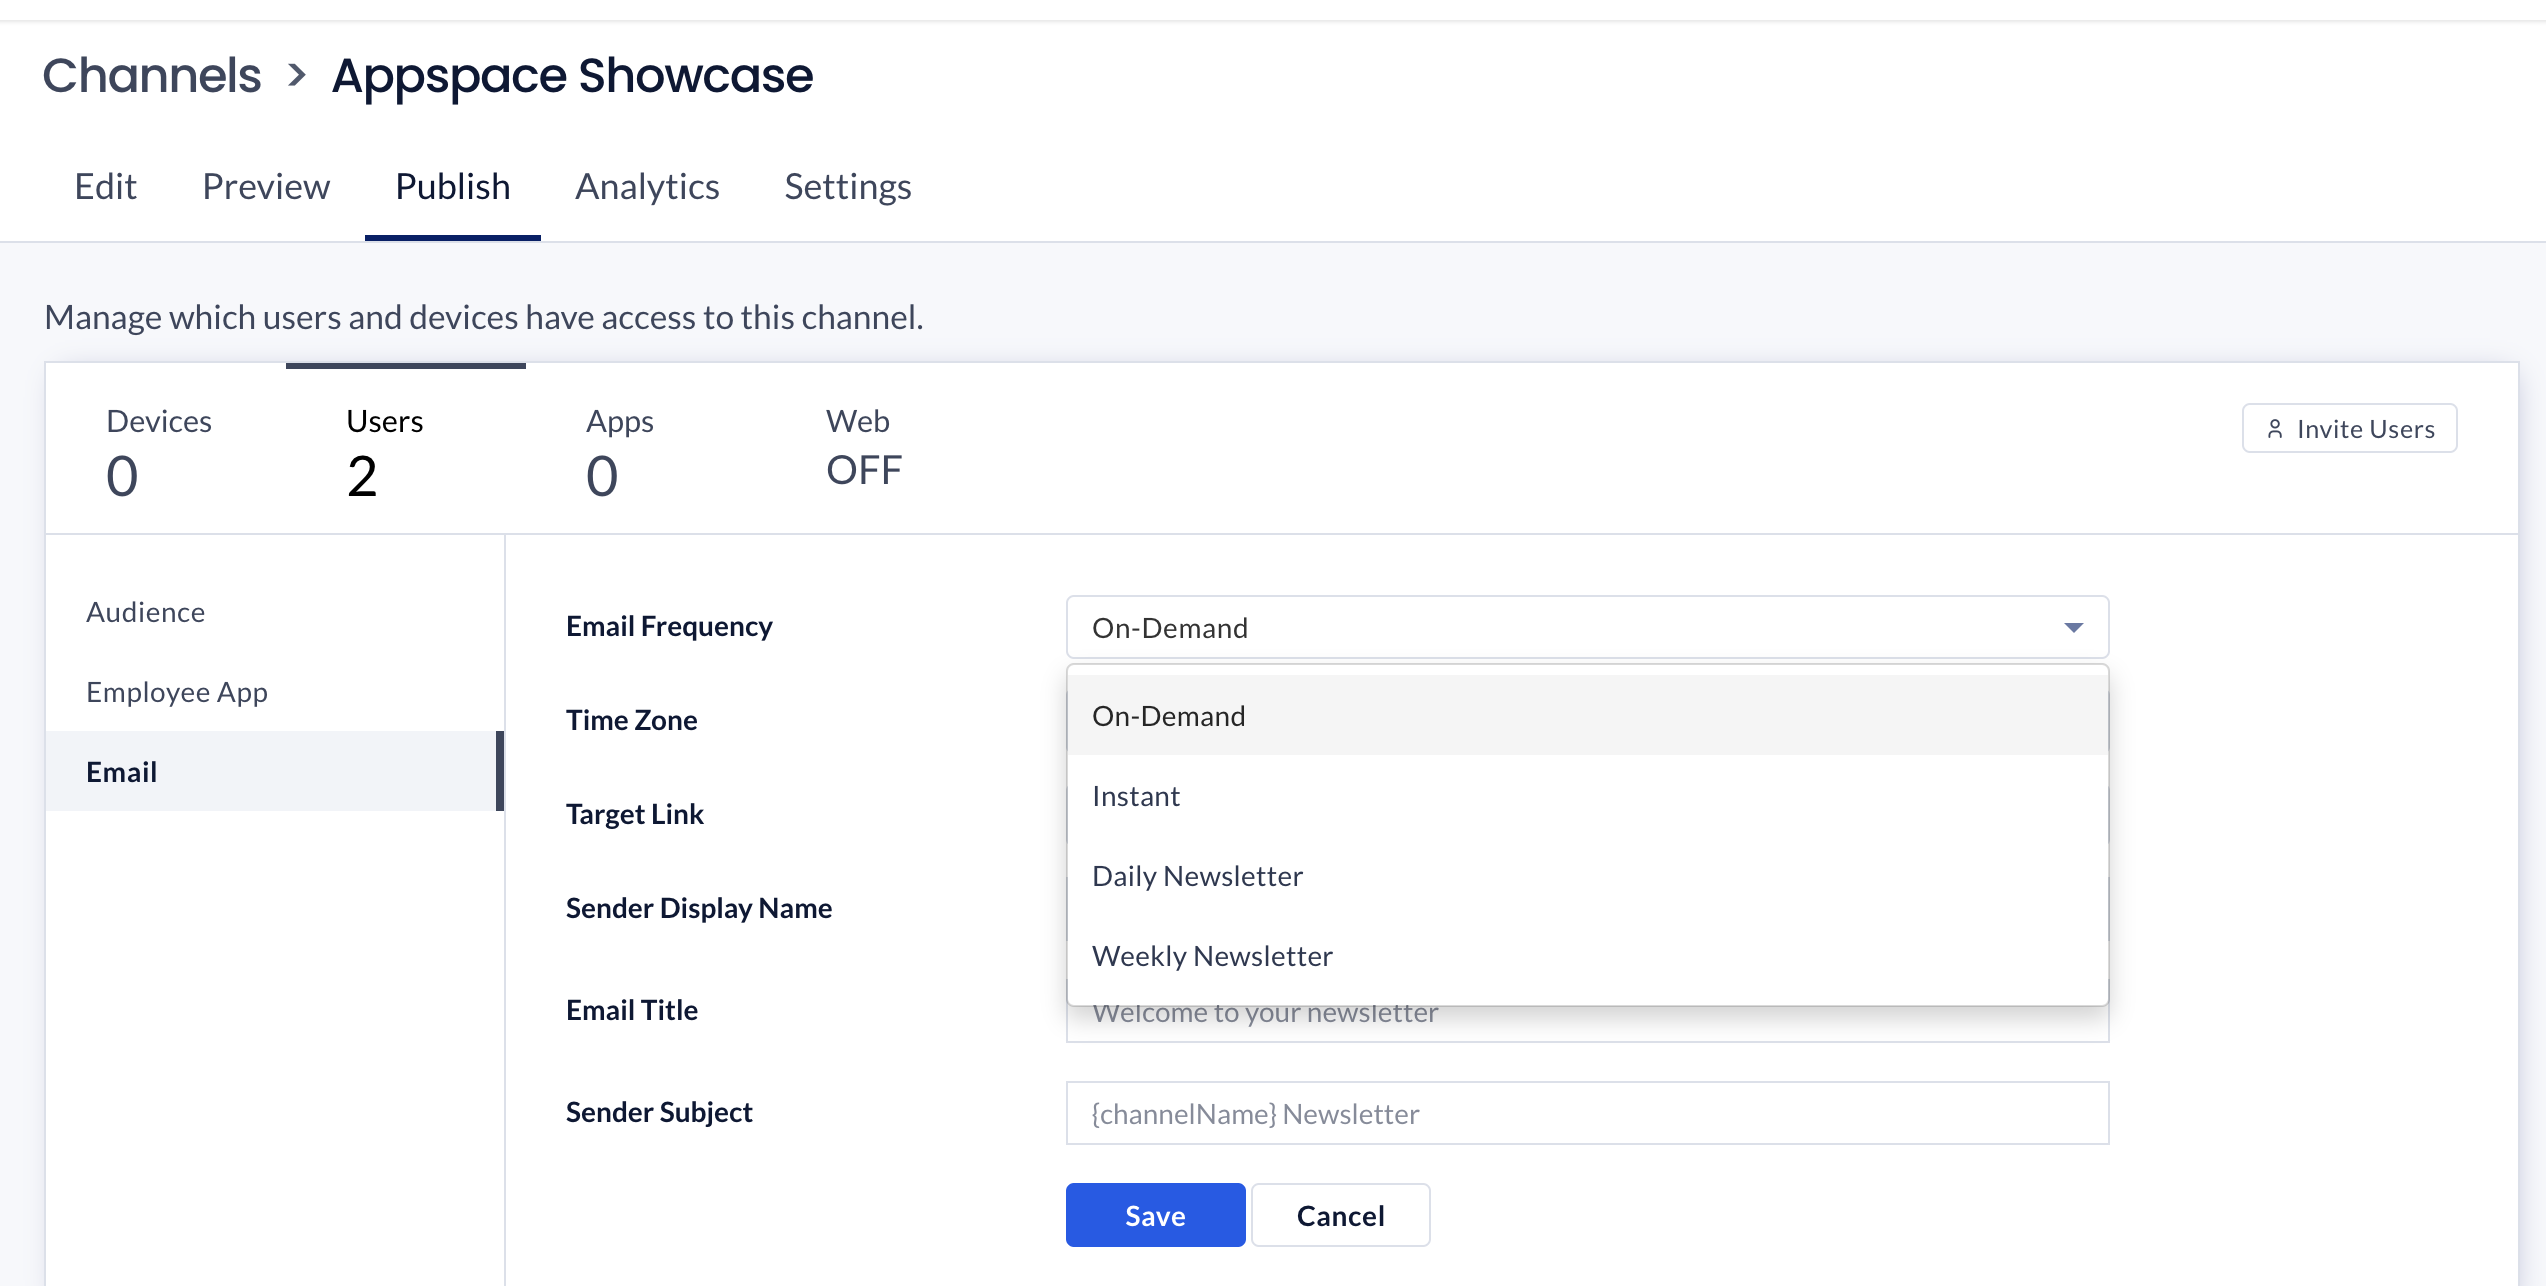
- Click Email on the left-panel, and select the Email Frequency to publish the email:
 NoteYou can preview the format of the emails sent by clicking the Preview tab at the top and selecting Email > Email Single Post or Email Newsletter.
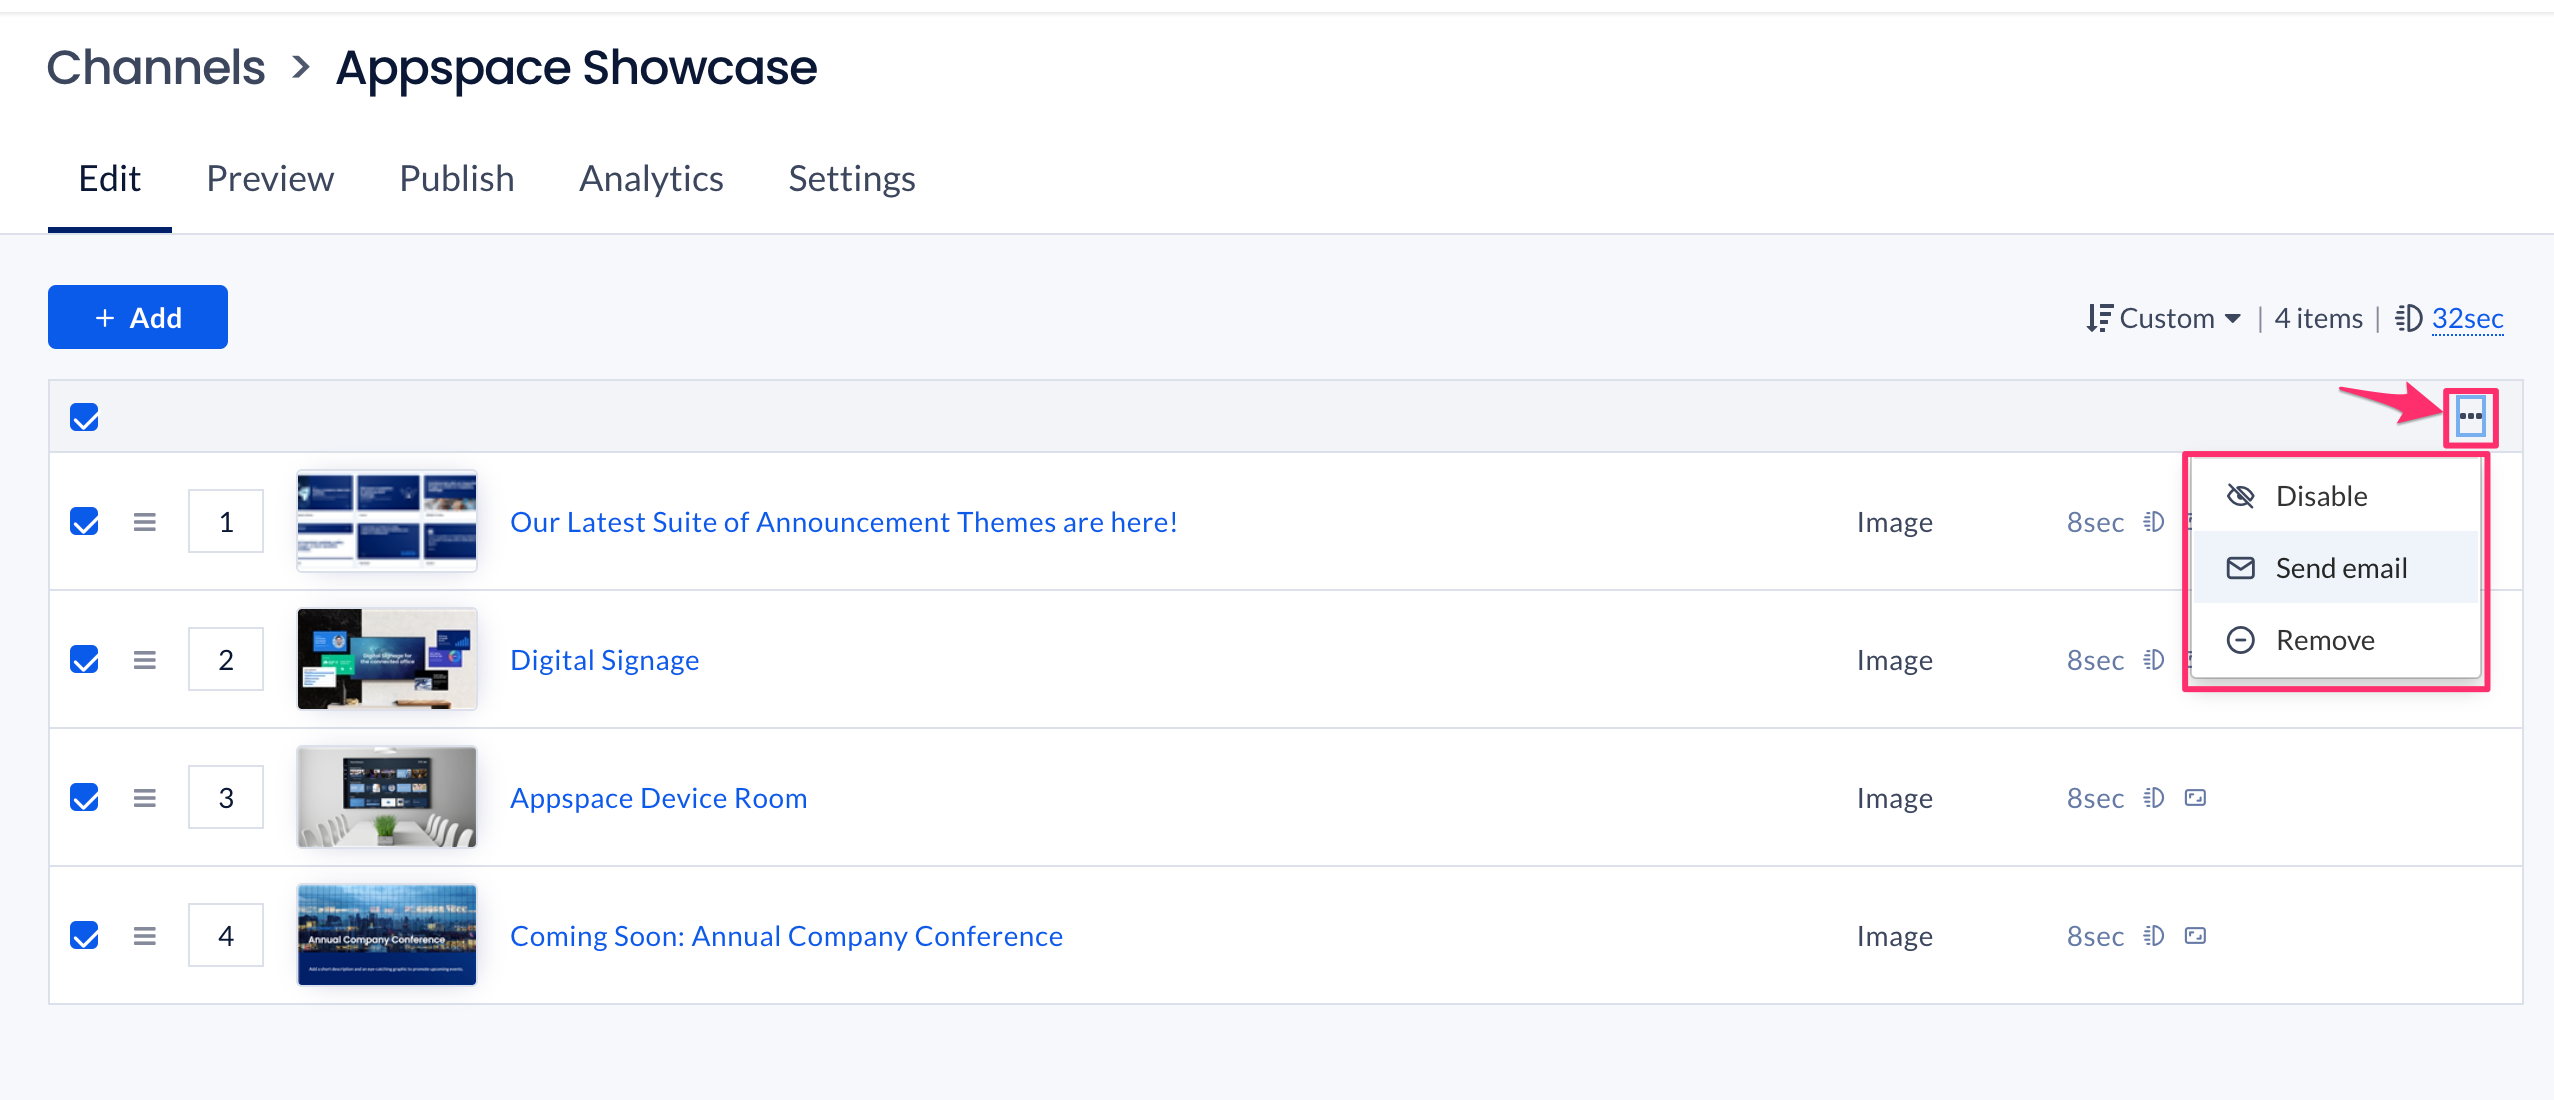
- On-Demand – The channel content will be published to users’ emails when you select the ellipsis to the right of the channel content and click Send Email. This option allows you to directly specify user emails to send to. The Email Newsletter will display a summary of up to the 8 newest content items on the channel.
- Instant – An email will be automatically published to users for new content items added to the channel. One email will be sent for each new content item (Single Post).
- Daily Newsletter – The channel content will be published to users’ emails daily at the set Publish Time (set to 8:00 AM by default). The Email Newsletter will display a summary of up to the 8 newest content items on the channel.
- Weekly Newsletter – The channel content will be published to users’ emails weekly at the set Publish Time (set to 8:00 AM by default) and on the selected Publish Day of the Week. The Email Newsletter will display a summary of up to the 8 newest content items on the channel.
- Select the Time Zone for the date and time displayed in the channel content or the content summary in the email.
Publish Content to Email, On-Demand
Follow the instructions below to send channel content immediately to any users’ emails. Only email addresses of registered Appspace users are able to receive the published channel contents and links to view the channel on the Appspace Employee App, either via the portal on a web browser, or a mobile device (if the email is opened on mobile).
- Click Channels from the Appspace menu, and select the desired channel you wish to publish.
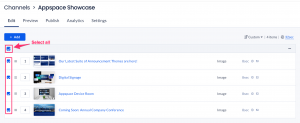
- Click the Edit tab. Select the checkbox for each of the channel content that you wish to publish as an email. Select the box at the top of the list to select all.
- Click the ellipsis to the right of the channel content and click Send Email.

- In the Email Confirmation prompt, select one of the following options for email recipients:
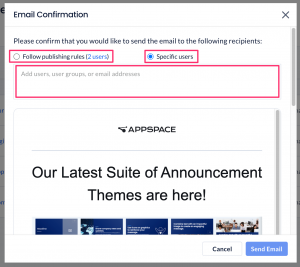
- Follow publishing rules – select this to publish the channel content to users’ emails based on the users selected earlier in the Audience tab.
- Specific users– select this to publish the channel content to users’ emails by entering users, user groups, or email addresses in the field below.
- Preview the email format and click Send Email.


Publish Content to Browsers
Follow the instructions below to publish a channel to a web browser using the Appspace PWA URL. This would run the Appspace App directly from your browser, so that you may simulate how your channel is displayed on a device.
- Launch a web browser, and enter the following Appspace PWA URL to run the Appspace App PWA (Progressive Web App) on your browser.
- Public cloud: https://cloud.appspace.com/app/
- Private cloud: https://<customer>.cloud.appspace.com/app/pwa/
- On-prem: https://<APPSPACE_FQDN>/app/pwa/ or https://<SERVER_IP>/app/pwa/
- Once Appspace App PWA has been initialized on the browser, a 6-character registration code is displayed on the Register your device splash screen. Remember the 6-characters.
- Log in to your Appspace console, and launch the device registration page via one of the following methods:
- Click the Quick Actions menu, and select Register a Device.
- Navigate to the Device Registration widget on the Dashboard
- Click Devices from the Appspace menu, and click the Add button in the Devices tab.
- Enter the 6-character registration code, Device name, and Select a network.

- Ensure the Channel selection mode is set to Channels will autoplay sequentially.
- Once done, click the Register button to complete the registration process.
- Proceed to the instructions outlined in the Publish Channel to Devices section above. NoteIn Step 4 of the section, enter the browser’s Device Name to publish the channel to the browser.
- The channel will be published and displayed on the browser window.
Was this article helpful?