This article provides instructions to configure and register Mersive Solstice Pod devices with the Appspace App, ideal for displaying signage in huddle spaces or conference rooms. Similar to how the app works on Cisco’s Collaboration Endpoints, the Appspace App (PWA) will run on a browser as signage, and will be automatically enabled when the device is not in use for conference or collaboration.
Only Playlist channels are supported. The Appspace App for Mersive Solstice Pod is only designed and tested for playlist channels, thus we do not support advanced channels, live stream channels, alerts, device tasks, or playout metrics.
The following content types are supported and can be included in the playlist channel:
- Images
- Videos
- All Appspace Supported Cards
The following device has been tested and certified with Appspace:
- Mersive Solstice Pod Gen 3
- Mersive Solstice Pod Gen 2i
Prerequisites
- The device must meet the manufacturer’s minimum hardware and technical specifications. Please refer to Supported Devices & Operating Systems.
- Supported Mersive Solstice devices:
- Mersive Solstice Pod Gen 3
- Mersive Solstice Pod Gen 2iImportantTo maintain the integrity of the local storage on the device, the registration information is written to the permanent storage on a timer. After a device is registered to Appspace, please do not remove power or reboot it for at least one (1) hour.
- Supported Mersive Solstice devices:
- Solstice Dashboard installed on your device. Download and install the Solstice Dashboard from https://www.mersive.com/products/solstice/dashboard-sds/
- An active Appspace account, with sufficient device licenses to register the device.
- Account Owner or Location Admin user roles with sufficient platform licenses.
- An active Internet connection.
- It is recommended that the device clock is set to automatically retrieve time from a Network Time Protocol (NTP) server, with the correct time zone, in order for it to sync correctly with the Appspace server.Note
- Appspace cloud servers by default retrieve time from a NTP server. If an Appspace on-premises server is used, ensure the server time is automatically retrieved by a NTP server.
-
Appspace has updated the timezone configurations, which now includes timezones other than GMT. This enables users with daylight savings to adjust the time accordingly.
For more information, please refer to the Appspace 7.1-ac.8 Release Notes
- Please ensure your network is configured to allow Appspace Approved URLs and the relevant network ports.On your proxy server, ensure our approved URLs are listed in the ‘How to set up networks with SSL content filters’ section in the following article: https://support.google.com/chrome/a/answer/3504942#sslinspection.
Configure Mersive Solstice Pod devices
Follow the instructions below to enable Appspace App on the Mersive devices:
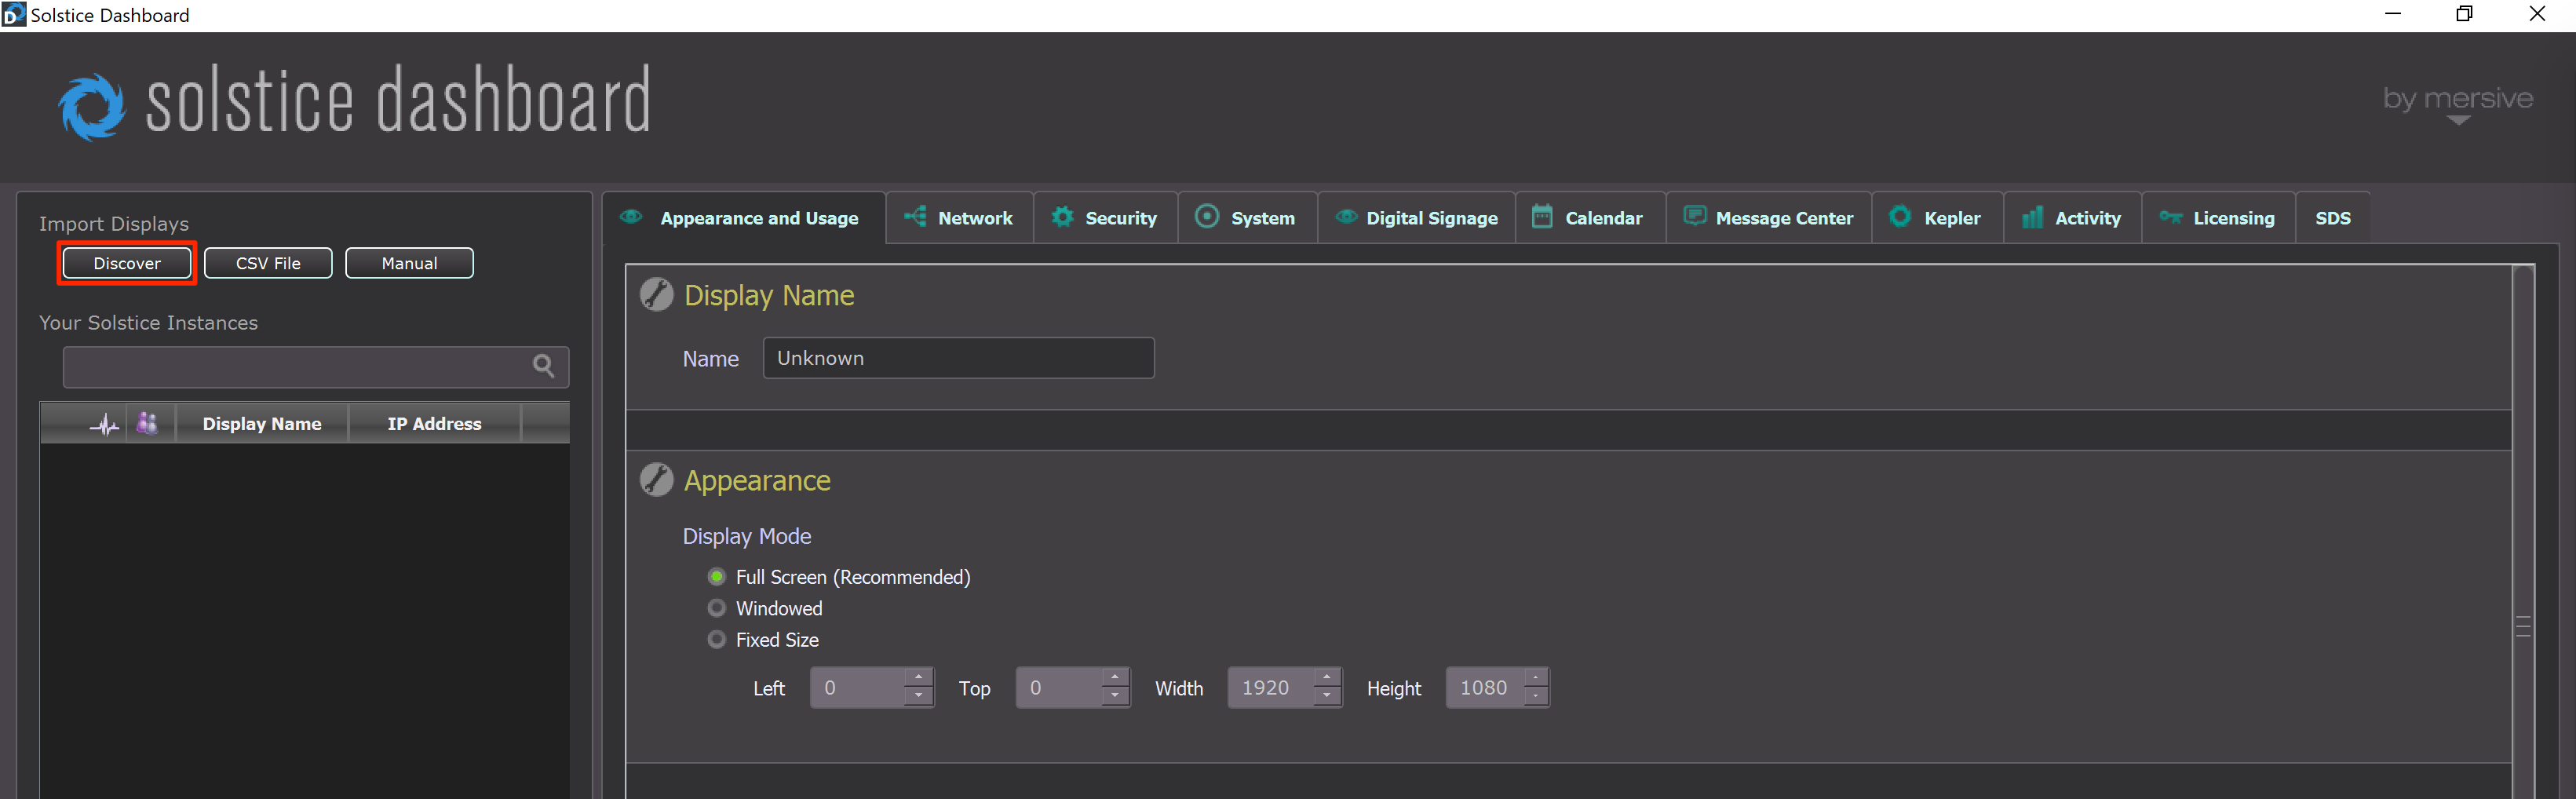
- Launch the Solstice Dashboard, and click the Discover button to add your Mersive Solstice devices on your network.
- Once the device has been added, click the Digital Signage tab, and check the Enabled checkbox.
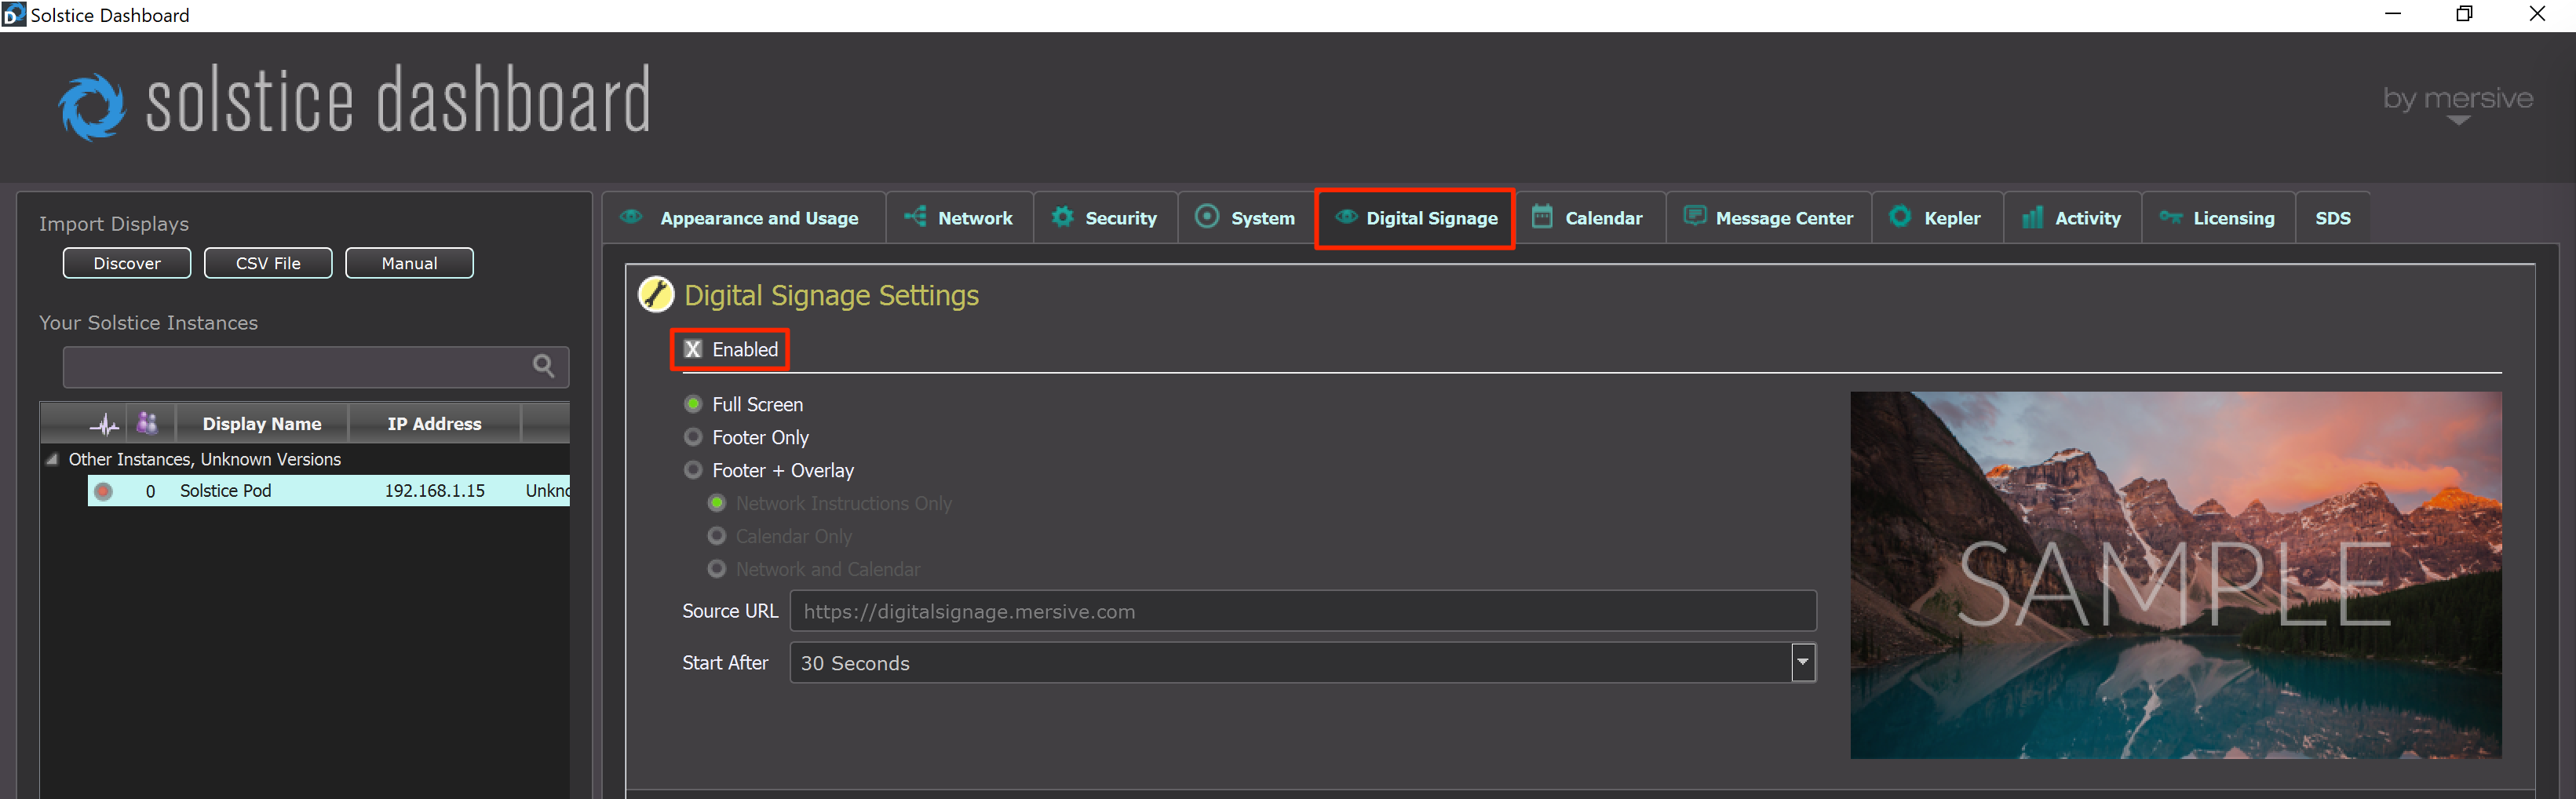
- Enter in the Appspace App PWA URL in the Source URL field. NoteThe Appspace App PWA URL for public cloud is https://cloud.appspace.com/app/?registrationmode=passive
- Click Apply, and the Appspace App will be launched based on the Start After duration set.
- Once successfully connected, the Appspace App device registration page is displayed. Follow the instructions in the Register a device article (from Step 2 onwards) to register your device using the 6 digit code displayed. NoteOnce registered, the device type will be displayed as Mersive, instead of PWA, and the device health will show as offline in the Appspace console because the Appspace App is only online when called upon.
- Publish and assign the Mersive device to your playlist channel(s). Please refer to the Publish a channel article.
Was this article helpful?