Seamlessly integrate your valuable SharePoint content into your Appspace SharePoint Intranet, amplifying its reach and impact. Elevate collaboration and knowledge sharing by bringing your essential SharePoint resources directly to your employees’ fingertips.
This article provides Administrators with an outline to configure a new SharePoint Online site collection as a new content source for an existing Appspace SharePoint Intranet installation.
Prerequisites
- Ensure Appspace SharePoint Intranet version 4.14 or later is installed on your Microsoft 365 tenant.
Microsoft 365 Specific Requirements
- Ensure Azure CLI version 2.56 or later is installed. Installation link: https://learn.microsoft.com/en-us/cli/azure/install-azure-cli-windows?tabs=azure-cli
NoteYou may execute the following PowerShell command to verify your Azure CLI version:
az version
- Ensure the following Roles and Permissions have been configured:
- SharePoint Administrator – This role within the Azure Microsoft 365 subscription is required to create the new SharePoint Online site collection.
- Appspace SharePoint Intranet Administrator – This is a SharePoint Site Collection Administrator assigned as an Appspace SharePoint Intranet Administrator, is required to add the site collection to the Appspace SharePoint Intranet configuration.
Create and Configure a SharePoint Online Site Collection
This section is to be performed by the SharePoint Administrator.
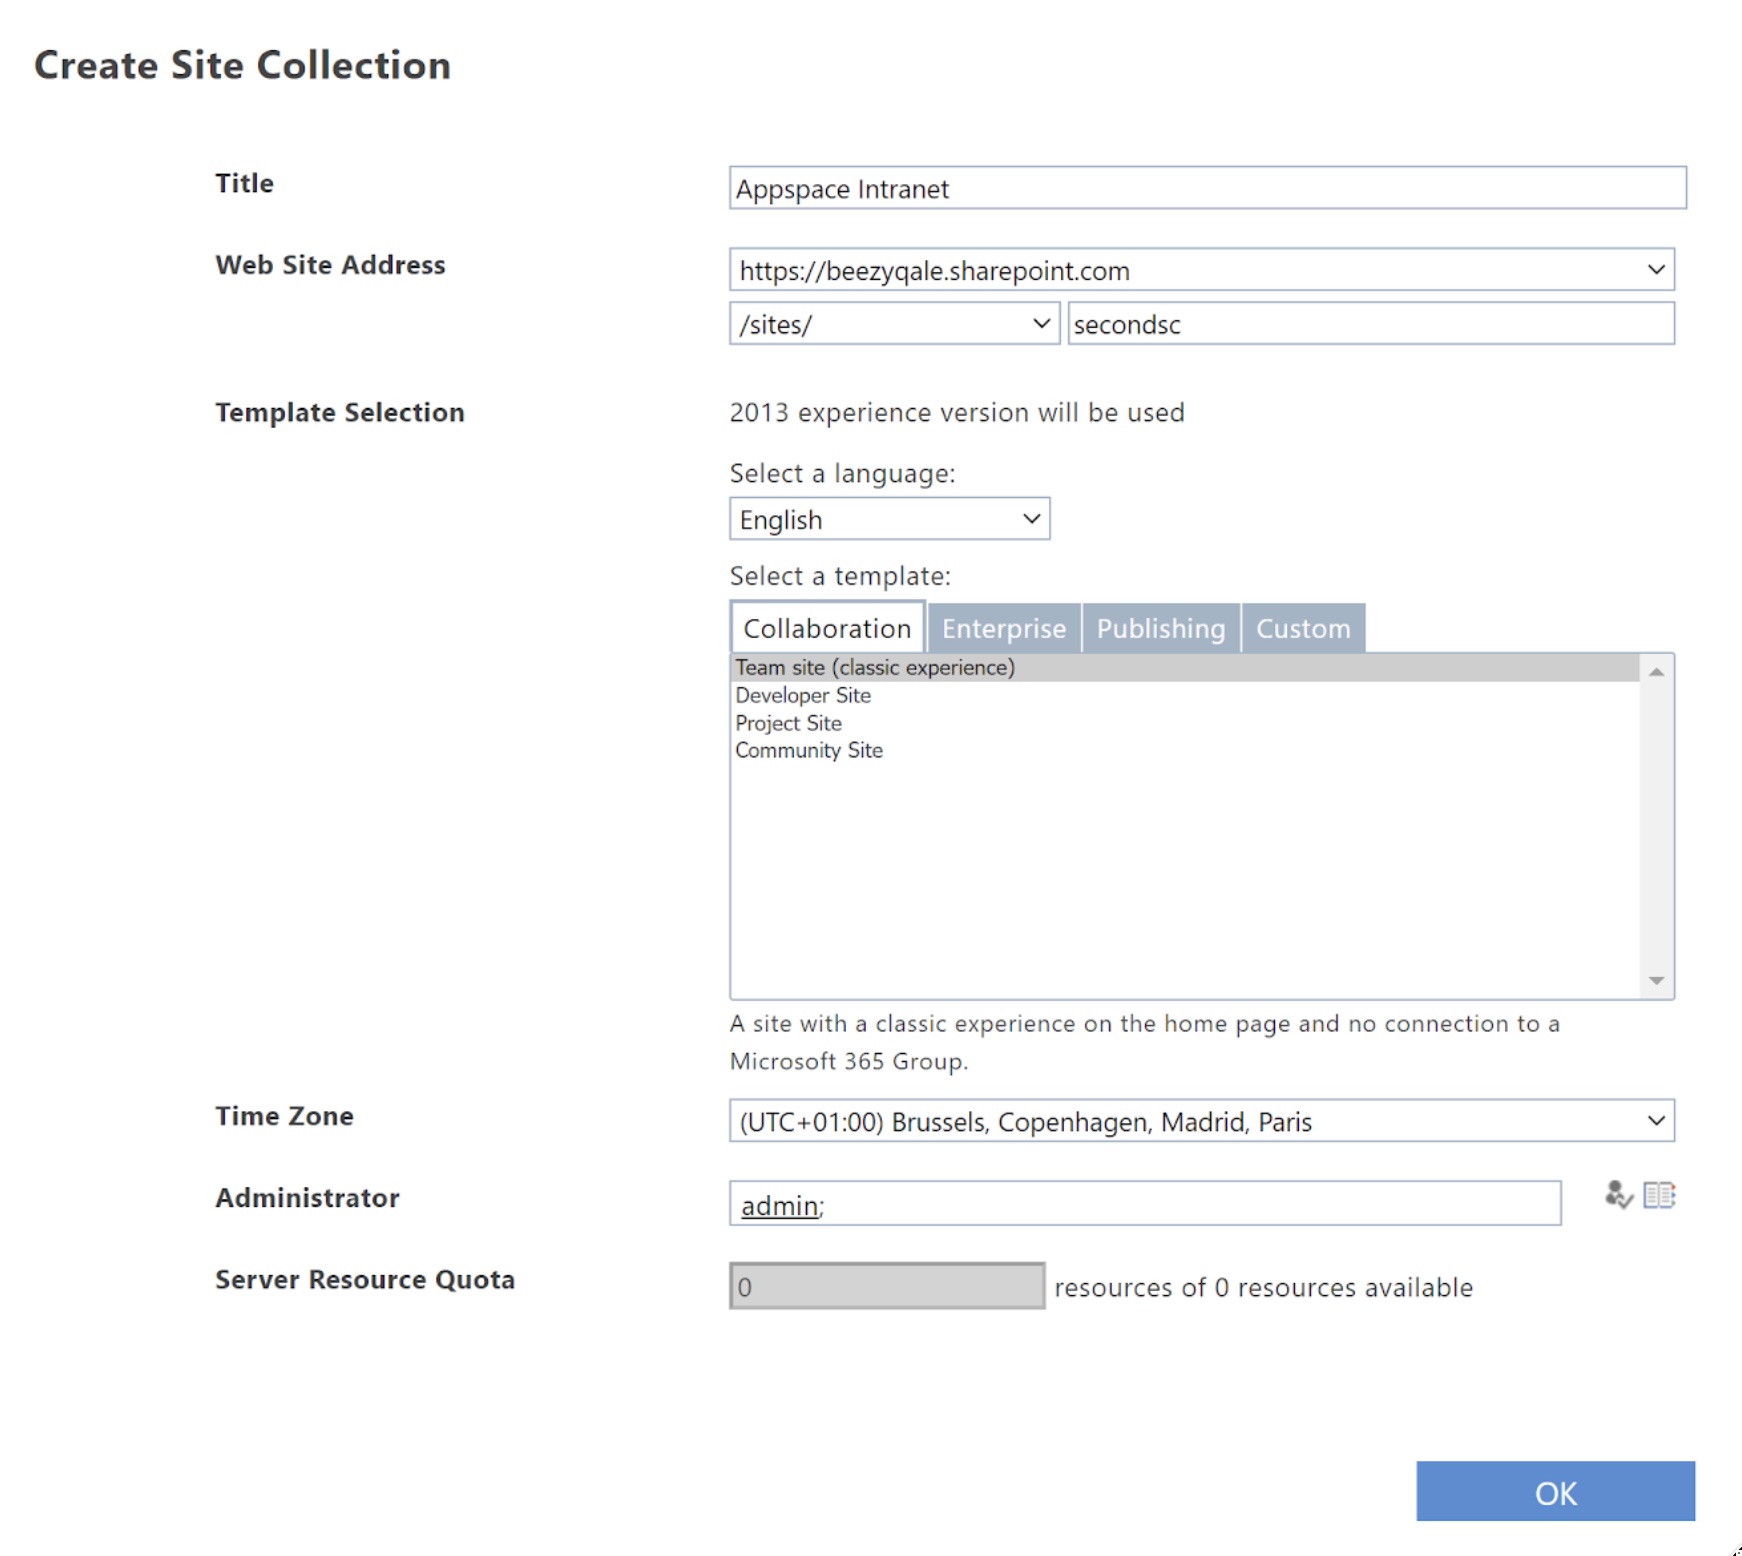
Create and configure the SharePoint site collection by using the Team site (classic experience) template as per the instructions outlined in the Create a site article by Microsoft.
Enable Custom Scripts
To enable the provisioning of CSS and JS files, pages, layouts, and images during installation, it’s essential to allow custom scripts for the new site collection. This involves enabling custom scripts on the newly created site collection, by following the instructions outlined in the Manage Custom Script from SharePoint Admin Center section within this Microsoft article.

Execute Install Script
This section is to be performed by the Appspace SharePoint Intranet Administrator.
Set-ExecutionPolicy -ExecutionPolicy Bypass -Scope Process
This is to prevent running into the “Running scripts is disabled on this system” error. For more information, please refer to the Microsoft about_Execution_Policies article.
Executing this script provisions all required files to the new SharePoint site collection, and updates the existing Appspace SharePoint Intranet configuration.
- Download and extract the contents of the installation package to your local folder.
- Browse and navigate to the “Install/Deployment Files” folder path.
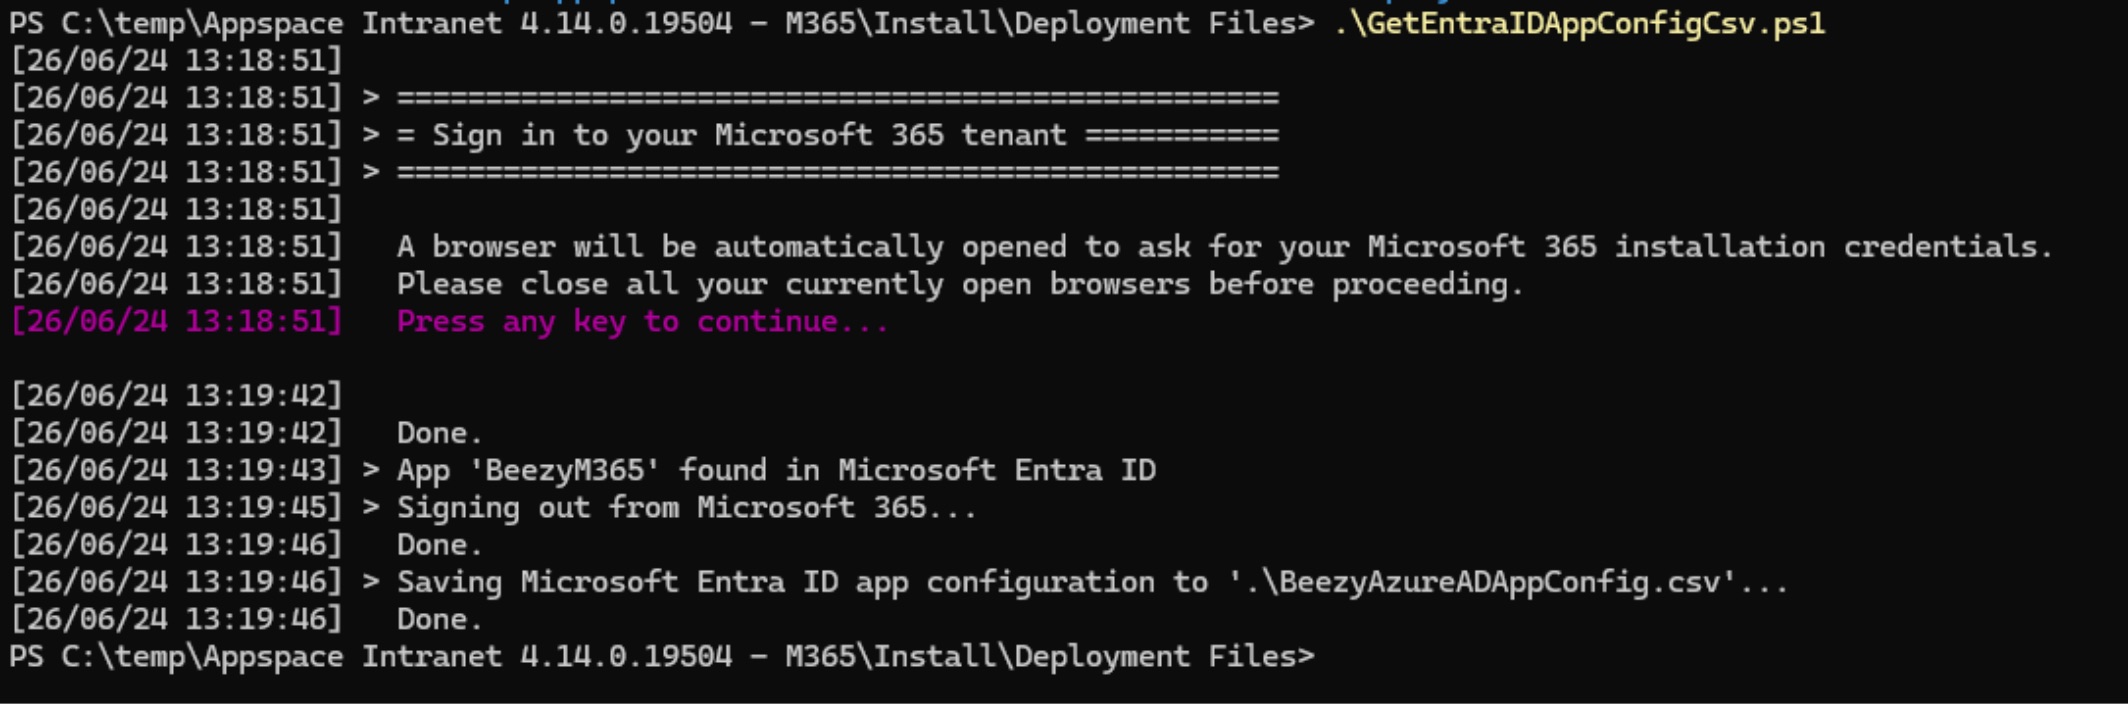
- Launch the PowerShell console, and execute the following script to save the Microsoft Entra ID app configuration as a CSV file, that is required to authenticate the account and connect to the Intranet API.
PS > .\GetEntraIDAppConfigCsv.ps1
- EntraIDAppName (optional): Name of the Intranet Microsoft Entra ID app. Only needed if you changed the default “BeezyM365” name or want to get another one.
- AppServiceCustomDomainUrl (optional): Public App Service URL. Only needed if you have a custom domain (URL different than https://*.azurewebsites.net).
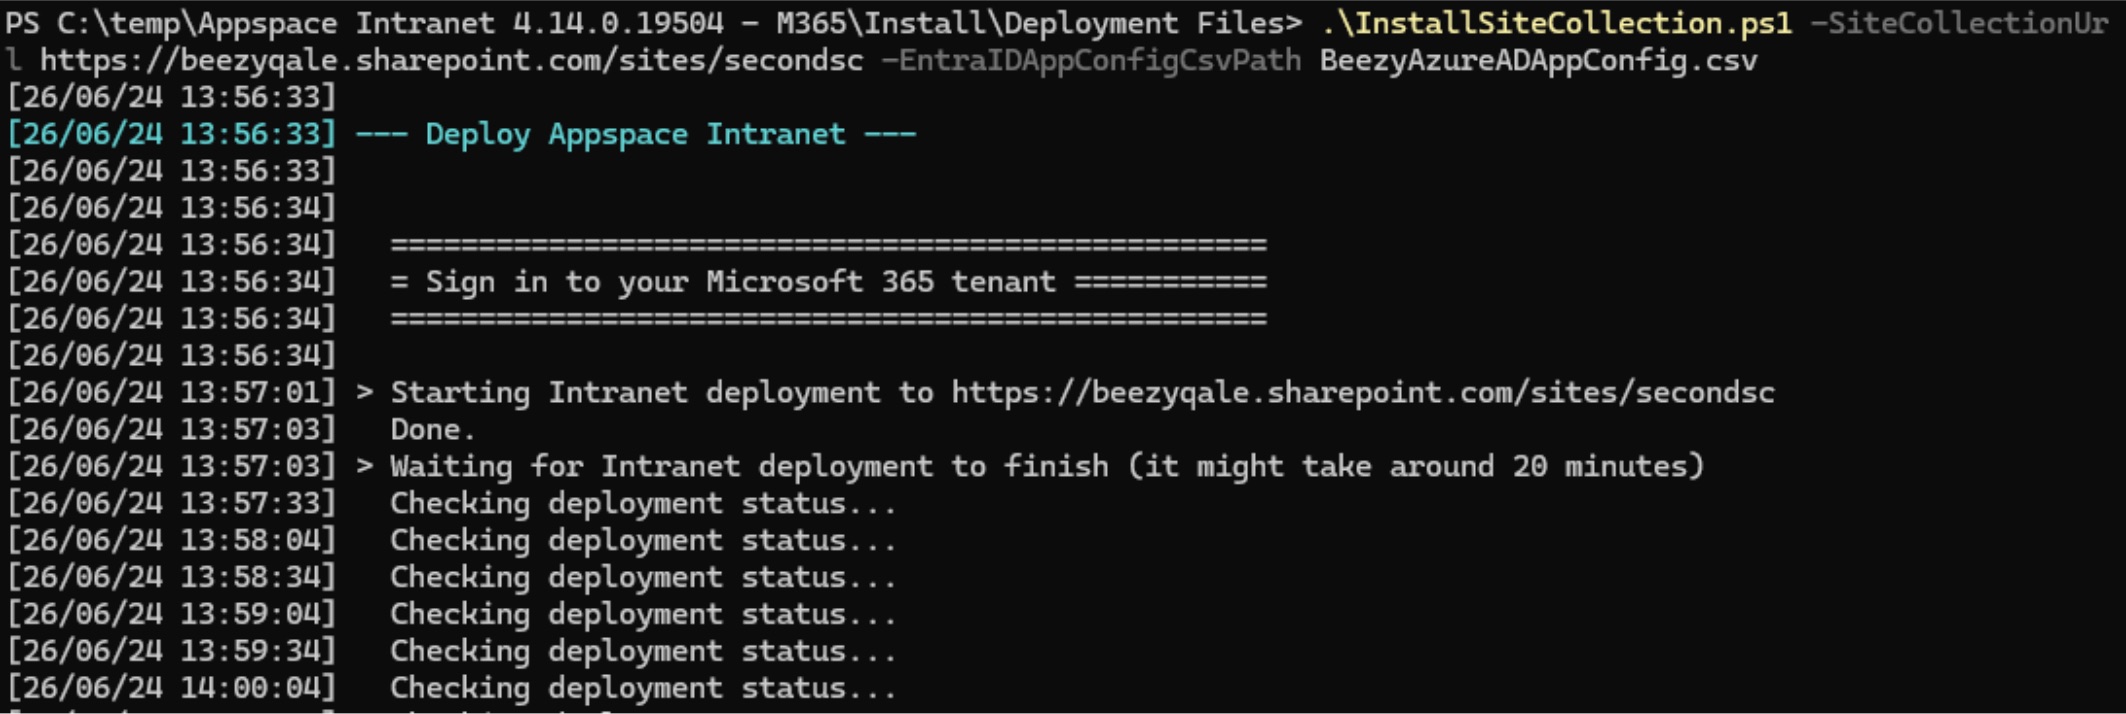
- Execute the following script to start the job to provision the required files and add the site collection to the Intranet instance:
PS > .\InstallSiteCollection.ps1 -SiteCollectionUrl https://mytenant.SharePoint.com/sites/secondsc -EntraIDAppConfigCsvPath BeezyAzureADAppConfig.csv
Parameters:- SiteCollectionUrl (mandatory): URL of the new site collection created in the previous step.
- EntraIDAppConfigCsvPath (mandatory): relative or absolute path where you have the CSV file with the Microsoft Entra ID app configuration data (generated in the previous step).
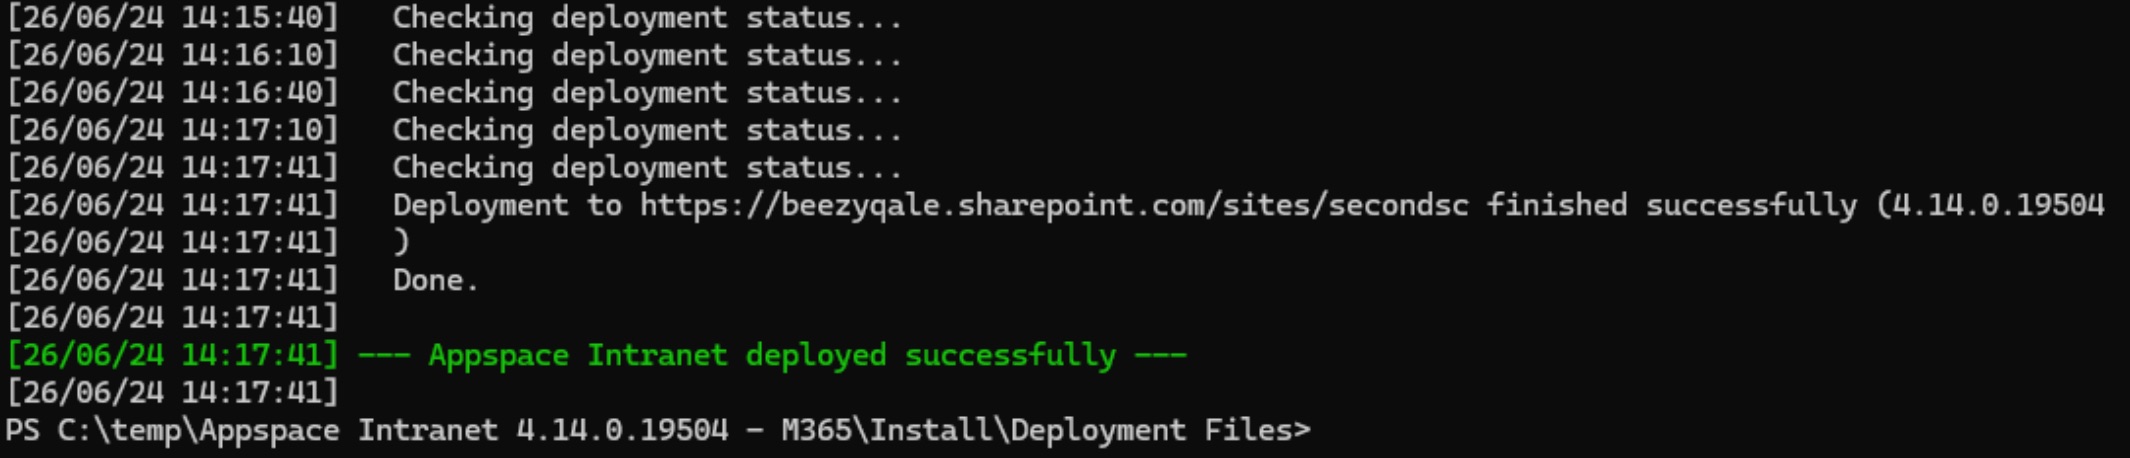
- Once the executed job has been completed successfully, you may browse the URL of the new SharePoint site collection to access the Appspace SharePoint Intranet. Alternatively, navigate to “Intranet settings > Manage site collections” to view all SharePoint sites within the instance.
Was this article helpful?