Please do not apply these steps unless explicitly instructed by Appspace SharePoint Intranet support.
Please, before you proceed, make sure that the branding package DLL is in the “bin” folder of the Web application and the Web.config file has the branding name configured.
Usually, branding packages are deployed together with the Appspace SharePoint Intranet installation or upgrade process. However, an administrator can apply a branding package separately following these steps:
1. Go to your Appspace SharePoint Intranet App Service in Azure –> Configuration
2. Application Settings –> Branding –> “YourName“
3. Restart the App Service
4. Using FTP URL, upload the new YourName.Beezy.Branding.Provisioning.dll to /site/wwwroot/bin
5. Restart again the App Service
6. Browse to Beezy –> Site settings in the root site of the Appspace SharePoint Intranet site collection and click on Beezy upgrades.
7. Once you are in the Appspace SharePoint Intranet upgrades page, change the word “upgrade” of the URL for “upgradejobs” and hit return:
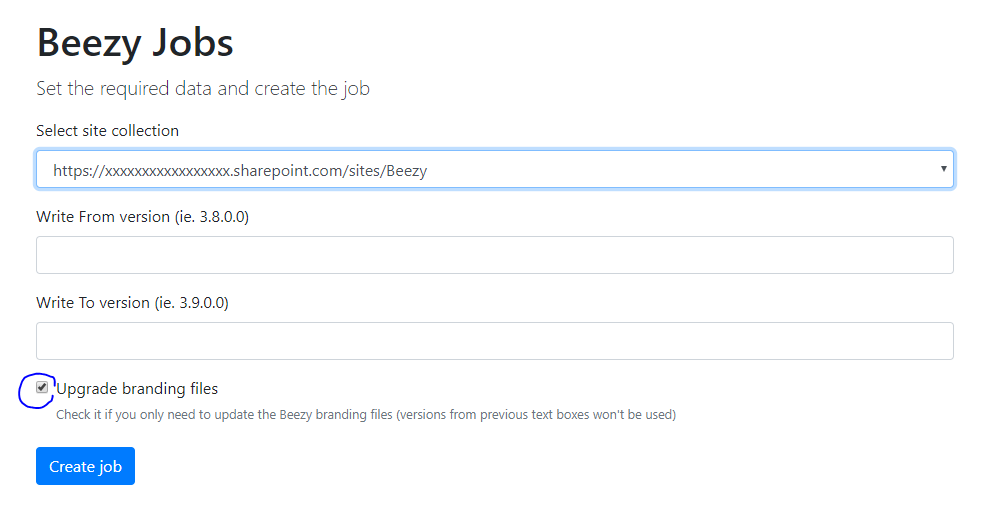
8. You will go to a page that contains a form where you can apply the branding update. In order to do so, please select the site collection (it’s necessary to repeat the procedure for each site collection where you want to apply the branding)
9. Click “Upgrade branding files”
10. Click “Create job”
11. Job should be created in Beezy Jobs
12. The new branding should be deployed after about 15 minutes
13. You should then see the job in the “Succeeded Jobs” list in the Sites Settings –> Beezy Jobs dashboard
This will initialize the provisioning jobs.
Was this article helpful?