The Crestron touch panel devices are integrated with the Appspace App and HTML5-based room scheduling cards, to provide you an ideal meeting room booking solution, with a simple way to view room availability, book instant meetings, extend a meeting that is in-progress, or schedule a future meeting.
This article provides instructions to configure and register Crestron TSS devices with Appspace App.
Important
The Appspace App for Crestron TSS is only designed and tested for playlist channels and room scheduling cards; thus we do not support advanced channels, live stream channels, videos, alerts, device tasks, or playout metrics.
Prerequisites
- The device must meet the manufacturer’s minimum hardware and technical specifications. Please refer to Supported Devices & Operating Systems. The models we currently support are the TSS-7 and TSS-10. ImportantCurrently, the Appspace App for Crestron TSS comes preinstalled on the device. If a Crestron device has been updated to the latest 3.002.0039.001 firmware from 3.002.0020 onwards, the Appspace App requires to be re-registered to the Appspace platform due to a known limitation.
- Create a Room Schedule card with one of the following calendar providers:
- Create and configure Room Schedule card with Google G Suite.
- Create and configure Room Schedule card with Microsoft Office 365.ImportantWhen adding the Room Schedule card to a playlist, please set content duration to 8 minutes for optimum results.
- An active Appspace account, with sufficient device licenses to register the device.
- Account Owner or Location Admin user roles with sufficient platform licenses.
- An active Internet connection.
- It is recommended that the device clock is set to automatically retrieve time from a Network Time Protocol (NTP) server, with the correct time zone, in order for it to sync correctly with the Appspace server.Note
- Appspace cloud servers by default retrieve time from a NTP server. If an Appspace on-premises server is used, ensure the server time is automatically retrieved by a NTP server.
-
Appspace has updated the timezone configurations, which now includes timezones other than GMT. This enables users with daylight savings to adjust the time accordingly.
For more information, please refer to the Appspace 7.1-ac.8 Release Notes
- Please ensure your network is configured to allow Appspace Approved URLs and the relevant network ports.On your proxy server, ensure our approved URLs are listed in the ‘How to set up networks with SSL content filters’ section in the following article: https://support.google.com/chrome/a/answer/3504942#sslinspection.
Configure Crestron TSS
Follow the instructions below to enable Appspace App on the Crestron TSS device:
- Enter in the Crestron device IP address in your web browser to access the Crestron web console.
- Click Sign in and enter in the Crestron device credentials.
- Click the Settings tab, and navigate to the Applications section. Select Appspace from the Application Mode drop-down menu.
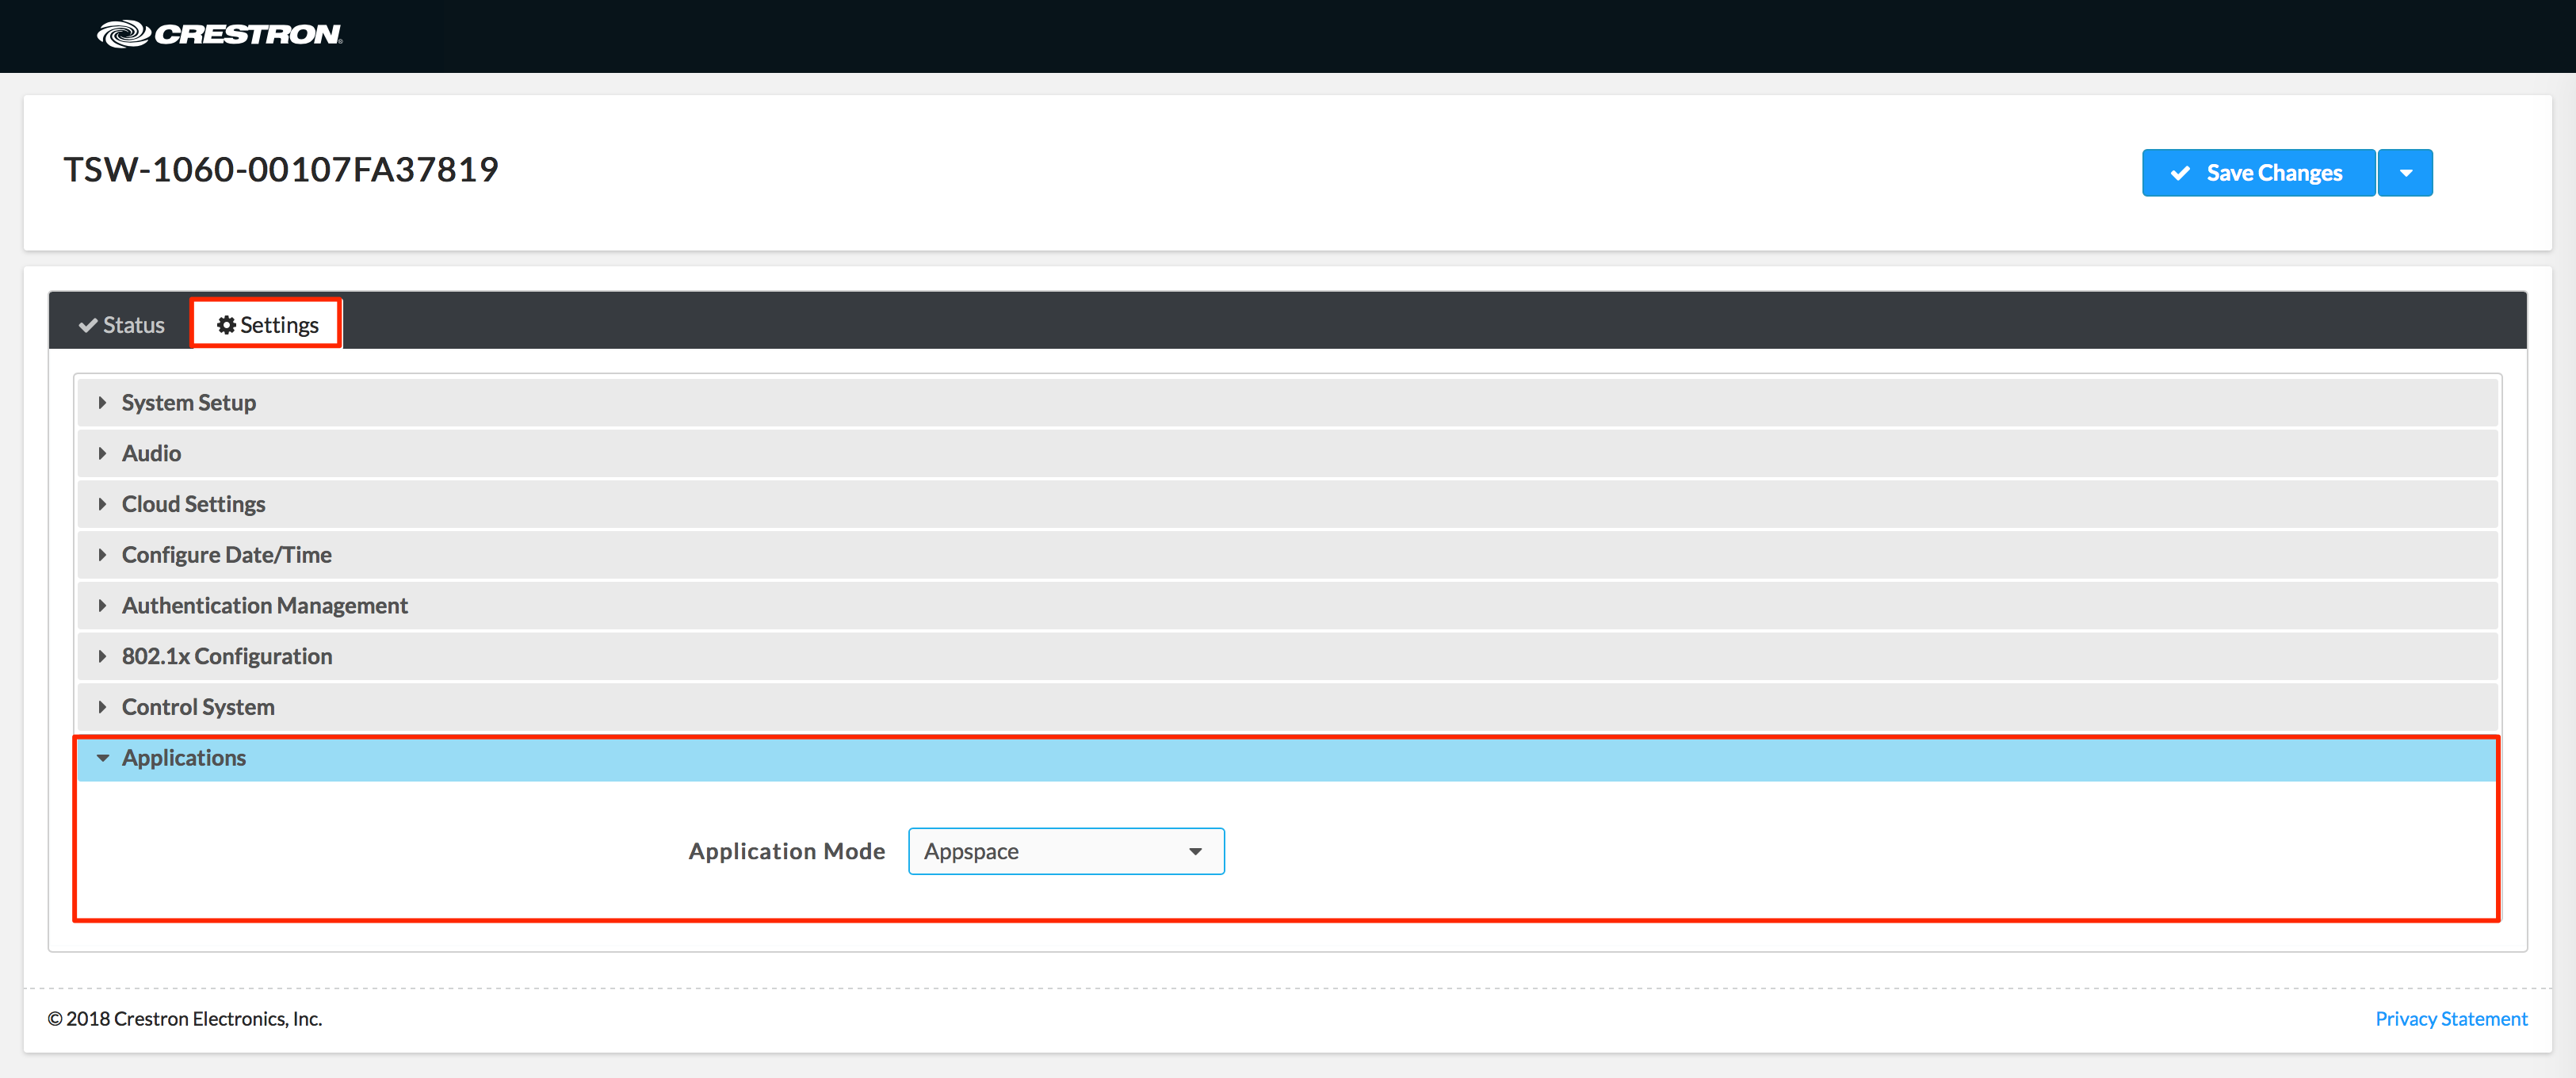
- Click Save Changes.
- Once successfully connected, the Appspace App device registration page is displayed. NoteCurrently, the Appspace App for Crestron TSS comes preinstalled on the device.
- Follow the instructions, from Step 2 onwards, in the Register a device article.
- In the Register a New Device window, type in the 6-character registration code, enter the device name, and select a network.
- Assign the playlist channel containing the Room Schedule card in the Assign a channel field.
- Click the Register button. ImportantDo NOT power off the device for at least one (1) hour after registration to ensure registration is complete.
- Once registration and content syncing is complete, you can view and browse the meeting room application on the device. NoteFor information on how to use the room scheduling cards and features available, go to Create room scheduling cards and manage bookings.
Was this article helpful?