The Appspace SharePoint Intranet offers a highly customizable navigational menu, known as the Megamenu in the page header, while the footer navigation contains various navigational links.
This article provides instructions to configure and manage the Megamenu header and footer navigation available on the Appspace SharePoint Intranet .
Prerequisites
- Global or Local Admin permissions.
Navigation Layout and Interface
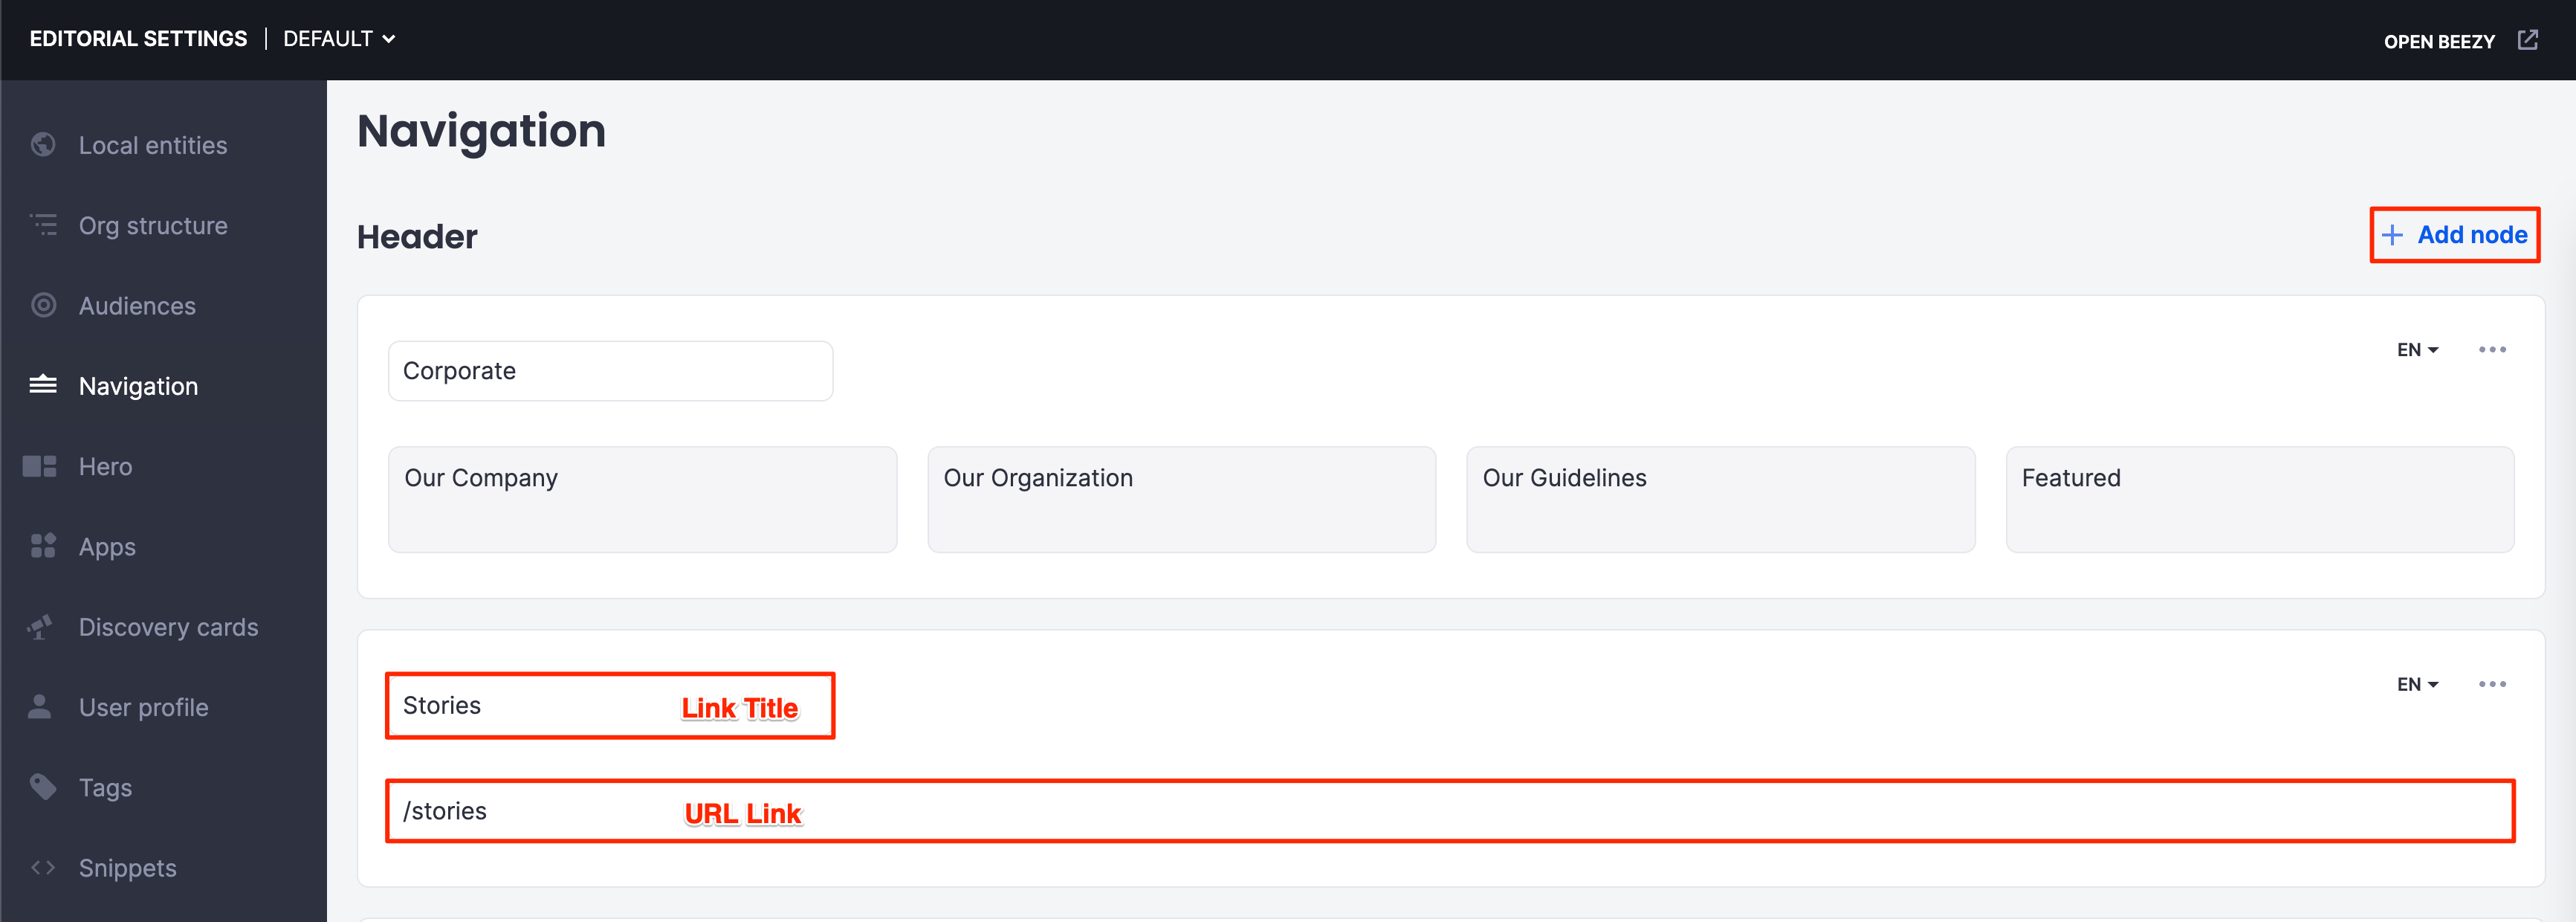
The below illustrates the Navigation dashboard on the Appspace SharePoint Intranet platform.
To access the Navigation dashboard, navigate to Settings > Site settings > Beezy settings > Editorial settings > Navigation.
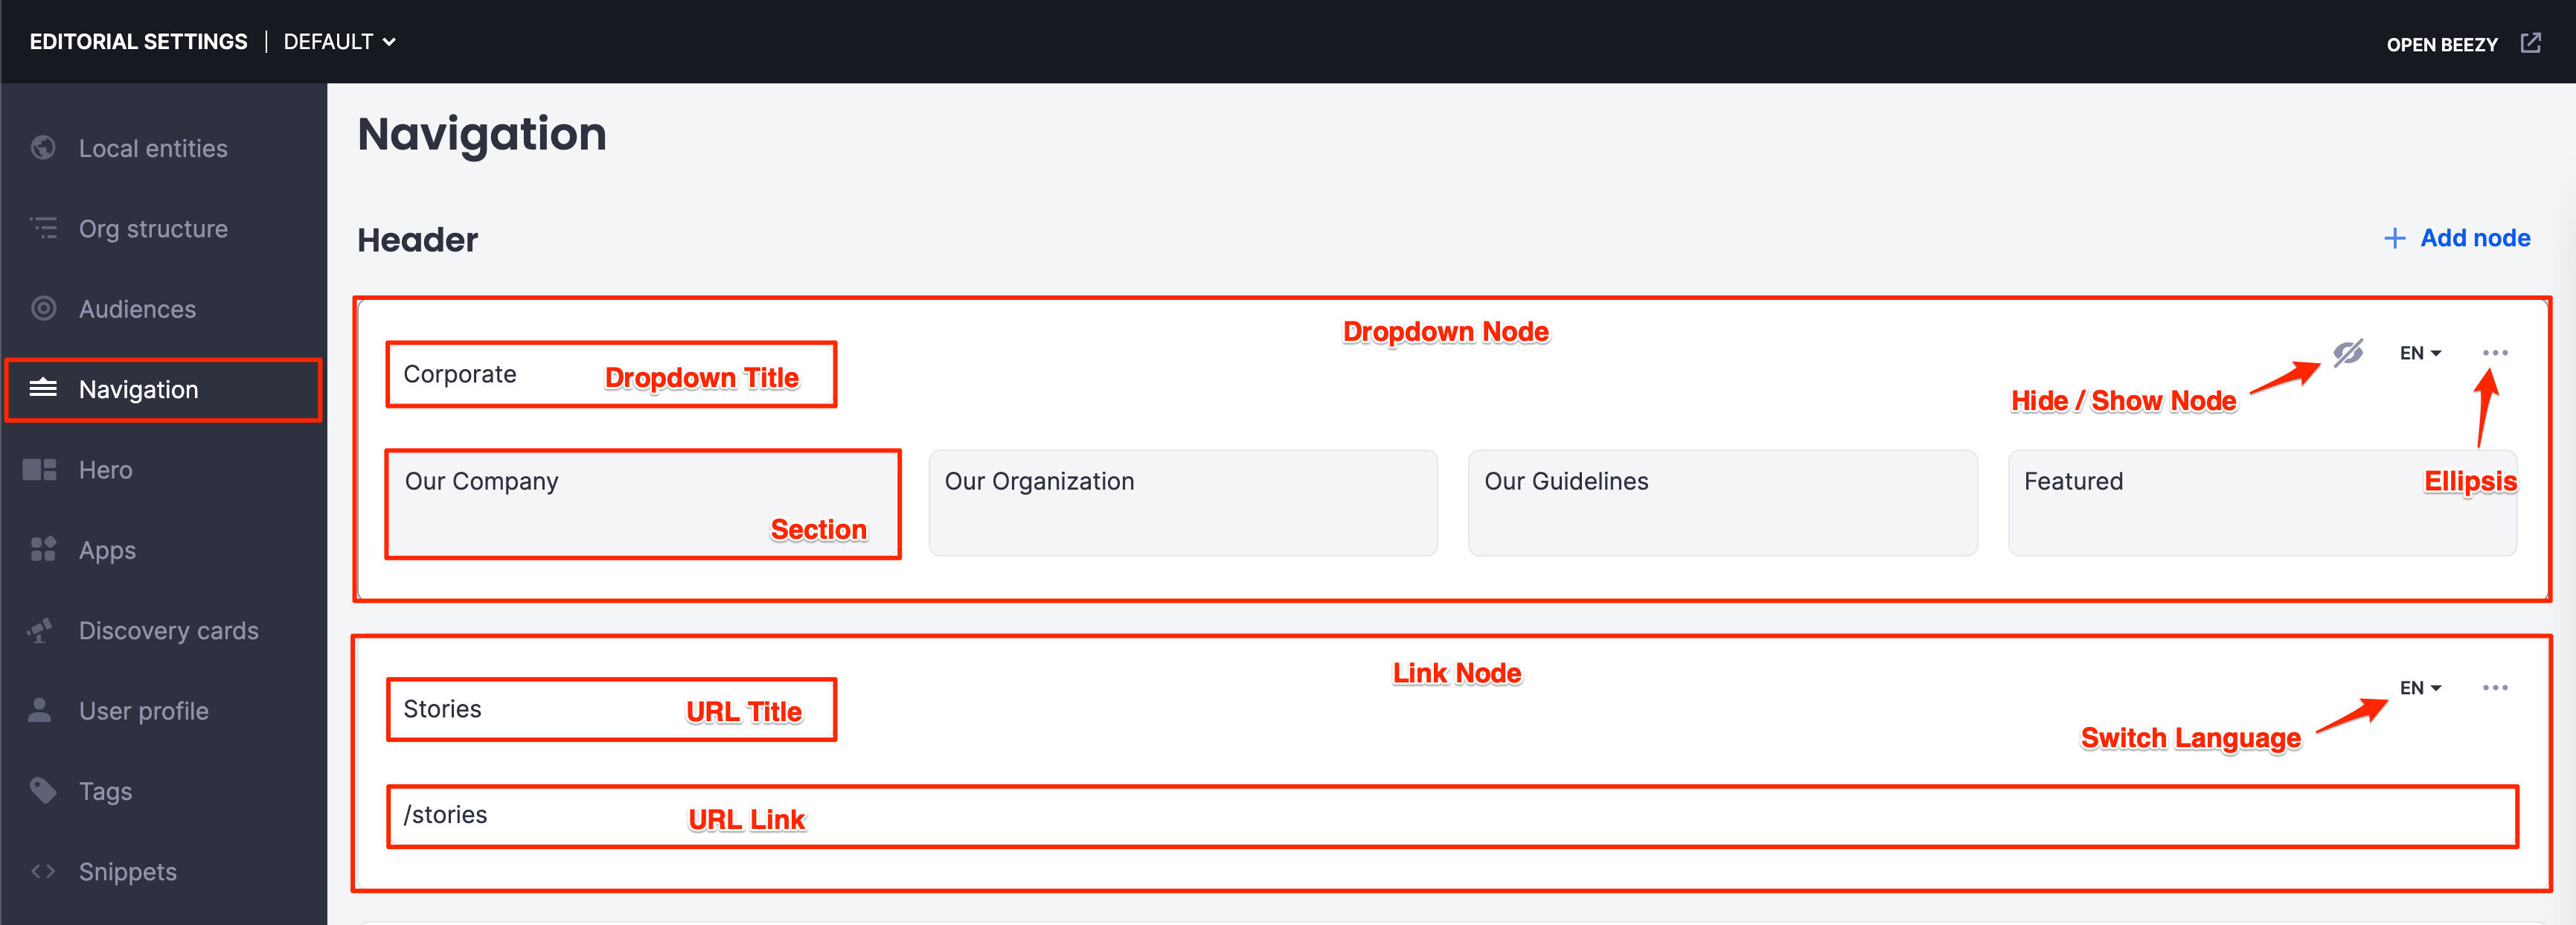
Icon Features
- Show / Hide Node icon – Displays or hides the navigation node within the menu.
- Language icon – Displays the selected language.
- Ellipsis – Additional options to manage nodes, such as to add and delete.
Configure the Navigation Header (Megamenu)
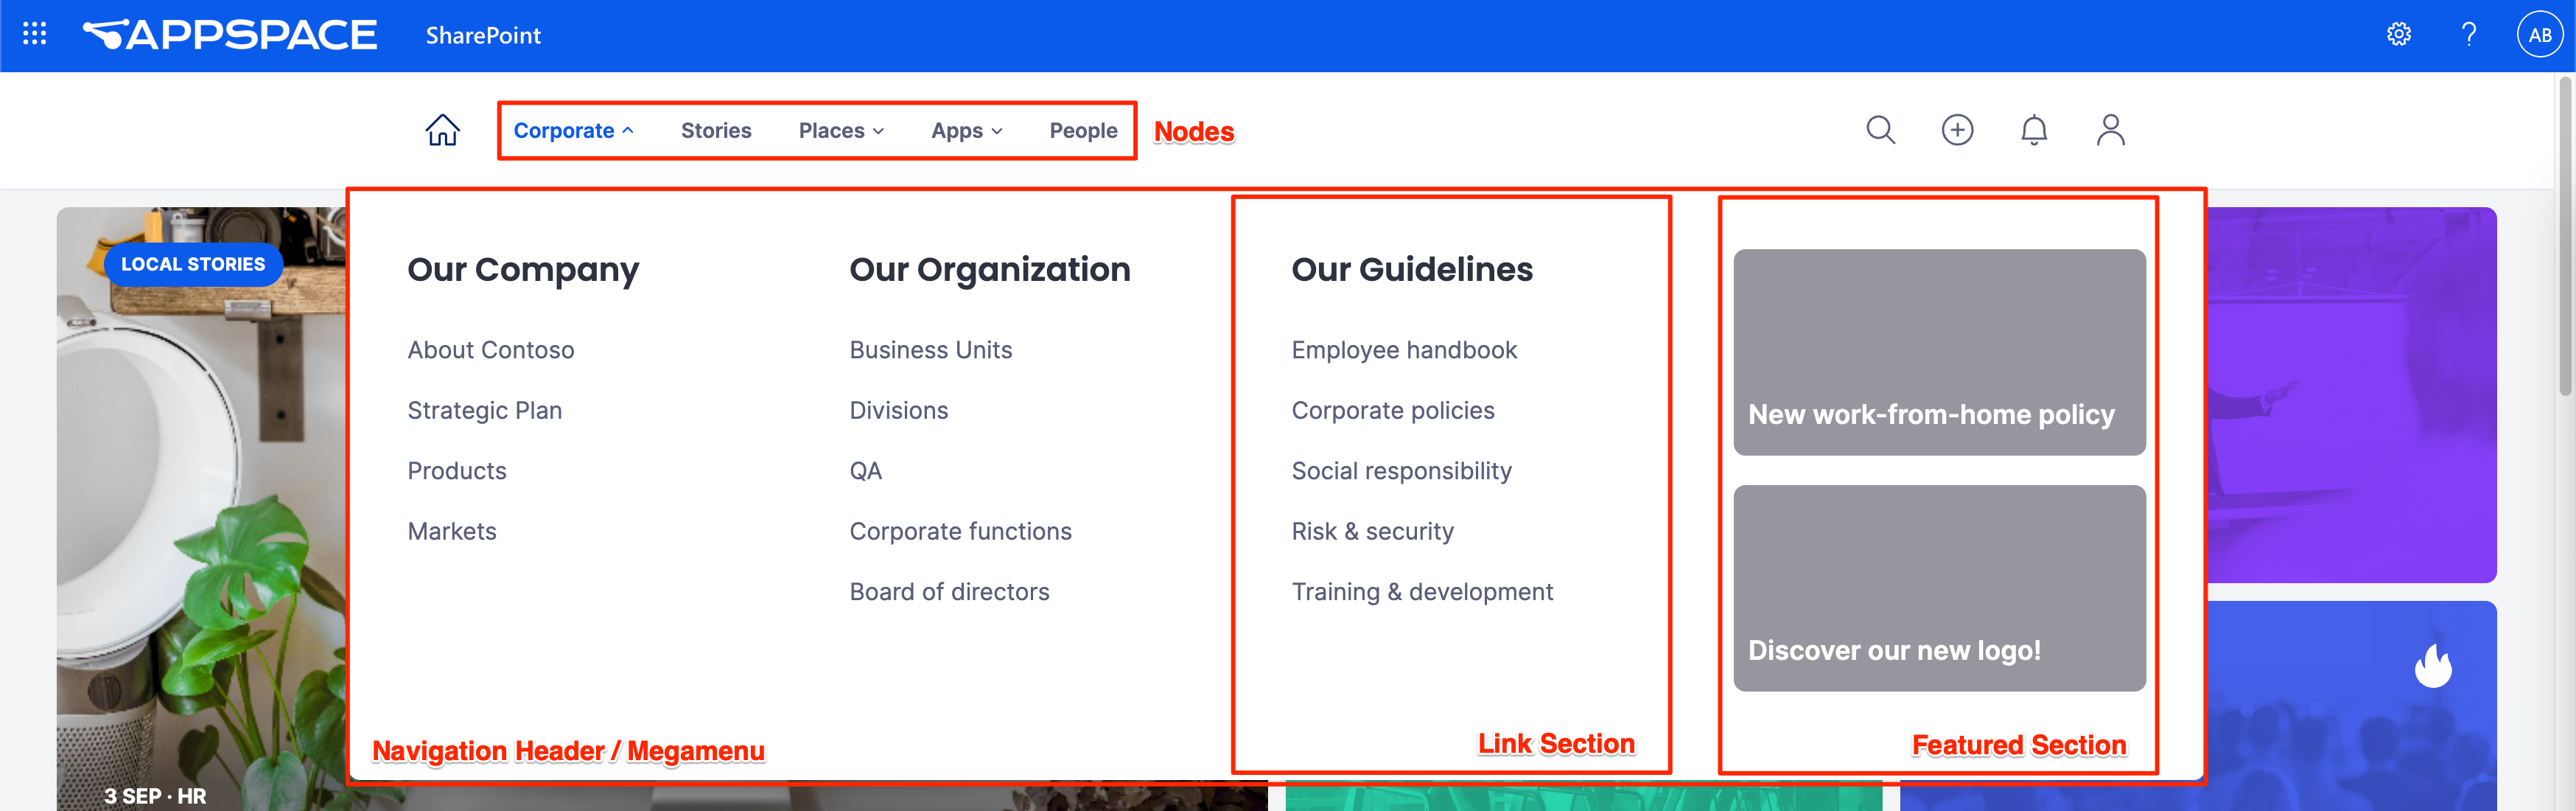
Admins may configure the navigational layout of the Navigation Header menu (or Megamenu) that is displayed on the Intranet platform. Only a maximum of 6 navigational nodes, with each node containing a maximum of 4 sections, may be added to the menu. Additionally, the Navigation Header may be customized with the following features:
- Add / Delete navigation nodes and sections
- Hide / Show navigation nodes
- Multilingual navigation nodes / sections (Limited to supported languages)
- Ability to reorder navigation items
- The navigation within Local Entities will be defined by the mix of Global and Local nodes and Sections in Megamenu and in the Footer.
- Global Admins only see the nodes from their own entity.
- All Local Admins of the same Local Entity view all Local Entity nodes. The global nodes are on the top of the view (the first ones) in the same position as the Global admin sees it.
Add a Dropdown Node
- Log in to your Appspace SharePoint Intranet console.
- Click the Settings ⚙ icon, and select Site settings from the SharePoint navigation.
- Navigate to the Site Collection Administration section, and click Beezy settings.
- Under Advanced configuration, click Editorial settings and click Navigation from the side panel.
- In the Navigation Header section, click + Add node.
- Select Dropdown, and click Save.
- Enter the Title for the drop-down node.
- Configure Link Section:
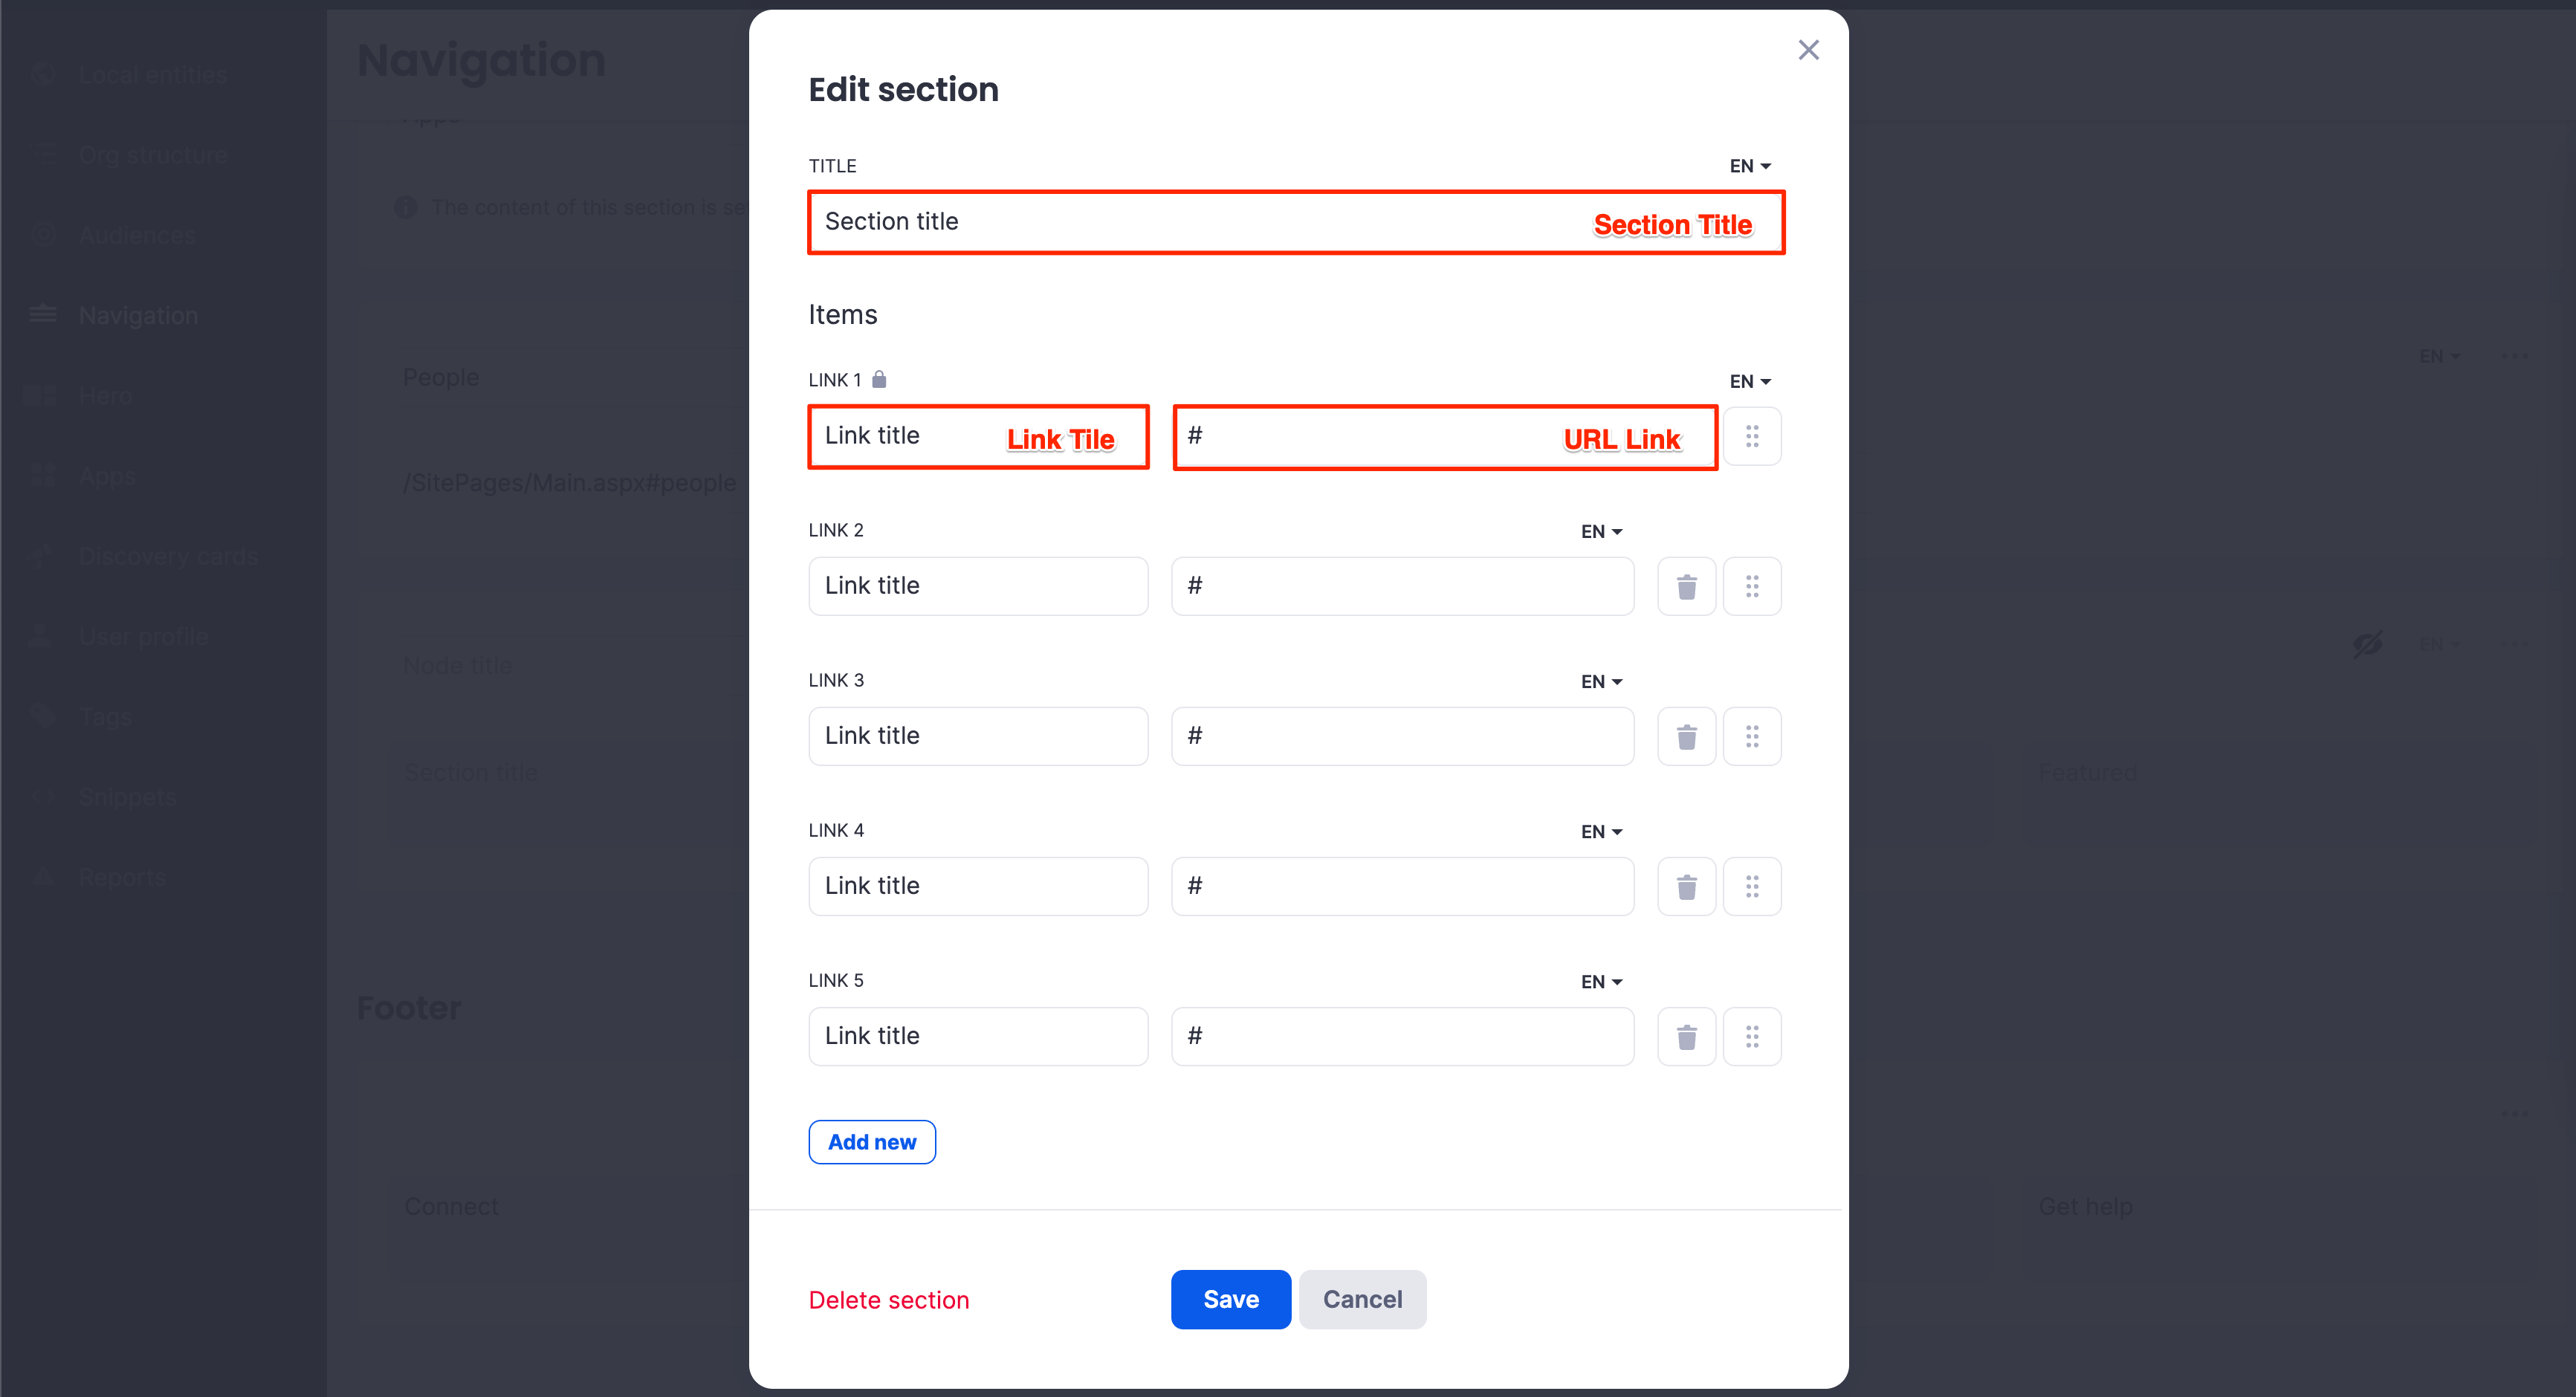
- Click the Section title to launch and configure the drop-down node.
- In the Edit section, enter the Title for the section.
- Proceed to enter the Section Title, Link Title, and URL Link of items for the drop-down node.
- You may add more links to the drop-down node by clicking the Add new button, or delete links by clicking the trash 🗑 icon.
- You may also reorder the links via drag-and-drop.
- Once complete, click Save.
- Configure Featured Section:
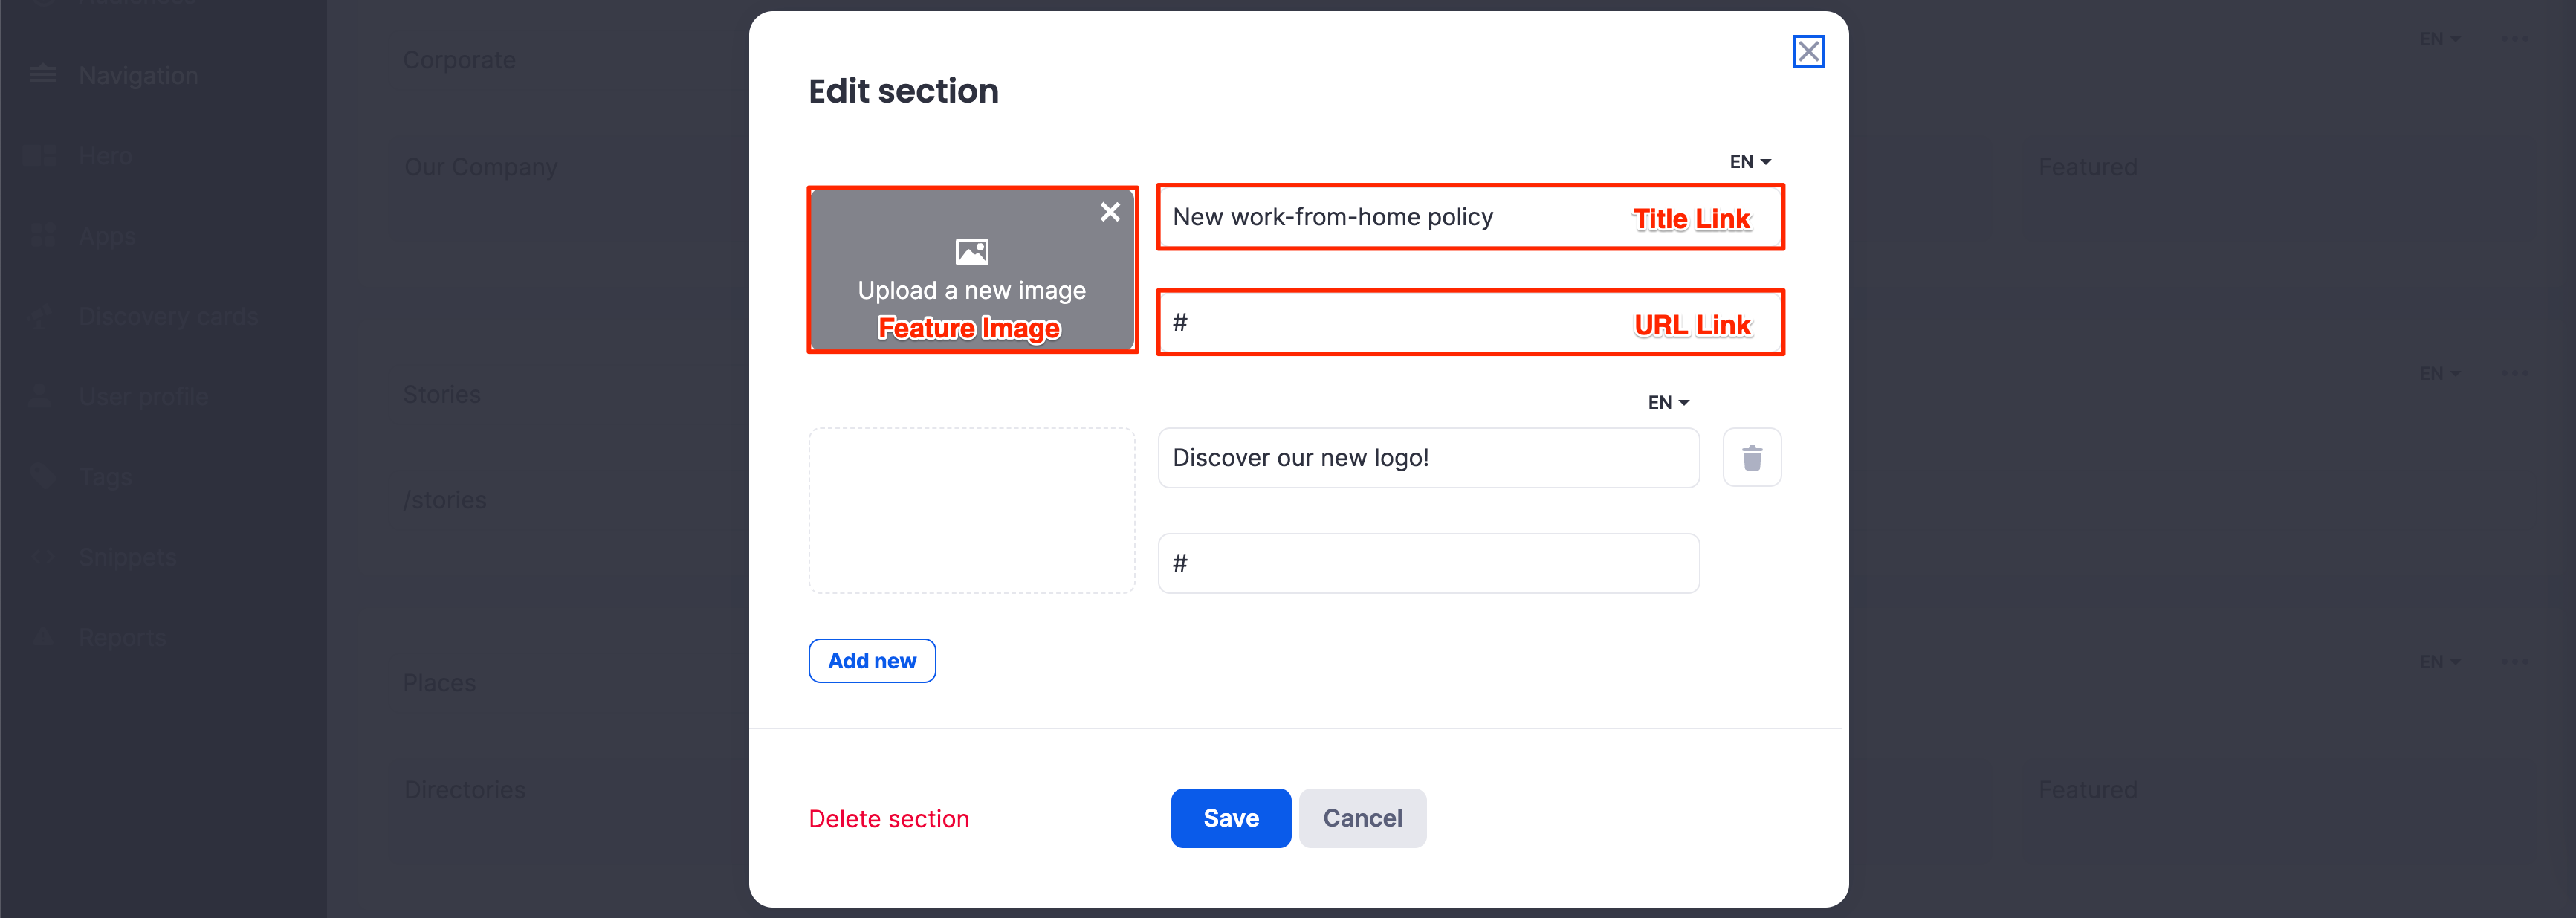
- Upload an image for the featured link.
- Proceed to enter the Link Title and URL Link of the featured item.
- You may add an additional featured link by clicking the Add new button, or delete a feature link by clicking the trash 🗑 icon.
- Once complete, click Save.
- Configure Link Section:
- Changes are saved automatically.
Add a Link Node
- Log in to your Appspace SharePoint Intranet console.
- Click the Settings ⚙ icon, and select Site settings from the SharePoint navigation.
- Navigate to the Site Collection Administration section, and click Beezy settings.
- Under Advanced configuration, click Editorial settings and click Navigation from the side panel.
- In the Navigation Header section, click + Add node.
- Select Link, and click Save.
- Enter the Title and URL for the link node.
- Changes are saved automatically.
Configure the Navigation Footer
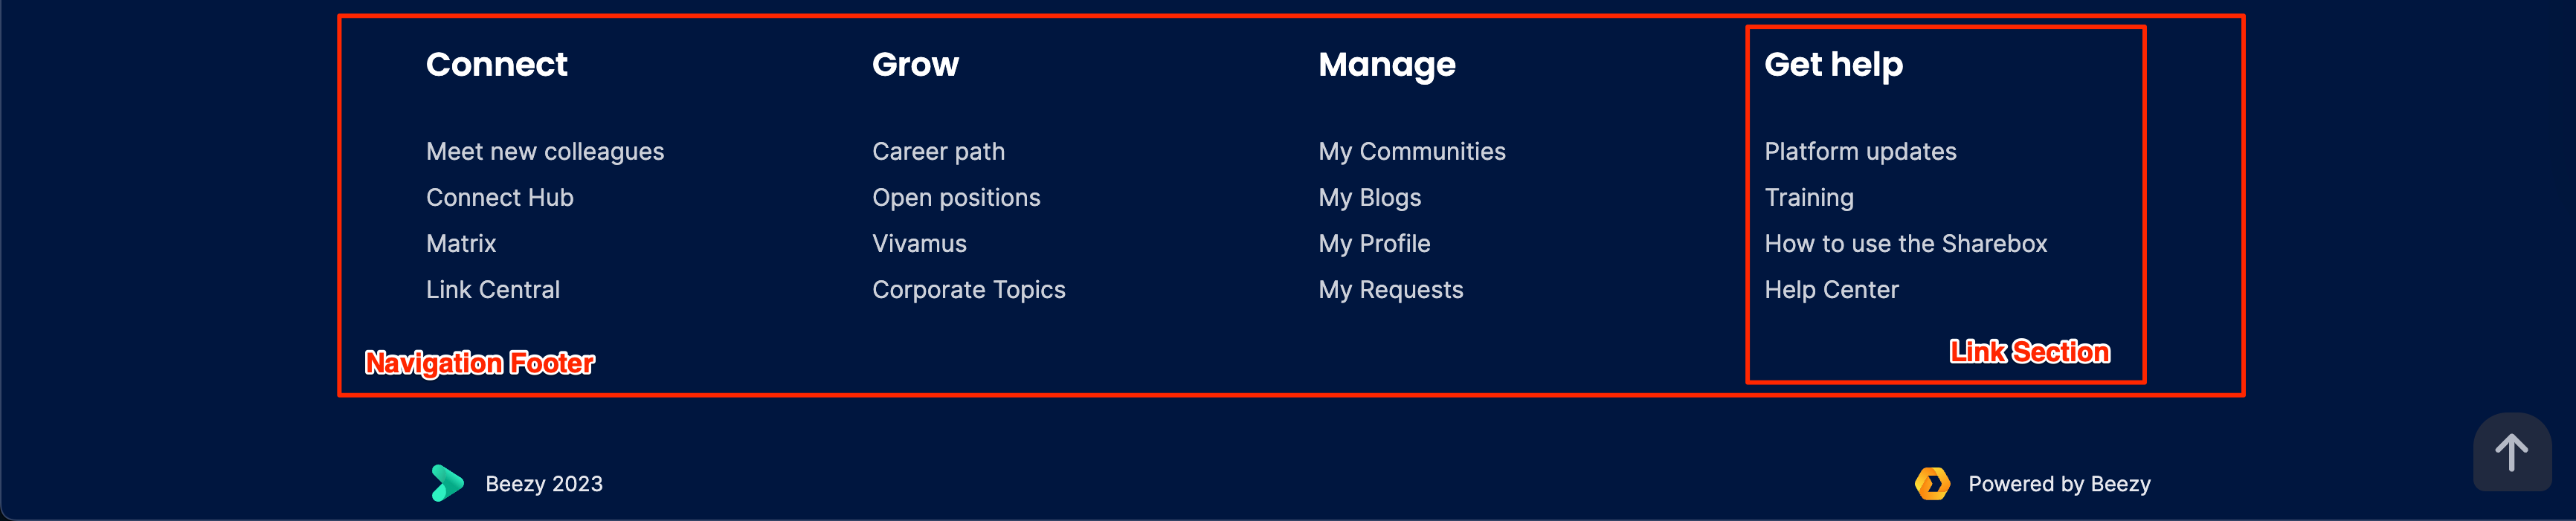
Admins may configure the navigational layout of the Navigation Footer menu that is displayed at the bottom of the Intranet platform. Only one navigational node, with a maximum of 4 sections, may be added to the menu. Additionally, the Navigation Footer may be customized with the following features:
- Hide / Show navigation nodes
- Add / Delete navigation sections
- Multilingual navigation sections (Limited to supported languages)
- Global Admin only sees global sections. Global Admin should secure a section of the footer, to not lose all control of the node. The management level of the footer is addressed to sections. Global Admin has no restrictions here on the number of sections that they can secure, can manage even the 4 sections.
- Local Admins can use empty sections left by Global Admin. If Global Admin wants to create more sections, local sections are pushed by new global sections. Local Admins will see global sections always on the left. No choice to reorder the sections.
- Log in to your Appspace SharePoint Intranet console.
- Click the Settings ⚙ icon, and select Site settings from the SharePoint navigation.
- Navigate to the Site Collection Administration section, and click Beezy settings.
- Under Advanced configuration, click Editorial settings and click Navigation from the side panel.
- In the Navigation Footer section, click the Section title to launch and configure the links node.
- In the Edit section, enter the Title for the section.
- Proceed to enter the Title, Link Title, and URL Link of items for the drop-down node.
- You may add more links to the drop-down node by clicking the Add new button, or delete links by clicking the trash 🗑 icon.
- You may also reorder the links via drag-and-drop.
- Once complete, click Save.
Was this article helpful?