This article provides instructions for employees with Concierge permissions to manage workspace reservations, such as office spaces, meeting rooms, and hot desks via the Concierge dashboard on the Appspace Employee App portal.
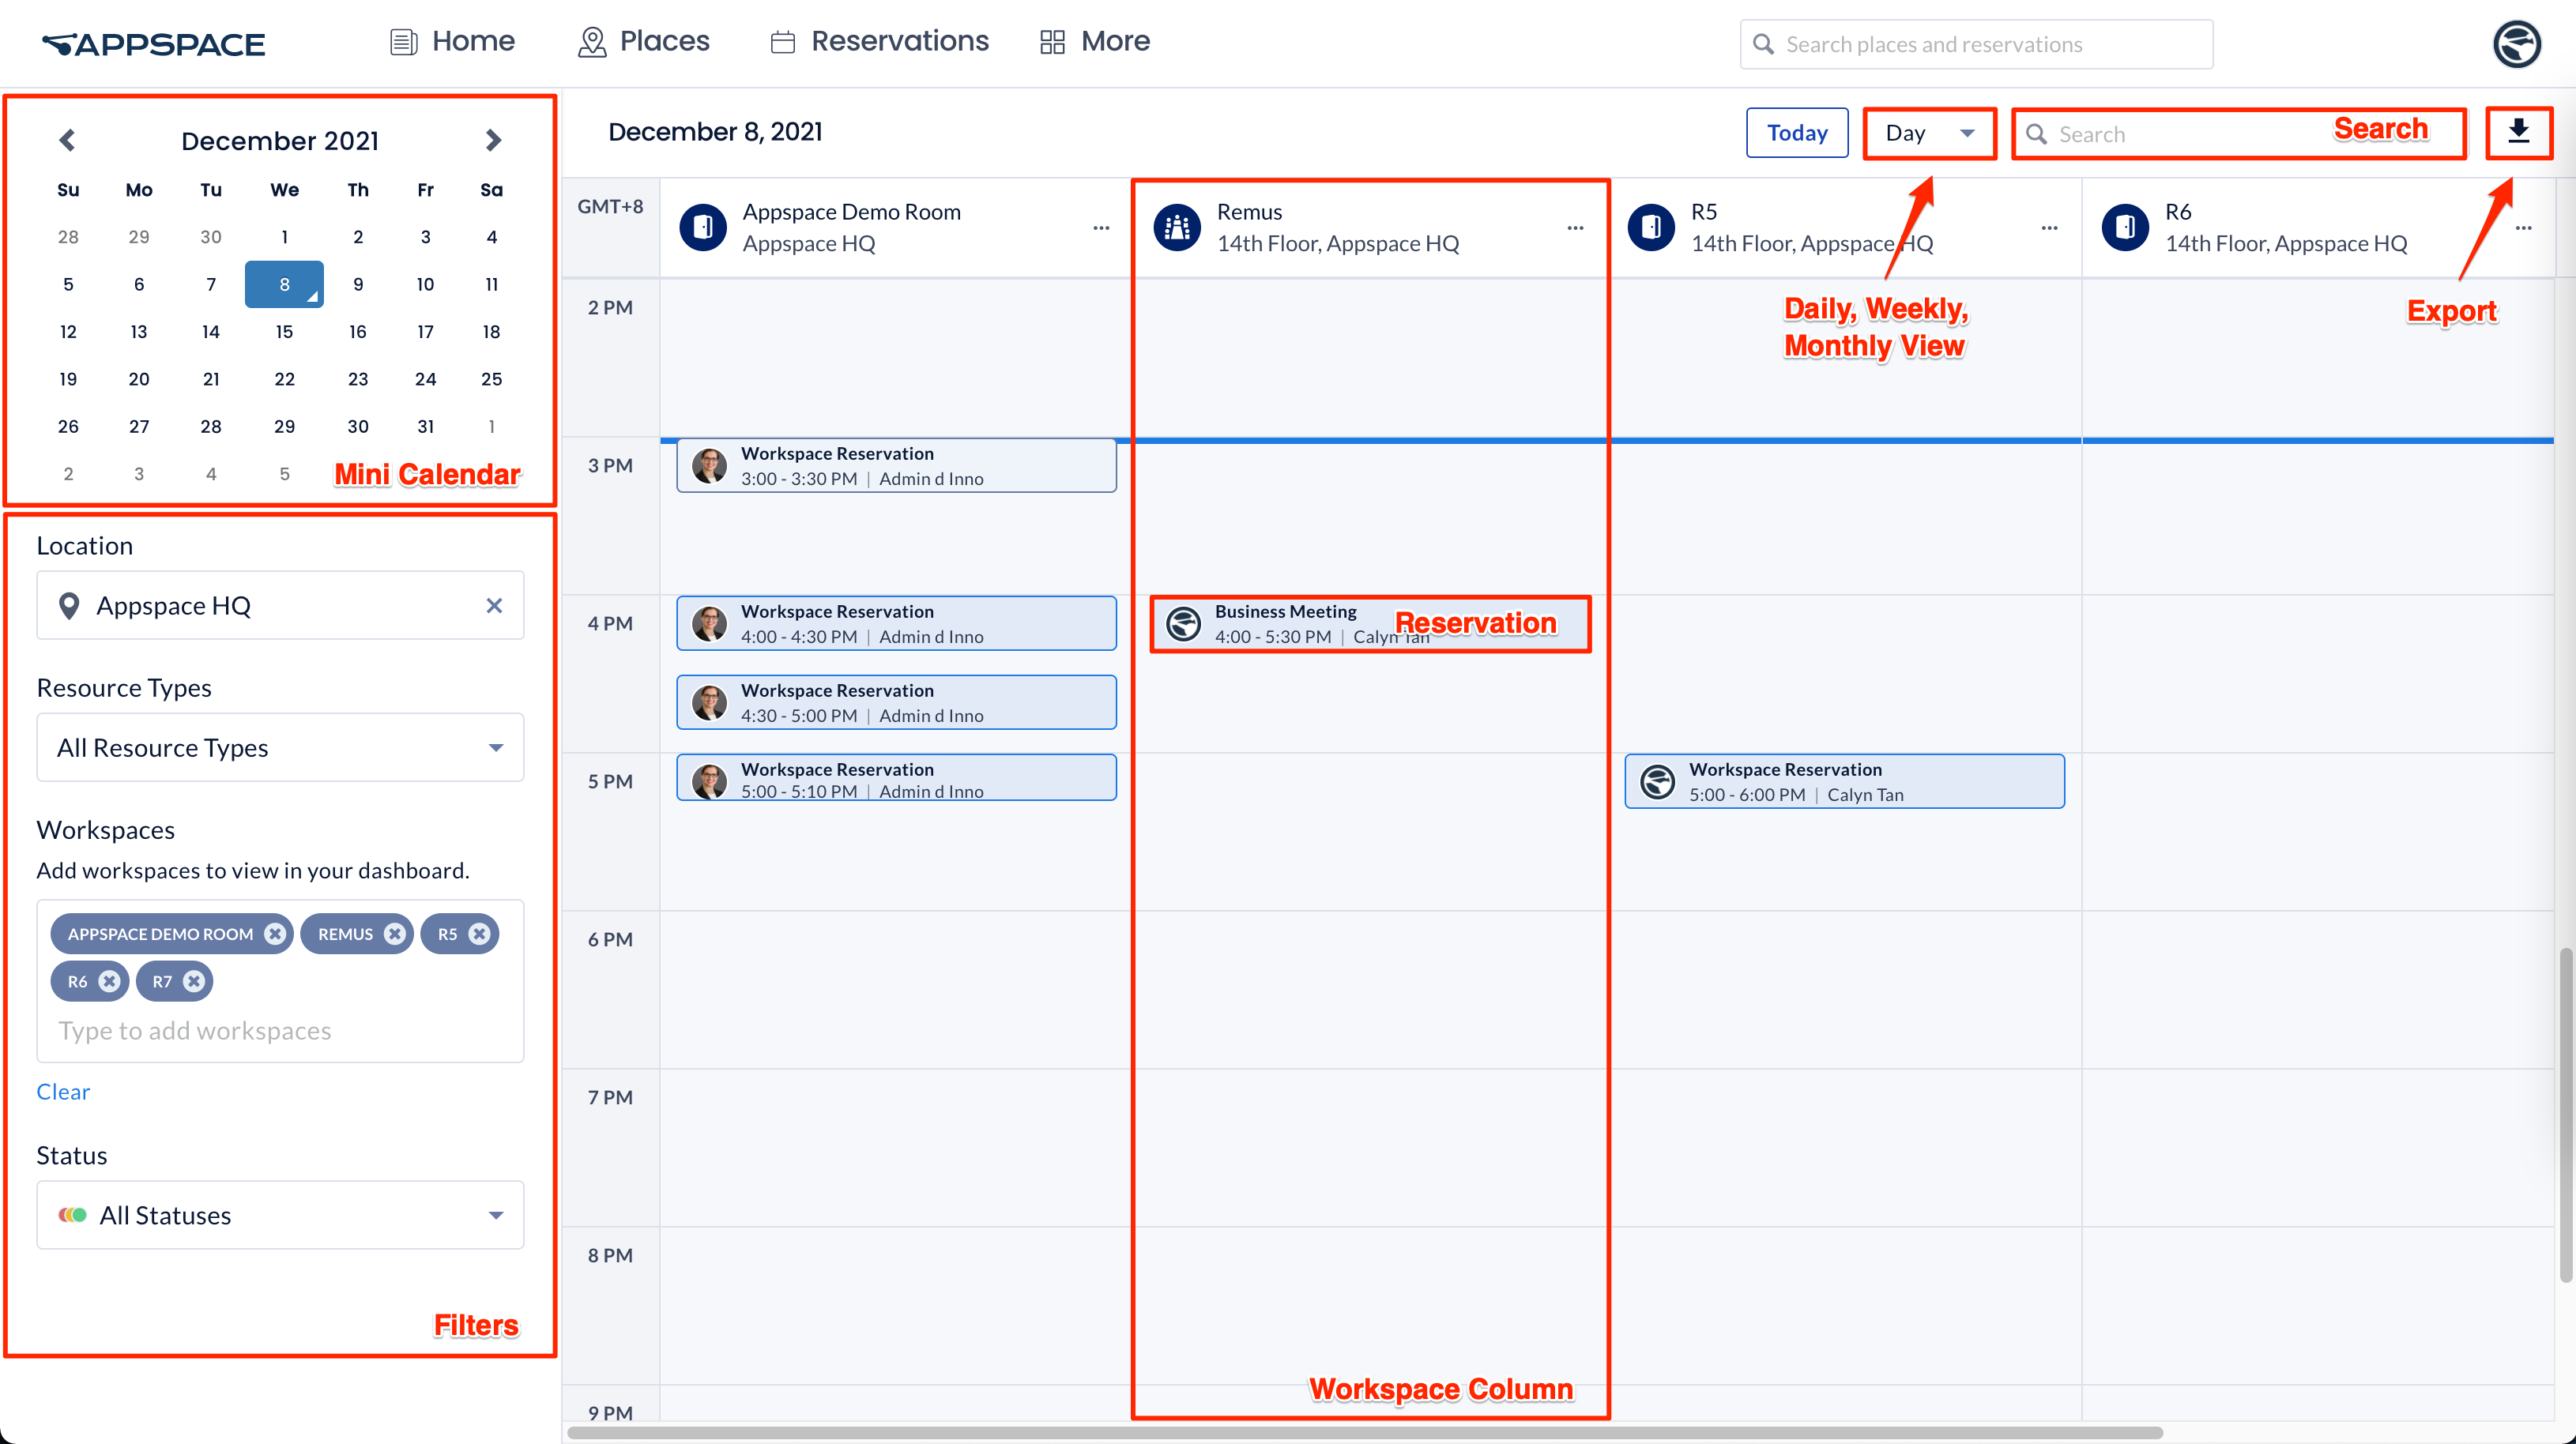
The dashboard will provide the Concierge user with a calendar view of reservations within the location that they have visibility over, with the following criteria:
- View current, historic, and future reservations in a calendar view.
- View the calendar in a daily, weekly, or list (new) format.
- The calendar view will display reservations based on selected workspace resources from locations that are specific or assigned to the concierge.
- Reservation details can be expanded to display additional information pertaining to the reservations, such as organizer, attendees, duration, meeting name, and other reservation details that are not displayed on the calendar view.
- Reservations can be filtered according to workspace resource type, and status.
- Reservations can be exported to a .xlsx format, containing all reservation records made.
- The concierge has limited editing capabilities but is able to delete a reservation.
- Administrators looking for instructions to configure the Appspace Reservations system, refer to Configure and Manage Workspace & Desk Reservations – Administrators.
- Administrators looking for information on navigating the Reservations module in the console, refer to Browse and Navigate Reservations Module in Appspace 8.0.
- Administrators who would like to reserve a building pass or workspace directly in the Reservations module in the console for themselves or on behalf of someone else, refer to Reserve Workspace & Building Pass in Console – Administrators.
- Administrators looking for instructions to configure a building pass, refer to Configure and Manage Building Passes-Administrators.
- Employees looking for guidance for reserving building passes, refer to Reserve A Building Pass – Employees.
- Administrators looking for instructions to configure the Schedule Board card with Appspace built-in provider settings to enable space, room, or desk reservations, on the card, refer to Cards: Schedule Board (Multi-Rooms) with Appspace Reservations.
- The Concierge List View provides a comprehensive overview of reservations.
- Reservation Services, allows the concierge to Download Checkpoint Information.
Prerequisites
- An active Appspace public/private cloud user account.
- An Appspace Premium license user assigned with the Concierge permissions.
- Supported web browsers if using the Employee App portal
- Supported mobile device if using the Employee App mobile.
Employee App
The Concierge dashboard provides employees assigned with Concierge permissions a calendar view of all reservations under their purview, in addition to the existing method of viewing historic and future reservations in a list view. Employees with concierge permissions are also able to view and manage the reservations of workspaces in locations they have been assigned to.
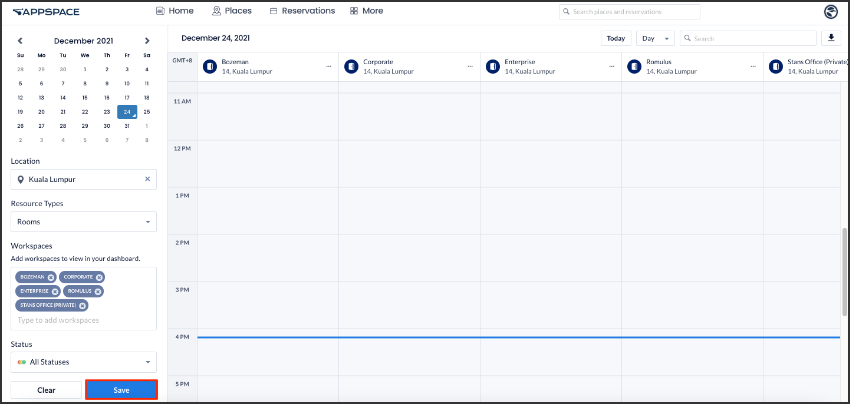
The Concierge dashboard now has a Save button allowing the Concierge user to save the selected filtered calendar view, which can then be accessed by the Concierge user upon subsequent login/access to the dashboard.
Configure Concierge Dashboard View
Follow the instructions below to configure your Concierge dashboard in the Employee App portal:
- Log in to your Employee App with your Appspace Premium User credentials that have been assigned with Concierge permissions.
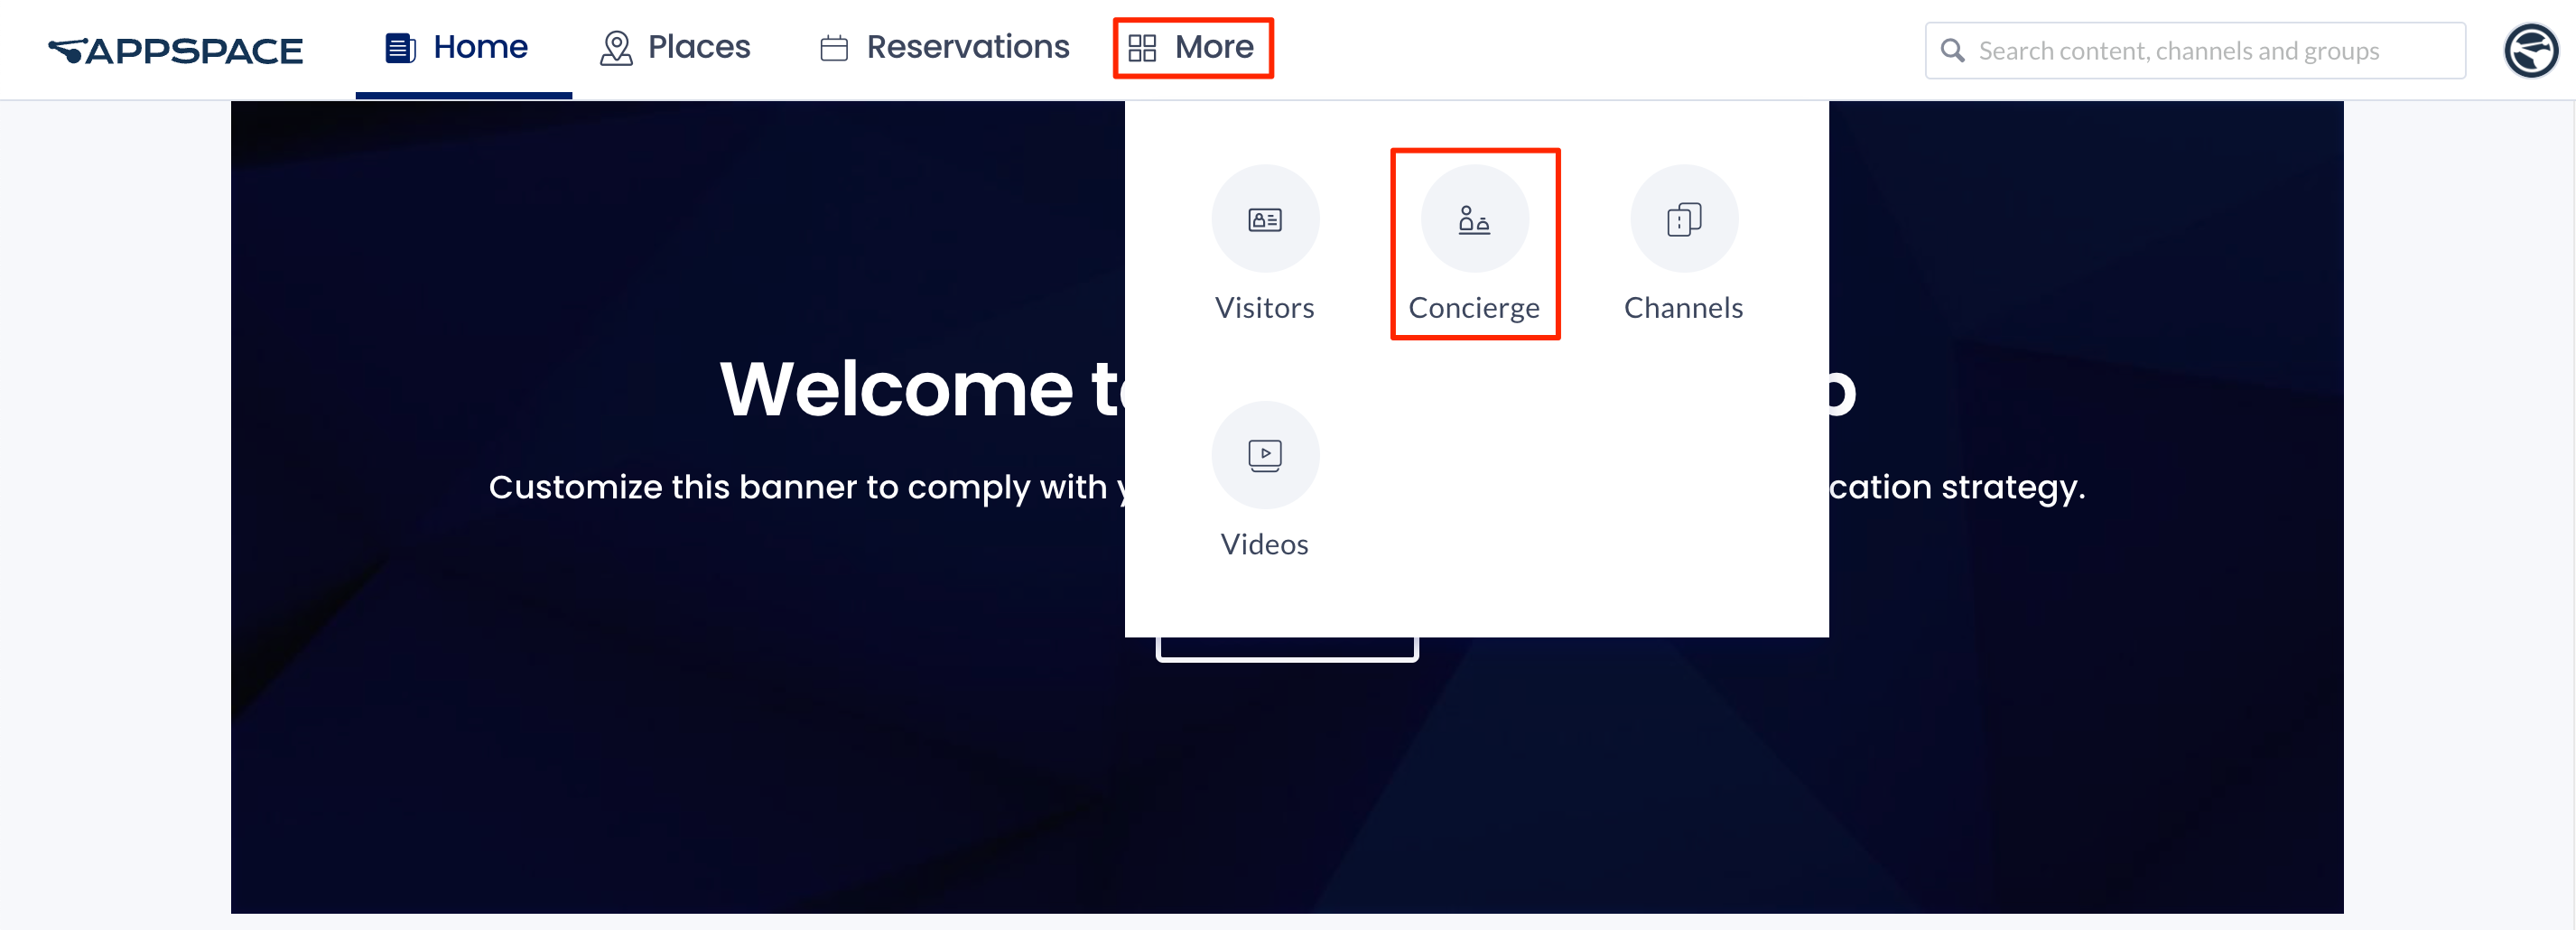
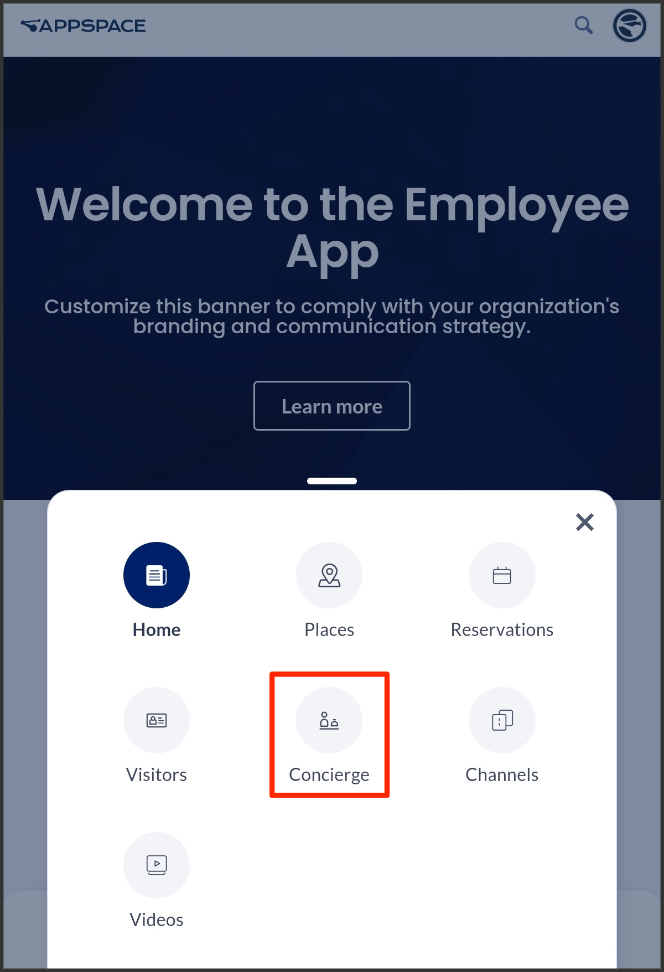
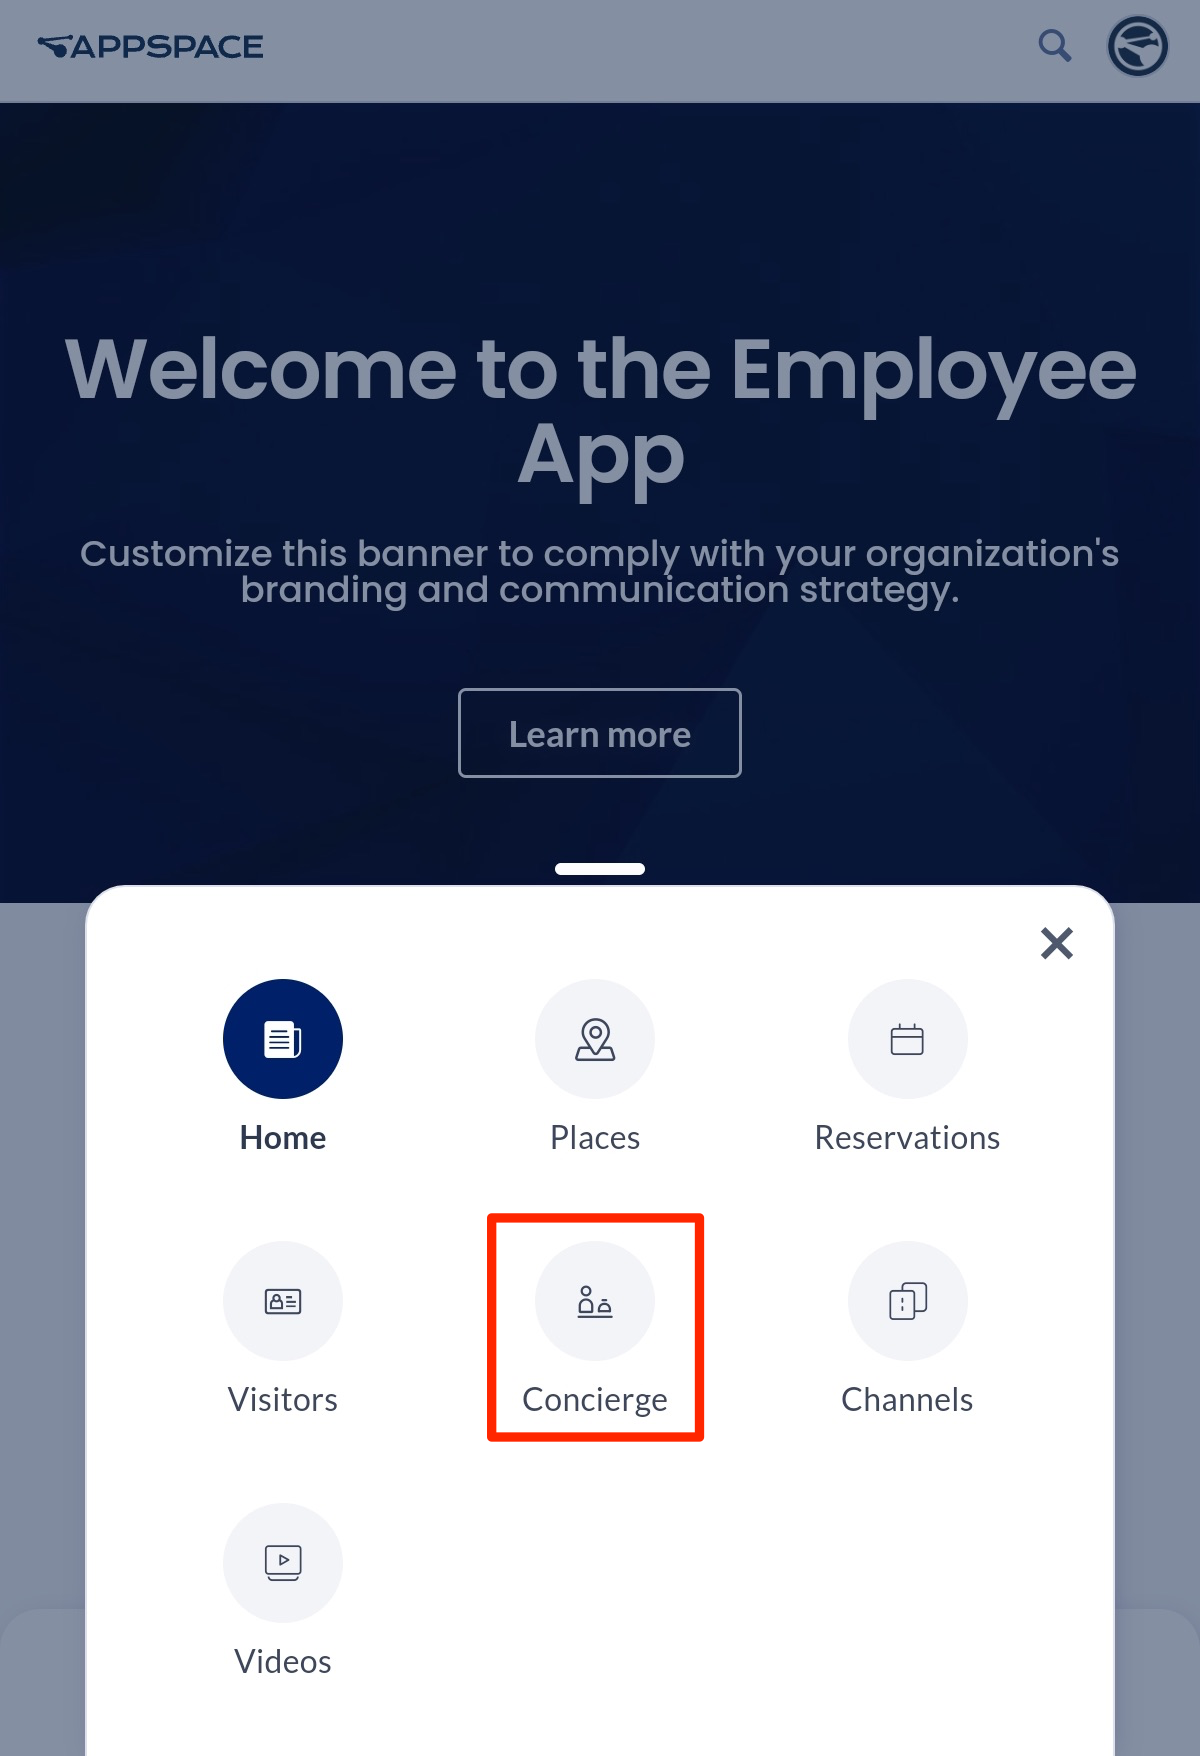
- Click More from the menu, and click Concierge.

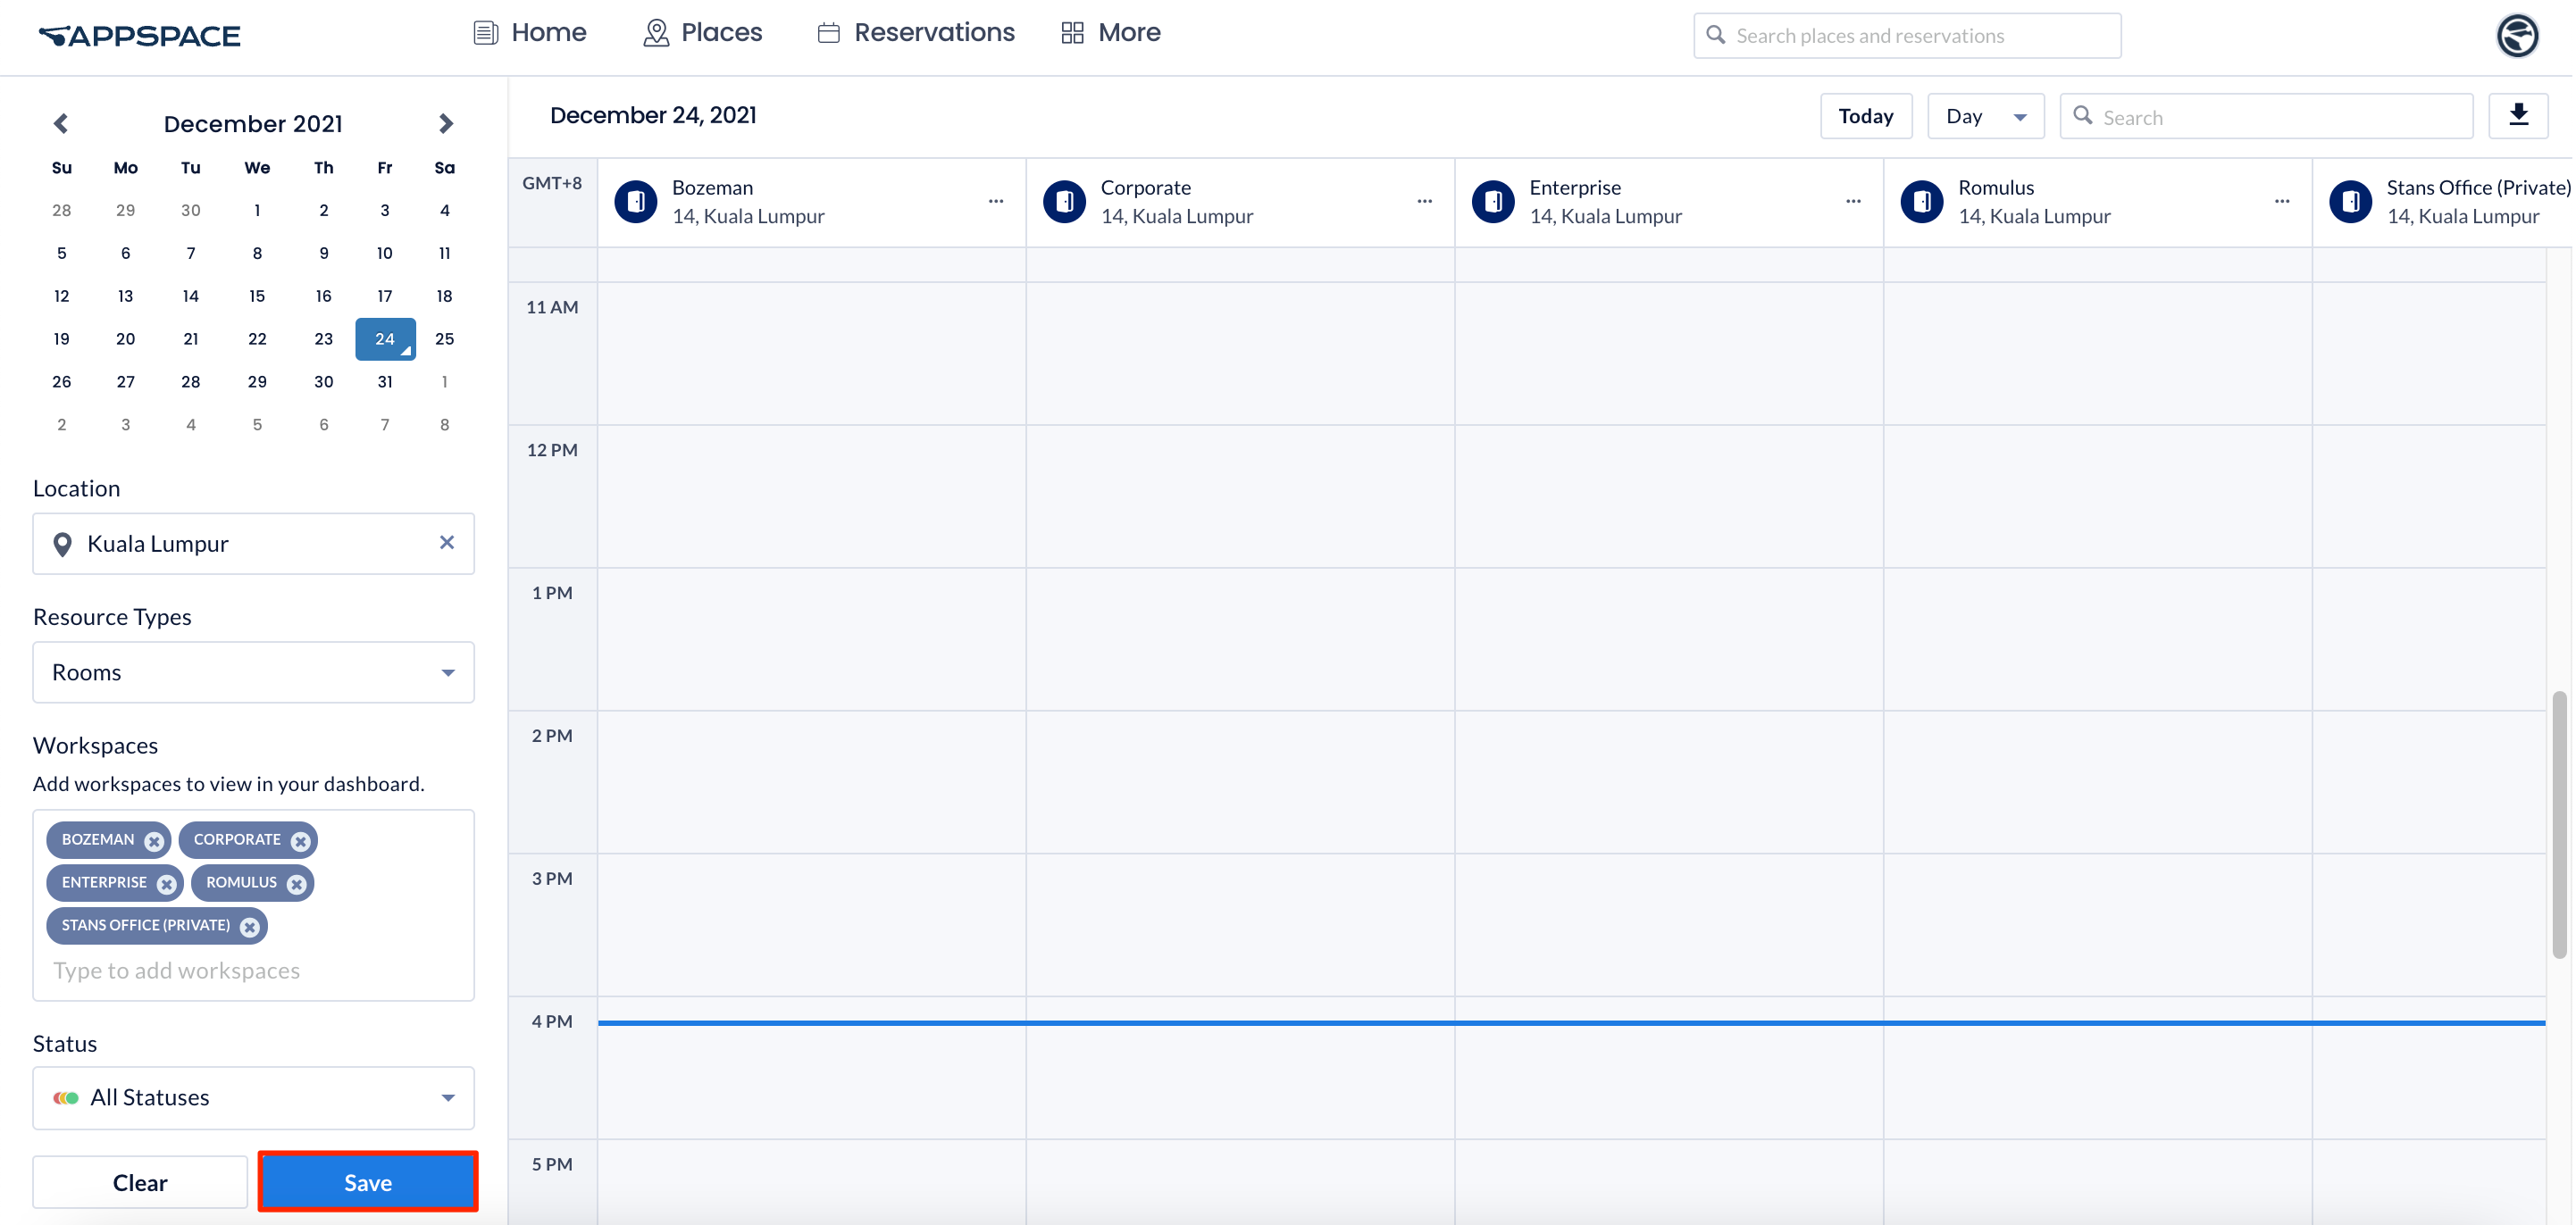
- The calendar will display the current date by default. If you wish to view or manage reservations on another date, click the desired date on the Mini Calendar.
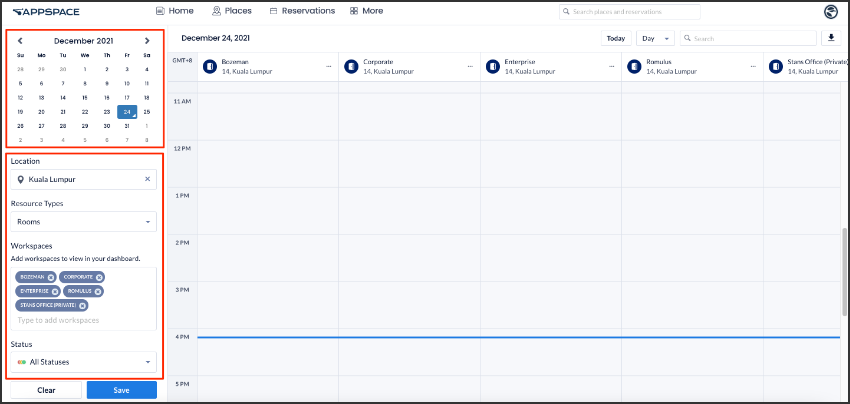
- Proceed to enter the name of the workspaces you wish to view on the calendar in the Workspaces input box.
- Alternatively, you may select the Location of the workspaces you wish displayed from the drop-down menu, which will then populate the calendar with the six latest workspaces available.
- If the workspace you wish to view was not added automatically, you may manually add the name of the workspace in the Workspaces input box.
- If you wish to remove a workspace from being displayed, click the “X” beside the workspace name tag from the Workspaces input box to remove it.
- Once done, the concierge calendar will display all reservations within its workspace column according to the time and date on the calendar. NoteReservations set to private will appear as “Workplace Reservation” instead of showing the full name. However, the full name will be visible to the host, meeting attendees, and the location administrator.
- Optionally, the following filters may be used to further narrow down the reservations you wish to display:
- Resource Type – Display reservations based on the workspace type.
- Status – Display reservations based on the reservation status.
- Click the Save button to save the Concierge dashboard with the current calendar view and its selected filters. When you log in to the Employee App again, you will be presented with the same filtered calendar view.NoteOnce this calendar view is saved, when you log out and log back in again to your Employee App, workspaces that you have added here will be displayed in the same order.

Manage Workspace Reservations
Follow the instructions below to manage a reservation from your Concierge dashboard in the Employee App portal:
- In the Employee App portal, click More from the menu, and click Concierge.
- Select the appropriate filters if desired, and click the desired reservation to manage.
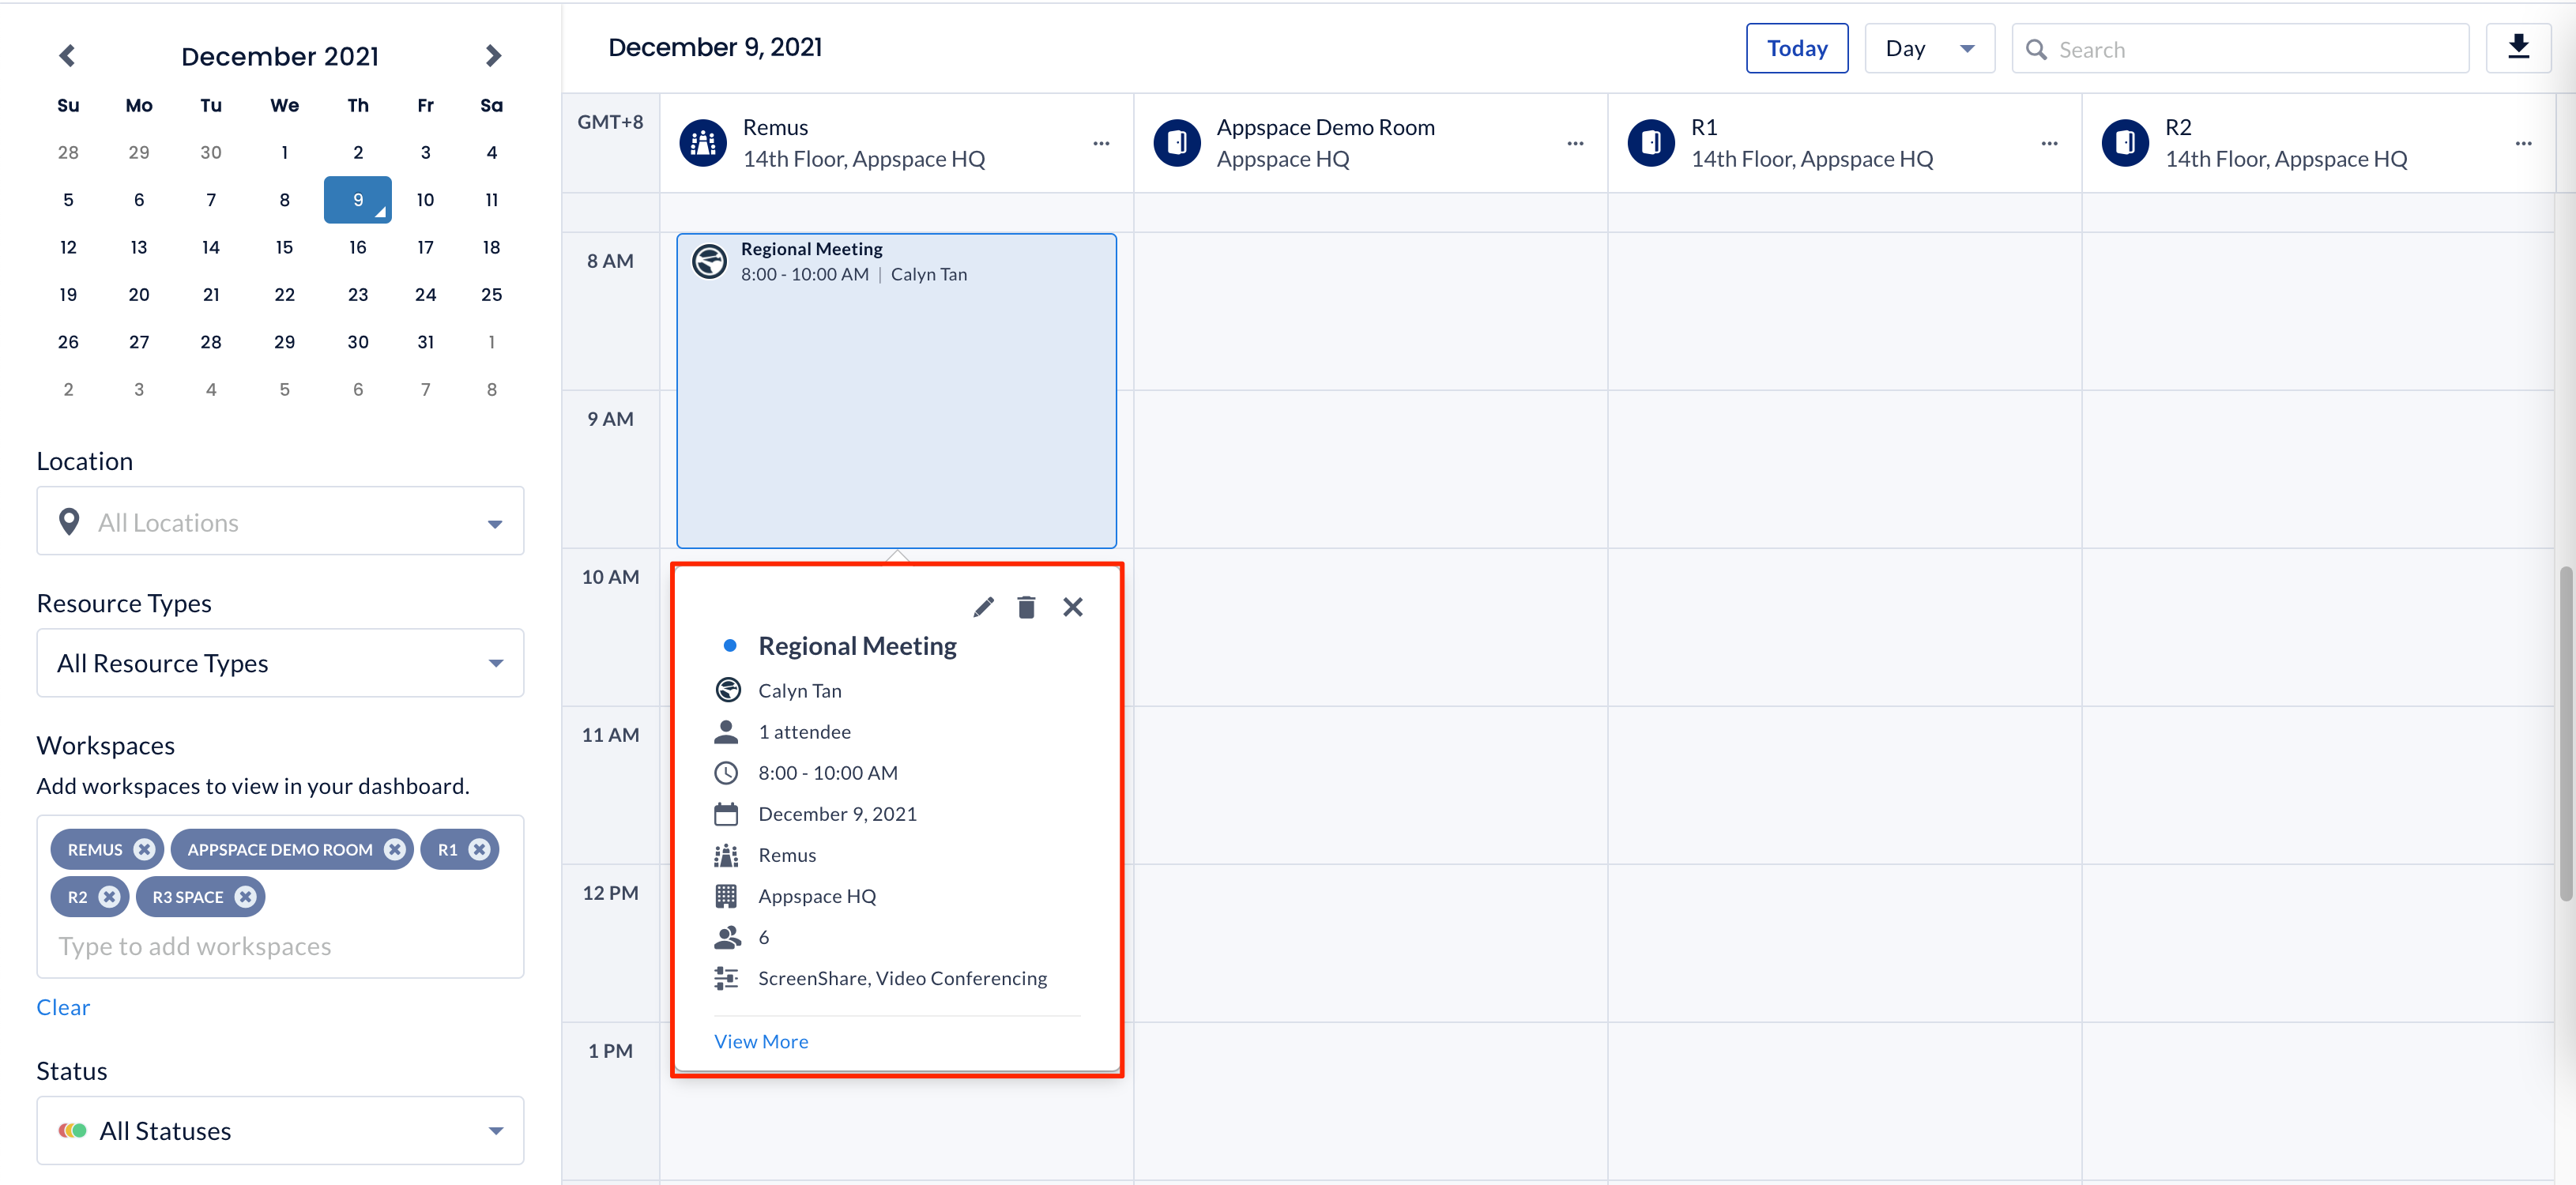
- To edit the workspace reservation, click the Edit icon or View More link, and proceed to make the following edits to the workspace reservation.
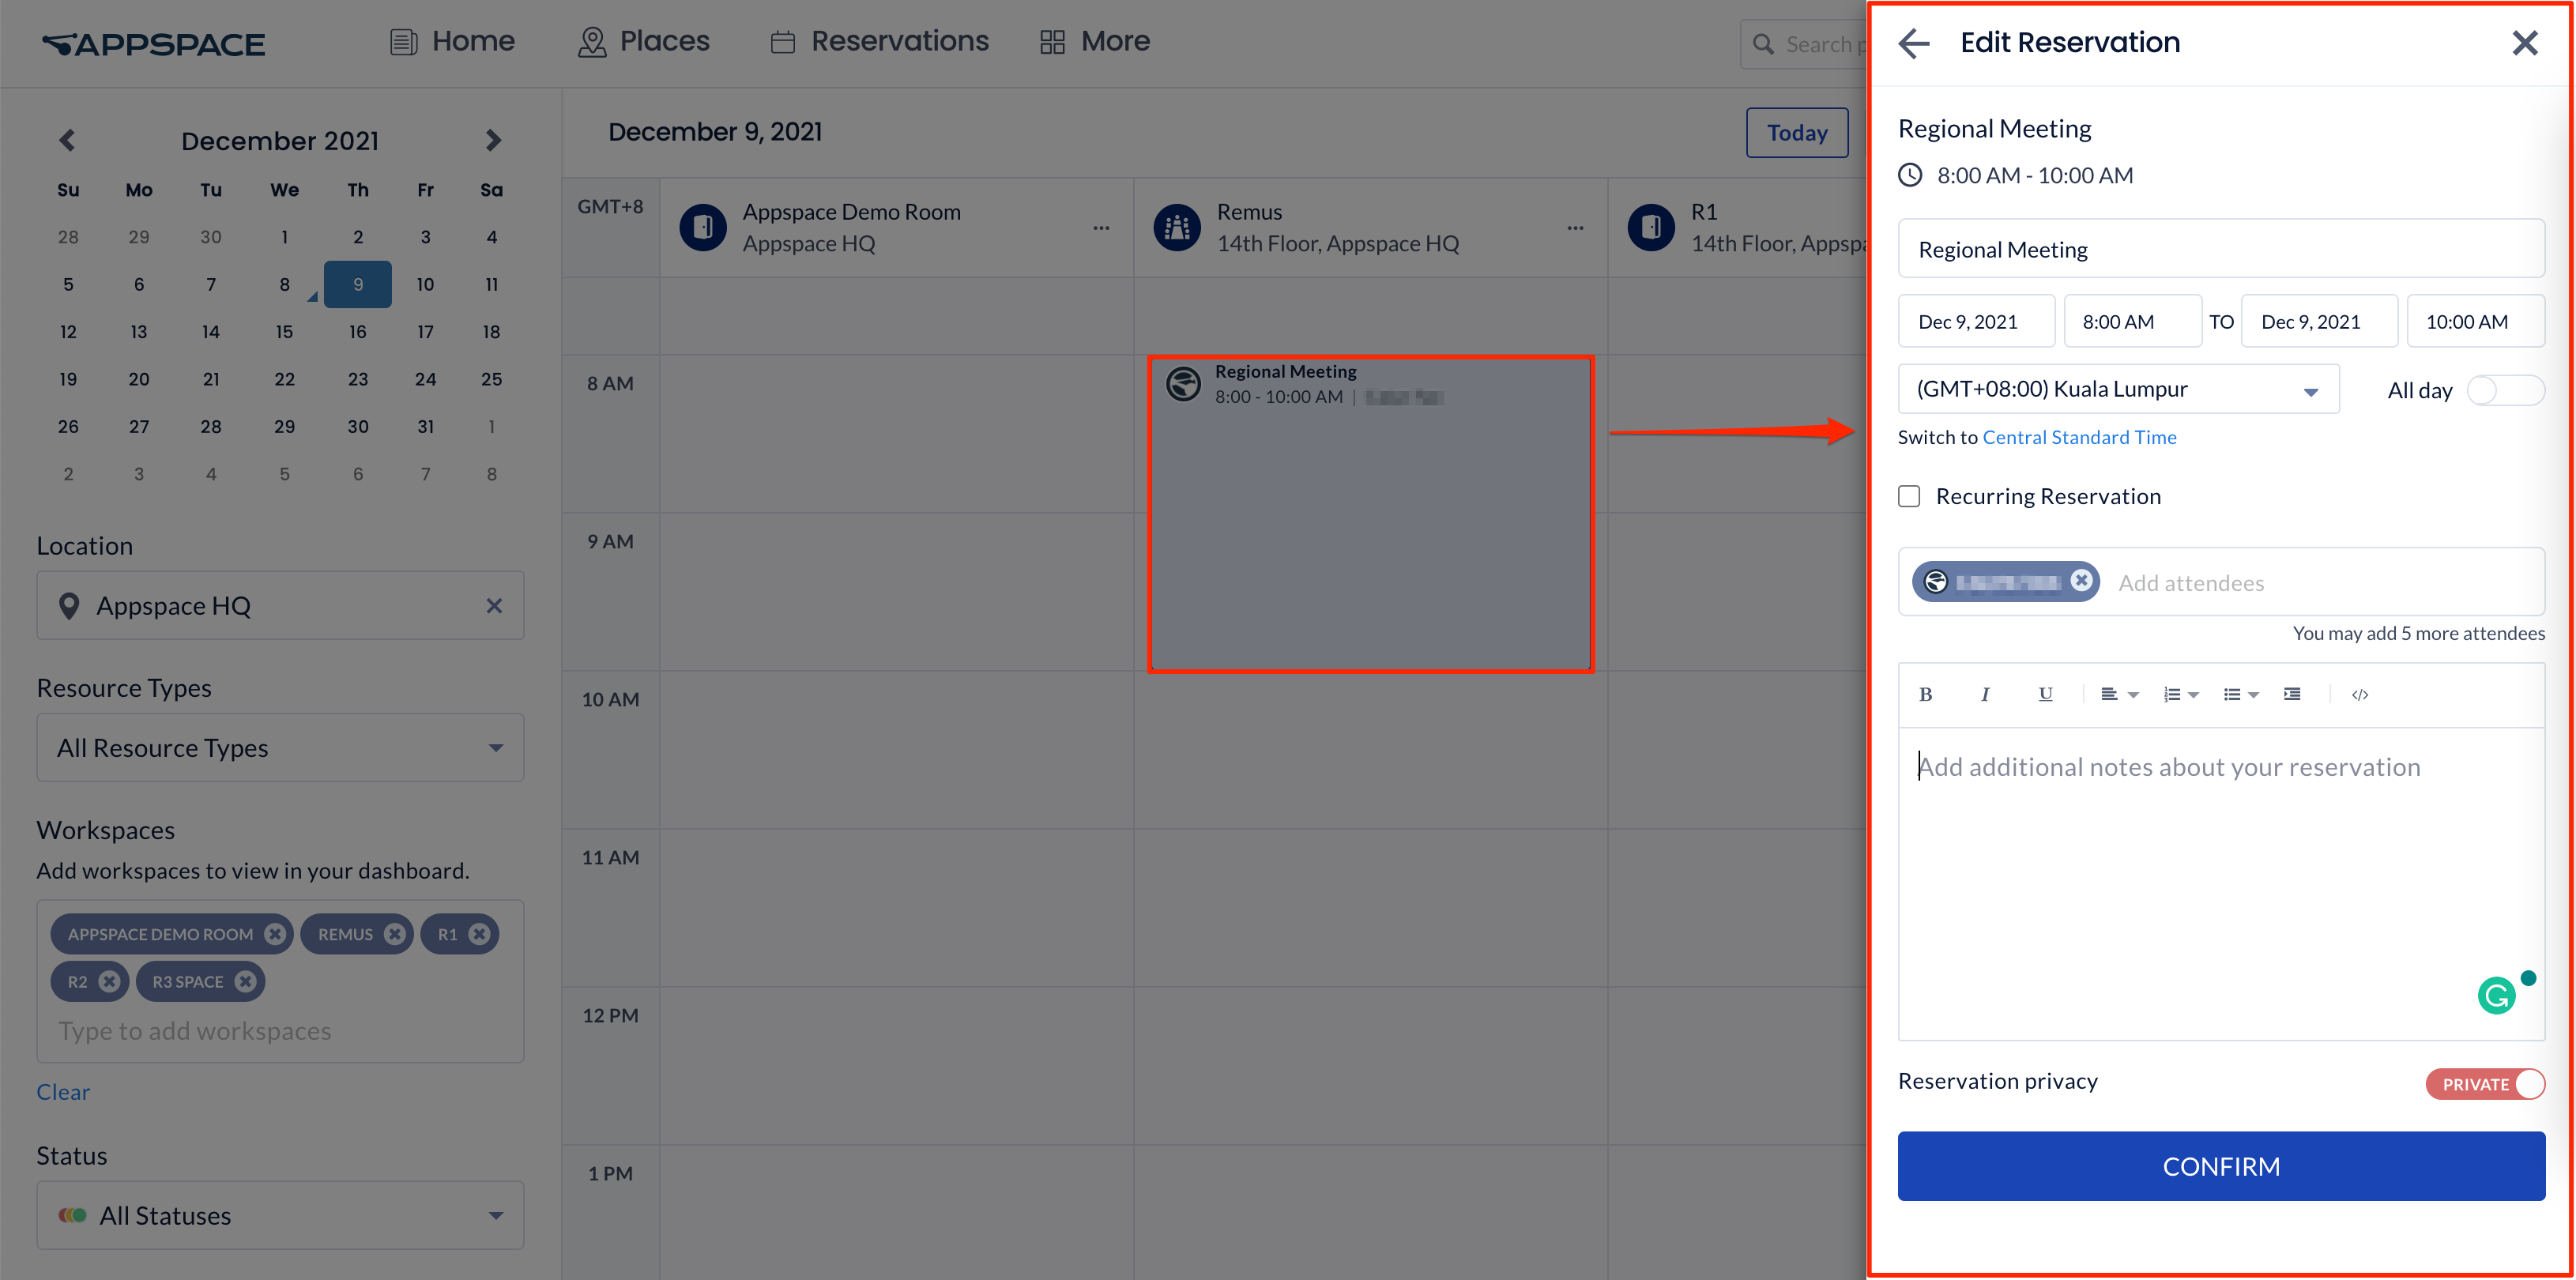
- Change the Reservation Name.
- Change the Date, Time, or Duration of the workspace reservation.
- Enable or disable Recurring Reservations.
ImportantThe Recurring Reservations checkbox may be disabled due to a limitation where once an event is created, it cannot be changed to recurring. We are currently working on a fix for this. - Add or remove Attendees.NoteReservations set to private will display the event’s host name but keep the attendee list hidden. However, the host, meeting attendees, and the location administrator will still have access to the full list of attendees.
- Edit the workspace reservation Notes.
- Enable or disable the Reservation privacy of the workspace reservation.
- Click CONFIRM.
Download Checkpoint Information from Concierge (New)
Follow the instructions below to download Checkpoint information from your Concierge dashboard in the Employee App portal:
- Log in to your Employee App with your Appspace Premium User credentials that have been assigned with Concierge permissions.
- Click More from the menu, and click Concierge.
- The calendar will display the current date by default. If you wish to view or manage reservations on another date, click the desired date on the Mini Calendar.
- Proceed to enter the name of the workspaces you wish to view on the calendar in the Workspaces input box.
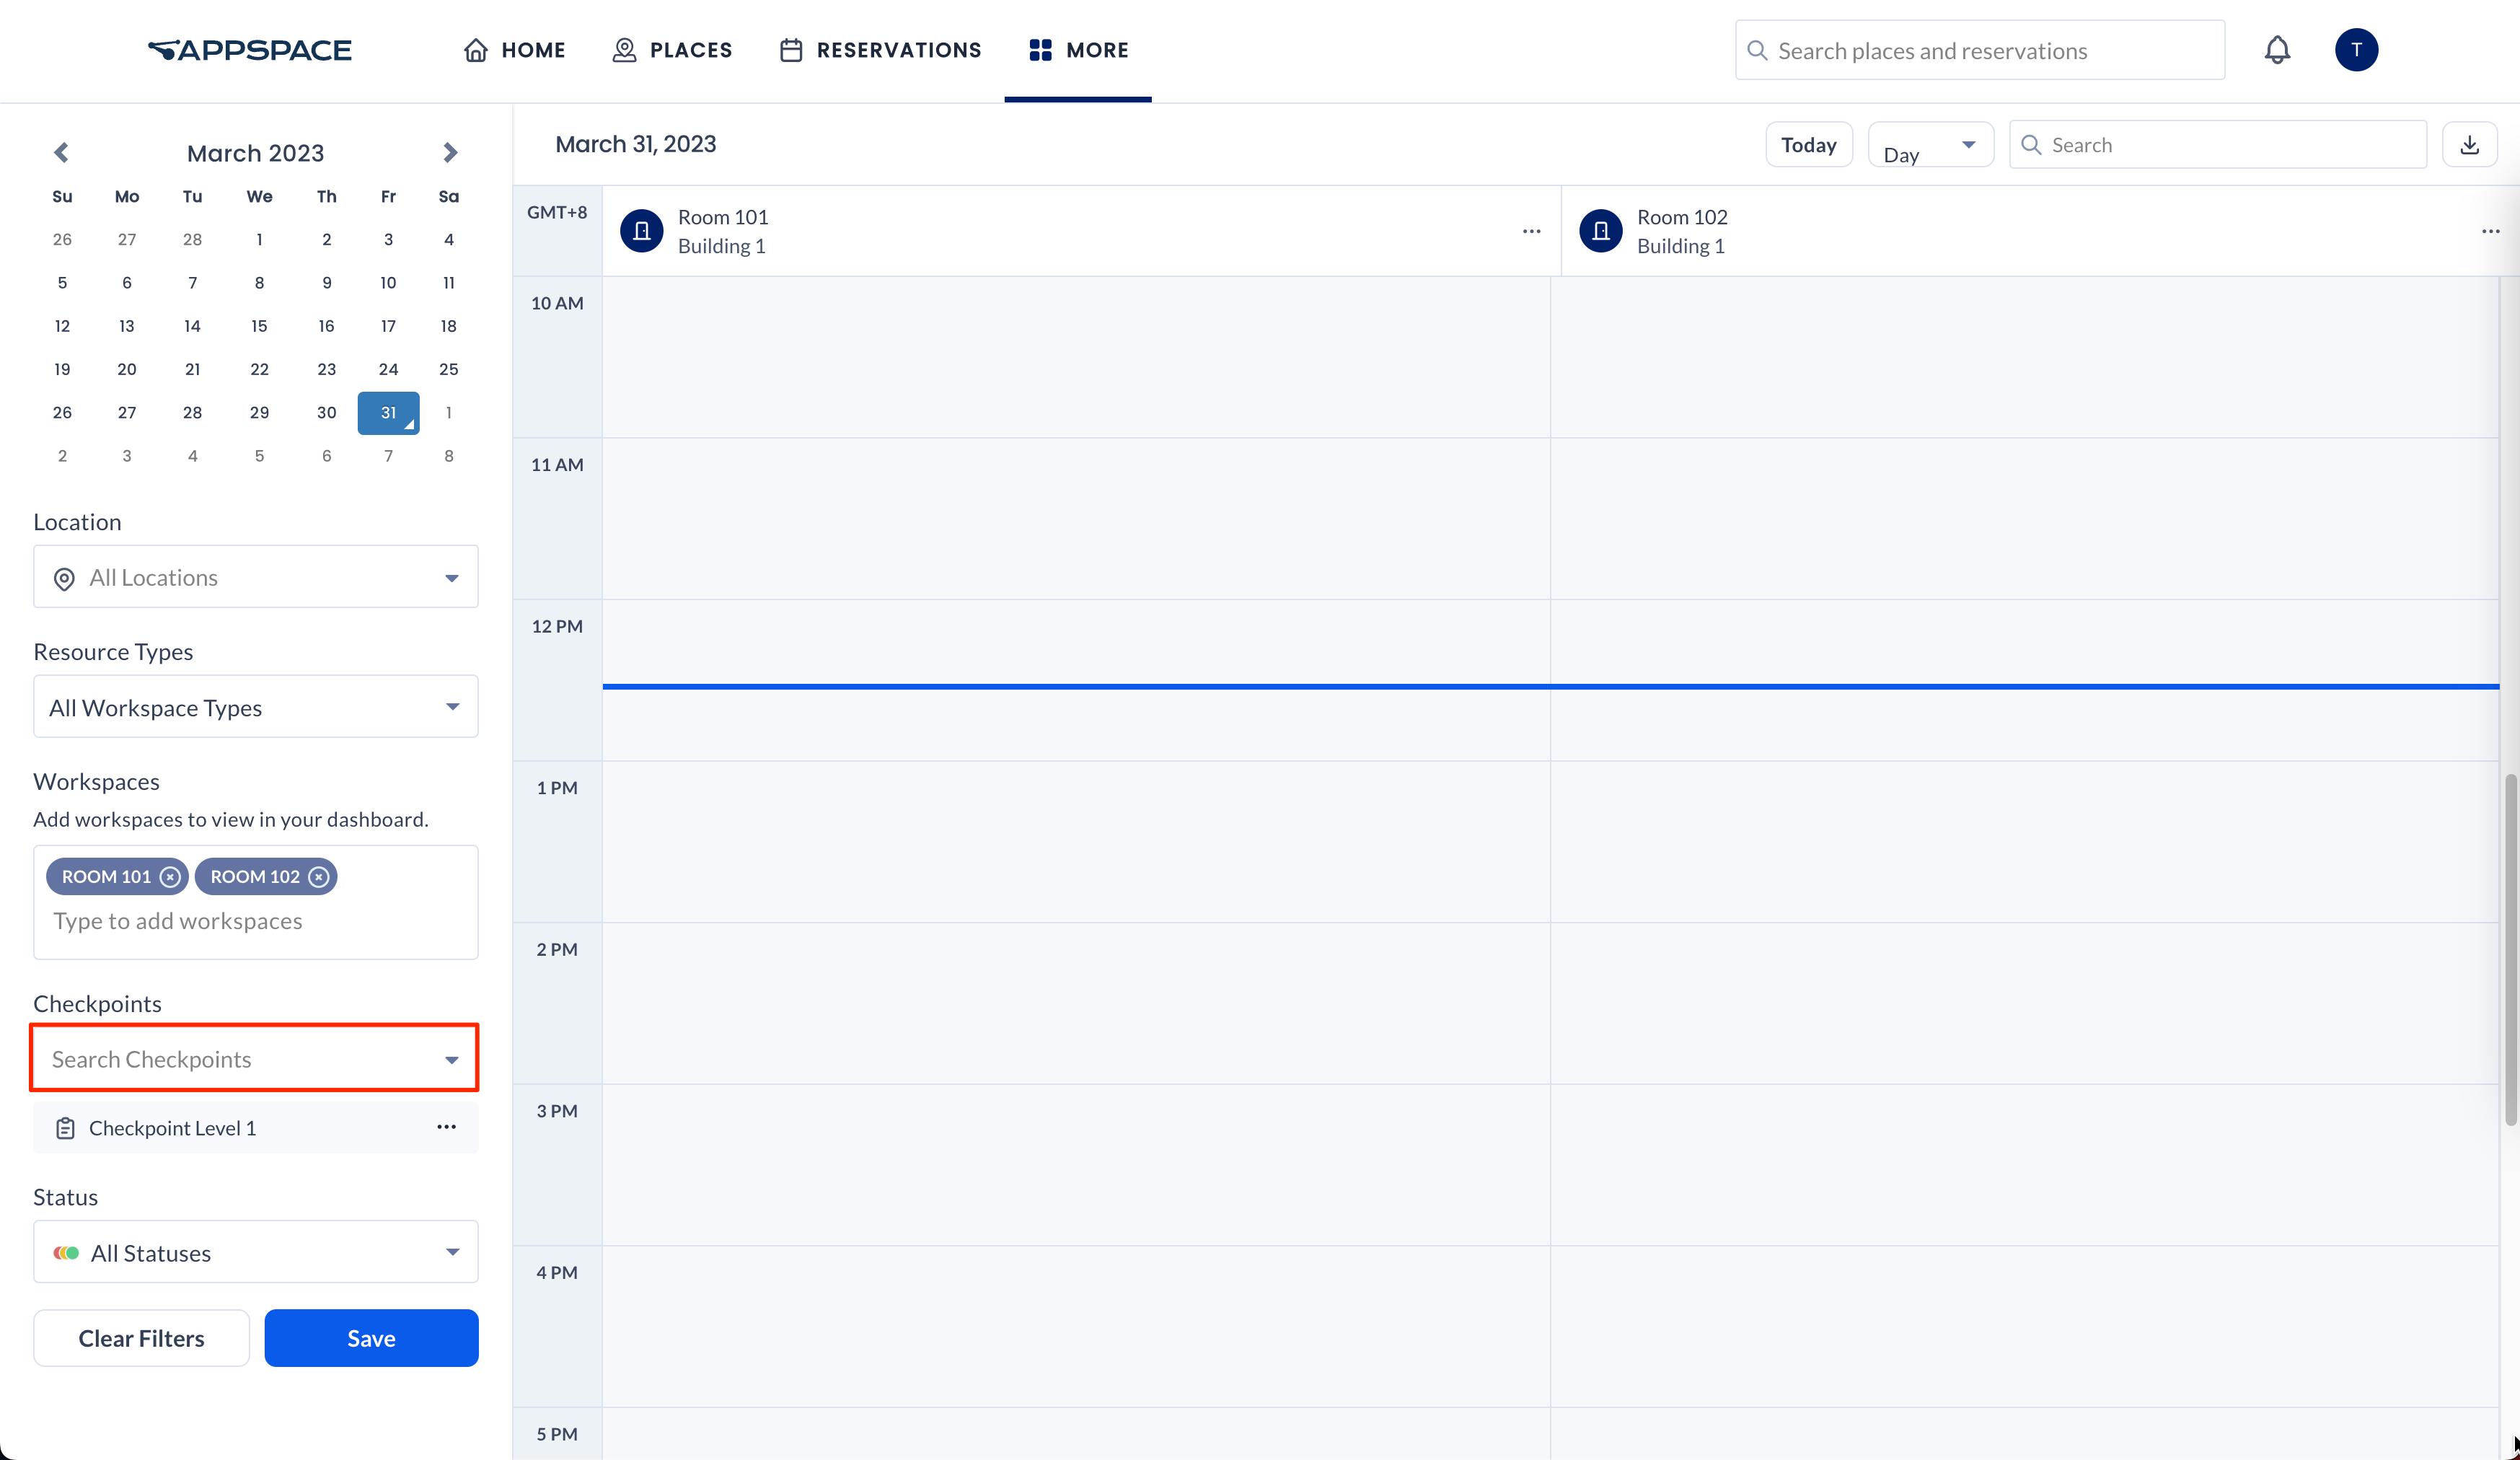
- Select the desired Checkpoint name from the drop-down menu, or you may search for it by entering the checkpoint name.
- Once done, click the ellipsis of the checkpoint, and click Download.

- The Checkpoint information spreadsheet (in .xlsx format) will be downloaded to your default folder.
- Alternatively, you may also click the Advance Filters to filter the checkpoint information based on the following:
- Response – Select one of the following checkpoint status.
- Pass
- Fail
- Pending
- Operator – Select an operator for the label or checkpoint options.
- Contains
- Does not contain
- Labels – Enter the checkpoint option you wish to filter.
- Response – Select one of the following checkpoint status.
Appspace Employee App (Mobile)
Configure Concierge Dashboard View
Follow the instructions below to configure your Concierge dashboard in the Employee App on mobile devices:
- Log in to your Appspace Employee App with your Appspace Premium User credentials that have been assigned with Concierge permissions.
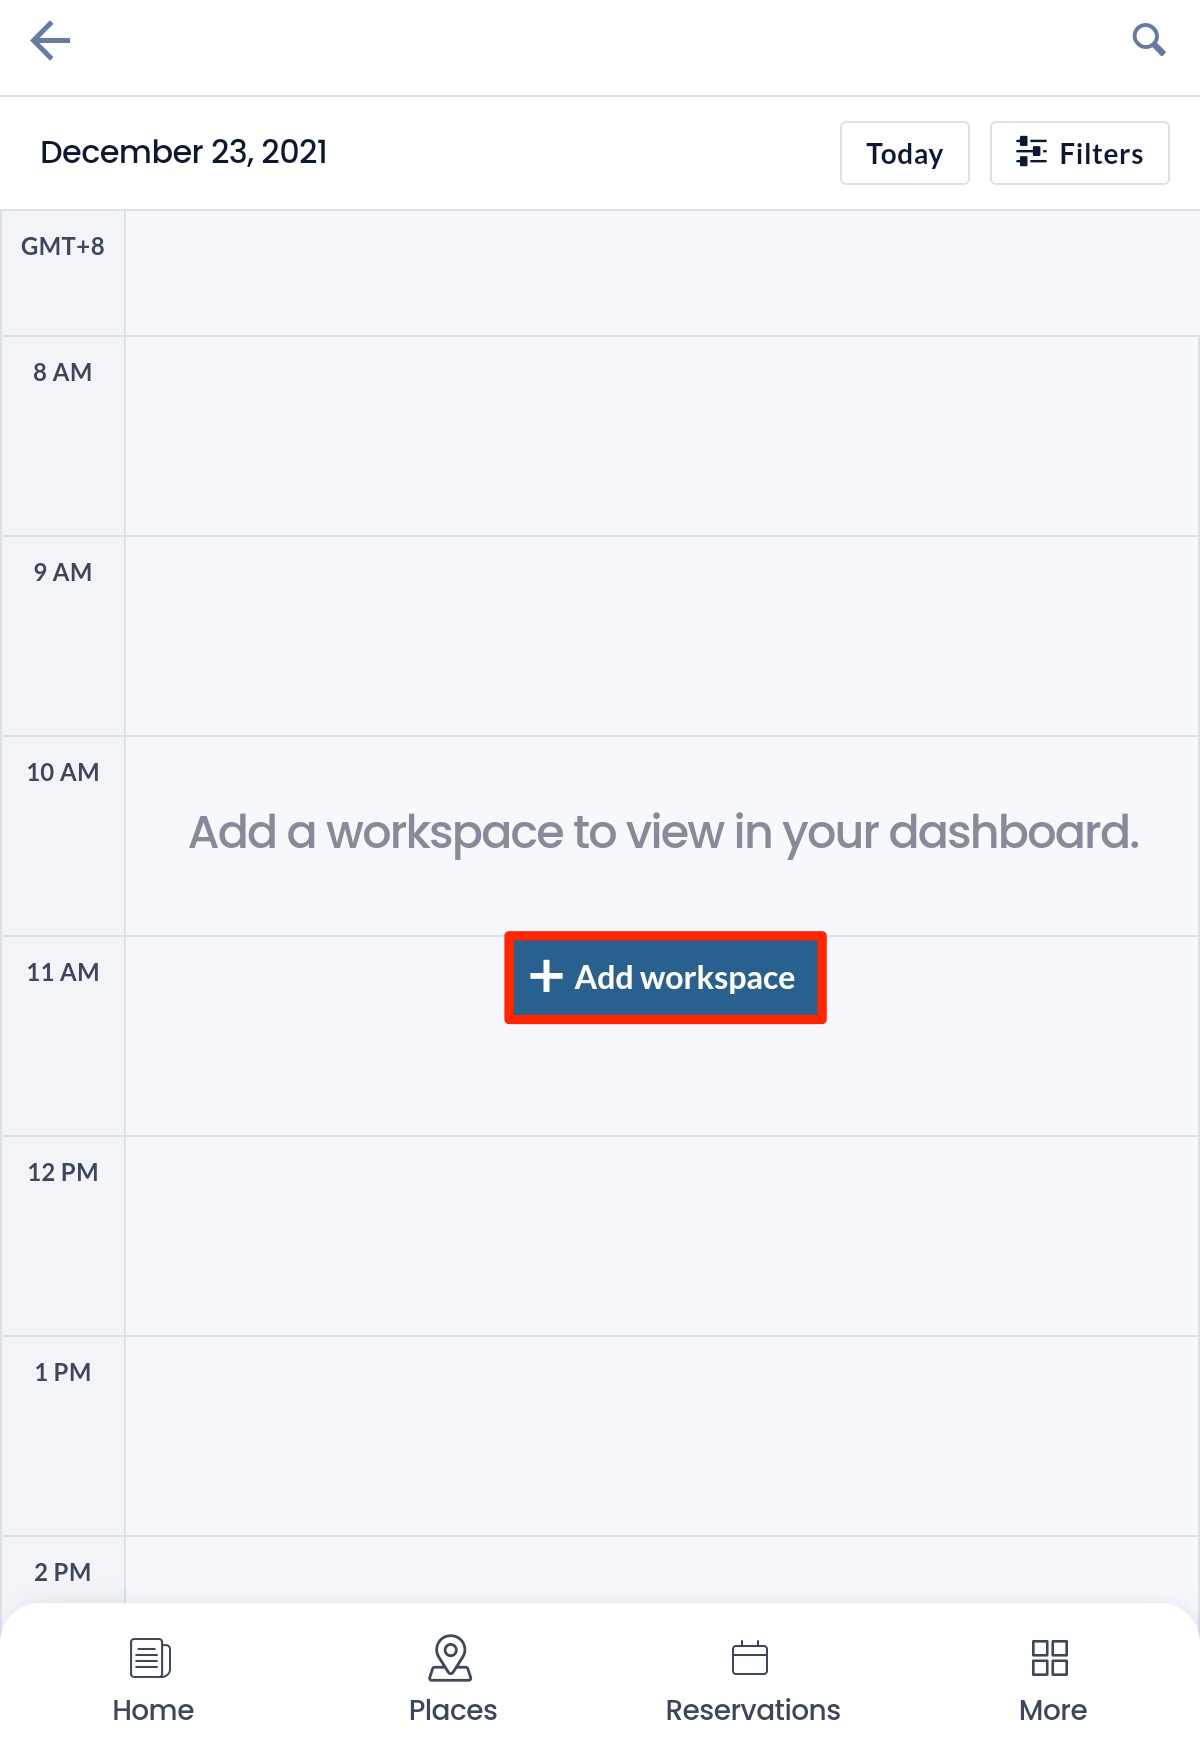
- Click More from the menu, and select Concierge. The calendar will display the current date by default.
- Click + Add workspace button. If you wish to view or manage reservations on another date, click the desired date on the Mini Calendar.
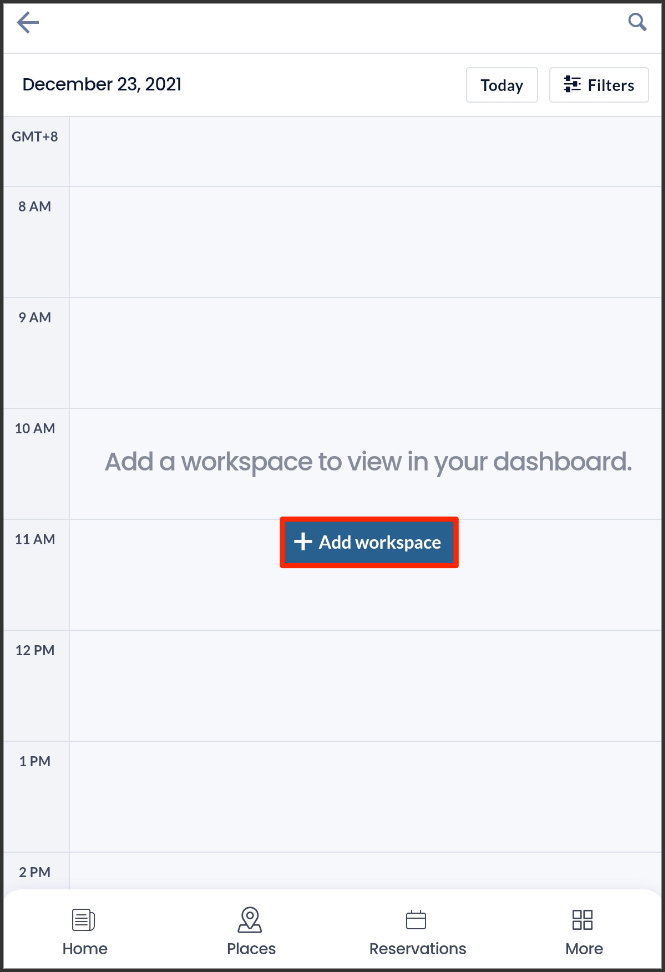
- Proceed to enter the name of the workspaces you wish to view on the calendar in the Workspaces input box.
- Alternatively, you may select the Location of the workspaces you wish displayed from the drop-down menu, which will then populate the calendar with the six latest workspaces available.
- If the workspace you wish to view was not added automatically, you may manually add the name of the workspace in the Workspaces input box.
- If you wish to remove a workspace from being displayed, click the “X” beside the workspace name tag from the Workspaces input box to remove it.
- Once done, the concierge calendar will display all reservations within its workspace column according to the time and date on the calendar.
- Optionally, the following filters may be used to further narrow down the reservations you wish to display:
- Resource Type – Display reservations based on the workspace type.
- Status – Display reservations based on the reservation status.
- Once done, click Save.
Manage Workspace Reservations
Follow the instructions below to manage a reservation from your Concierge dashboard in the Employee App on mobile devices:
- Launch the Appspace Employee App.
- Click More from the menu, and click Concierge.
- Once you have configured your concierge dashboard view, select and click the desired reservation to manage.
- To edit the workspace reservation, click the Edit icon or View More link, and proceed to make the following edits to the workspace reservation.
-
- Change the Reservation Name.
- Change the Date, Time, or Duration of the workspace reservation.
- Enable or disable Recurring Reservations.
ImportantThe Recurring Reservations checkbox may be disabled due to a limitation where once an event is created, it cannot be changed to recurring. We are currently working on a fix for this.
- Add or remove Attendees.
- Edit the workspace reservation Notes.
- Enable or disable the Reservation privacy of the workspace reservation.
-
- Click CONFIRM.
Was this article helpful?