The Playlist Channel is the most versatile Appspace channel type ideal for displaying content for digital signage, room scheduling devices, kiosks, and wallpapers for collaboration endpoints, which run the Appspace App for Devices. Now we are introducing additional options to display the content in various layouts using multi-zone templates.
Organizations may leverage the available multi-zone templates on the Appspace platform, or use a customized multi-zone template built for their display requirements.
Layout
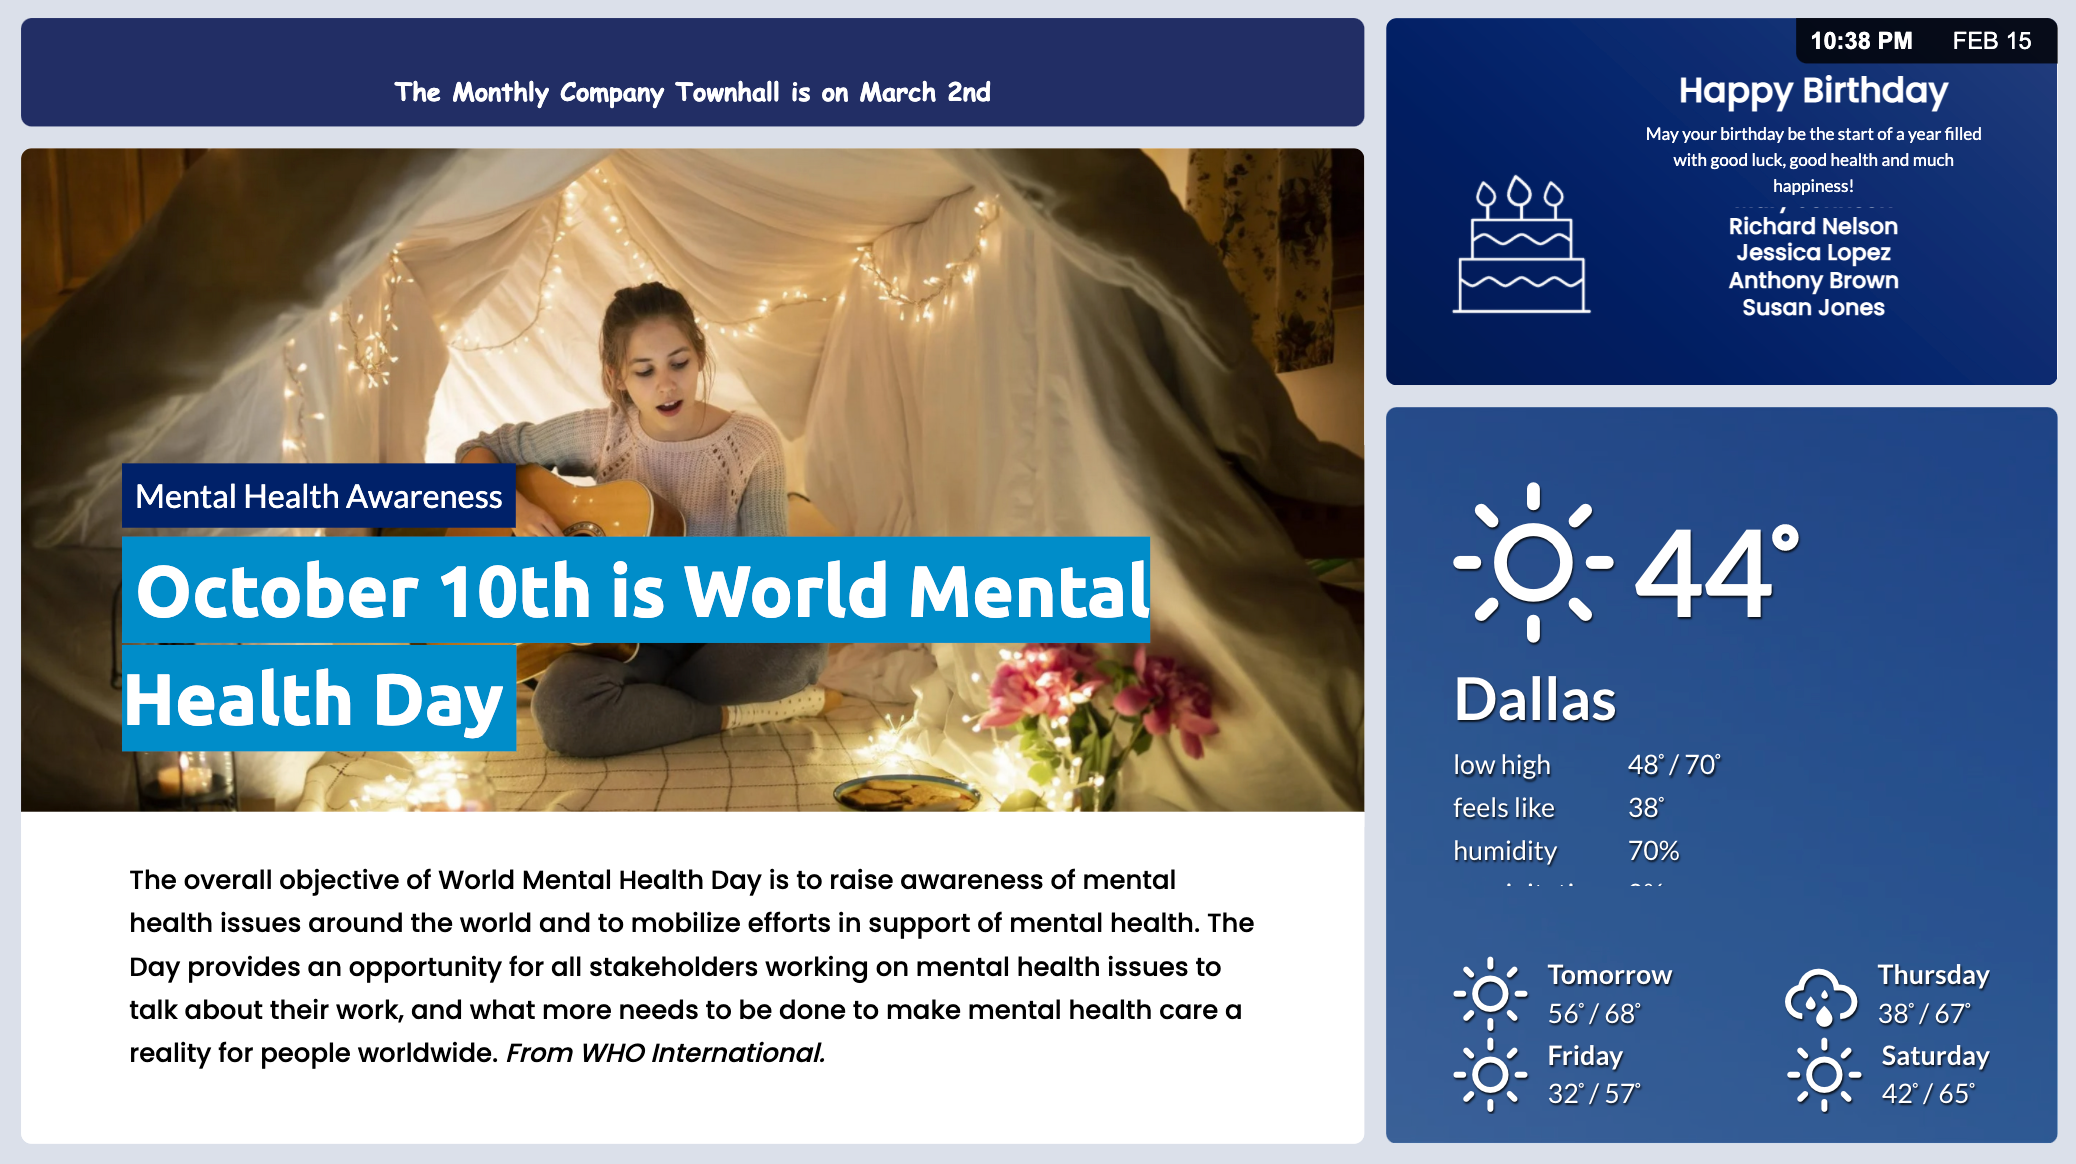
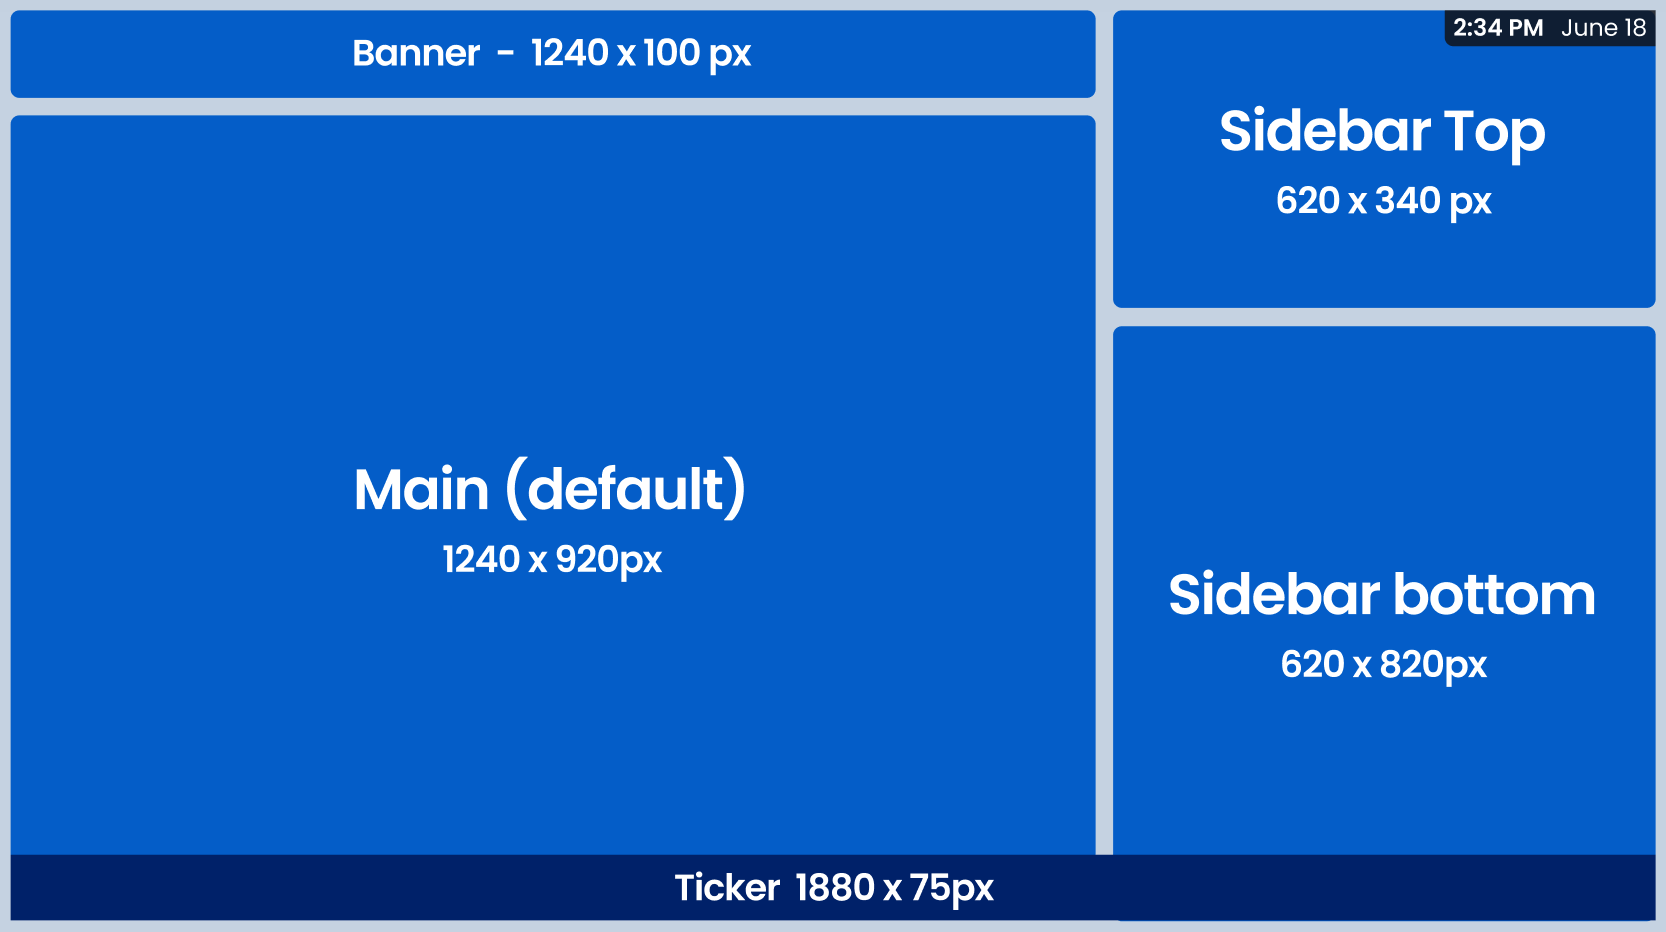
Below is an overview of a playlist channel layout when configured with a multi-zone template. Every template has a Date and Time widget that displays the current date and time on the top left.
Click the following options on the left sidebar to either view the overall layout, or add content to each zone:
- Layout Overview – Returns you to the layout overview of the multi-zone template screen.
- Zones – Select the desired zone either from the side panel, or from the layout view to view/add content.

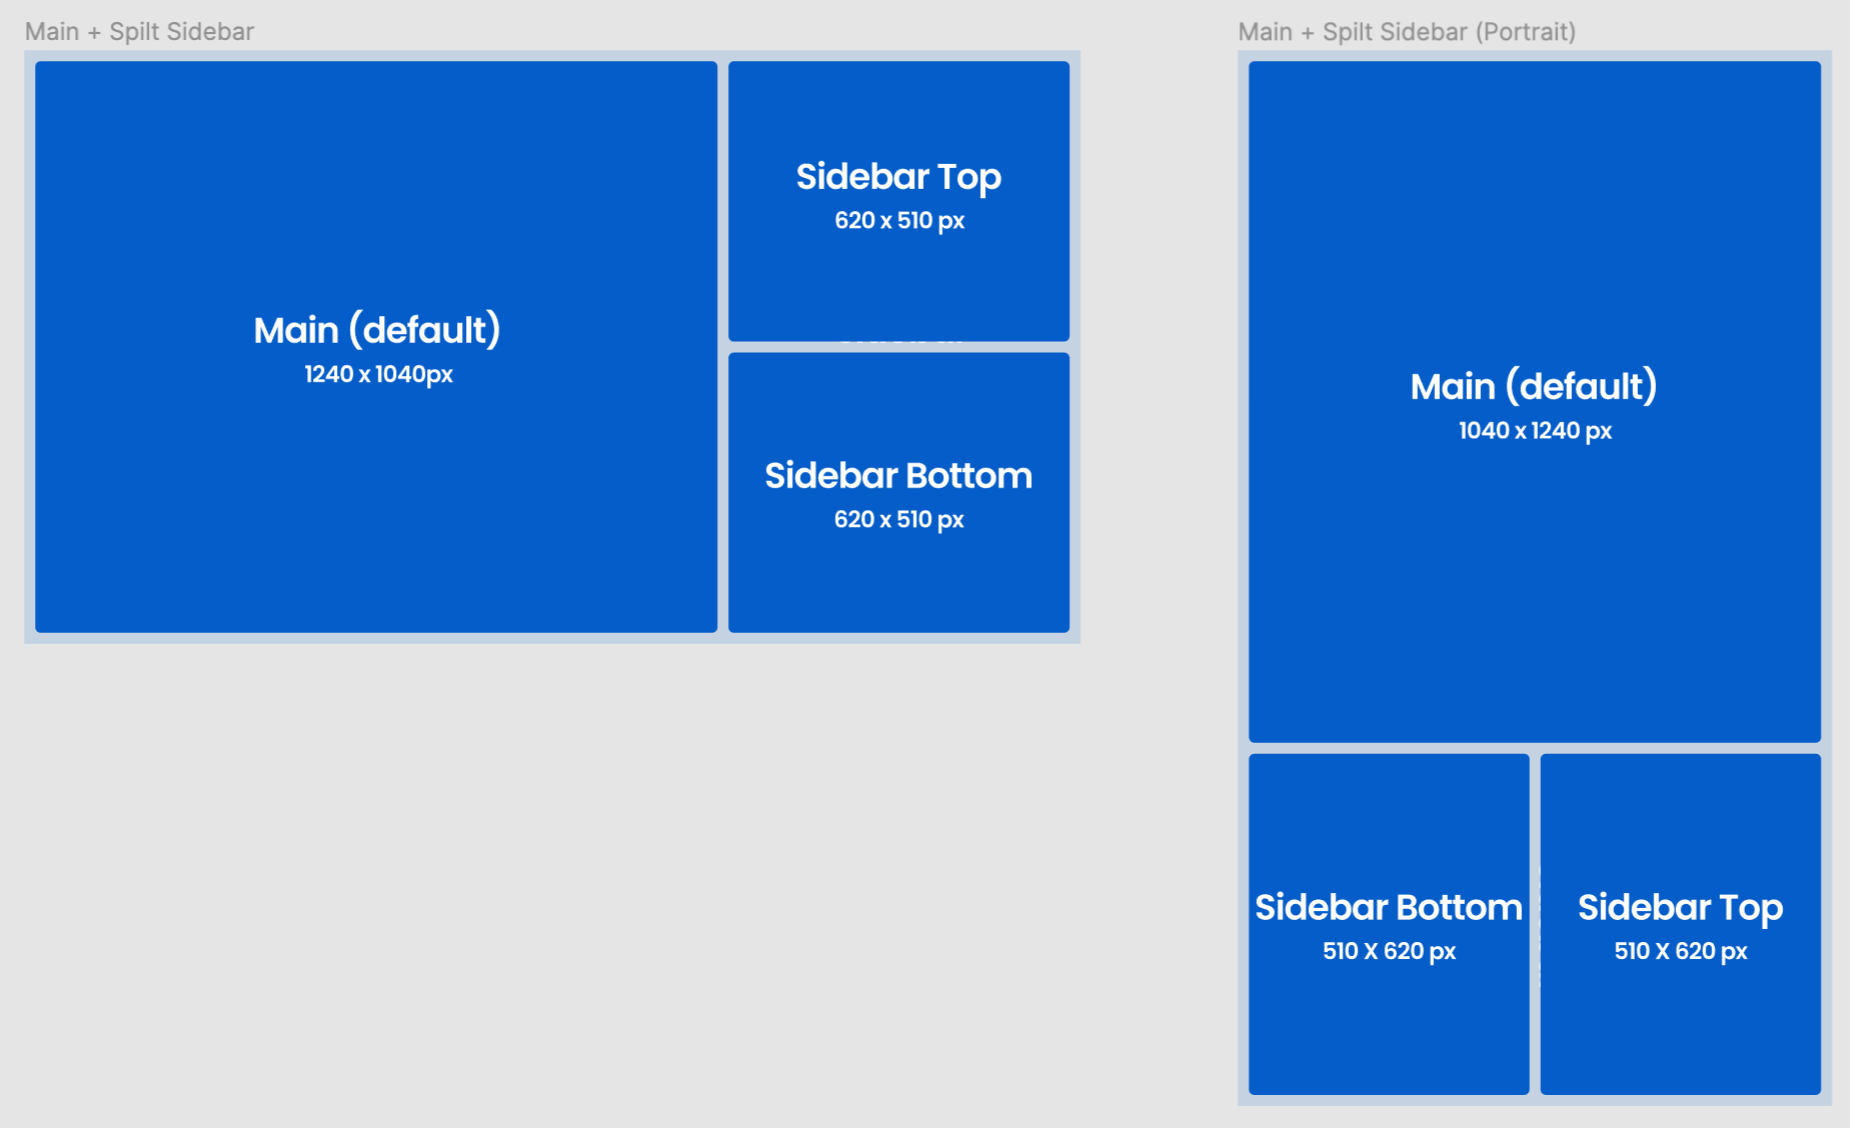
Multi-zone templates may consist of two or more of the following zones types:
-
- Main – This is a full playlist channel zone. You may add a playlist channel with one or more content items ranging from cards, images, or videos.
- Sidebar Bottom – This is a full playlist channel zone. You may add a playlist channel with one or more content items ranging from cards, images, or videos.
- Sidebar Top – This is a full playlist channel zone. You may add a playlist channel with one or more content items ranging from cards, images, or videos.
- Banner – Here you can include an image or use the Banner card.
- Ticker – This zone is only for a text ticker. With a text ticker, you can customize and display a length of text continuously.
With the Appspace 8.1 ac.23 release, the following multi-zone templates are currently available:
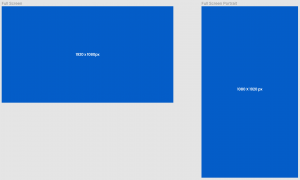
- Full Screen (generic playlist channel)
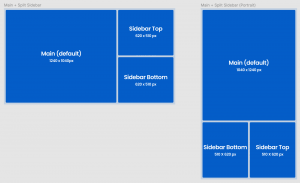
- Main + Split Sidebar + Banner (5-zone template)

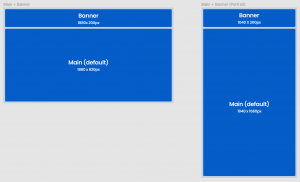
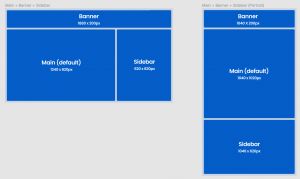
- Main + Banner
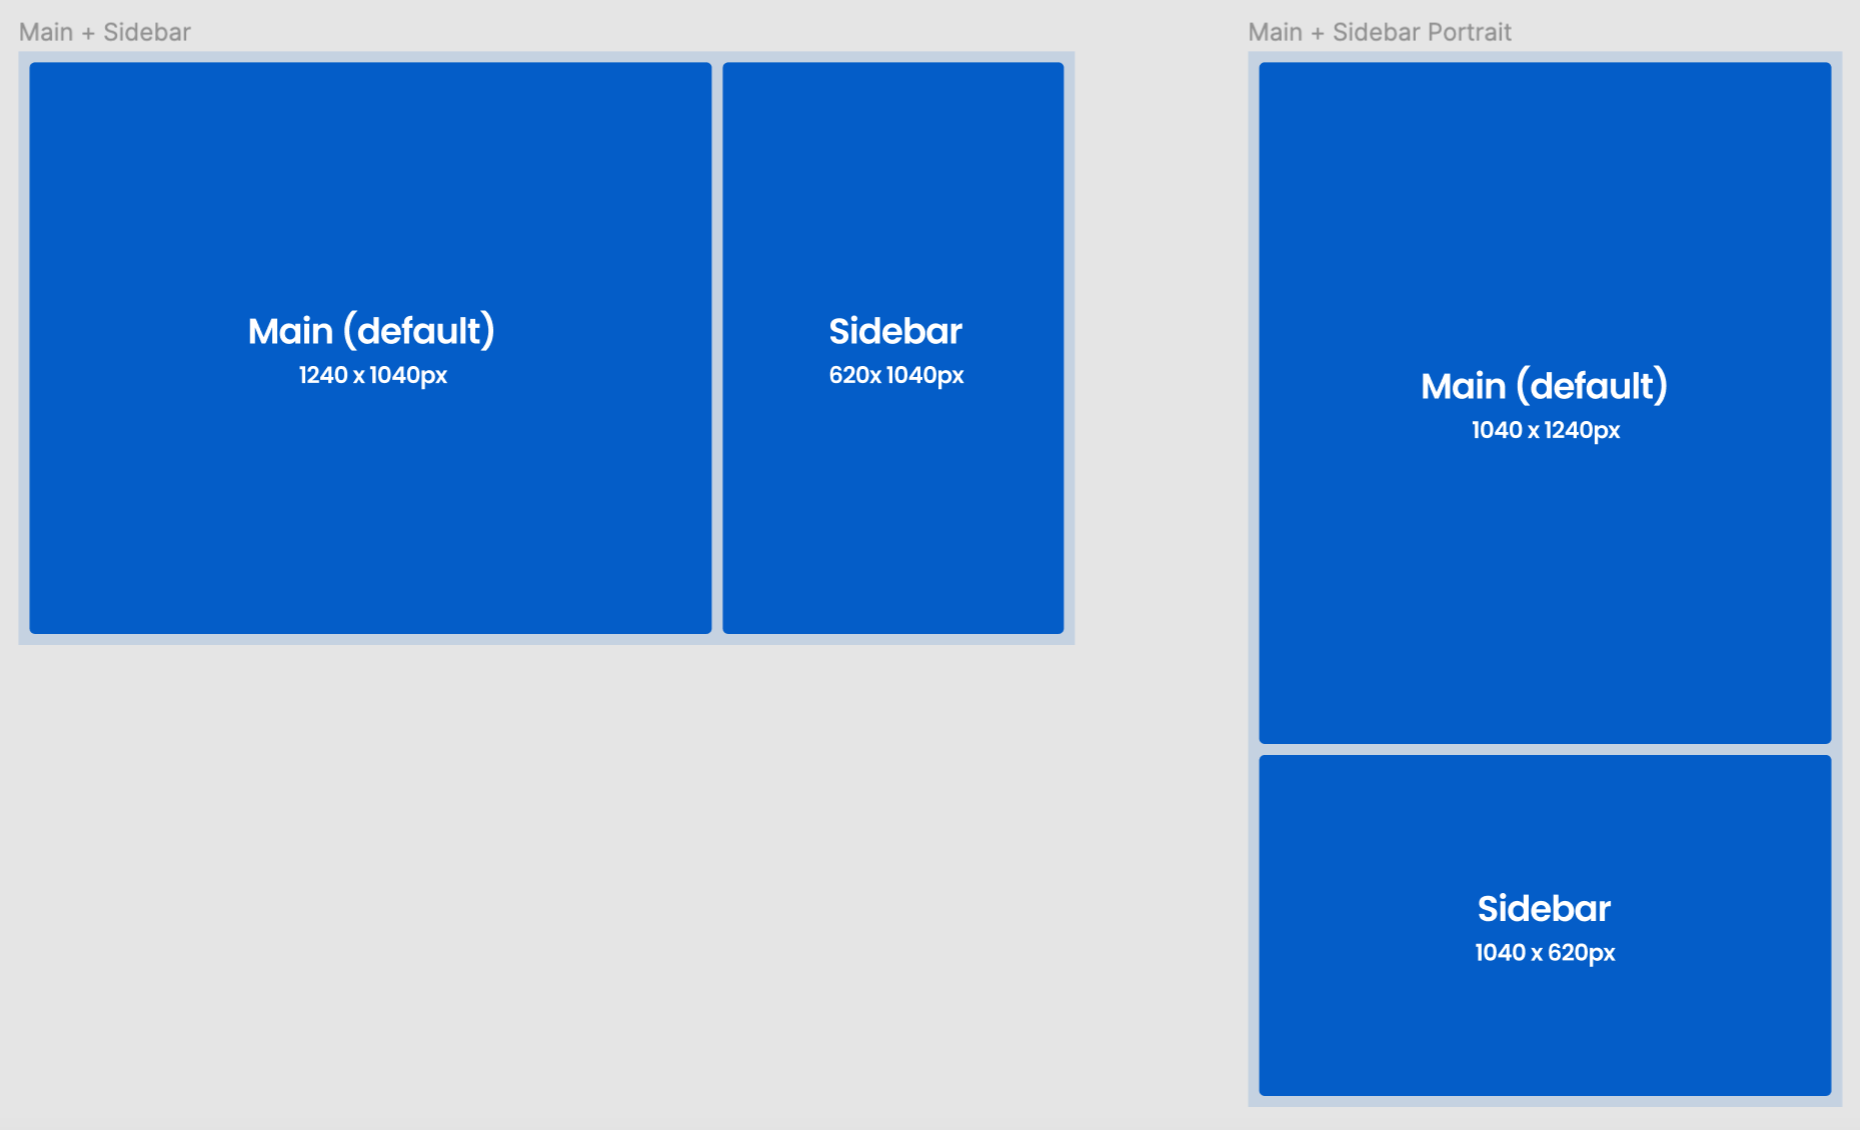
- Main + Sidebar


- Main + Split Sidebar
- Main + Sidebar + Banner
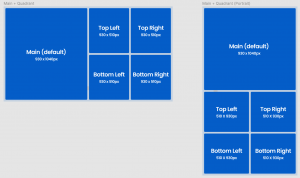
- Main + Quadrants
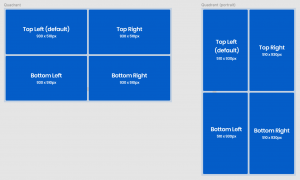
- Quadrants


This article provides instructions to create, configure, add content, and publish the playlist channel with a multi-zone template to a variety of devices:
Prerequisites
- Platform user with Account Owner or Publisher roles.
- Devices running the Appspace App for Devices.ImportantThese multi-zone templates are not supported on the Employee App. To display content on the Employee App, please create a playlist channel and select an Employee App template instead.
Best Practices
Appspace recommends the following best practices and content types for the following zones:
Banner Zone
- Recommended: the single Banner card.
- Alternatively, you can add one single image (.jpg, .svg, .png) with a size of 1240 x 100px.
- The single image in the zone will play infinitely, therefore users will not need the ability to set a transition duration for the content.
- This zone uses Uniform Fill, thus images are stretched to fit the area of the zone.
Main Zone
- Any content type, such as Appspace cards, images, videos, or audio.
- Recommended image size: 1240 x 92opx
- Content playback is displayed in an ordered sequence, with the following default playback properties:
- Fade transition
- 8 seconds duration
- Uniform aspect ratio
Sidebar Top Zone
- Any content type, such as Appspace cards, images, videos, or audio.
- Recommended content: the Weather card (with 1-day forecast layout) or the News card.
- Recommended image size: 620 x 430px.
- A persistent date and time will be displayed in the top right corner of this zone. The date/time widget will float above this zone and the channel background.
- Content playback is displayed in an ordered sequence, with the following default playback properties:
- Fade transition
- 8 seconds duration
- Uniform aspect ratio
Sidebar Bottom Zone
- Any content type, such as Appspace cards, images, videos, or audio.
- Recommended content: the Quote card.
- Recommended image size: 620 x 820px
- Content playback is displayed in an ordered sequence, with the following default playback properties:
- Fade transition
- 8 seconds duration
- Uniform aspect ratio
Create Playlist Channel with Multi-Zone Template
Follow the instructions below to create and configure a Playlist Channel with a multi-zone template:
- Log in to your Appspace console.
- You may create the playlist channel via one of the following options:
- Click Channels from the ☰ Appspace menu, and click the + CREATE button.
- Click the + Quick Action button from the Appspace navigation bar on top, and select Create Channel.
- Click the Dashboard tab, and click the + plus icon on the Channels widget.
- In the Create Playlist Channel dialog box, enter the name of the playlist channel.
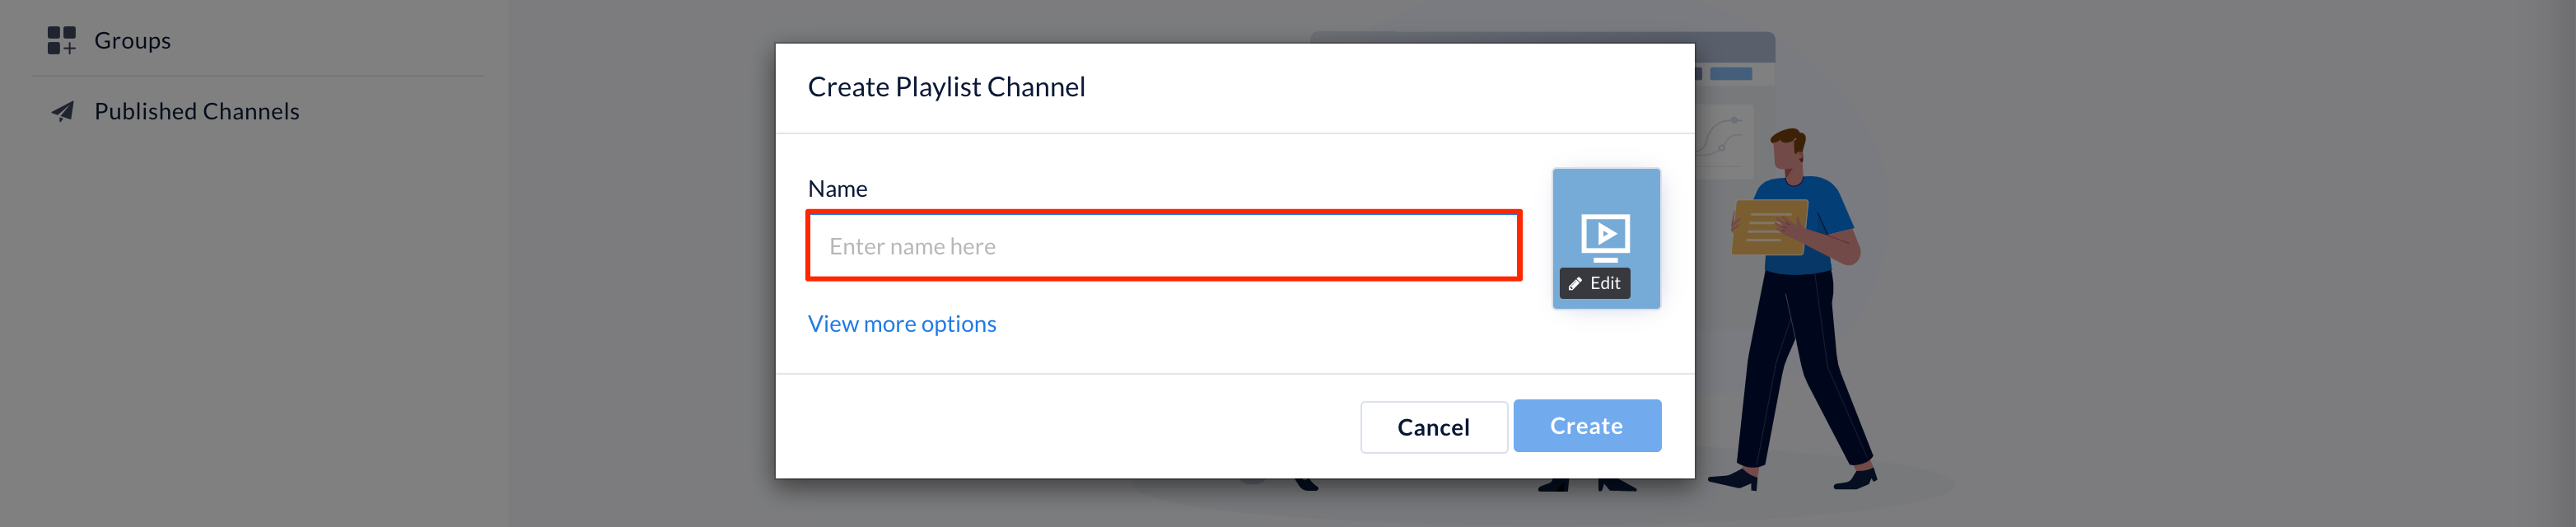
- Click the View more options, and select the desired Device Template (multi-zone) layout you wish to use on your playlist channel.
NoteIn this 8.1 ac.23 release, the multi-zone templates cannot be modified by the user, nor the zones resized or moved around. We are looking forward to bringing you these features in our upcoming releases.
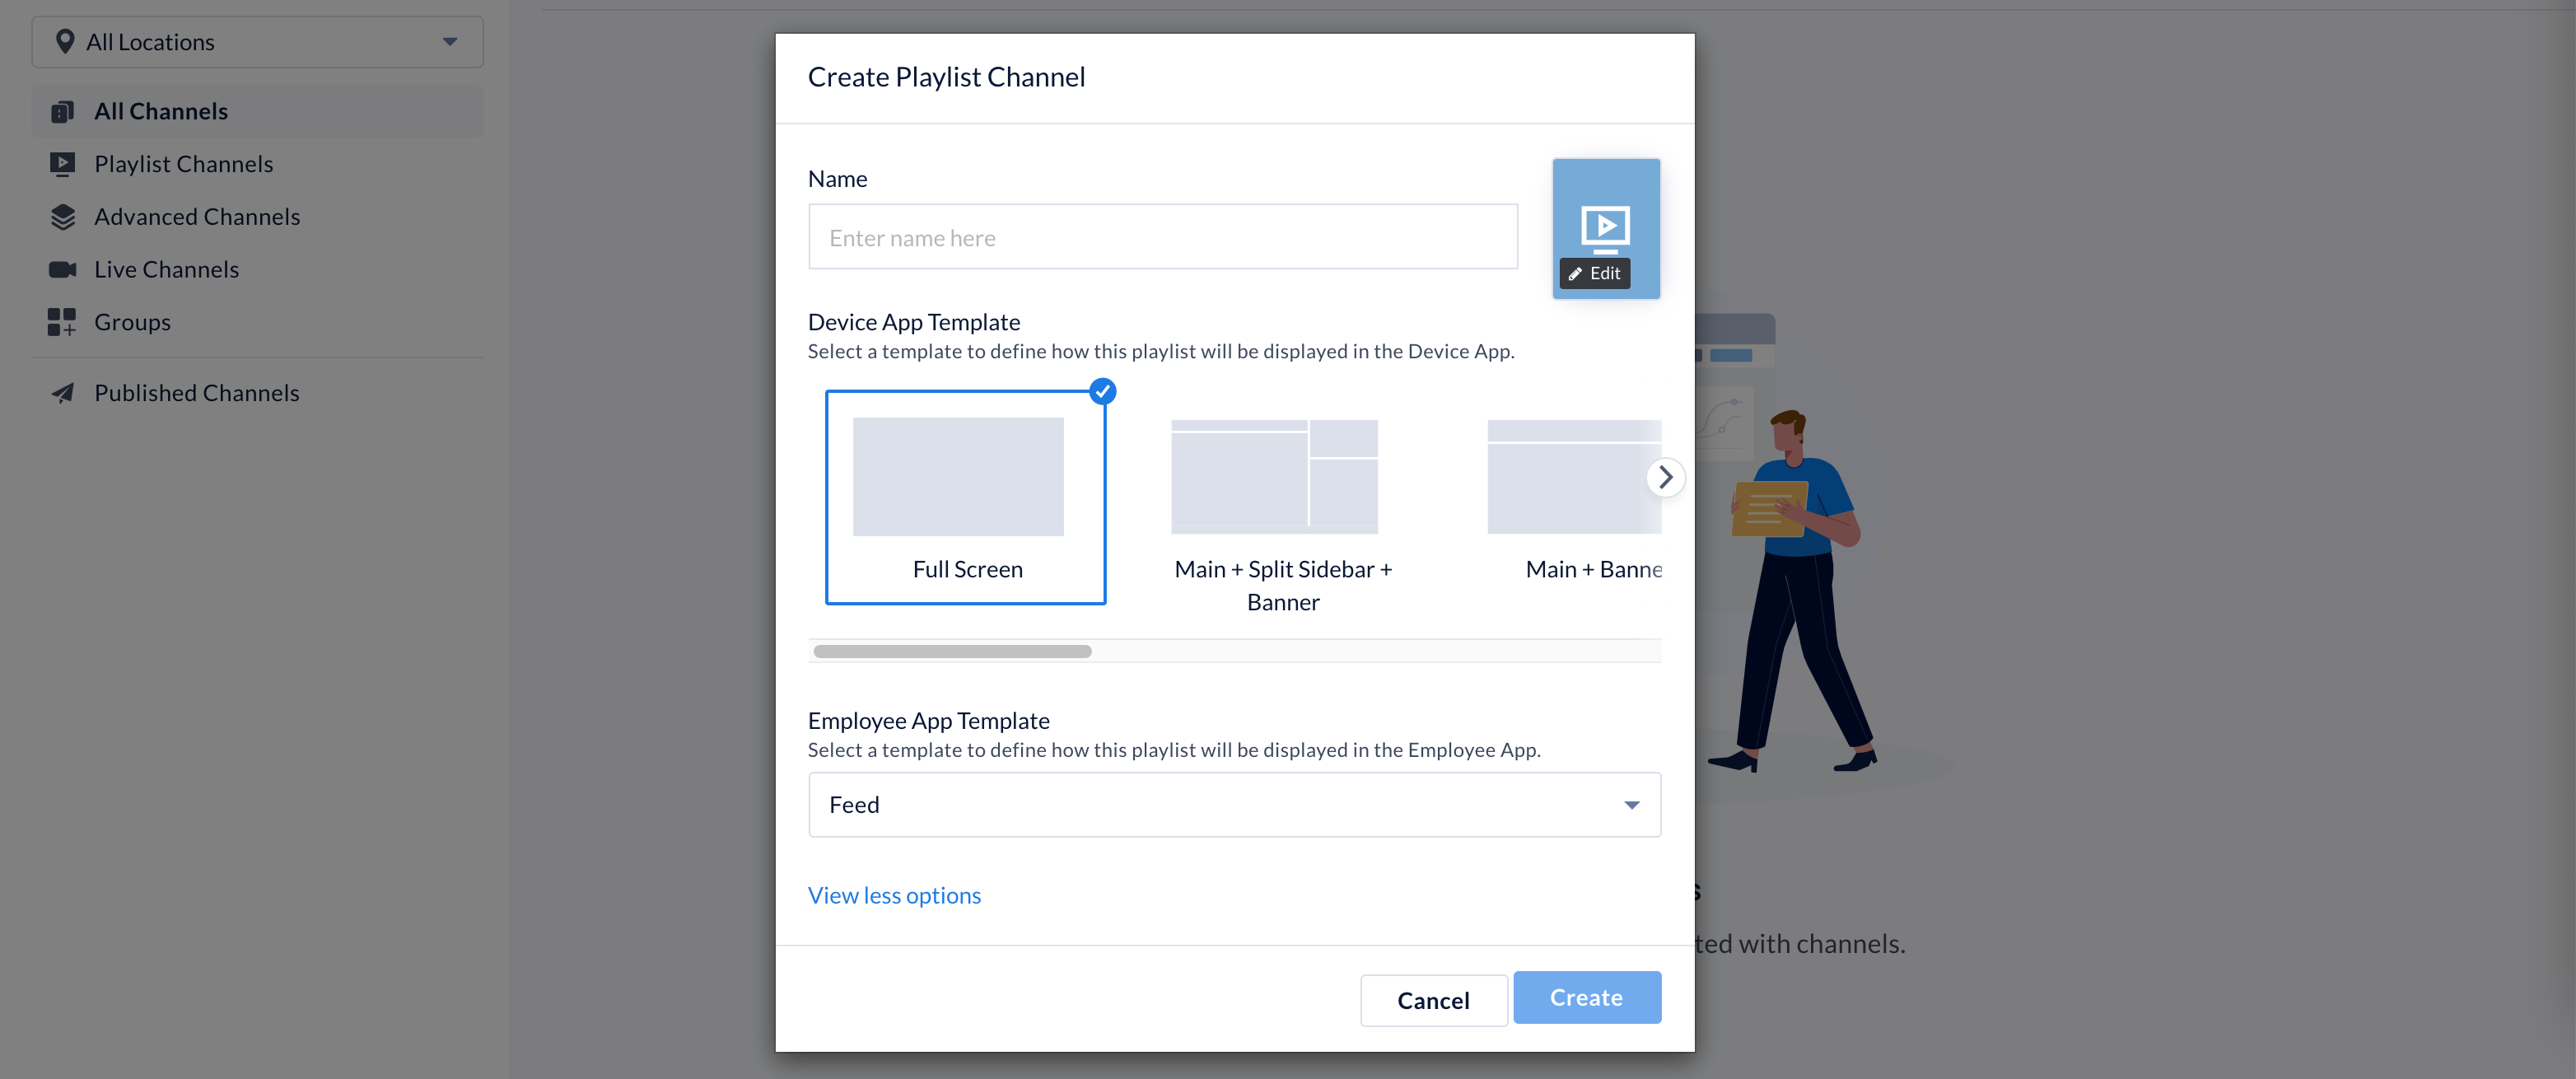
- Optionally, if you would like to customize the playlist channel color and icon, click the Edit button.
- Once done, click Create to create the playlist channel.
- Proceed to the Add Content to Zones section below.
Add Content to Zones
Follow the instructions below to add content to your selected multi-zone template:
- In the playlist channel, click the Edit tab, and select one of the desired zones to add content:
- Main, Sidebar, or Quadrant zones
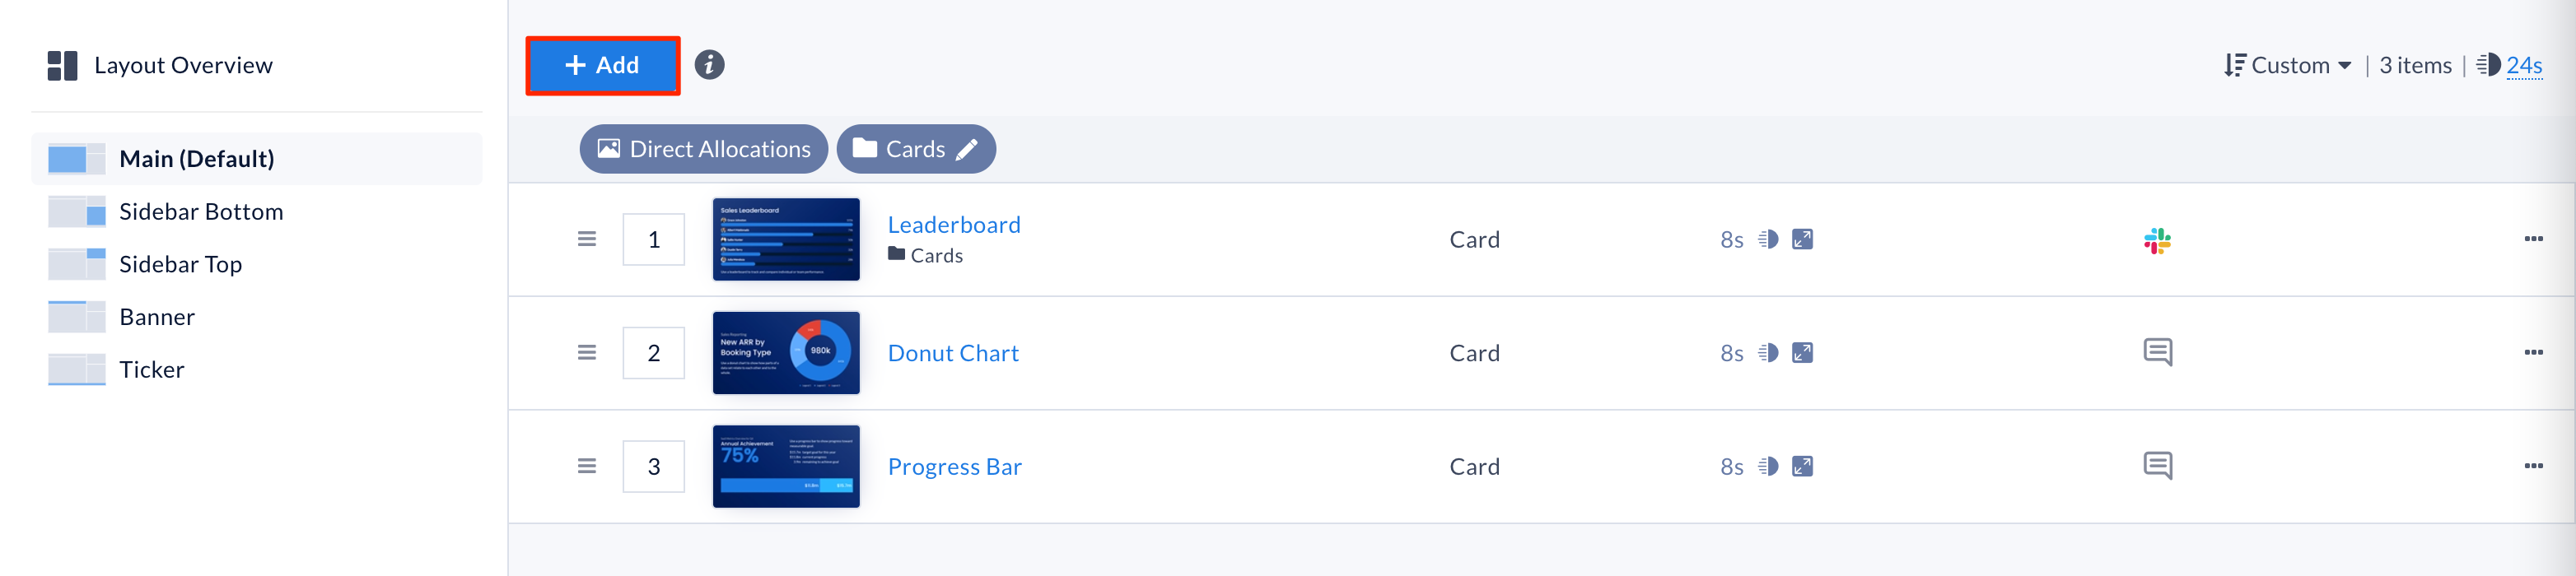
- Select the desired zone from the side panel, and click the + Add button. Alternatively, you may also click the + icon of the zone from the layout screen, and select Add Content.
NoteIf you are unable to view the + Add button, or Add Content selection, please contact your Appspace administrator to provide you access to the library.
- In the Add Content screen, you may add content in the following ways:
- Click Upload Media to upload content(s) from your computer.
- Select a card template to create content from Cards.
- Click the Browse Library tab, and select the desired content(s) or content folder(s) from the desired library.
- Once the content(s) has been added to the playlist channel, you have the option to configure the following playout properties for the added content, by clicking the Playout Properties icon:
- Transition
- Aspect Ratio
- Content Duration
- Content Audio – New
- Schedule
- Frequency Restrictions
- Dayparting
- Tag Rules
ImportantPlease refer to the Configure Content Playback Properties article for detailed information and configuration instructions on these playback properties.
- Optionally, if there are multiple contents within the playlist channel, you may arrange the order of the contents to be displayed by selecting one of the following options from the Sort drop-down menu:
- Name – Sorts content alphabetically based on the filename.
- Updated – Sorts content based on when it was last updated.
- Shuffle – Sorts content in a randomized order. Content from various folders may be displayed back to back.
- Custom (default) – Customize the content order by moving it up or down within the playlist channel.
- Select the desired zone from the side panel, and click the + Add button. Alternatively, you may also click the + icon of the zone from the layout screen, and select Add Content.
- Banner zone

- Select the Banner zone from the side panel, and click the Browse link to select the content from the Library, or click Upload to upload content from your computer. While any content type may be used, Appspace recommends using the Banner card for this zone.
- Ticker Zone
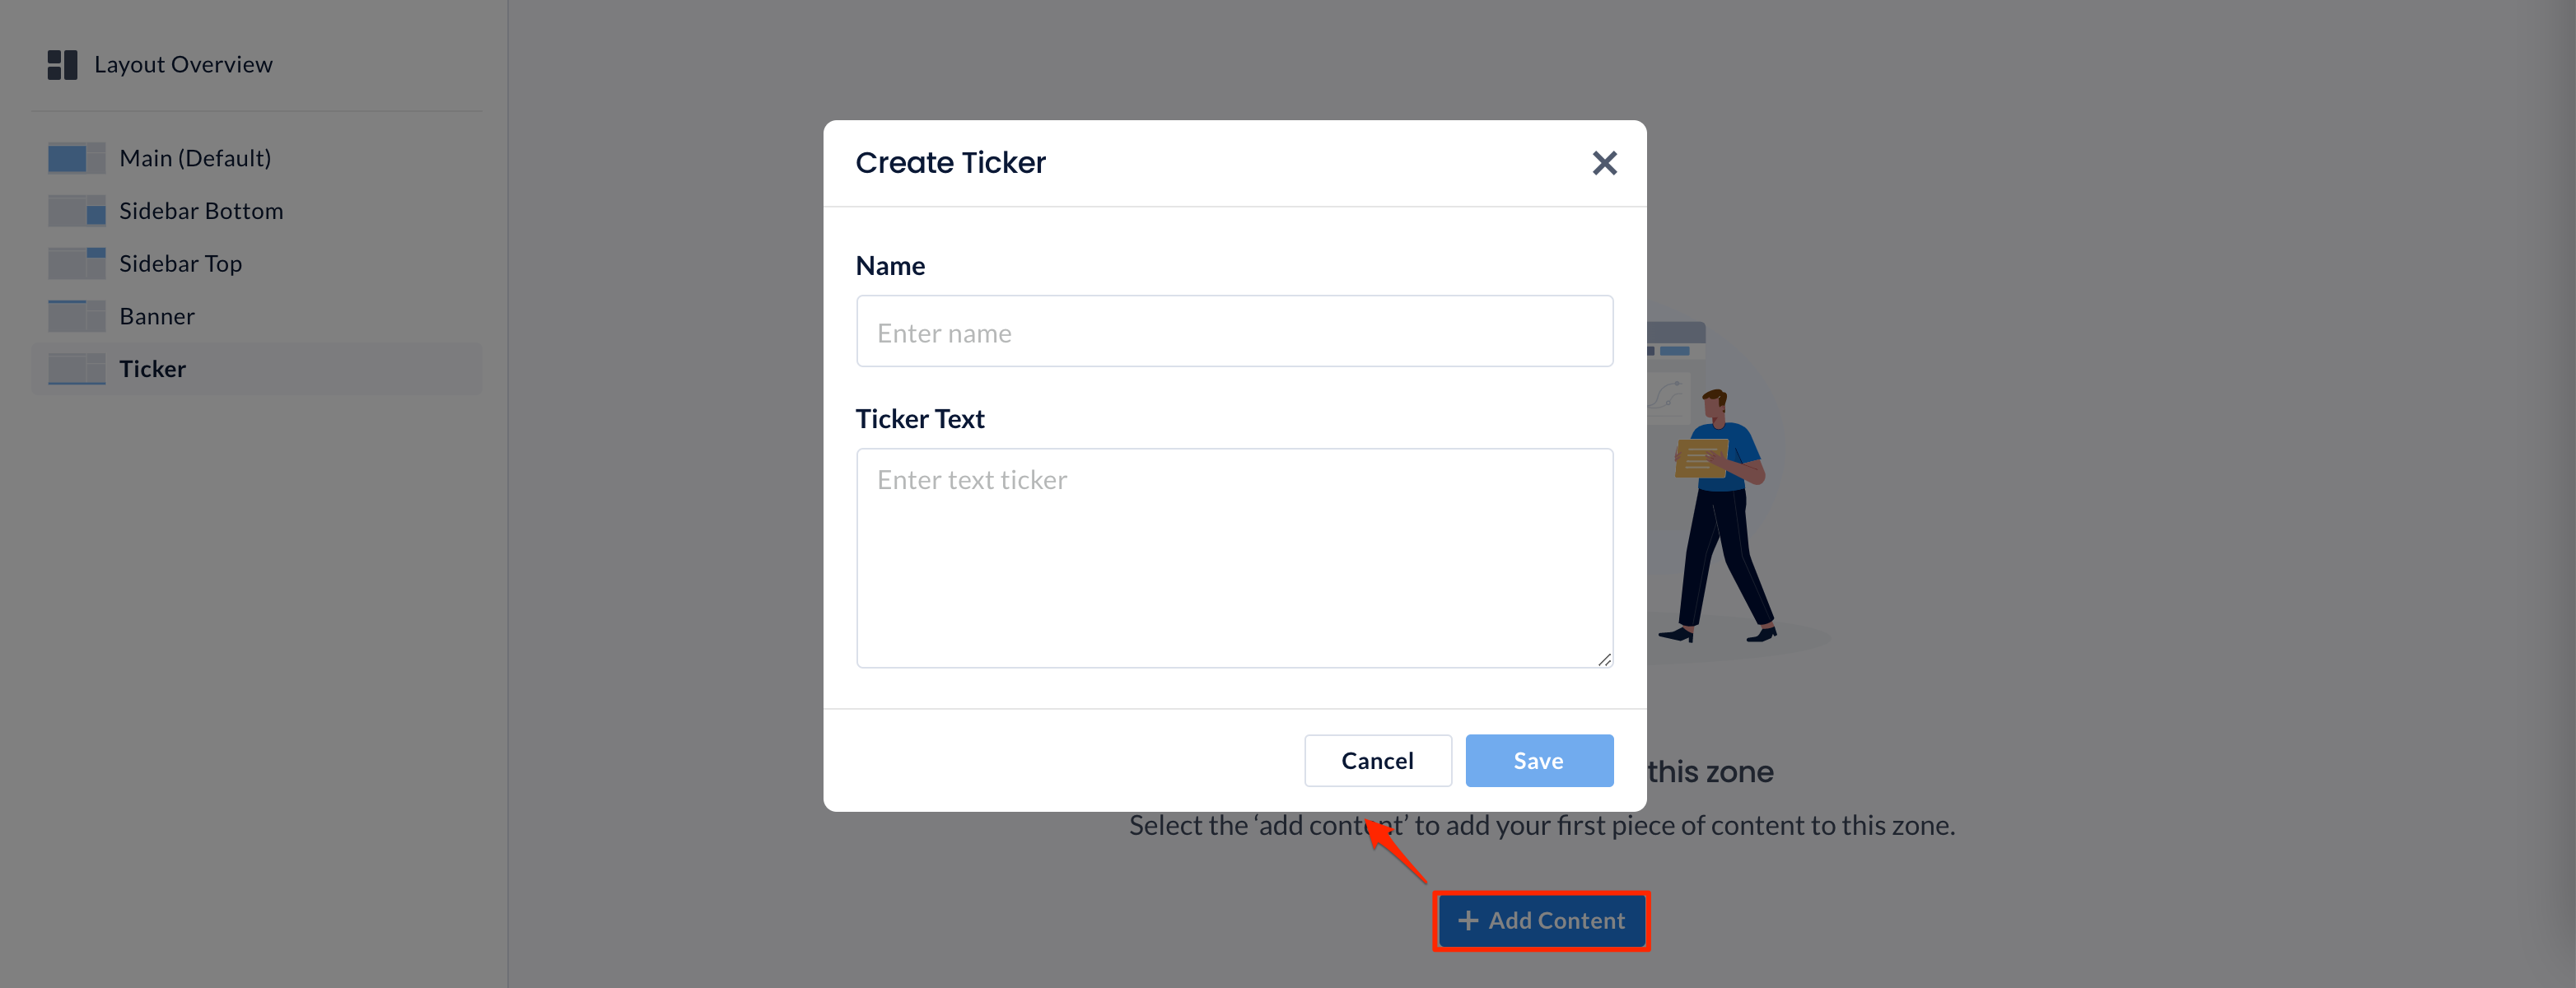
- Select the Ticker zone from the side panel, and click the + Add Content button.
- In the Create Ticker dialog box, Enter the Name of the ticker, and the Ticker Text to be displayed.
- Click Save once done.
- Once done, click Save. NoteMultiple ticker text may be added, and you may rearrange the order of the ticket text to be displayed.
- Main, Sidebar, or Quadrant zones
Preview Content
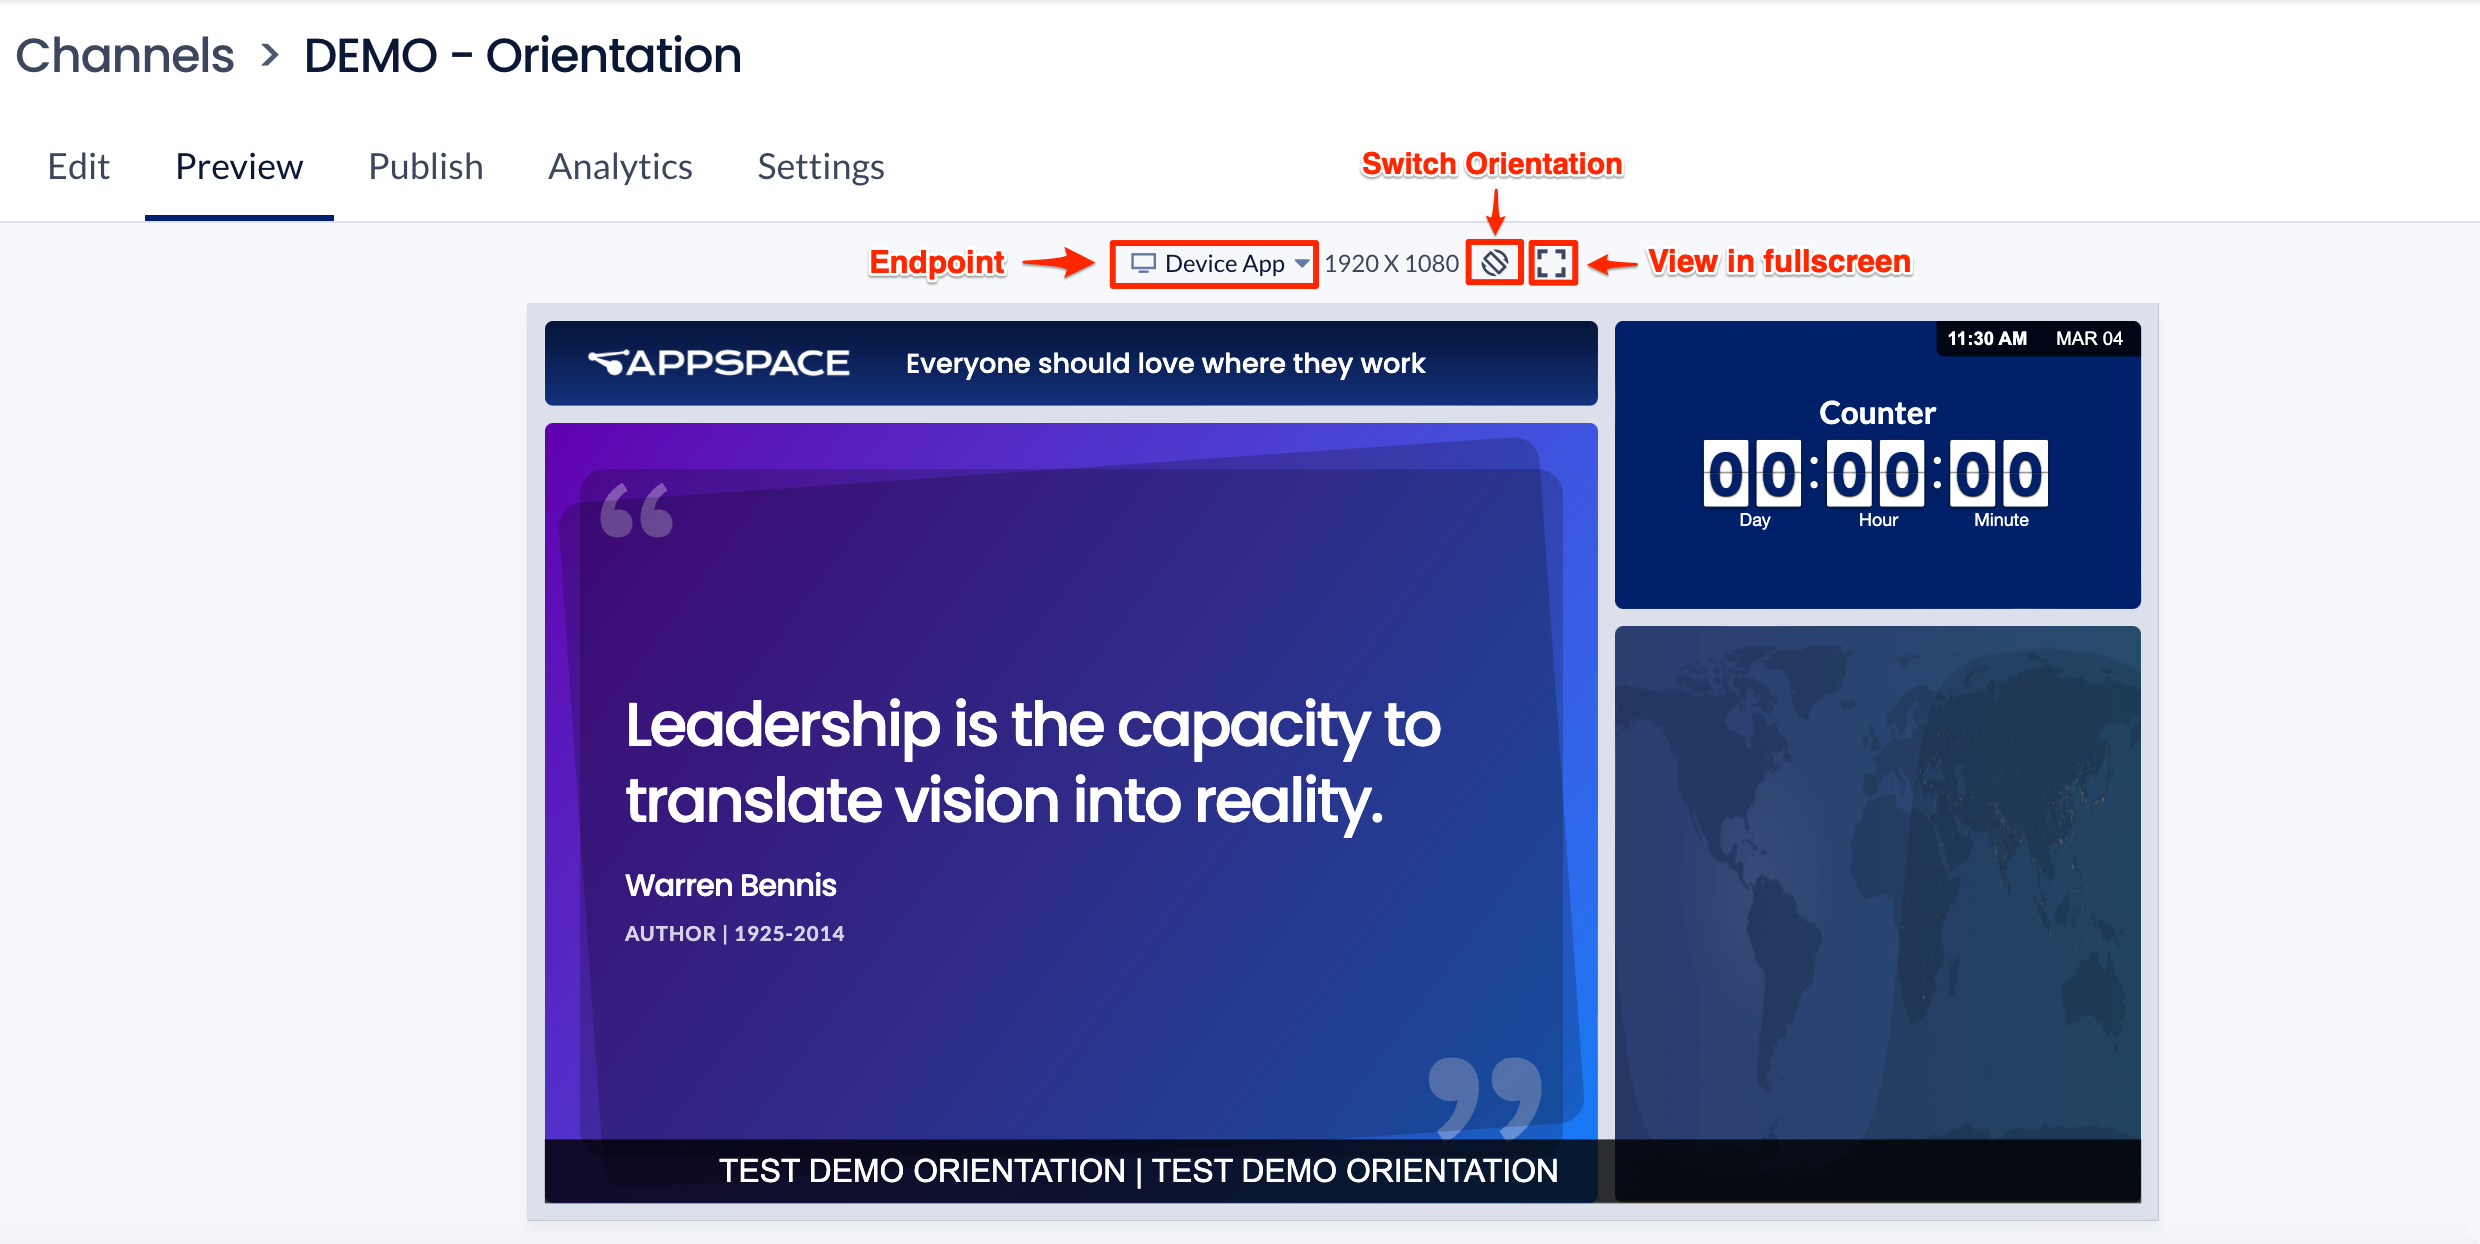
Select the Preview tab to preview how the content is displayed on your desired publishing endpoint (see Publish Multi-Zone Playlist Channel section below). You are also able to change the orientation of the channel in the preview tab.
- Select Endpoint drop-down to select your publishing endpoints: Device App, Employee App or Enterprise Messaging.
- Click the Switch Orientation icon to switch between portrait or landscape mode.
- To view fullscreen, click the View in fullscreen icon.
Publish Multi-Zone Playlist Channel
Once the channel is created, you may publish it to an enterprise messaging app such as Slack, Webex Team, Microsoft Teams, Workplace from Meta Inc, supported devices, users/employees, or to the web.
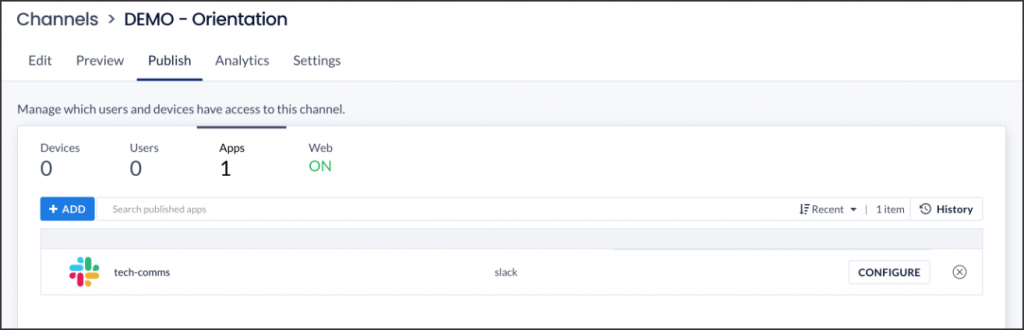
- To publish the playlist channel to devices, users, apps, or to the web, click the Publish tab. NoteThe multi-zone playlist requires the device to be in Administrators can select a single channel mode to display the zones accurately.NoteFor detailed instructions, refer to the Publish Content to Apps, Devices, Employees, or Web article.
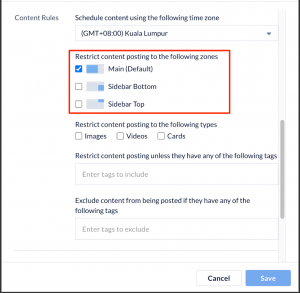
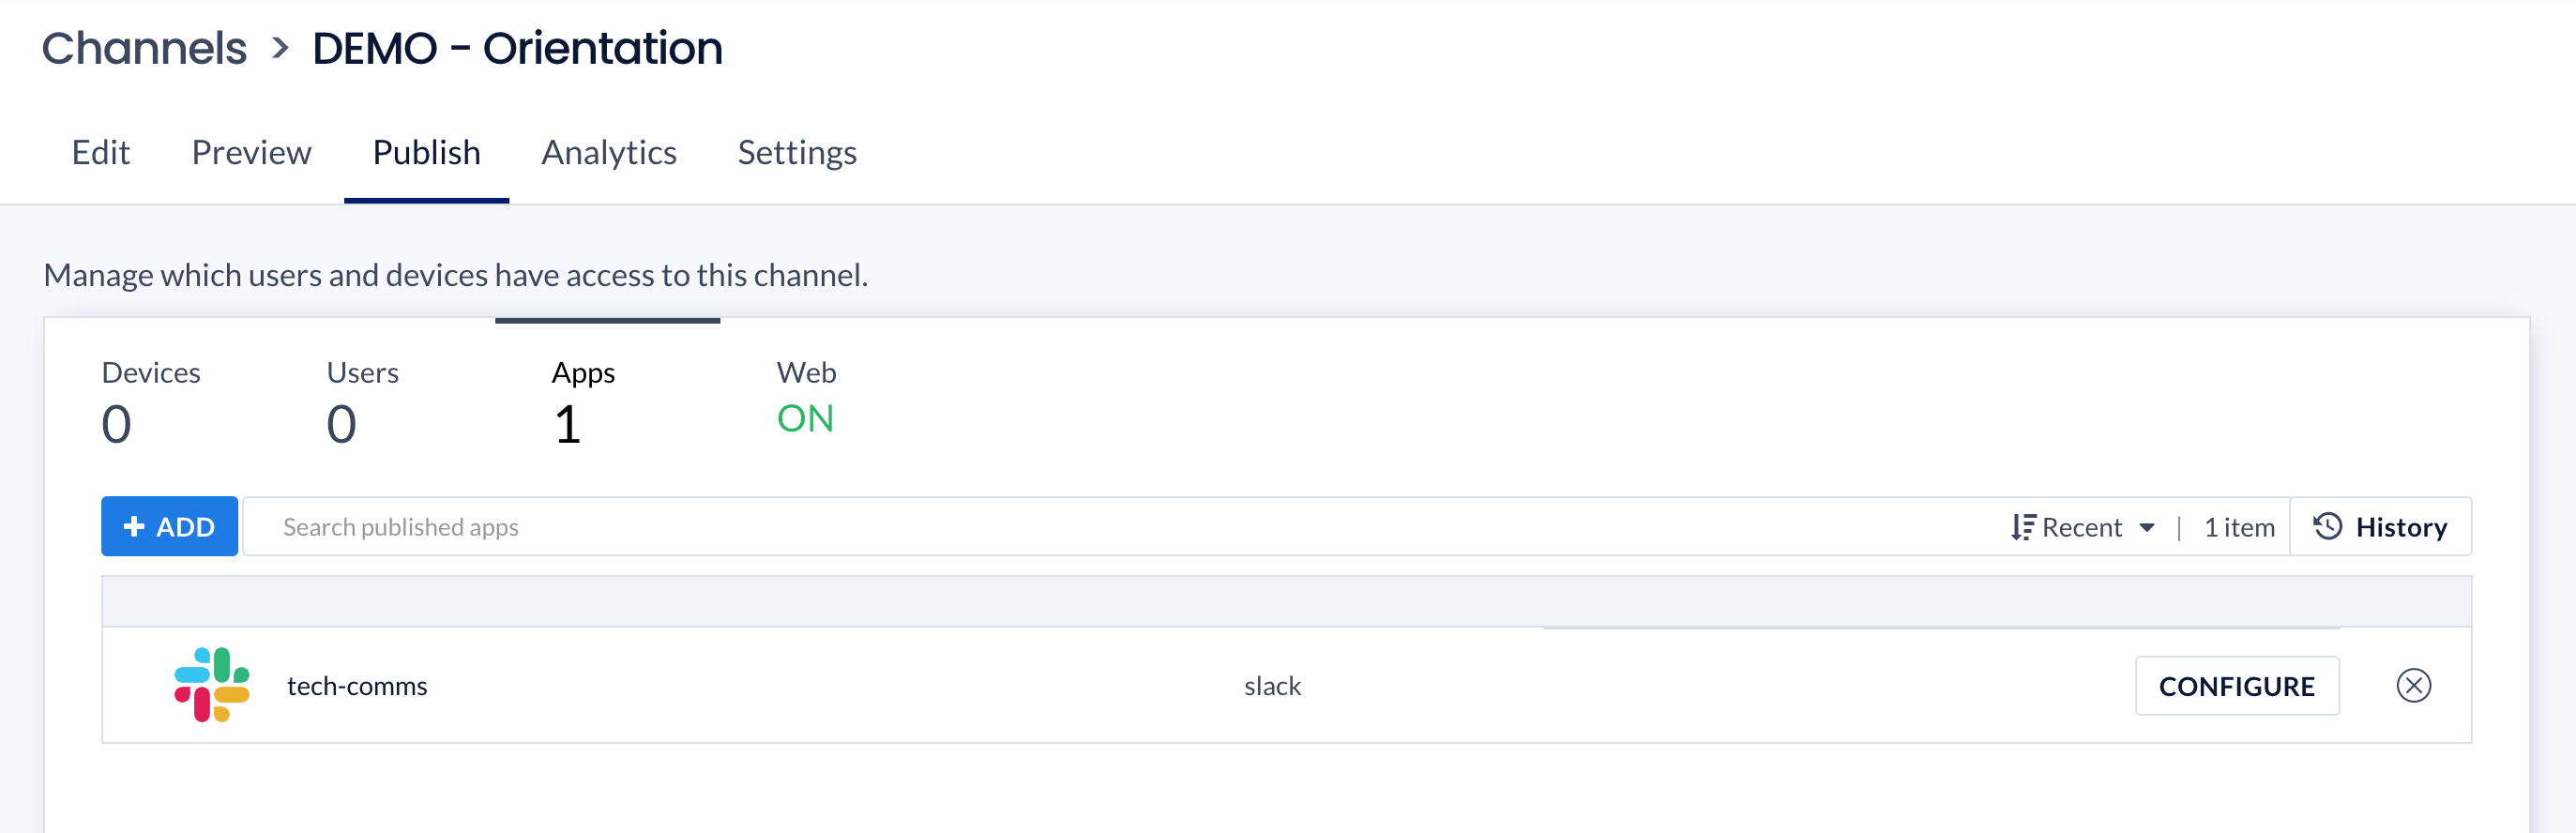
- With multi-zone channels, you can choose to publish the whole channel or one or more of the selected zones to an enterprise messaging app. Click the Apps tab and do the following:
- If you do not yet have an enterprise messaging app configured, click the +ADD button.
- If you already have an enterprise messaging app configured, click the CONFIGURE button next to the desired enterprise messaging app.
- In the Content Rules section, select the desired zones you wish to publish.
- Once a playlist channel has been published, the devices, users, apps, or web icons are displayed to provide quick visibility to where the playlist channel has been published to, on the Channels dashboard.

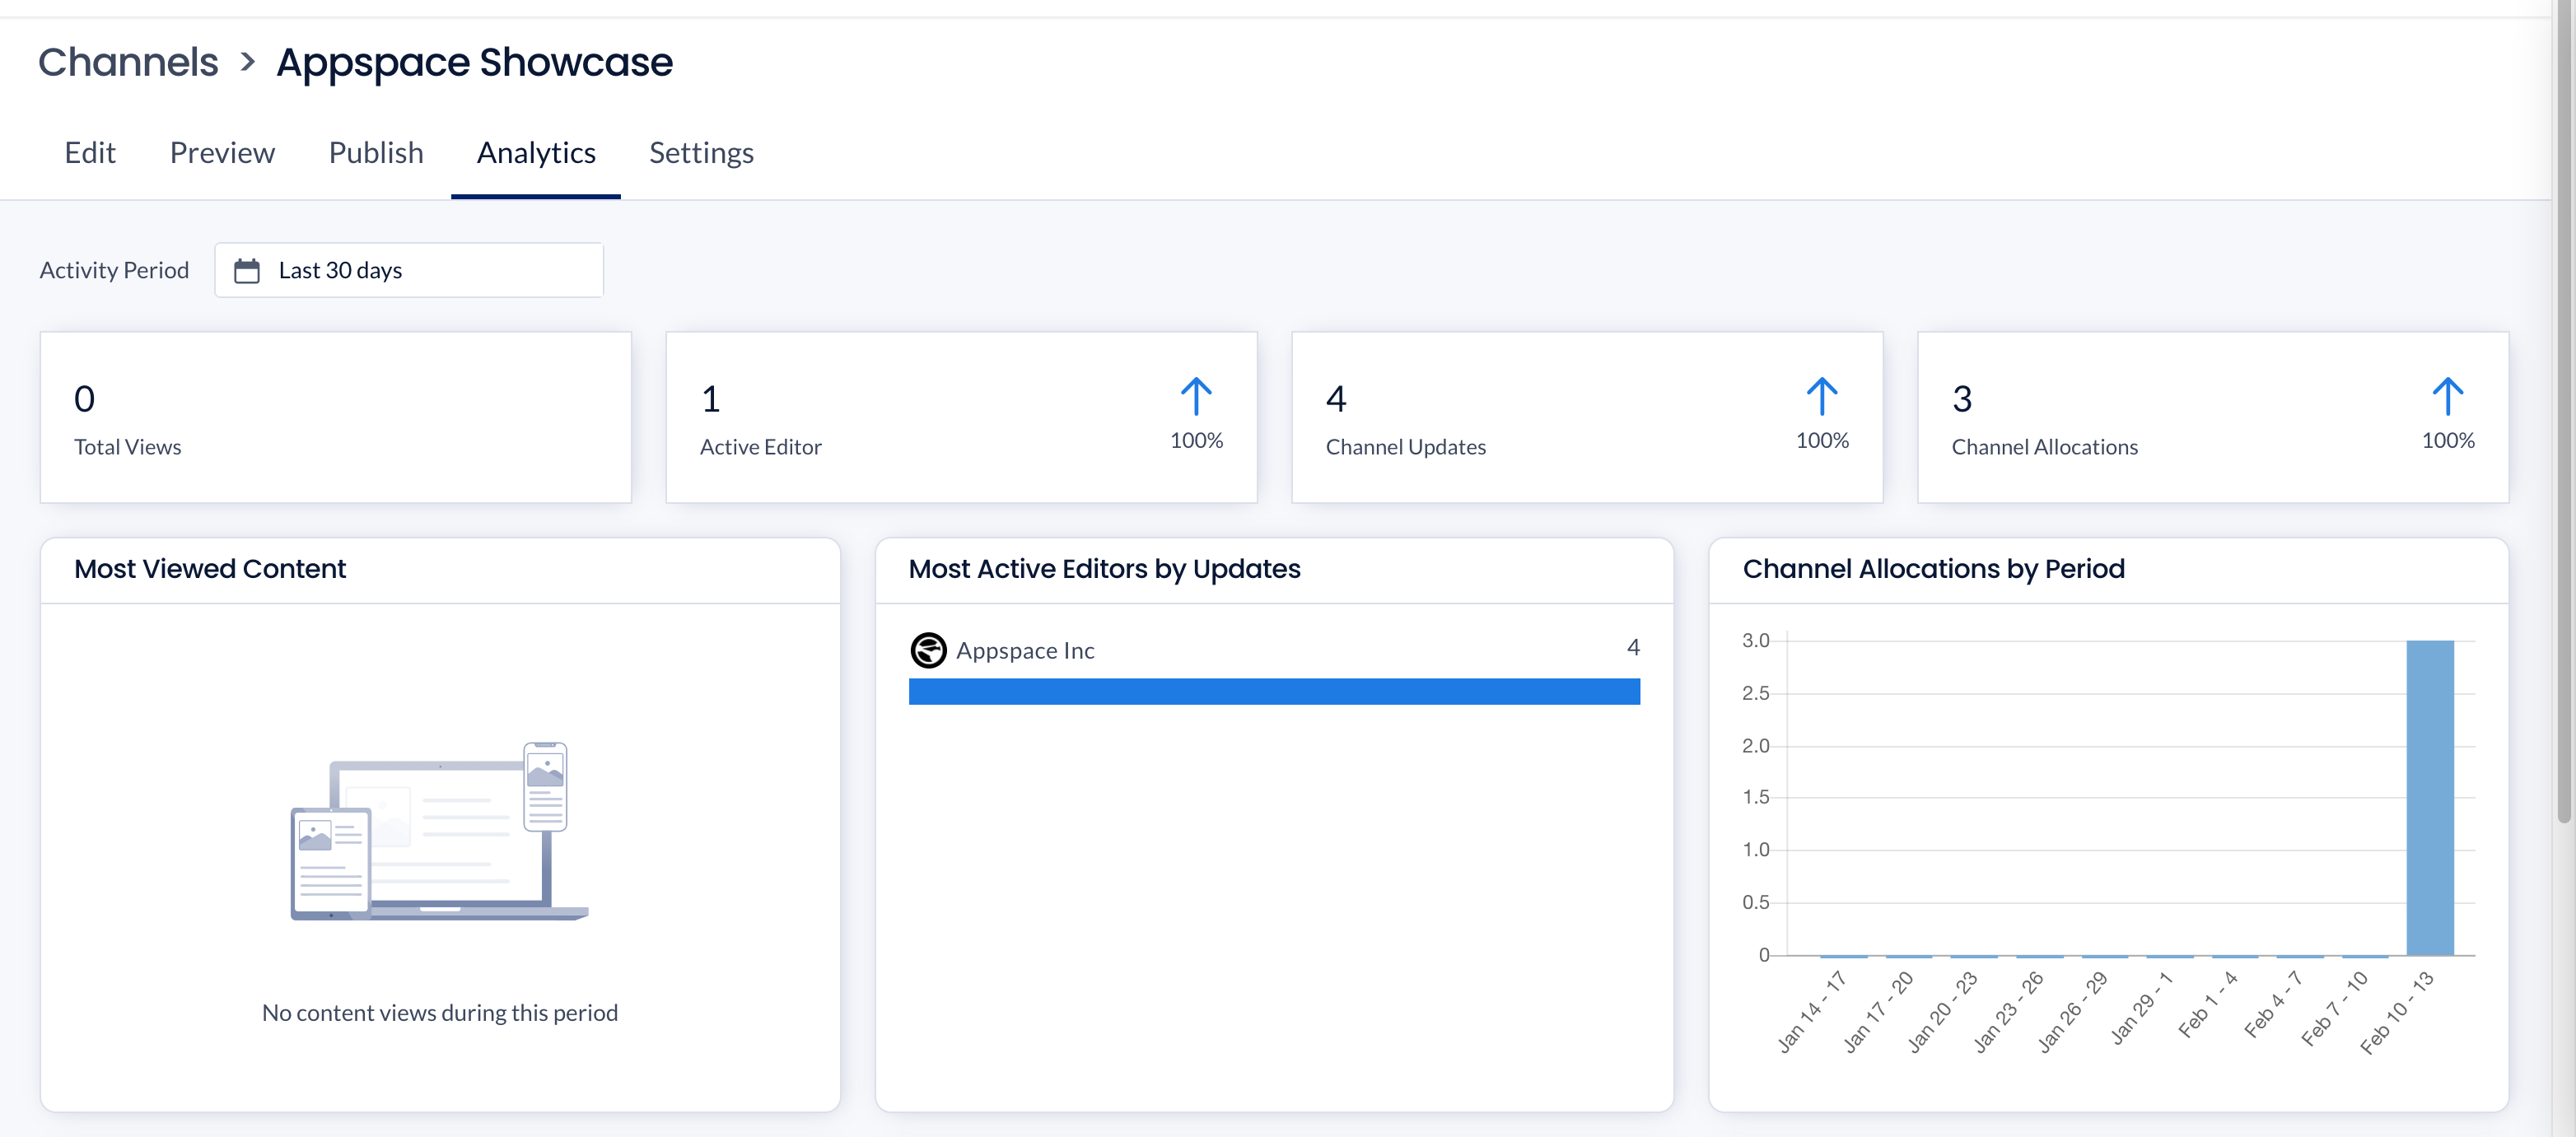
View Playlist Channel Analytics
To view the analytics of the playlist channel, click the Analytics tab.
For more information on the analytic widgets displayed on the Analytics tab, please refer to the Playlist Channel Analytics section in the View Analytics article.
Configure Playlist Channel Settings
To configure the following settings on the playlist channel, click the Settings tab:
Overview
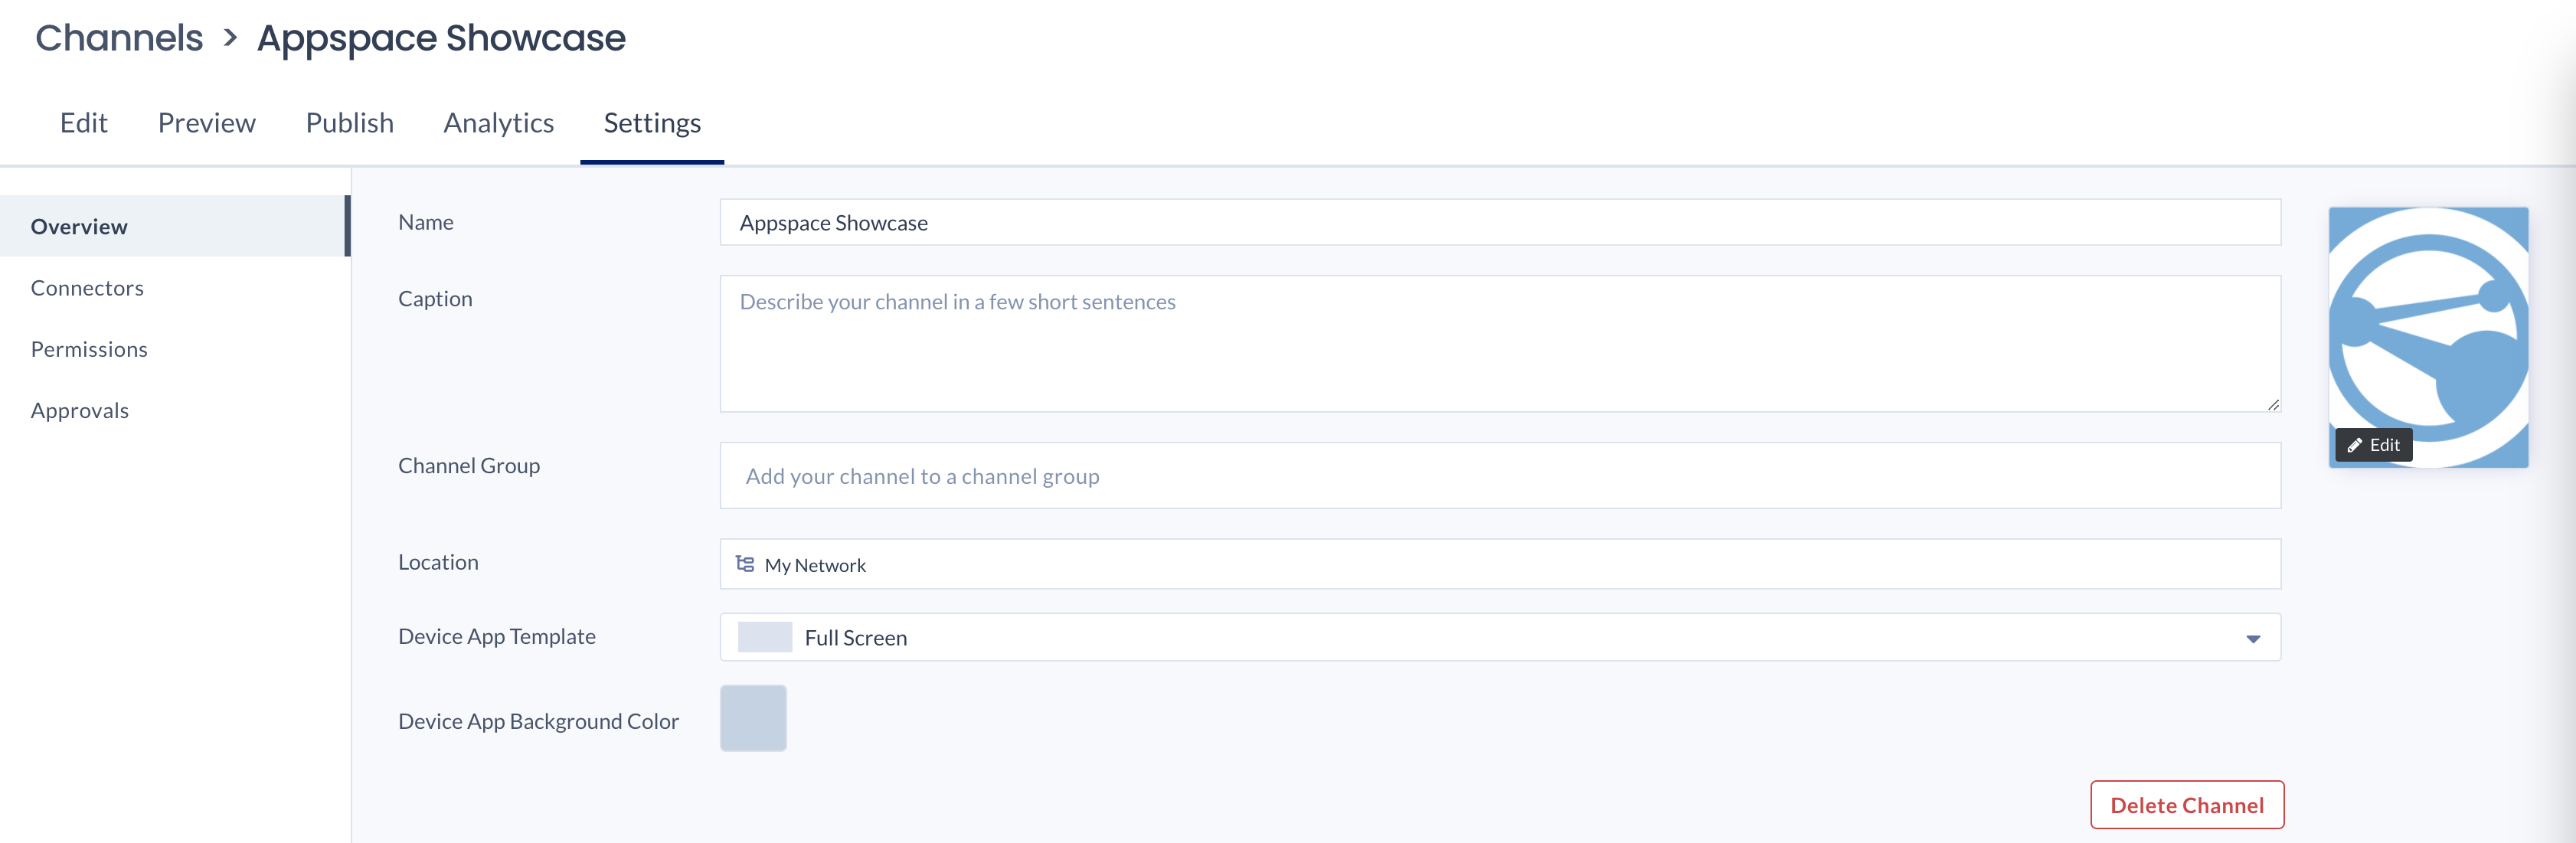
In the Overview side-panel tab, you may perform the following settings:
- Name – Enter a name for the playlist channel
- Caption – Enter a caption for the playlist channel.
- Channel Group – Assign a channel group to the playlist channel.
- Location – Edit the Location of the playlist channel.
- Device Template – Determine the multi-zone layout for the playlist channel, by selecting the Device Template from the drop-down menu. To configure a multi-zone playlist channel, please refer to our Create a Multi-zone Playlist Channel article for more detailed instructions.
WarningSwitching Device Templates give you the option to merge existing content to a zone, or delete it.
- Device App Background Color – Select the background and border color of the device app to match your branding or individual preferences.
- Delete Channel
- Playlist Thumbnail Image – Upload a custom image, or select an icon or color for the playlist channel.
NoteCustom thumbnail images should ideally have a 16:9 aspect ratio for the best display results.
Connectors
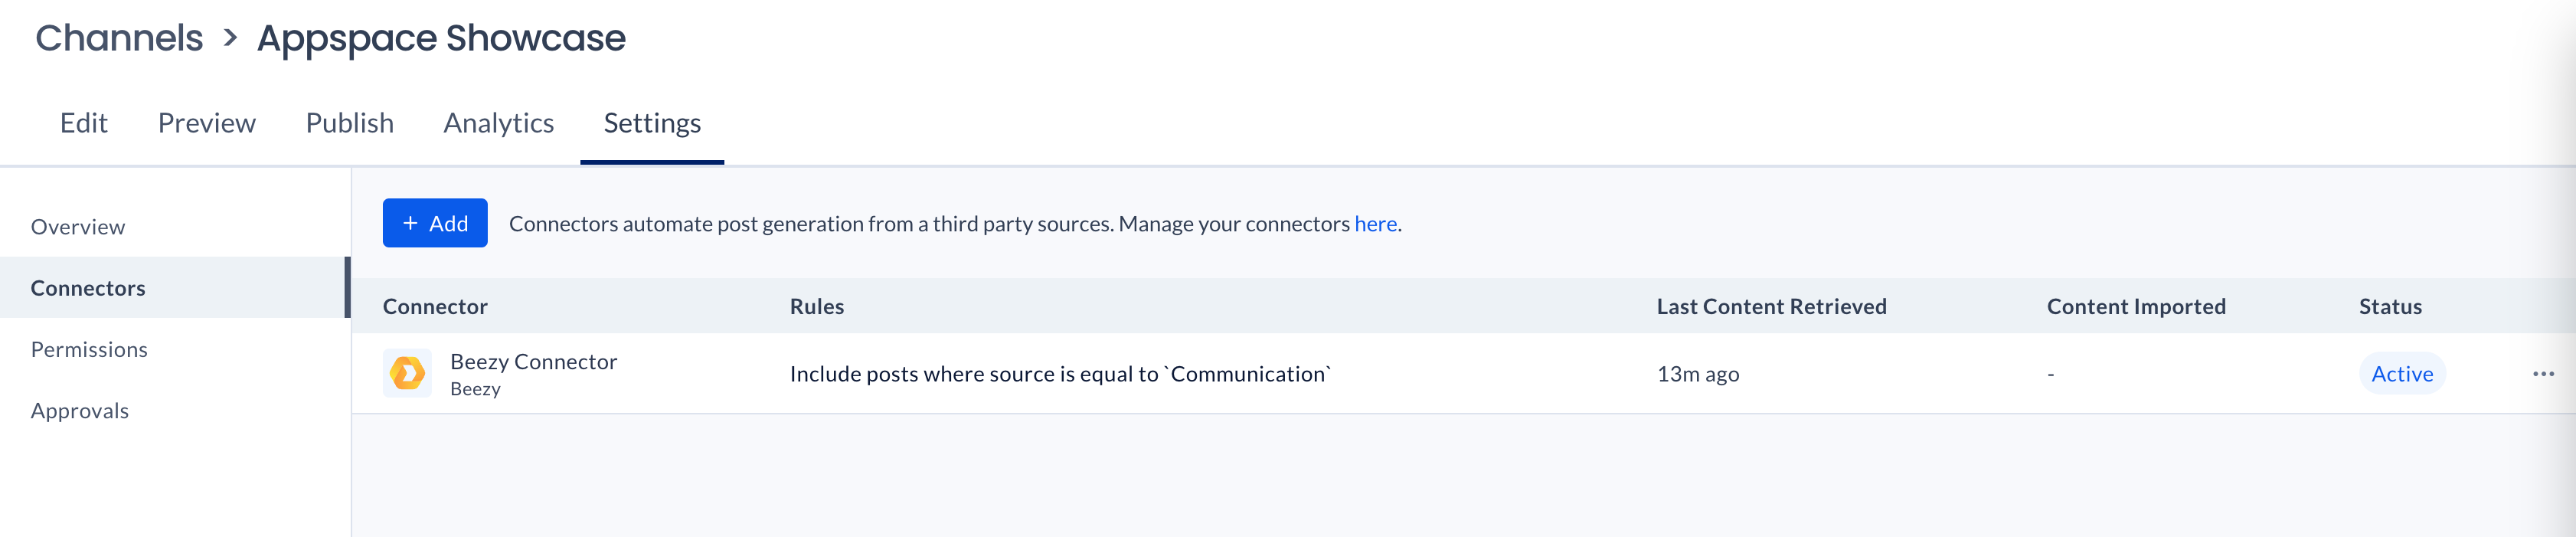
In the Connectors side-panel tab, you may perform the following settings:
- Click the + Add button to connect to a third-party source via Connectors.
- Select the Connector type you wish to connect to from the drop-down menu
- Once connected, you may select specific channels or lists to retrieve content from, or leave it blank to retrieve all channels or lists.
- Optionally, you may click Show more to display additional fields to configure:
- Rule – Include or Exclude the following rule.
- Property – Select the property of the rule from the drop-down menu.
- Operator – Select the operator from the drop-down menu.
- Value – Enter the value of the property selected.
- Once done, click Save.
Permissions
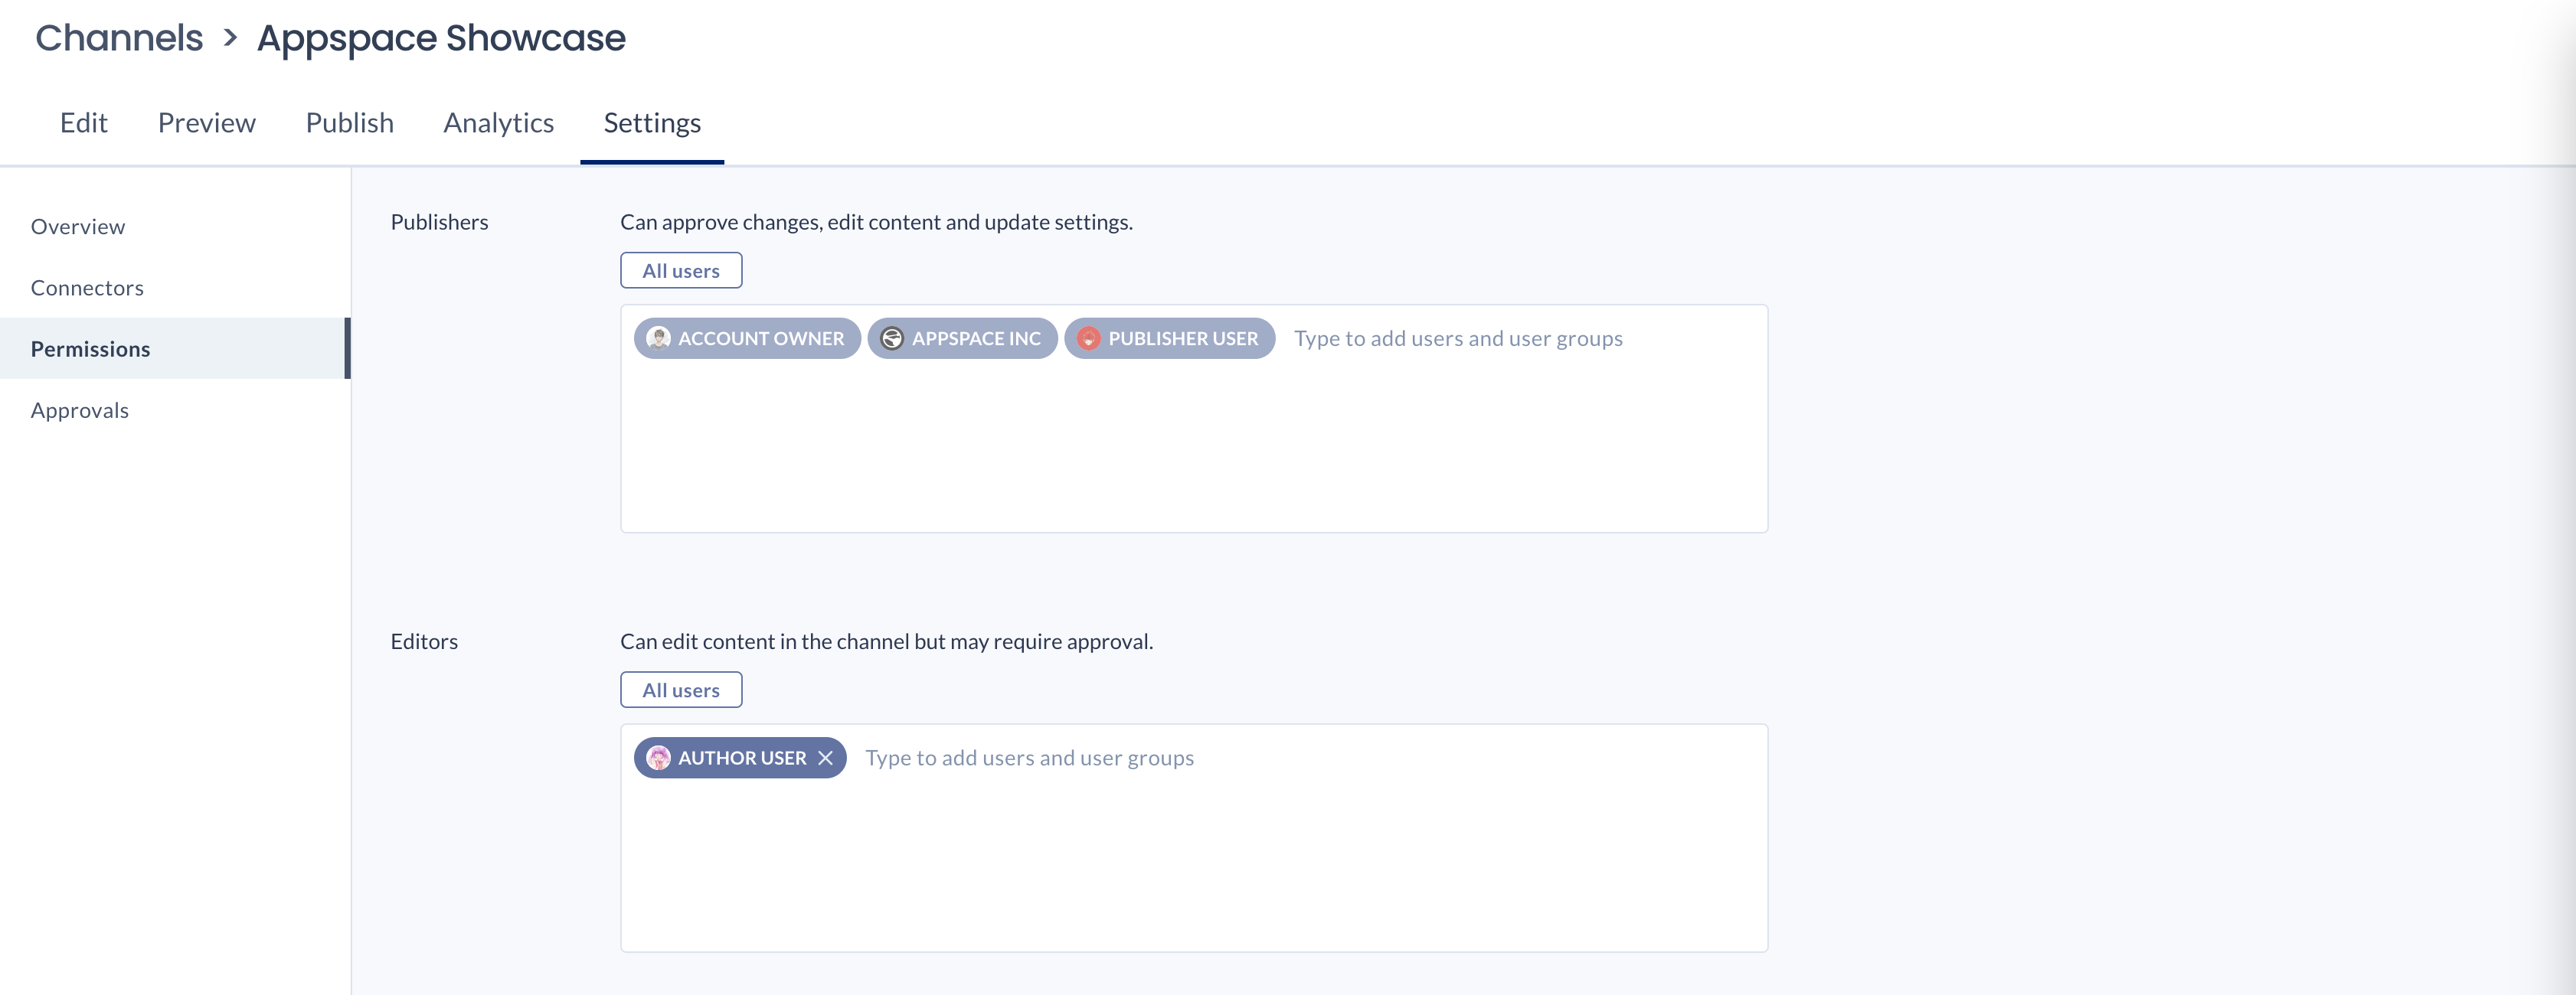
In the Permissions side-panel tab, you may assign the following permissions for the playlist channel to users or user groups:
- Publisher: A publisher will have full read, write, and delete access to this channel. A user with publisher access can change, edit content, and update settings for this channel.
NoteSome users are automatically added as a publisher when they inherit the full access from the account, network, or user group. Clicking on the user that was automatically added, will provide more information on the inheritance.
- Editors: An editor can only edit and manage the content in this channel, based on the approval rules applied to the channel in the Approvals tab (below).
Approvals
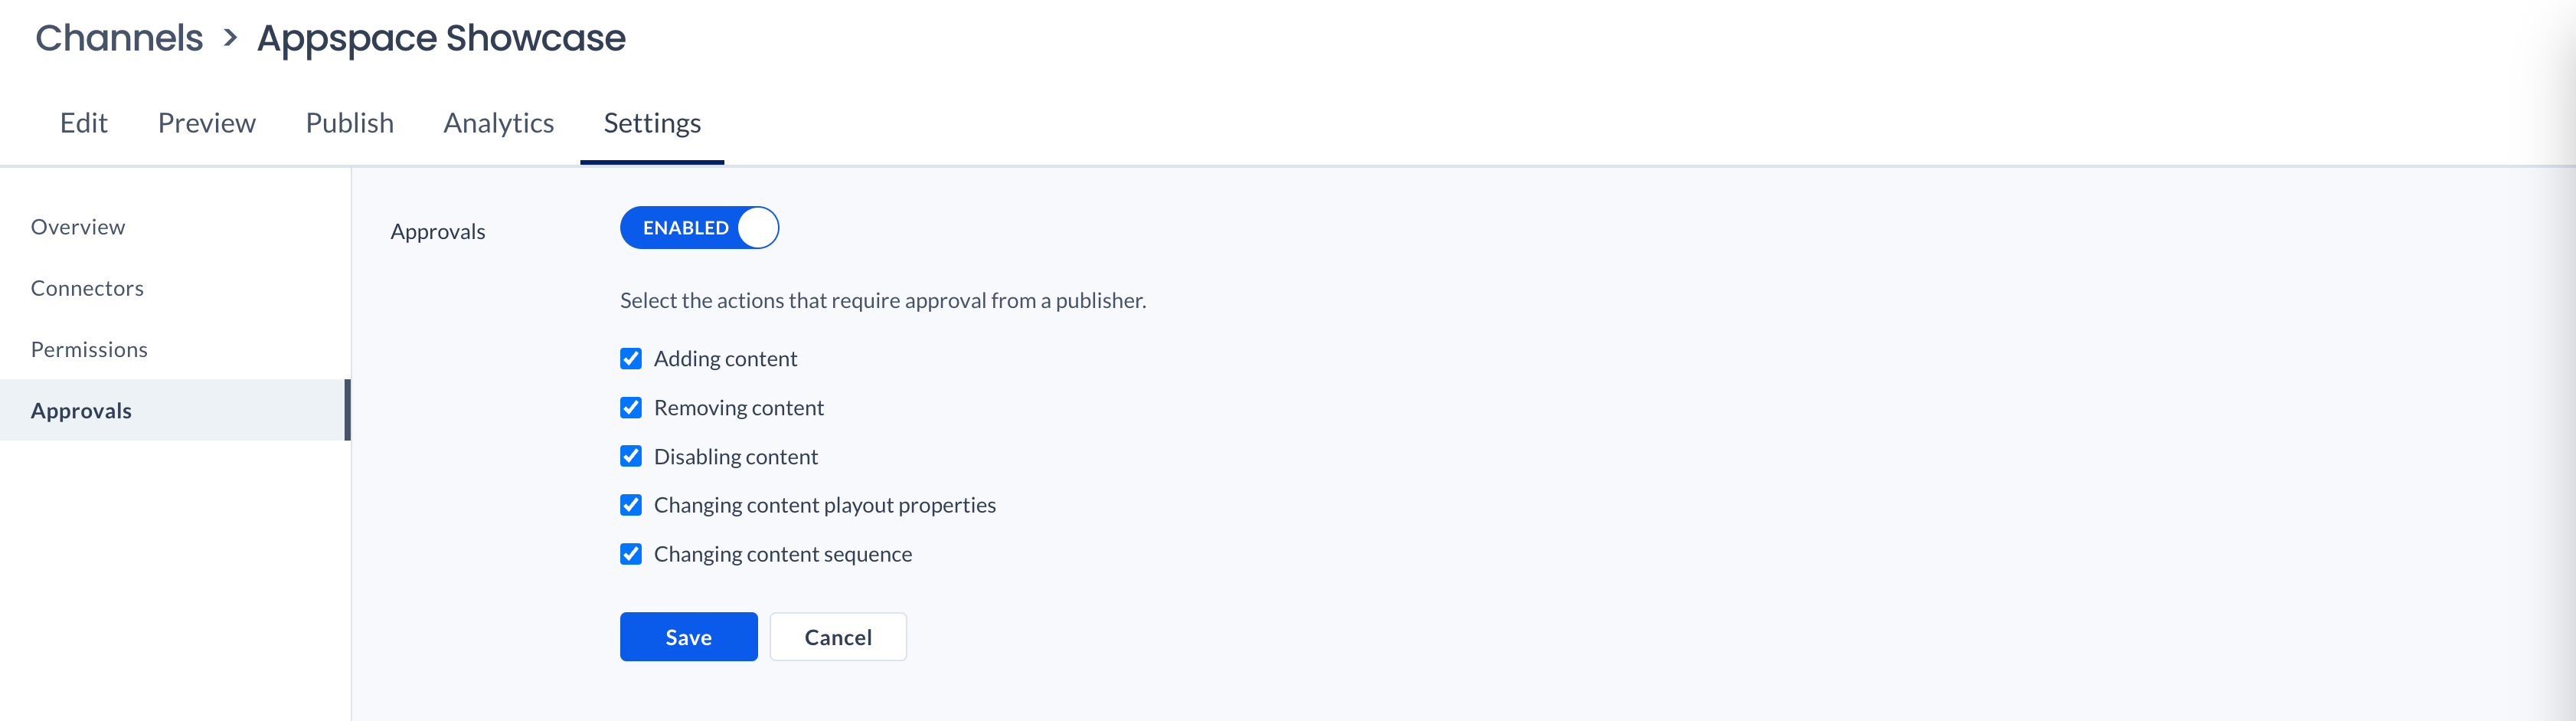
In the Approvals side-panel tab, you can select the actions that require approval from the Publisher of this channel. These approval rules are then applied to a channel editor.
- Adding Content
- Removing Content
- Disabling Content
- Changing content playout properties
- Changing content sequence
Was this article helpful?