The Appspace app allows employees to browse and view corporate content published to them, via their mobile phones. The app improves the overall information sharing workflow across an organization making it easy for users to access information from anywhere.
Employees may also use the app to reserve rooms, desks, or designated workspaces at the office, or a building pass to a building or campus area with restricted access.
The app’s user interface aligns with the streamlined design for improved user experience introduced in Appspace 8.0, making it easy for users to navigate through the different channels and channel groups that have been published to them as individual users or their user groups.

This article provides illustrations on navigating the Appspace Employee App, allowing employees to make reservations, and access corporate content that has been published to them either via the Appspace console.
Employee App Access
Once the Appspace app is installed, when the app is launched, employees have the option to log in to Appspace public or private cloud domain.
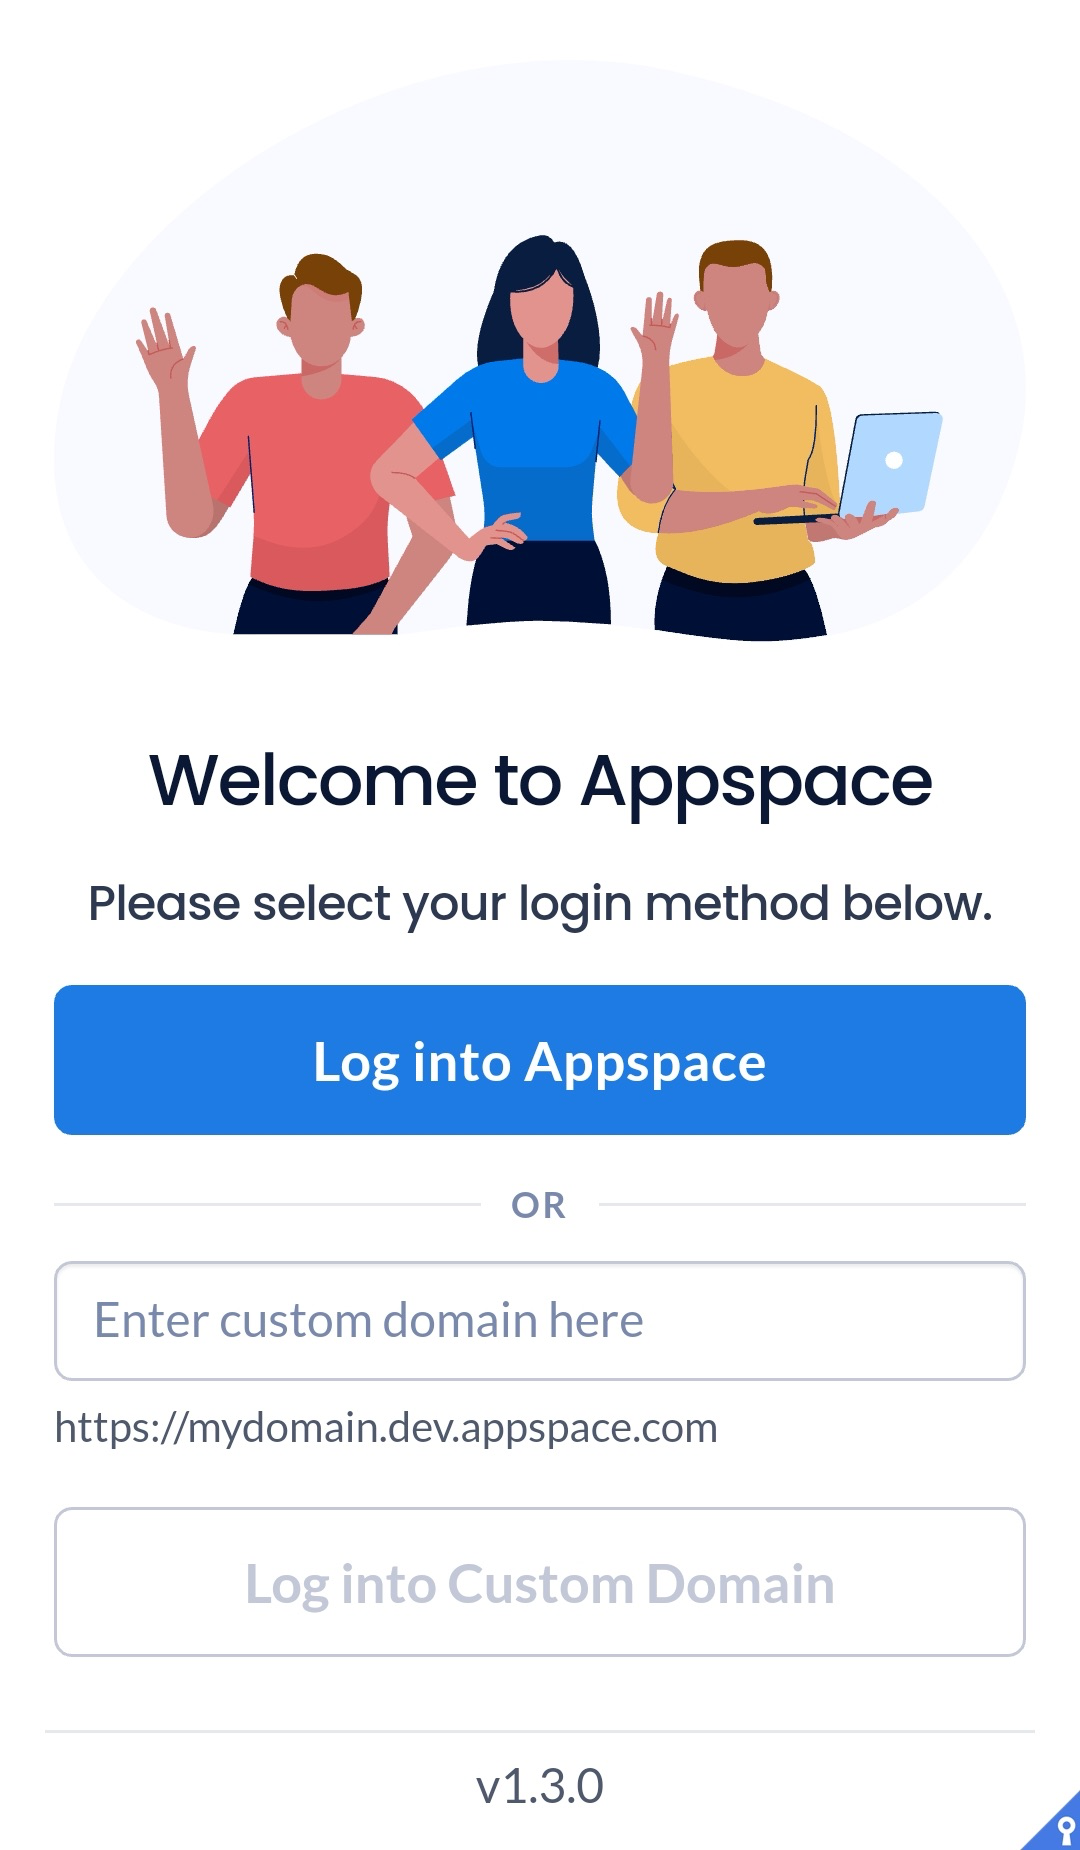
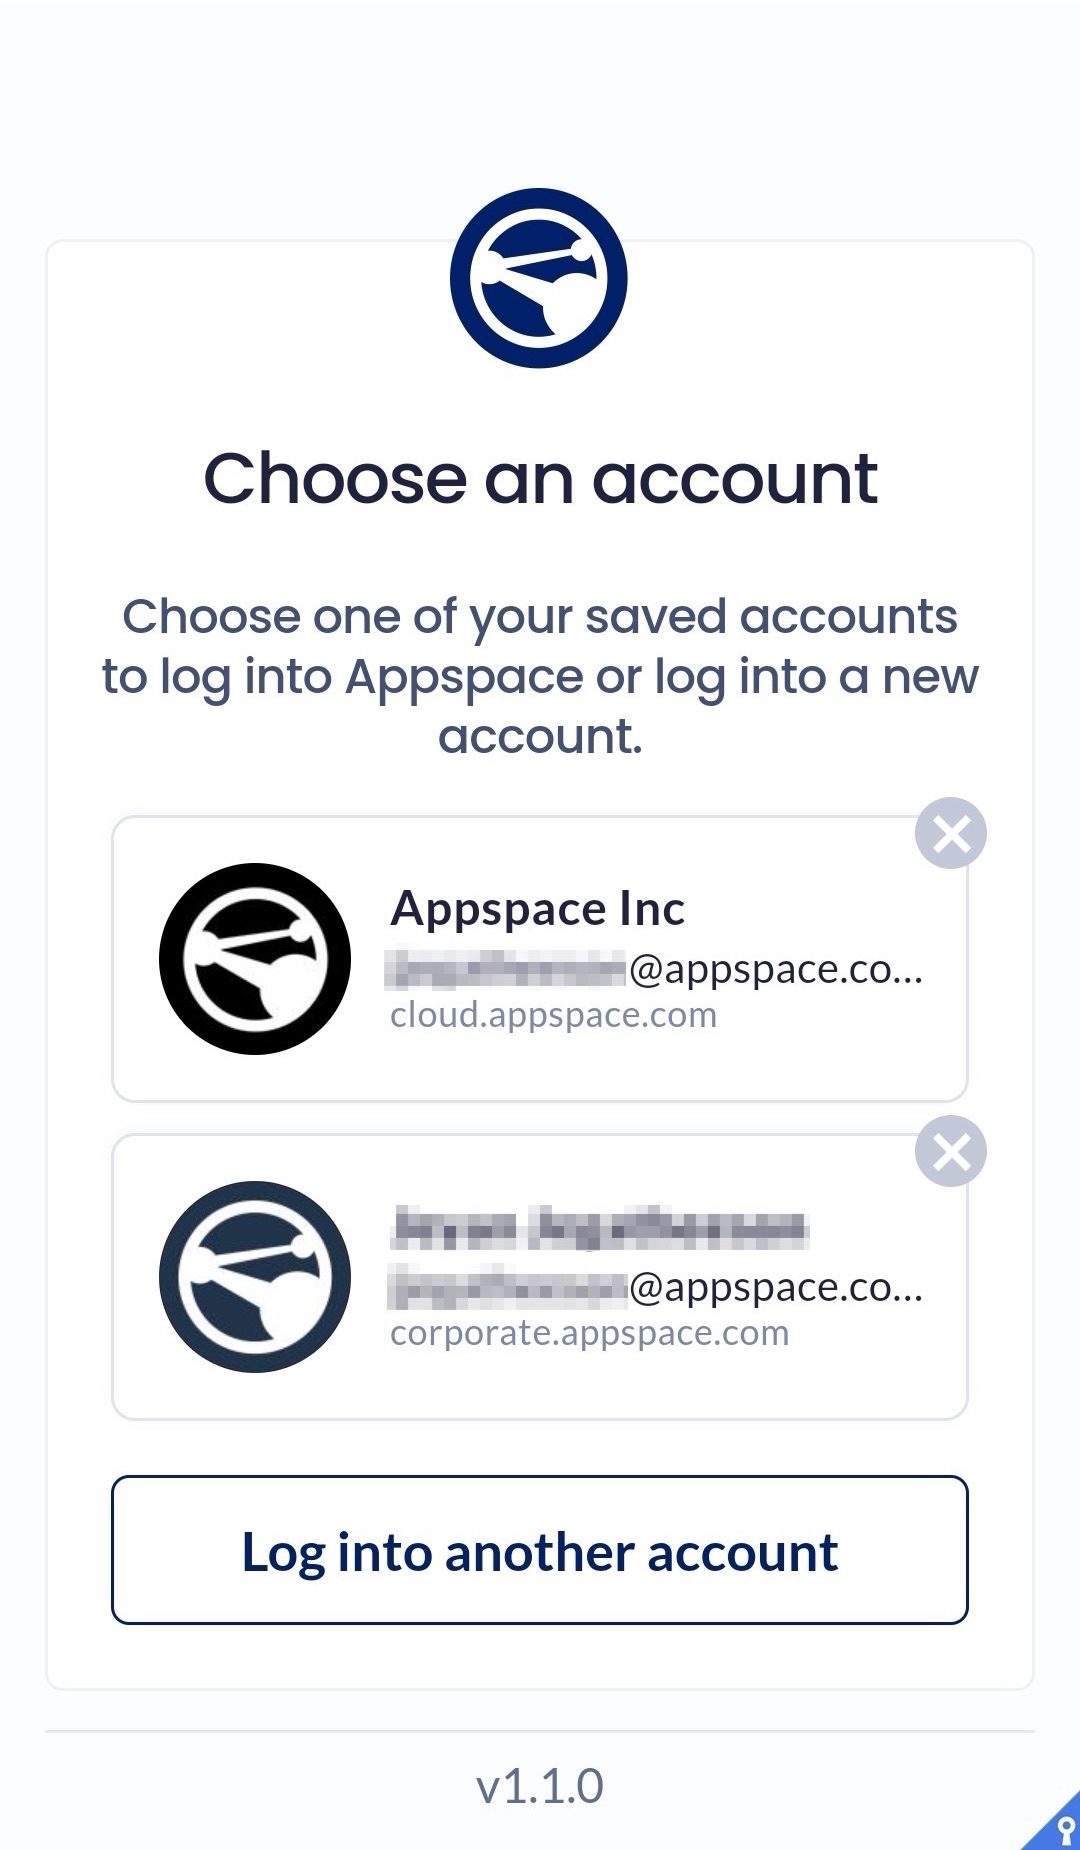
If you have previously logged in, you may just select the user account you wish to log in with to access the published content.
You may log out from the Appspace app by clicking the User Profile icon and clicking the Logout button.
Layout & Navigation
The below illustrates the default app display of the Appspace Employee App when viewed from a mobile device.
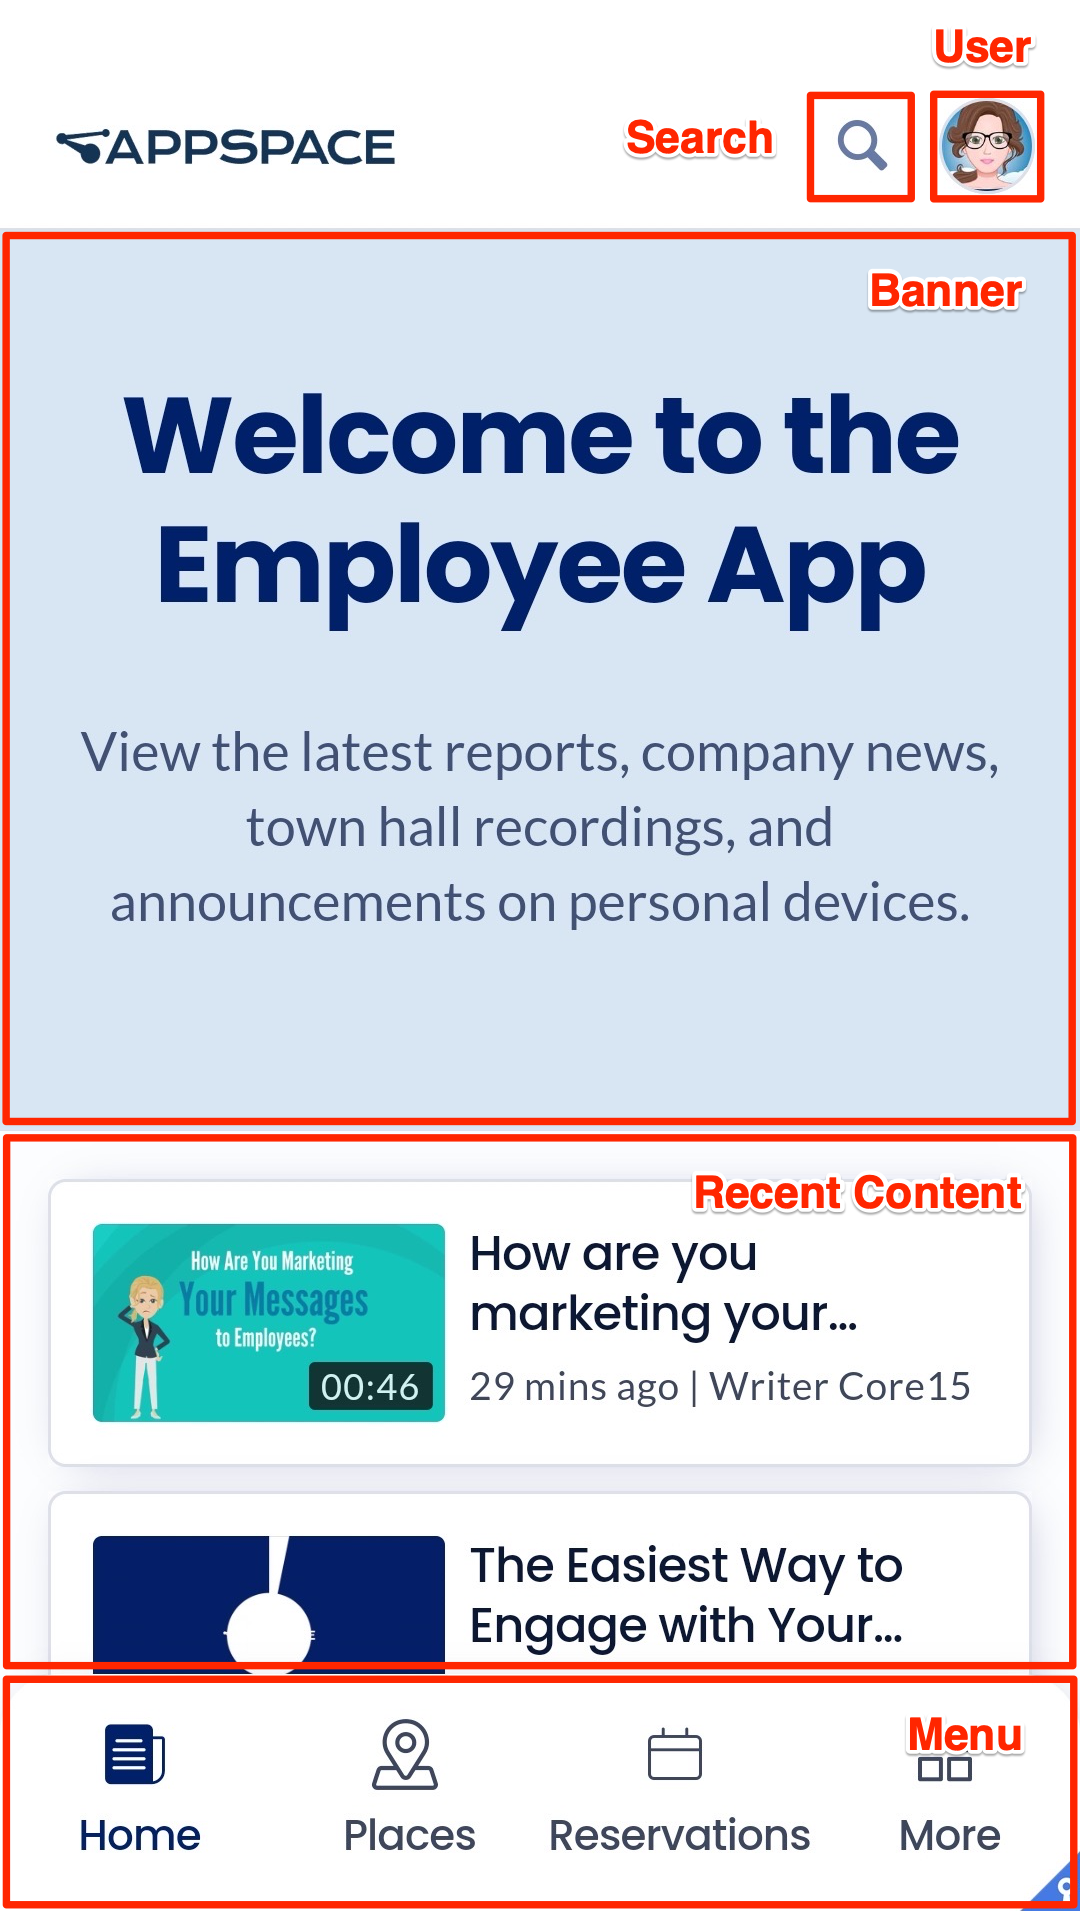

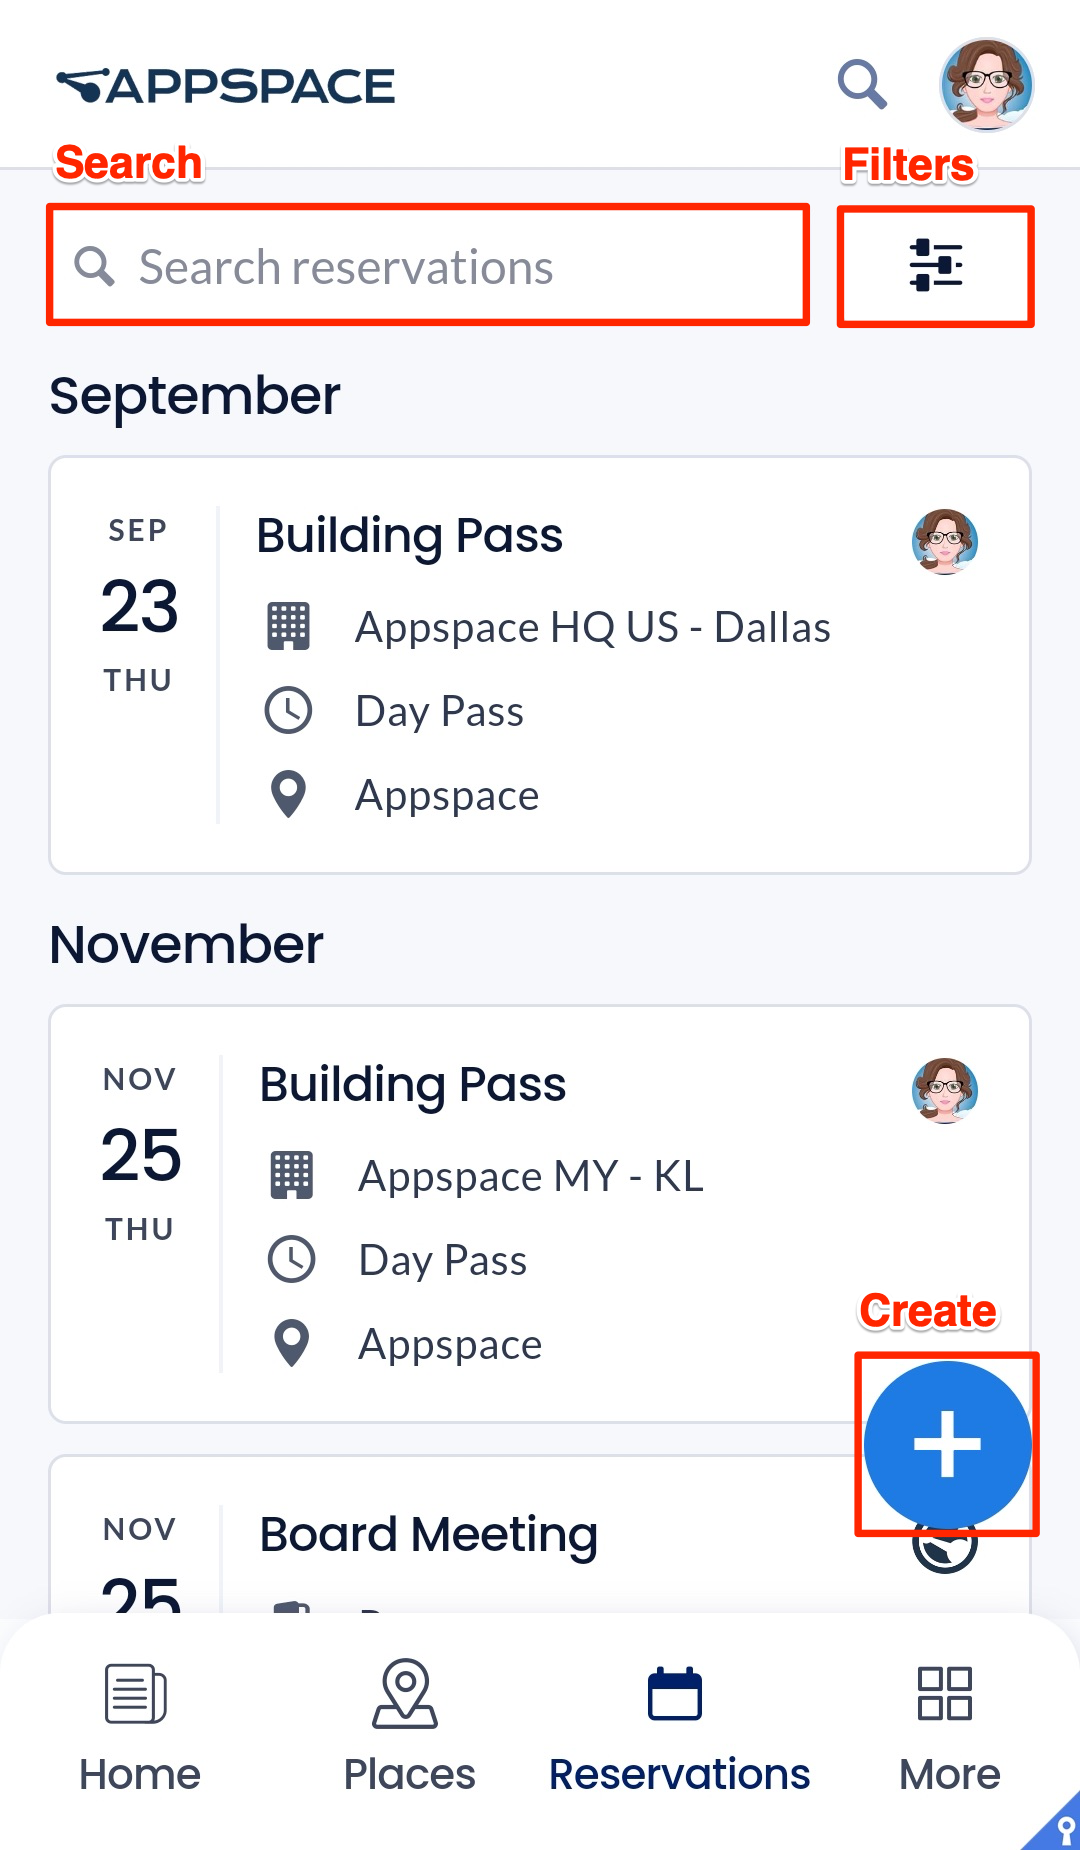
Search
The global Search bar in the Employee App is dynamic. If you are on the Home screen or in Channels, you perform a search for content, channels, and channel groups. If you are in Places or Reservations, then your search results will be for buildings or reservations.
Additionally, if you are in Places or Reservations, you will have another localized search bar that will allow you to search for a resource, reservation, or building pass, specific to that menu item. See the individual sections below for more information.
Across the app, utilizing predictive search, results are displayed as soon as characters or numbers of the keyword are entered in the search field.
Menu
- The menu is displayed at the top of the page in the portal. The menu items displayed are dependant on the features required by your organization. These sections can be toggled on and off by an administrator (see Configure Theming below).
- The default menu contains all the following items:
- Home – lists all the latest content posted to you or your user group.
- Places – find buildings, and reserve a workspace or building pass.
- Reservations – view and manage bookings.
- More
- Home – lists all the latest content posted to you or your user group.
- Places – find buildings, and reserve a workspace or building pass.
- Reservations – view and manage bookings.
- Channels – displays all channels and channel groups posted to you or your user group.
- Videos – displays all videos posted to you or your user group.
- Concierge – provides employees concierge permissions to view a calendar of all reservations under their purview.
- Visitors – displays the Visitor Management system to invite visitors to a meeting or event held at your company.
- Apps – displays third-party application links that are applicable to the employee’s needs.
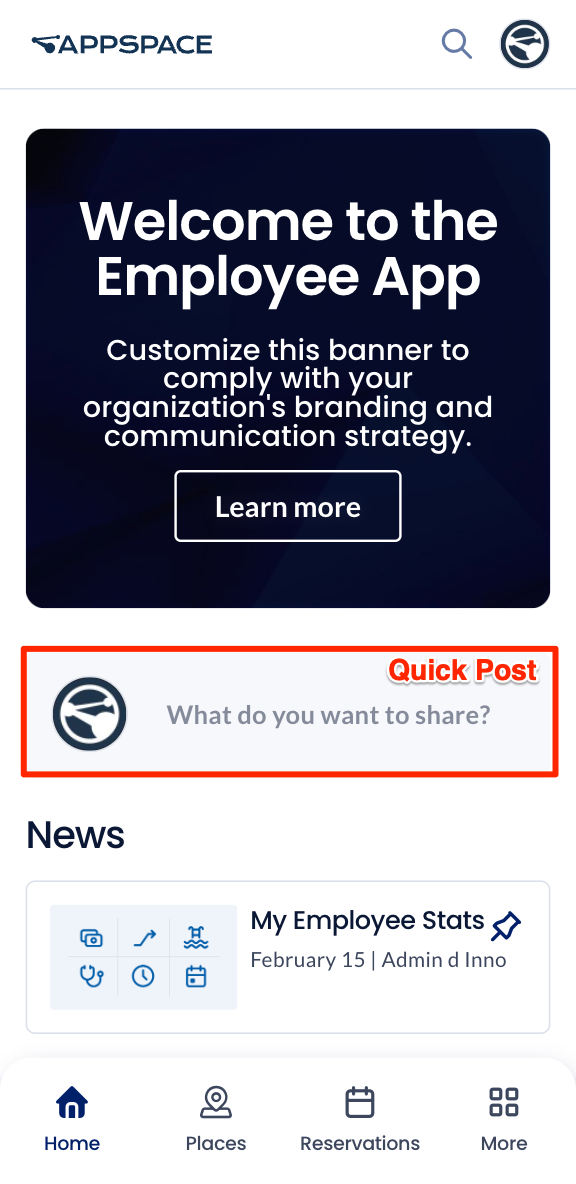
Quick Post
Authors, Publishers, and Account Owners can quickly create posts within the Appspace Employee App, resulting in an improved content creation workflow experience that allows authors to quickly post articles with text and media without leaving the Employee App (and go to the Appspace console). They can create a post, upload media, and publish it to a channel from the Home dashboard or any channel in the Employee App. The content of the post will be automatically translated to digital signage and enterprise messaging formats by the Appspace platform.
Broadcasts
Broadcasts are important messages published to the Appspace Employee App of teams and employees, such as emergency alerts and warnings, upcoming organizational events (for example, conferences or live town halls), or noteworthy company news. Publishers and Account Owners can create Broadcasts from the Appspace console to send push notifications and broadcast messages to the Appspace Employee App of targeted users on iOS and Android devices.
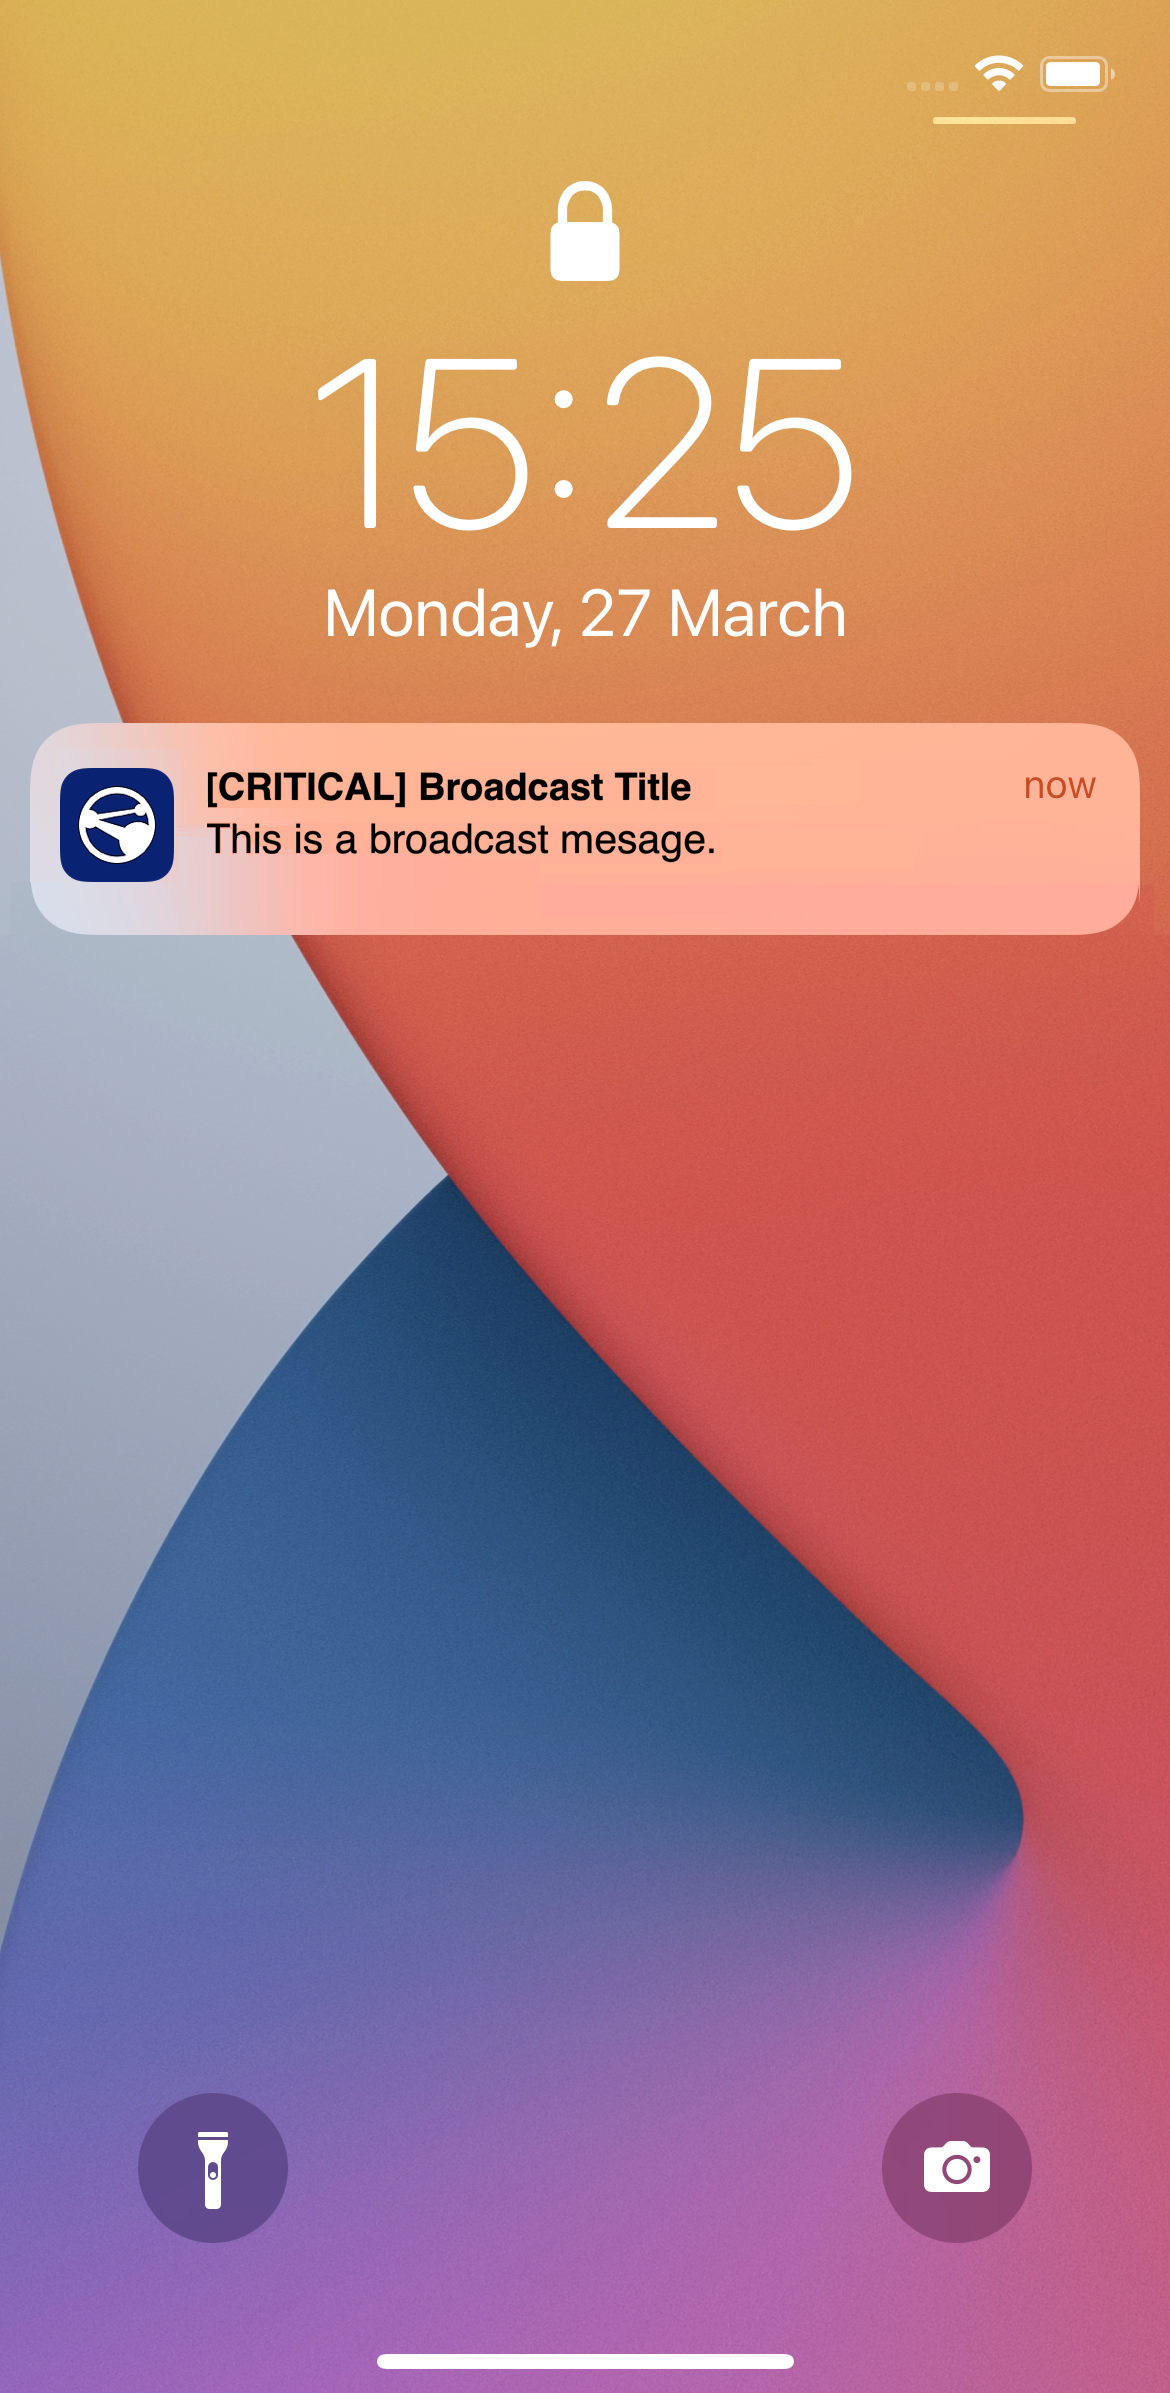
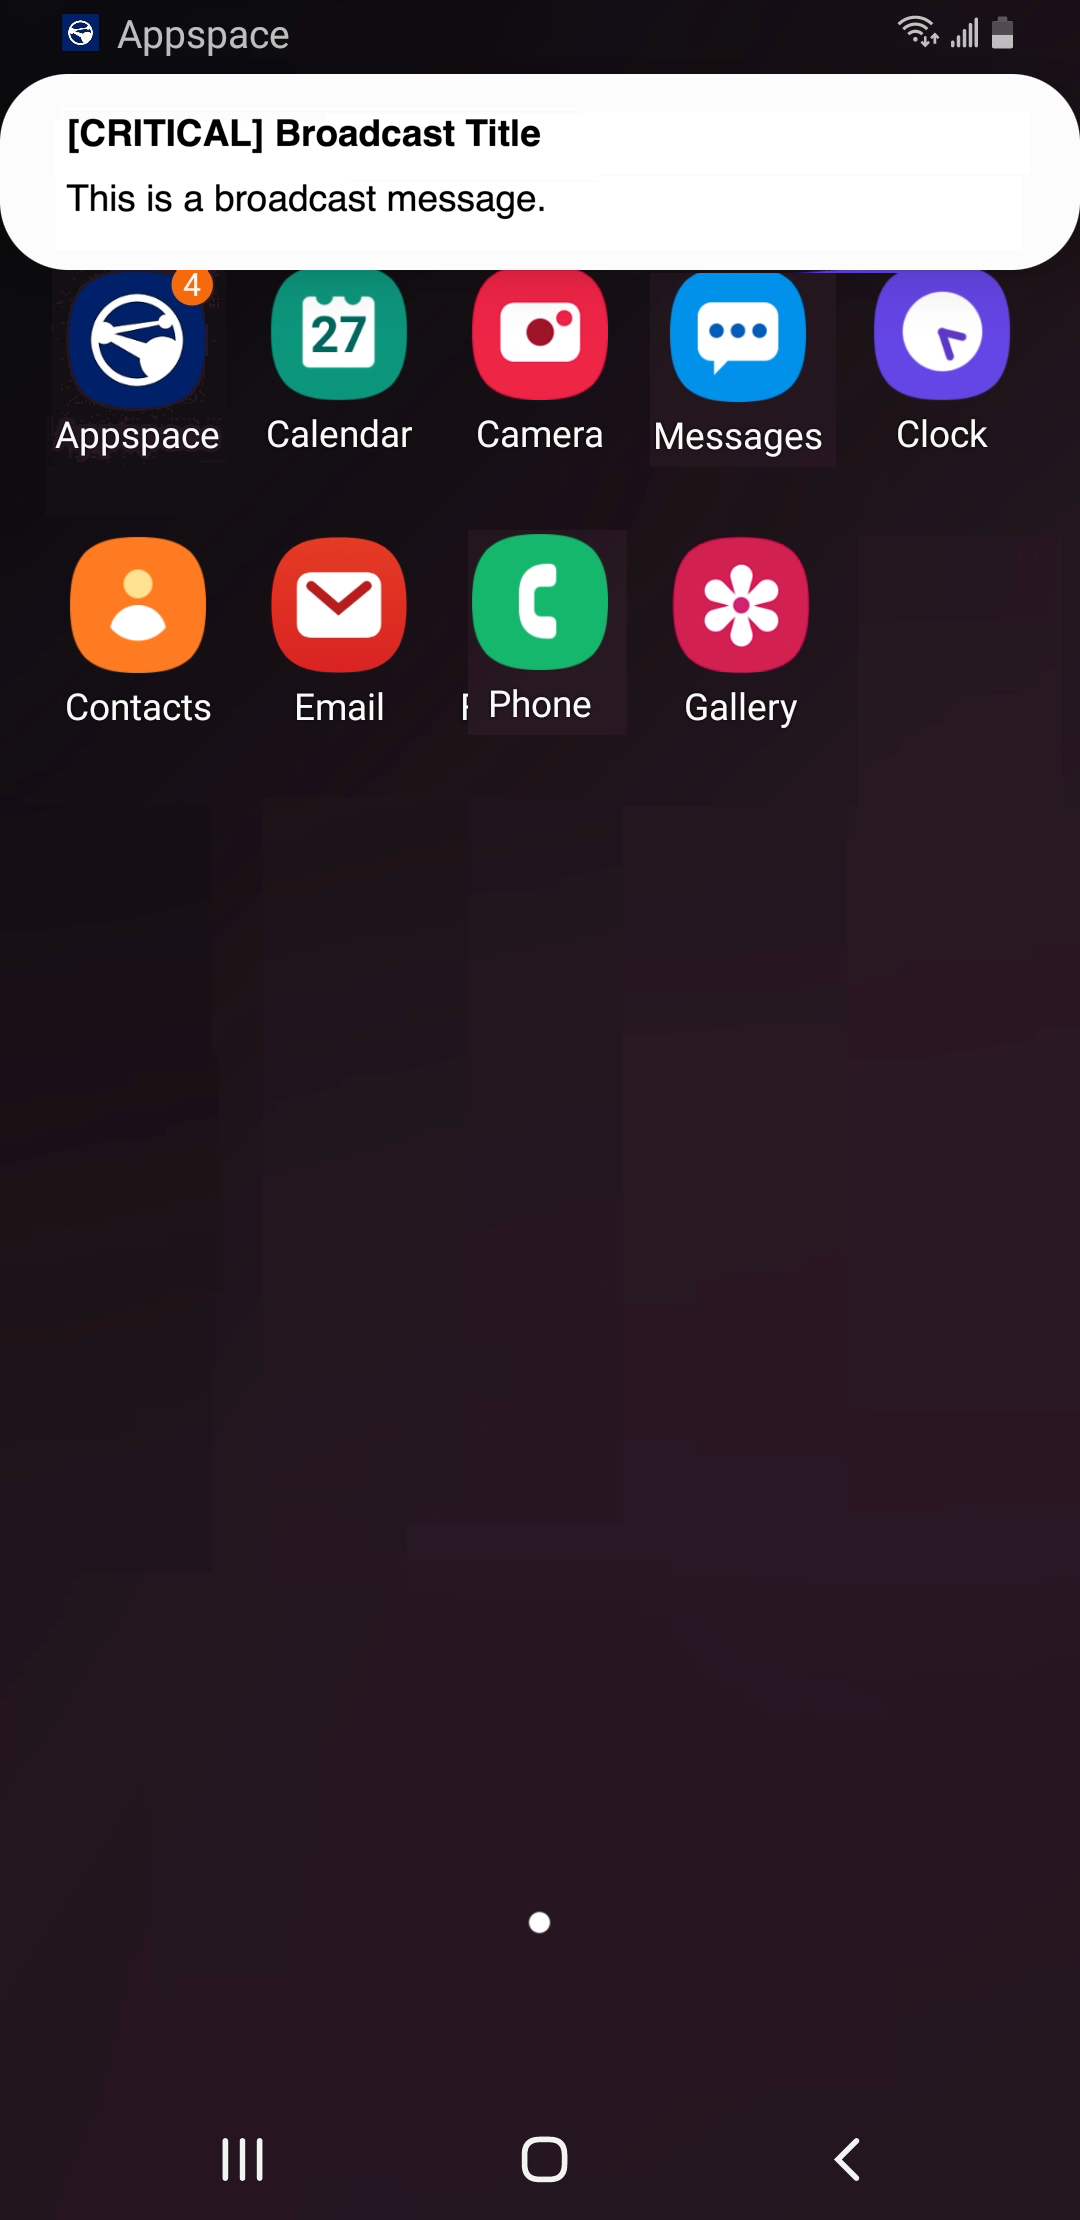
- Broadcast push notifications use the built-in notification system for iOS and Android and do not require the Appspace App to be opened on the device. When an active broadcast is sent, targeted users will see a push notification banner on the home screen, the lock screen, and the notification center. For critical priority broadcasts, a “[CRITICAL]” indicator will appear in the message.After receiving the push notification, the user can tap the notification message to open the Appspace App and go to the most recently visited page, or swipe the banner to clear the notification on their mobile device.NoteBroadcast push notifications on iOS may not have sound, vibration, or the notification badge icon count. This is a current limitation.
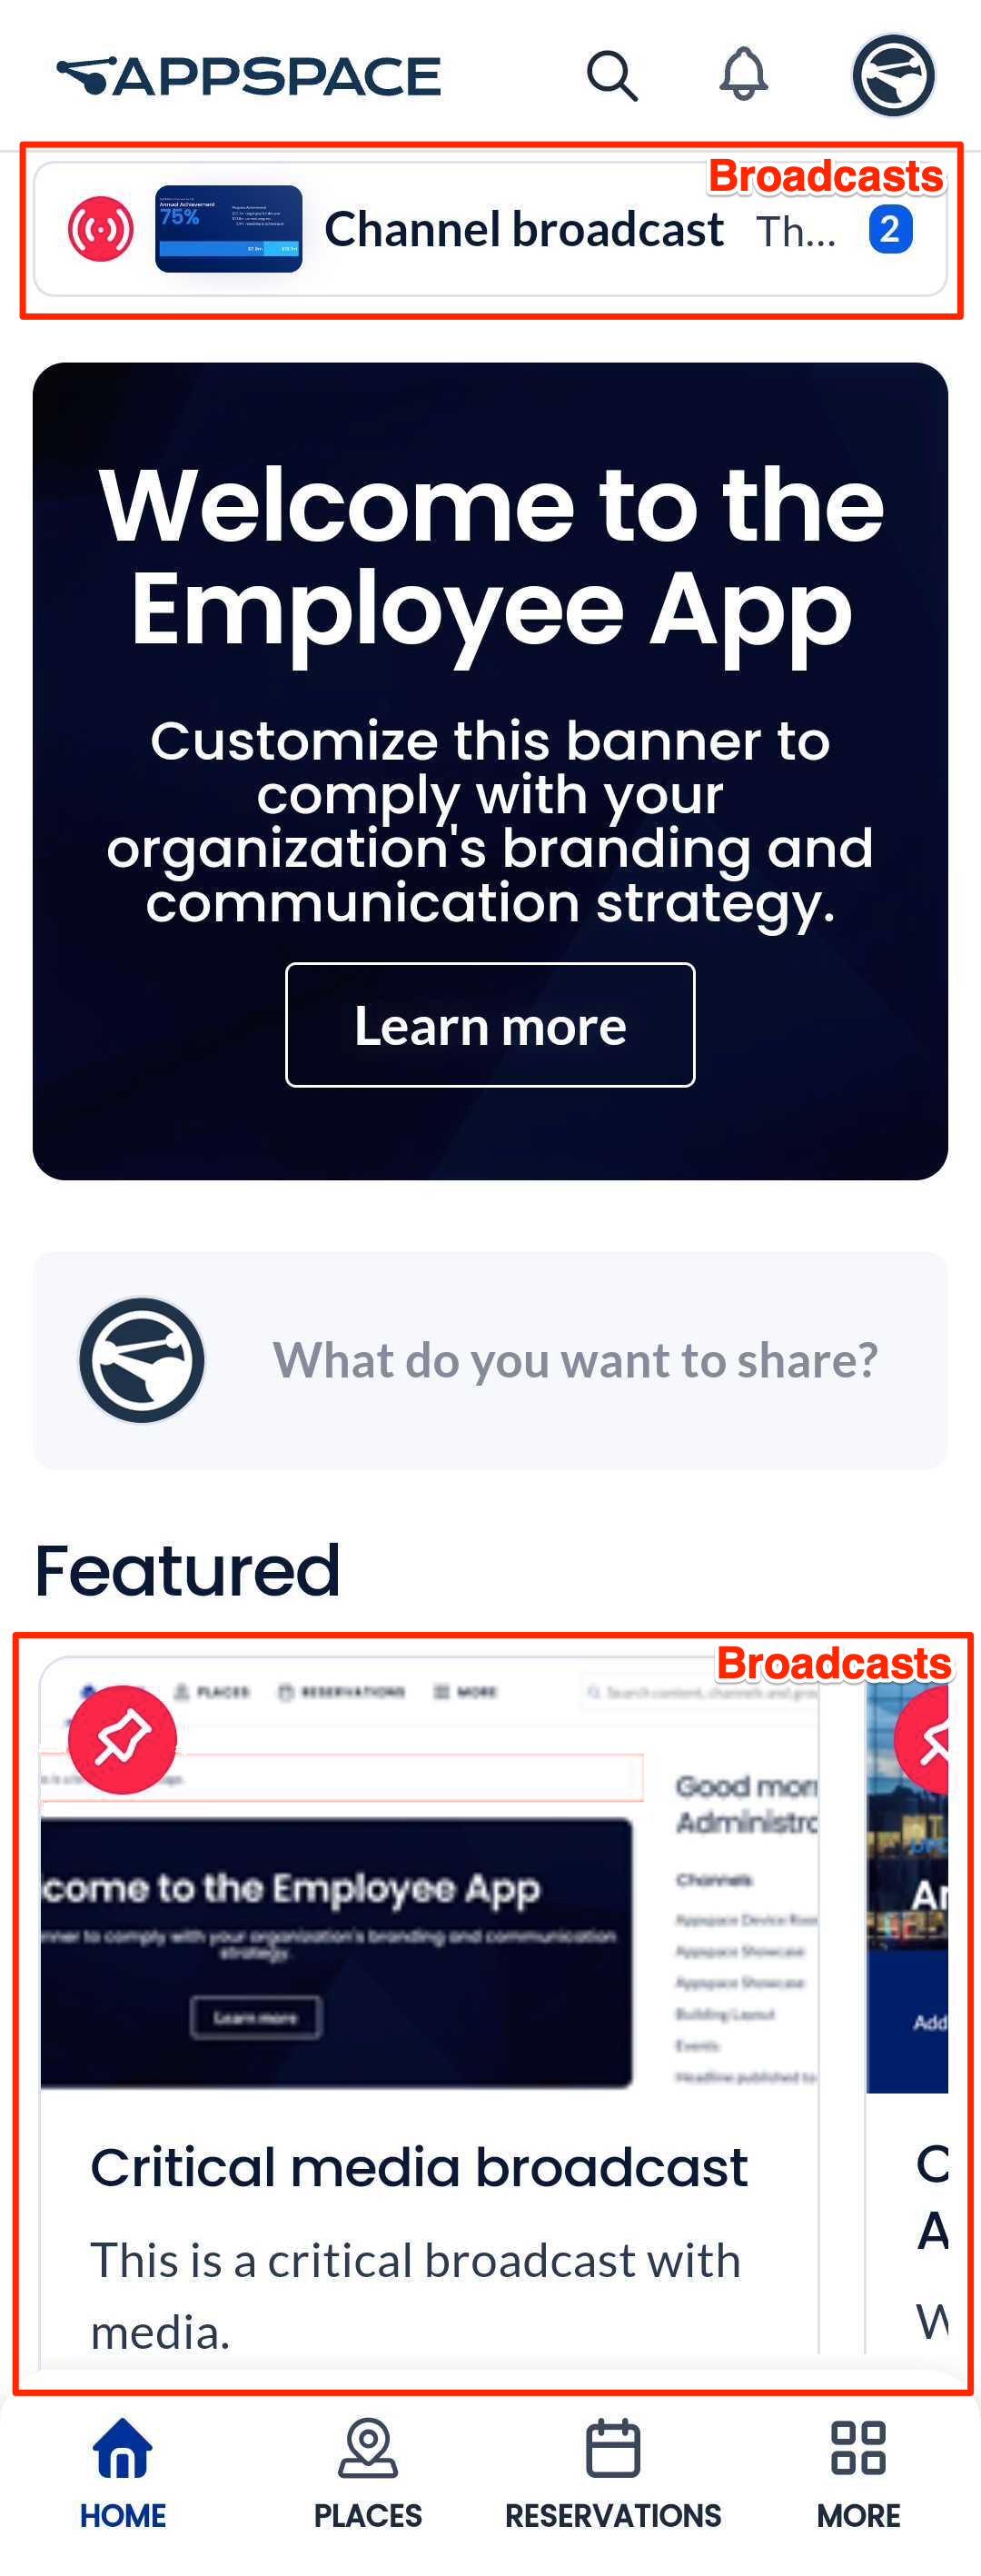
- Broadcasts will appear in one of two locations on the Employee App for mobile, depending on how the broadcast is configured:
- Notification – The broadcast will be displayed as a message above the banner of the Employee App.
- Pinned Content – The broadcast will be displayed as pinned content below the quick post field on the Employee App.
Broadcasts set as Critical will be prioritized before other broadcasts in their respective location.
Home
The Home tab displays the latest corporate content published to you or your user group. You may click any content to view in detail or select one of the listed channel groups on the right to view all content posted to that channel group.
To view all other available content, or older content, go to the Channels or Video tabs (in the More section).
Places
The Places tab includes two sub-tabs: Workspaces (default selected) and Building Pass.
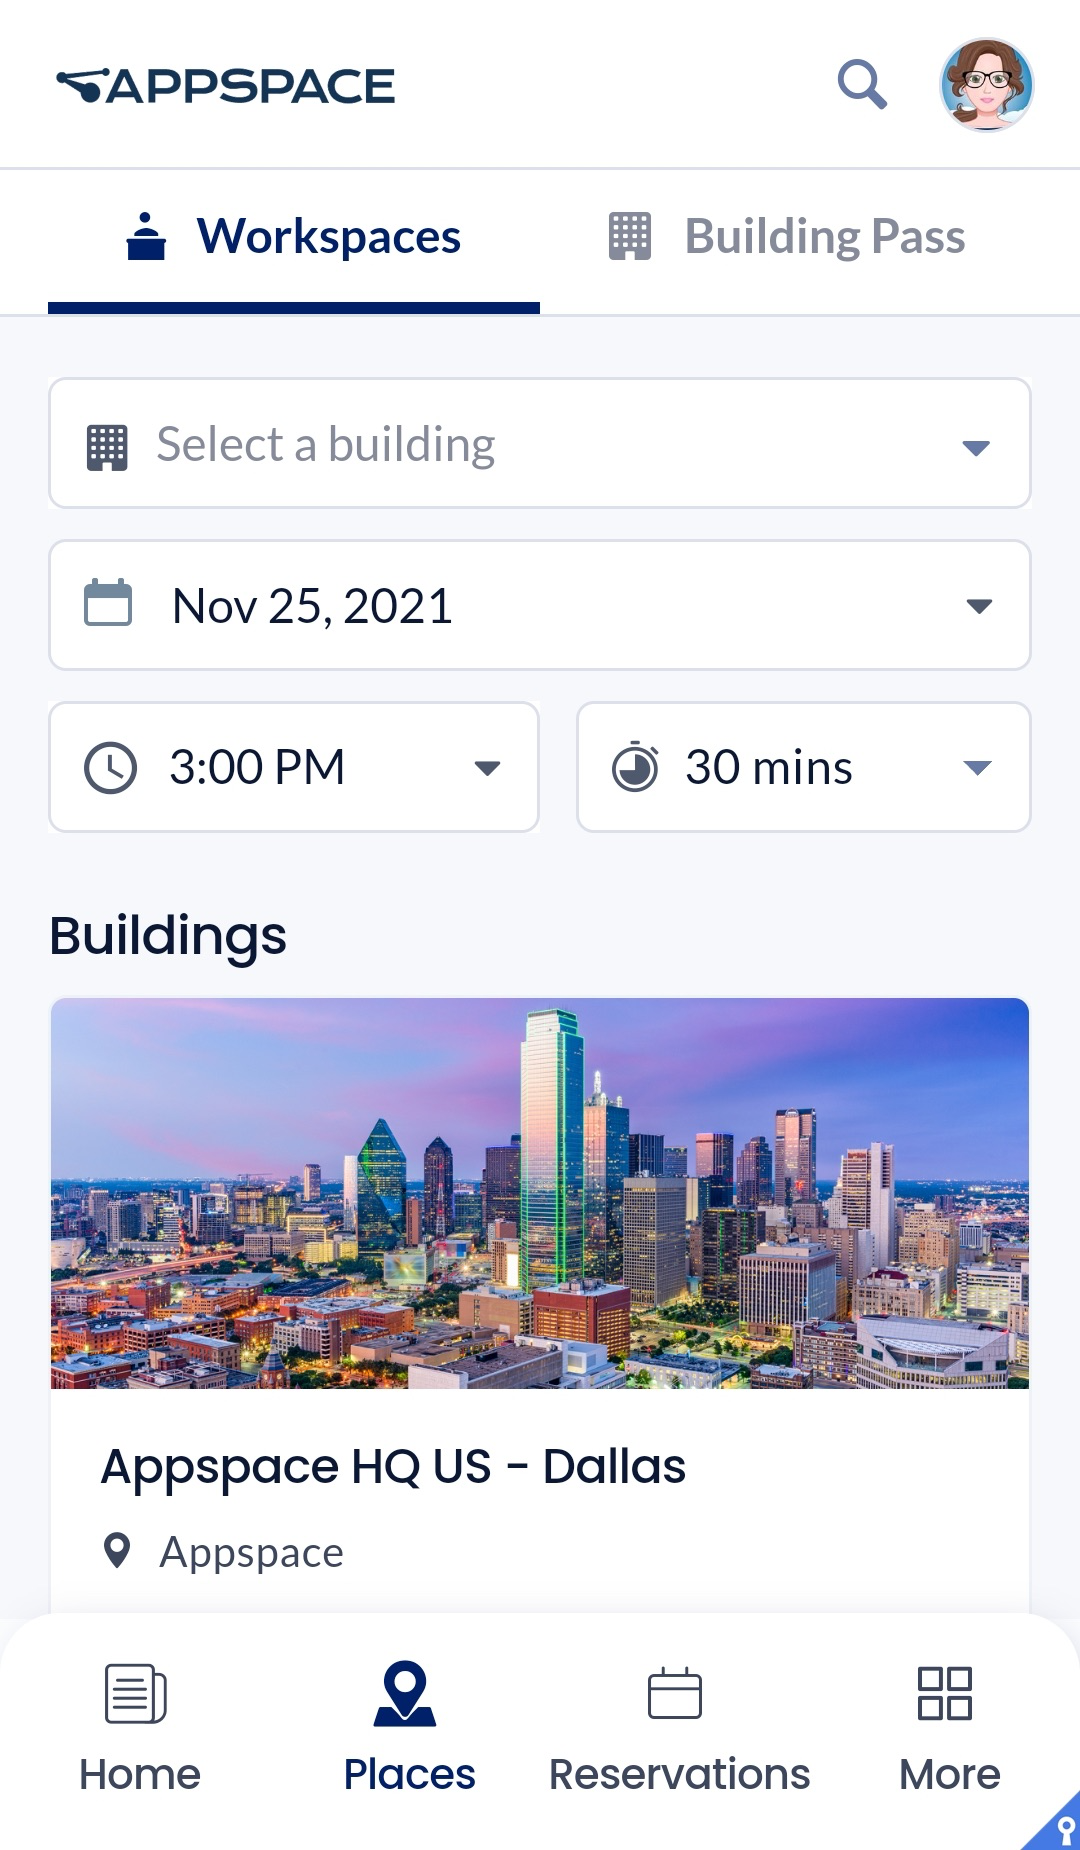
Workspaces
The Workspaces tab will list your most recent building and workspace reservations/bookings, for easy access and quick reservations. However, this section will be empty on first use, as no reservations have been made prior.
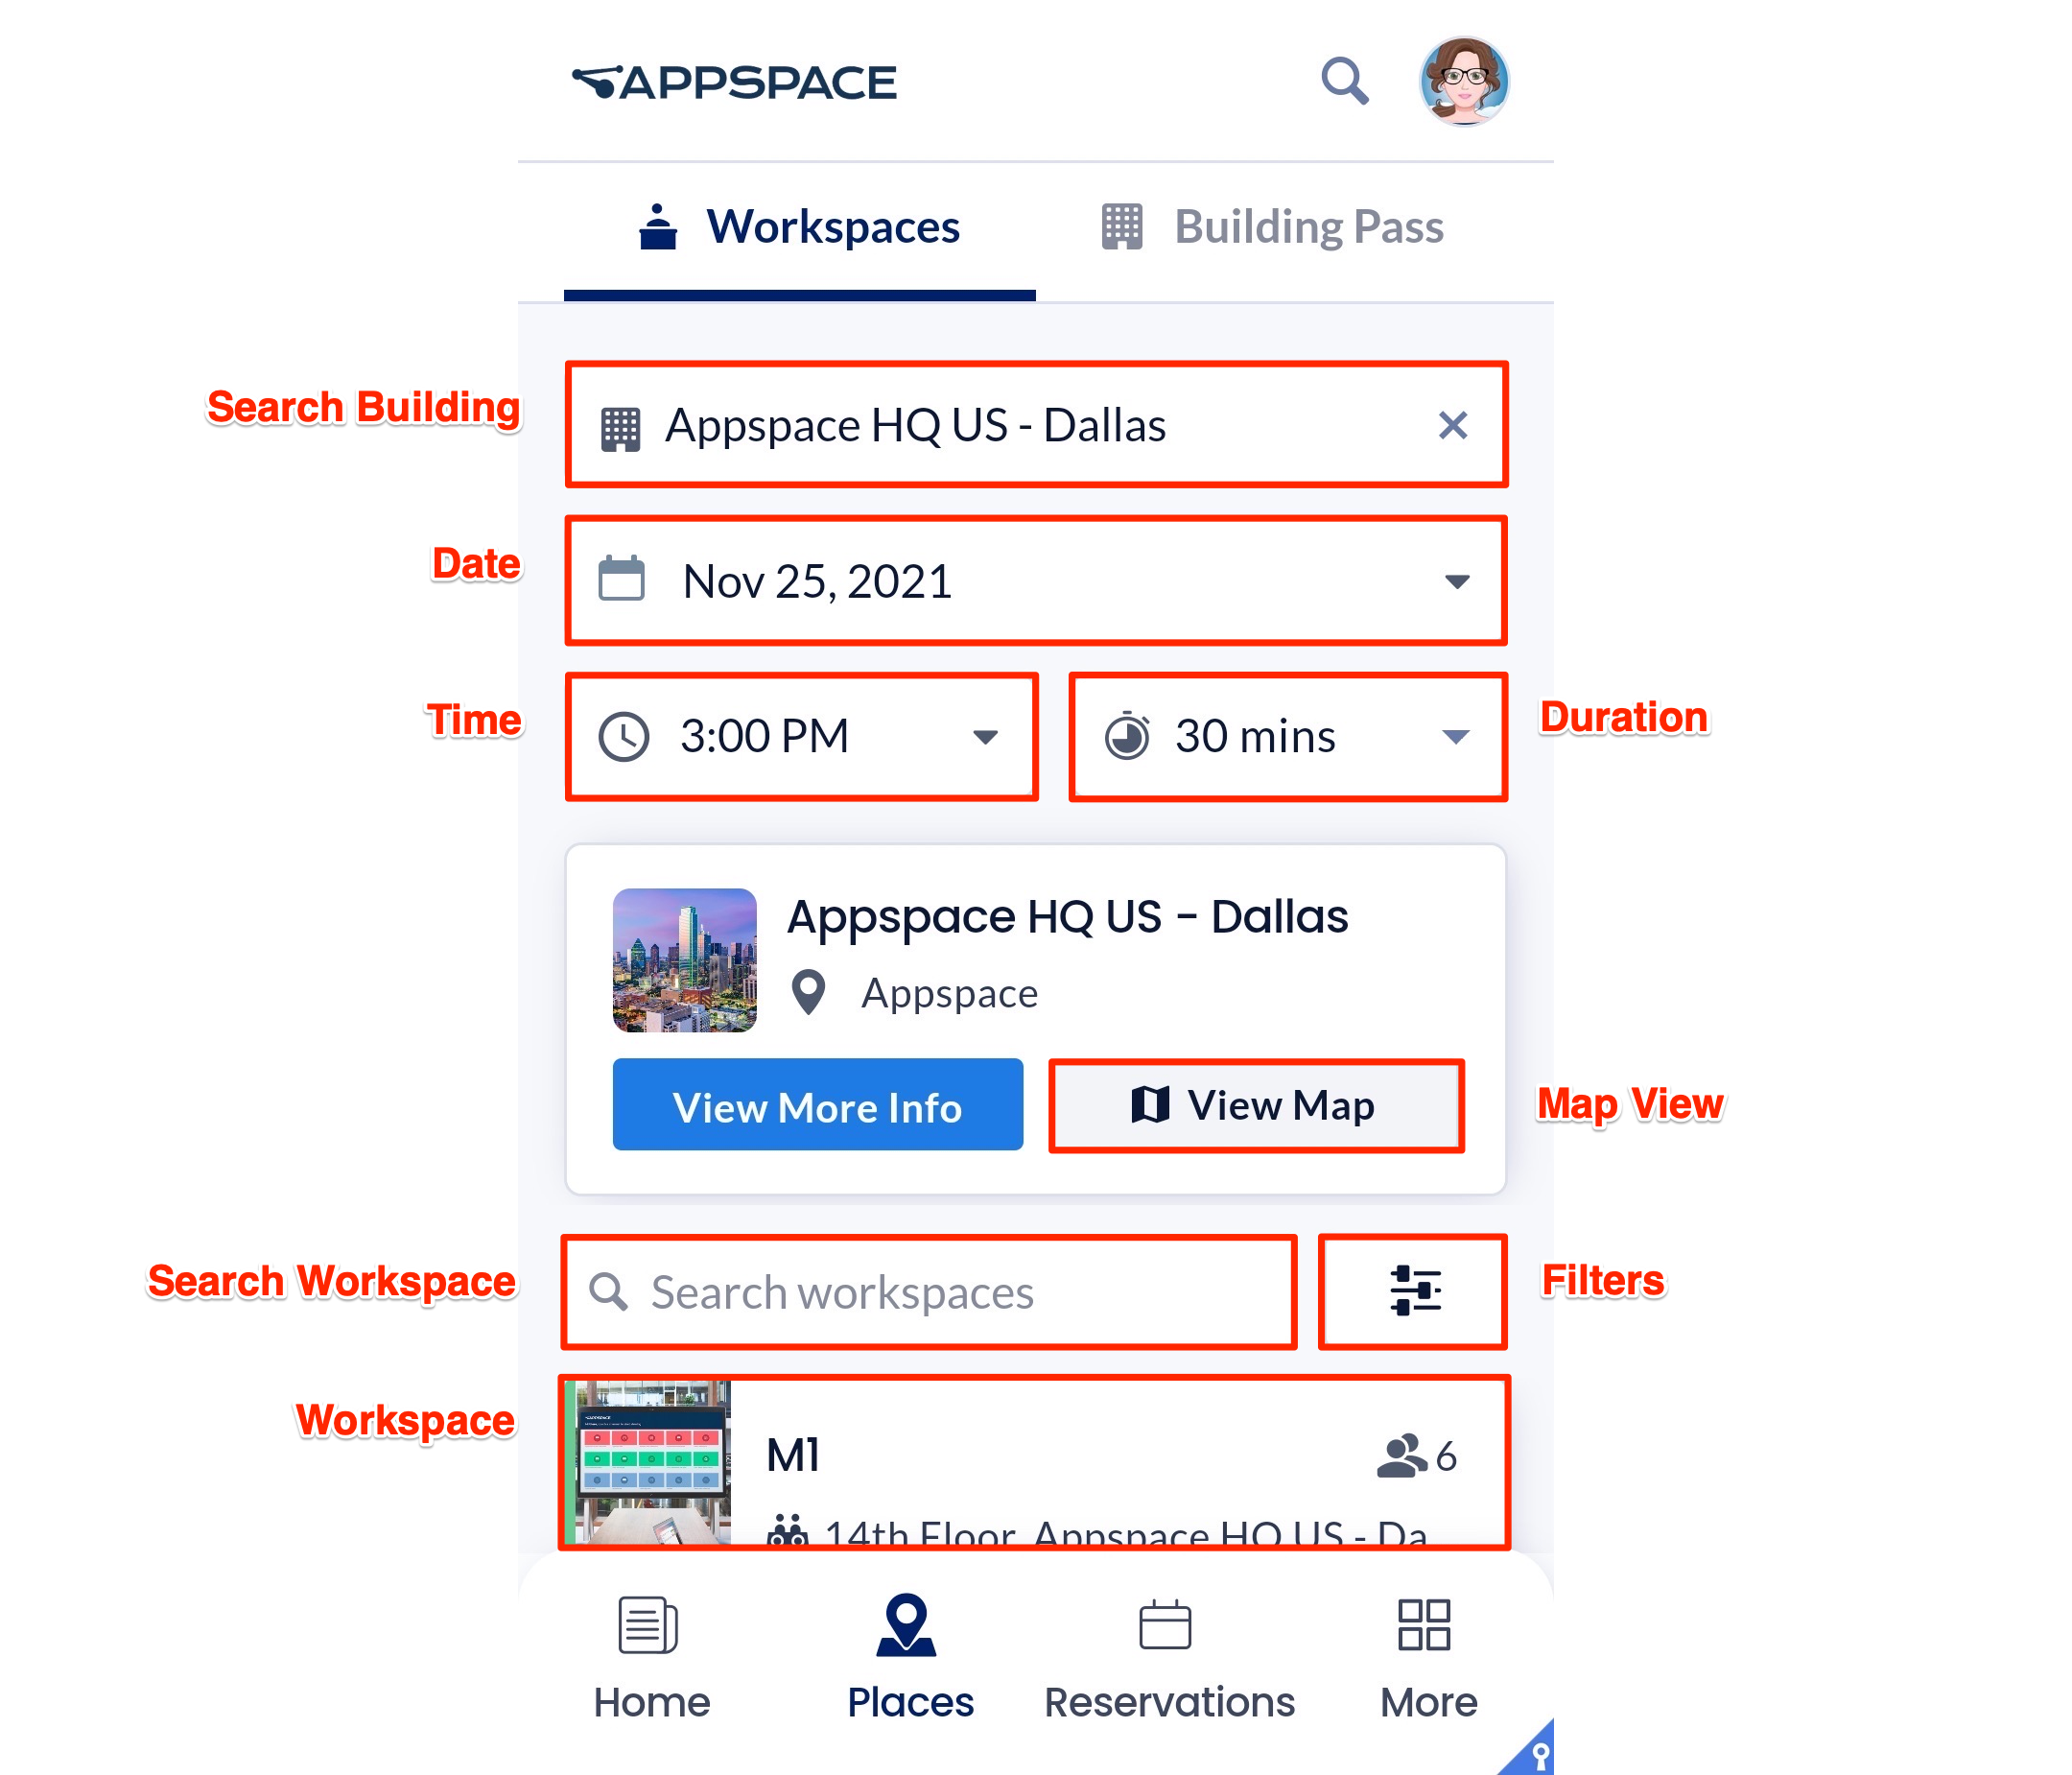
- Search – The search bar on the top menu bar is now localized to this Workspaces tab. Type in a letter or keyword to search for available buildings or resources.
- Building – Type in a letter or keyword, and select a building from the drop-down menu. Use the Date, Time, and Duration filters to narrow down your search for buildings.
Once you select a building, the building is displayed on the left, and all workspaces in that building are displayed on the right.
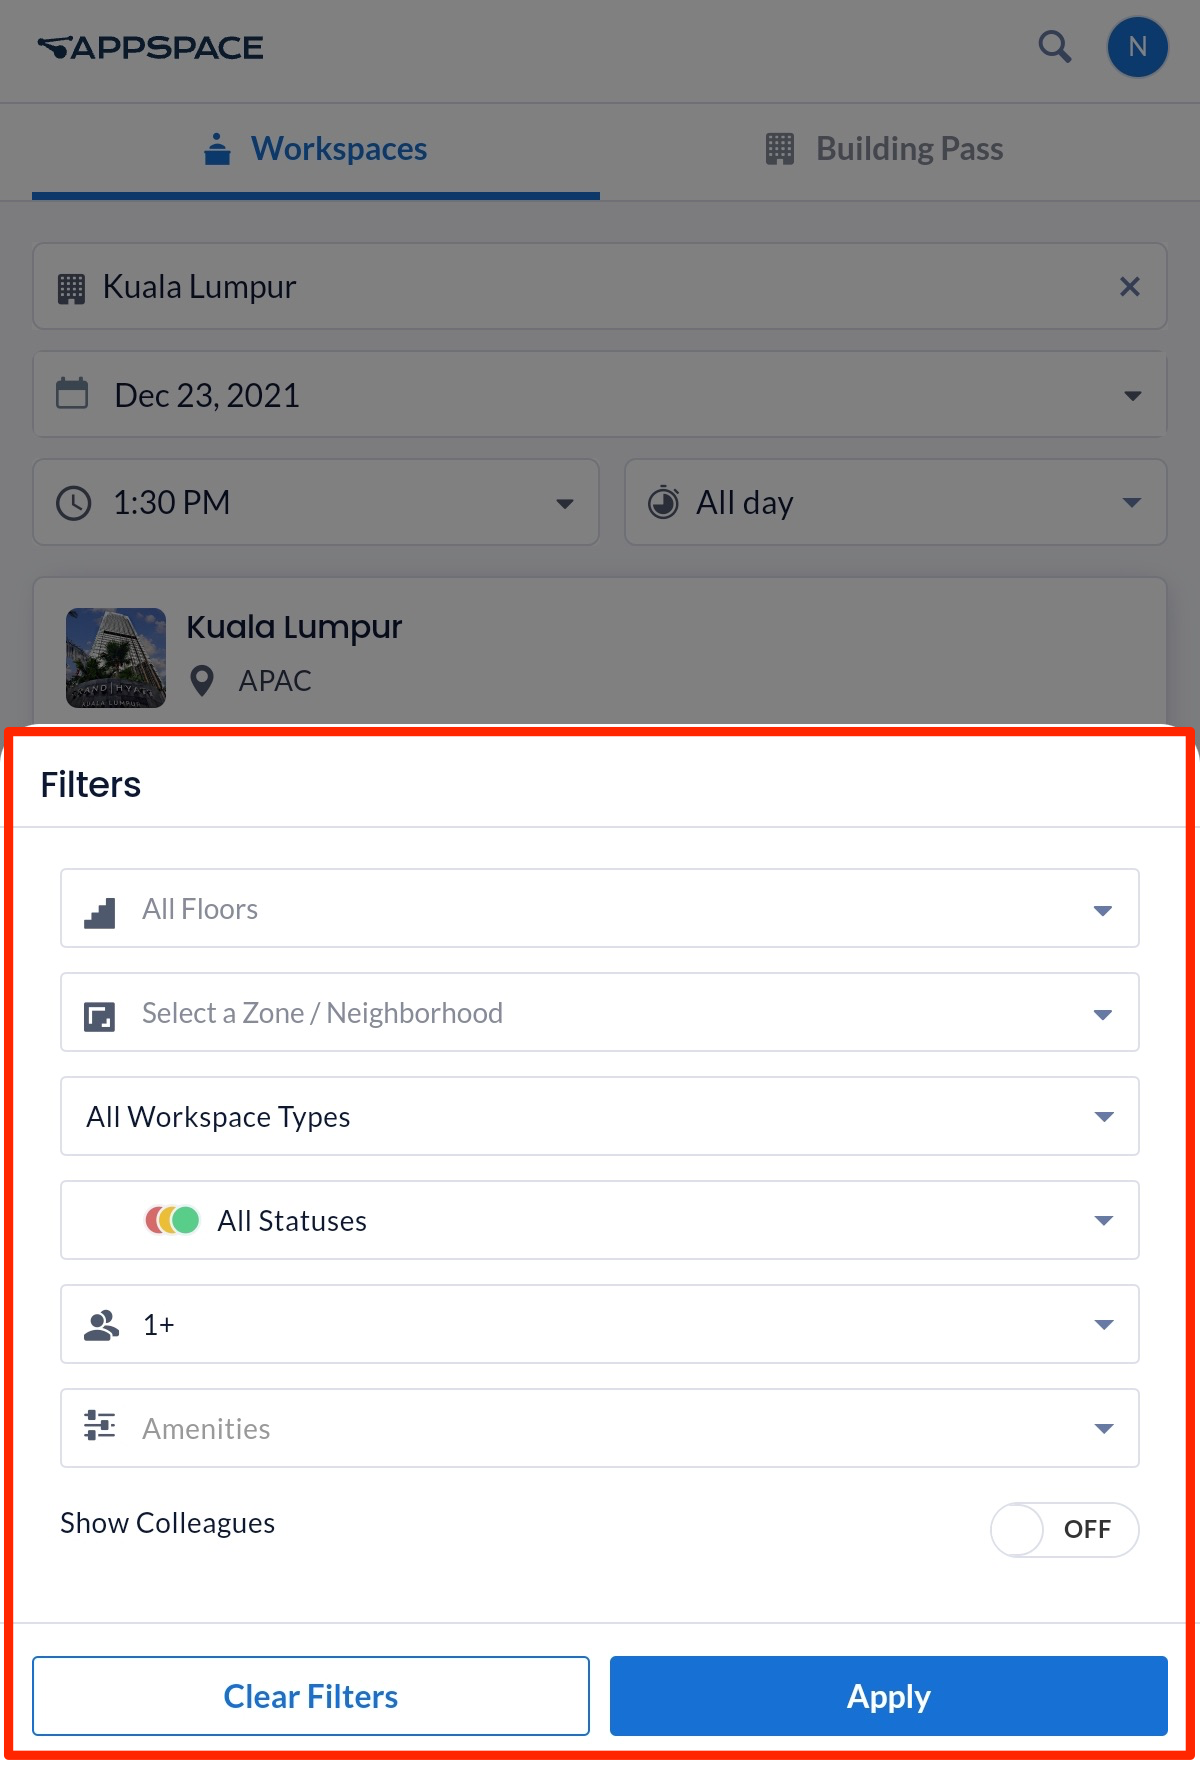
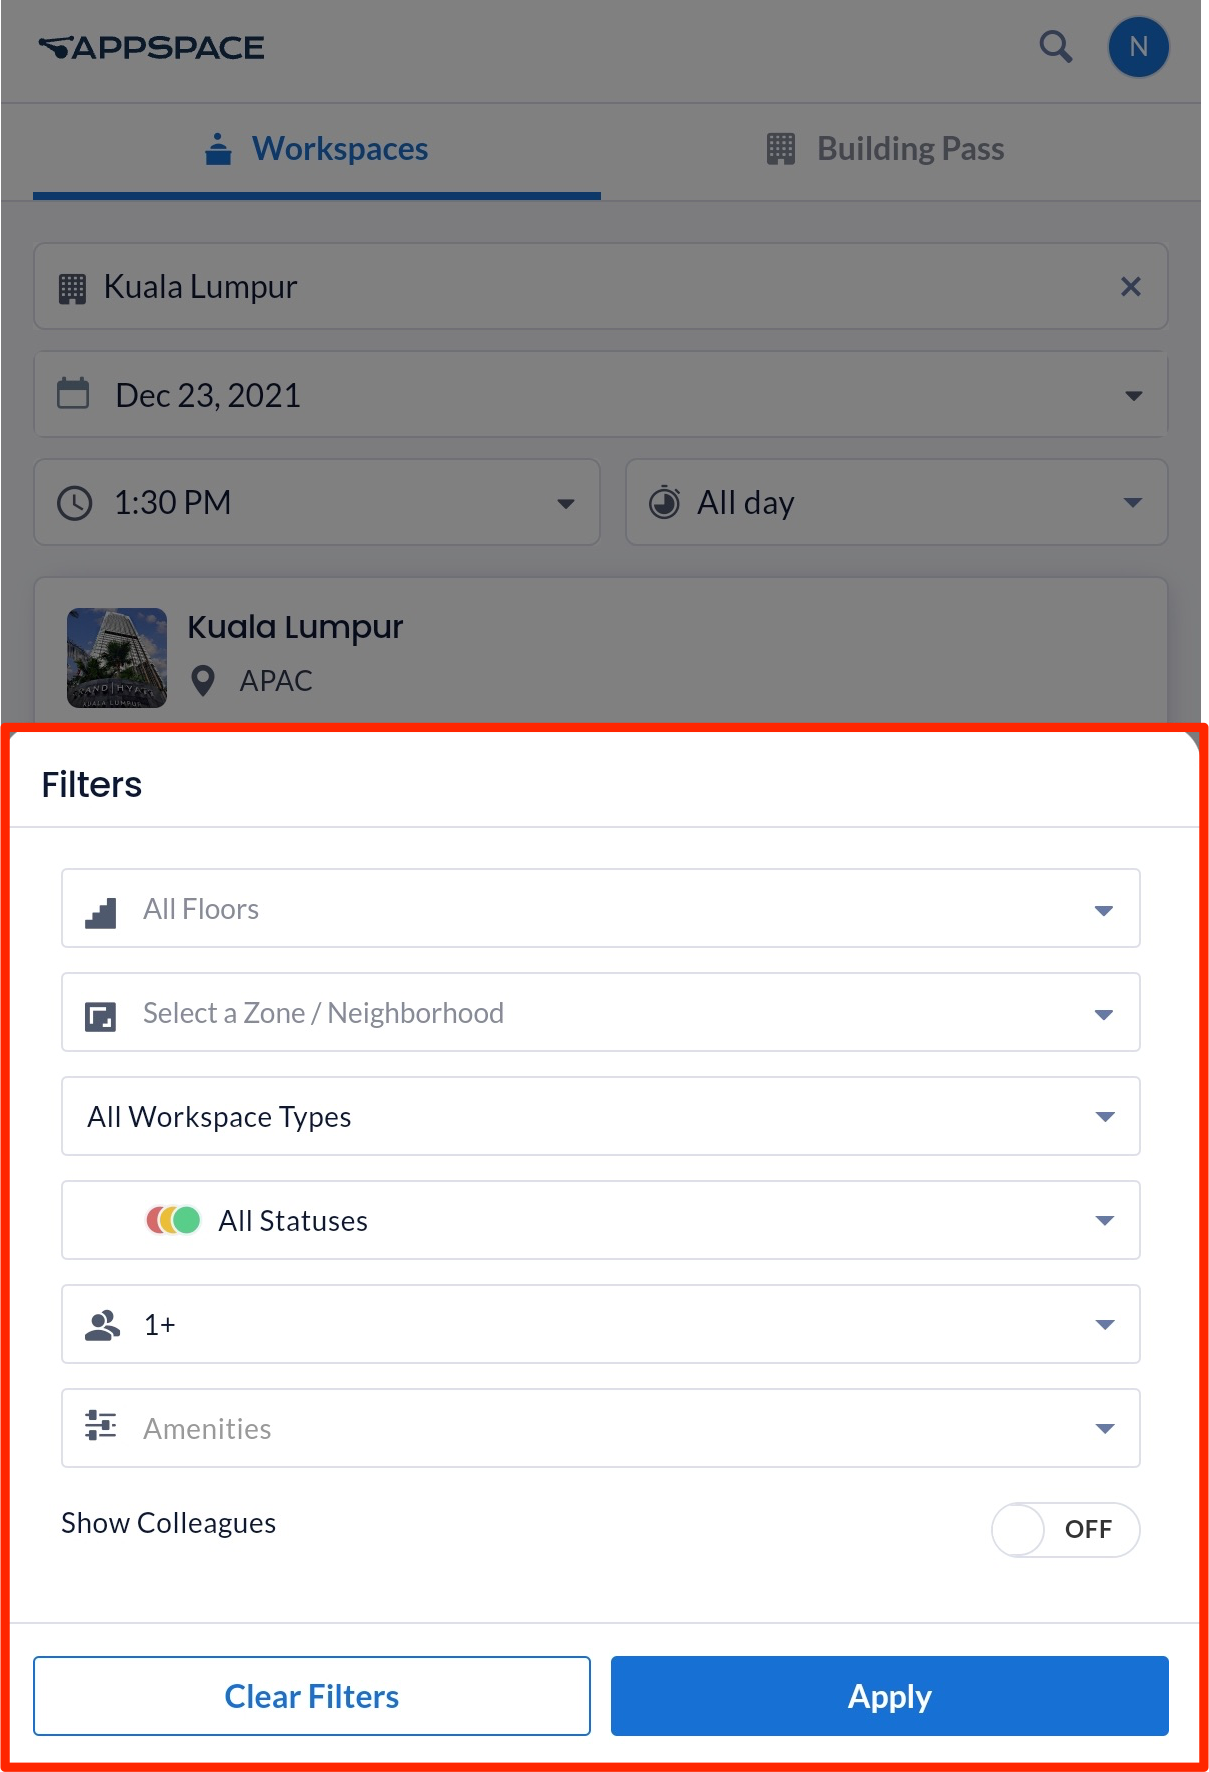
- Filters – Use the Filters button to narrow down the search based on the floor, zone, workspace type, resource status (Available/Unavailable), capacity, and facilities available in this building.
- Floor Selection – Select an available floor to view the floor plan and all its available resources. If there are no floors in this building, this option will not be available.
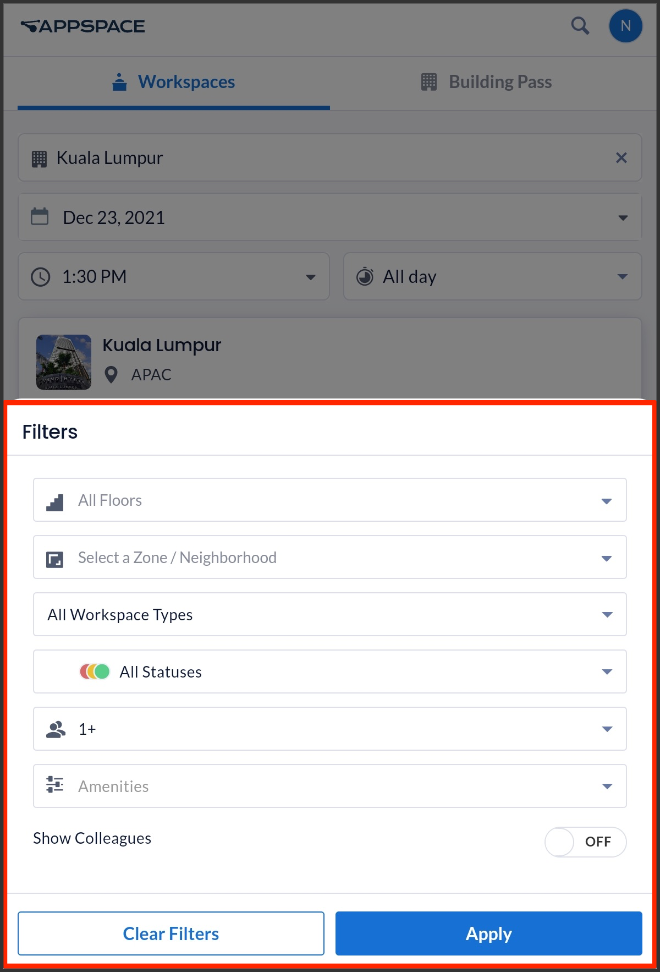
You can also turn on the Show Colleague toggle to see which colleagues have booked the resource next door. - View More Info – Click this button to display more information about the building, such as capacity, number of floors, and any applied restrictions. You may also directly reserve a building pass to this building.
- View Map – Click this button to display the floorplan in map view. The floorplan will display all available workspaces and resources on the selected floor (if applicable).
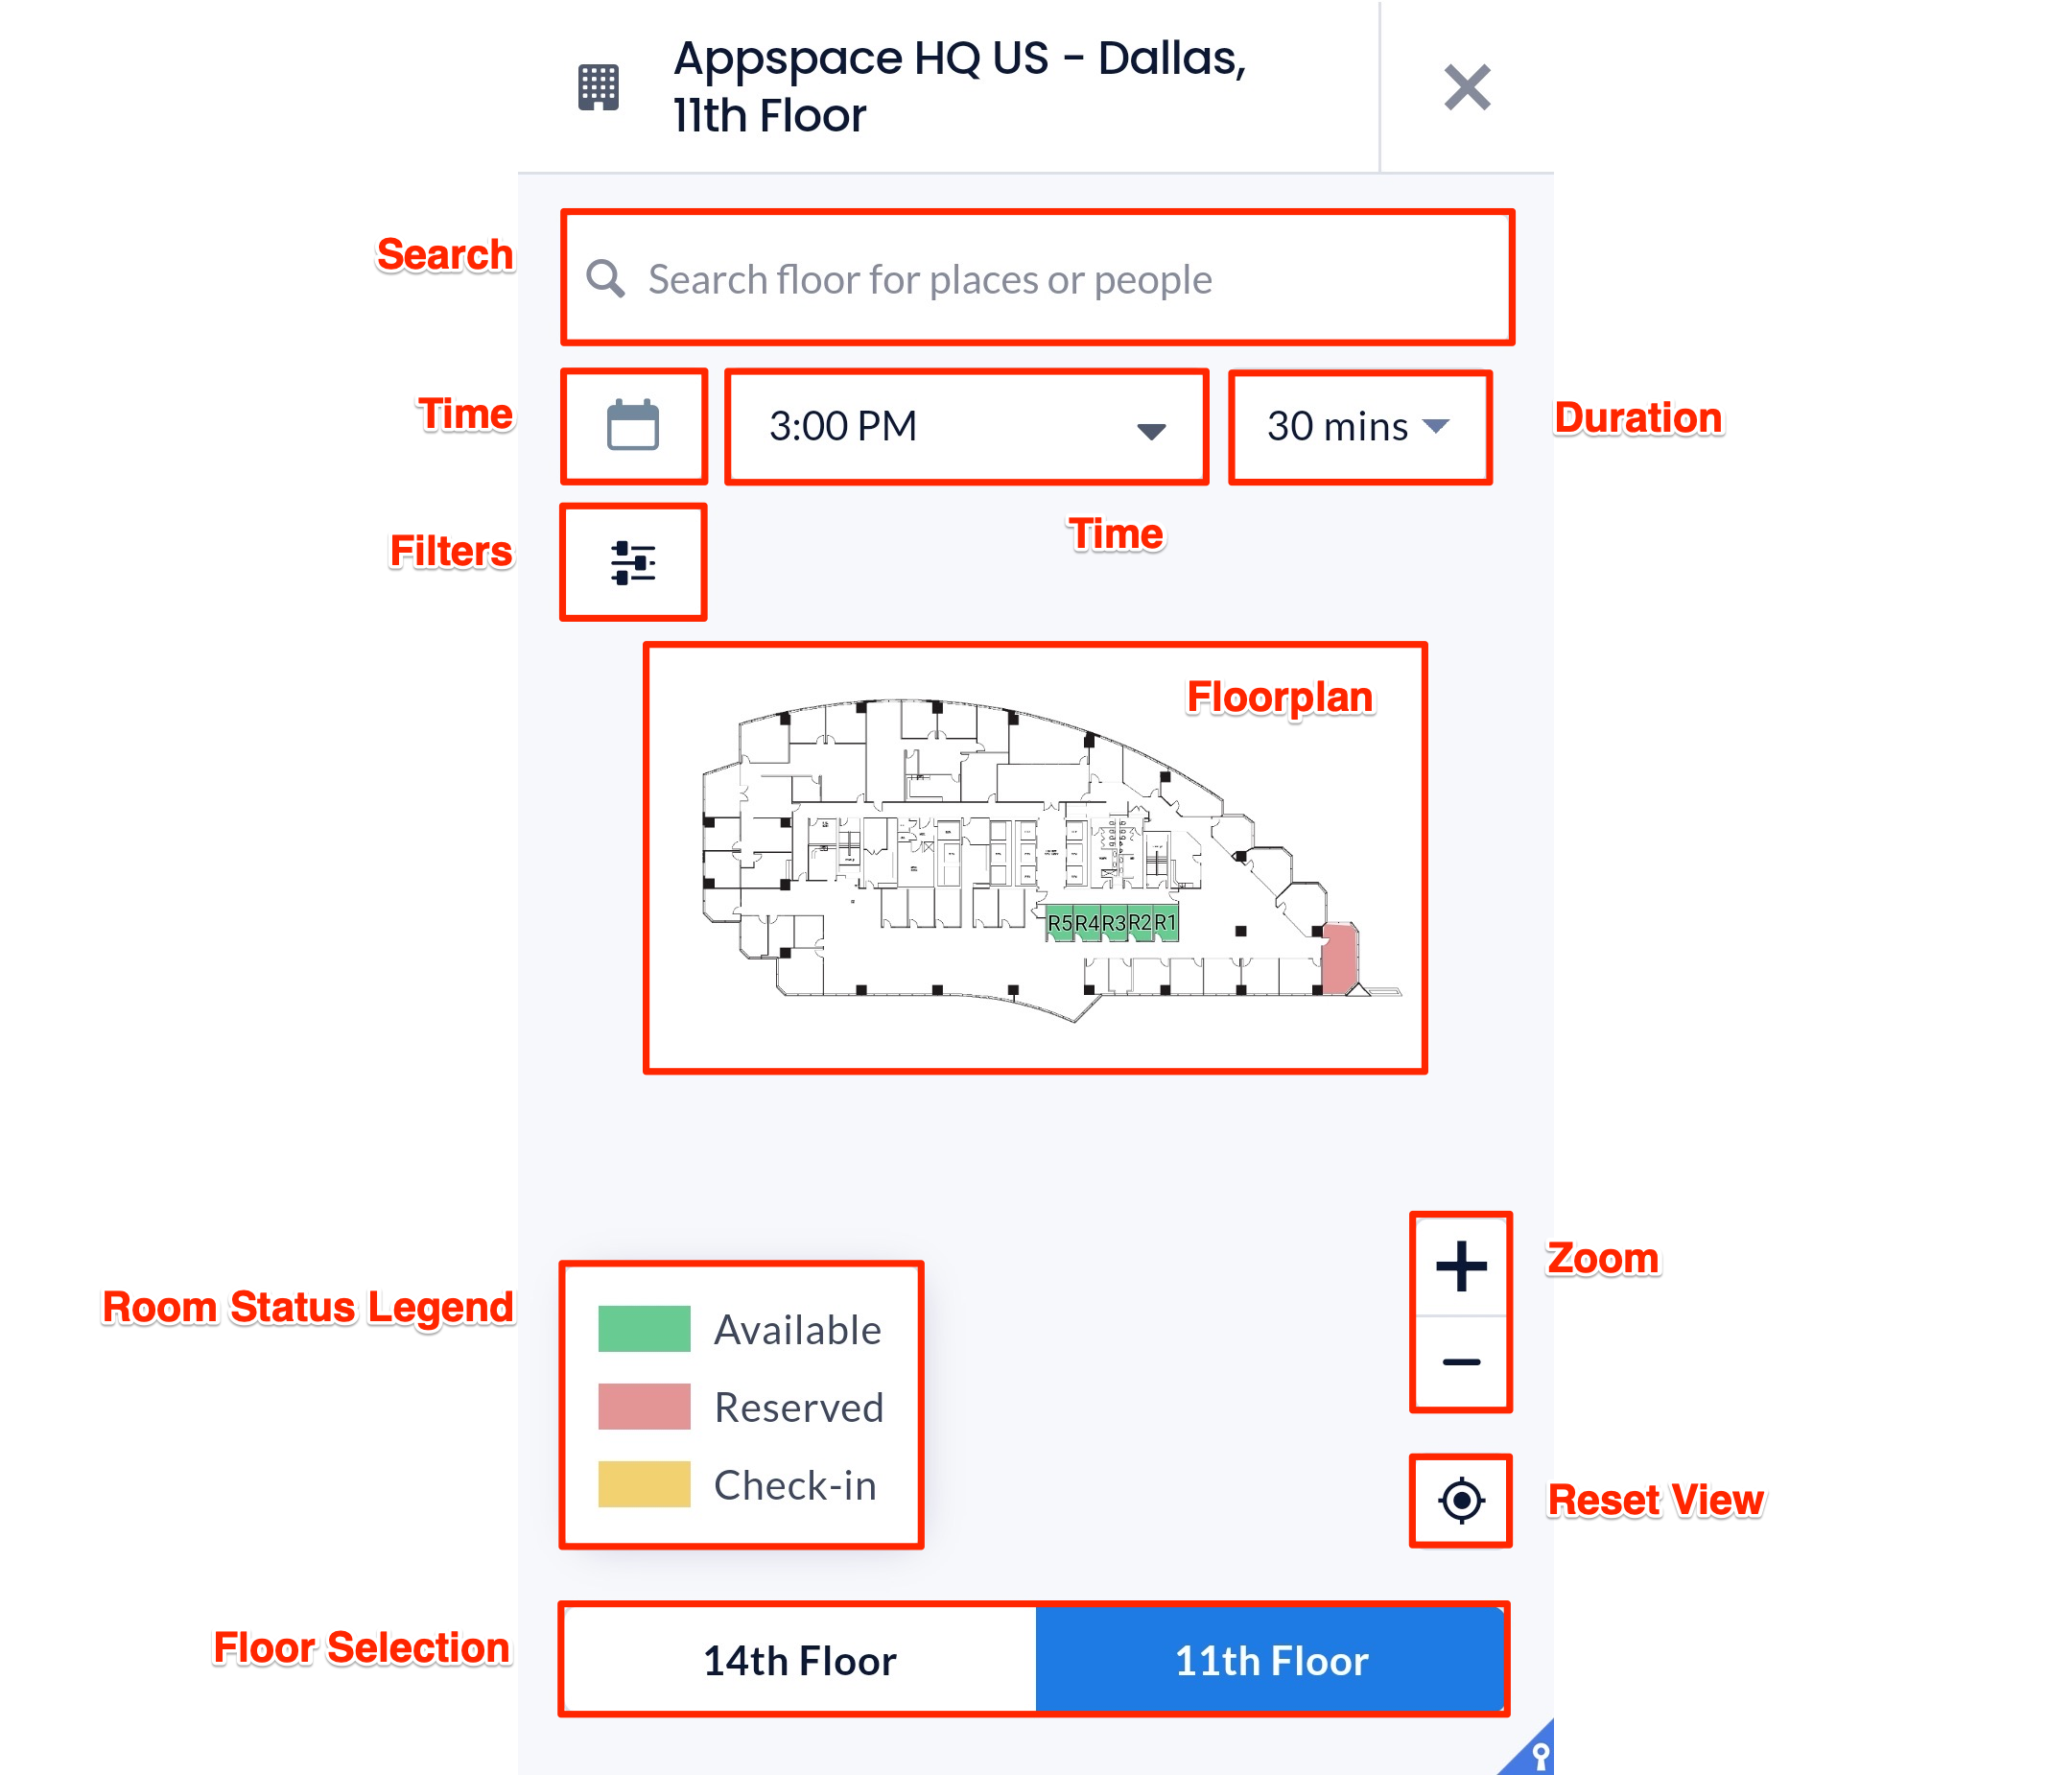
On this floorplan view, you may do the following:
- Search – Type in a letter or keyword to search for and display floors, workspaces, or people (colleagues) in this building or the selected floor. Use the Date, Time, and Duration filters to narrow down your search.
- Filters – Use the Filters button to narrow down the search based on workspace type, resource status (Available/Unavailable), capacity, and facilities available in this building.
- Floor Selection – Select an available floor to view the floor plan and all its available resources. If there are no floors in this building, this option will not be available.
- Zoom – Use the + or – buttons to zoom in or out.
- Reset View – Reset to the default floorplan view.
- Room Status Legend – indicates the colors for room status. These colors may be customized by an administrator to follow your organization’s preferences.
Making a Reservation
Once you’ve found the desired resource either in normal view or the map view, you may reserve the resource. Refer to the Reserve a Workspace, Desk, or Room – Employees article for detailed instructions.Building Pass
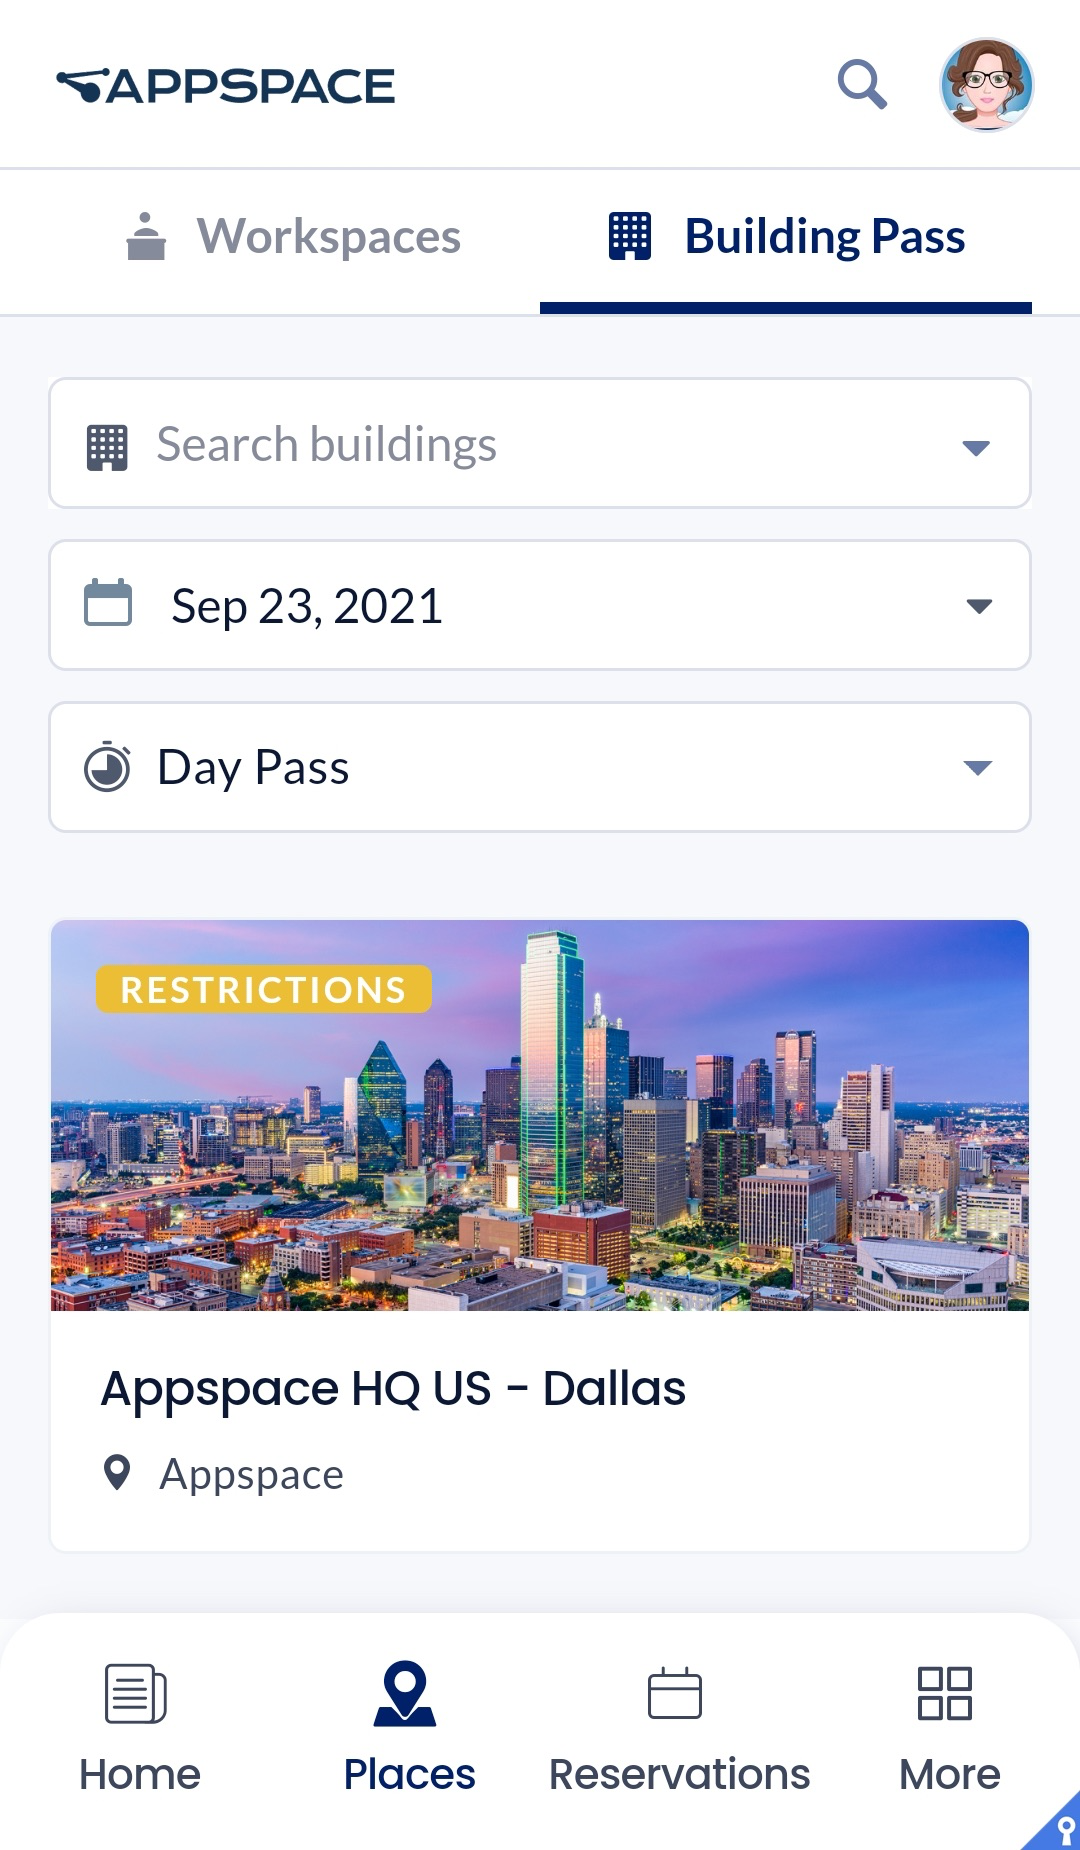
The Building Pass tab will list all the buildings available in your location. Each building block indicates the building name, location, and its status (Available, Unavailable, Restrictions).

You may search for a building with a letter or keyword, and select a building from the drop-down menu. Use the Date and Duration (Pass type) filters to narrow down your search for buildings.
Select any building to view details, restriction details (if any), and directly book a building pass. Refer to the Reserve A Building Pass – Employees article for more information.
Reservations
The Reservations tab lists all the reservations and building passes you have personally booked, or meetings that you have been invited to.
You can check, extend, or even cancel your reservations. Administrators are also able to make and manage reservations on behalf of someone else.
When you select a building pass or workspace reservation, you may view the resource details, booking details, and the resource’s location on a map (if available).
You may also confirm the reservation by clicking Yes or scanning the QR code to check in. You may also extend or cancel the booking.

For more information, refer to either one of these articles:
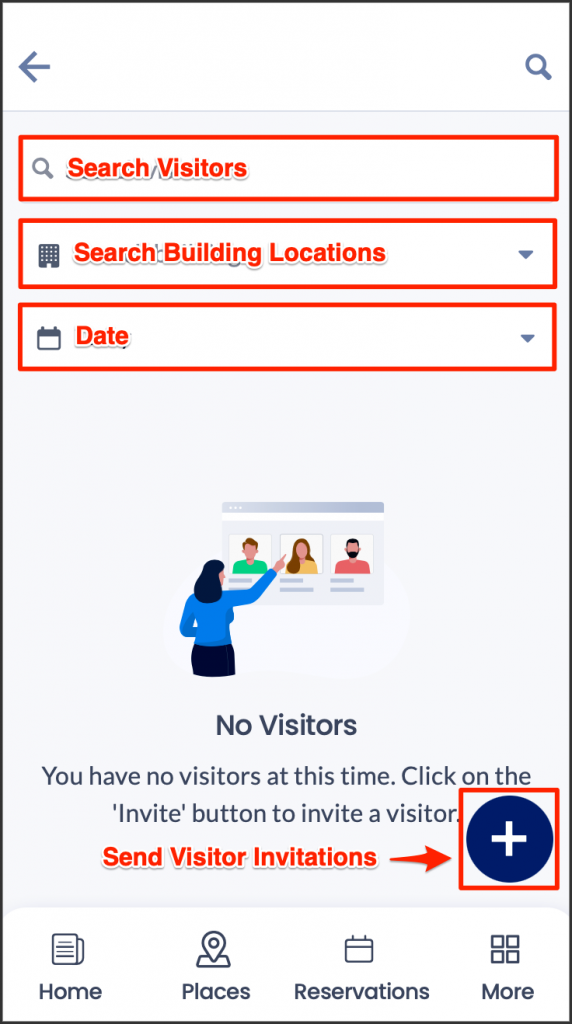
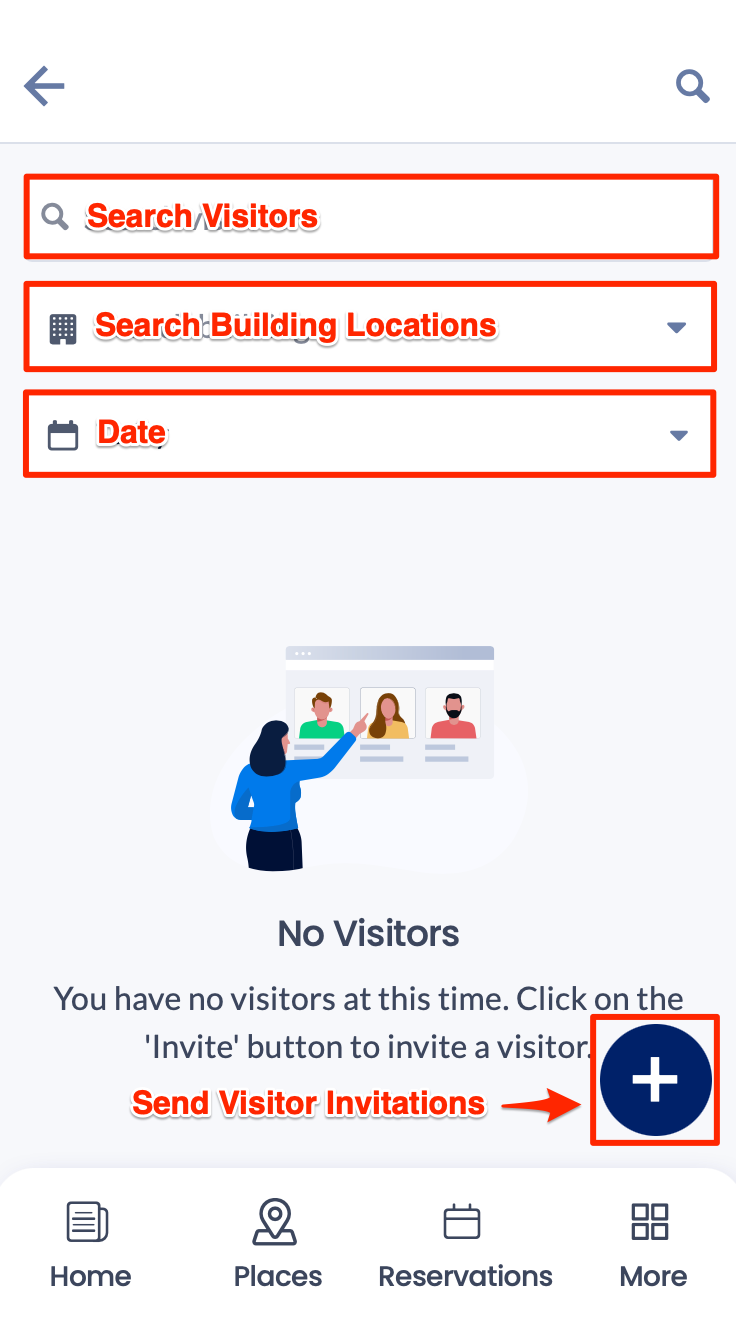
Visitors
The Visitor tab displays the Visitor Management system used to invite external users (visitors) to a meeting or event held at your company. These visitors could be an employee from another facility, division, or subsidiary within your company or other corporate entities from outside the company. Event Hosts and Facilitators may do the following:
- send an invitation to a prospective visitor.
- check-in to the desired visitor invitation.
Refer to the following articles for more information:
Concierge
The Concierge tab provides employees assigned with concierge permissions a calendar view of all reservations under their purview. Employees with concierge permissions are also able to view and manage reservations of workspaces in locations they have been assigned to.
-
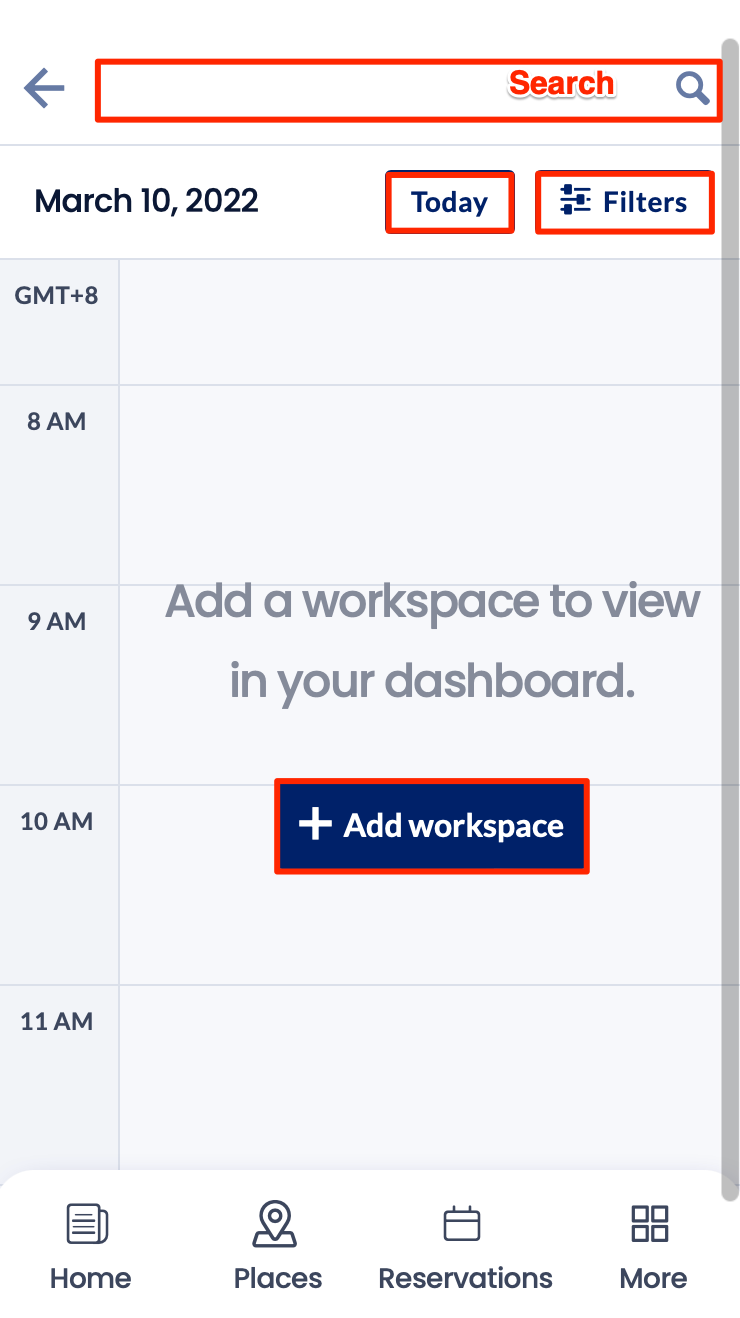
- Search – Type in a letter or keyword to search for a workspace or reservation.
- If a workspace is selected, it will be added automatically to the calendar view if it wasn’t already.
- If a reservation is selected, the reservation edit window will be displayed for viewing or editing.
- Today – Click this button to bring back the calendar focus to the current time and date.
- Filters – To narrow down the reservations you wish to display:
- Resource Type – Display reservations based on the workspace type.
- Status – Display reservations based on the reservation status.
- Workspace – To view the name of the workspaces you wish to view on the calendar. You may select the Location of the workspaces you wish displayed from the drop-down menu, which will then populate the calendar with the six latest workspaces available.
- If the workspace you wish to view was not added automatically, you may manually add the name of the workspace in the Workspaces input box.
- If you wish to remove a workspace from being displayed, click the “X” beside the workspace name tag from the Workspaces input box to remove it.
- Search – Type in a letter or keyword to search for a workspace or reservation.
For more information, refer to the articles below:
- Manage Workspace, Desk, or Room Reservations – Concierge
- Configure Concierge Permissions in Reservations
Channels
If Places and Reservations are turned on, access Channels by clicking More. If they are not turned on, you will see the Channels tab next to Home.
The Channels tab displays all channels and channel groups that have been published to you or your user group.
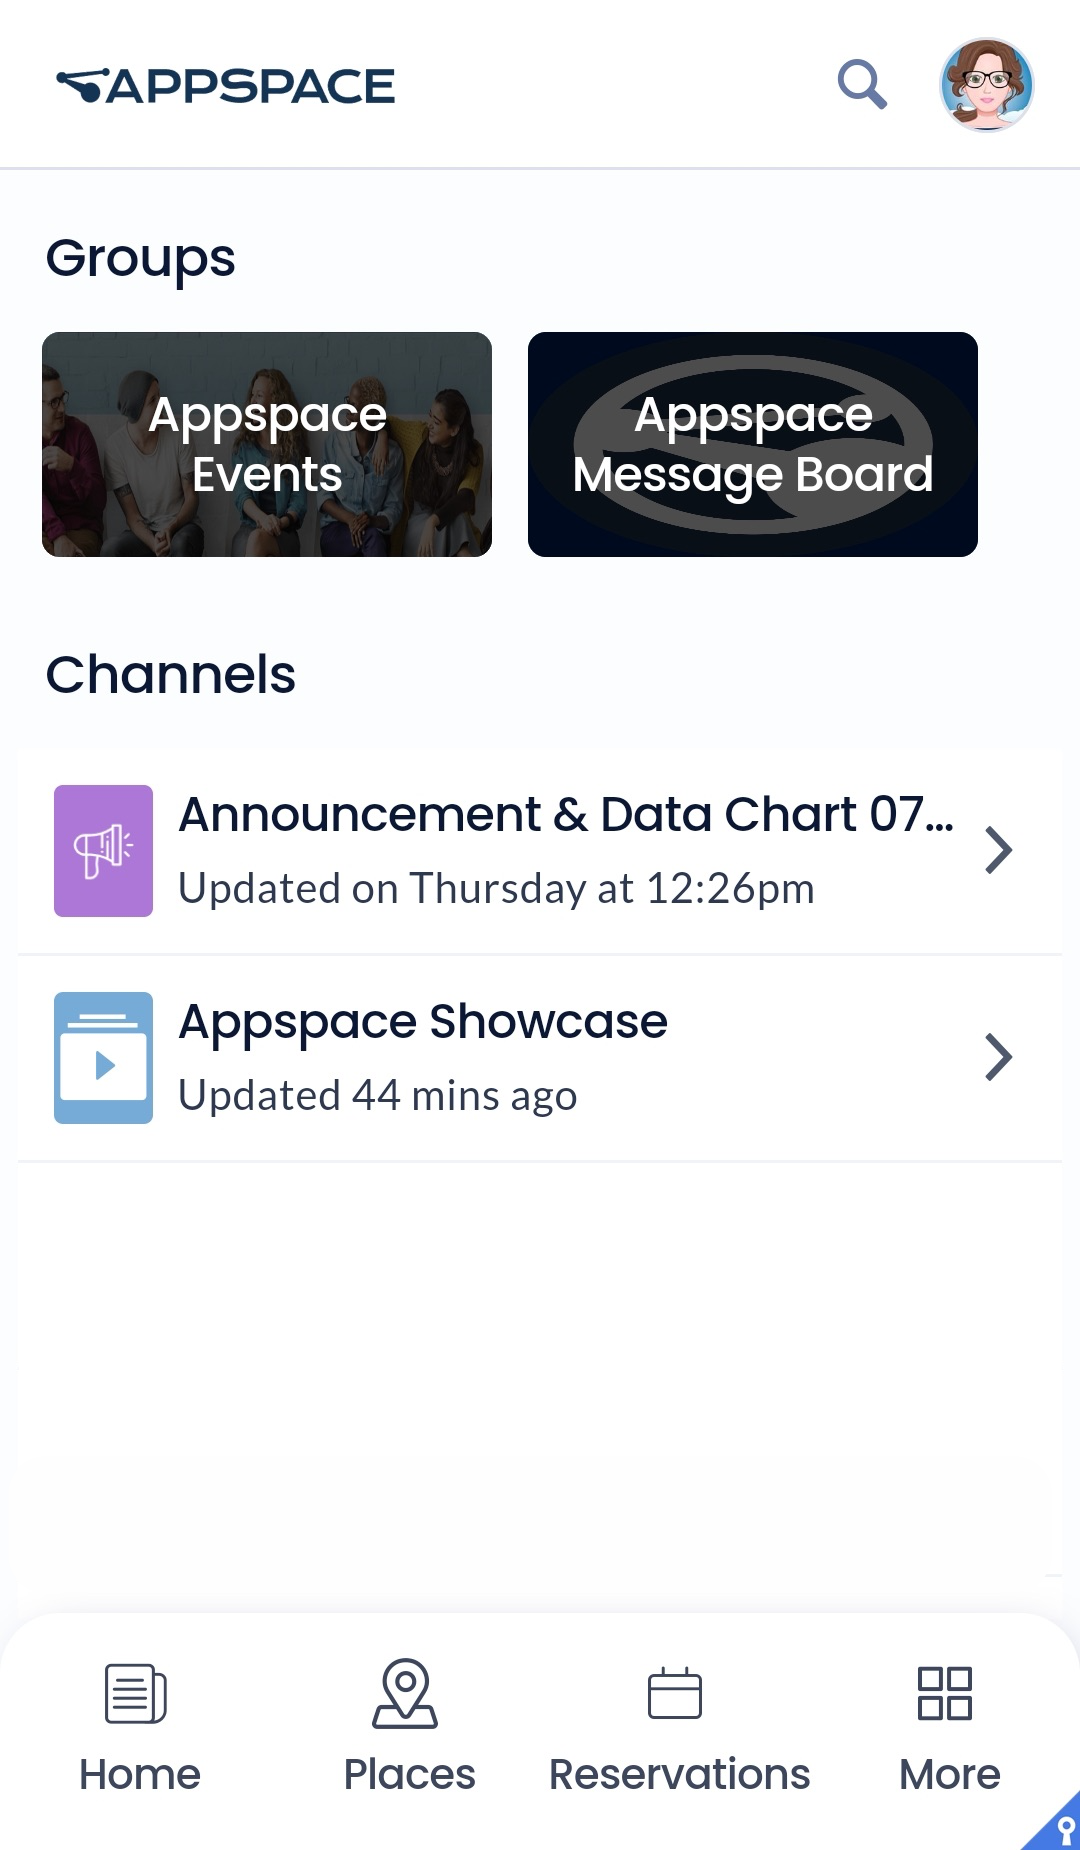
Select a channel group from the Group section (top), or select a channel from the Channels section to view content.
Channel Group
When a channel group is selected, the channels within the selected channel group will be listed on the right sidebar, while the channel content will be listed in the left section.
Channel
When a channel is selected, the channel will be displayed either in Feed view or Carousel view. These views are configured by an administrator in the Employee Mode settings when creating a channel.
- Feed – All content within the channel will be listed, allowing users to select specific content for viewing.
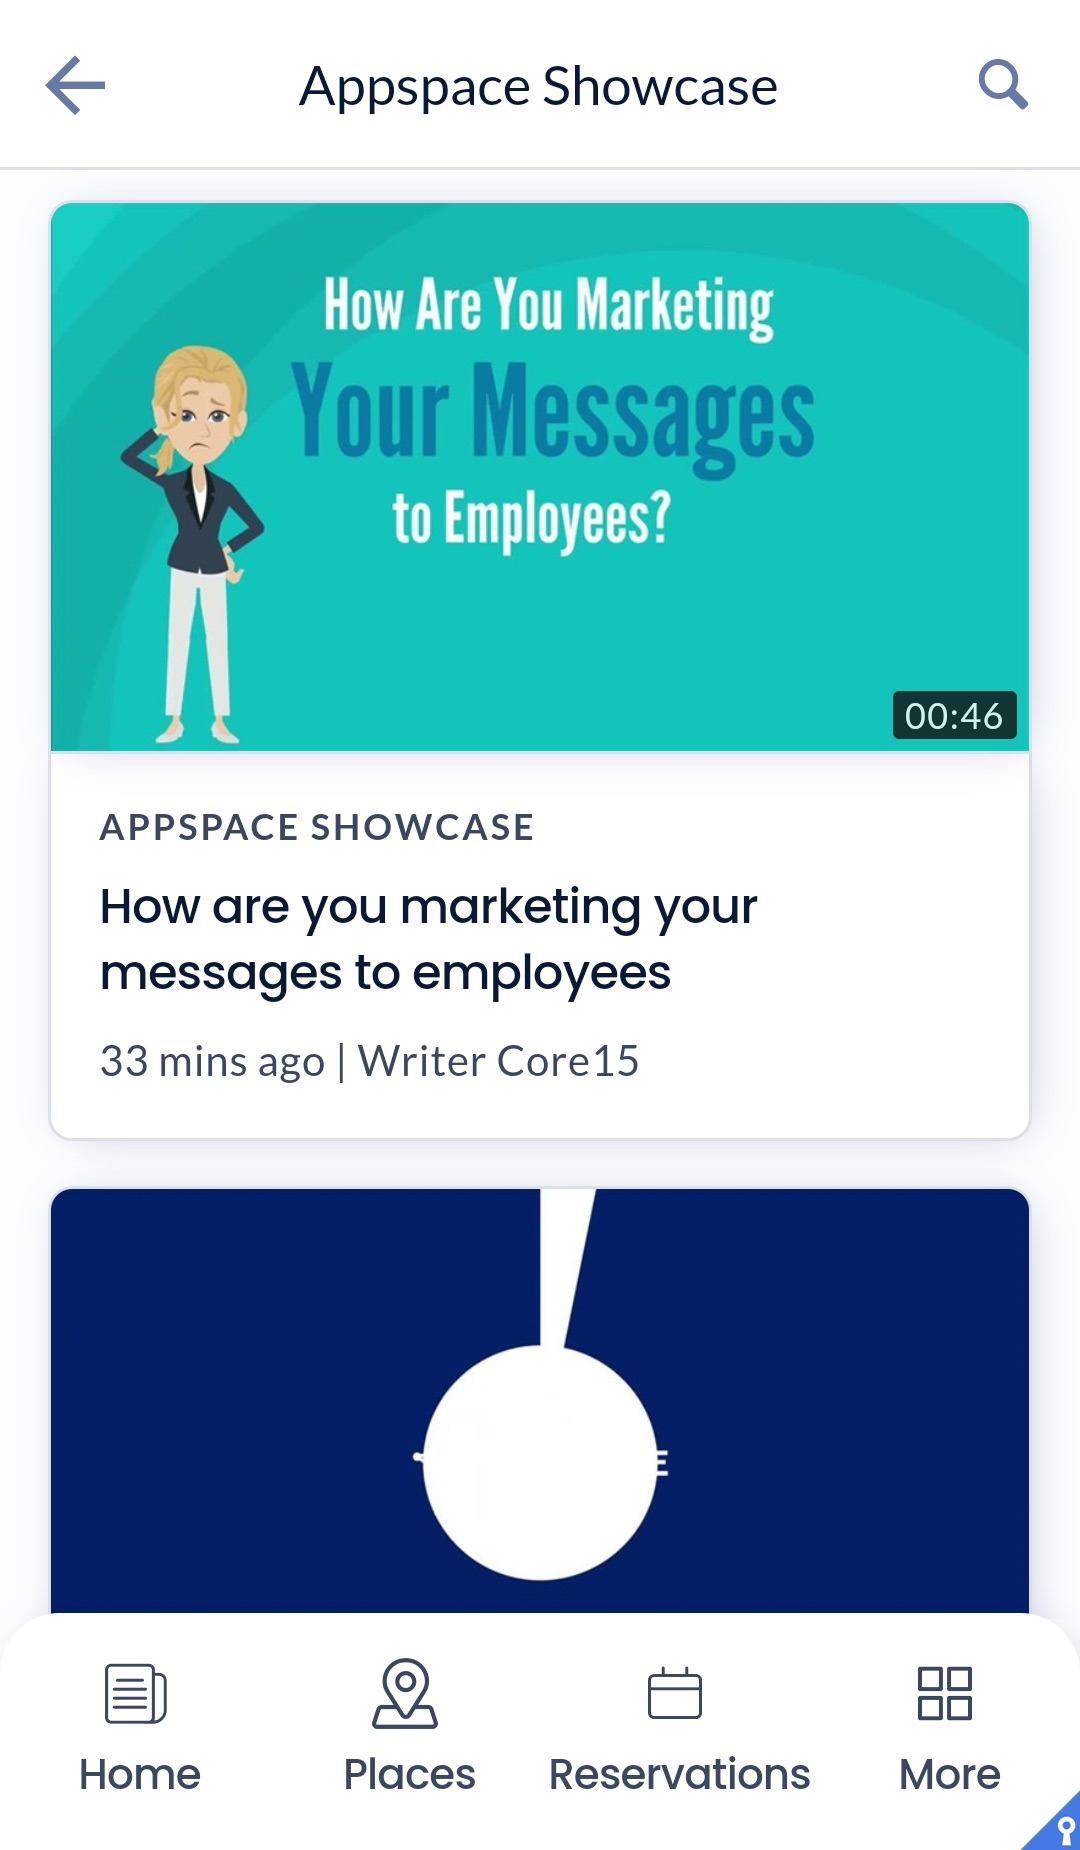
- When you click any content, the content together with details such as title, article (description), and publishing details are displayed.
- Users with Publisher or Editor permissions, can directly edit the content by clicking the Edit content icon.
- Carousel – In this format, all content within the channel will be displayed similar to how it will be viewed during device playback. This feature is only applicable and available for playlist channels.
- You may click the thumbnail below this content to view the next content.
Videos
If Places and Reservations are turned on, access Videos by clicking More on the menu. If they are not turned on, you will see the Videos tab next to Channels or Home.
The Videos tab simply displays a collection of all videos available in your app, from all the channels and channel groups assigned to you or your user group.
Each video block will include details such as channel name, video title, duration, publish date, and author name.
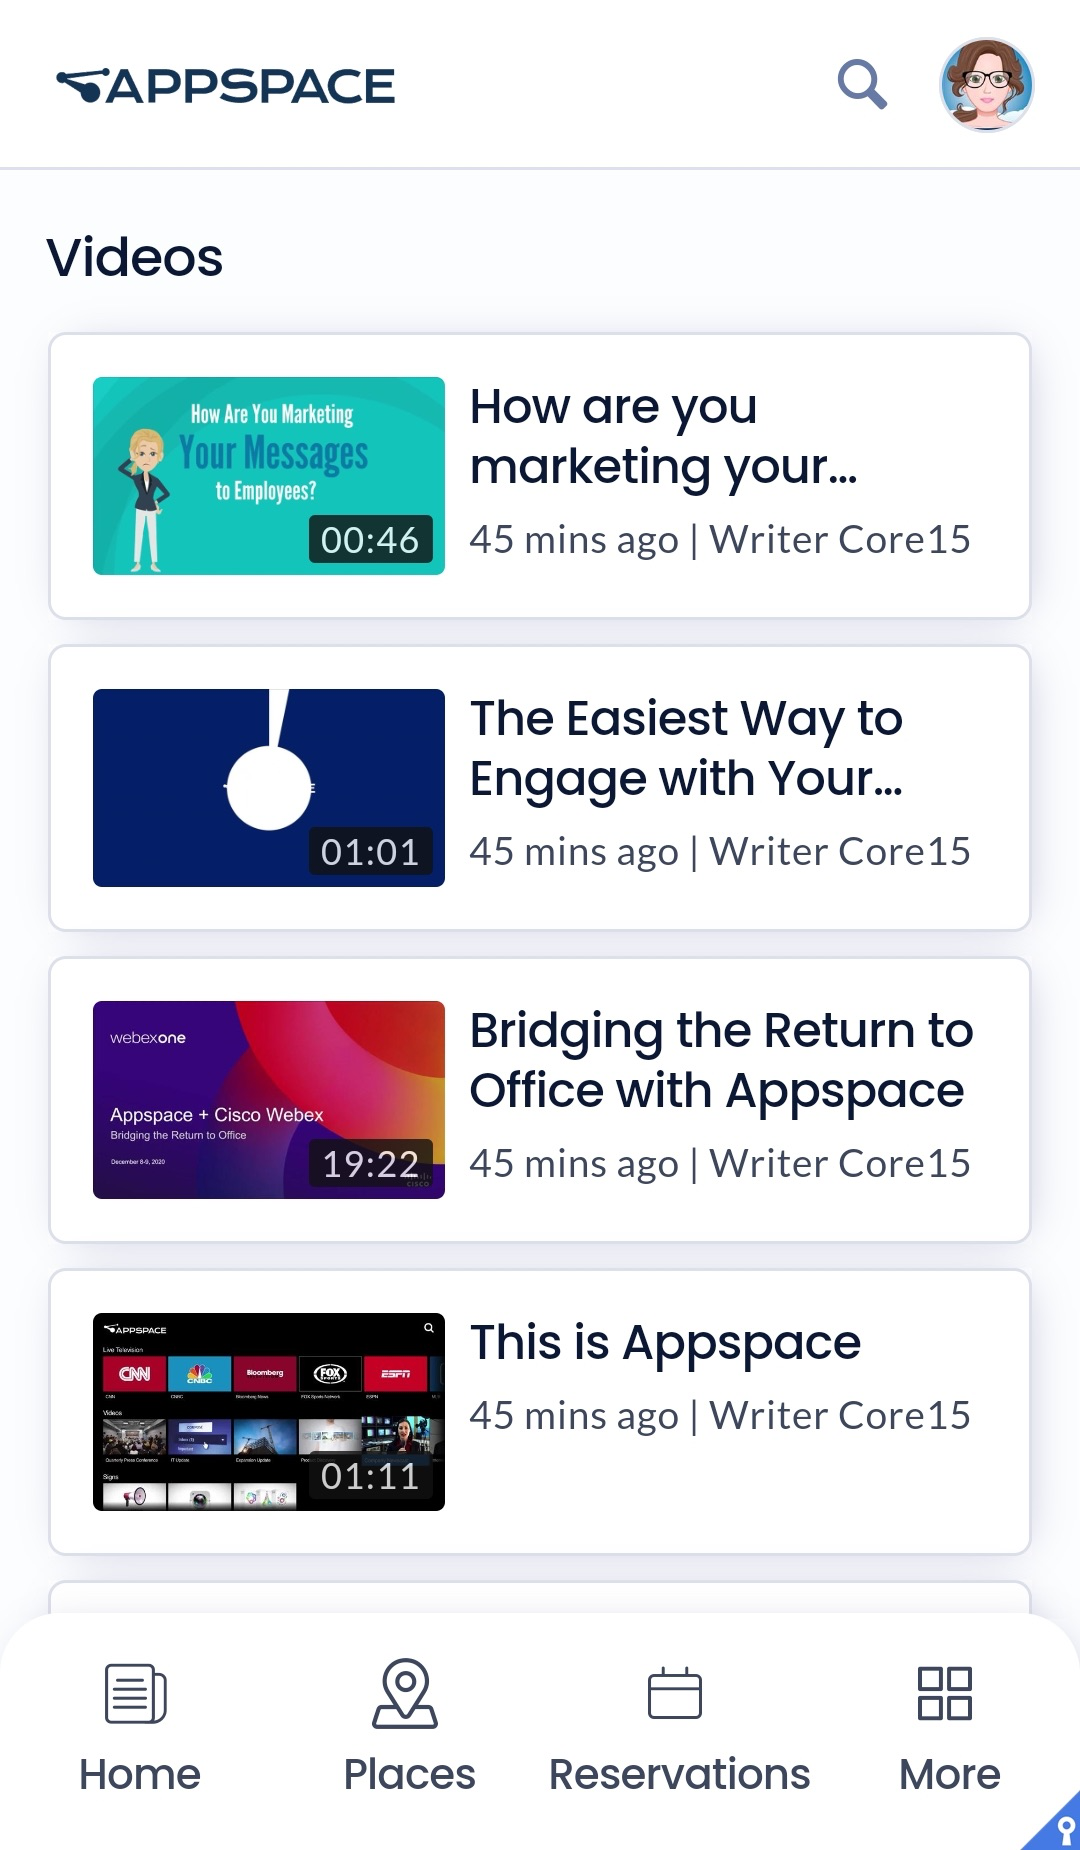
Simply click on any video block to view.
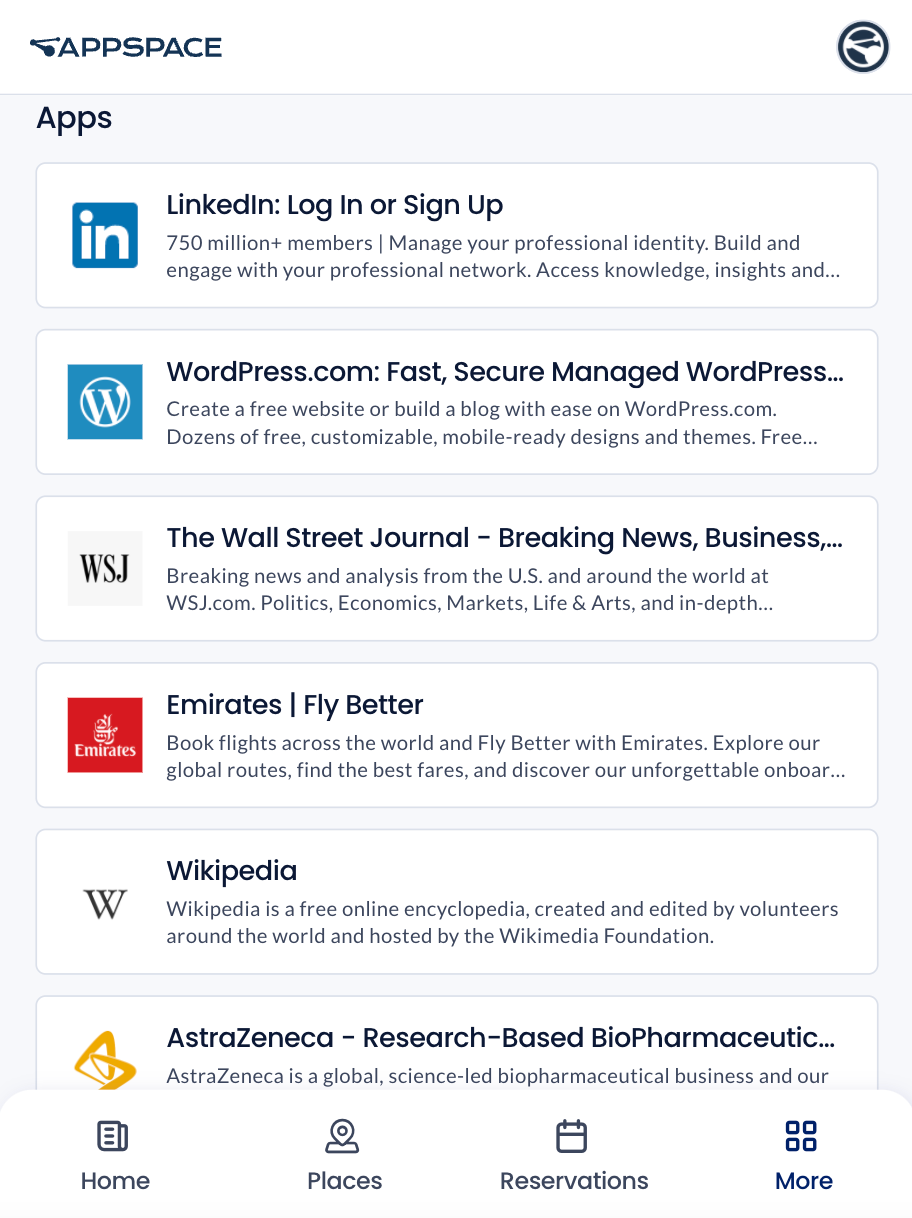
Apps
If Places and Reservations are turned on, click More to select Apps.
The Apps dashboard displays links to third-party applications within the Employee App that are applicable to the employee’s needs. The Location Admin administer these links, which can target the entire organization or specific user groups, regions, or locations.
User Profile
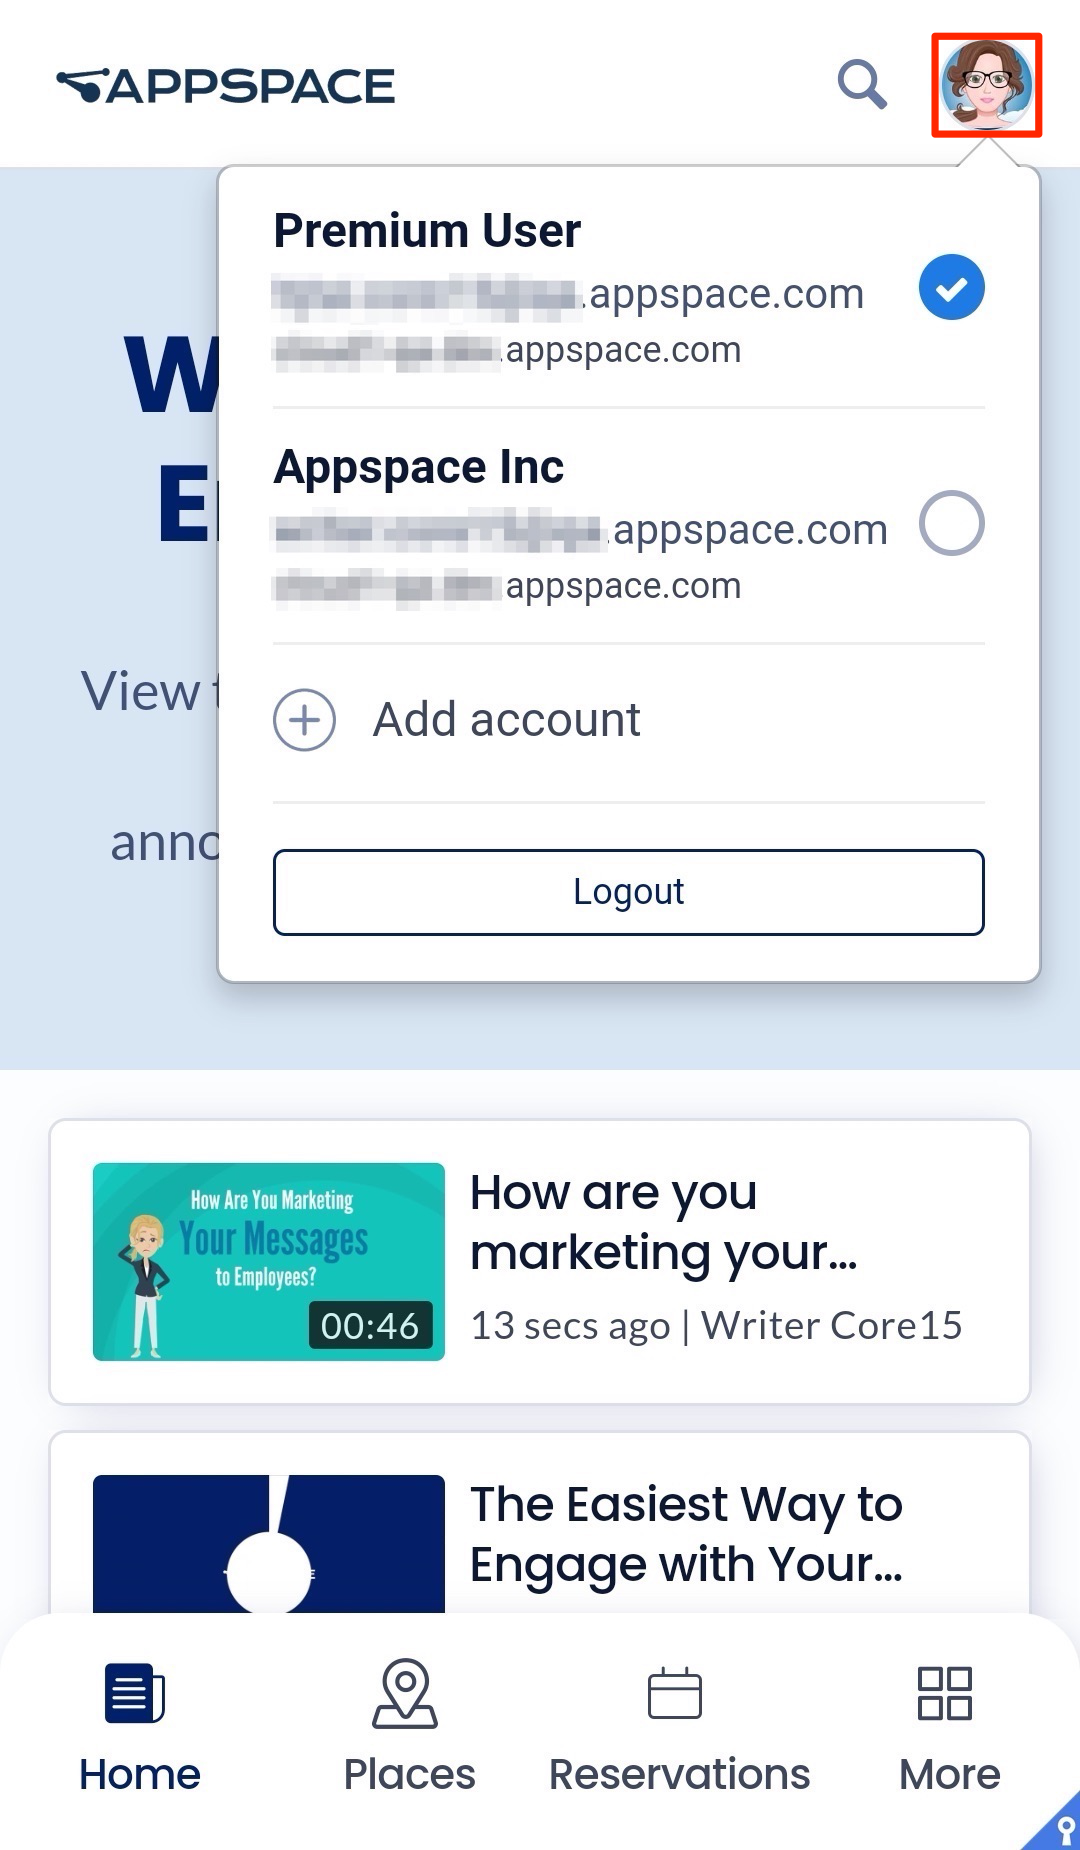
The User profile window allows you to view your user information and do the following:
- View the current user name and role.
- View the Appspace account number
- Switch to Admin Console – Only available to administrators.
- Configure Theming and branding for this portal – Only available to administrators. For instructions please refer to Configure Employee App Theme, Branding, & Third-Party App Links.
- Log out from the Employee App.
Was this article helpful?