Appspace now supports Google Meet devices allowing organizations to display content, such as company communications or workplace information, when the device is in idle mode and not in a meeting. Appspace will automatically run and display channel content after a period of inactivity on the Google Meet device, with the duration for the idle period set in the Google Admin console.
All Appspace-supported cards, images, audio, and video files up to 4K resolutions, in landscape mode, can be displayed via a playlist channel, multi-zone channel, or an advanced channel.You can register and configure Google Meet devices with your Appspace licenses via the Google Admin console.This article provides instructions to configure Appspace with Google Meet devices.
Prerequisites
- An active Appspace account, with sufficient device licenses to register the device.
- Appspace 8.1 and later.
- The Google Meet device must meet the manufacturer’s minimum hardware and technical specifications. Please refer to Supported Devices & Operating Systems.
- Google Admin credentials with a G Suite (Google Apps) account.
- A Google Enterprise (CDM) account is required.
- A Google Meet device enrolled to your Google Enterprise account.
- Supported content: all Appspace-supported cards, images, audio, and video files up to 4K resolutions, in landscape mode. See Limitations below.
- Supported channels: playlist channel, multi-zone channel, or advanced channel. See Limitations below.
- An active Internet connection.
- A USB keyboard for activation.
- It is recommended that the device clock is set to automatically retrieve time from a Network Time Protocol (NTP) server, with the correct time zone, in order for it to sync correctly with the Appspace server.NoteAppspace cloud servers by default retrieve time from a NTP server. If an Appspace on-premises server is used, ensure the server time is automatically retrieved by a NTP server.
- Please ensure your network is configured to allow Appspace Approved URLs and the relevant network ports.
- On your proxy server, ensure our approved URLs are listed in the ‘How to set up networks with SSL content filters’ section in the following article: https://support.google.com/chrome/a/answer/3504942#sslinspection.
Configure Google Meet Device
Follow the instructions below to configure and register a Google Meet device on the Appspace console.
-
Log in to your Google Admin console.
-
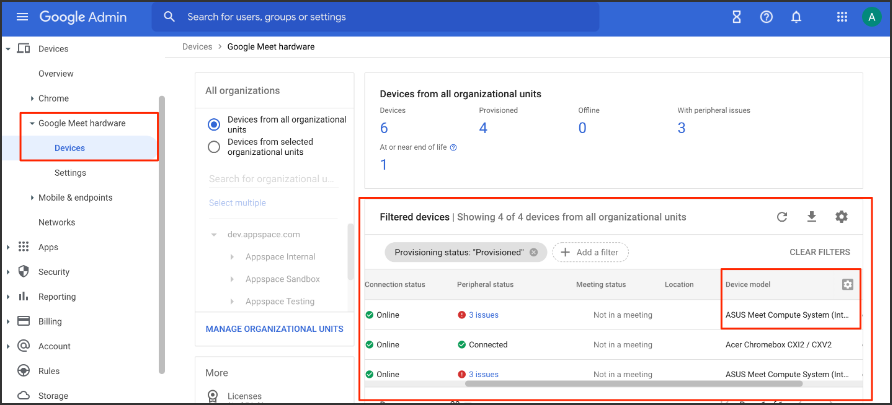
On the left panel, go to Devices > Google Meet hardware > Devices.
NoteYour Google Meet device must be first configured with Chrome Device Management via Chrome Enterprise. Refer to the instructions in the Enroll your device article. - The enrolled device will be listed under the Filtered devices section.
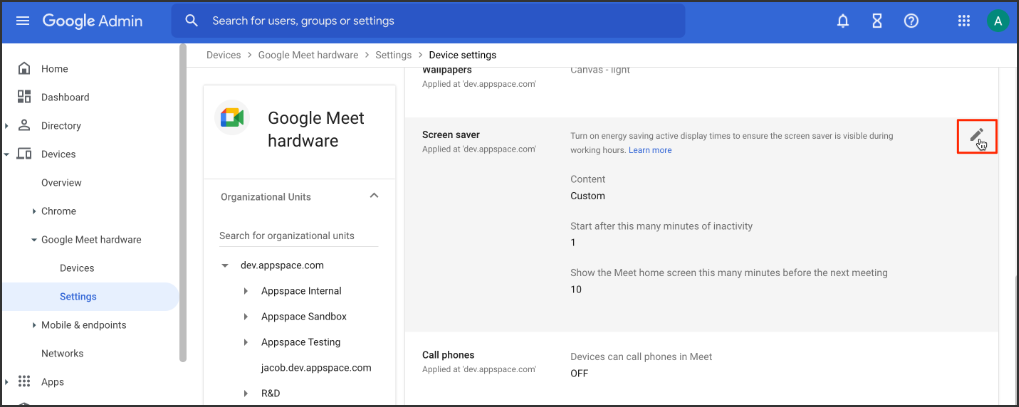
- On the left panel, click Google Meet hardware > Settings.
- Under the Devices settings section, scroll down to the Screen saver section.
- Click the pencil icon next to Screen saver.
-
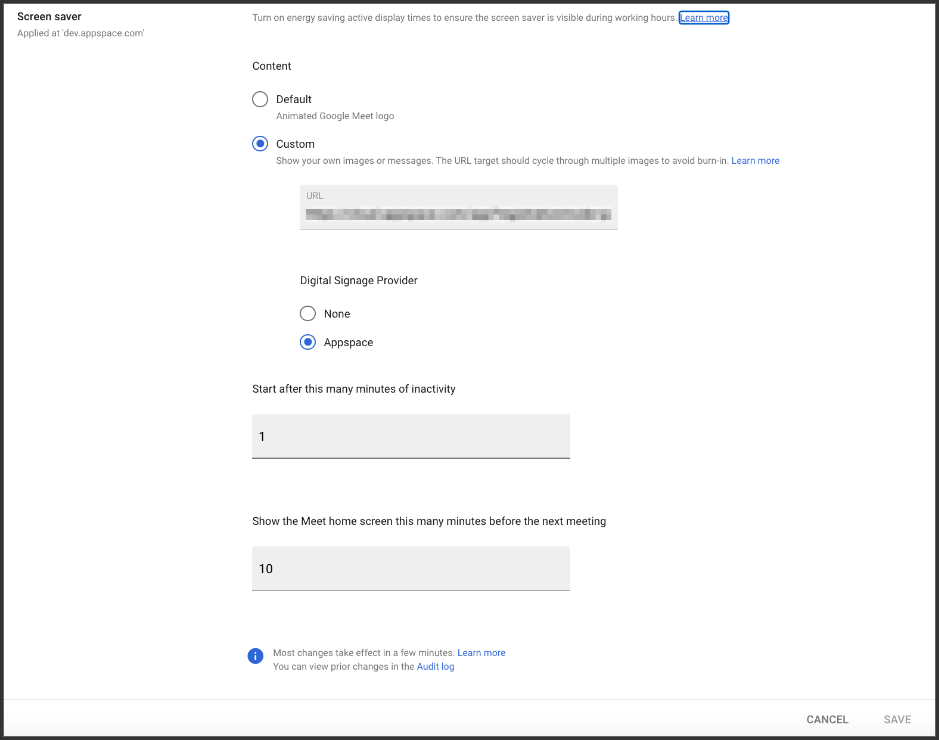
Under Content, select the Custom option.
-
Input one of the following Appspace App PWA URLs in the Custom > URL field, depending on your Appspace deployment:
- Appspace Public Cloud:
- https://cloud.appspace.com/app/?registrationmode=passive
- Appspace Private Cloud:
- https://<customer>.cloud.appspace.com/app/pwa/?registrationmode=passive
- Appspace Public Cloud:
- Under Digital Signage Provider, select Appspace.
- Input in minutes in the Start after this many minutes of inactivity field. This option determines when the screensaver should start playing after the device has been idle.
- Input in minutes in the Show the Meet home screen this many minutes before the next meeting. This option determines when the screensaver should stop playing and display the Google Meet home screen before the next meeting starts.
- Click Save and proceed to reboot the device.
- On the left panel, go to Google Meet hardware > Devices, select the desired device, and click REBOOT DEVICE.
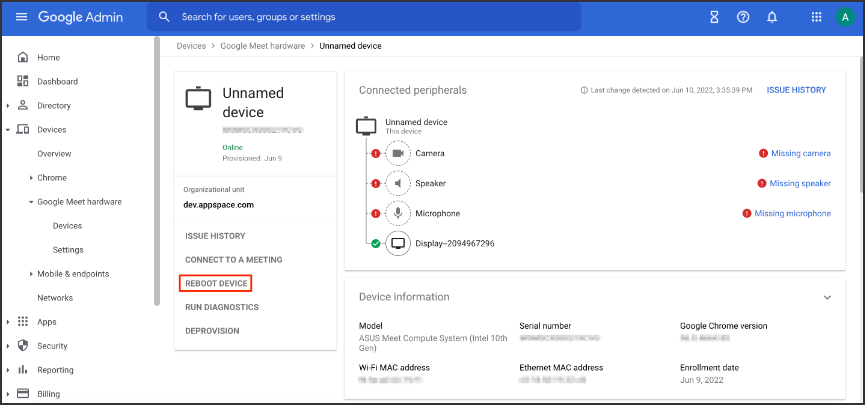
- Once the Google Meet device reboots and enters idle mode, the signage mode is activated and launches the Appspace App displaying the registration code.
- Follow the instructions, from Step 2 onwards, in the Register a device article. ImportantIf you would like to bulk-register multiple devices, please proceed to the Bulk-Register Google Meet Device section below.
- In the Channel selection mode field, select one of these playback options and assign a channel (if already created):
- Channels will autoplay sequentially – this option is currently available only for playlist channels. Channels with autoplay based on the playlist sequence or any scheduling or dayparting settings configured.
- Administrators can select a single channel – ideal for signage, you may select either a playlist channel, an advanced channel or a live channel. However, to select a channel here, the channel must already be created prior to this registration. If the channel has not been created, you may skip this step and assign a channel later.
- The Appspace content will be displayed as a screensaver/wallpaper when the Google Meet device becomes idle.
Bulk-Register Google Meet Device (Advanced Registration)
Follow the instructions below to register a Google Meet device on the Appspace console.
-
Log in to your Google Admin console.
-
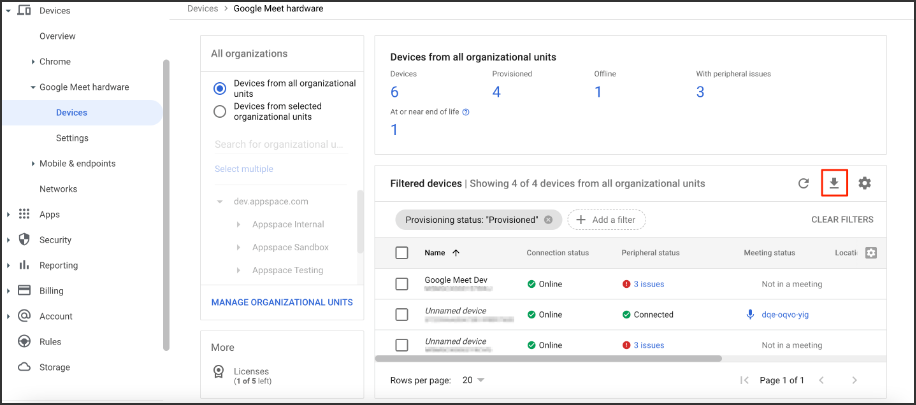
On the left panel, go to Devices > Google Meet hardware > Devices.
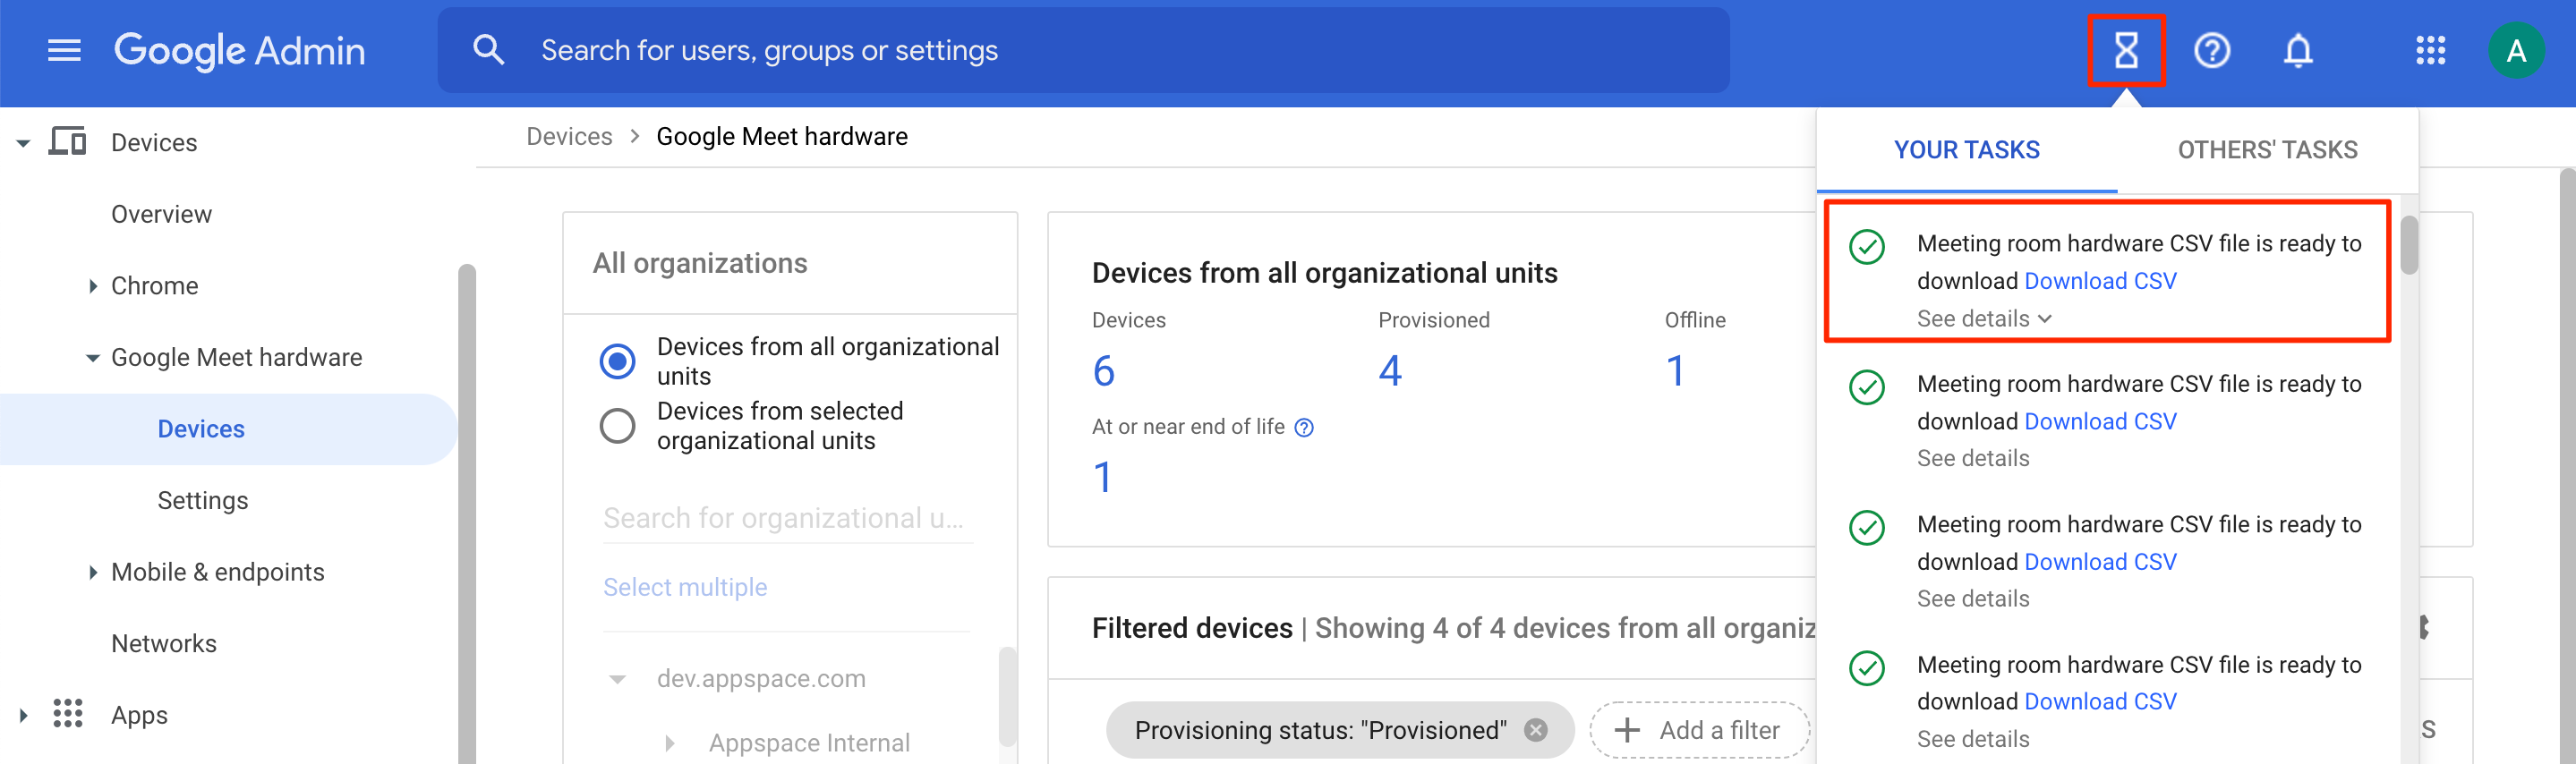
- In the Filtered devices section, click the download icon.
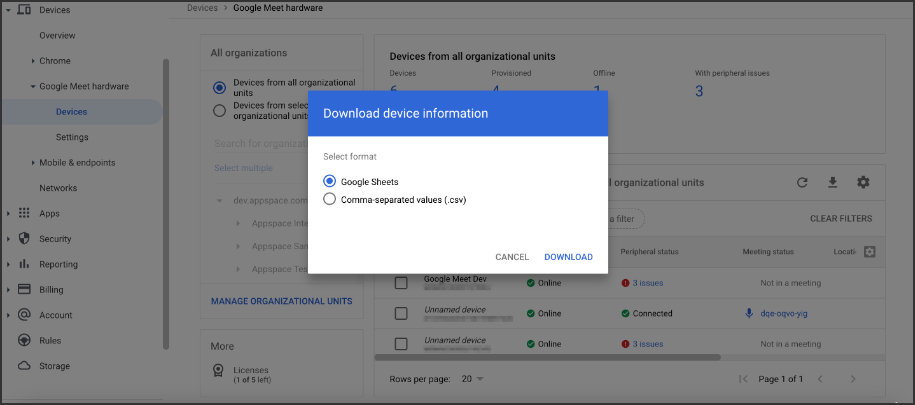
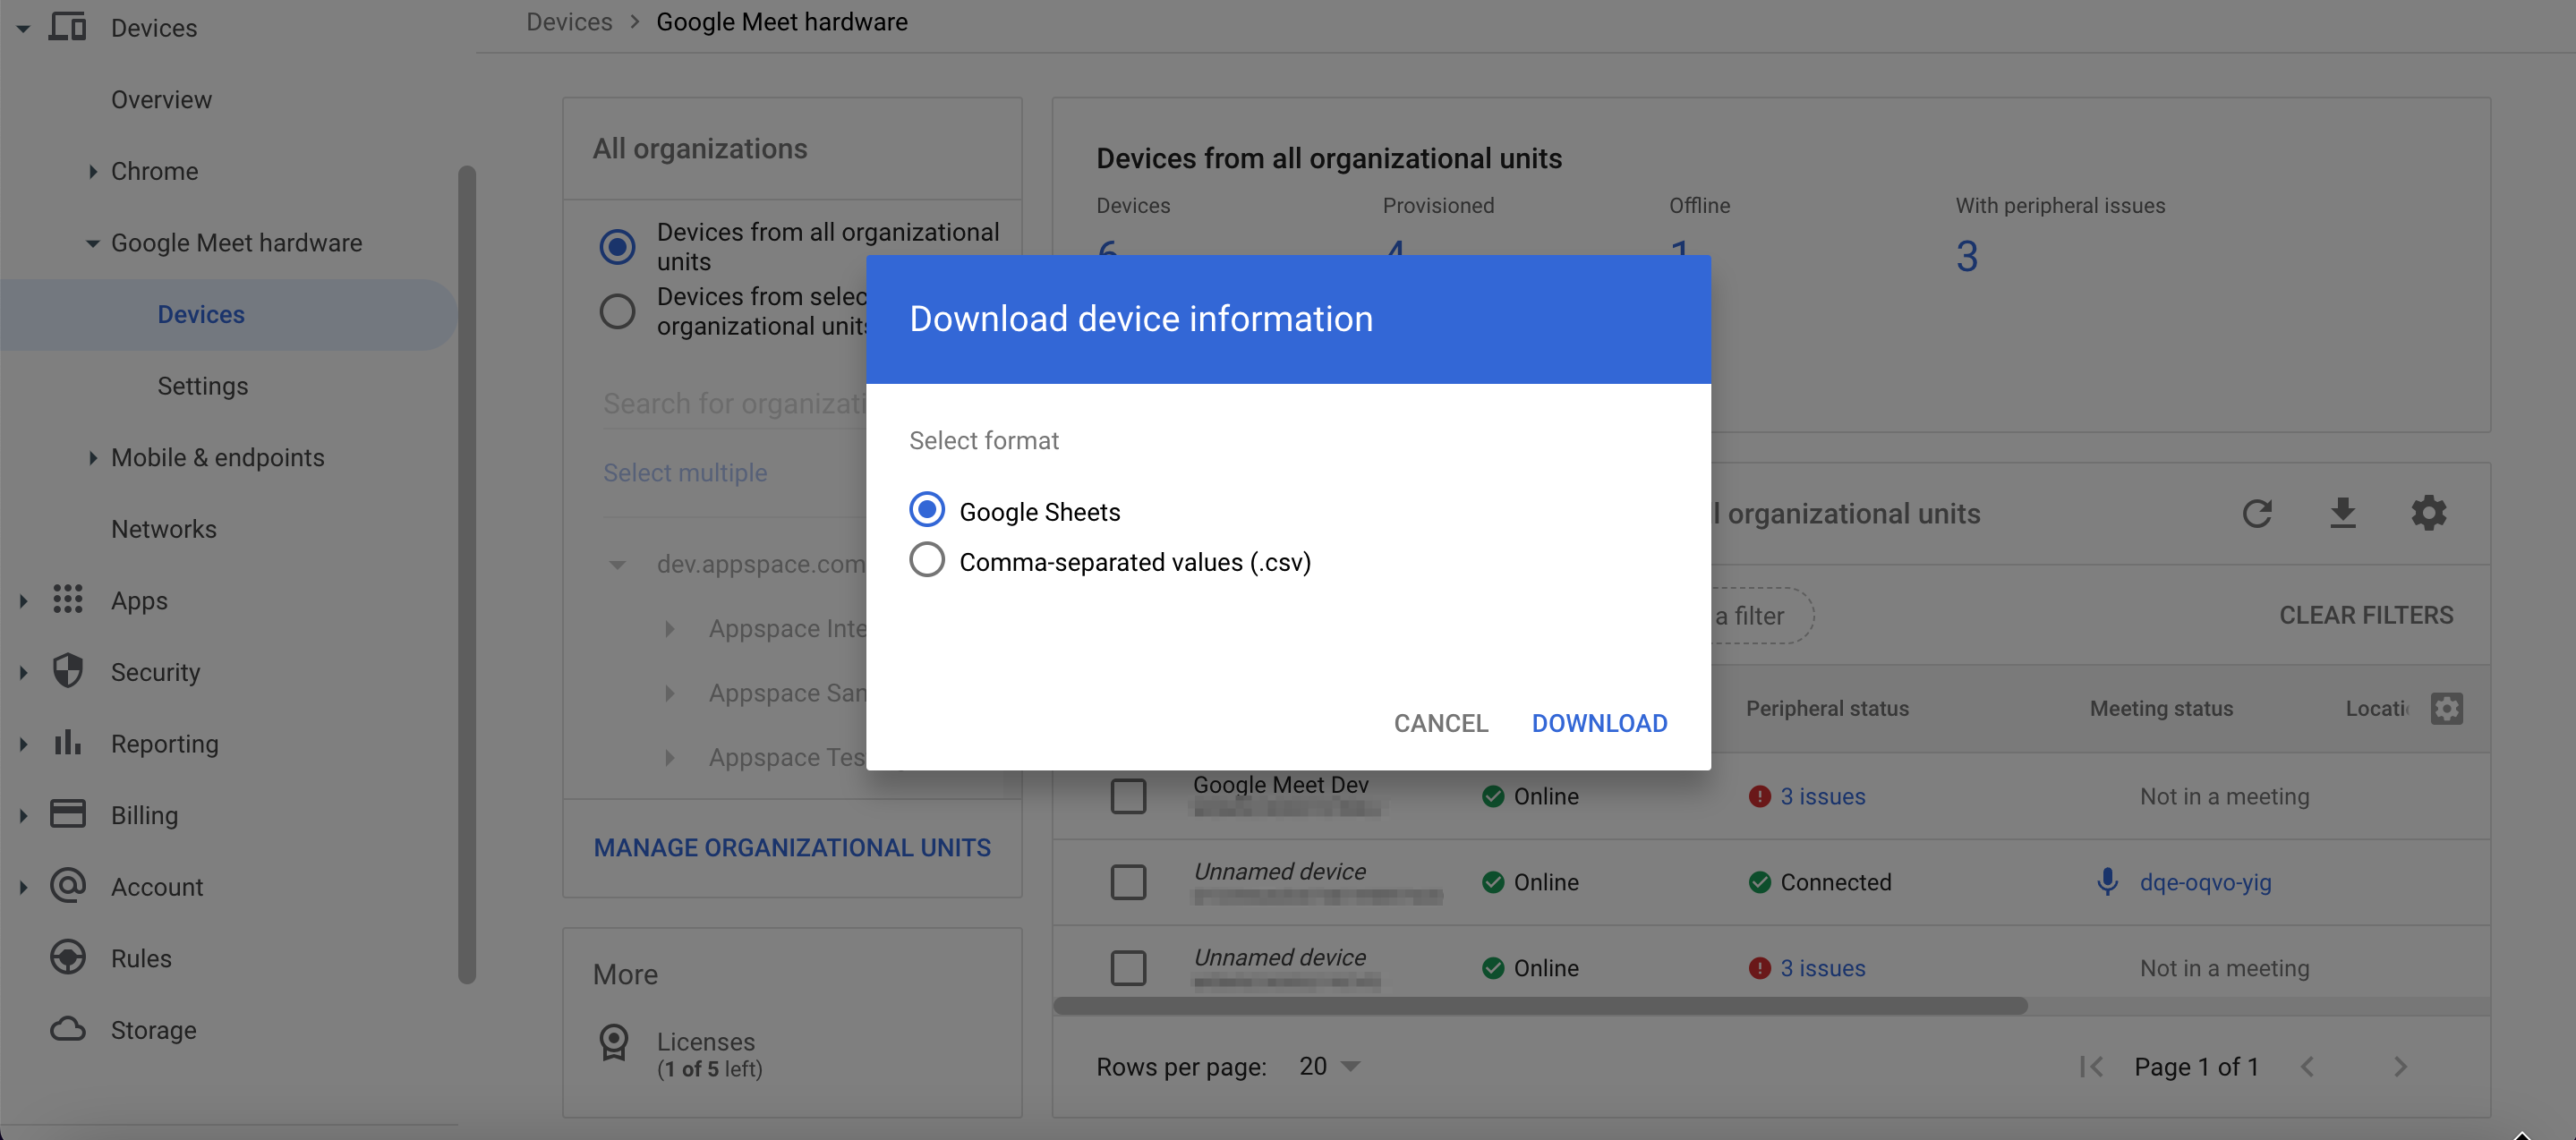
- Select the desired file format to be downloaded in the Download device information section, and click Download.
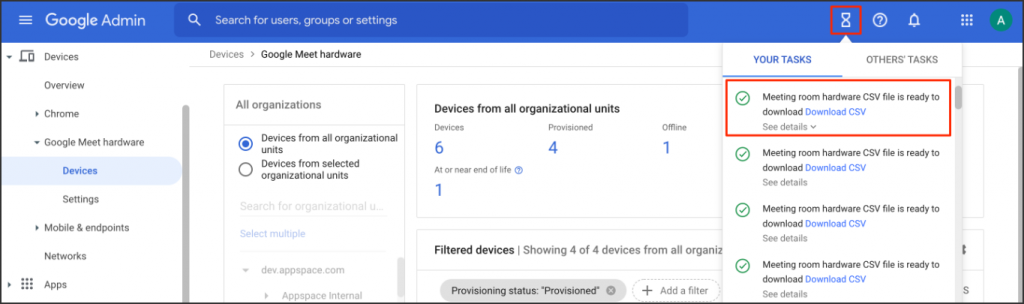
- Once completed, select Task > Download CSV to view the CSV file.
- In the CSV file, search for integrationId column to get the Google Meet device serial number.
- Follow the instructions from Step 1 onwards in the Register Device(s) section of the Register Devices with Serial Numbers article to register one or more devices by directly adding the serial numbers, MAC addresses, or device identities (which may be unique IDs) in the Appspace Device Registration window.
- In the Channel selection mode field, select one of these playback options and assign a channel (if already created):
- Channels will autoplay sequentially – this option is currently available only for playlist channels. Channels with autoplay based on the playlist sequence or any scheduling or dayparting settings configured.
- Administrators can select a single channel – ideal for signage, you may select either a playlist channel, an advanced channel or a live channel. However, to select a channel here, the channel must already be created prior to this registration. If the channel has not been created, you may skip this step and assign a channel later.
- The Appspace content will be displayed as a screensaver/wallpaper when the Google Meet device becomes idle.
Limitations
The following are some known issues and limitations:
- As Google Meet devices running the Appspace App do not support interactivity, the “Users can browse published channels” (Channel Browsing mode) channel playback mode is not supported.
- As the Google Meet device will only display the channel and its contents in non-interactive mode, any interaction with the device screen during playback will cause it to exit the Appspace App.
- We do not support portrait mode, consistent with other PWA based-device behaviour.
- If using a multi-zone playlist channel, you may only add one Appspace card to one of the zones. In this release (Appspace App 2.50), we do not support playing two cards simultaneously in two different zones.
- Only 6-code registration is supported, with advanced registration options planned for future releases.
Related Links
- Google Article: Display custom screen saver images or digital signage content – https://support.google.com/a/answer/11390122?hl=en