Advanced account security
Appspace comes with more advanced account security features that may be enabled by administrators. These include the options to enforce a maximum number of failed attempts before a user’s account becomes locked as well as requiring user passwords to conform to meet certain complexity requirements to be deemed acceptable.
This guide will cover two key security features:
Prerequisites
- Appspace user credentials with Portal Administrator role
- Appspace On-prem deployment
Enabling Account Lockout (Failed Attempts)
Navigate to System > Configuration from the Appspace menu.
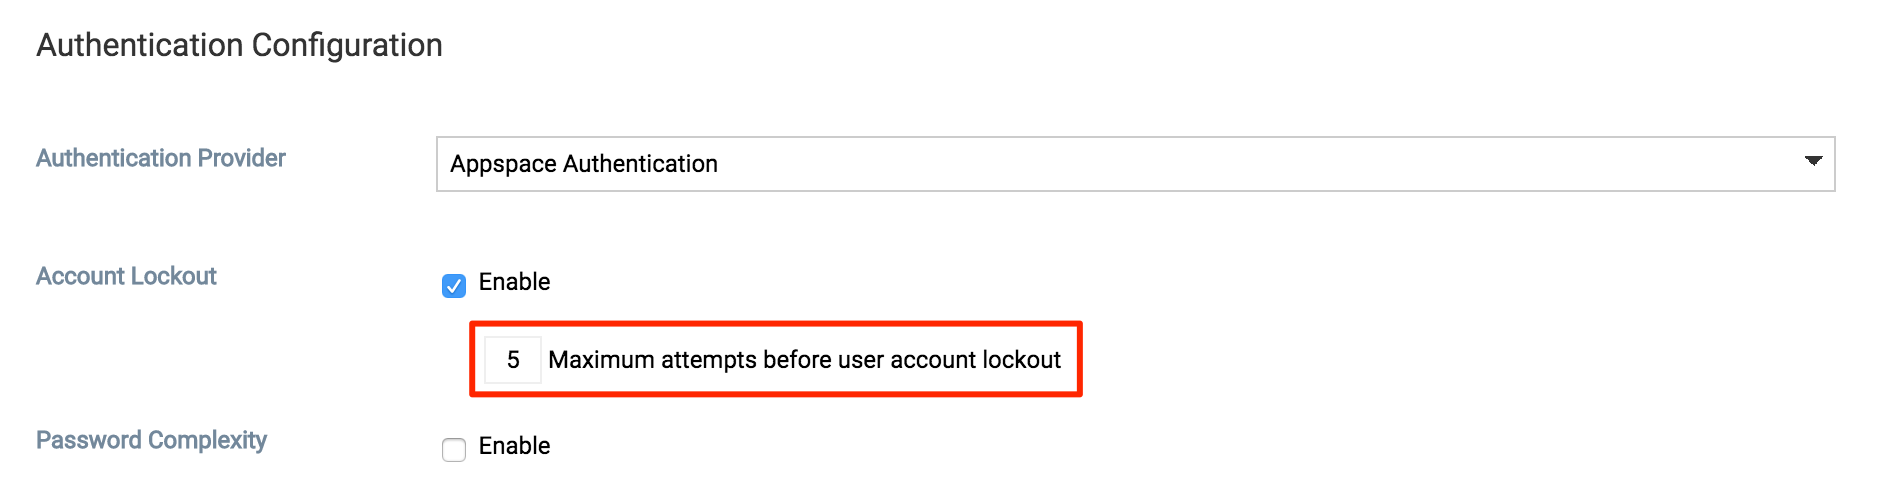
Click the Authentication tab, and enable the Account Lockout feature by checking the Enable checkbox.

Once enabled, you will also be presented with the option of defining the maximum number of attempts before a user’s account becomes locked.
Click Save once complete, and Yes to confirm settings.
The system should automatically detect a change to the Appspace settings and prompt you with a notification at the top of the page. Click the Click Here link.
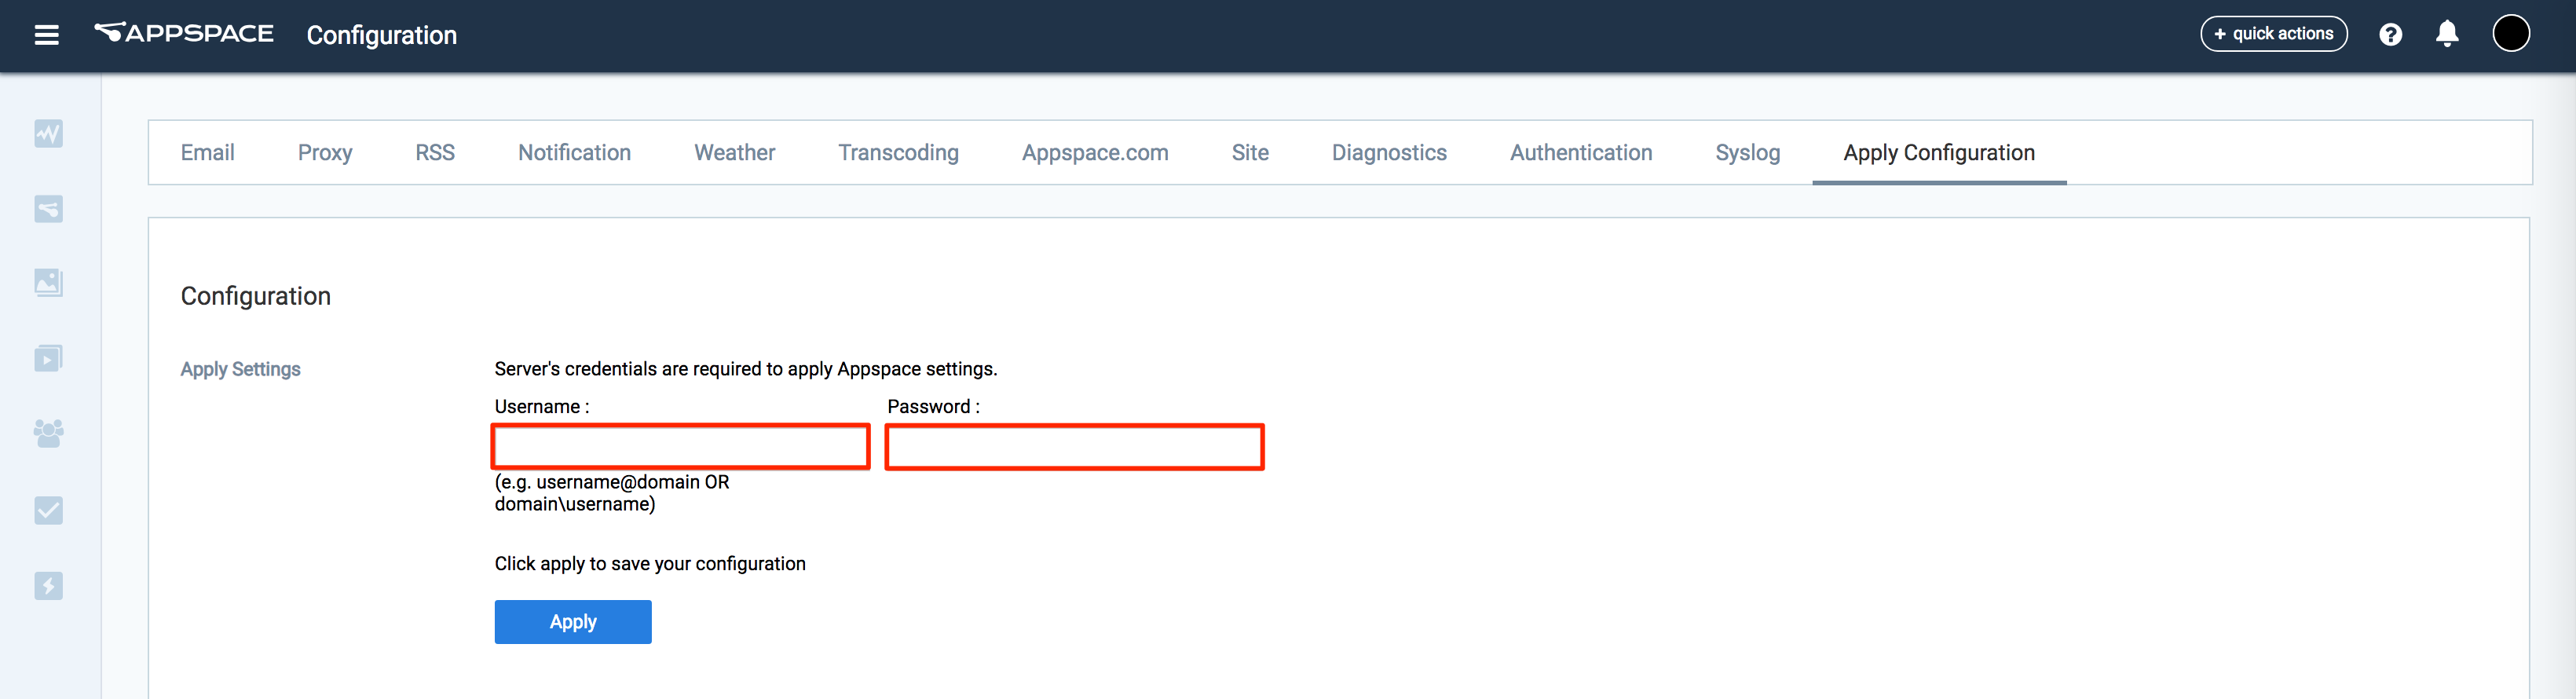
You will automatically be taken to the Apply Configuration tab. To finish applying the changes to the system settings, enter your Windows Server credentials and click Apply.
Warning
You must input your Windows Server Administrator credentials or an account with local administrator privileges to make and apply changes to server settings.
This is NOT your Appspace on-prem server administrator credentials or your Appspace Cloud user credentials.
Click Yes to confirm and to restart your Appspace server. You should see a message indicating the server restart progress.
Click OK to complete the process.
Enabling Password Complexity
Navigate to System > Configuration from the Appspace menu.
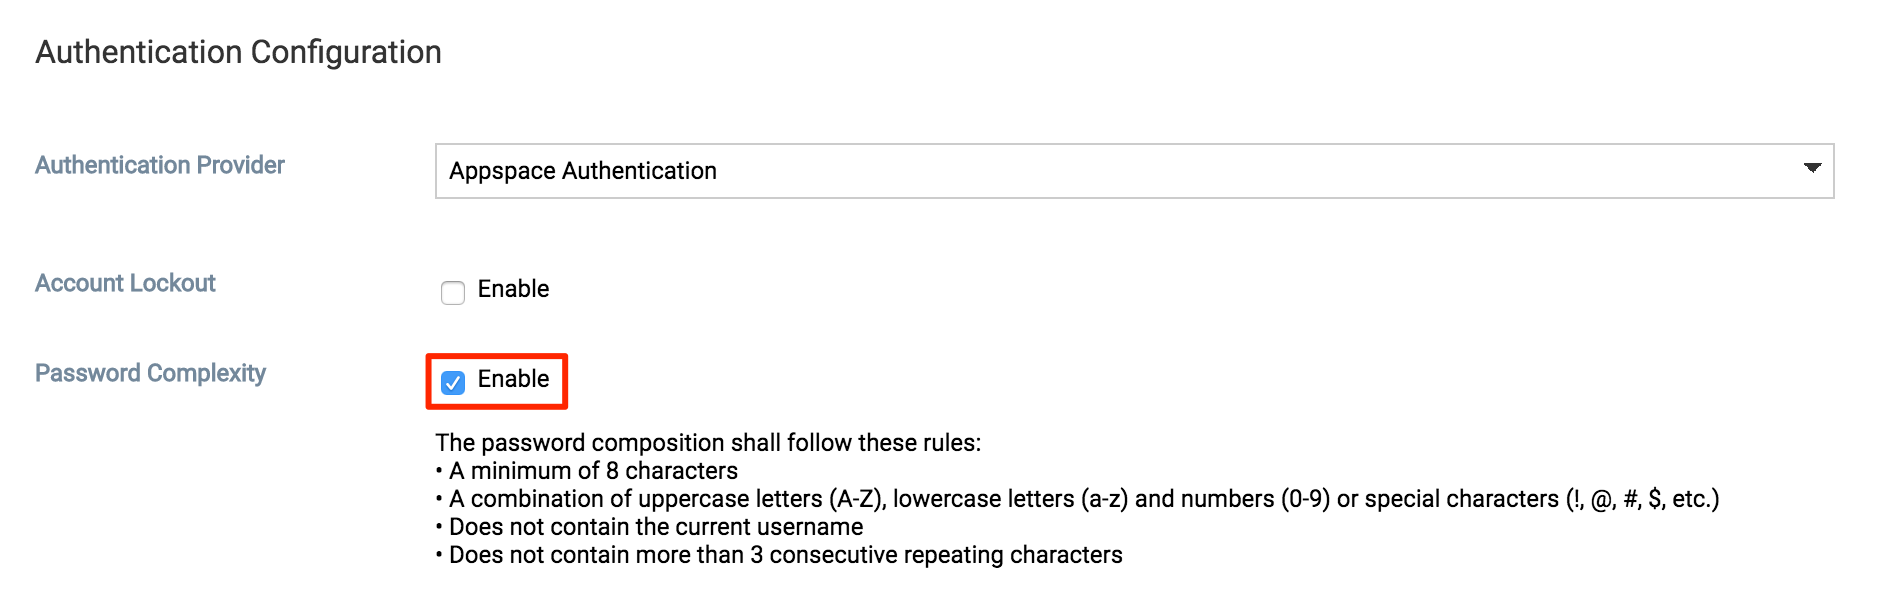
Click the Authentication tab, and enable the Password Complexity feature by checking Enable checkbox.
The Appspace server’s password complexity rules that will be enforced will be clearly listed/defined on the screen.
Click Save once complete, and Yes to confirm settings.
The system should automatically detect a change to the Appspace settings and prompt you with a notification at the top of the page. Click the Click Here link.
You will automatically be taken to the Apply Configuration tab. To finish applying the changes to the system settings, enter your Windows Server credentials and click Apply.
Warning
You must input your Windows Server Administrator credentials or an account with local administrator privileges to make and apply changes to server settings.
This is NOT your Appspace on-prem server administrator credentials or your Appspace Cloud user credentials.
Click Yes to confirm and to restart your Appspace server. You should see a message indicating the server restart progress.
Click OK to complete the process.