Upgrade to Appspace 7.0 on-prem
This article provides the instructions to perform a full upgrade to Appspace on-prem 7.0, for existing Appspace customers running an older version of Appspace on-prem.
Please ensure you meet the prerequisites, and ensure your older version of Appspace has been upgraded according to our set upgrade paths.
Please follow the upgrade instructions in this order:
- Download Prerequisite Software
- Uninstall Appspace Installation Center
- Install Prerequisite Software
- Install Appspace 7.0
Note
If you are a new Appspace customer looking to install our software for the first time, please refer to the Install Appspace 7.0 on-prem article.
Upgrade Paths
Important
All older versions of Appspace on-prem require an interim upgrade before you can upgrade to the latest version. You must upgrade any older version of Appspace on-prem to Appspace 6.2.4 prior to proceeding with this article.
See the following table for the upgrade path of your Appspace on-prem version.
| Starting Version | Upgrade Paths |
|---|---|
| Appspace 7.0.1 | 7.0.1 |
| Appspace 6.2.4 | 6.2.4 > 7.0.1 |
| Appspace 6.1.0 | 6.1.0 > 6.2.4 > 7.0.1 |
| Appspace 6.0.3 | 6.0.3 > 6.2.4 > 7.0.1 |
| Appspace 5.8.0 | 5.8.0 > 6.0.3 > 6.2.4 > 7.0.1 |
| Appspace 5.5.5 | 5.5.5 > 6.0.3 > 6.2.4 > 7.0.1 |
| Appspace 5.2.3 | 5.2.3 > 6.0.3 > 6.2.4 > 7.0.1 |
| Appspace 5.1.2 | 5.1.2 > 5.2.3 > 6.0.3 > 6.2.4 > 7.0.1 |
| Appspace 5.0.3 | 5.0.3 > 5.1.2 > 5.2.3 > 6.0.3 > 6.2.4 > 7.0.1 |
| Appspace 4.2.2 | 4.2.2 > 5.0.3 > 5.1.2 > 5.2.3 > 6.0.3 > 6.2.4 > 7.0.1 |
| Appspace 4.1.0 | 4.1.0 > 4.2.2 > 5.0.3 > 5.1.2 > 5.2.3 > 6.0.3 > 6.2.4 > 7.0.1 |
Prerequisites
Please ensure you meet all the requirements listed in the On-prem system requirements article.
Appspace on-prem 6.2.4 required for this upgrade. To upgrade to 6.2.4, refer to Upgrading to Appspace 6.2 on-premises.
HTTPS is required for communication to the Appspace on-prem server.
Configure DNS FQDN and install a valid SSL certificate for the Appspace on-prem server.
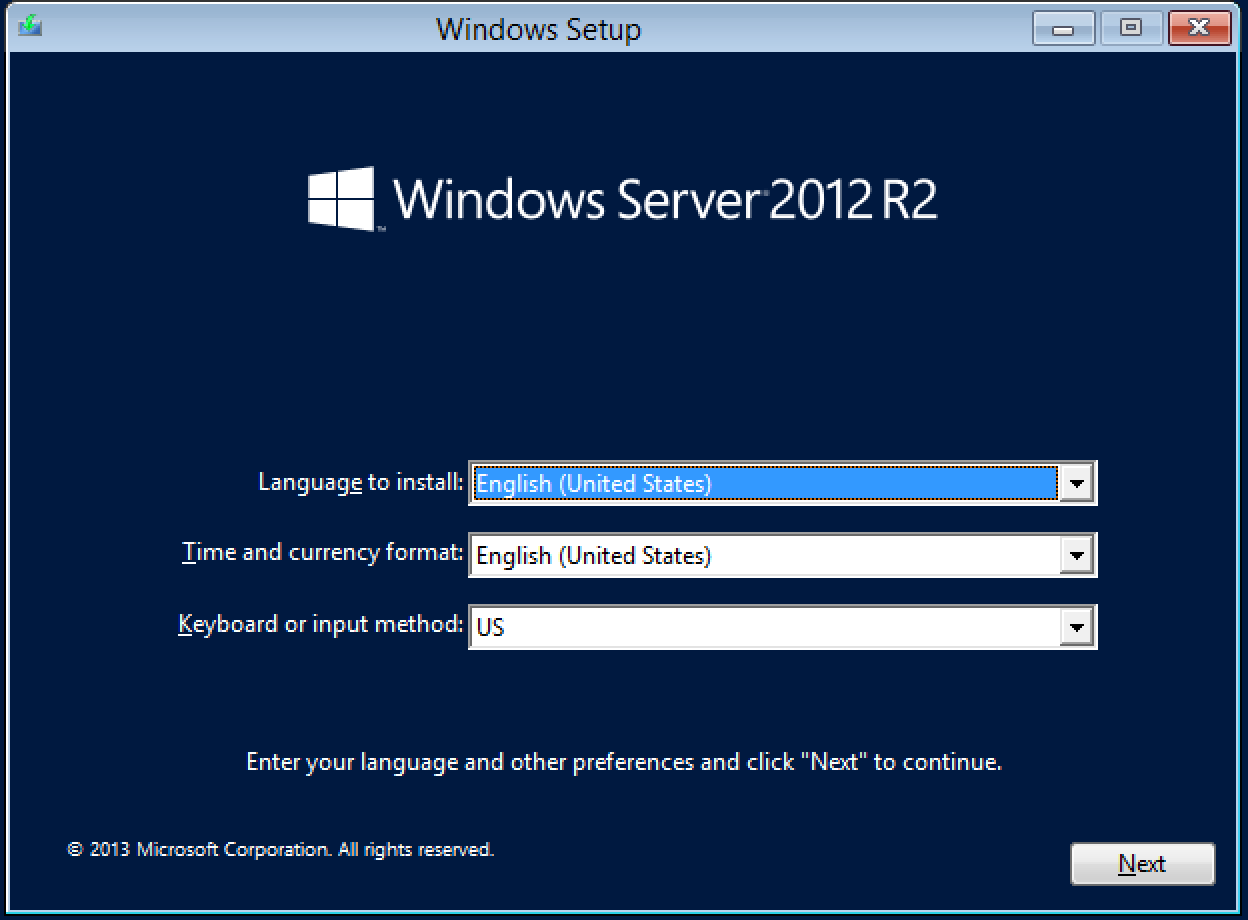
Ensure the KB2999226 patch has been installed on your Windows Server 2012 R2.
If not, install the Universal C Runtime update as per instructions on the Microsoft website: https://support.microsoft.com/en-us/help/2999226/update-for-universal-c-runtime-in-windows
If Shared IIS Configuration is enabled, you must disable it and install the IIS URL Rewrite feature manually on each web server, by following the instructions here: https://social.technet.microsoft.com/wiki/contents/articles/25762.how-to-install-and-configure-iis-url-rewrite-over-iis-shared-configuration-feature.aspx
The Appspace Installation Center may not be able to install the IIS URL Rewrite feature correctly if the Shared IIS Configuration is enabled.
Turn off anti-virus software prior to installation. If unable to turn off anti-virus software due to company policies, configure the anti-virus software to exclude all Appspace folders and databases.
Important
When not turned off, anti-virus software blocks installer processes from running, which prevents the installation of some Appspace files. Overall installation time is also slower.
Download Prerequisite Software
Warning
Only download these software and DO NOT install yet.
Download the following database, according to your preference. Ideally the same database used in your previous Appspace installation:
MySQL: Download MySQL 5.7.x: http://downloads.mysql.com/archives/installer/.
MS SQL: If you are using MS SQL 2012, no upgrade required.
Please contact Appspace Support to get the latest Appspace Installer (Appspace Installation Center).
Proceed to the instructions in the next section below.
Uninstall Appspace Installation Center
You must first remove the previous build of Appspace Installation Center.
Go to the Windows Control Panel, and double-click Programs and Features.
In the list of installed programs, select Appspace Installation Center and click Uninstall.
Proceed to the instructions in the next section below.
Install Prerequisite Software
Important
- Links to the installation instructions on the provider’s website are provided.
- Please ensure you take note of and complete the specific configuration required for each application, described in each step below.
- Please right-click each installer file and select Run as Administrator to install.
Please install the prerequisite software downloaded earlier, in the following order:
Install all the necessary updates for Windows Server 2012 R2 Standard Edition as per instructions on the Microsoft website: https://support.microsoft.com/en-us/help/3067639/how-to-get-an-update-through-windows-update
Important
Ensure that there are no pending Windows server updates, as there may be installation conflicts between the Appspace installation process and windows server updates being installed simultaneously in the background.
Upgrade the Appspace database:
MySQL
Upgrade the previous MySQL 5.6 database, to MySQL 5.7 by following the instructions here: https://dev.mysql.com/doc/refman/5.7/en/windows-upgrading.html
MS SQL
If you are using MS SQL 2012, no upgrade required.
Proceed to install the Appspace 7.0 Installer.
Install Appspace 7.0
Note
The installation of Appspace 7.0 on-prem involves the installation of two Appspace installers. The Appspace Installation Center Setup file is included as part of the Appspace 7.0 Installer.
The Appspace Installation Center (AIC) is used for the installation as well as the maintenance or upgrade of Appspace software. Please remove any old instances of the Appspace Installation Center from the Windows Control Panel > Add/Remove Programs, prior to installation.
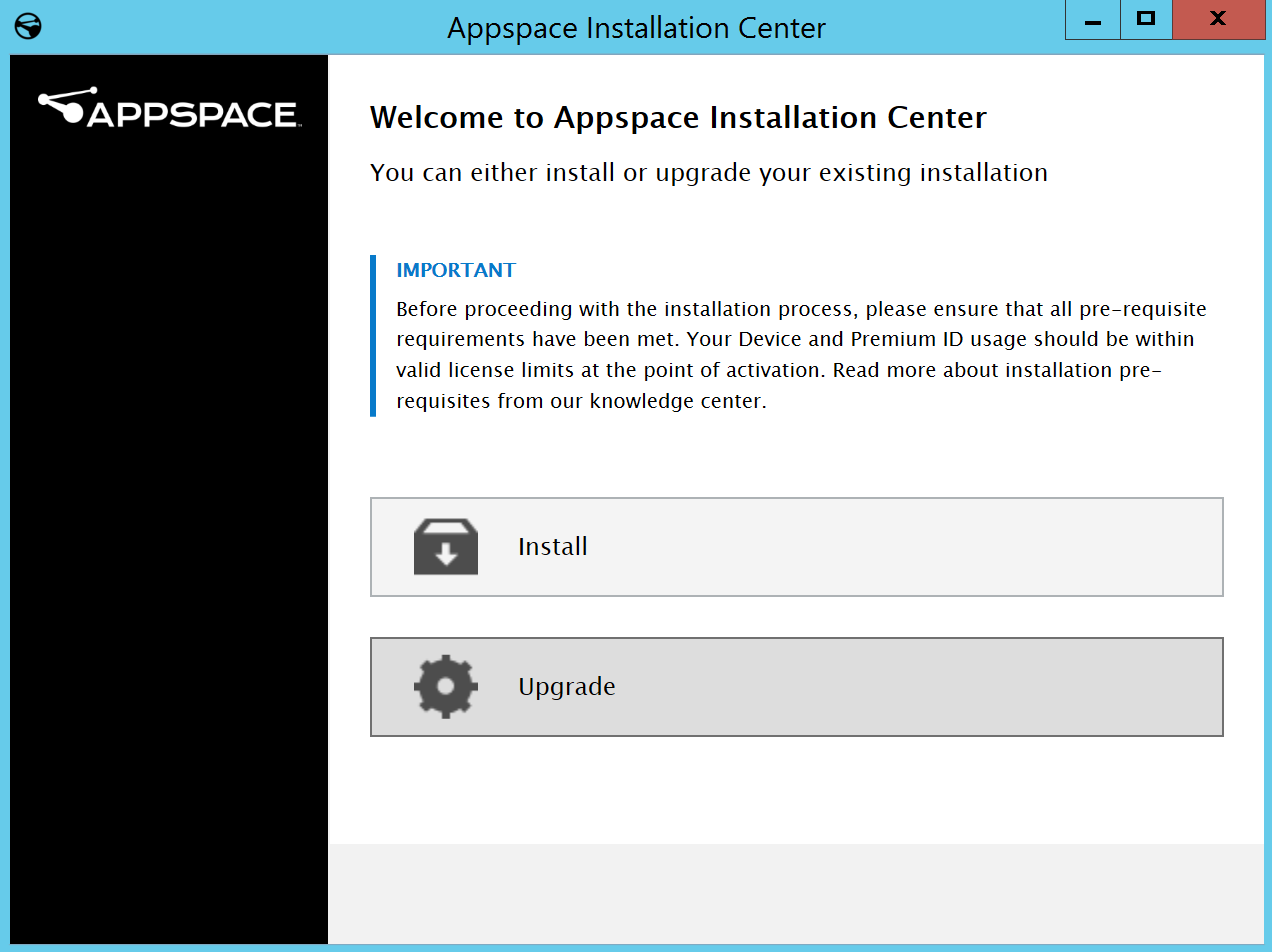
Right-click the Appspace 7.0 Installer setup file on your on-prem server, and select Run as administrator to launch the installer. Click Begin Installation.
Read the Appspace’s Software License Agreement. If you agree to the terms, check the checkbox, and click Agree.
Click Next once you have ensured the installation paths for the Application, Content, and Data paths are correct.
Enter in Host Name URL of the server, as it will be used to identify and access the Appspace console once installation is complete.

Review the list of applications and services that will be installed, and click Install.
The Appspace 7.0 Installer will begin installing the required applications, services, and the Appspace Installation Center Setup file. The installation duration varies, and may require the server to be restarted multiple times during the installation process.
Once the Appspace Installation Center Setup is launched during the installation process, click Upgrade.
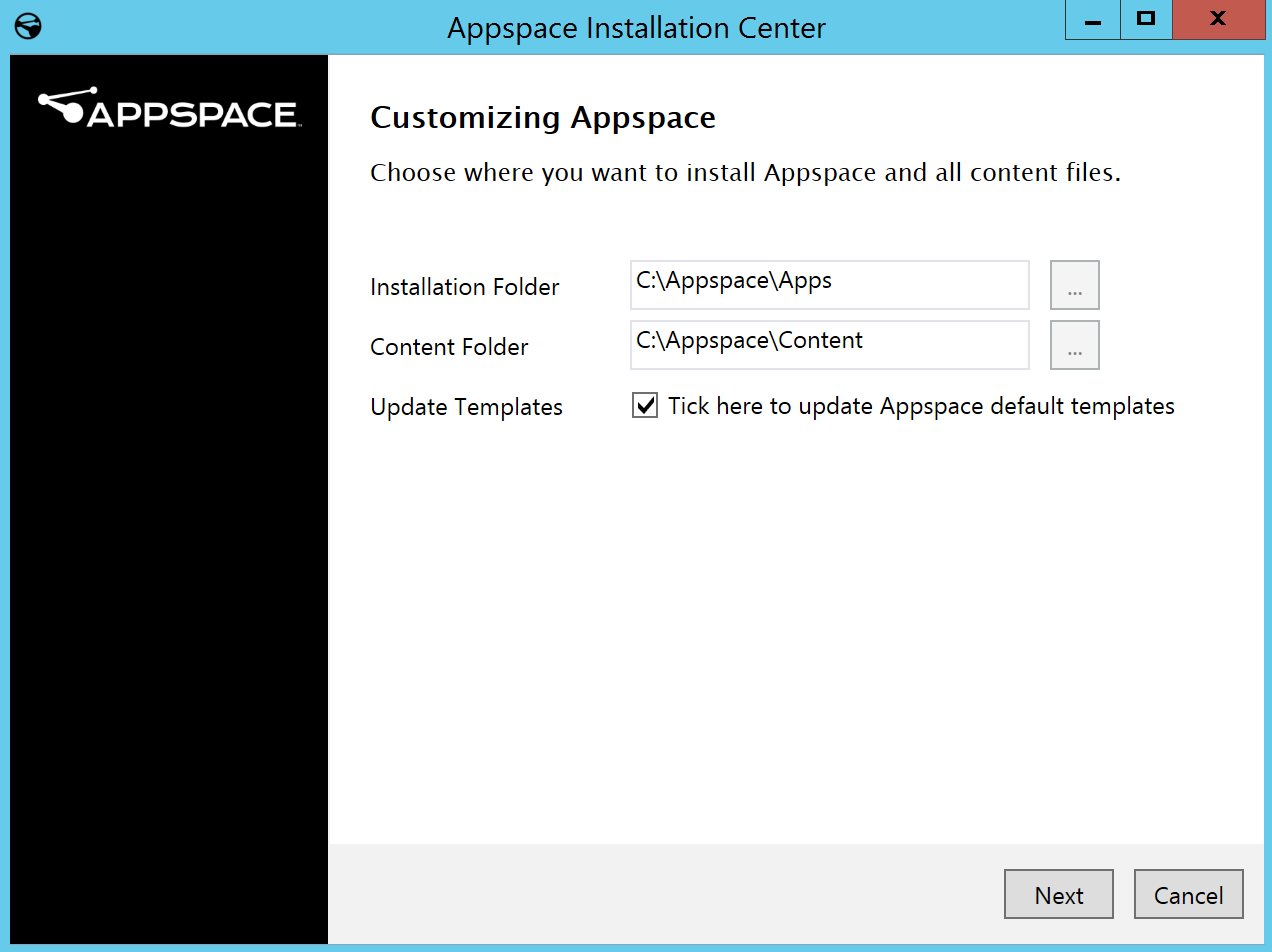
Ensure the Installation, and Content folder paths are correct. Optionally, you may check the Update Templates checkbox to update the Appspace default templates. Click Next.
Select the server Database type from the drop-down menu, and enter in the database Host and root credentials.
You may leave localhost as the Host. If the database engine is installed on a separate server, replace the Host value with the IP address of the remote database server.
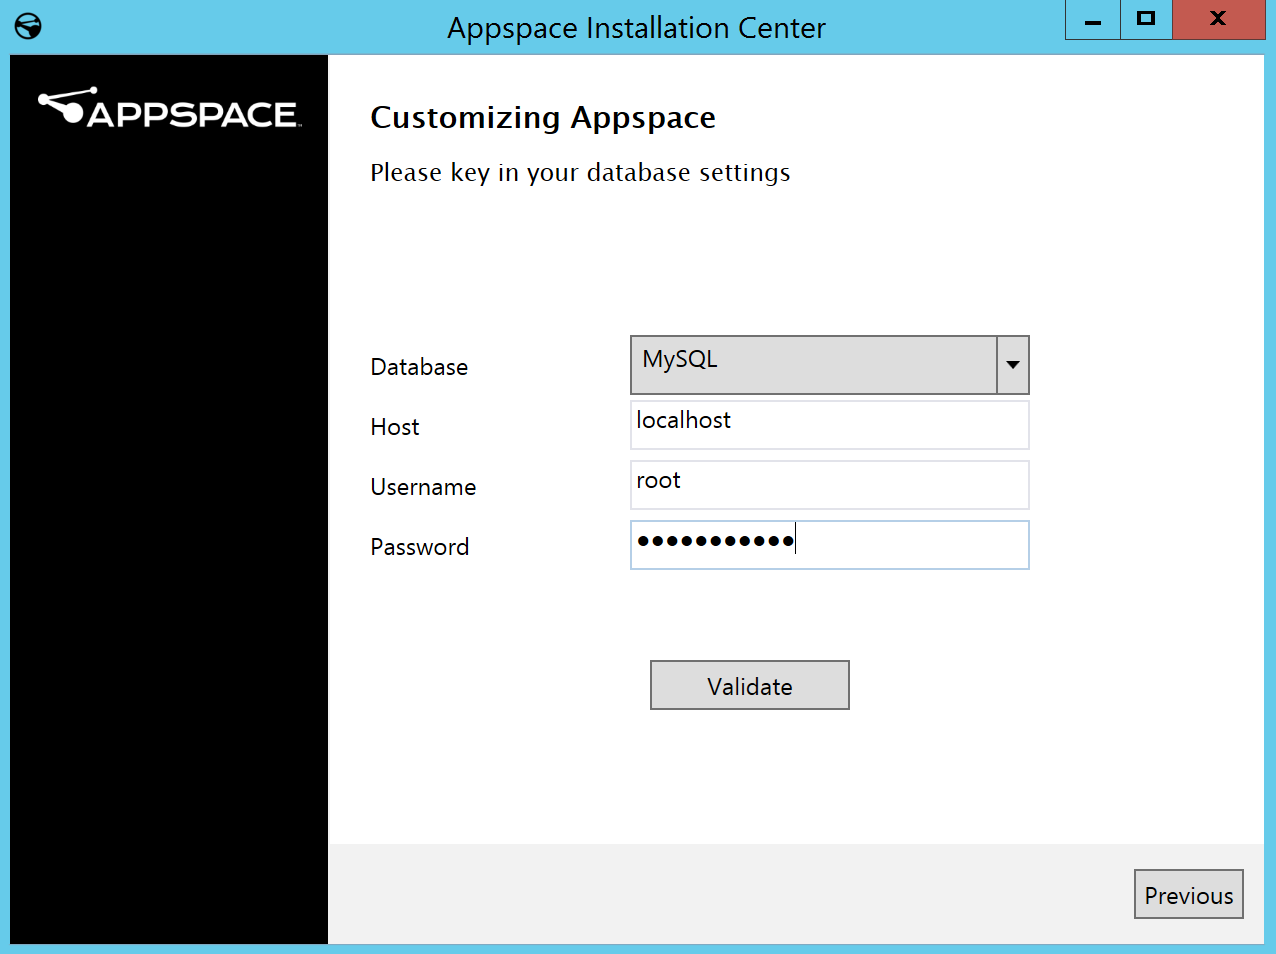
Click Validate to continue the installation process.
Restart the server once the Appspace Installation Center Setup has completed as indicated.
Once restarted, the Appspace 7.0 Installer would continue the installation process.
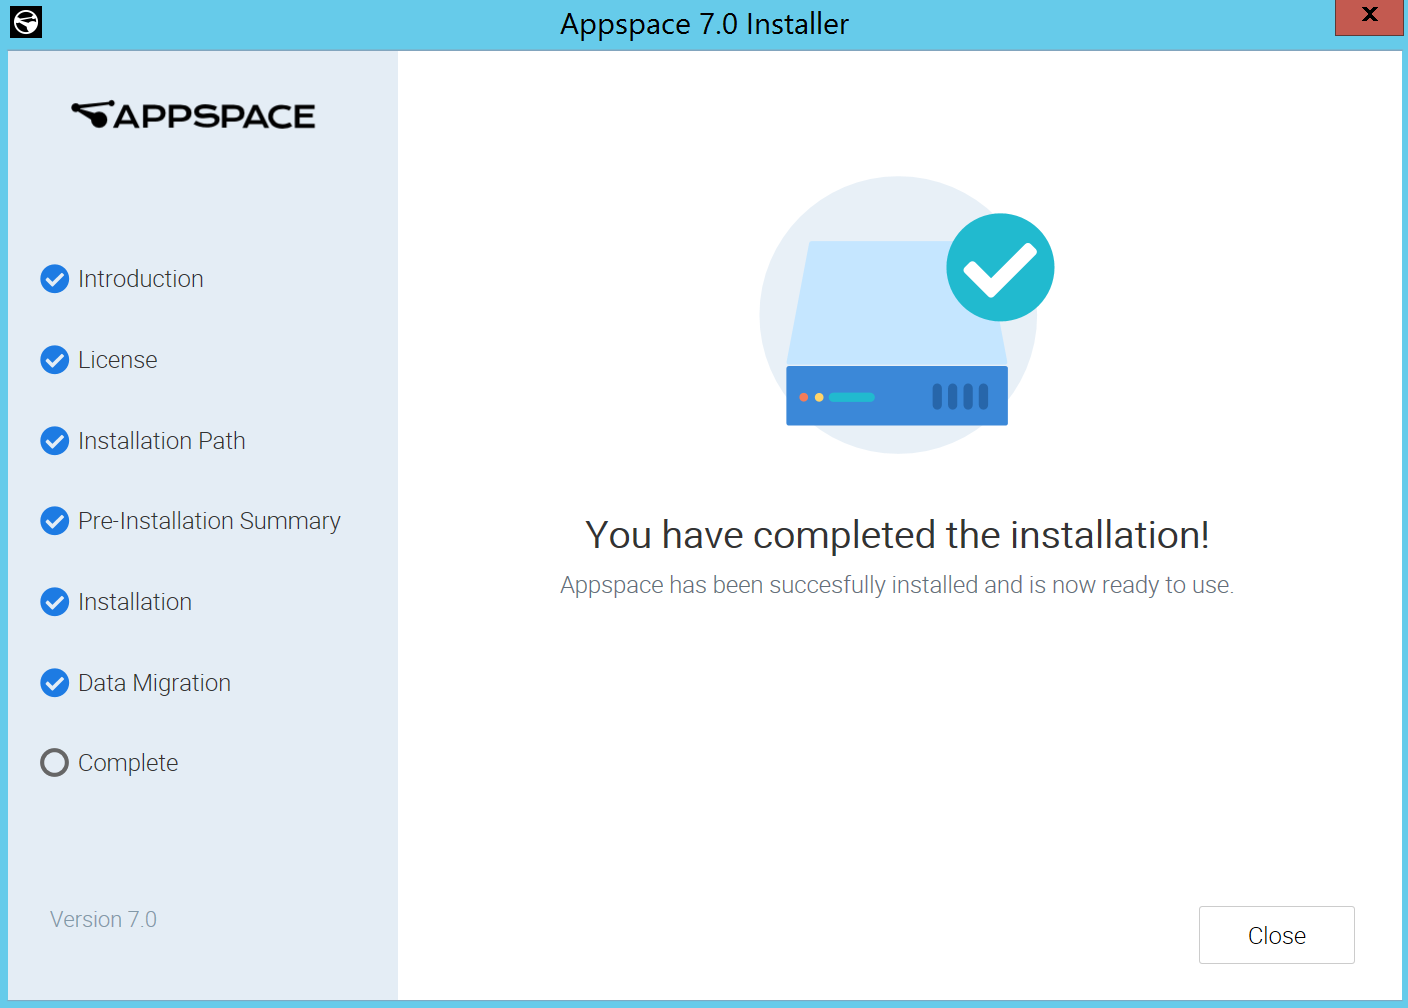
Click Next once the installation process is complete, and Next again at The installation was successful screen.
The Data Migration process will begin. Click Next once the migration process is complete, and Next again at The data migration was successful screen.
Click Close at the You have completed the installation! screen, and OK at the confirmation dialog box.
Launch your web browser and connect to your Appspace console via the following URL:
https://<hostname>
(replace <hostname> with the Host Name entered in Step 3 above)
Note
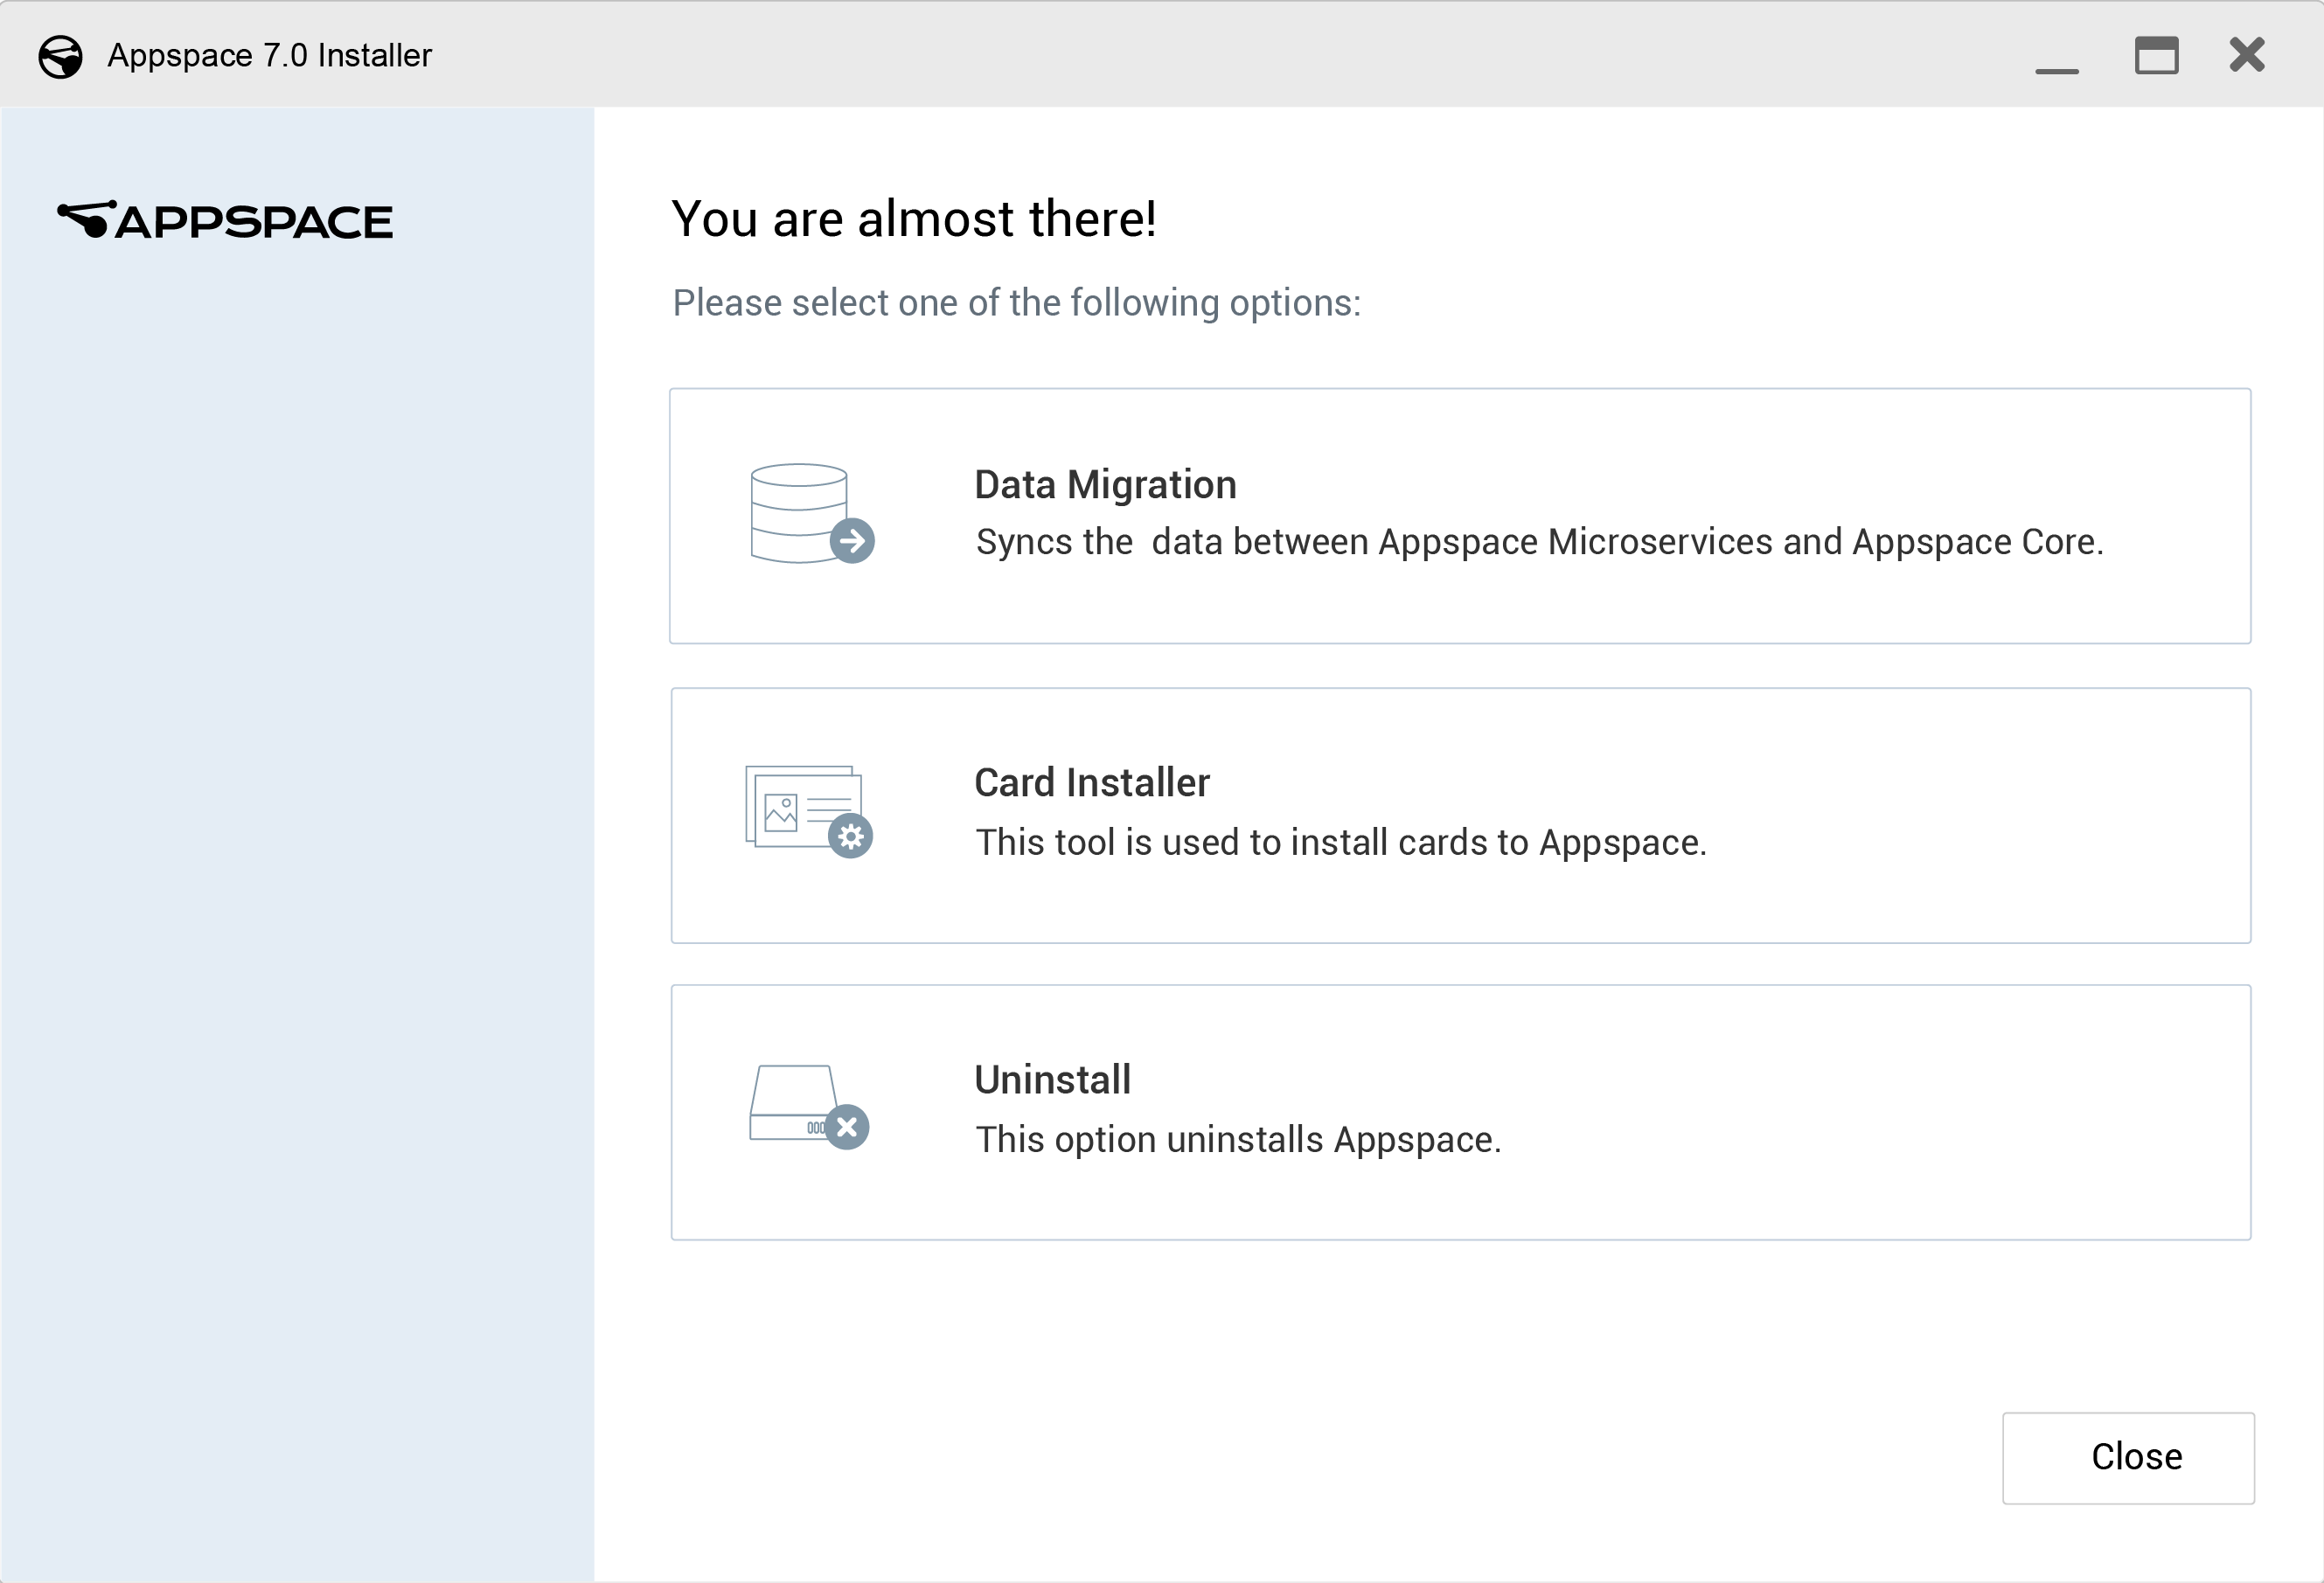
If there was an issue during the data migration or card installation phase, or if you wish to uninstall Appspace 7.0 on-prem, relaunch the Appspace 7.0 Installer setup file, and select one of the following options:
- Data Migration - Select this option if Data Migration previously was not completed during the installation phase.
- Card Installer - Select this option to install Cards (Update existing templates, and themes).
- Uninstall - Select this option to uninstall Appspace 7.0.