Single Sign On (SSO) for single and multiple-tenant deployments
The Single Sign On (SSO) integration feature for on-prem deployments allows users to seamlessly and securely connect to Appspace using a single set of credentials, simplifying username and password management.
This article provides the instructions to configure SSO with ADFS as the Identity Provider, and Appspace as the Service Provider.
- Requirements
- How SSO Works
- Install Active Directory Federation Services
- Configure SSO
- Configure ADFS Relying Party Trust
- Log in with SSO
Requirements
Active Directory Server
- Microsoft Windows Server 2012 R2.
- SSL configured.
- Windows Server Administrator credentials.
Active Directory Federation Services (ADFS)
- Can be installed on the Active Directory Server.
- SSL configured.
- Windows Server Administrator credentials.
Network
- All servers must belong to the same domain or sub domain.
Appspace Server
- Version 5.2 and above.
- SSL configured.
- Windows Server Administrator credentials.
- Appspace Portal Administrator, Account Administrator or Account Owner role
- All users created on the Appspace server must have an email.
How SSO Works
A user starts by trying to log in to Appspace. Upon accessing the login page, the user will be redirected to an SSO login page. The user will then have to authenticate his/her login credentials against the Identity Provider. Upon successful authentication, the Identity Provider will send a SAML assertion to Appspace via the web browser to allow the user to log into Appspace.

Install Active Directory Federation Services
Install the Active Directory Federation Services as per instructions from the Microsoft website: https://msdn.microsoft.com/en-us/library/azure/dn528857.aspx
Note
This can be performed on the AD server or on a separate server.
Configure SSO
Download the Identity Provider (ADFS) metadata. Open a browser and key in the URL https://<ADFS FQDN or IP>/FederationMetadata/2007-06/FederationMetadata.xml.
Note
This metadata is used by the Identity Provider (ADFS) to recognize the Service Provider (Appspace). This process involves downloading the metadata file in XML format, uploading to and re-downloading from Appspace, and finally uploading it to the Identity Provider (ADFS).
Navigate to System > Configuration from the Appspace menu.
Note
You’ll have to be a Portal Administrator to access the Appspace system settings.
Click the Authentication tab, and enable SSO globally by selecting the Enable option. Once done, the SSO configuration menu will be visible.
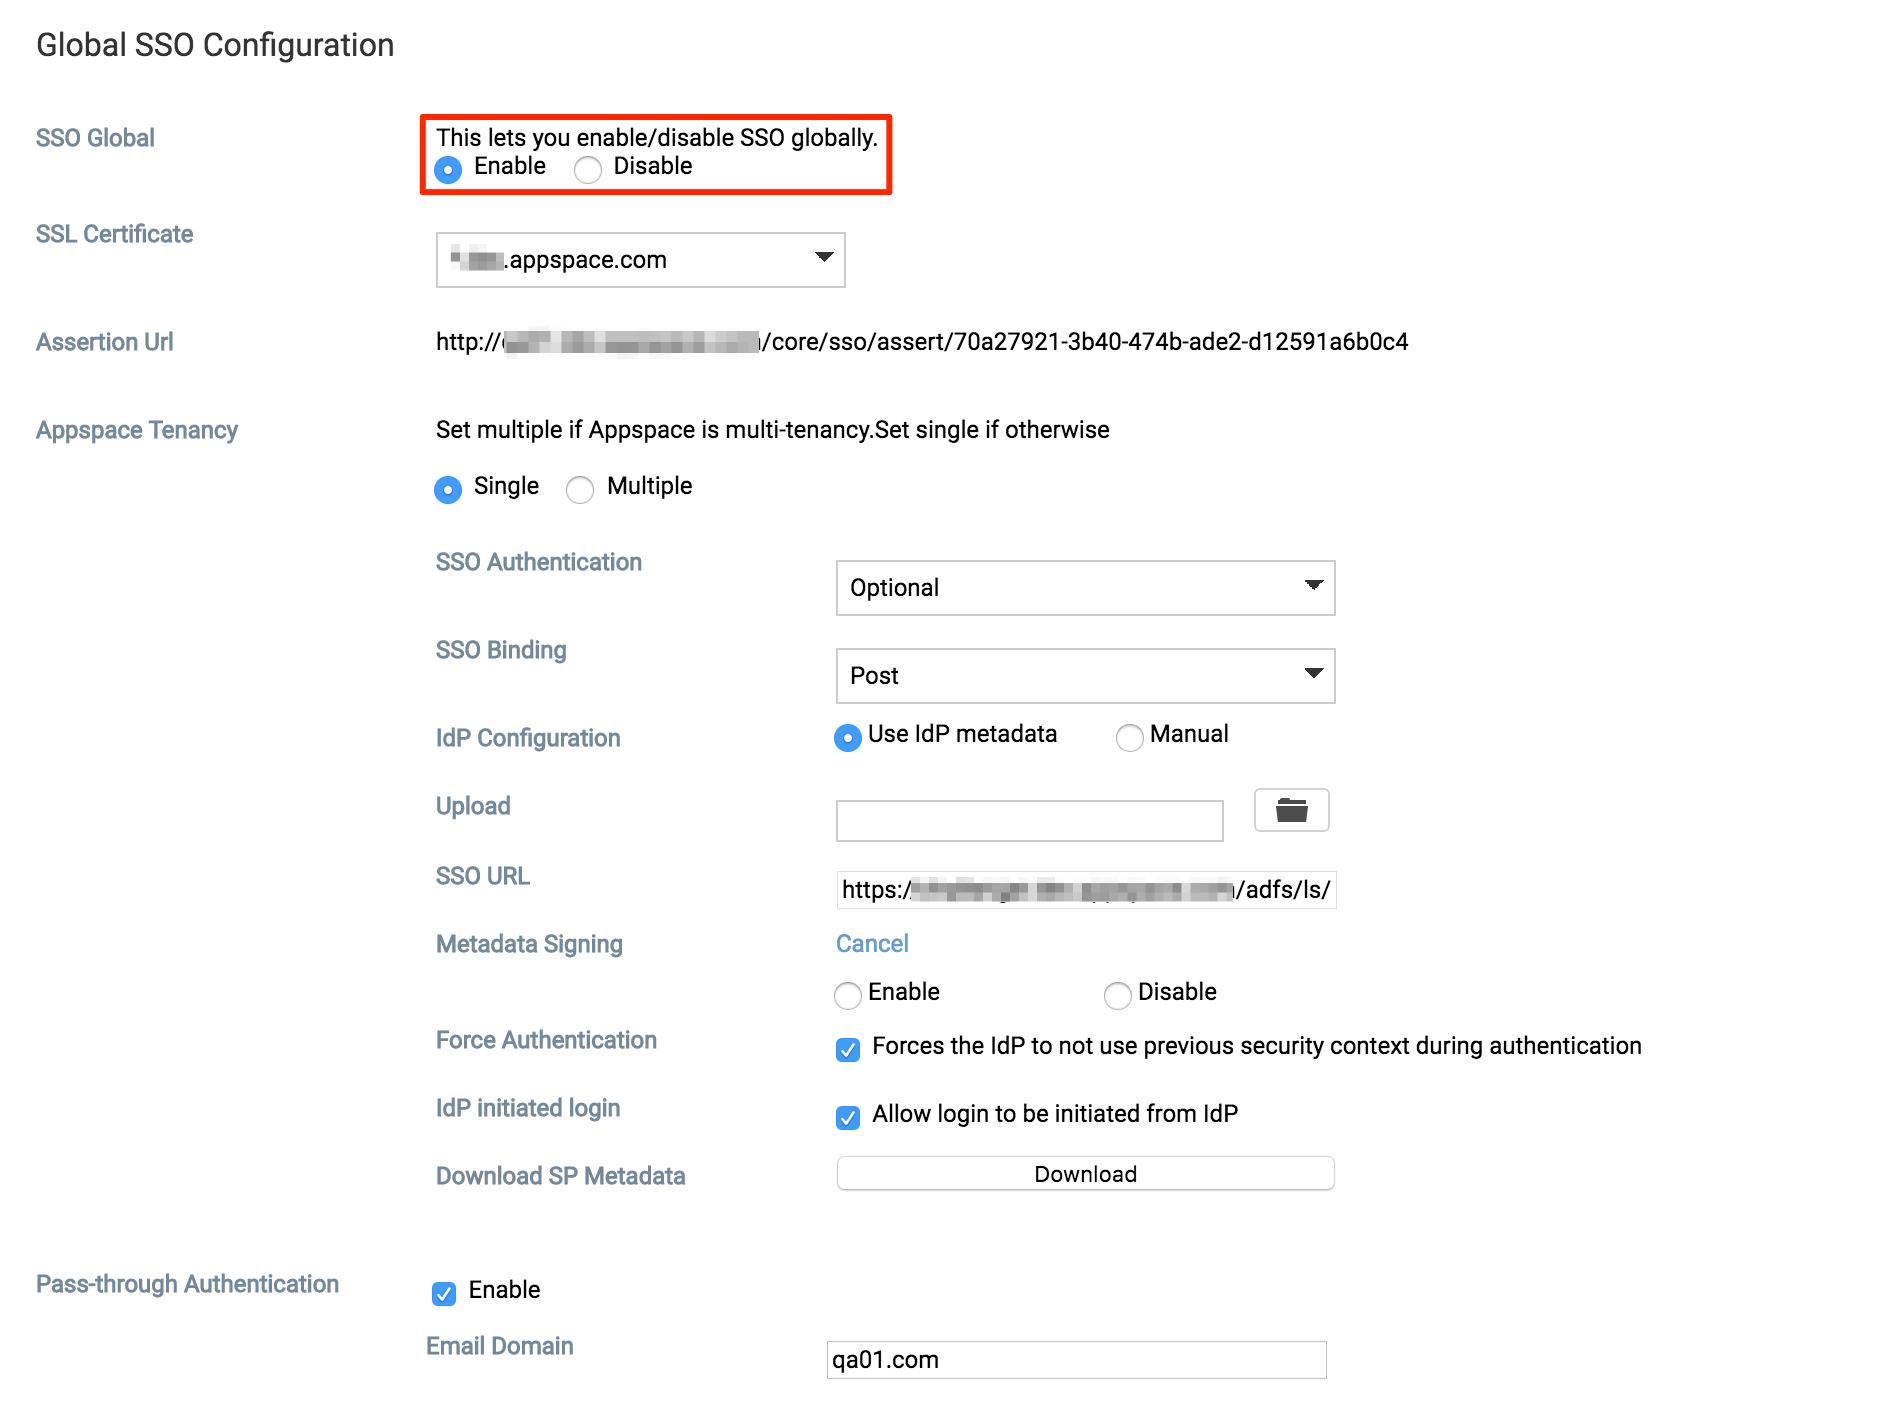
If the Appspace server has a valid SSL certificate installed, the SSL Certificate field will be populated automatically.

In the Appspace Tenancy section, do the following:
Single Tenancy
- Select the Single option, and configure the SSO authentication option.
Multi Tenancy
Select the Multiple option.
Click Save once complete, and Yes to confirm settings.
The system should automatically detect a change to the Appspace settings and prompt you with a notification at the top of the page. Click the Click Here link.
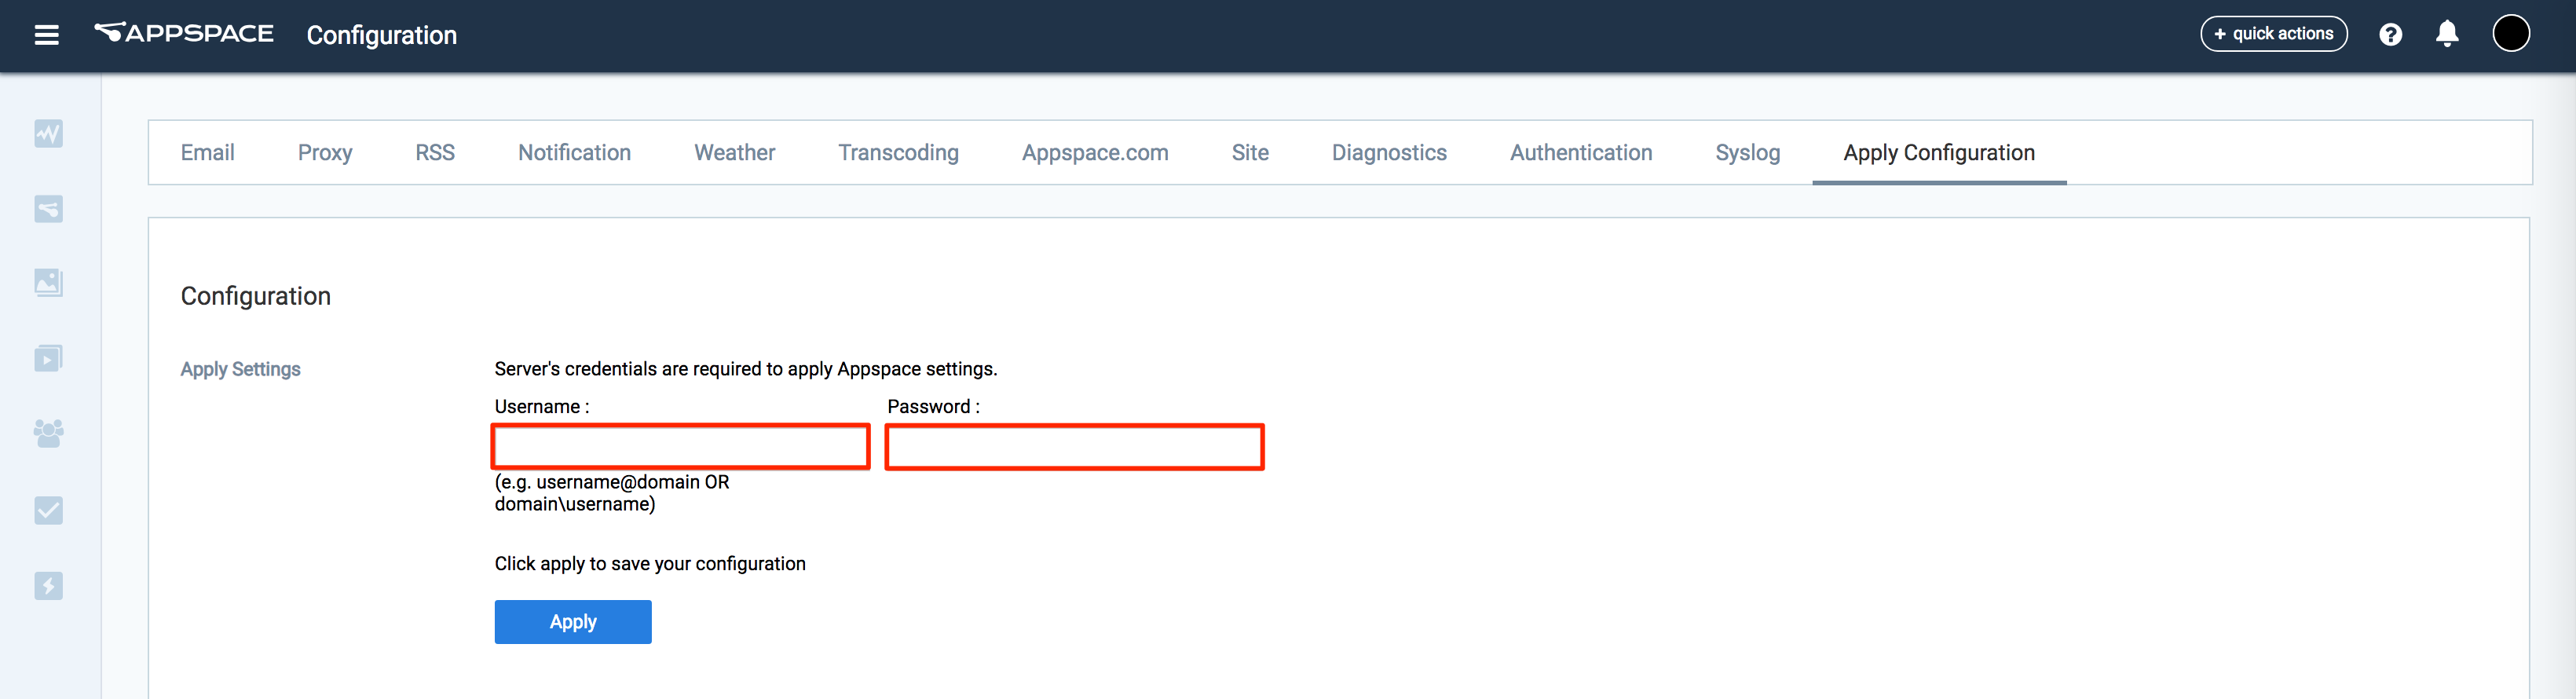
You will automatically be taken to the Apply Configuration tab. To finish applying the changes to the system settings, enter your Windows Server credentials and click Apply.
Warning
You must input your Windows Server Administrator credentials or an account with local administrator privileges to make and apply changes to server settings.
This is NOT your Appspace on-prem server administrator credentials or your Appspace Cloud user credentials.
Click Yes to confirm and to restart your Appspace server. You should see a message indicating the server restart progress.
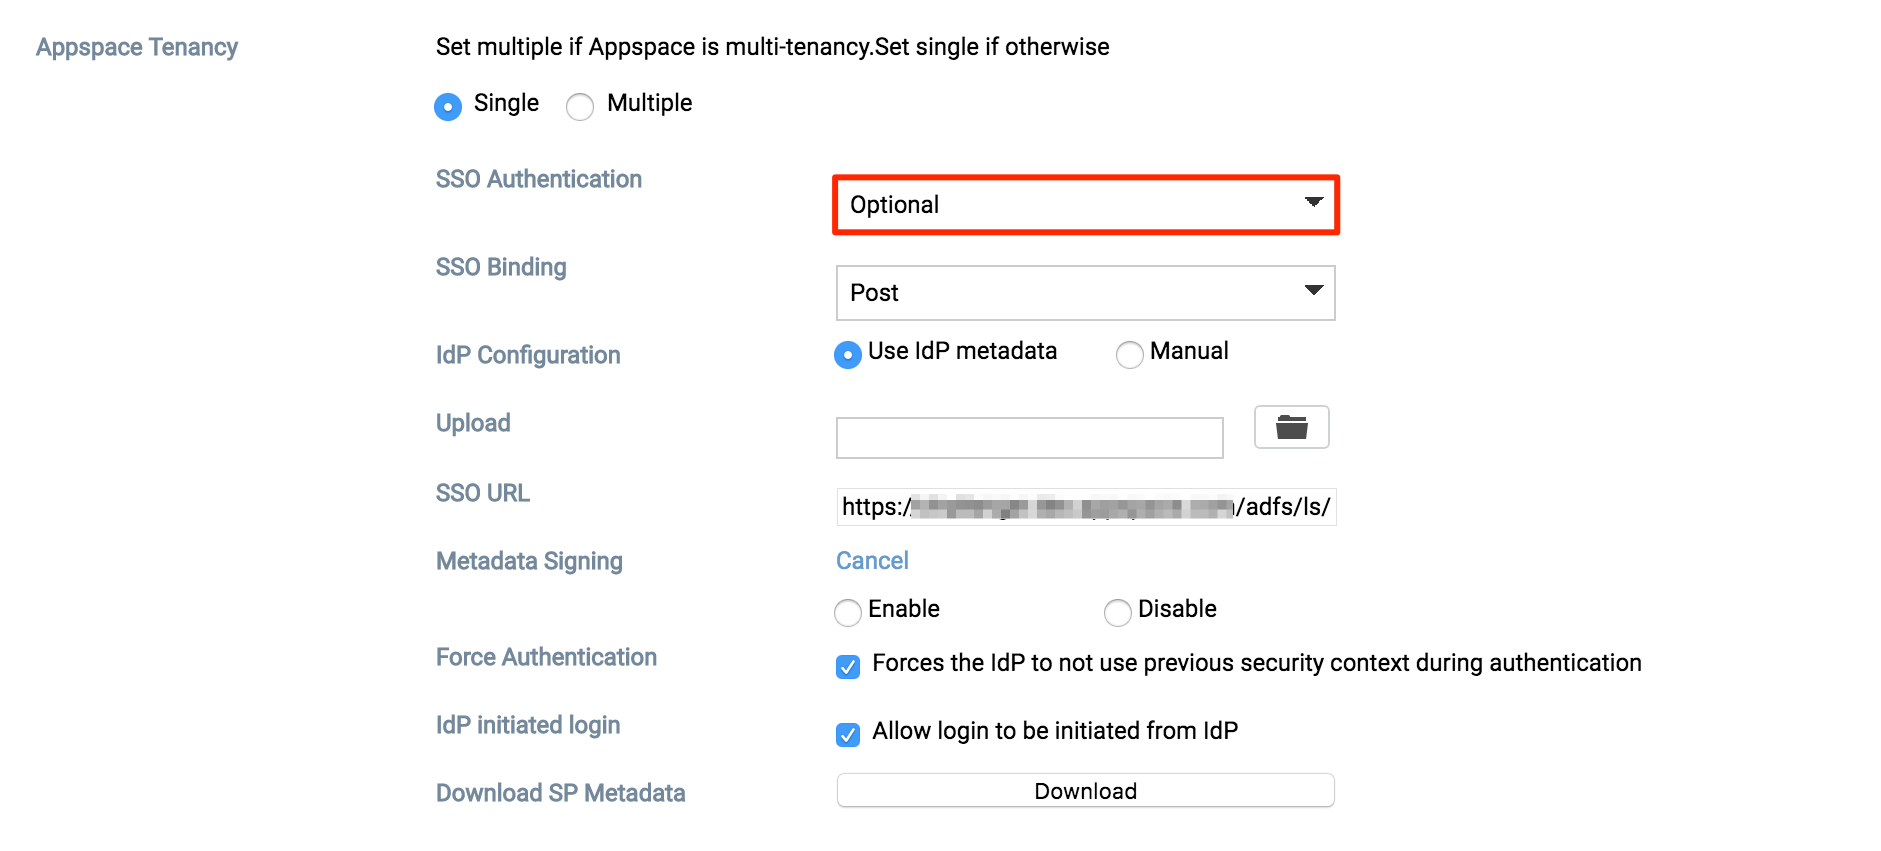
- For each tenanted account, navigate to Account > SSO, and configure the SSO Authentication option.
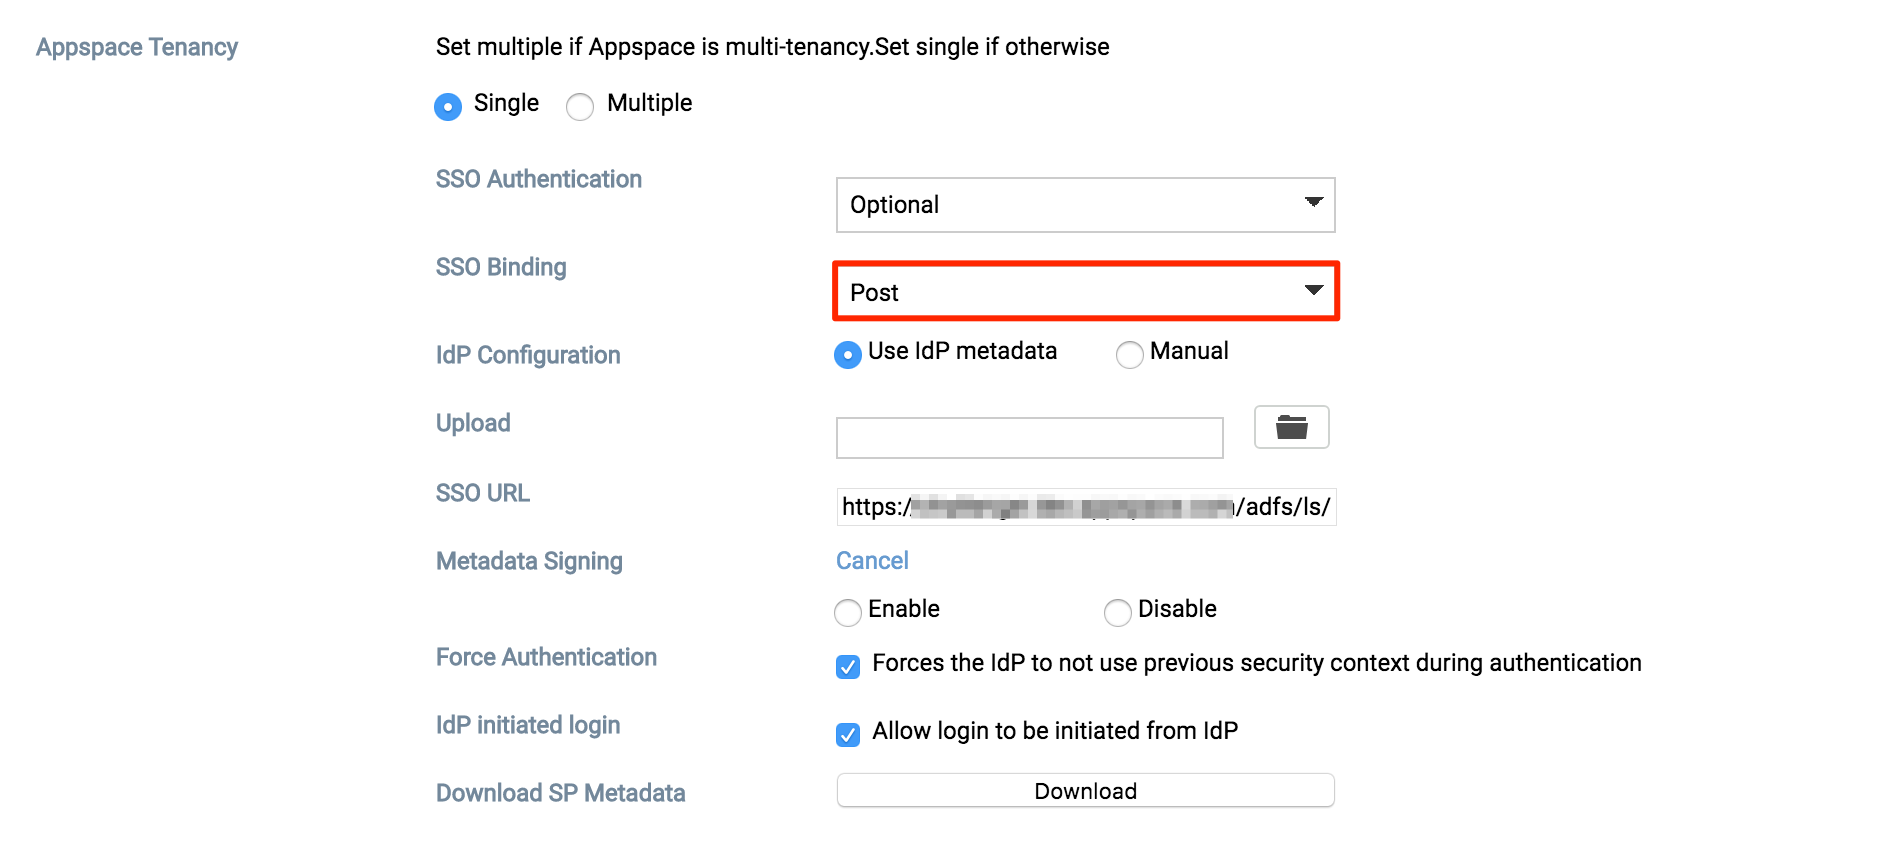
You will be given three SSO Authentication options: OFF, Optional, or Required. We’ll be selecting Optional in this example.
Note
- Optional – Users can select between using their Appspace login credentials or via SSO (AD credentials).
- Required – Users can only login via SSO (AD credentials).
You will be given two SSO Binding options; Redirect or POST. We’ll be using POST in this example.
Note
- Redirect – Users will be redirected to the Identity Provider. SSO details will be passed in a query string with “?SAMLRequest=……” as part of the URL.
- Post – SSO details will not be passed through a query string but will be passed using the POST method. For this method to work, you must ensure that the Identity Provider has direct access to the Appspace server.
You will be given two Identity Provider (IdP) Configuration methods; Use IdP Metadata or Manual.

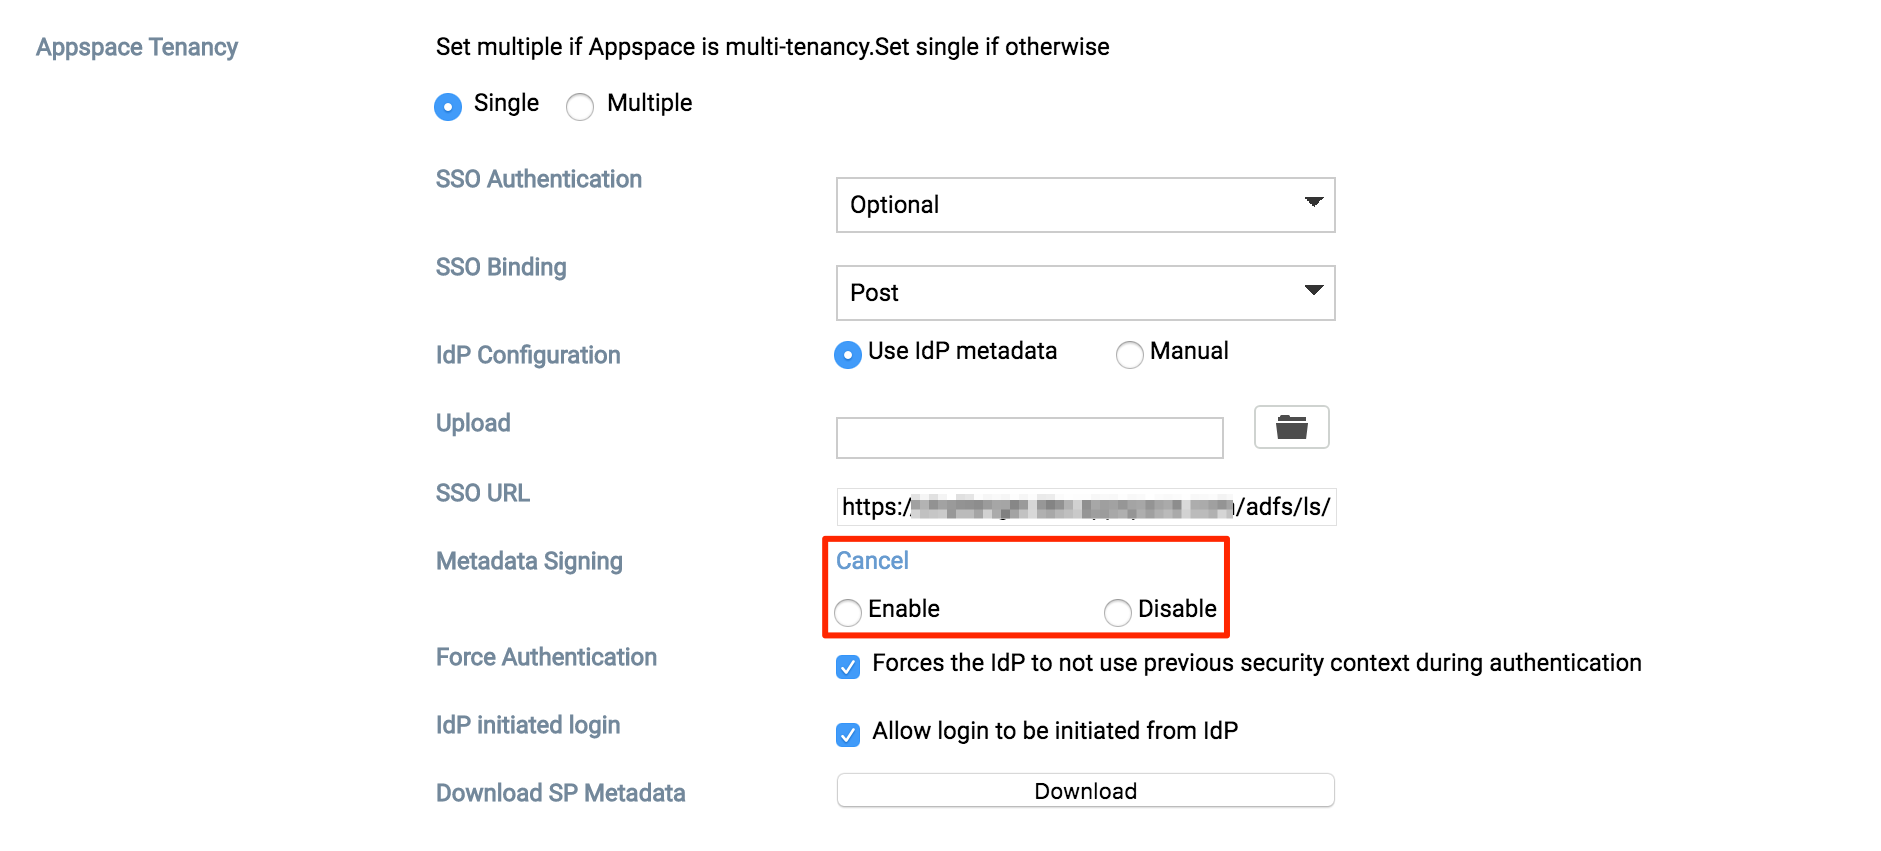
Use IdP Metadata (automatic)
Upon selecting the Use IdP Metadata option, upload the metadata XML file downloaded in Step 1 above. Browse and upload the metadata file to the Appspace server.
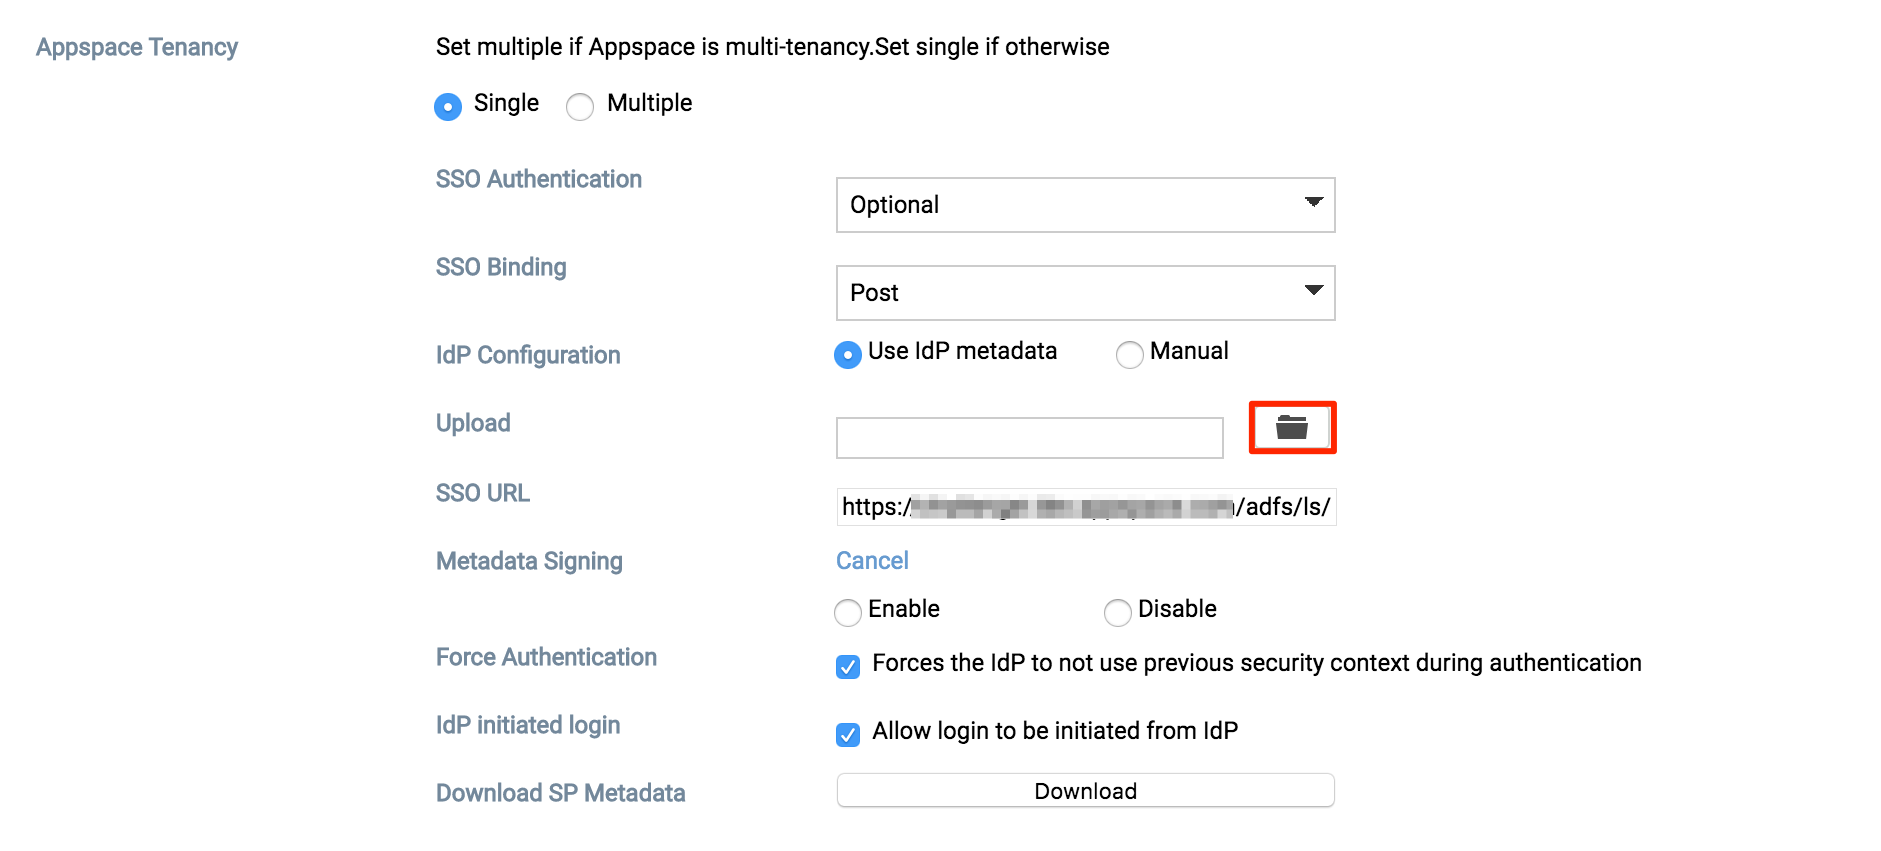
The upload path will be displayed. Proceed to Step 9 below.
Use Manual configuration
To use the Manual configuration method, you will need to fill in the SSO URL and the X.509 Certificate details.
Fill in the SSO URL of the ADFS server with https://<ADFS server’s FQDN/IP>/adfs/ls/
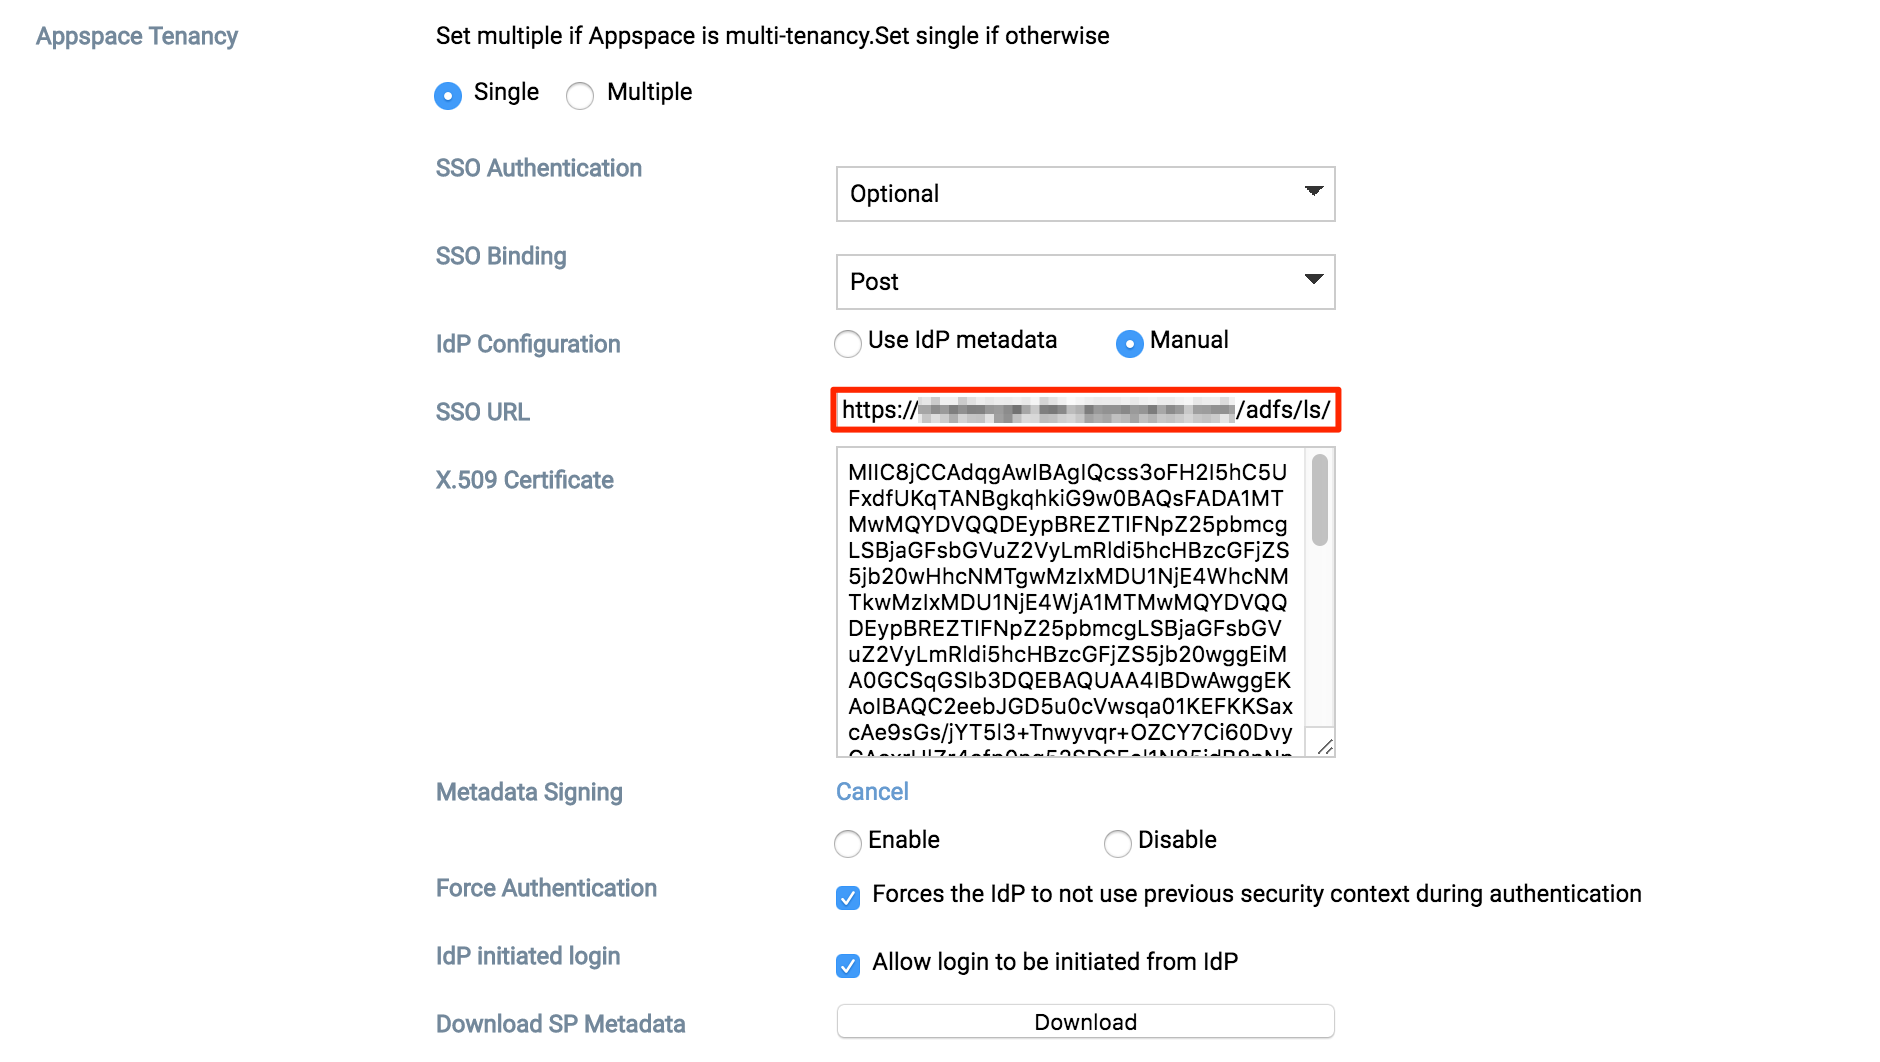
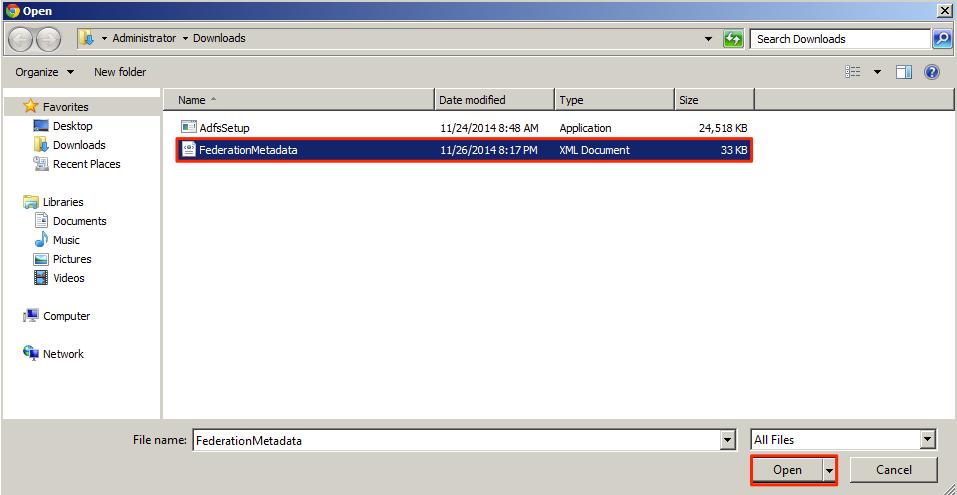
Fill in the X.509 Certificate, locate the downloaded FederatedMetadata.xml in Step 1 and open it in a browser.
Locate the line <X509Certificate> and copy its associated text.

Paste the text in the X509 Certificate textbox.
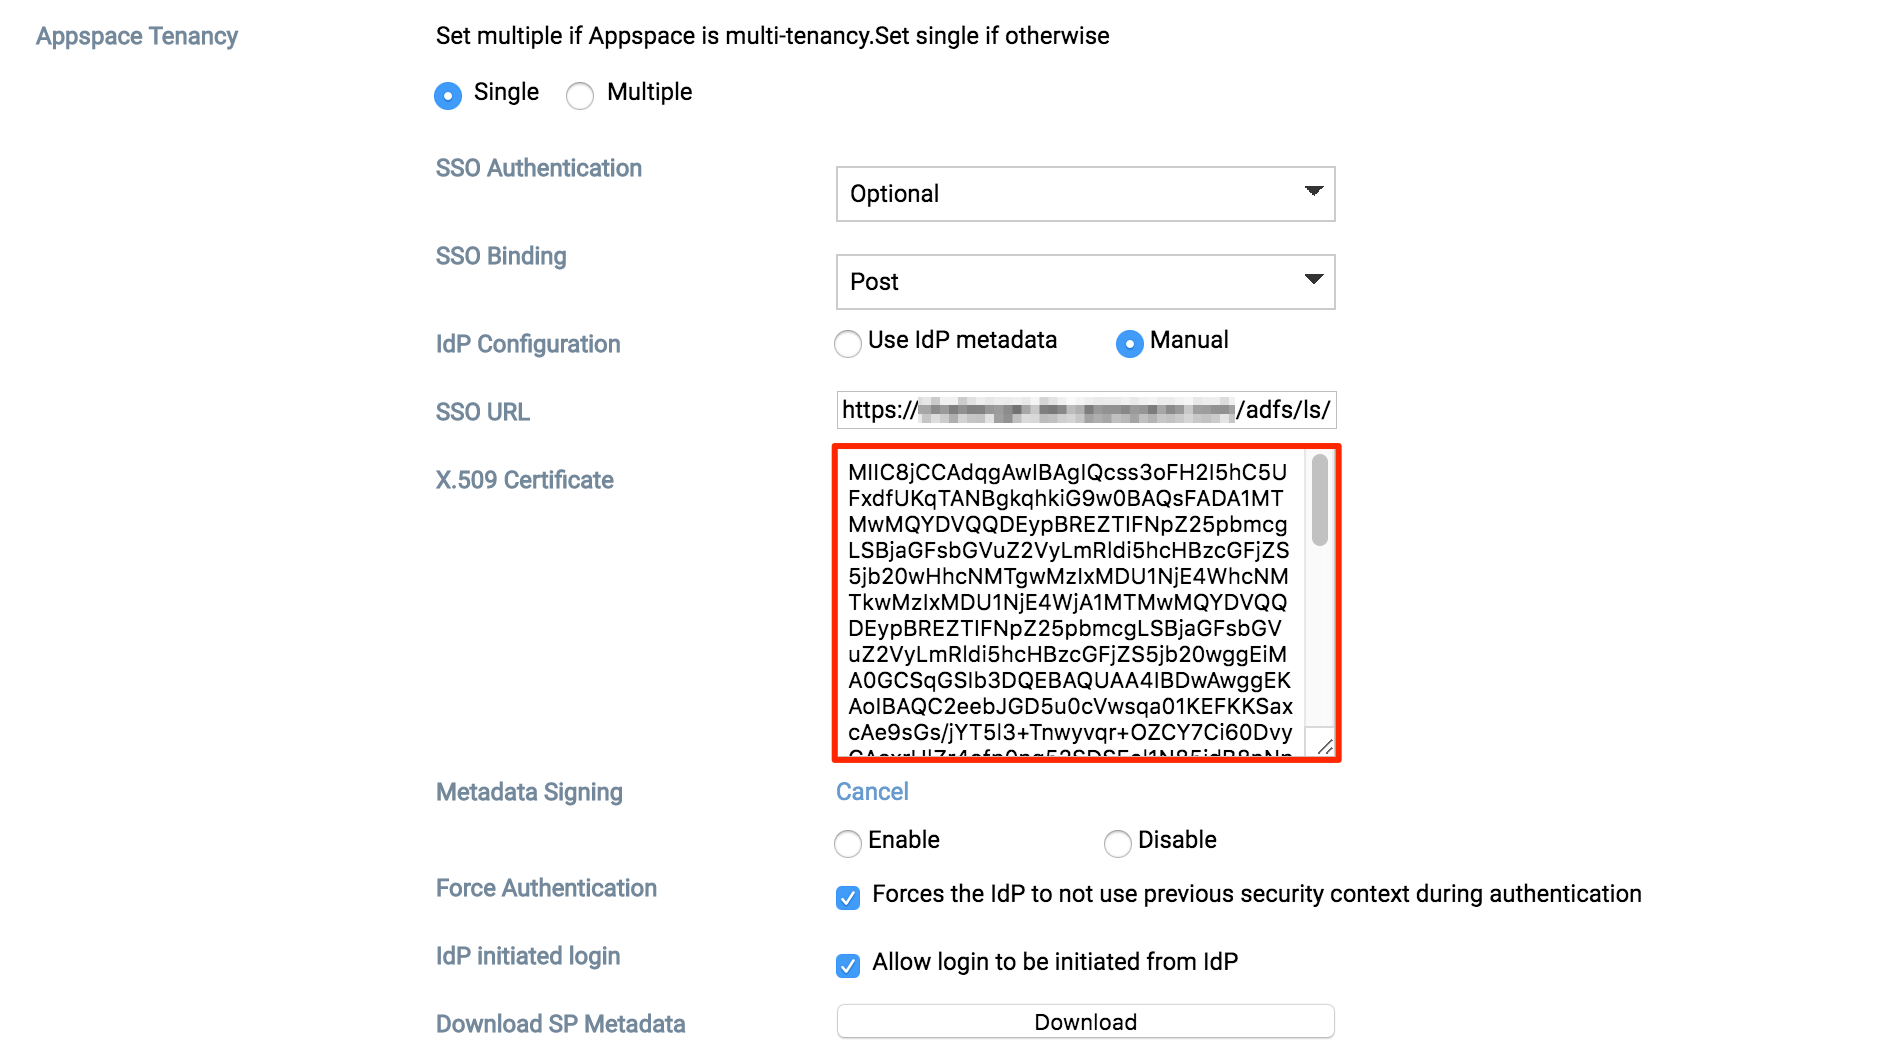
In the Metadata Signing field, click the Change link to show the options.
Note
- Enabled – The SP metadata file will be generated in an ‘Encrypted’ format.
- Disabled – The SP metadata file will be generated in a ‘Plain text’ format.
Optionally, you may enable Pass-through Authentication, by checking the Enable option, and entering the e-mail domain.

Note
Pass-through authentication enables you to utilize an external IdP so that your users can access channels through the Appspace App without using Premium User IDs.
Click Save once complete, and Yes to confirm settings.
The system should automatically detect a change to the Appspace settings and prompt you with a notification at the top of the page. Click the Click Here link.
You will automatically be taken to the Apply Configuration tab. To finish applying the changes to the system settings, enter your Windows Server credentials and click Apply.
Warning
You must input your Windows Server Administrator credentials or an account with local administrator privileges to make and apply changes to server settings.
This is NOT your Appspace on-prem server administrator credentials or your Appspace Cloud user credentials.
Click Yes to confirm and to restart your Appspace server. You should see a message indicating the server restart progress.
Click OK to complete the process.
Once Appspace has restarted, navigate back to the Authentication tab, click Download to download the Service Provider’s metadata file.
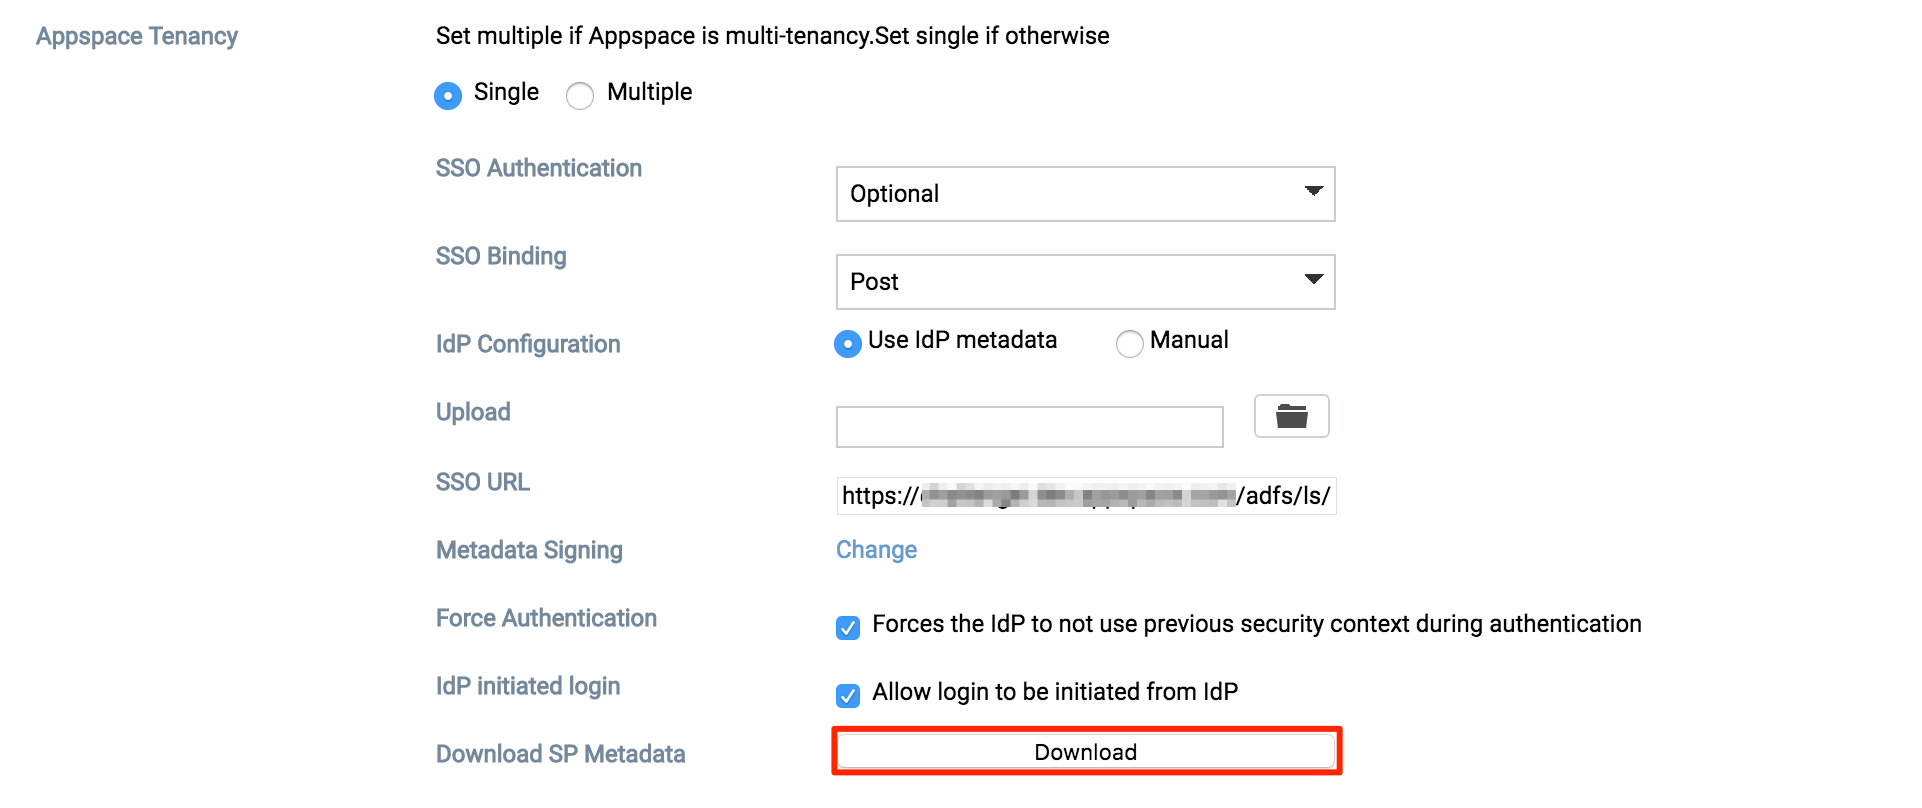
Copy and paste the file to a desired location on your Identity Provider (ADFS) server.
Configure ADFS Relying Party Trust
Note
This section is performed on the Identity Provider (ADFS) server.
Configure the ADFS Relying Party Trust as per instructions on the “To create a claims aware Relying Party Trust using federation metadata” section on the Microsoft website: https://docs.microsoft.com/en-gb/windows-server/identity/ad-fs/operations/create-a-relying-party-trust#to-create-a-claims-aware-relying-party-trust-using-federation-metadata
In Step 4 of the instructions, on the Select Data Source page, select the ‘Import data about the relying party from file’ option,
Select the Service Provider’s metadata file that was downloaded from the Appspace server earlier.
Click Next and continue with Step 5 to specify Display Name.
In the Edit Claims Rules dialog box, create a rule as per instructions on the “To create a rule to send LDAP attributes as claims for Windows Server 2012 R2” section on the Microsoft website: https://docs.microsoft.com/en-gb/windows-server/identity/ad-fs/operations/create-a-rule-to-send-ldap-attributes-as-claims#to-create-a-rule-to-send-ldap-attributes-as-claims-for-windows-server-2012-r2
In Step 4, in the Edit Claim Rules dialog box, select the ‘Issuance Transform Rules’ tab, and click Add Rule.
In Step 6, on the Configure Rule page, map the LDAP attributes to outgoing types value as below:
LDAP Attribute Outgoing Claim Type E-Mail-Addresses E-Mail Address SAM-Account-Name Windows account name Note
All Appspace users authenticating via SSO are required to have email addresses (can be used as the usernames as well).
In the Edit Claims Rules dialog box, create a rule as per instructions on the “To create a rule to transform an incoming claim in Windows Server 2012 R2” section on the Microsoft website: https://docs.microsoft.com/en-gb/windows-server/identity/ad-fs/operations/create-a-rule-to-transform-an-incoming-claim#to-create-a-rule-to-transform-an-incoming-claim-in-windows-server-2012-r2
In Step 4, in the Edit Claim Rules dialog box, select the ‘Issuance Transform Rules’ tab, and click Add Rule.
In Step 6, on the Configure Rule page, configure the claim types as follows:
Incoming claim type E-Mail Address Outgoing claim type Name ID Outgoing name ID format Transient Identifier
In the menu tree, click Relying Party Trusts, and select your display name.
Click the Advanced tab, and select SHA-1 as the secure hash algorithm from the drop-down menu.
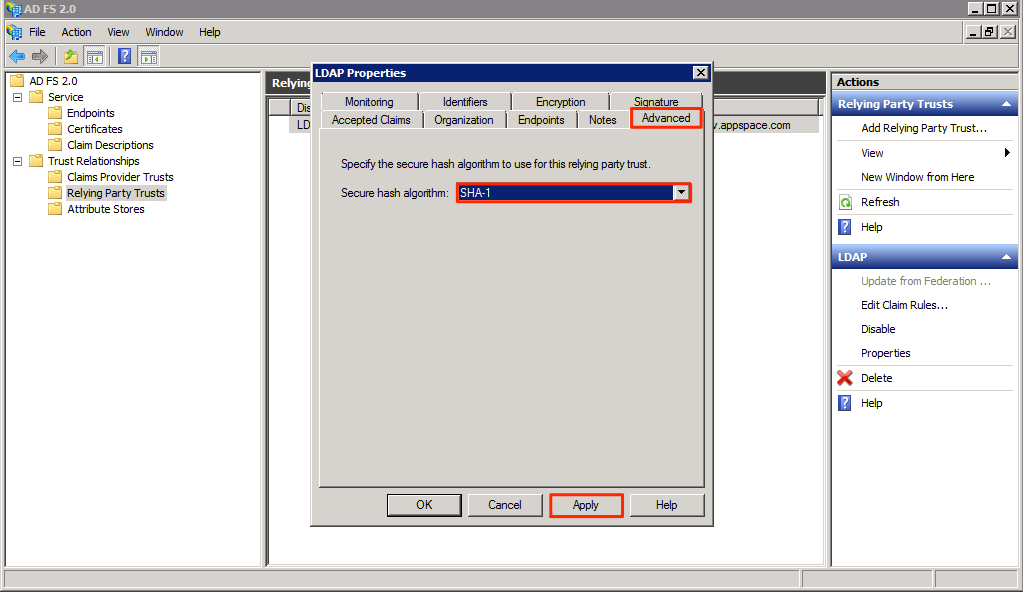
Click Apply, and OK once done.
Log in with SSO
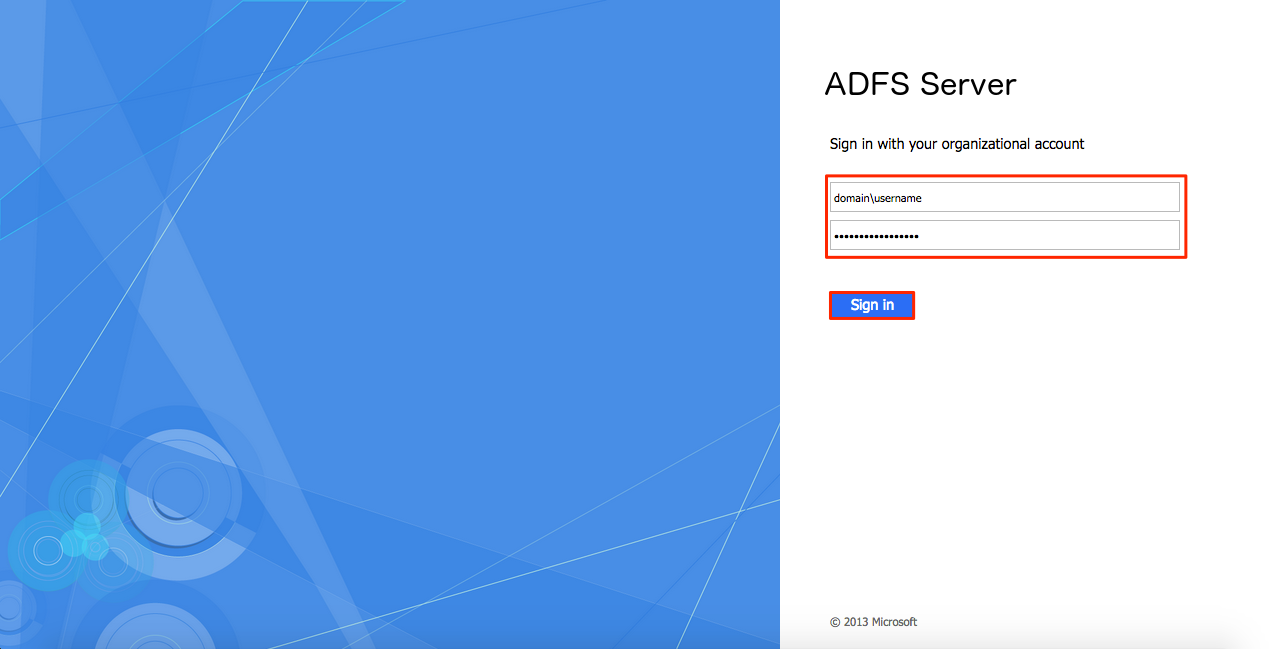
At the Appspace login page, log in with your username (This should be an email), and you will be redirected to the SSO login page provided by your Identity Provider.
Warning
You must use HTTPS for SSO to work.
Enter your Appspace credentials. Upon successful authentication, you will be redirected back to your Appspace dashboard.