Manage room scheduling
You can now leverage our brand-new Room Schedule card that enables you to book meeting rooms in your organization on interactive touch-screen enabled compatible tablets or devices running the Appspace App.
Booking functions on this card include:
- Book now – ability to book 30 minutes, 1 hour, or 1.5 hours from the current time, based on room availability.
- Book in advance– book future time slots (on the same day only) or up to 7 days in advance, based on room availability.
- Check in - option to check in to a meeting from 10 minutes before until 10 minutes after the start of the meeting.
- Extend meeting - extend current meeting by 30 minutes, 1 hour, or 1.5 hours.
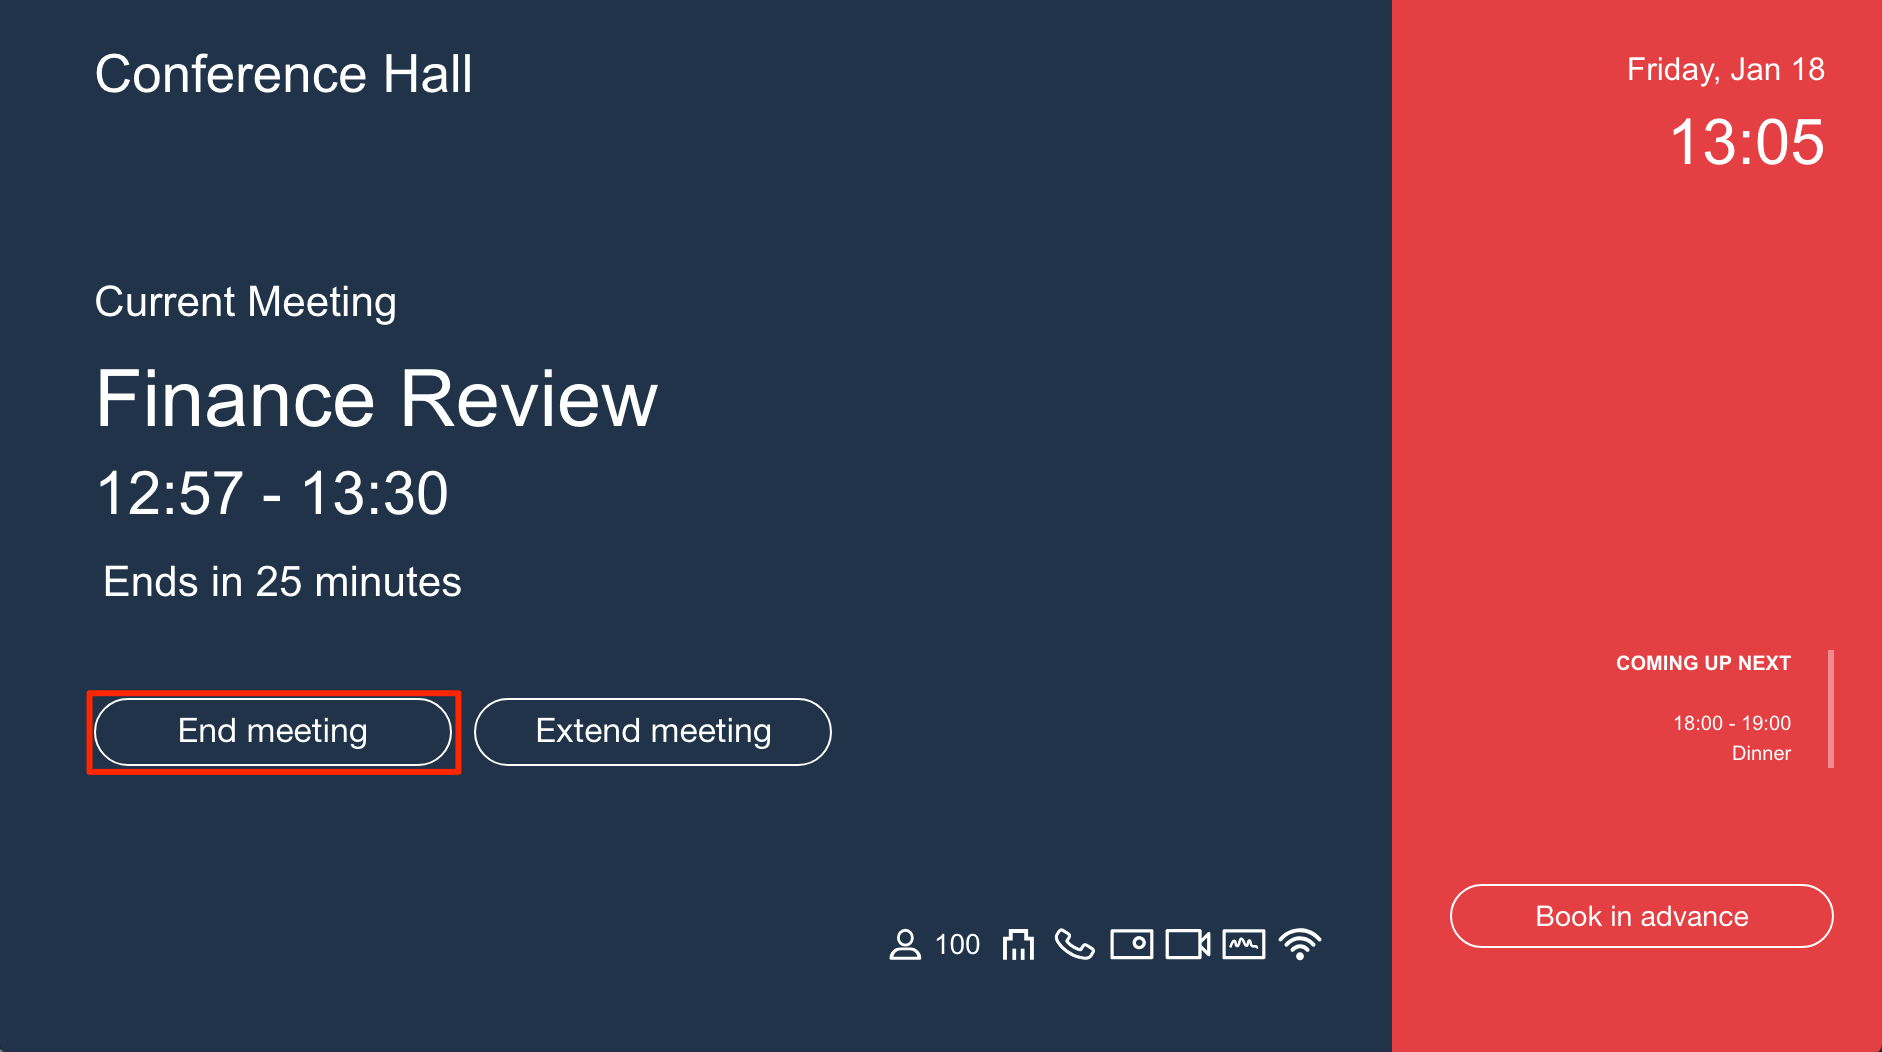
- End meeting - end current meeting, and make the room available.
Important
When the check-in option is enabled while using a User Account with limited administrator privileges (Microsoft Calendar Provider), the below behavior is expected:
- Able to book meetings instantly or in advance.
- Able to check in, extend, or cancel a meeting that is booked by the user.
- Unable to check in, extend, or cancel a meeting that is not booked by the user
When check-in option is disabled:
- Unable to check in for meetings.
- Able to book meetings instantly or in advance.
- Able to extend and end a meeting that is booked the user.
- Unable to cancel a meeting that is not booked by the user.
- Able to extend a meeting that is not booked by the user; the user will be able to end the meeting extension done by the user.
This article describes how to book the meeting room directly via our App (on a tablet) or via your calendar providers:
Note
However, you (or your administrator) must first configure the card and install the Appspace App on the target devices located outside your organization’s meeting rooms. Please refer to:
Book a meeting room via a tablet
When the Room Schedule card is configured and displayed on a tablet outside the respective meeting room, the following features will be available to you:
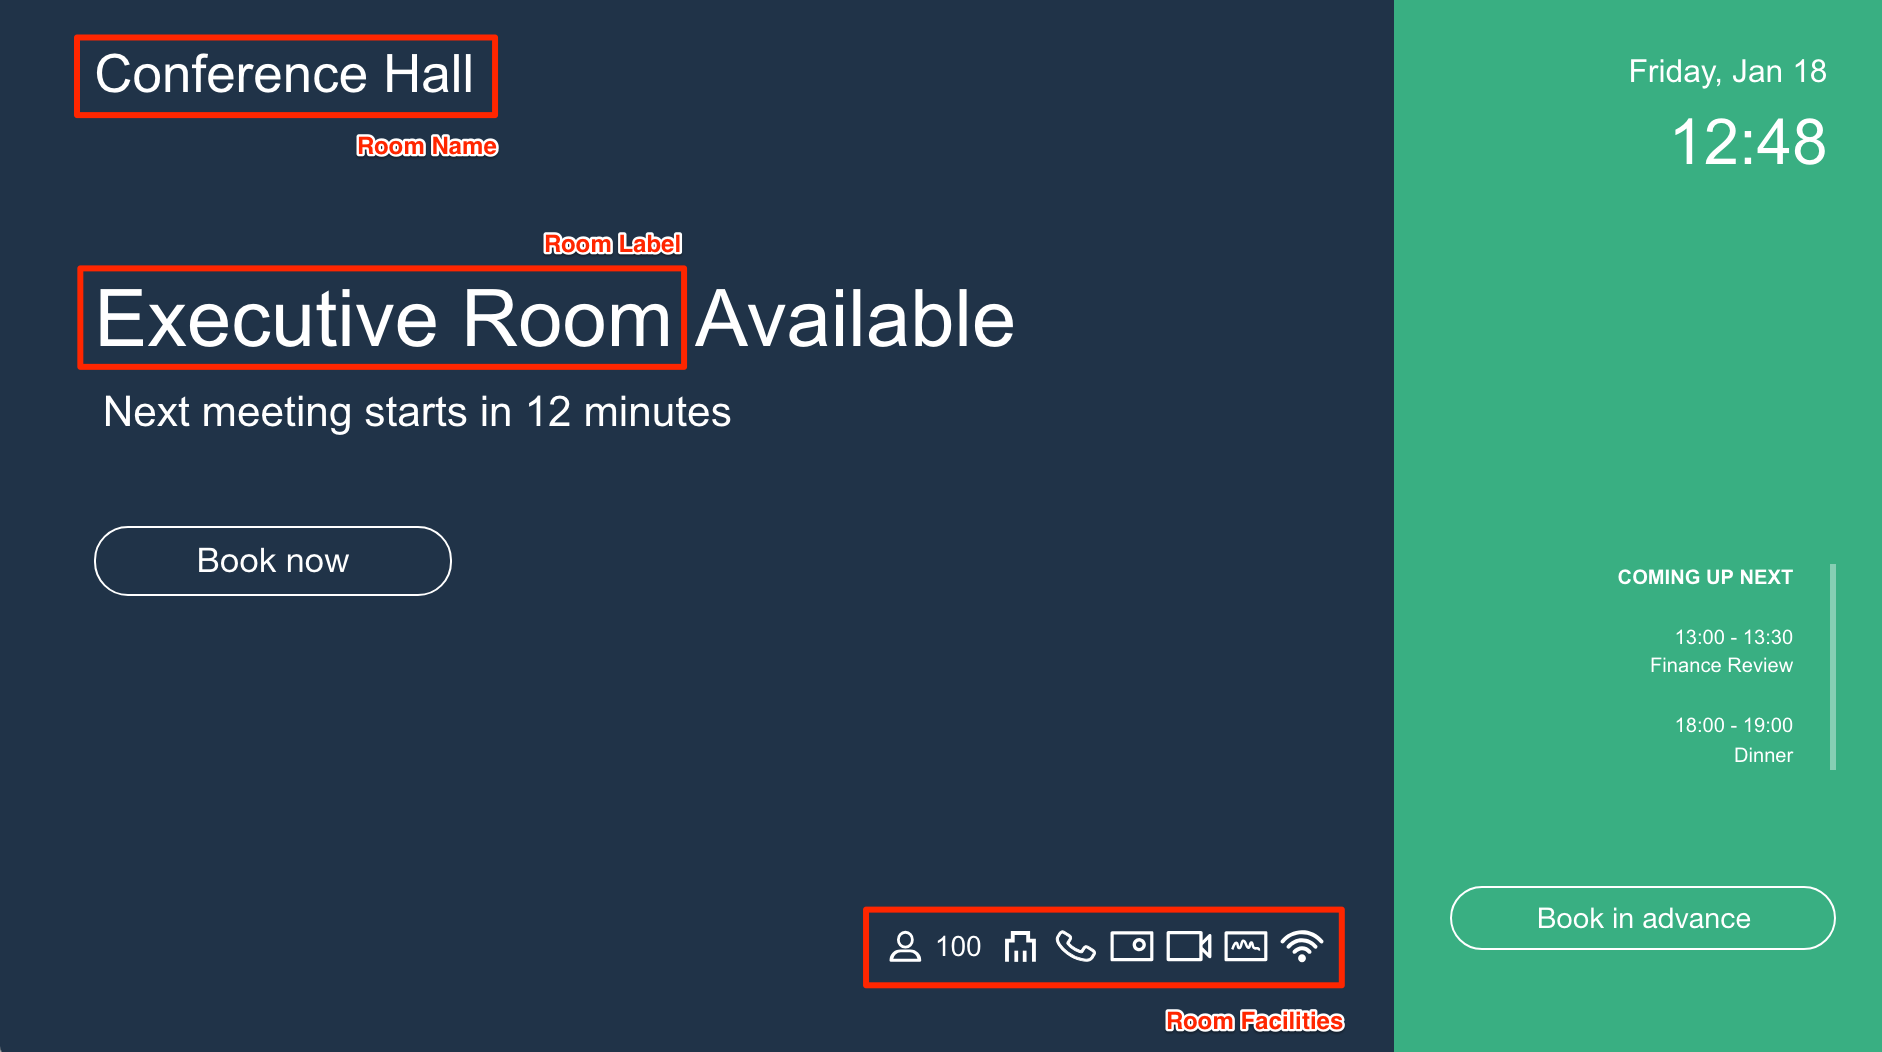
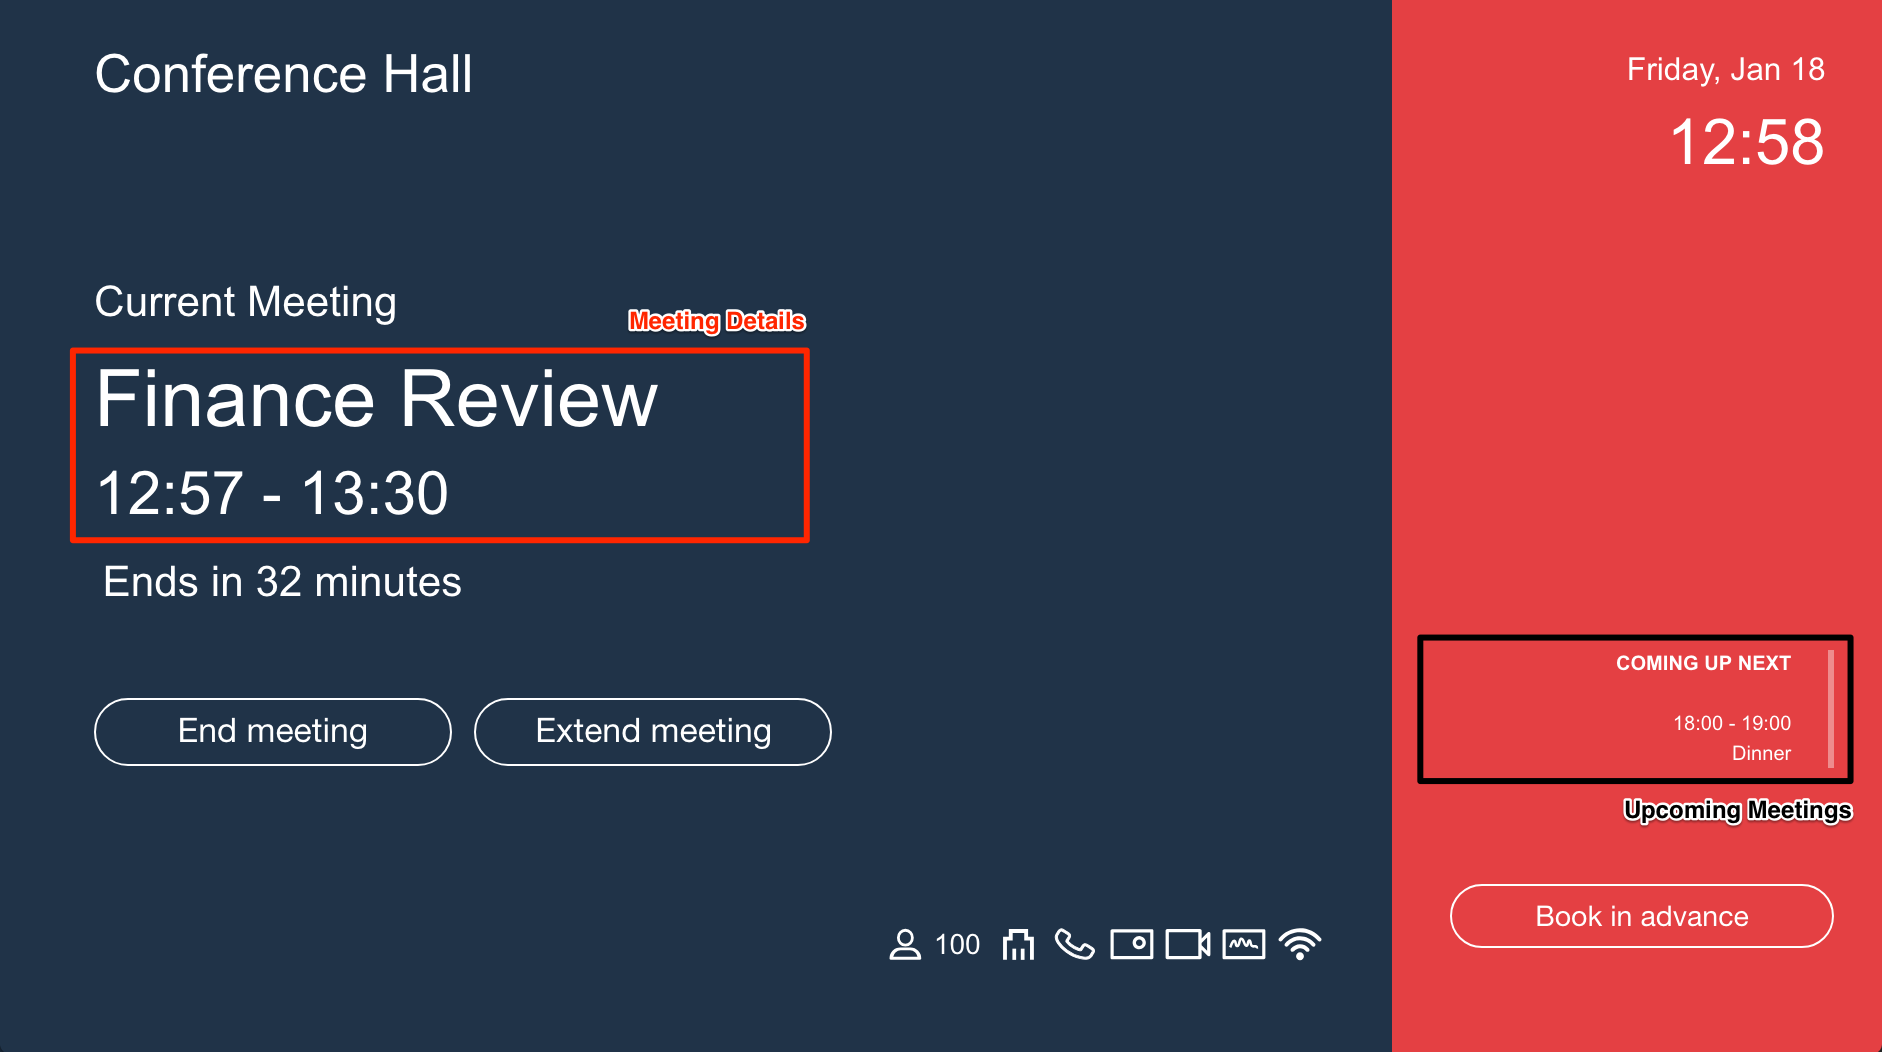
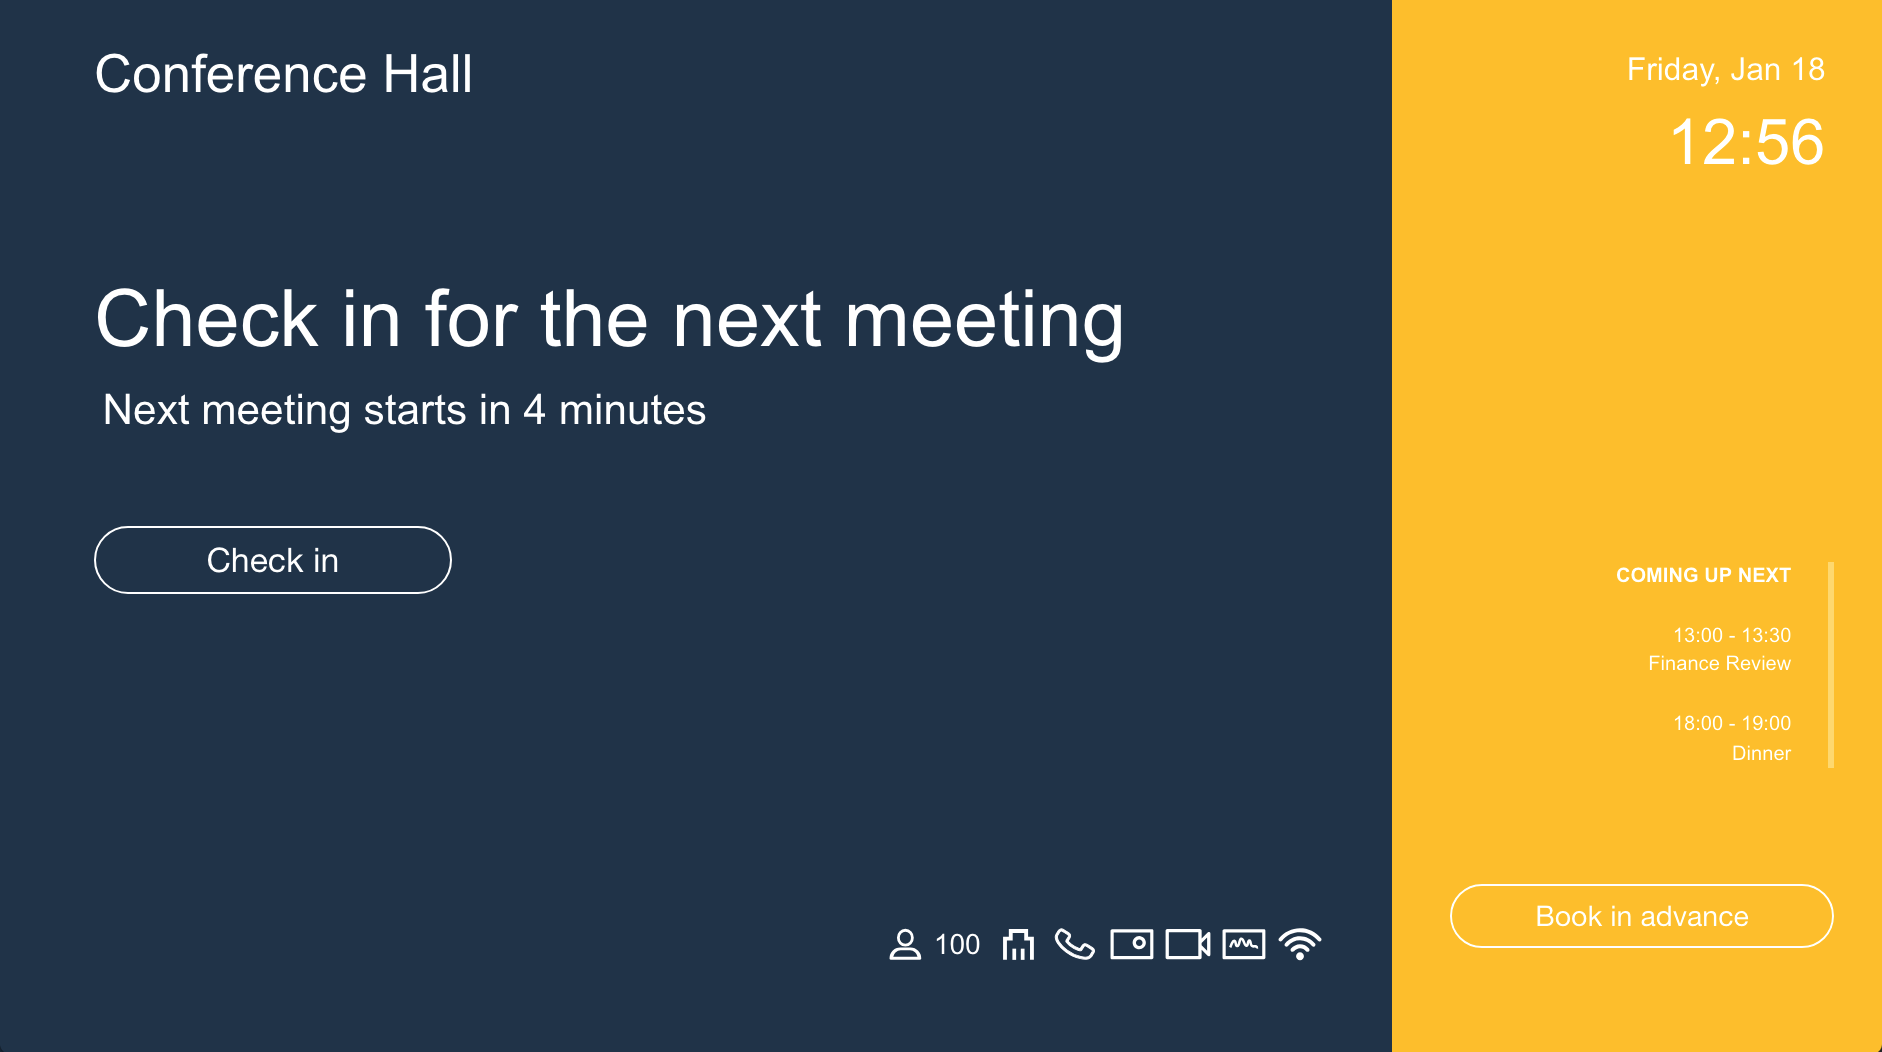
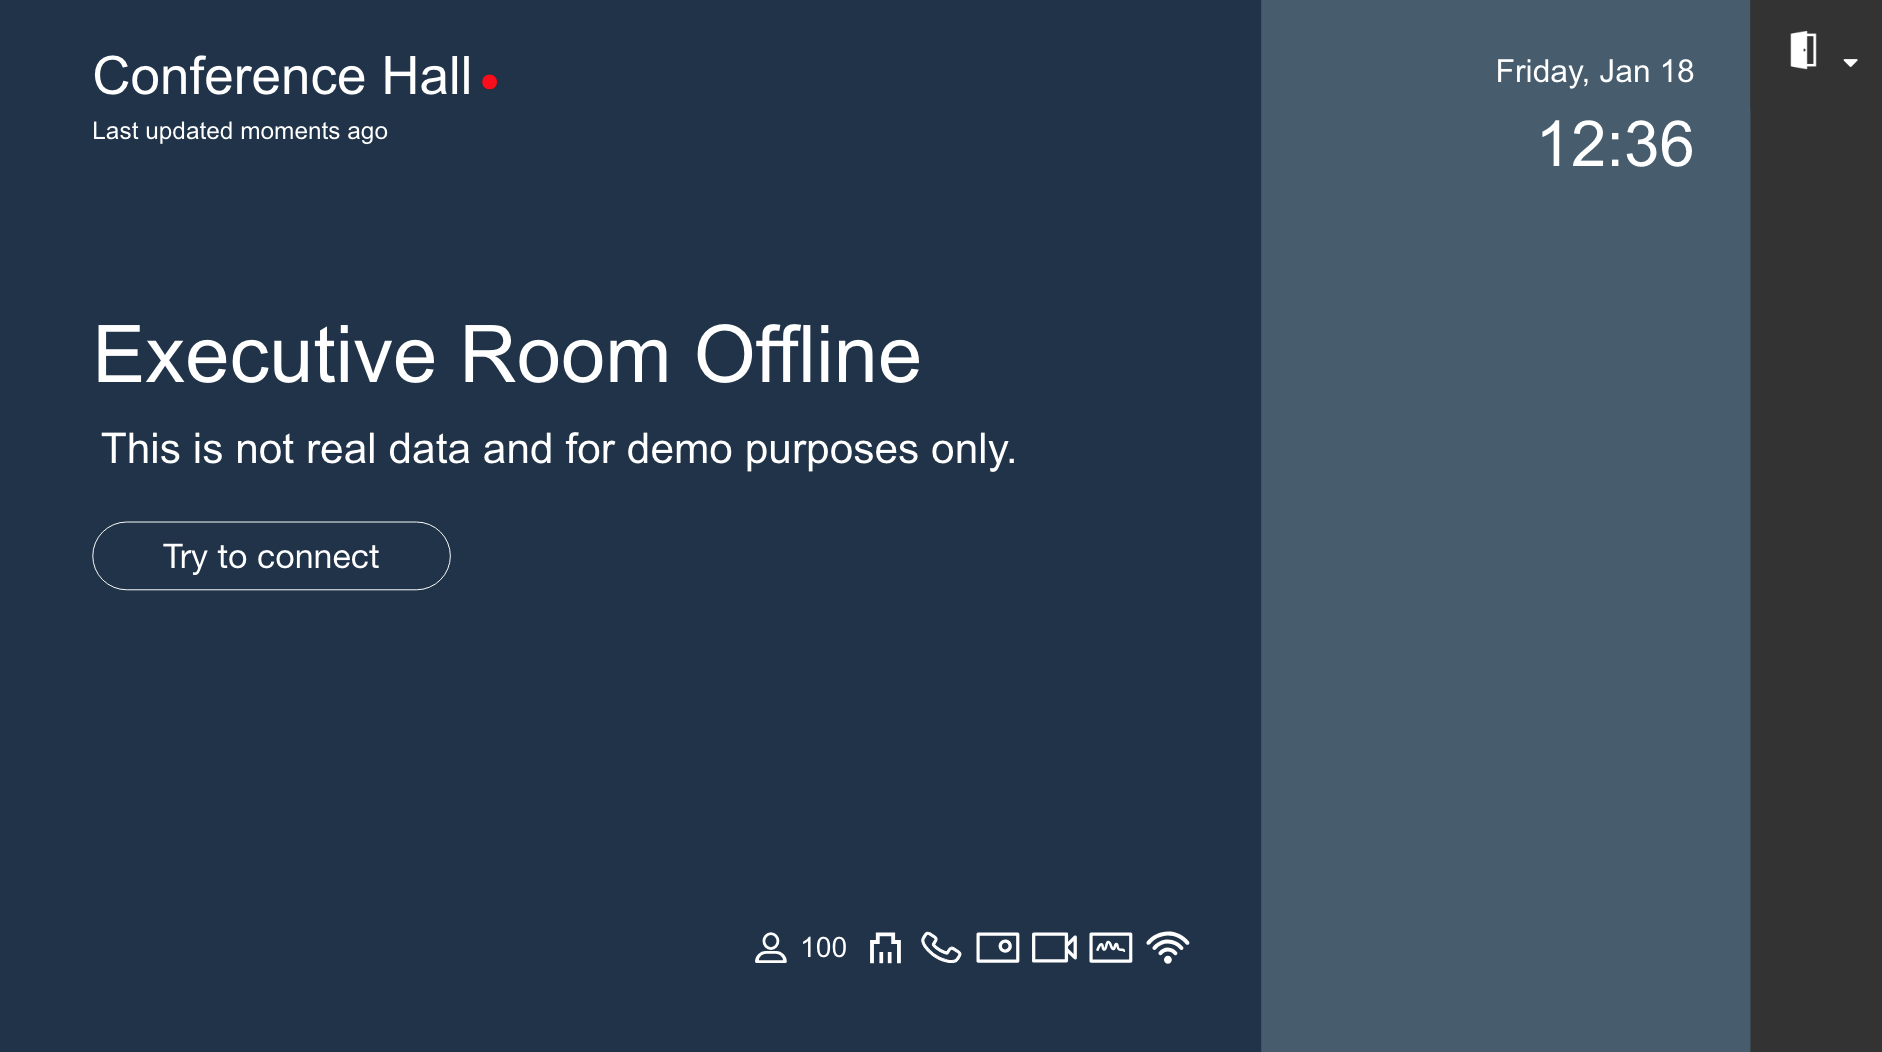
Room information – the room name and status indicating if the room is available, offline, or occupied is displayed.
Available - when the room is available, the card displays the Book now button, and the default display color is green (unless if the color was changed earlier during the card customization process).
Booked – when the room is occupied, the card displays the meeting name, and the default display color is red.
Check in – when a meeting is about to start, the card displays the Check in button, and the default display color is yellow.
Offline - if the room has no connection to the calendar provider server, the Try to connect button is displayed.
Note
These status colors can also be extended to the entire page by changing the options when configuring the card.
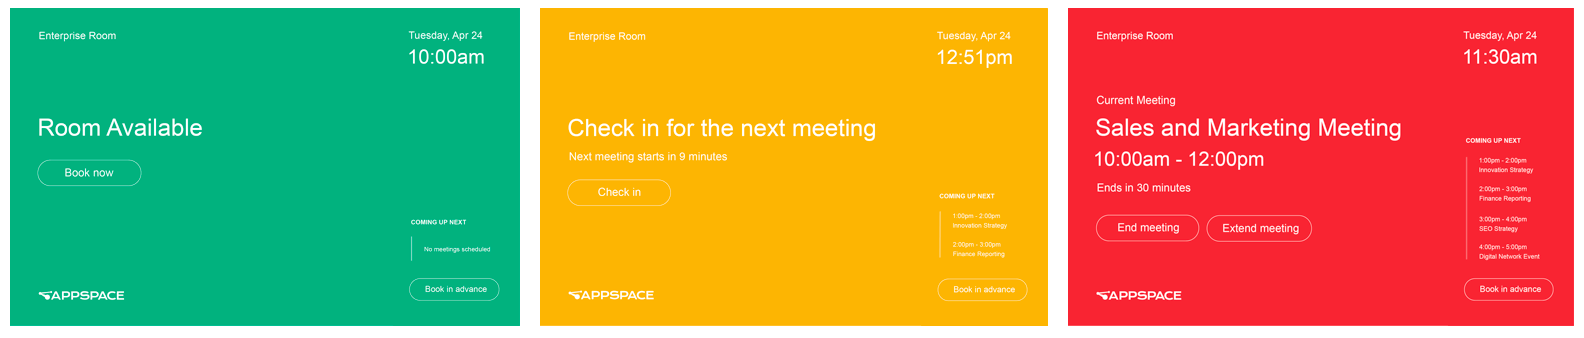
Meeting information – details of current meeting and upcoming meetings for the day.
Booking functions -
Note
You may not see some of these functions, if the features were not enabled when creating the card.
Book now
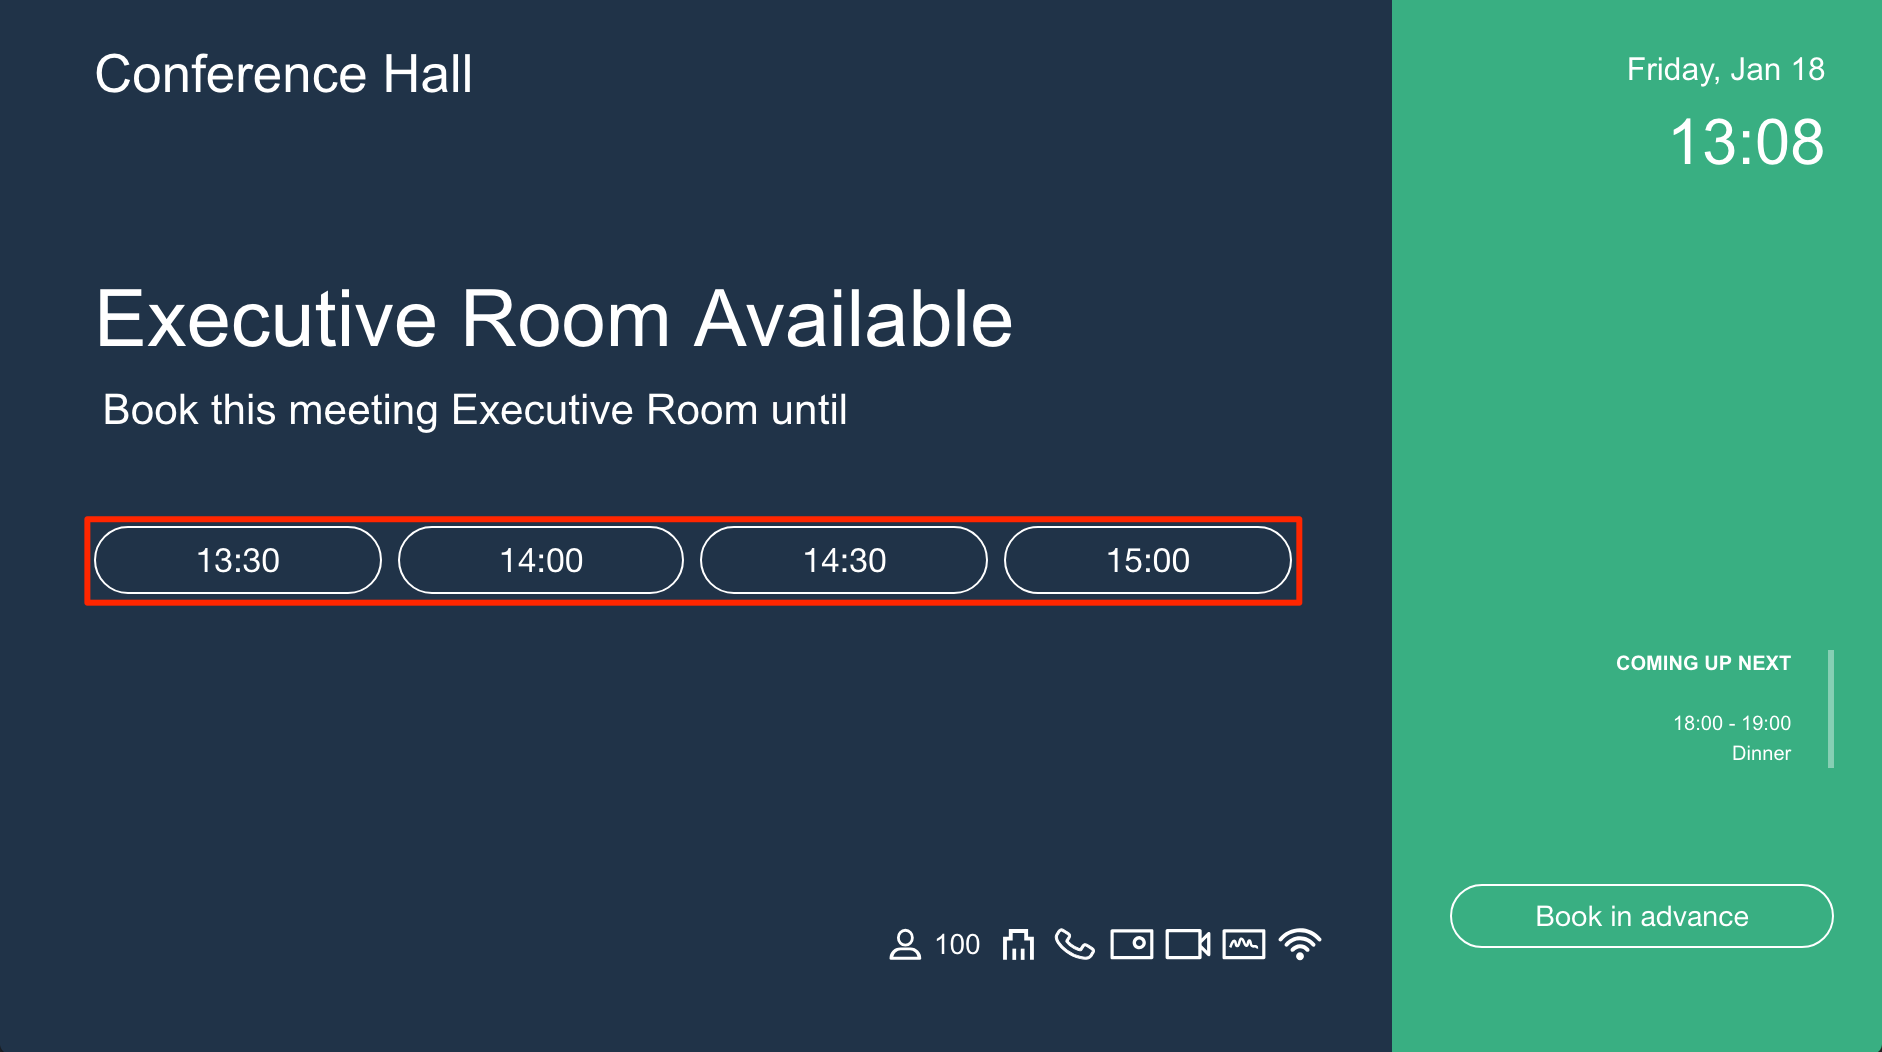
You may book a meeting room instantly when the room is available. To book a slot from the current time:
Click the Book now button.
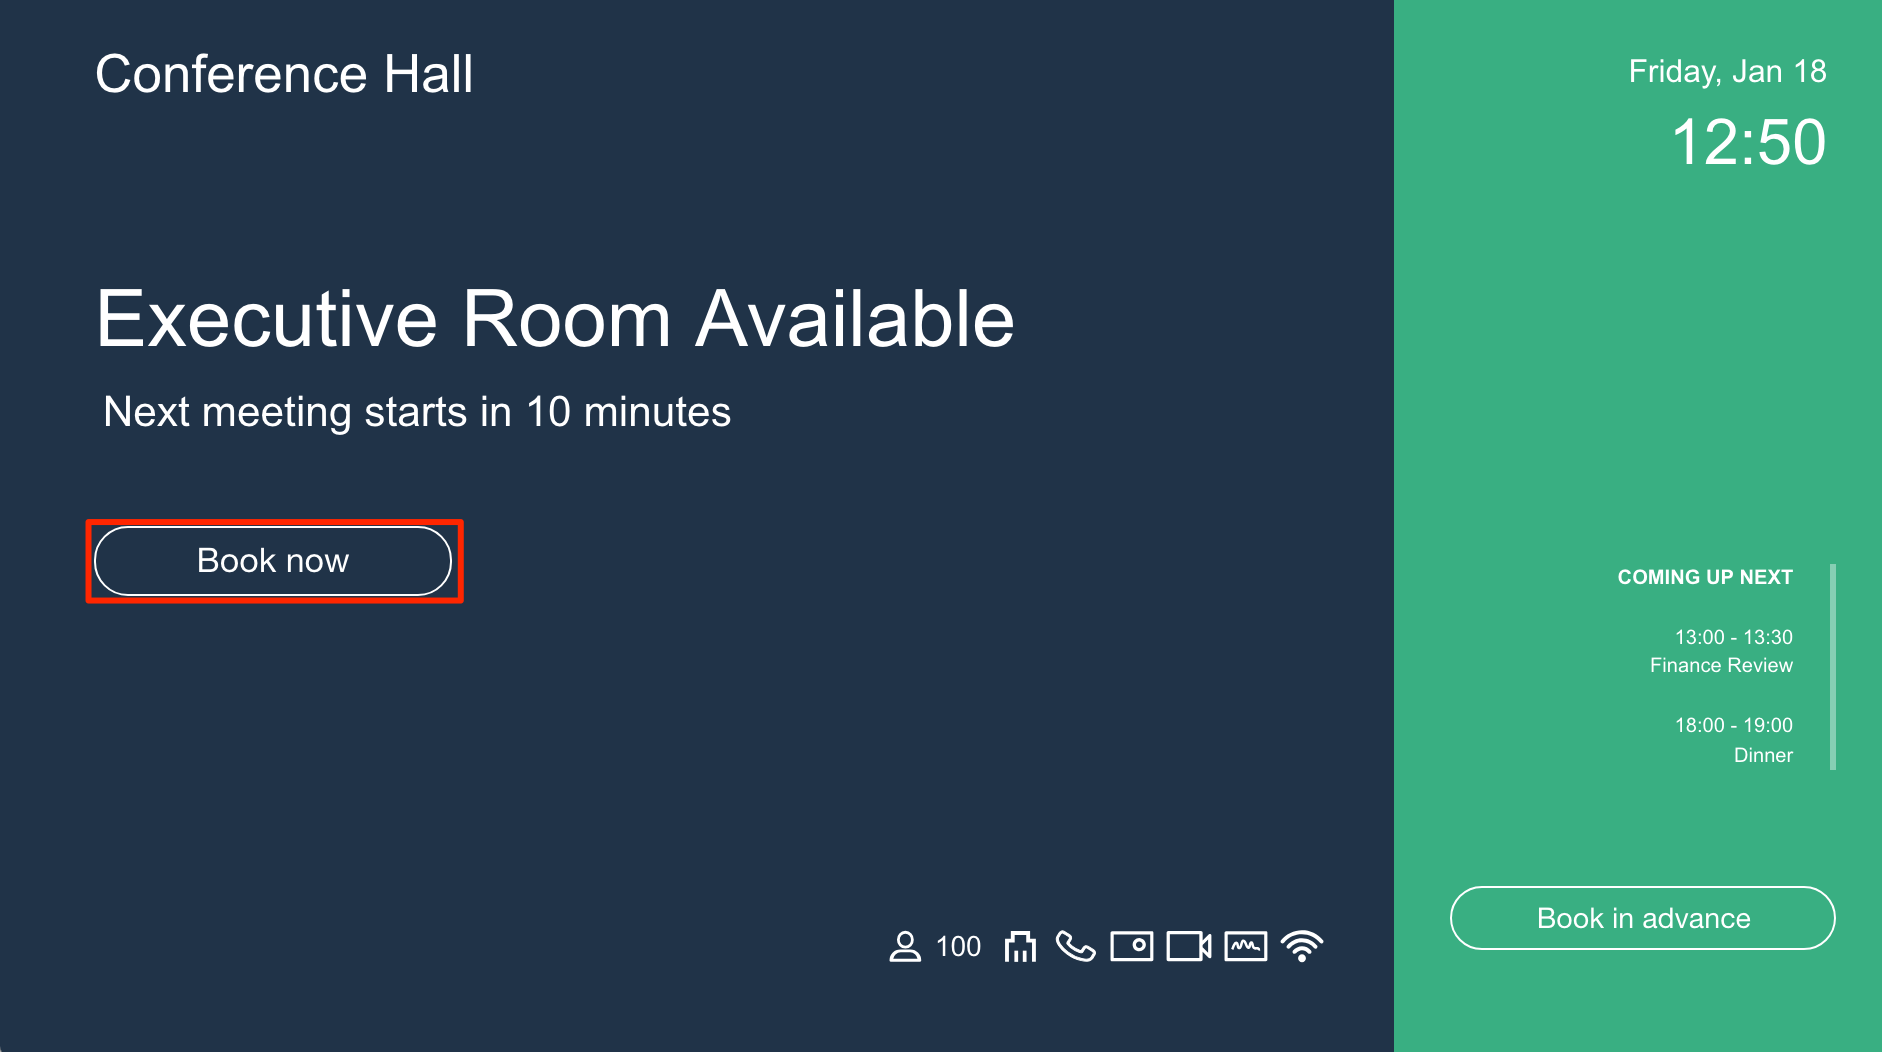
Select the end time of the meeting.

Or click one of the available time slots. Choosing one of the time slots will book the room from now until the time slot chosen. These time slots will only be available if the “Show available time slots” option was selected during the card configuration.
Book in advance
To make an advanced booking:
Click the Book in advance button.
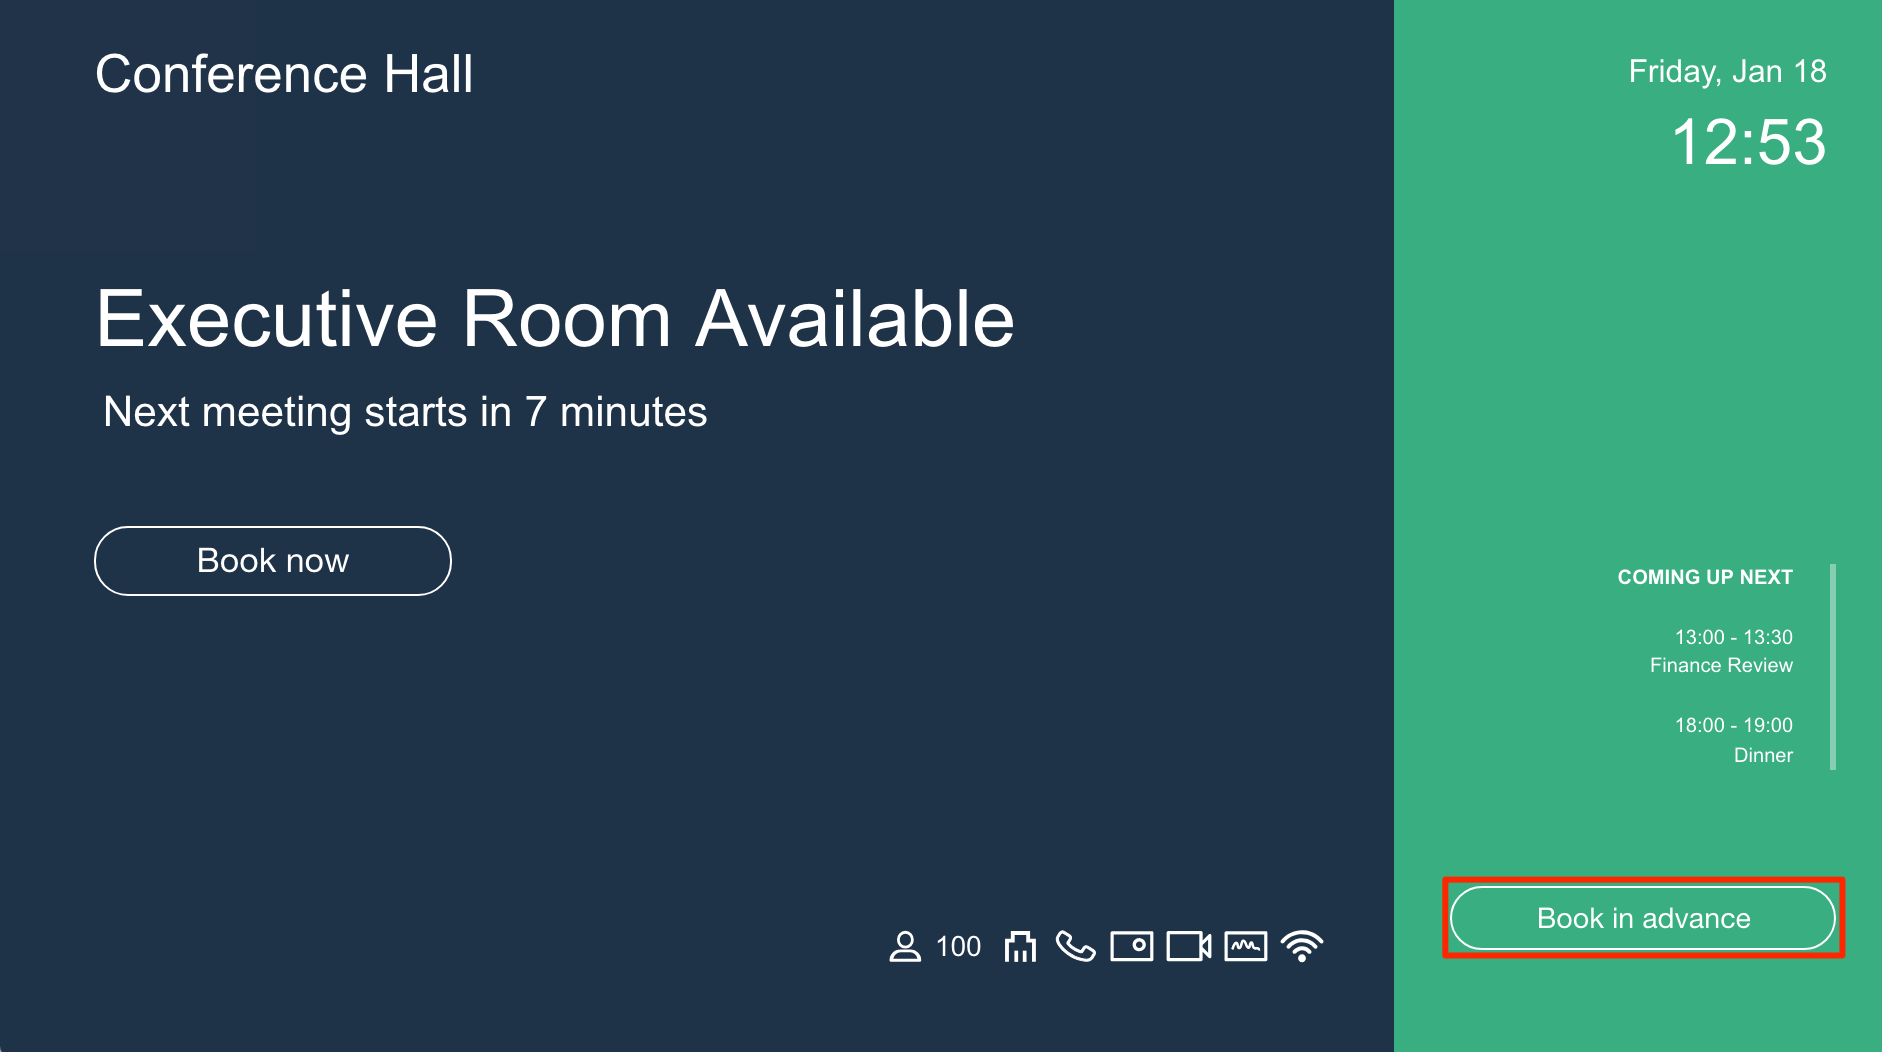
Select the desired date and time slot. Each time slot is a 30-minute block, thus multiple time slots can be selected to set the duration of your meeting.
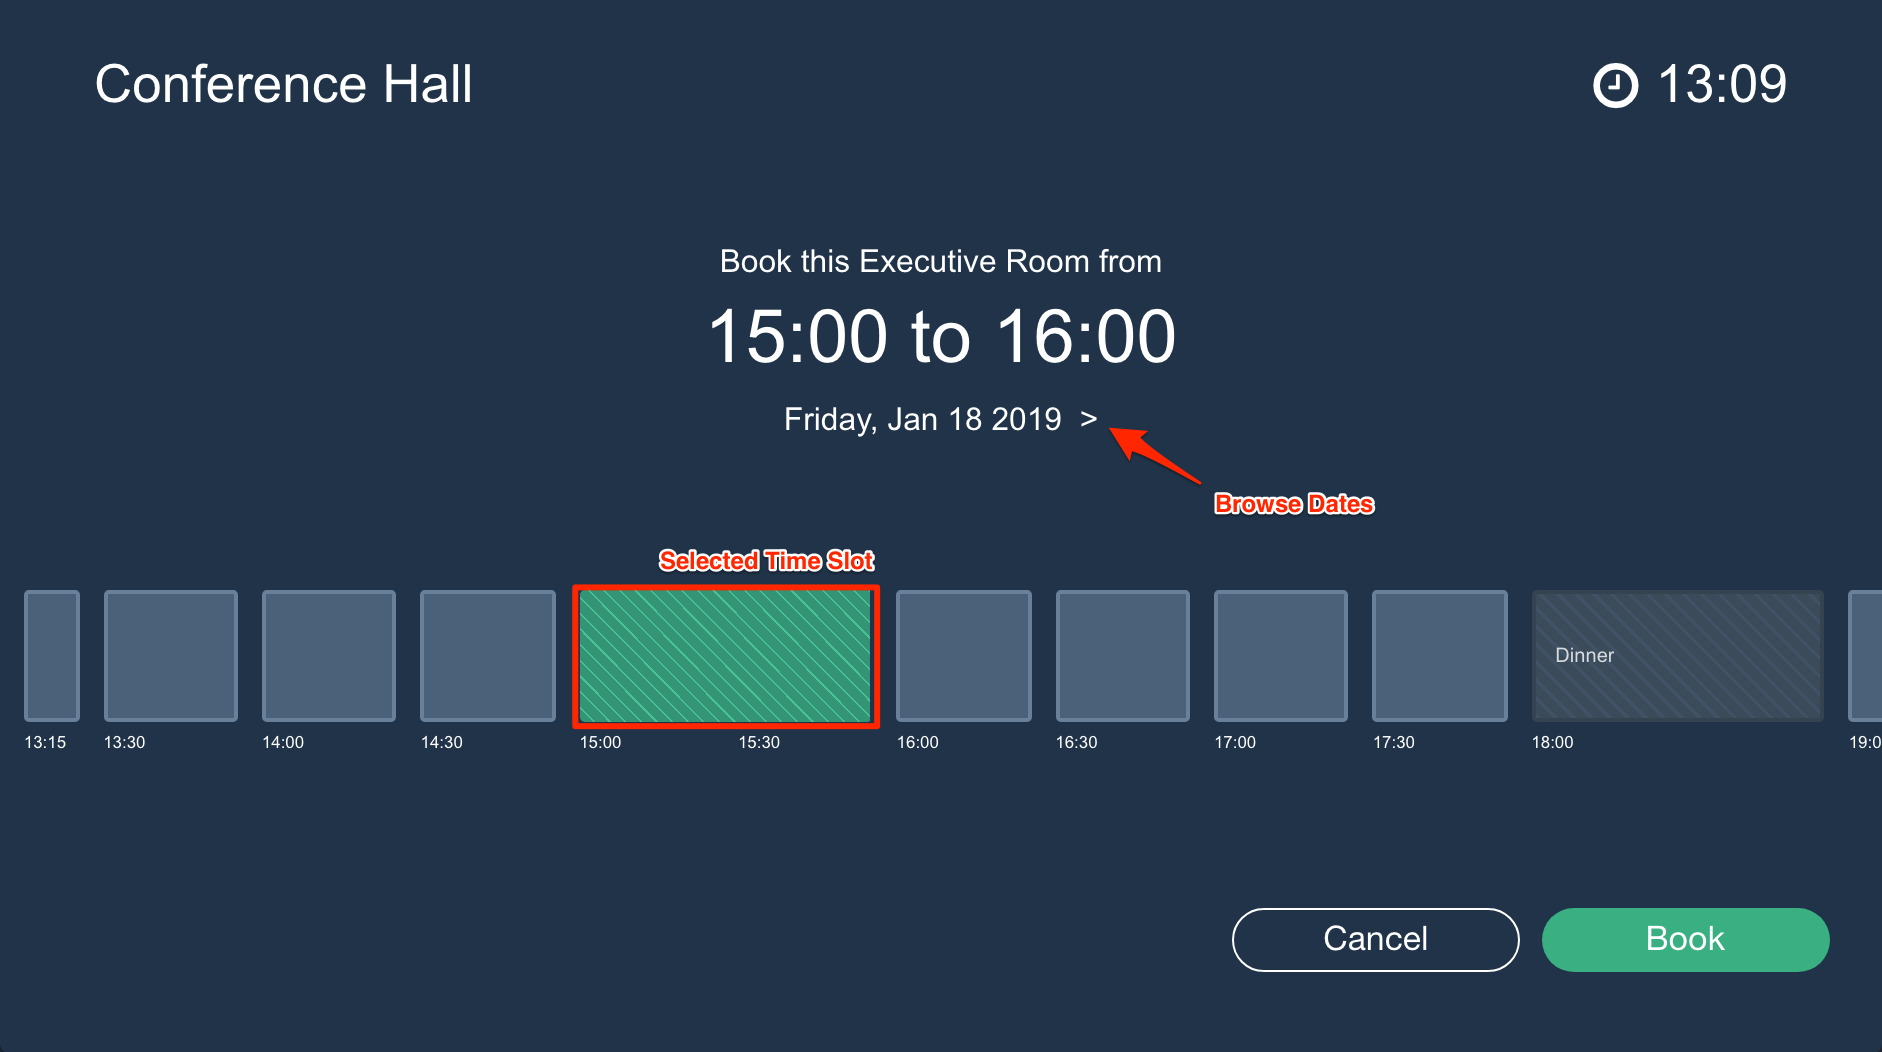
Note
You can only book in advance for the current day, if the 7 days advance booking option is unchecked.
Click the Book button.
Check in
The Check in button becomes available on the app 10 minutes before the start of the meeting until 10 minutes after.
If no one performs a check-in within that 20-minute window, the meeting room reservation is automatically cancelled.

Extend meeting
You may choose to extend the booking of a meeting room that is already in session, if the room is available after your slot.
To do this, click the Extend meeting button.
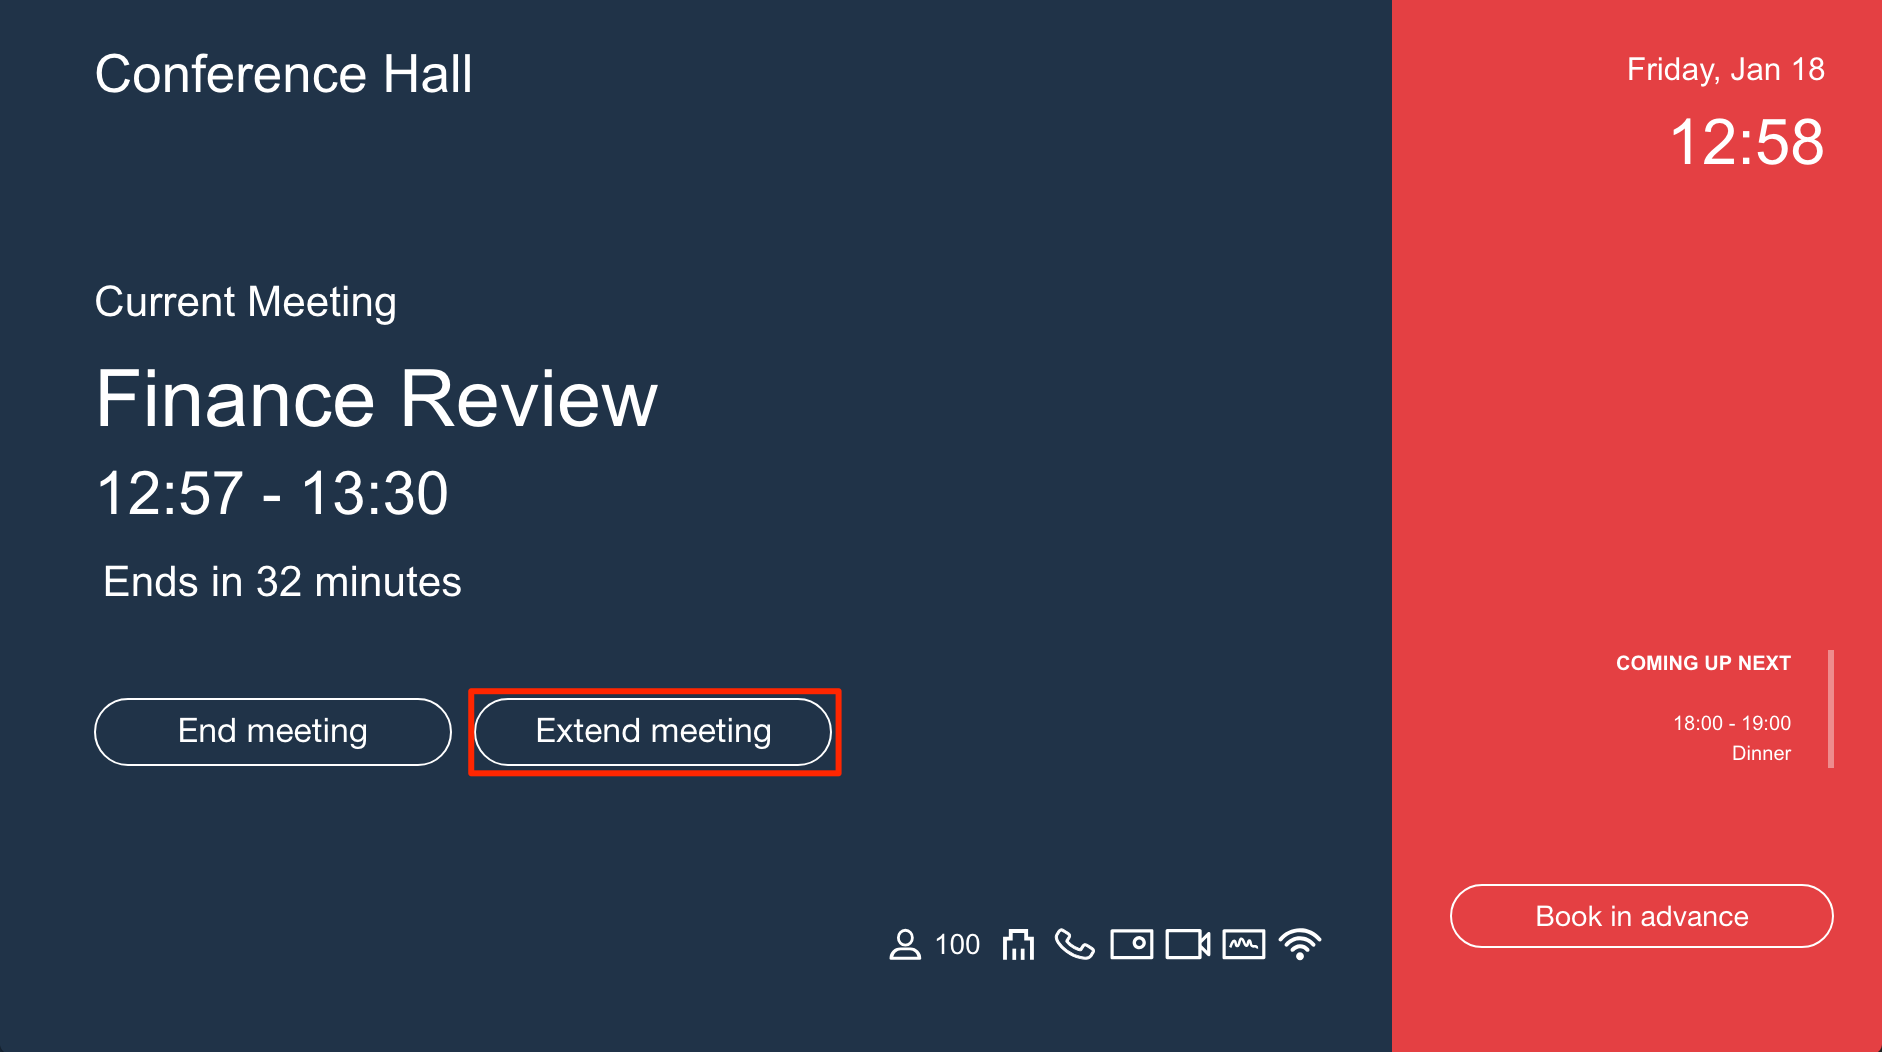
Select the end time.

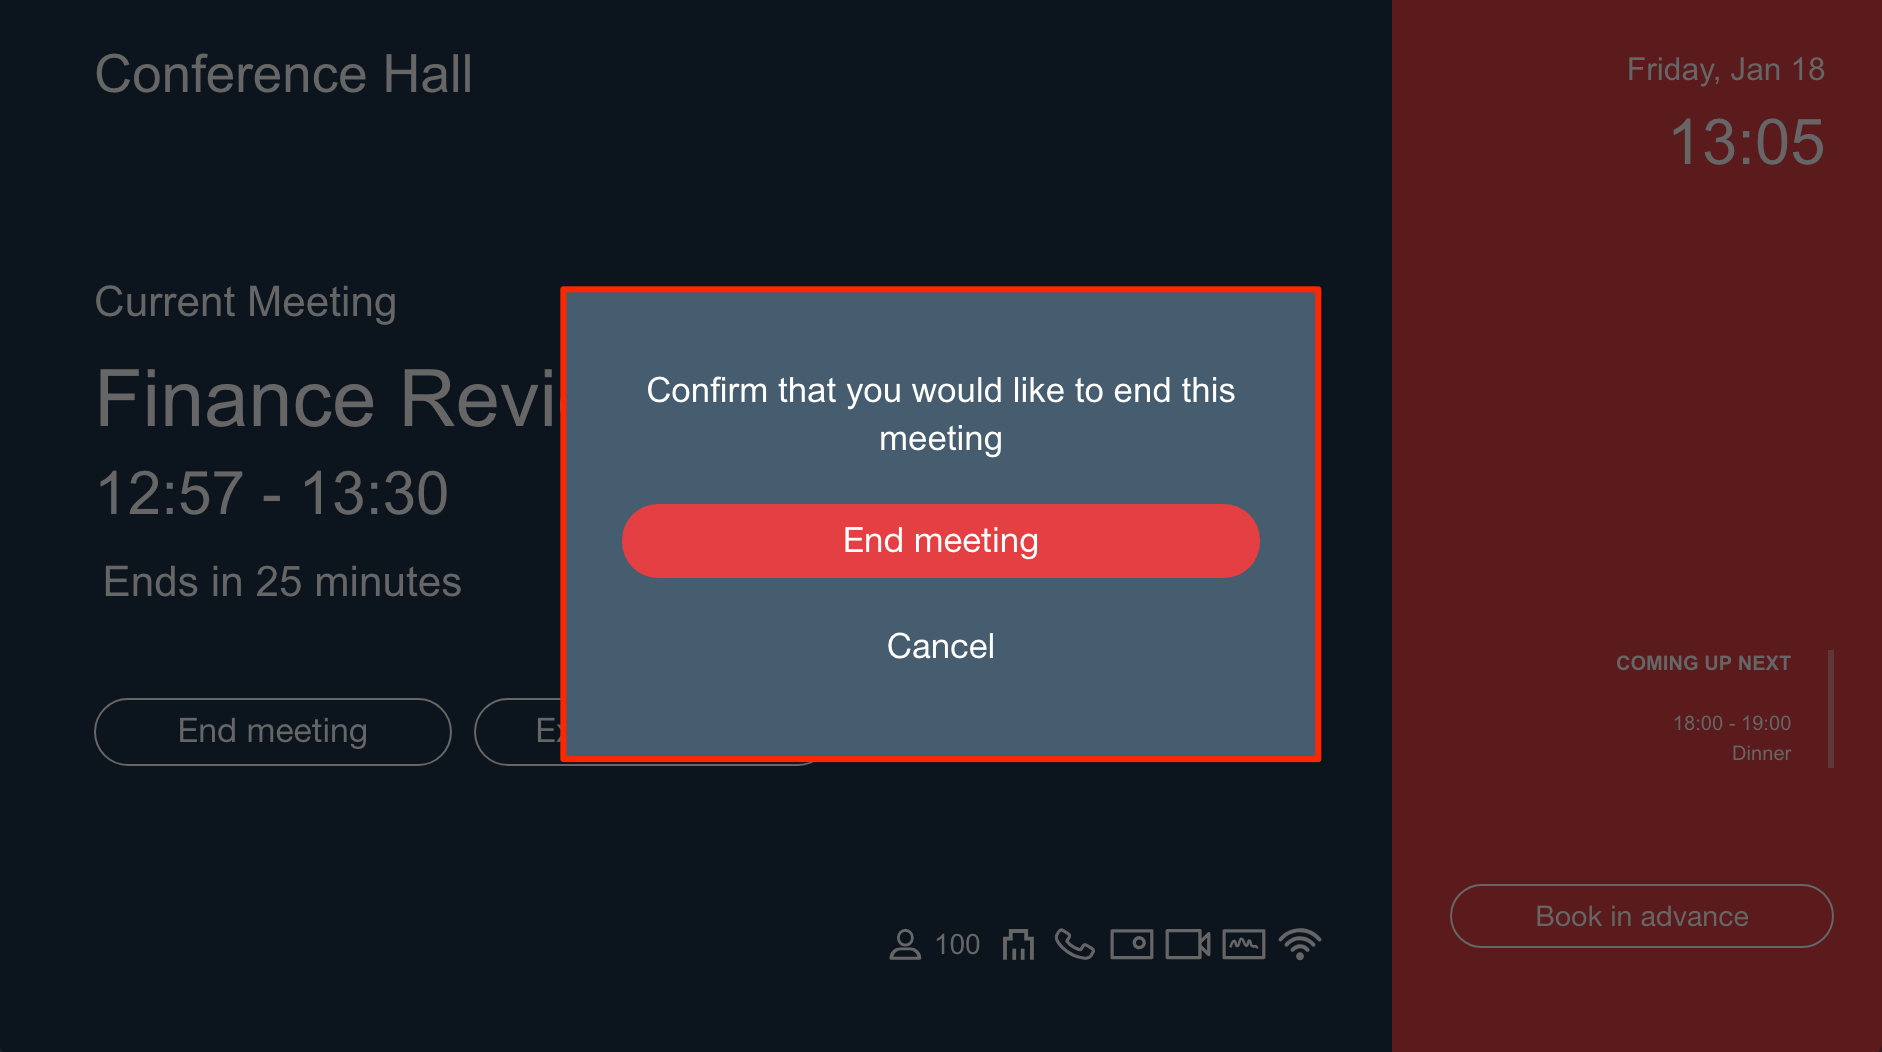
End meeting
To end a meeting immediately while the meeting is in session, click the End meeting button.
Book a meeting room via a calendar provider
You may also book your meeting rooms directly from your calendar provider, after you have configured the card and delegation access for your personal email account.
However, the following features that exist on the App would not be available to you:
- Check-in feature
- Extend Meeting
- End meeting
For instructions to book a meeting room using one of our supported calendar providers, click the link below:
Google Calendar
To schedule a meeting and book the meeting room via your Google Calendar,
Follow the instructions in the Create an event article: https://support.google.com/calendar/answer/72143?hl=en&co=GENIE.Platform%3DDesktop
We recommend creating your event by selecting the Click the Create button in the Ways to create an event section.
Be sure to enter in the following EVENT DETAILS:
- Meeting Title
- Meeting Date and Time
- Meeting Description
- Guests - Click the GUESTS tab, to add the meeting attendees
- Meeting Room - Click the ROOMS tab, to add the meeting venue. Select the meeting room configured to your card(s).
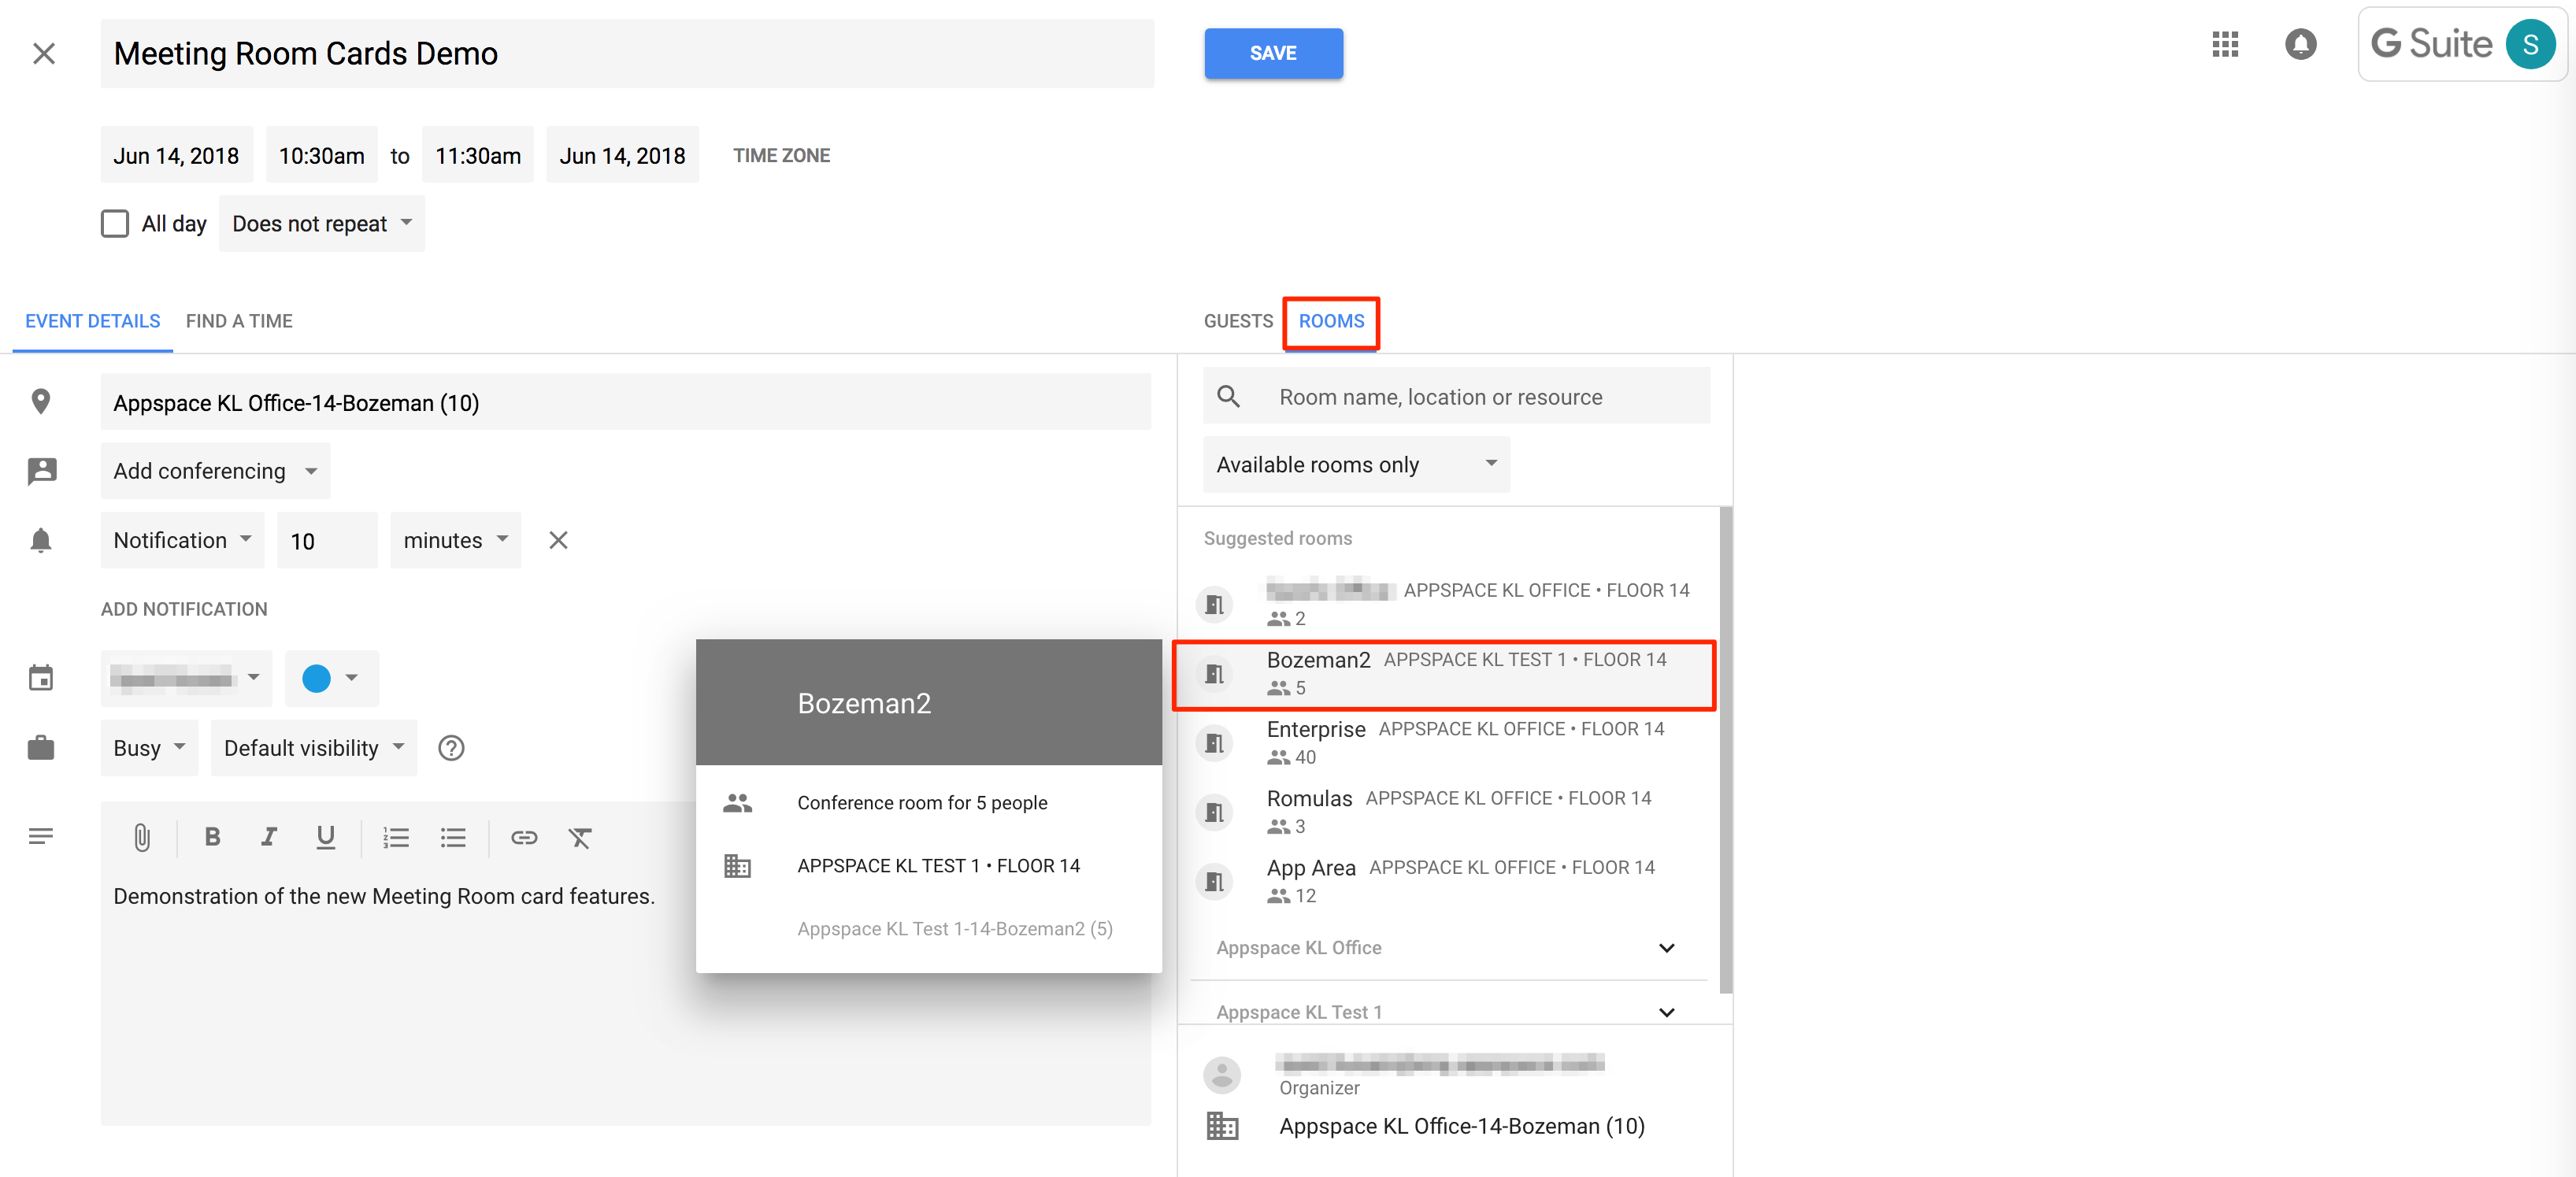
The successful booking will be reflected on the room schedule card tablet outside the booked room.
Important
Google Calendar allows bookings to overlap. Please ensure you do not overlap bookings when booked directly via Google Calendar.
We do not allow overlaps when booking directly via the Room Schedule card.
Microsoft Outlook
To schedule a meeting and book the meeting room via your Microsoft Outlook calendar,
Follow the instructions in the Schedule a meeting with other people article: https://support.office.com/en-us/article/schedule-a-meeting-with-other-people-5c9877bc-ab91-4a7c-99fb-b0b68d7ea94f#ID0EAABAAA=2016,_2013,_2010
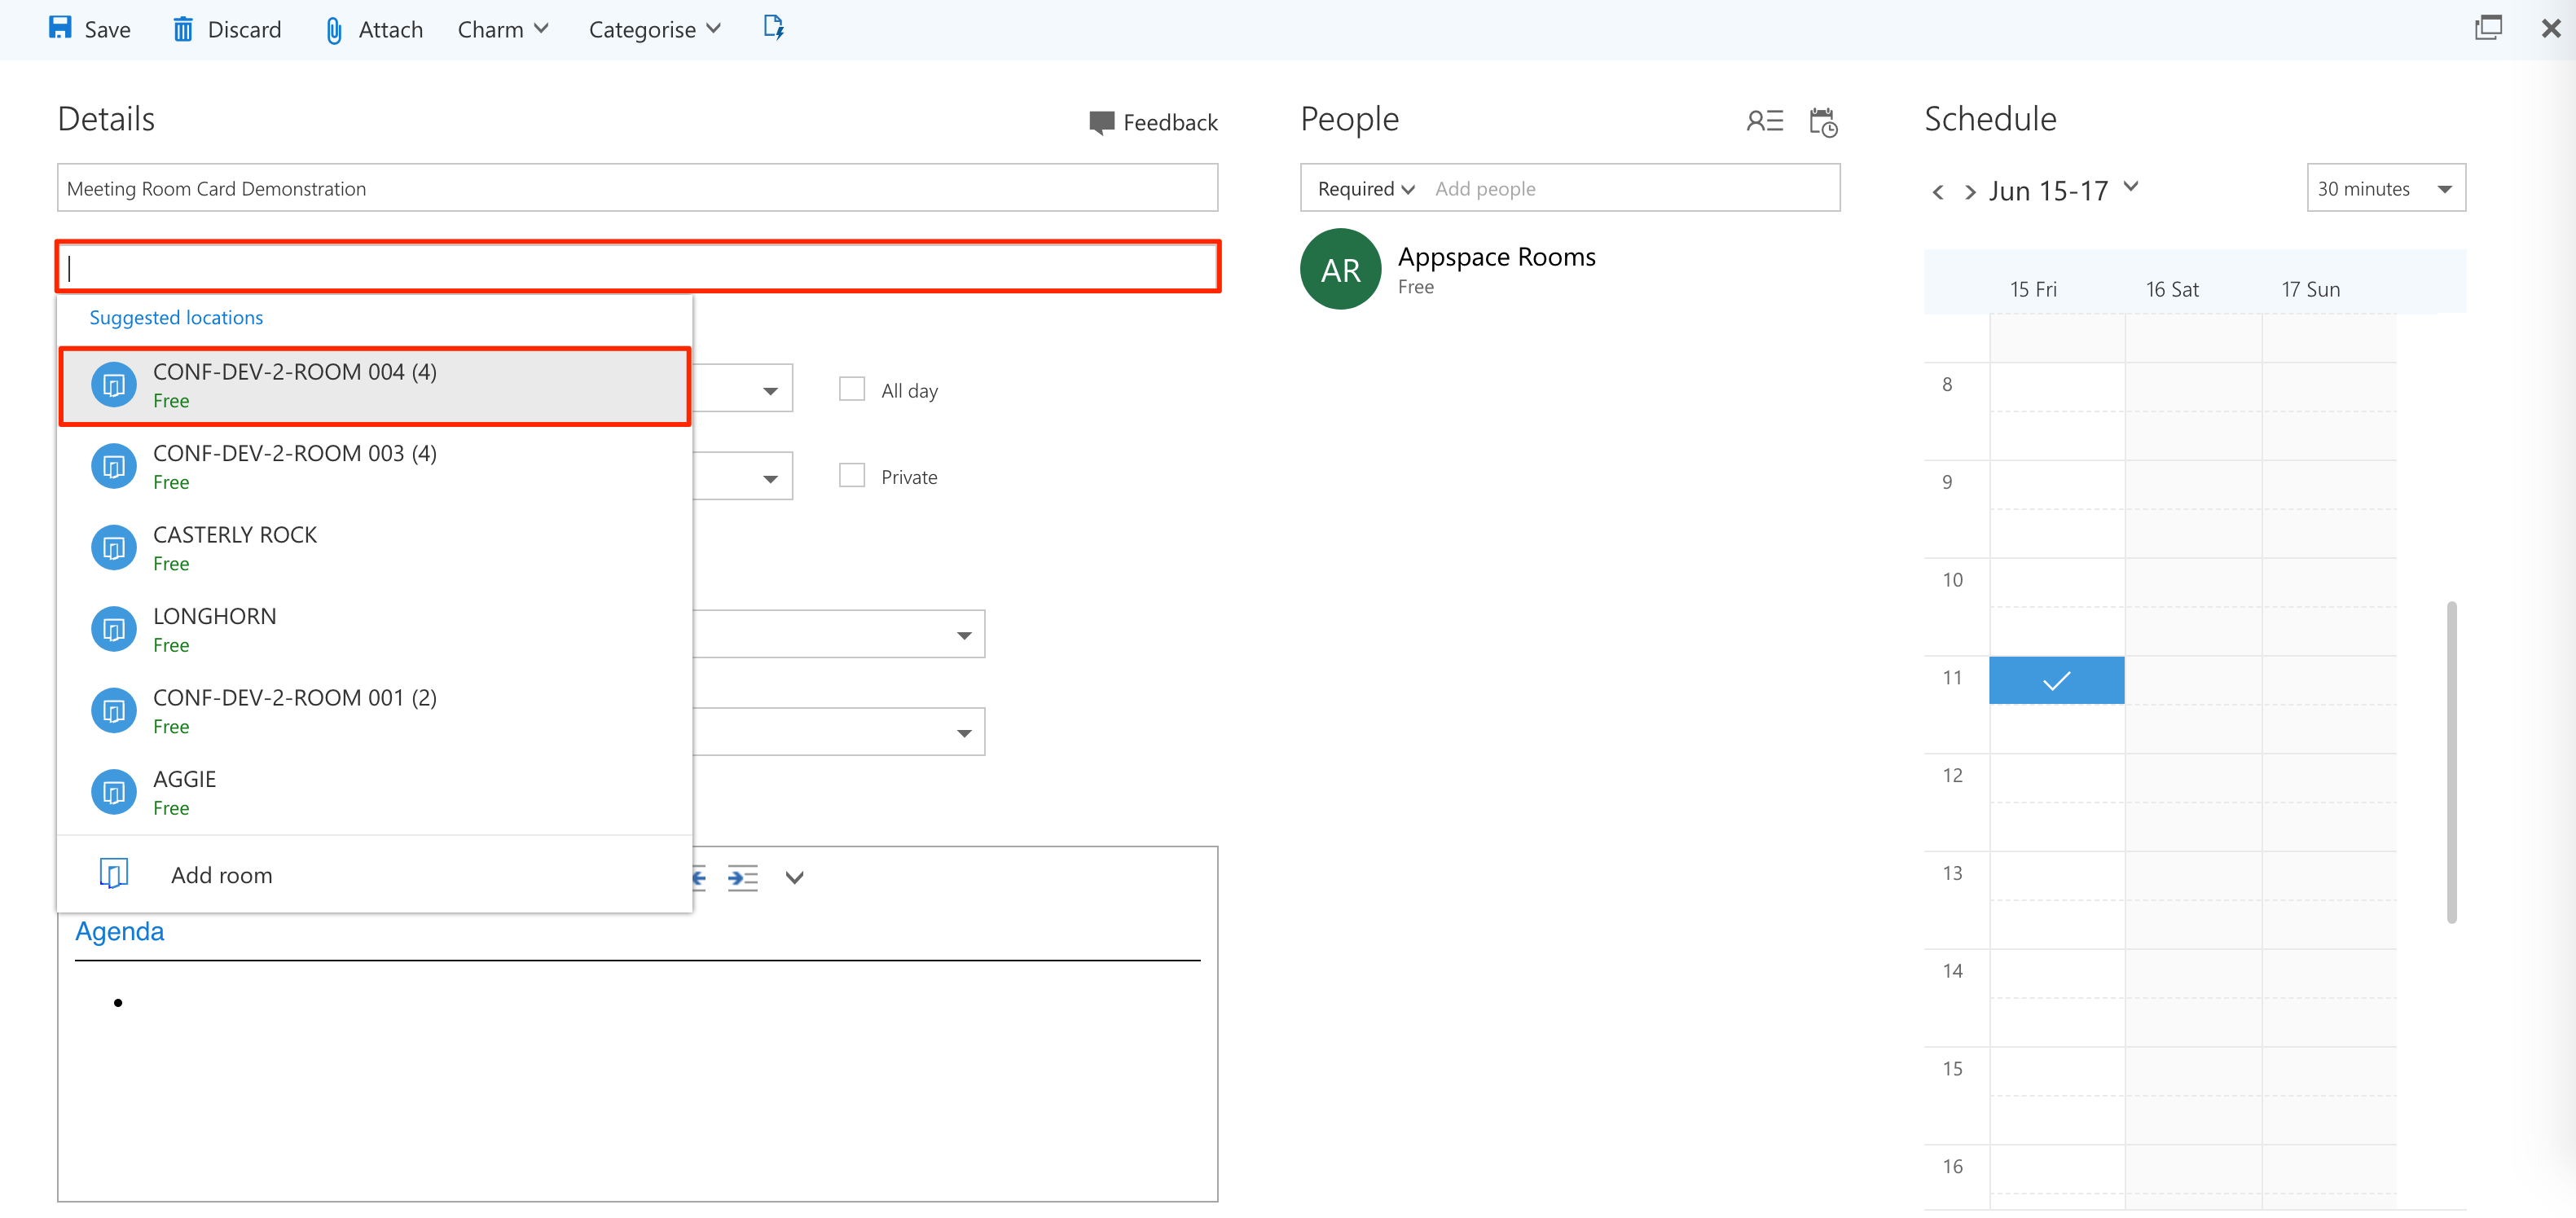
When selecting Location, select the meeting room configured to your card(s).
The successful booking will be reflected on the room schedule card tablet outside the booked room.