Configure wallpaper for Cisco Collaboration Endpoints
This article provides the instructions to configure an Appspace playlist channel as a wallpaper with customized messaging, to be displayed in the background, when a Cisco Collaboration Endpoint device is in an idle state.
Appspace can also be configured to display alerts and emergency messages over the wallpaper when triggered. Both the wallpaper and the alerts are only displayed when the Cisco CE device is not in conference.
The wallpaper content will change periodically based on the playlist channel’s predefined schedule and playout duration (e.g. every 30s, hourly,).
Important
The Appspace App for Cisco Collaboration Endpoints is only designed and tested for playlist channels, thus we do not support advanced channels, live stream channels, videos, alerts, or playout metrics.
However, as the Cisco CE devices do not behave like other full-fledged Appspace supported devices, we will need to use a caching device that will act as an intermediary between a number of Cisco CE devices and the Appspace server. The caching device must be an Appspace supported device running the full Appspace App. The caching device is used to simplify networking rules, eliminating the need for each Cisco CE device to allow inbound calls from Appspace, which many networks do not allow.
The caching device, in turn, will call to the Appspace server so that the network does not need to allow inbound traffic. The device will then cache the wallpaper and push it to the Cisco CE device(s), as presented in the diagram below.
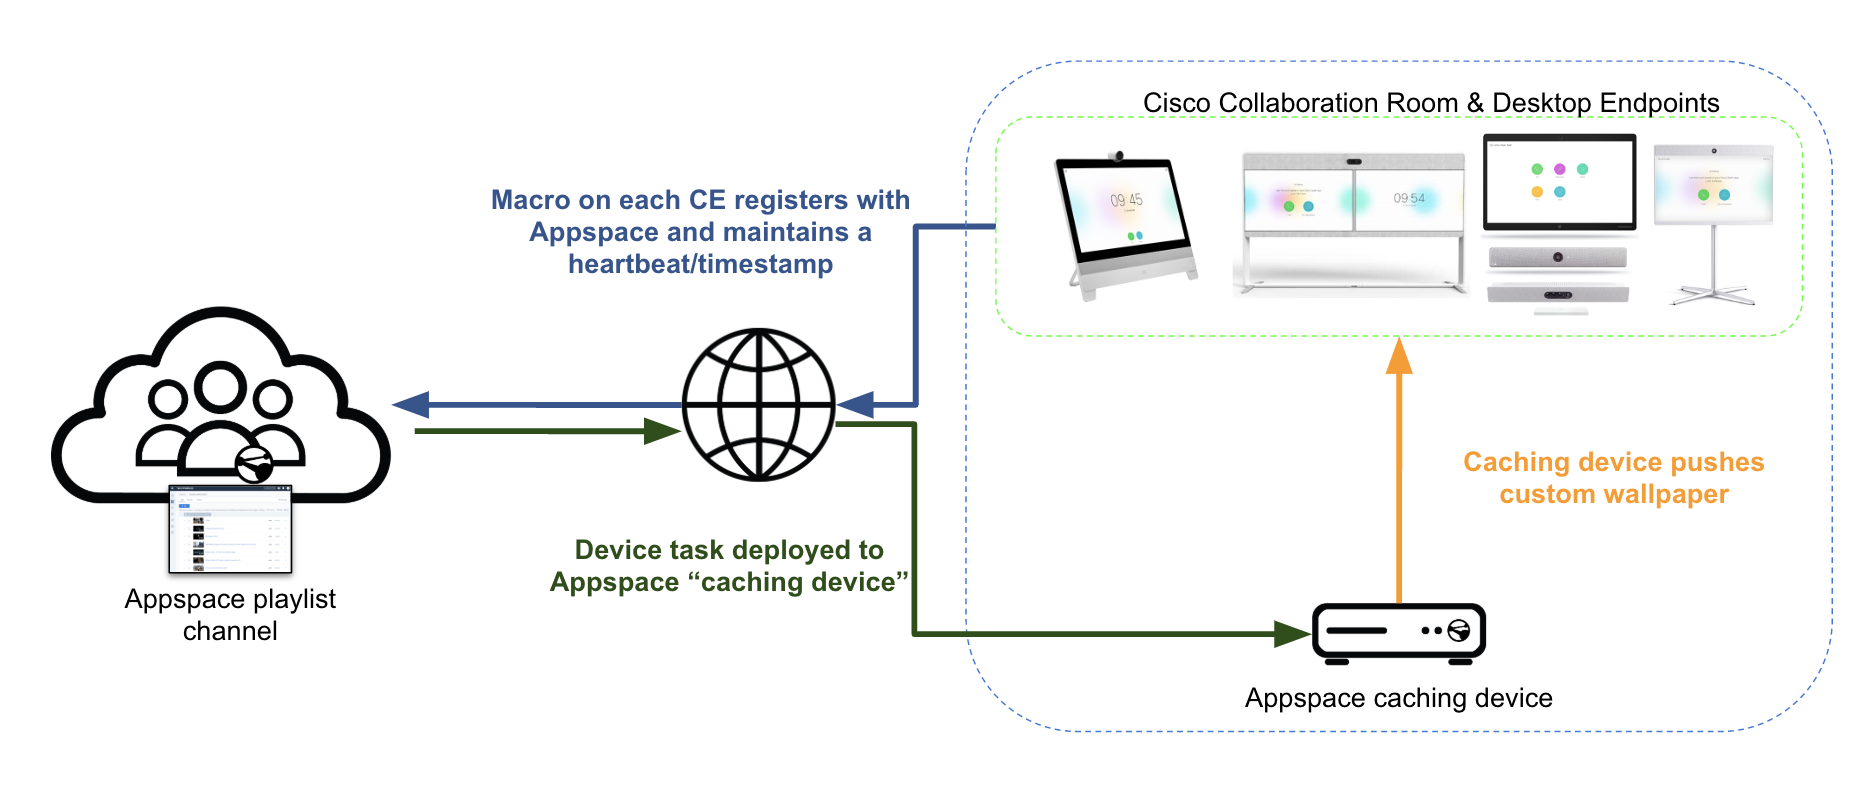
We have also enabled distribution group tagging to ensure all Cisco CE devices and caching devices communicate efficiently. All these devices must be configured with the cedg<unique_name> device tags to ensure the Cisco CE devices receive updates from the caching device. A Cisco CE device may only contain one device tag, however the caching device may be configured with multiple device tags.
Note
If you would like to know more about this or other Appspace-Cisco integrations, please find our whitepapers on this site: https://www.appspace.com/cisco/resources
Prerequisites
Appspace 7.0 or higher.
An active Appspace account, with sufficient Device IDs to register the devices.
Important
Please ensure your network is configured to allow Appspace whitelist URLs and the relevant network ports. This is necessary for the creation of the macro that needs to be deployed to the caching devices.
An Appspace playlist channel, with content only consisting of images set to a minimum of 60 secs duration per item. Click here for instructions to create a playlist channel.
Important
- Only one playlist channel must be created.
- The playlist channel must contain only images or static screenshots of Appspace cards. Card animations are not supported here.
- Duration for each content item (image/static screenshot) in the playlist must be set to a minimum of 60s or more. We recommend changing content only once or twice in an hour or once at the top of every hour. It will be ideal to display the wallpaper content between meetings. Changing content too frequently is not ideal for device scalability and performance.
- Advanced channels, live stream channels, videos, alerts, and playout metrics, are not supported for this solution.
An Appspace App supported device, installed and configured with the Appspace App. This device will be configured as a caching device (see section below) on the same network as the Cisco CE devices.
Note
Every registered caching device will consume one Appspace ID each.
The Appspace App supported device must have access to the Appspace platform (cloud/on-prem) via HTTP/HTTPS, and can be used independently.
Supported Cisco CE devices running either one of the following:
Cisco Collaboration Endpoint Software CE9.6 or later, if registered on CUCM.
Important
We recommend customers to update their devices to the latest firmware versions as per Cisco’s recommendations.
The latest Cisco Room OS, if registered on Webex Cloud. We support the following devices:
- Cisco Webex DX Series - DX80
- Cisco Webex Room Series - Room 55, Room 70, Room Kit, Room Kit Mini, Room Kit Plus, Room Kit Pro.
- Cisco TelePresence MX Series - MX200, MX300, MX700, MX800
- Cisco TelePresence SX Series - SX20, SX80
Note
Every registered Cisco Collaboration Endpoint device will consume one Appspace ID each.
Ensure Cisco CE devices are configured to allow access to the Appspace platform (cloud/on-prem) via HTTP/HTTPS.
Ensure Cisco CE devices are configured to allow access to the Appspace App supported device (caching device) via HTTP/HTTPS.
Important
- All Appspace App supported devices can currently support HTTP.
- Only BrightSign currently supports HTTPS, with a device task deployment that will allow Cisco self-signed certificates.
Ensure Cisco CE devices are configured to enable Custom Wallpaper, while Branding is disabled, as both these features are unable to co-exist together.
Note
You can disable the Branding feature via Setup > Personalization on the Cisco CE device.

An administrator account on the Cisco Collaboration Endpoint device to install the macro.
An Integrator account on the Cisco Collaboration Endpoint device to run the macro.
Tag all caching devices and Cisco CE devices with cedg<unique_name> (i.e. cedgcachingdevice1 or cedgLobby).
The Appspace advanced device task: “Appspace App: Cisco Room Endpoints Controller”.
Note
Ensure the advanced device task is deployed correctly to the caching device (supported Appspace App device). This task has been preconfigured to run 50 congruent API calls at a time, thus if a single caching device is meant to update more than 50 Cisco CE devices, the push happens only after the first 50 API calls have been made. The deployment settings for this task is set to run “On Boot” by default, and shouldn’t be changed.
An active Internet connection.
Configure Cisco Collaboration Endpoint
Follow the instructions in the following order to setup the Cisco CE devices with Appspace.
- Configure the Collaboration Endpoint (CE) Macro
- Configure the Collaboration Endpoint (CE) Device
- Configure the Appspace Caching Device
Configure the Collaboration Endpoint (CE) Macro
Important
You must create a playlist channel with images prior to proceeding with these instructions.
Log in to your Appspace account, and click Devices from the Appspace menu.
In the Devices tab, click ADD, and click the advanced device registration link.

Select Cisco Collaboration Endpoint Macro from the Deployment method drop-down menu, and select the desired network.
Select the playlist channel that will be displayed as the wallpaper for the Cisco CE device.
Enter in the Integrator account credentials of the Cisco CE device. Optionally, if the Integrator account doesn’t require a password, select No.
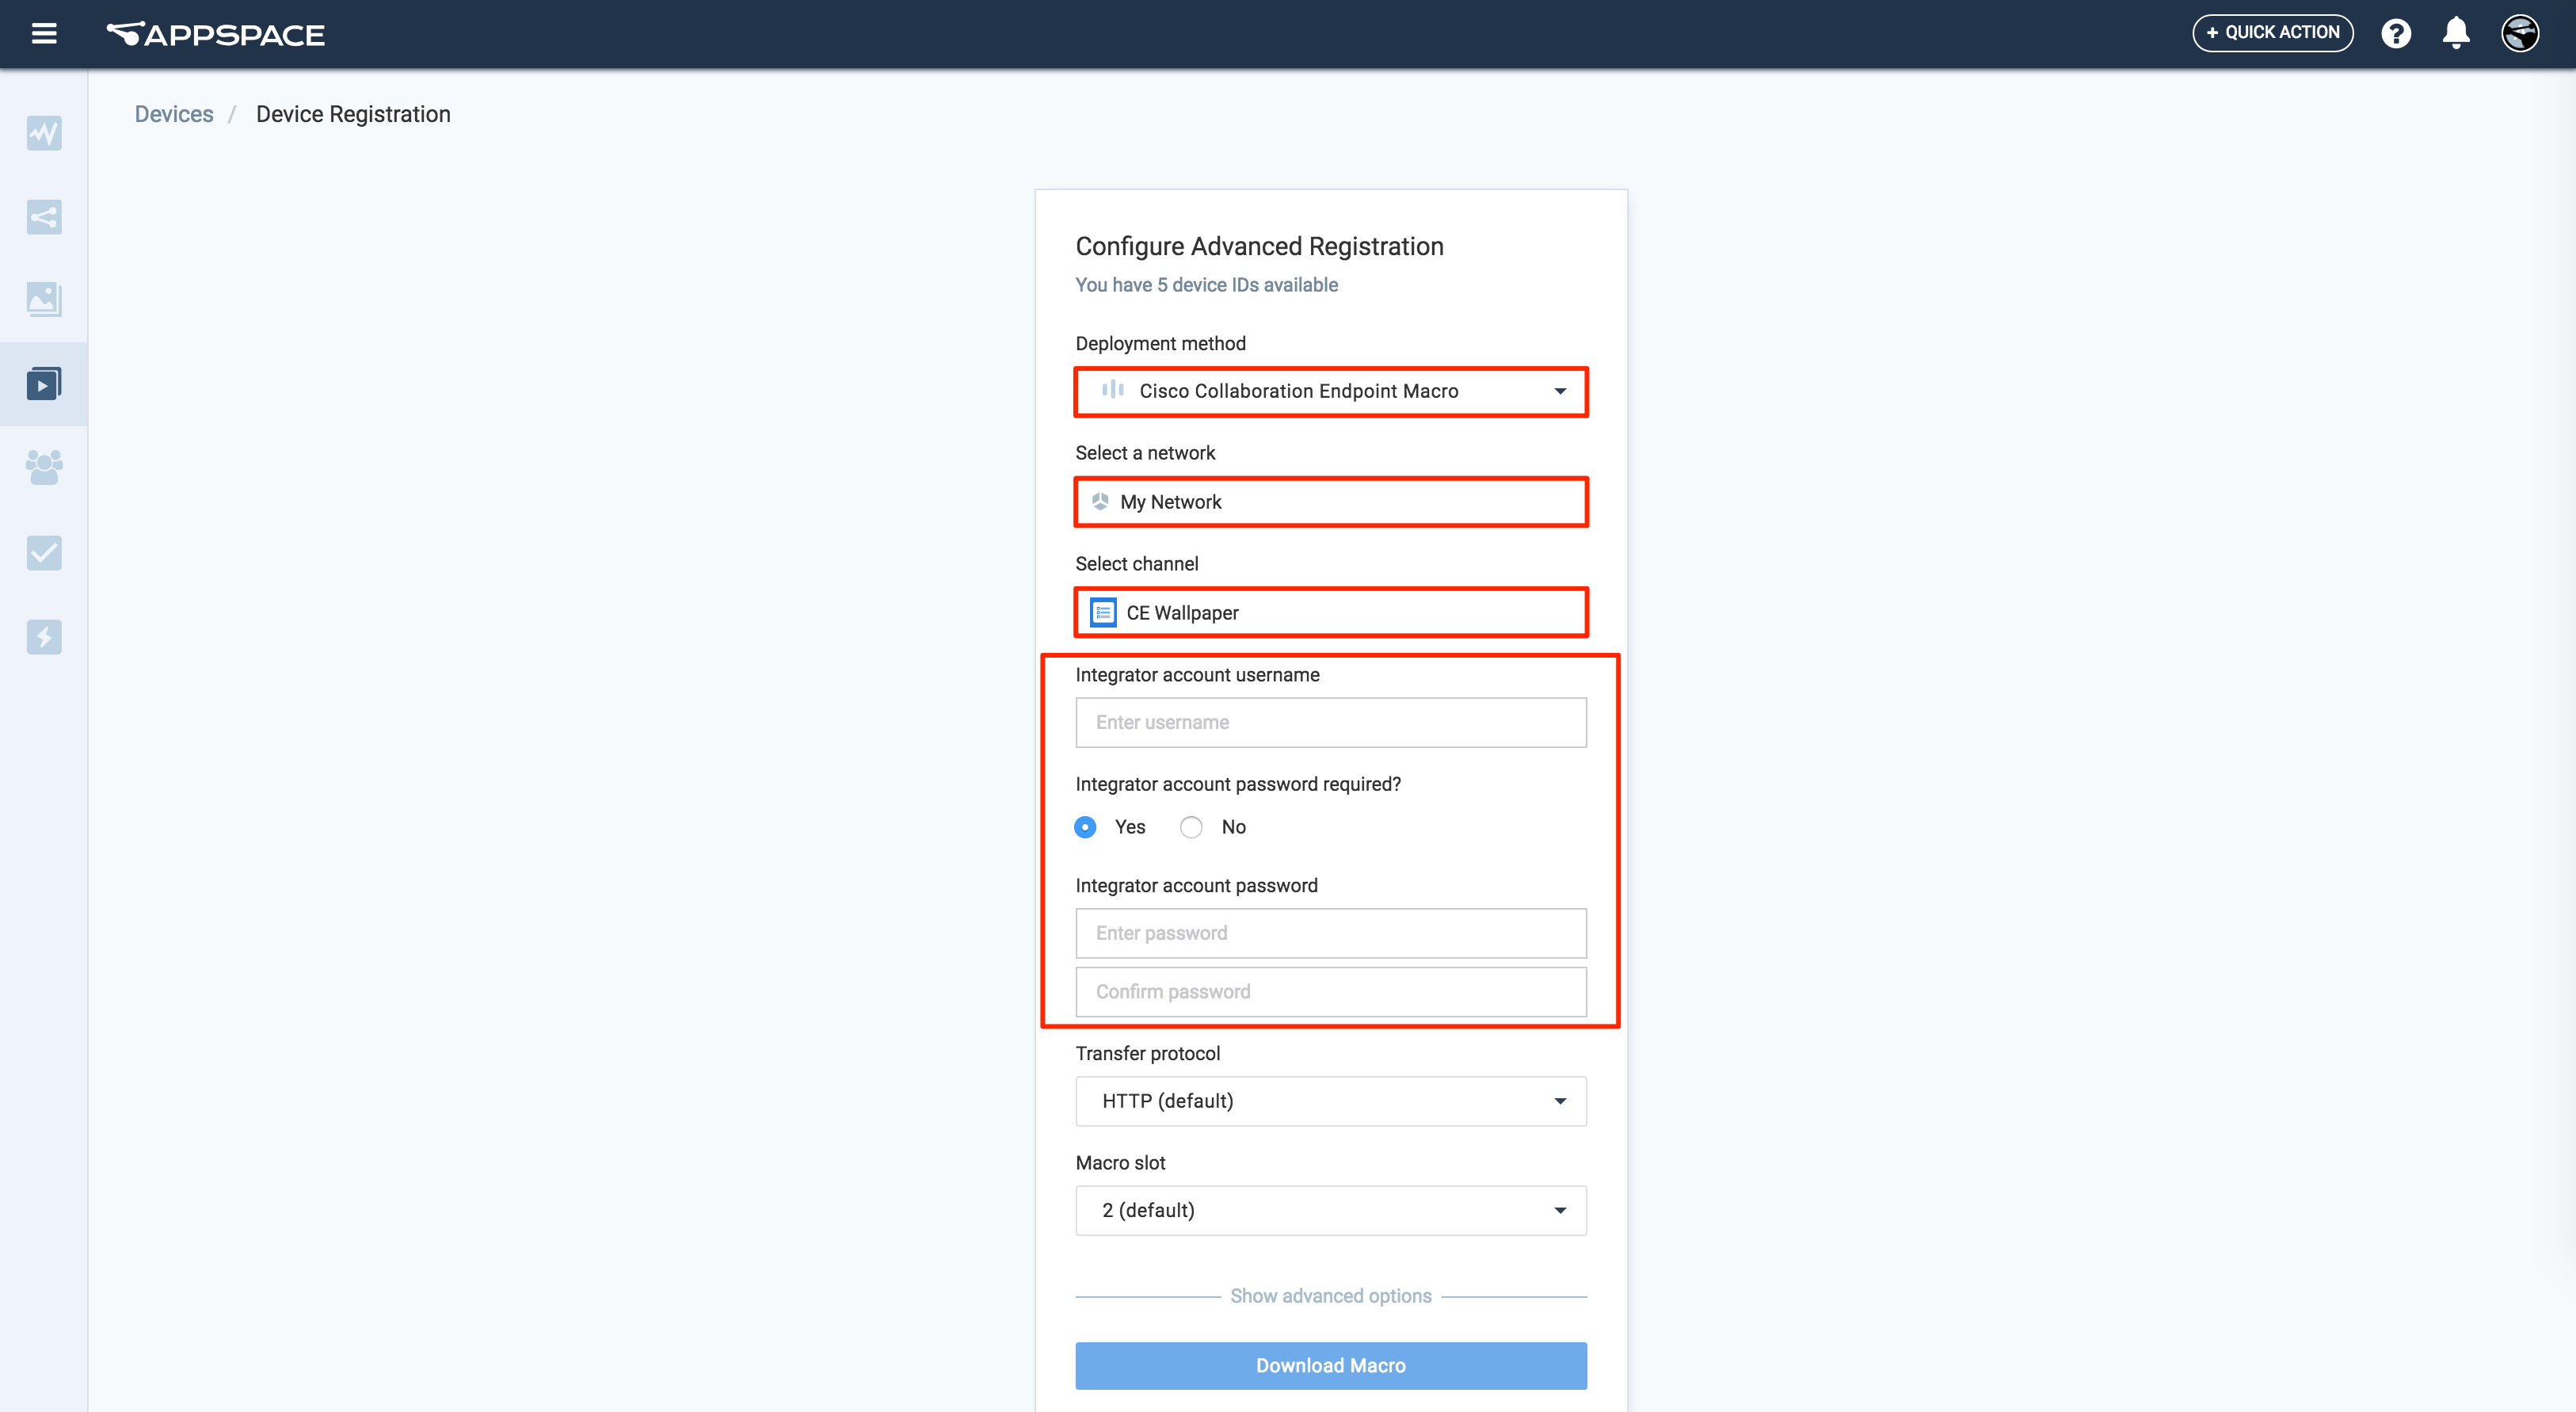
Configure the Transfer protocol and Macro Slot for the Cisco CE device to communicate with the caching device.
Note
- The Transfer protocol, is the communication protocol between the Cisco CE device and the caching device, defaulted to HTTP.
- The Macro slot, or HttpFeedback Slot is the integrations deployed that may be communicating over HTTP/HTTPS with the CE device, is defaulted to 2.
Important
Ensure the communication protocol on the Cisco CE device matches the protocol selected in the macro, only then can a connection be established.
All Appspace App supported devices can currently support HTTP. However only the BrightSign device supports HTTPS with a device task deployment.
Click the Show advanced options link, to configure the Device Description, Device Group, and, Device Tags. Add the cedg<unique_name> device tag (i.e. cedgConference1 or cedgmydevice).
Click Download Macro to download the macro.js file to a default download folder in your local machine.
Configure the Collaboration Endpoint (CE) Device
Log in to your Cisco Collaboration Endpoint (CE) device’s web interface (via device IP address) with your Cisco Admin credentials, and navigate to Integration > Macro Editor.

Click Import from file to import the downloaded macro.js file.
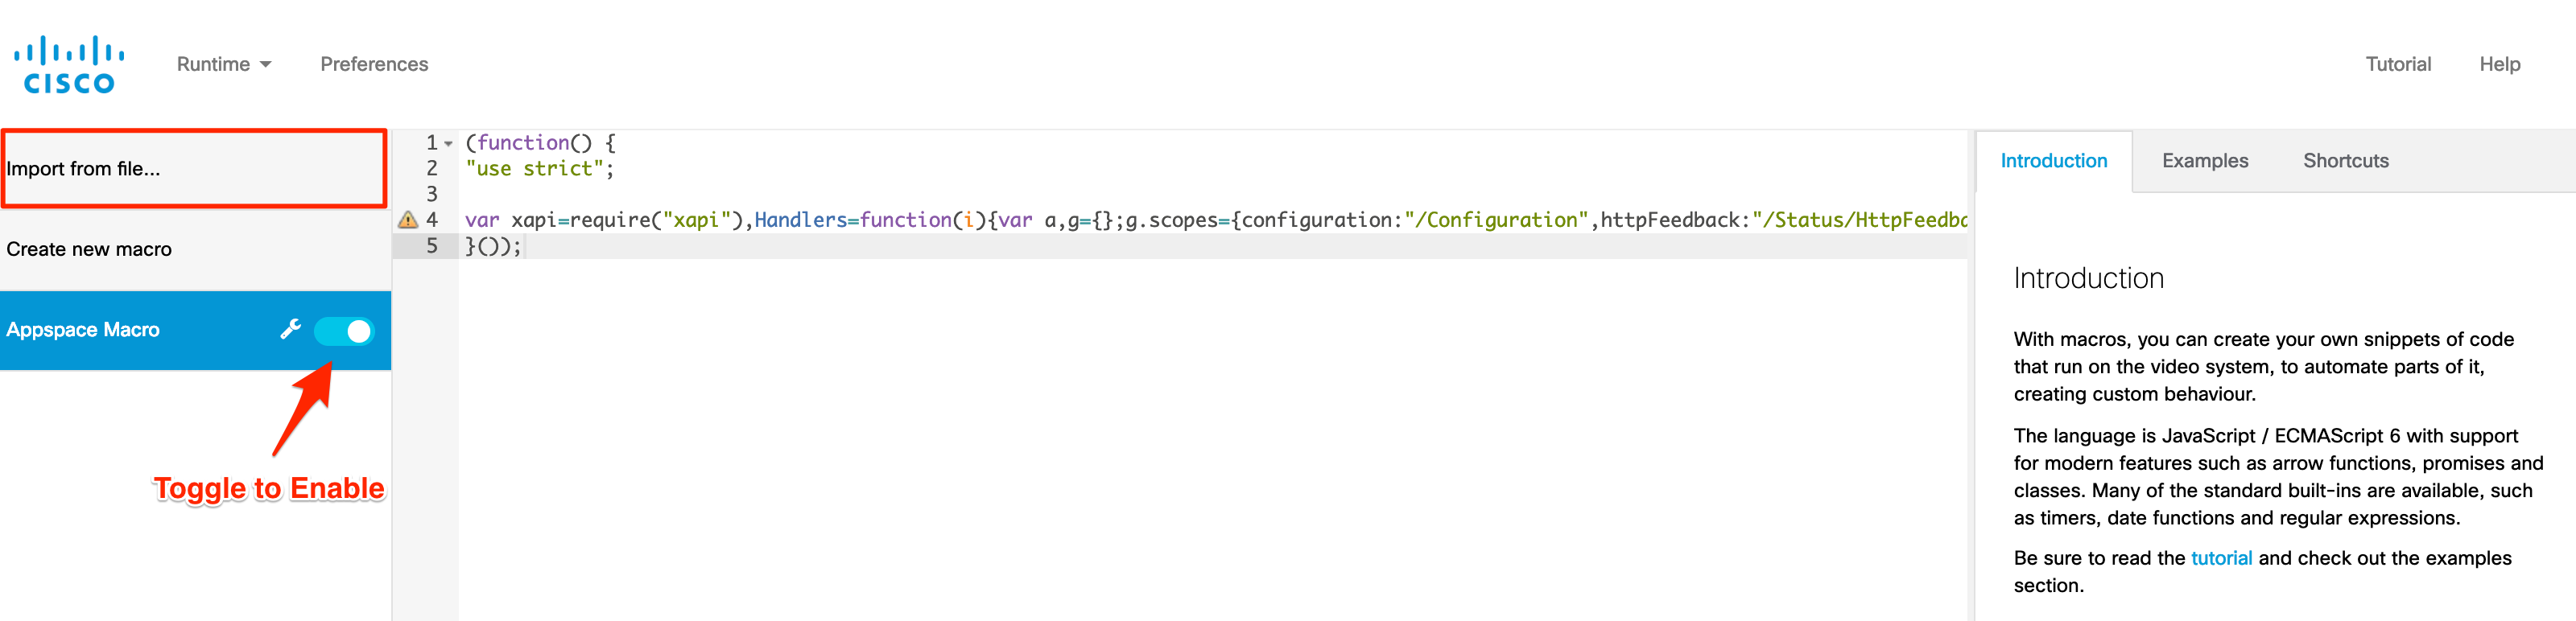
Save, and enable the macro entry via the toggle.
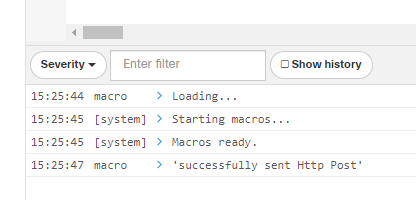
To verify if the macro has been deployed correctly, click Show History, and the message “successfully sent Http Post” should indicate the Cisco CE device is able to reach out to the Appspace server.
The Cisco CE device should also appear in the device list in Devices, in the Appspace console.
Note
The device name will be the CE device’s serial number.
Configure the Appspace Caching Device
Important
You must install the Appspace App and register the device prior to proceeding with these instructions.
Log in to your Appspace account, and click Devices Tasks from the Appspace menu.
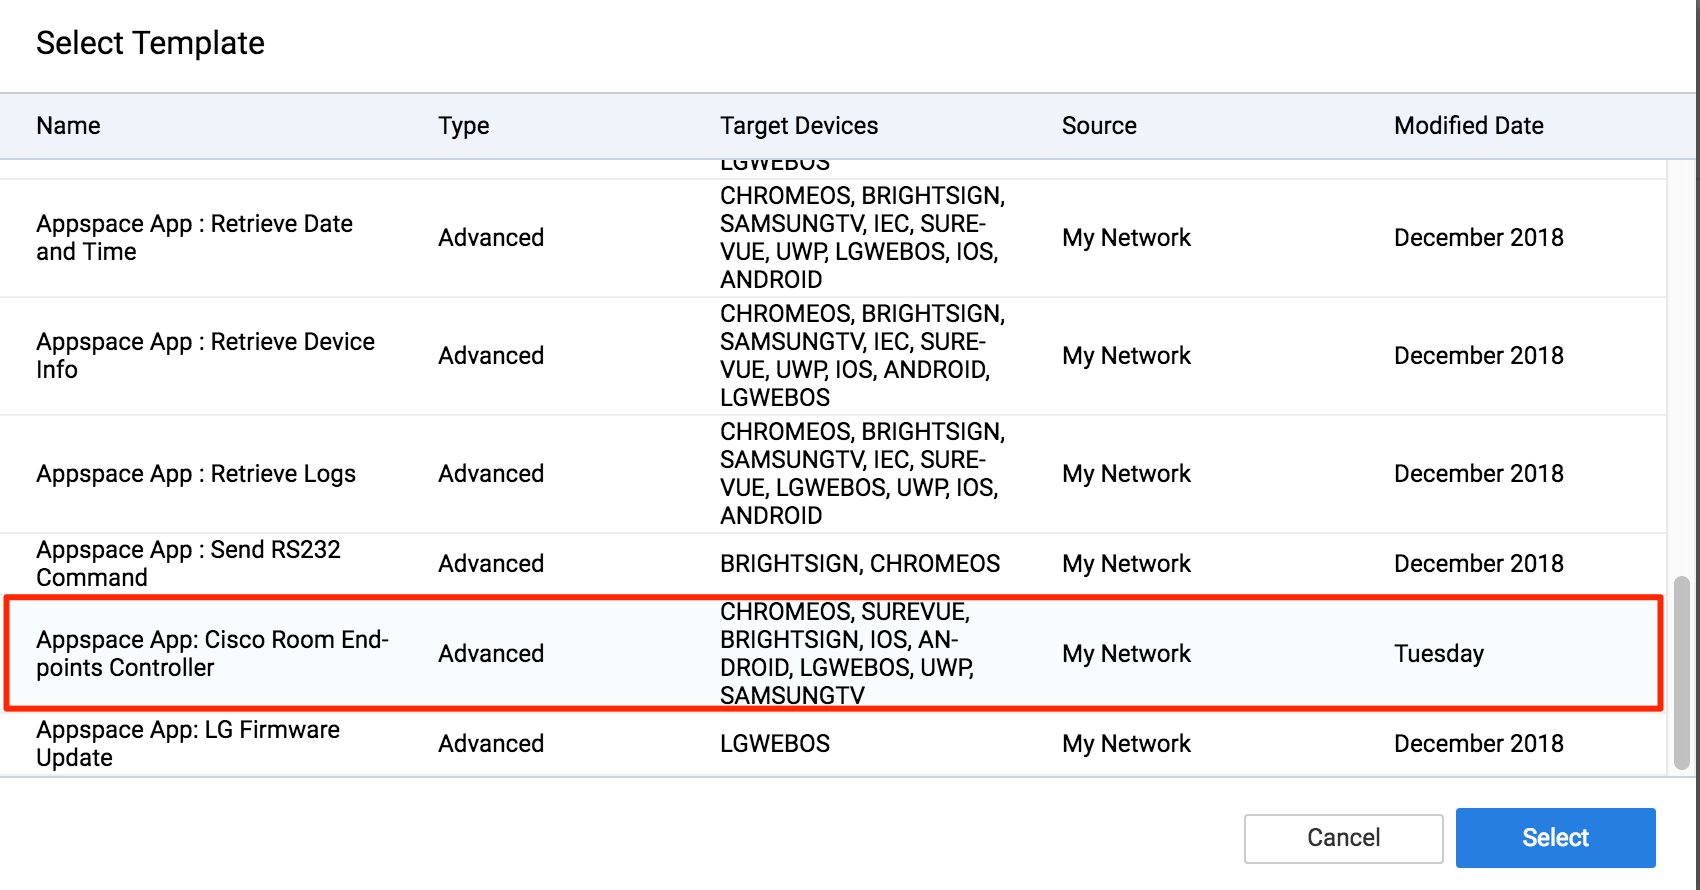
In the Advanced Tasks tab, click ADD, and select the Appspace App: Cisco Room Endpoints Controller device task.
In the Deploy To section, click the Add icon, and select the Appspace device which would function as the caching device.
This device task has been preconfigured to run On Boot, hence the task becomes part of the startup sequence.
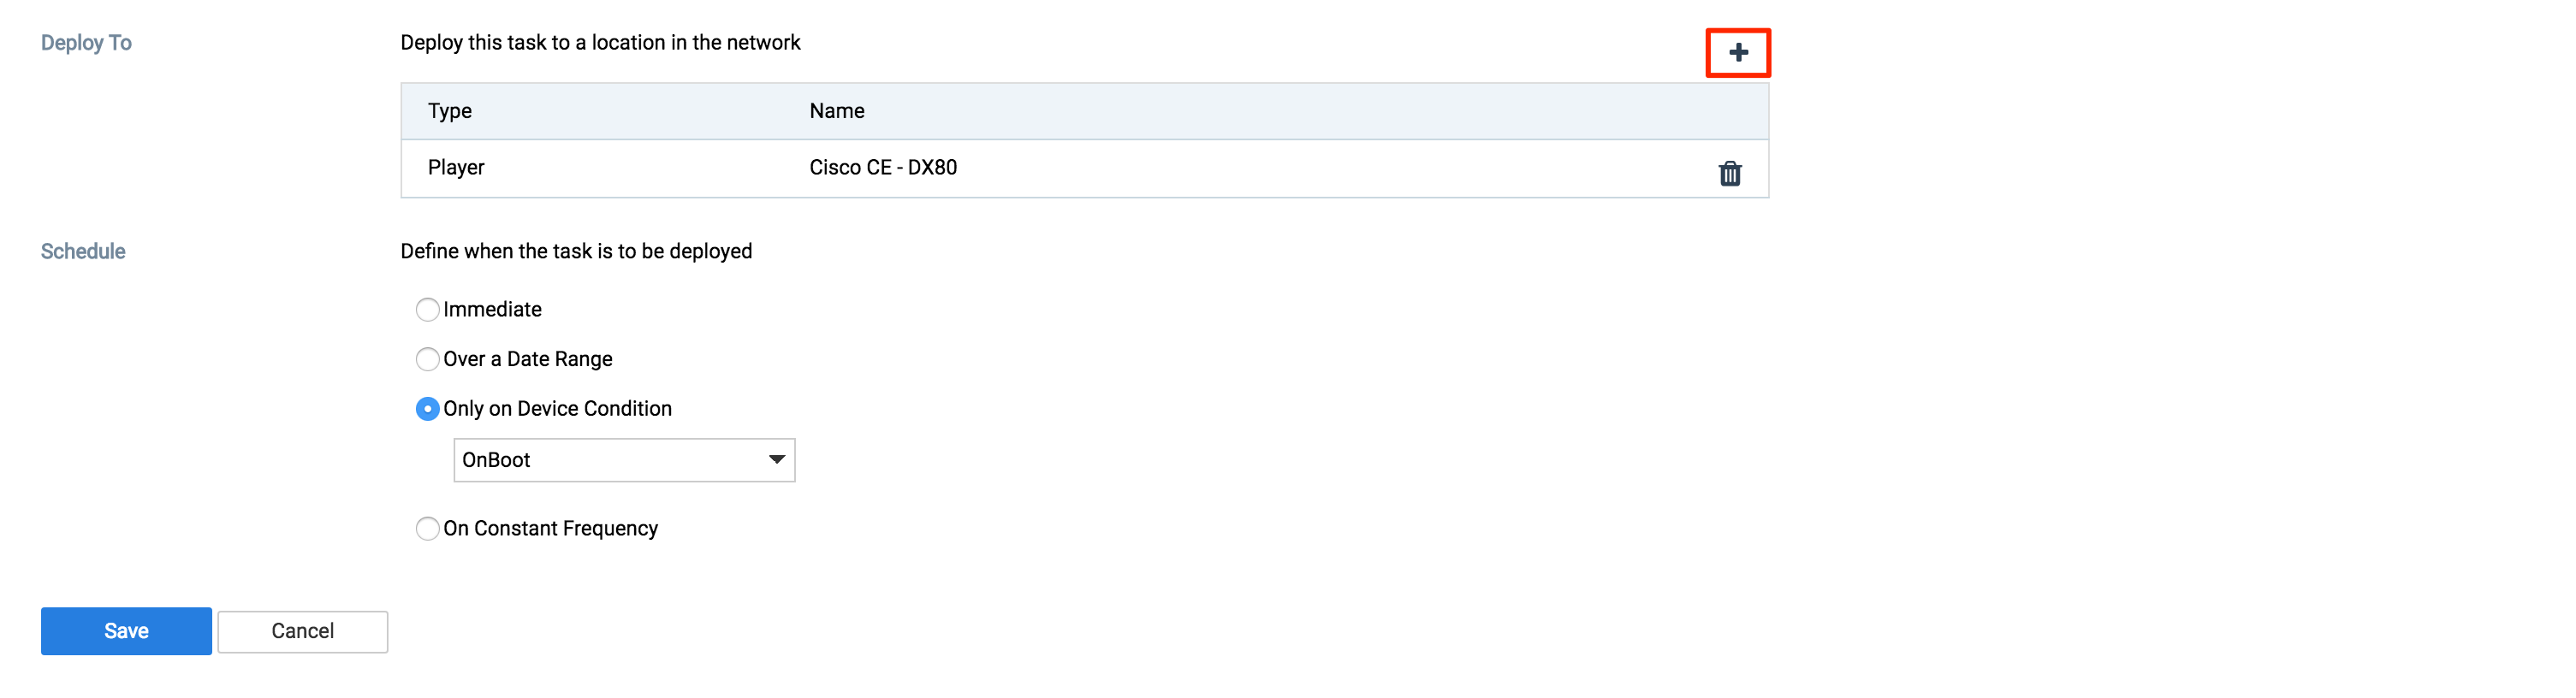
Once done, click Save. Wait for the device task to be successfully deployed.
Add the cedg<unique_name> device tag to your caching device (i.e. cedgConference1 or cedgLobby2). Click here for instructions to add tags.
Reboot the caching device. Upon reboot, the caching device returns the response: “CE Sync status begun successfully”.
Important
For troubleshooting instructions, please refer to Cisco Collaboration Endpoint device does not show wallpaper.