Install Appspace App on LG webOS
This article provides the instructions to configure and register LG webOS devices for Appspace.
- Configure LG webOS
- Registering LG webOS via Local Policy file
- Configure LG webOS via Remote Deployment
Prerequisites
The device must meet the manufacturer’s minimum hardware and technical specifications, as well as the Appspace App’s minimum requirements. Please refer to Appspace App requirements.
A LG webOS compatible USB drive.
An active Appspace account, with sufficient Device IDs to register the device.
An active Internet connection.
It is recommended that the device clock is set to automatically retrieve time from a Network Time Protocol (NTP) server, with the correct time zone, in order for it to sync correctly with the Appspace server.
Note
Appspace cloud servers by default retrieve time from a NTP server. If an Appspace on-premises server is used, ensure the server time is automatically retrieved by a NTP server.
Please ensure your network is configured to allow Appspace whitelist URLs and the relevant network ports.
On your proxy server, whitelist the hostnames listed in the ‘How to set up networks with SSL content filters’ section in the following article: https://support.google.com/chrome/a/answer/3504942#sslinspection.
Configure LG webOS
Follow the instructions below to setup the LG webOS device:
In your Appspace console, navigate to System > Downloads, and download the Appspace App for LG webOS 3.0 (com.lg.app.signage.ipk).
Copy the com.lg.app.signage.ipk file to the /application directory on the USB drive.
Insert the USB drive into the LG device.
Access the SI Server settings panel.
On webOS 3.0
On the LG remote control, press the Home button, and select SI Server from the app tiles to access the SERVER settings.
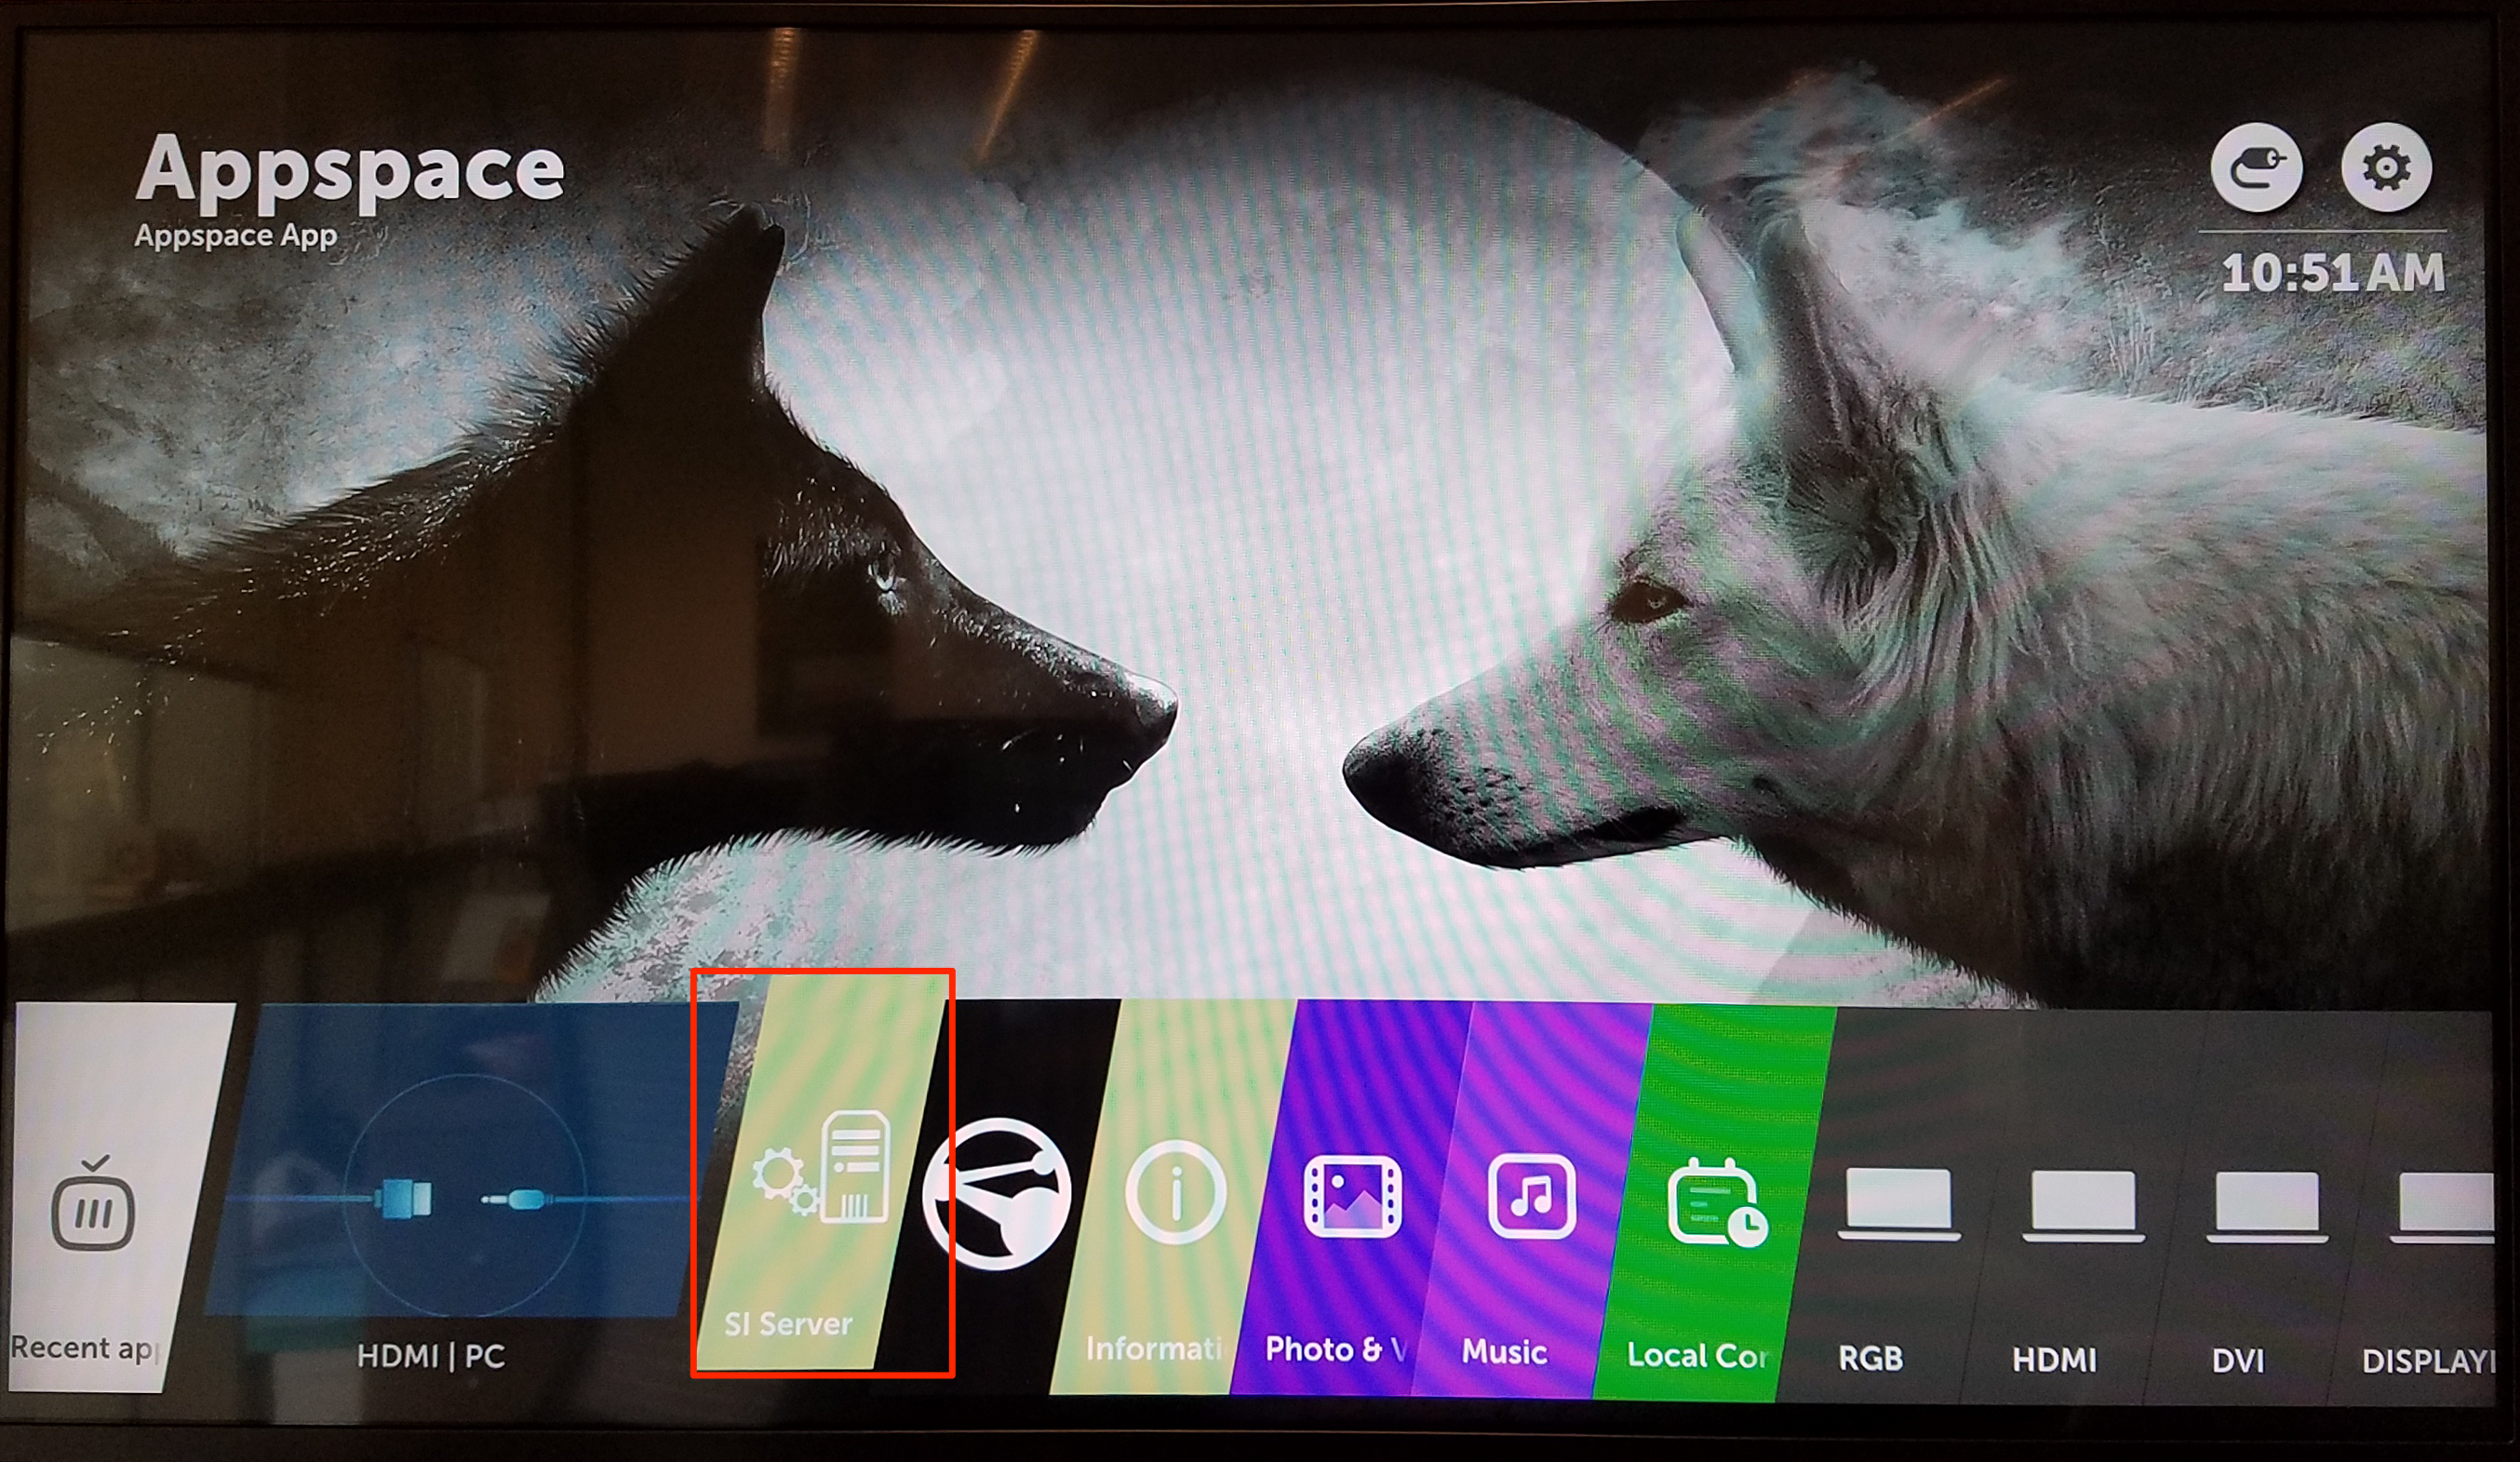
Important
If the SI Server tile is not found in the app tiles, you’ll need to access the SERVER settings via a hidden menu.
- On the LG remote control, hold the Settings button until the chat bubble icon appears.
- In sequence, press 8, 0, 8, 0, and the OK button to access the SERVER settings.
- Or, in sequence, press 0, 0, 0, 0, and the OK button to access the CONFIGURATION menu, to enable the SI Server tile on the app tiles.
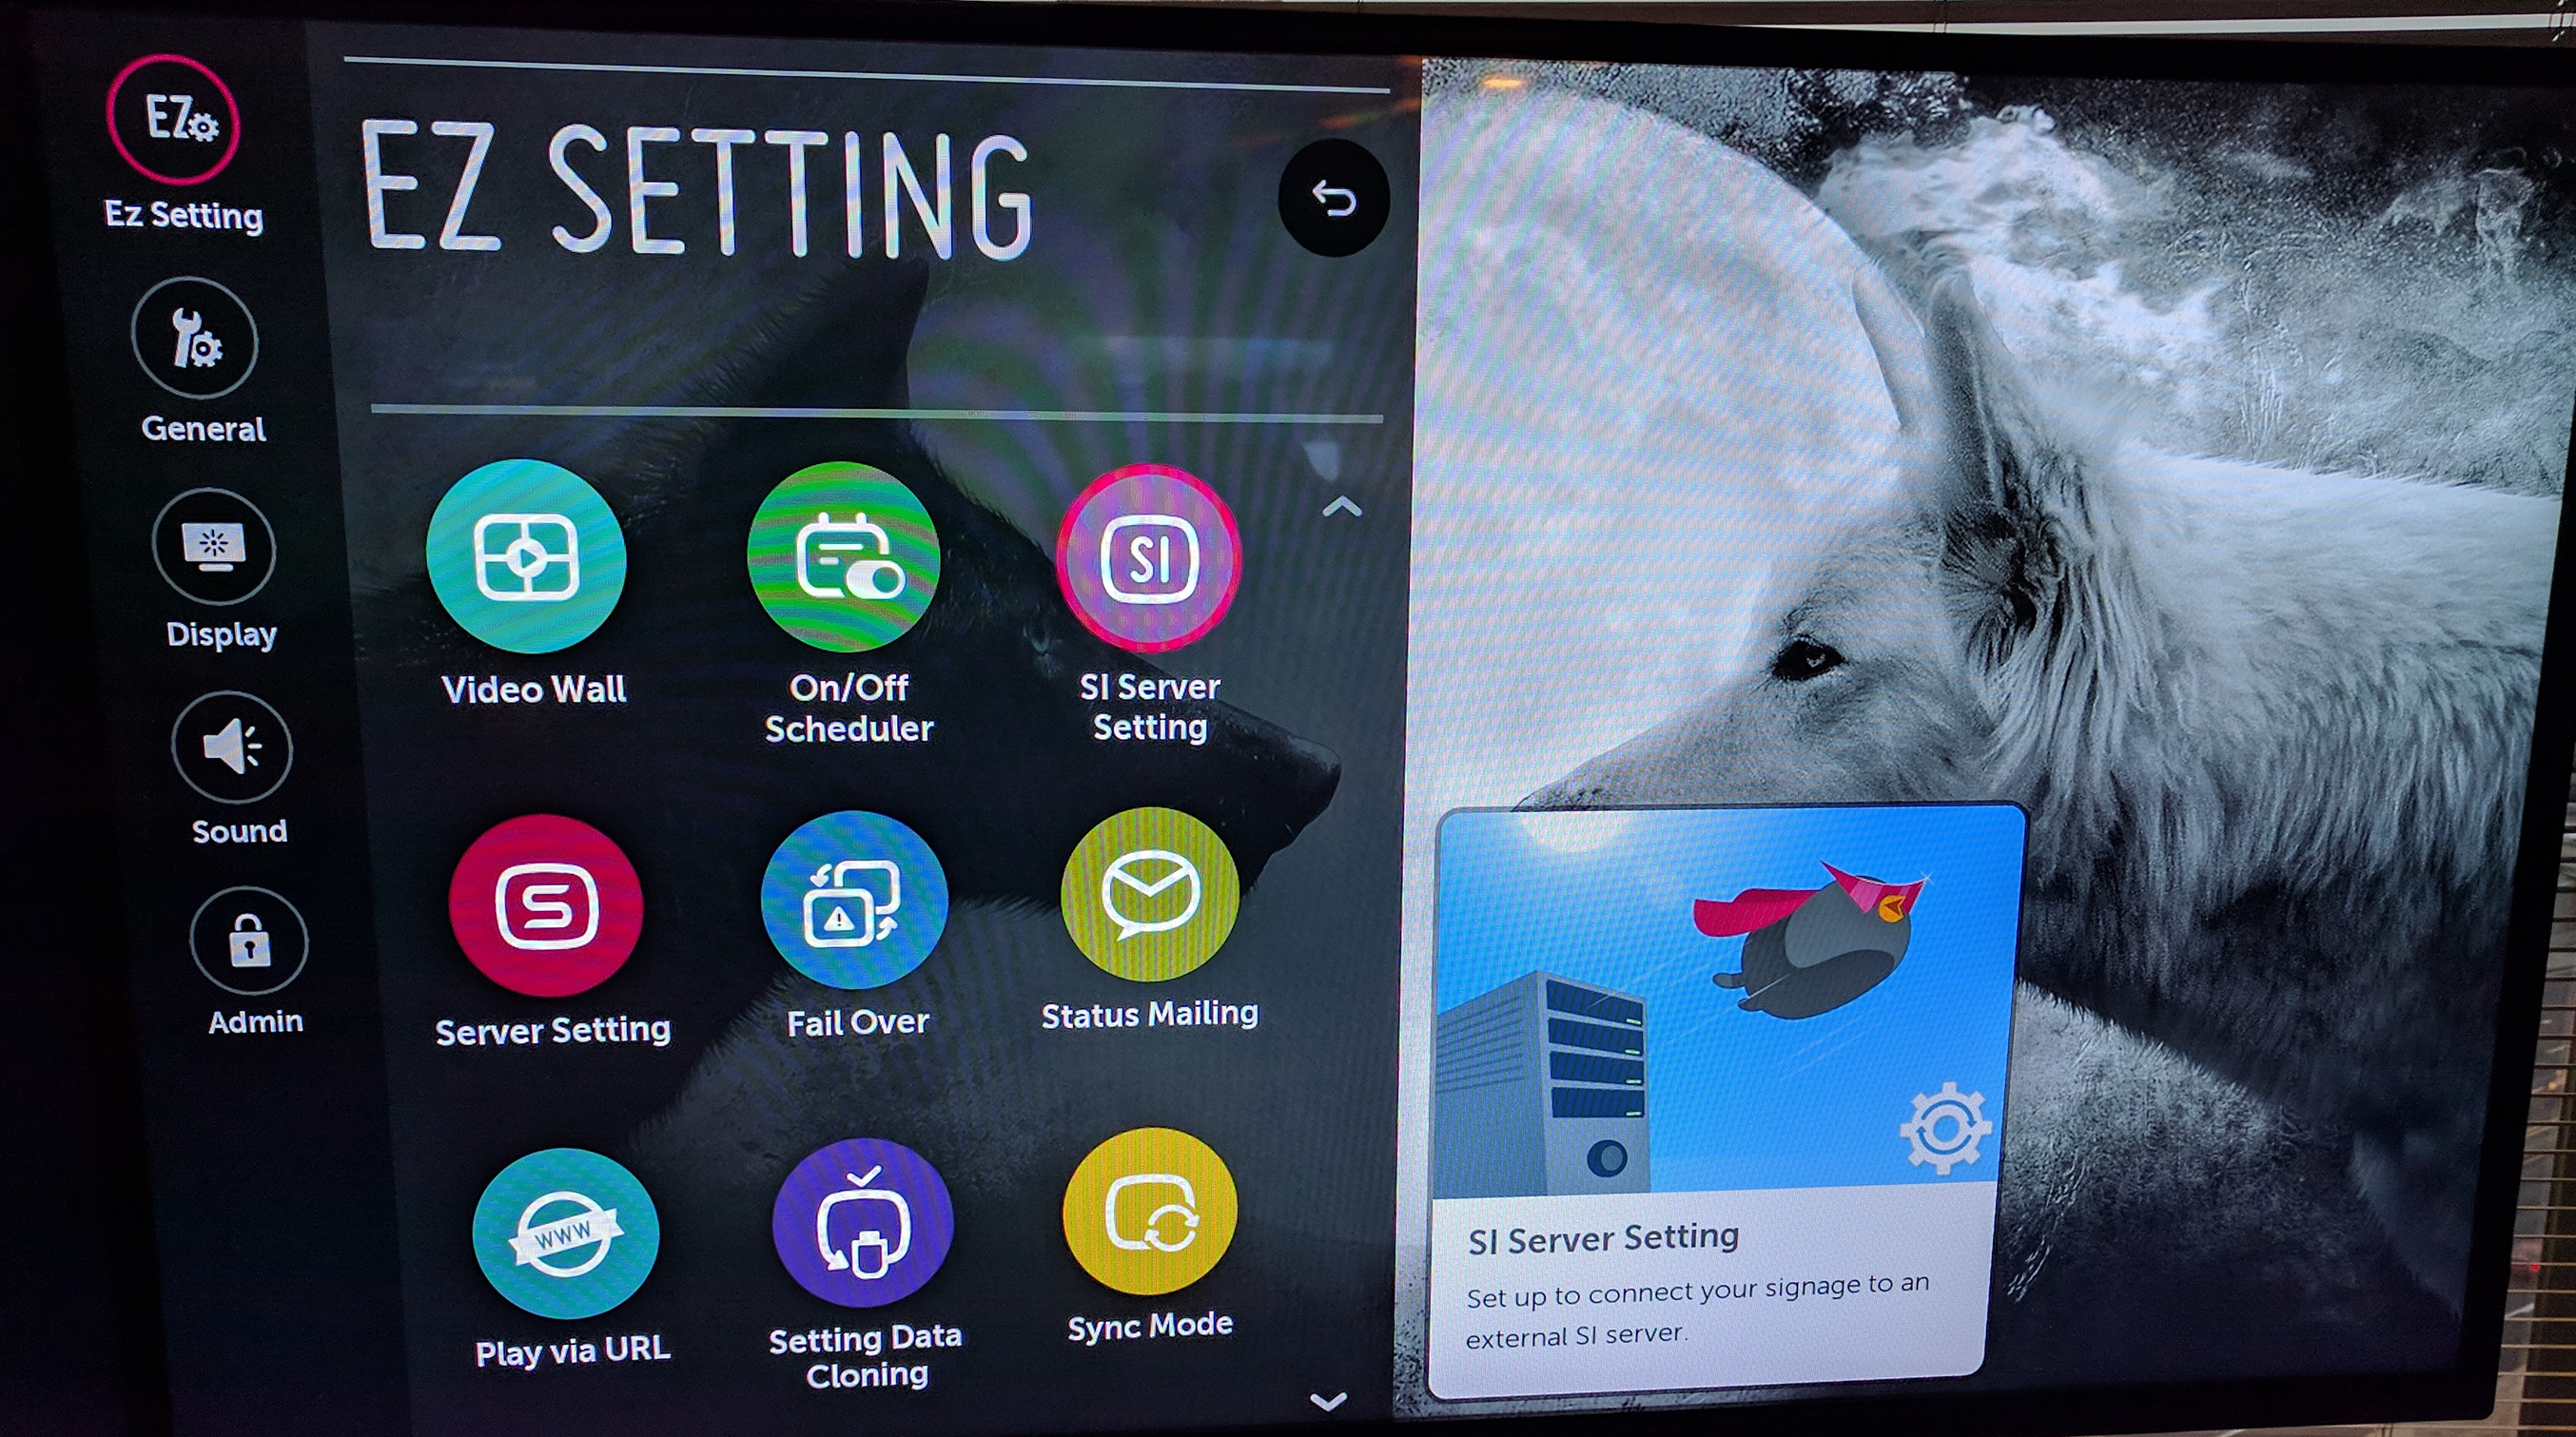
On webOS Signage 3.0+ and webOS 4.0
On the LG remote control, press the Settings (Gear icon) button, and select EZ Setting > SI Server Setting to access the SERVER settings.
In the SERVER settings panel, select the USB button in the Local Application Upgrade field.
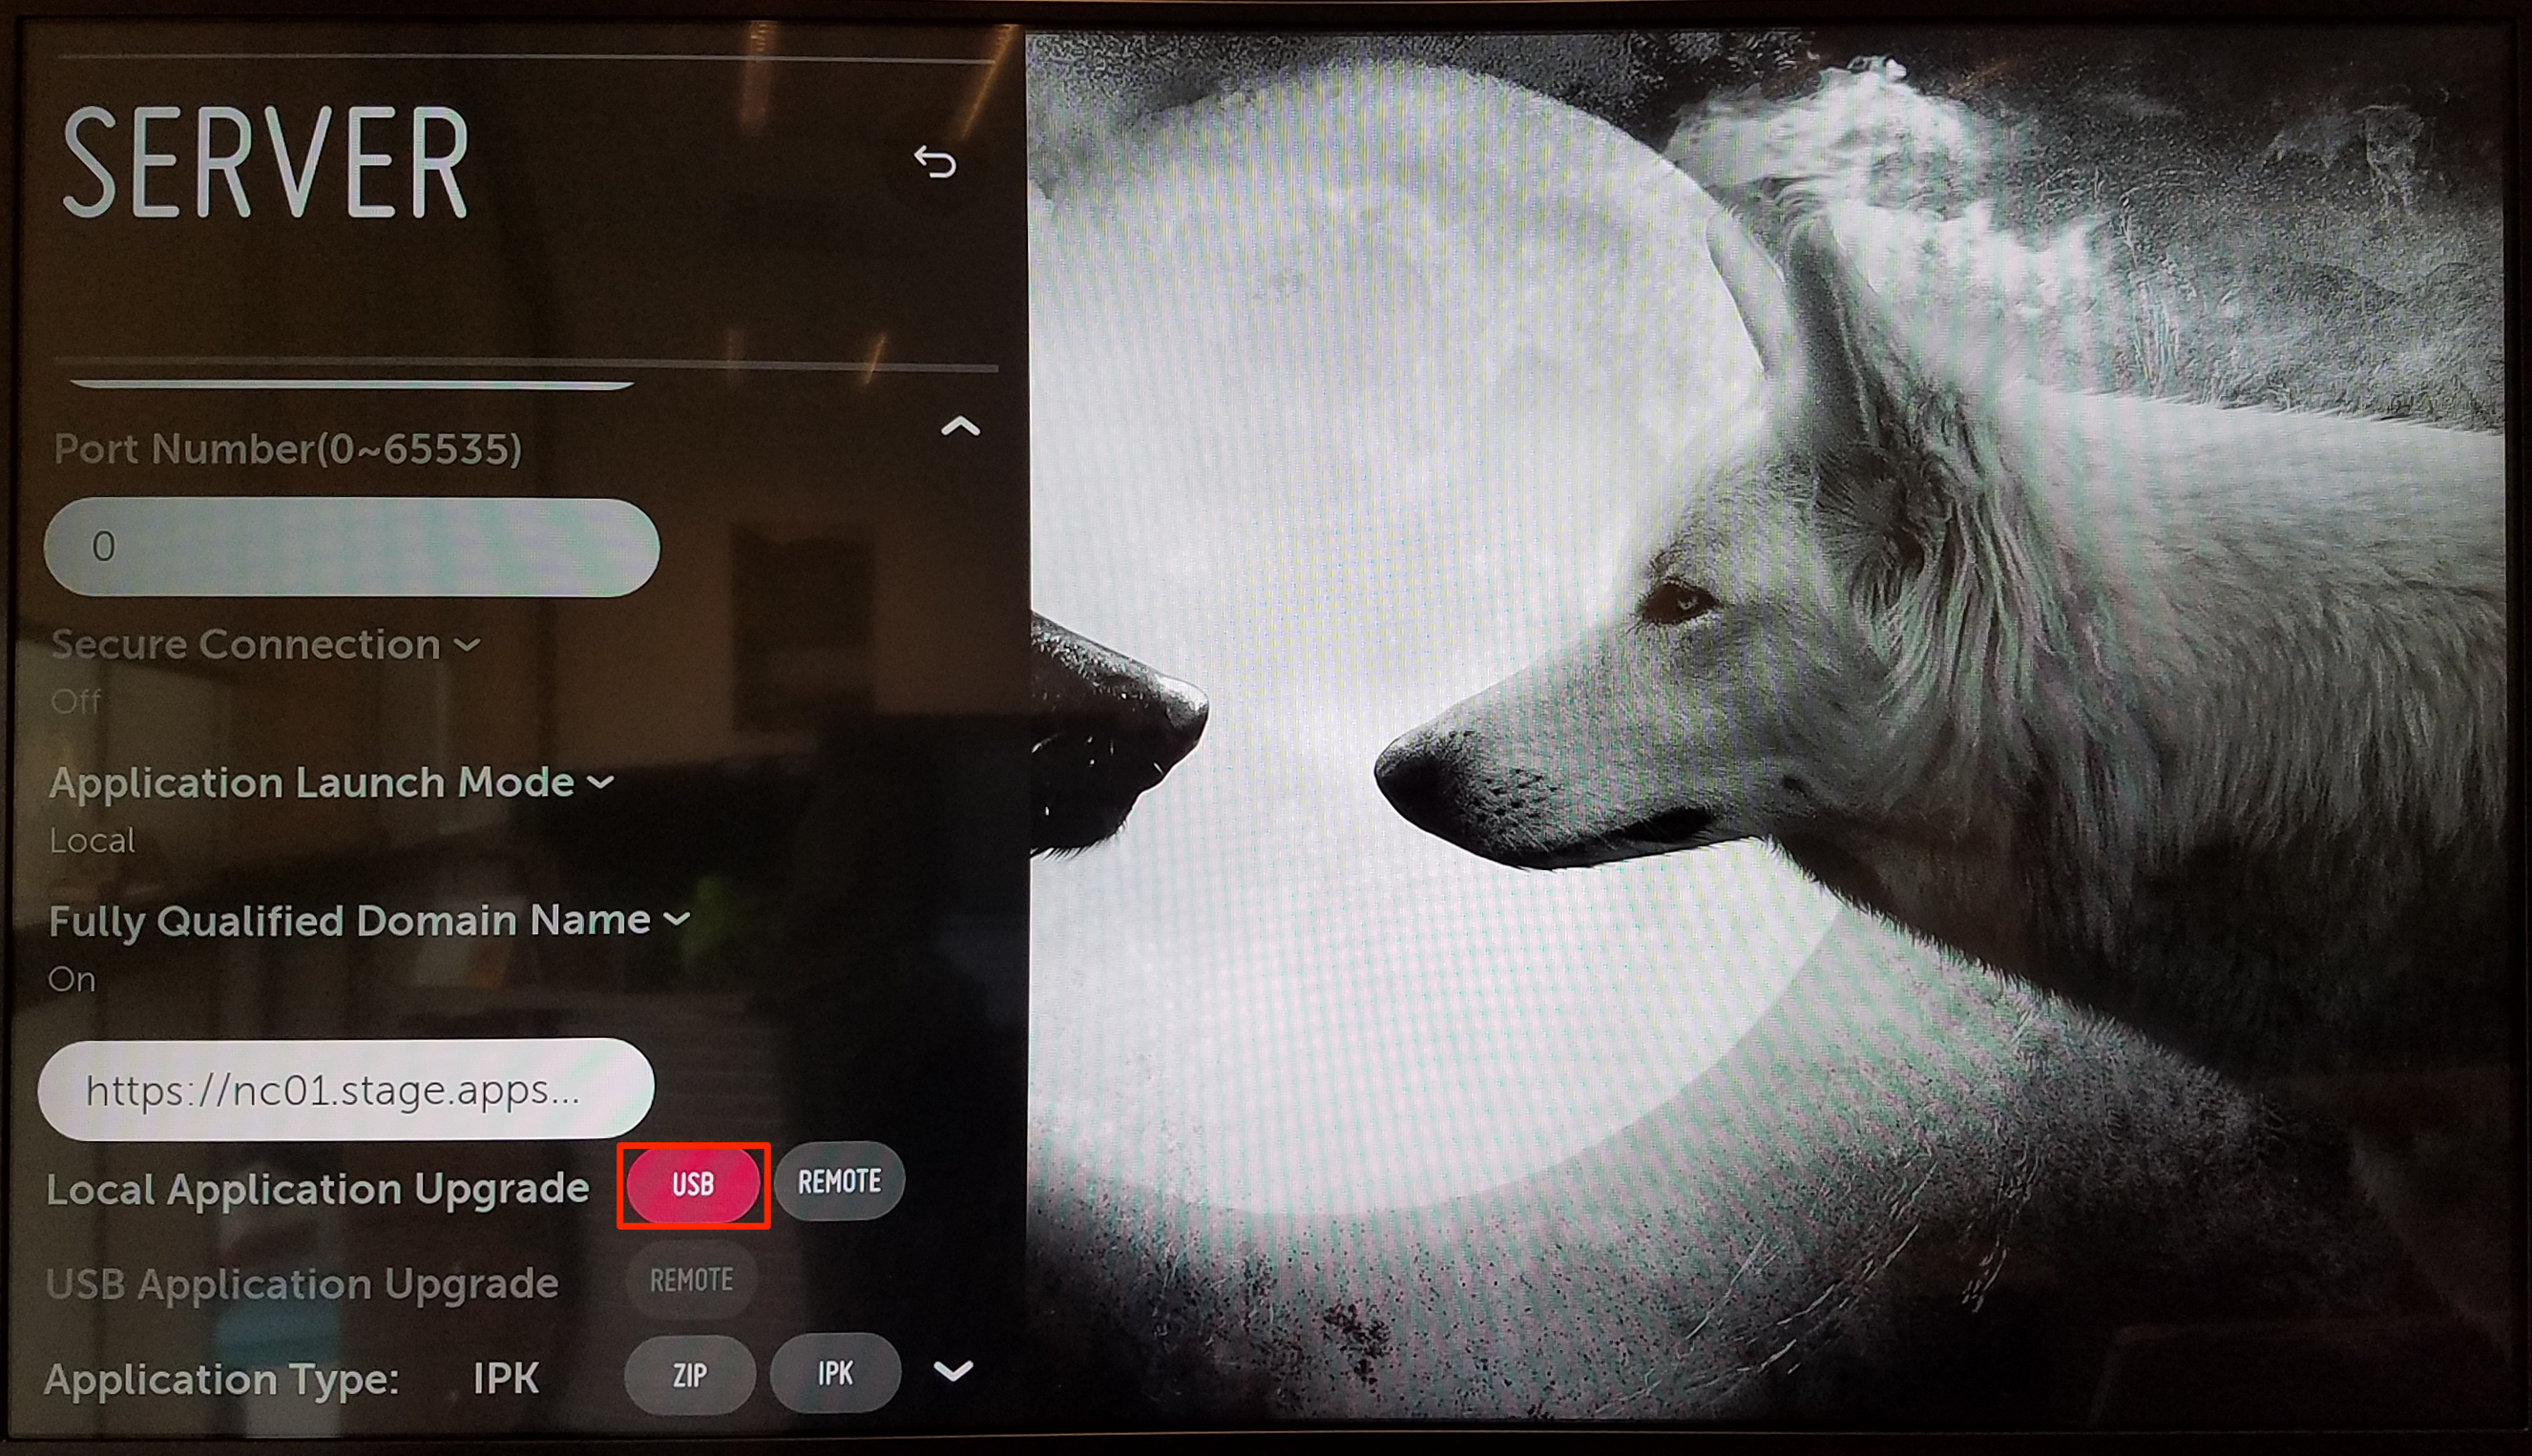
Select CONFIRM in the APPLICATION UPGRADE dialog box, and wait for the LG device to install the Appspace App to the device. The device should return to the Home screen once done.
Select and launch Appspace App from the Home screen.
-
Registering LG webOS via Local Policy file
Note
Appspace App has to be installed on the LG device prior to registering via local policy file.
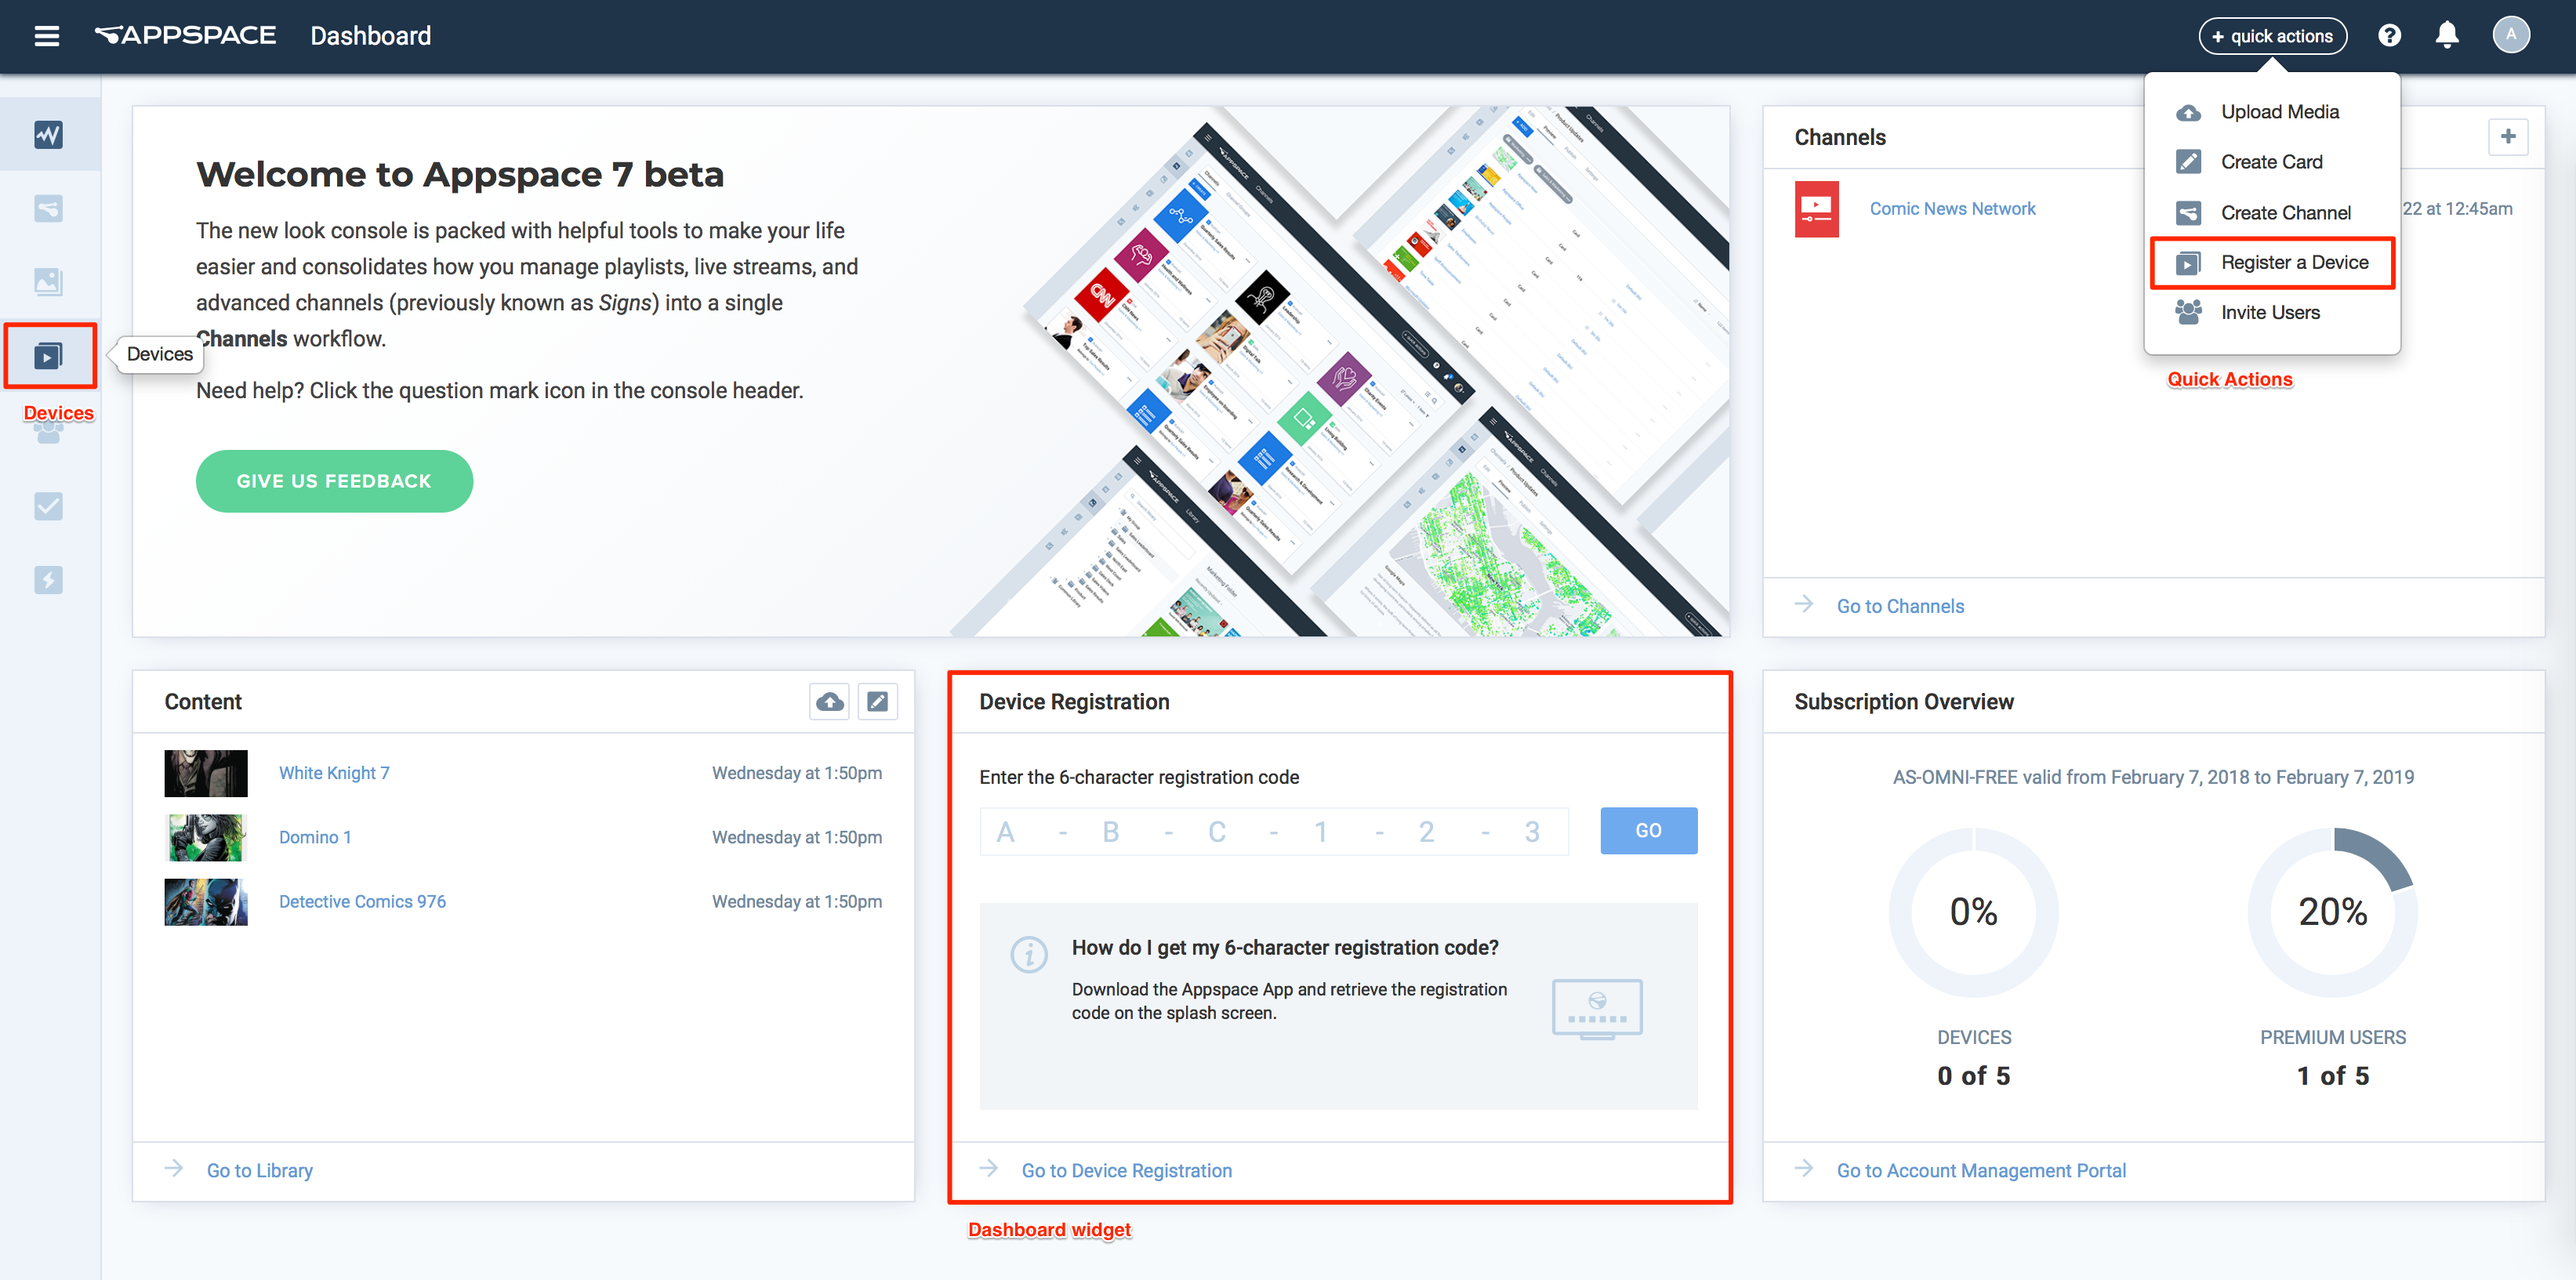
Login to Appspace Cloud at cloud.appspace.com, and launch the device registration page via one of the following methods:
- Click the Quick Actions menu and select Register a Device.
- Go to the Device Registration widget on the Dashboard.
- Click the Appspace menu, select Devices, and click the Add button in the Devices tab.
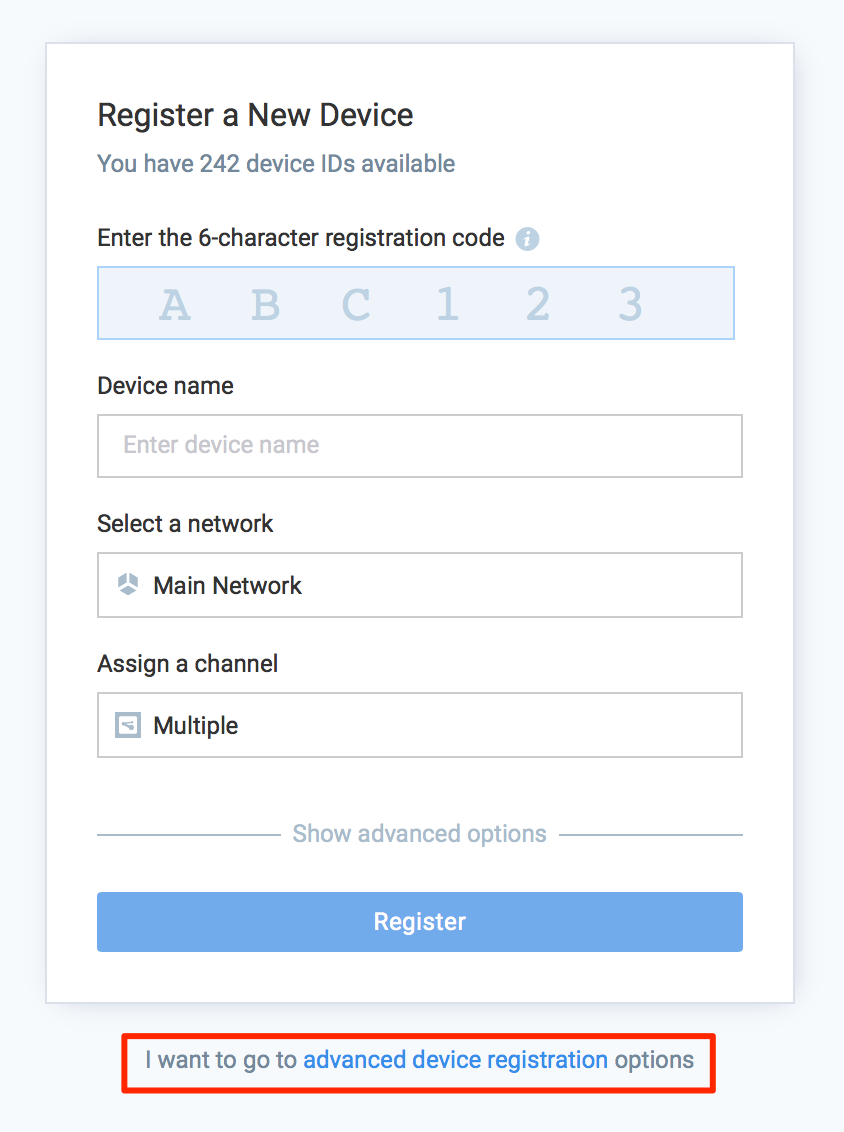
In the Register a New Device window, click the advance device registration link
In the Configure Advanced Registration window, select BrightSign Package for the Deployment Method drop-down menu.
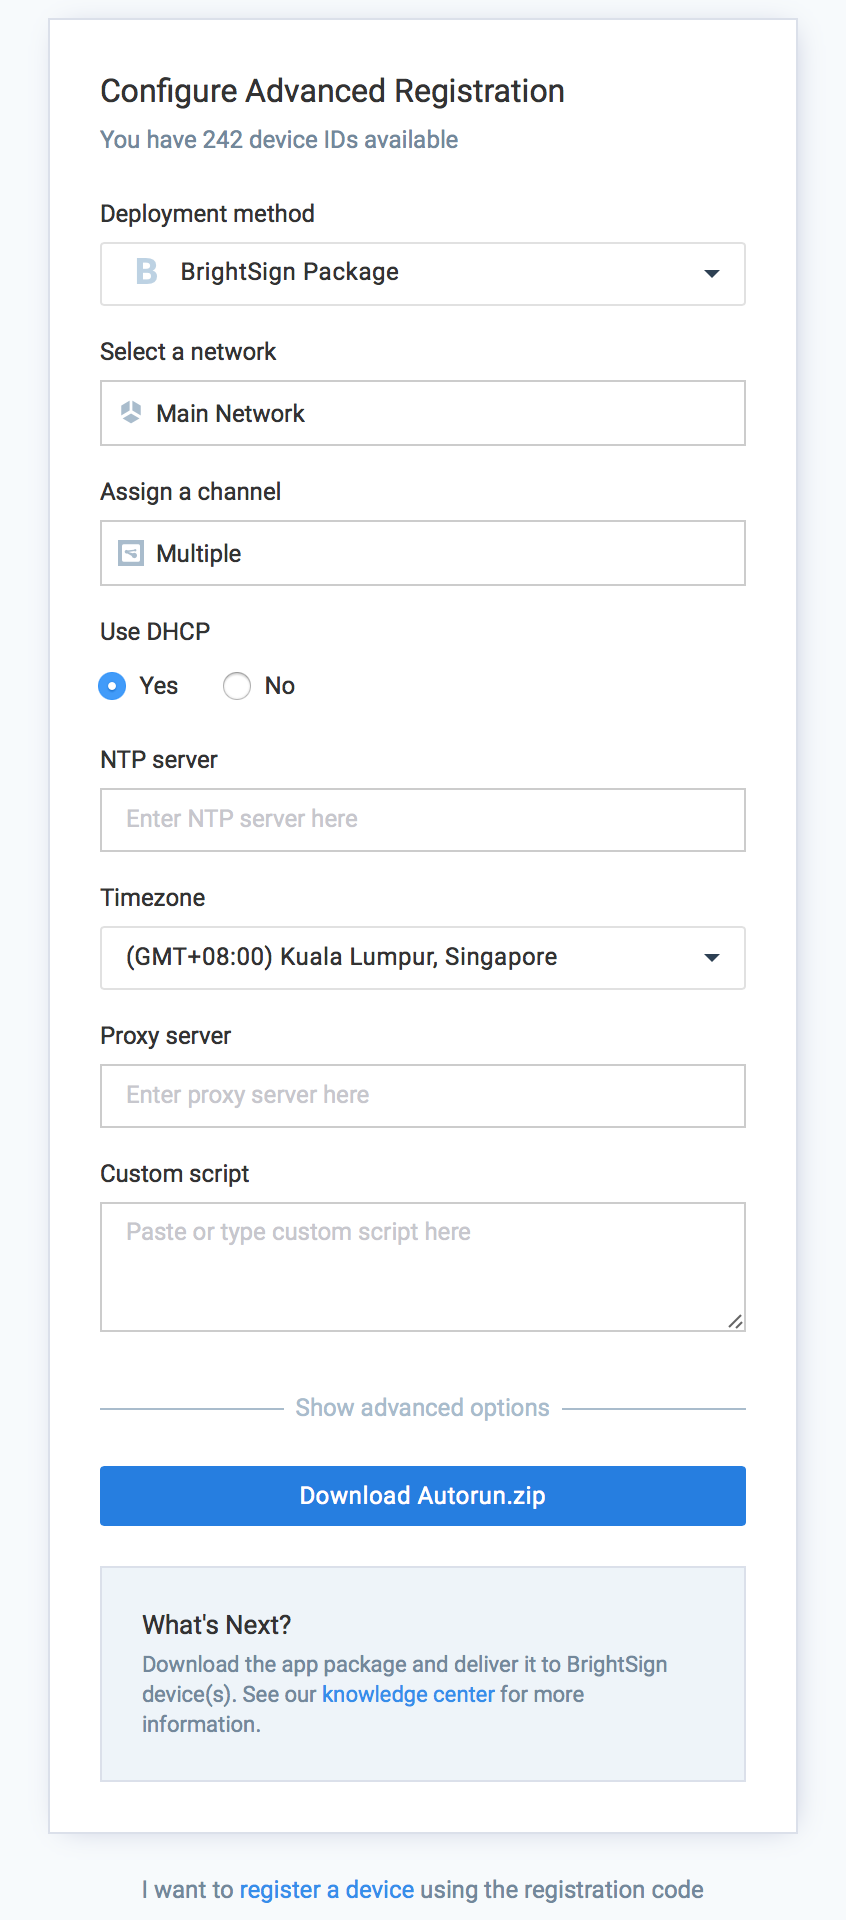
Select the network the device is in, and assign a channel for the device.
Optionally, clicking the Show advanced options allows you to configure the Device Description, Device Group and Device tags for the device.
Note
The DHCP, NTP server, Timezone, Proxy server and Custom script fields are only supported on BrightSign devices.
For LG devices, please leave this section as is and continue below.
Click Download Autorun.zip to download the autorun.zip file.
Extract the downloaded Autorun.zip file.
Within the Autorun folder, locate the policy.json file in the www folder.
Copy the policy.json file, and paste the file in the /procentric/scap/application/content/policy/ folder on your USB drive.
Launch Appspace App on the LG device.
Important
If Appspace App is not launched before inserting the USB drive, Appspace App will use the USB storage, rather than local storage to save files.
Insert the USB drive into the LG device, and restart Appspace App. The device will begin registration once Appspace App has restarted.
Configure LG webOS via Remote Deployment
Follow the instructions below to setup the LG webOS device remotely:
Note
For Appspace on-premises, download the Appspace App for LG webOS 3.0 (com.lg.app.signage.ipk), and upload the package to the Deployments page in the Appspace console.
Access the SI Server settings panel.
On webOS 3.0
On the LG remote control, press the Home button, and select SI Server from the app tiles to access the SERVER settings.
On webOS Signage 3.0+ and webOS 4.0
On the LG remote control, press the Settings (Gear icon) button, and select EZ Setting > SI Server Setting to access the SERVER settings.
In the SERVER settings panel, enter in the URL to the Appspace App for LG webOS 3.0 in the Fully Qualified Domain Name field.
- Cloud: https://cloud.appspace.com/device/lg.ipk
- On-Premises: <server url>/app/FastNetData/SoftwarePackages/lg/com.lg.app.signage.ipk
In the Local Application Upgrade field, select the REMOTE button.
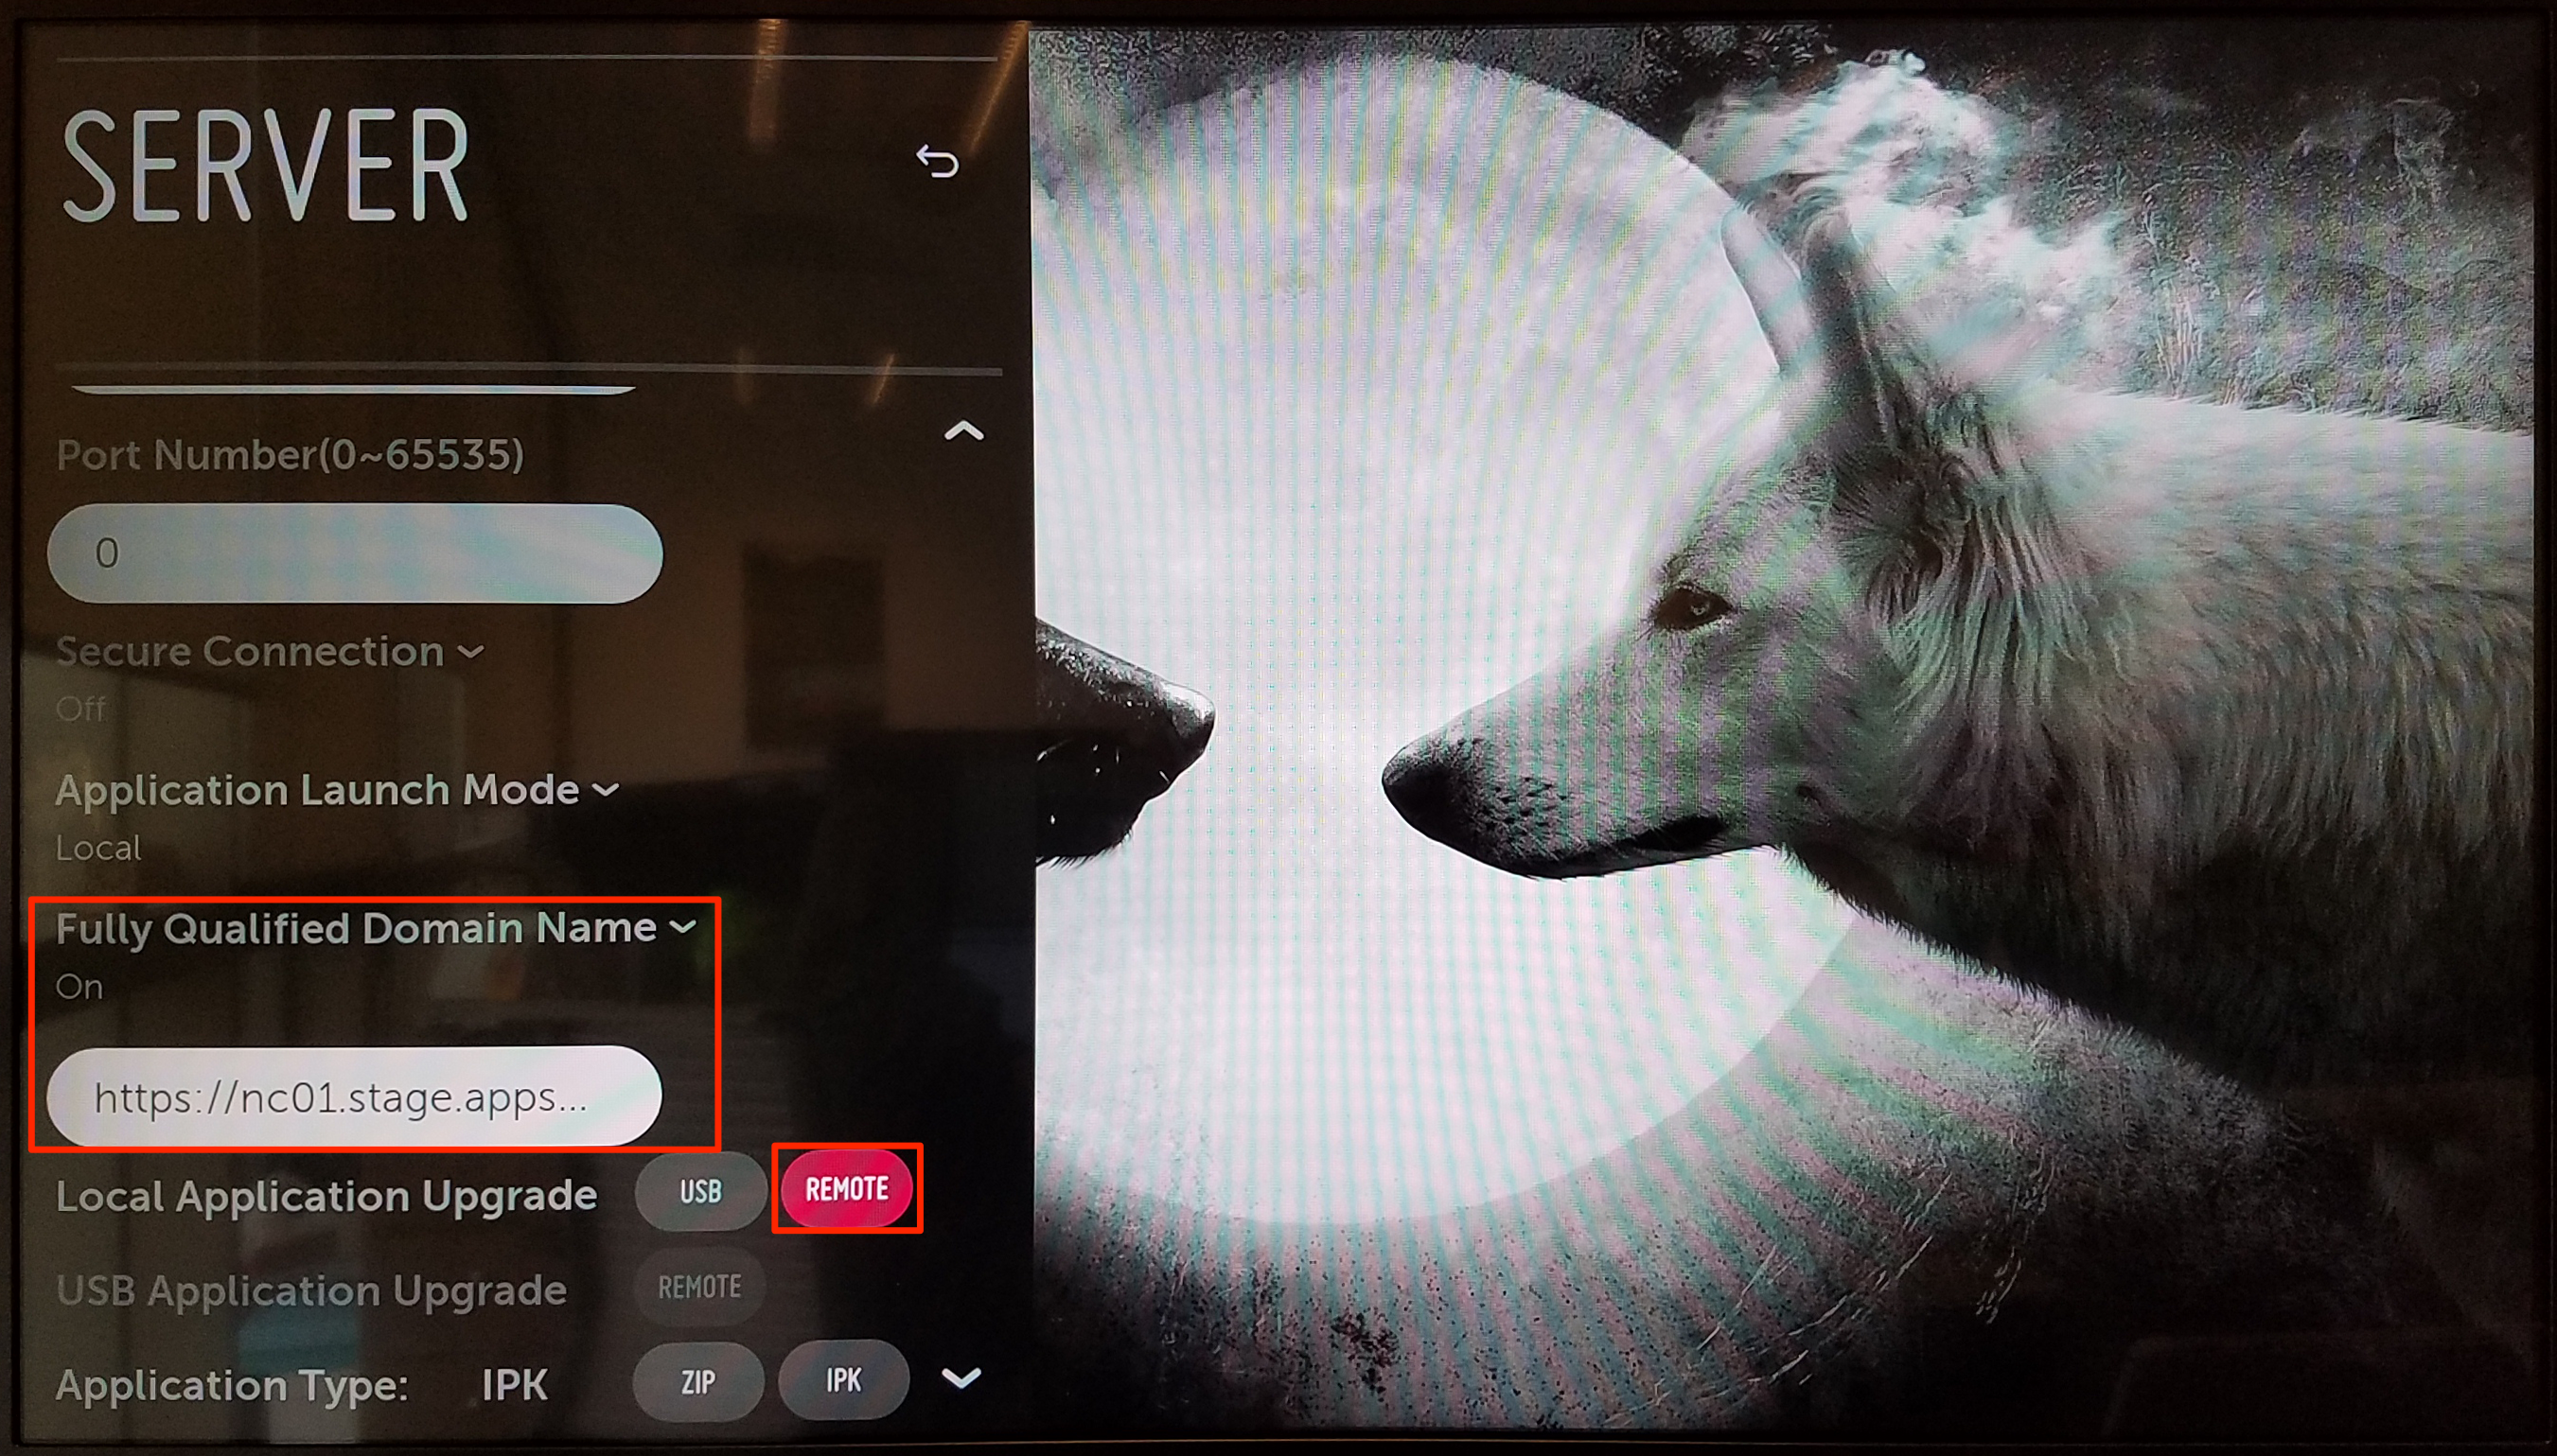
Select CONFIRM in the APPLICATION UPGRADE dialog box, and wait for the LG device to install the Appspace App to the device. The device should return to the Home screen once done.
Select and launch Appspace App from the Home screen.
-