Create an advanced channel (sign)
This article provides the instructions to configure, add, and remove advanced channels, previously known as a sign.
Advanced channels offer features such as scheduled content playback, multi-zone layouts, custom resolutions, and advanced interactive experiences. All of which can be viewed through the Appspace App.
Our WYSIWYG editor lets you create multi-zone layouts, include data sources, custom scripting, and add interactive behavior. With advanced channels, you can create informative dashboards, menu boards, directories, touch and device driven experiences, and much more.
HELPFUL TIP
Let Appspace Professional Services help you plan, design, and build your advanced channel. Contact us about services subscription plans today.
- Creating Advanced Channels
- Making Advanced Channels Interactive
- Copying Advanced Channels
- Deleting Advanced Channels
Creating Advanced Channels
Click Channels from the Appspace Menu navigation bar, and click the Channels tab.
Click the CREATE button, select Advanced Channel and enter in a name for the advance channel.

Click the Edit tab to access the layout(s) for this channel.
Note
To add an additional layout, click the ADD button, and enter in the layout name.

Click the Visual Editor button to launch the Visual Editor.

Click the ADD MEDIA button.

Select the desired content from the Library, and click Apply.
Note
To edit the content properties, please refer to the Configuring content properties article.
Click ADD WIDGET to add widgets. Please refer to the Managing Widgets article.
To configure the widget properties and permissions, and add content or event actions. Please refer to the Configuring Widget Properties article.
To schedule your layouts. Please refer to the Scheduling Layouts article.
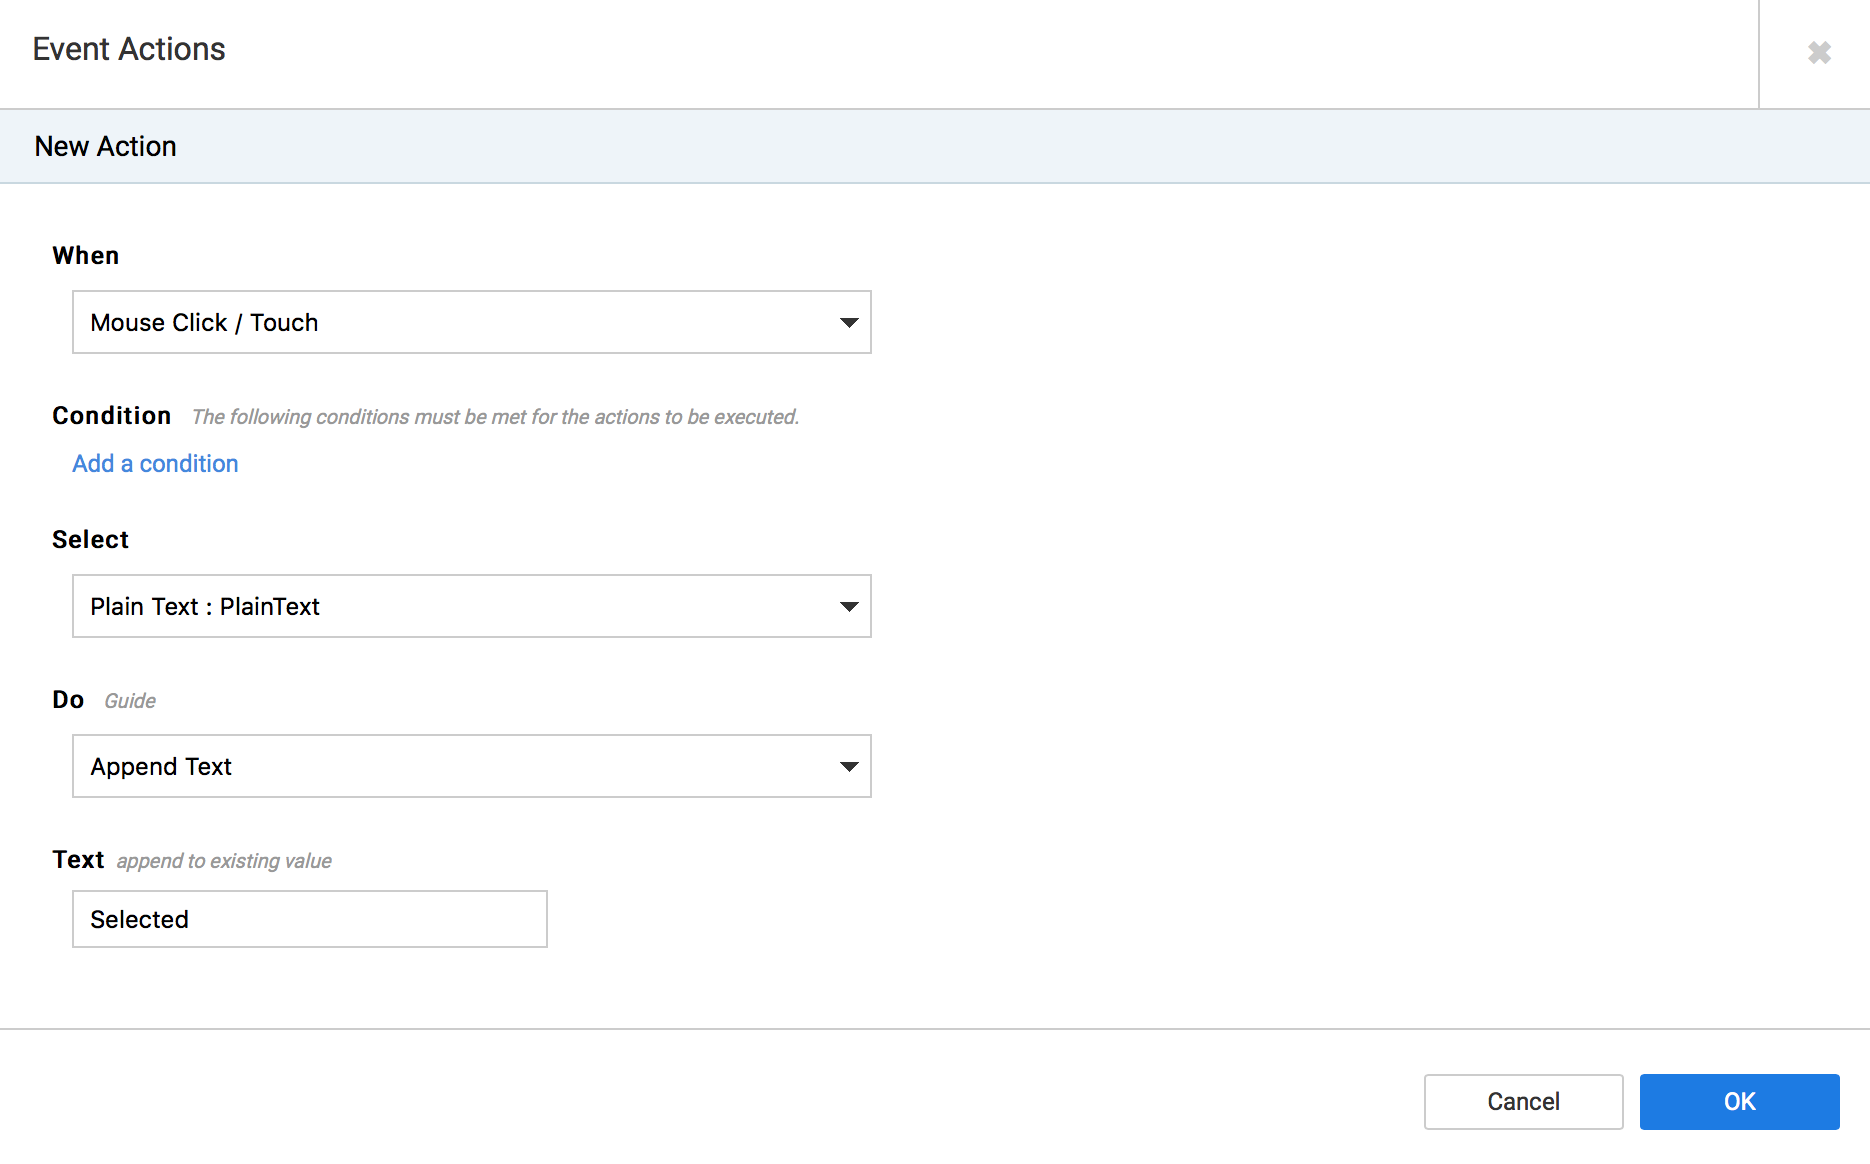
Click the Action tab to add an event action to your advanced channel. Please refer to the Adding a New Action section in the Managing Event Actions in Applications article.
Click the Preview tab to preview your advanced channel. You may click the Preview device link for a full screen preview with a better quality and resolution.
Note
- Select a desired date and time to preview the layouts scheduled on the selected date and time. Click the date calendar and clock slider respectively.
- Live stream content may not display in preview, as web browsers may not be installed with the necessary codecs to play the live stream.
- Refreshing the browser when preview is in full screen, may cause the preview screen to stuck on the loading screen.
Click the Settings tab to configure permissions for this channel.
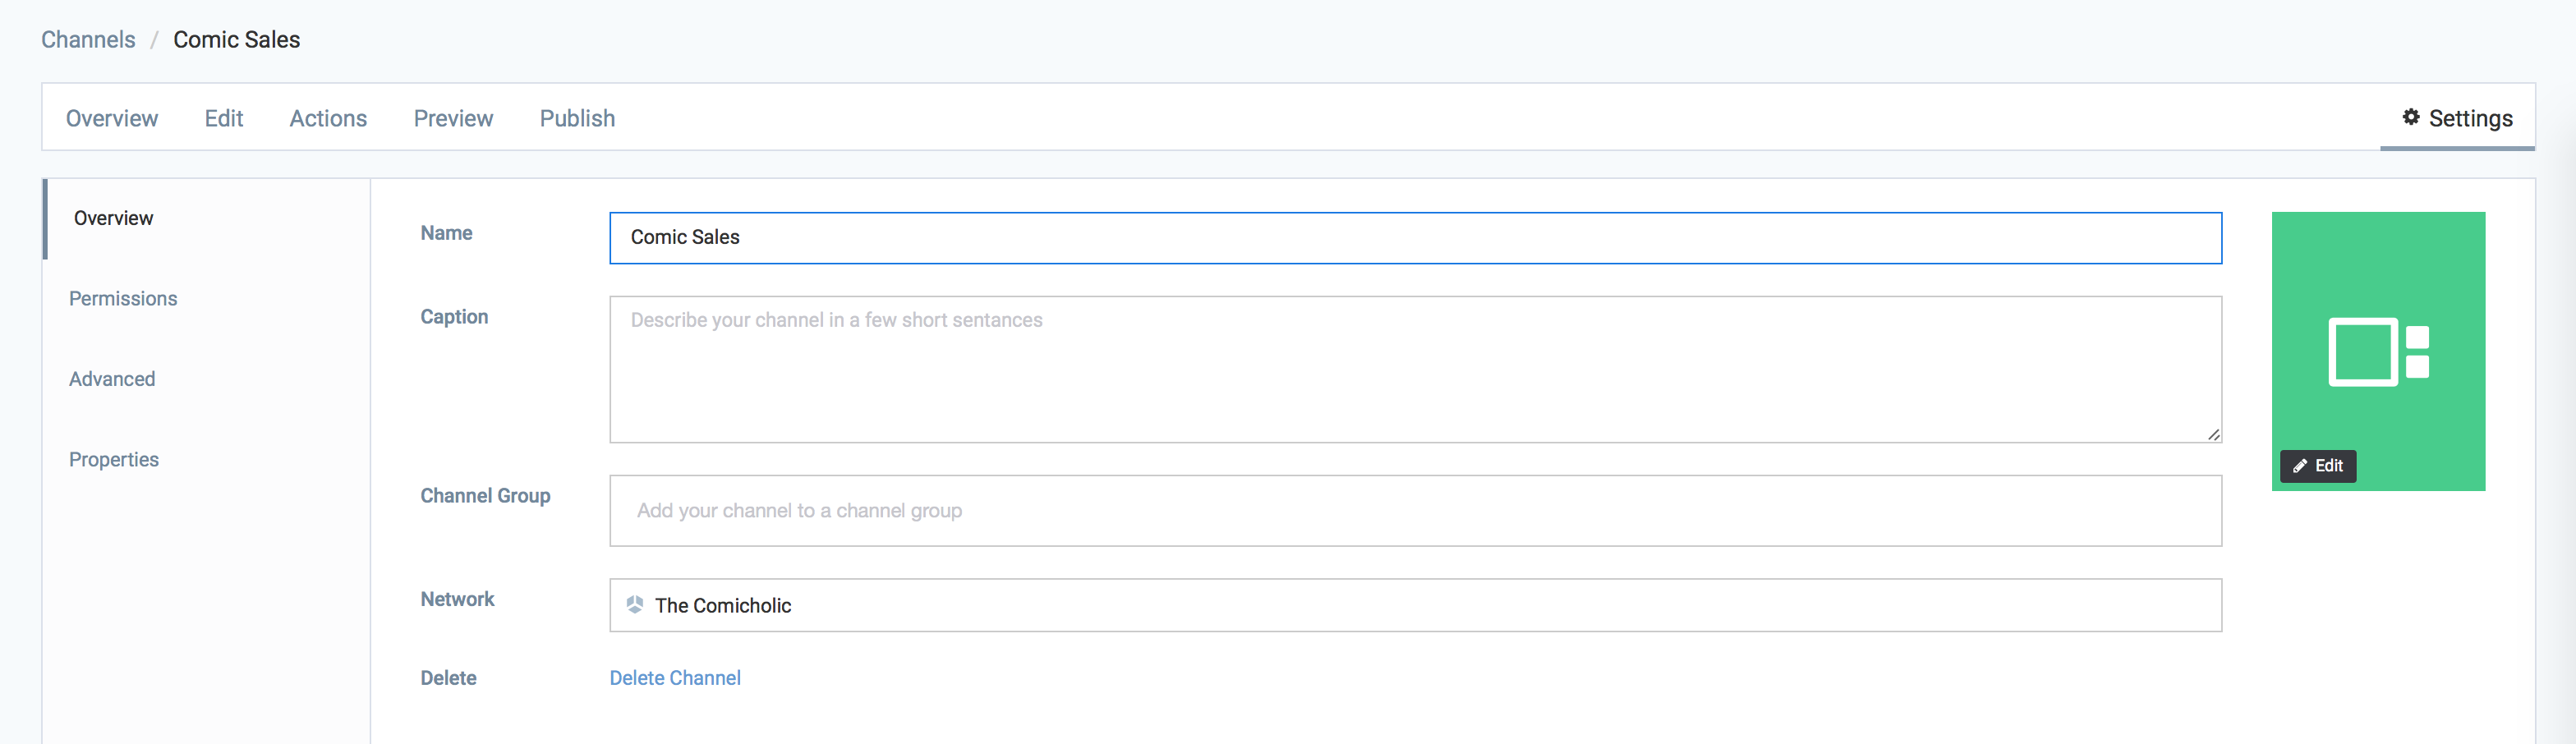
In the Overview tab, you can:
- Edit the Name of the advanced channel.
- Enter in a Caption for the channel.
- Assign a Channel Group to the channel.
- Change the Network of the channel.
- Upload a custom image, or select an icon or color for the channel.
- Delete the channel.
Note
Custom thumbnail images should ideally have a 16:9 aspect ratio for the best display results.
In the Permissions tab, you can:
- Manage the advanced sign permissions. Please refer to the Managing sign permissions article.
In the Advanced tab, you can:
- Select a Target Device for the channel
- Select a Resolution for the channel
- Enable Public Access via web browser for the channel.
- Enable Layout Scheduling to the channel.
- Enable content Approval Notification via email for the channel.
In the Properties tab, you can:
- Configure the list of custom properties for the channel.
Click the Publish tab, and select the YES option in the slider to publish the playlist. Determine the Devices or Users that can access this channel by selecting the devices or users.
Note
For more information on publishing, please refer to the Publish a channel article.
Click Save to publish.
Making Advanced Channels Interactive
To make an advanced channel interactive, you can create an event that is triggered upon an action, from a widget or on an advanced channel layer. For example, when you click a button on your application, the action triggers a switch to the next layout.
To set these actions and conditions, please follow the instructions in the following articles:
Add an Event Action (action script) to your widget. Please refer to the Adding a New Action section in the Managing Event Actions in Widgets article.
Add an Event Action (action script) to your advanced channel. Please refer to the Adding a New Action section in the Managing Event Actions in Applications article.
Copying Advanced Channels
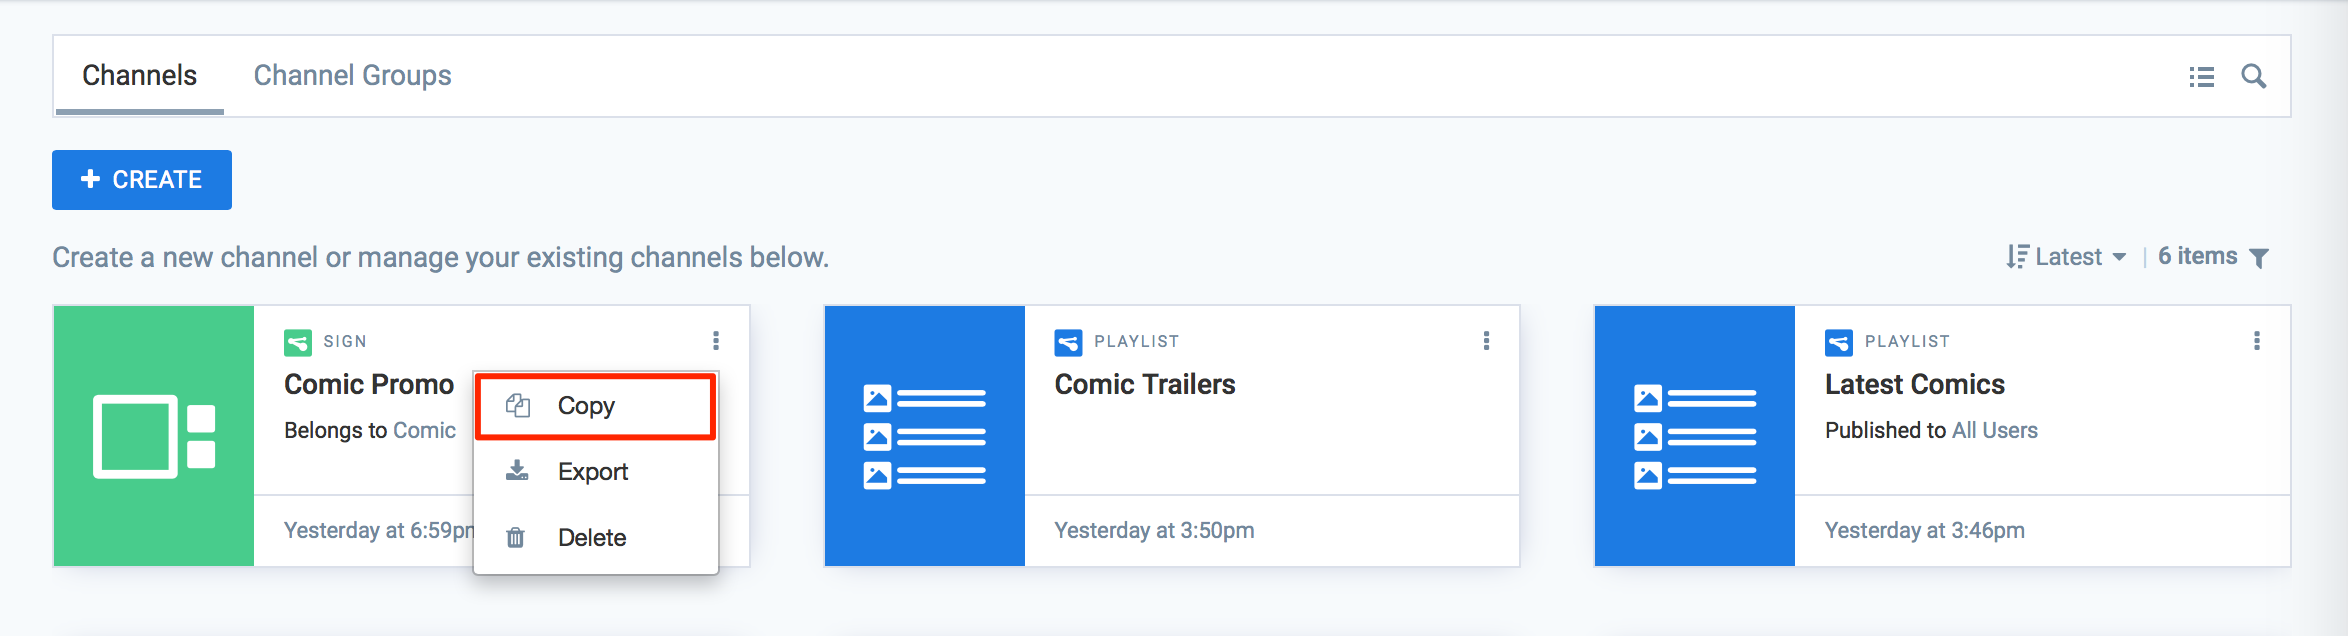
To copy an advanced channel, please follow the instructions below:
Click Channels from the Appspace Menu navigation bar, and click the Channels tab.
Select the desired advanced channel, click the Ellipsis and select Copy.
The channel will be copied with Copy appended to the channel name.
Deleting Advanced Channels
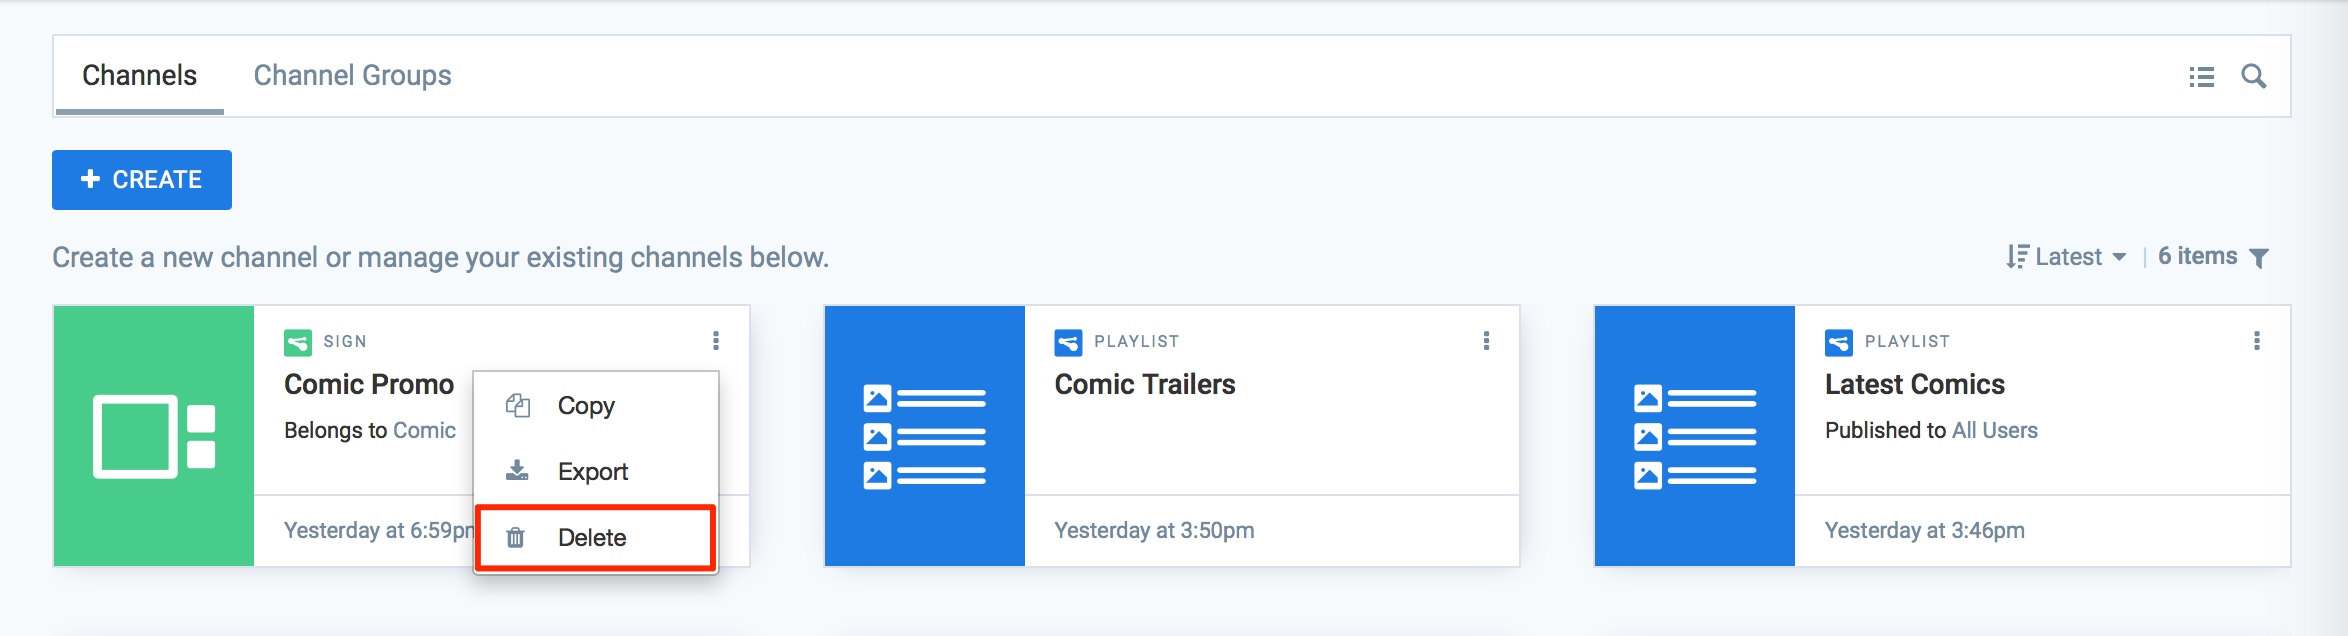
To delete an advanced channel, please follow the instructions below:
Click Channels from the Appspace Menu navigation bar, and click the Channels tab.
Select the desired advanced channel, click the Ellipsis and select Delete. Click OK to confirm.
The channel will be deleted.