Create and send user invitations
This article provides the instructions to add additional users to your Appspace instance via email invitation in the Users extension. This workflow covers the basics of creating and sending an invitation to the user to begin creating their account.
- Create User Invitations
- Edit and Configure a User Role
- Activate User Account
- Reactivate User
- Resend Invitations
- Delete Users
Important
To assign Network Administrator or Content Administrator roles, please go to Devices > Networks tab instead, as the permissions for these roles are added directly to a network. Please refer to the Create a Network section.
Prerequisites
- You must be one of the following users:
- Portal Administrator
- Account Administrator
- Network Administrator
- Account Owner
- For On-Premise deployments, when using AD/LDAP Authentication, email addresses must be created in Active Directory prior to creating user invitations in Appspace.
Important
Appspace servers must have active connectivity to the SMTP server to be able to add new users, or send e-mail notifications.
Create User Invitations
A user must be invited into Appspace by a system administrator. To send user invitations, follow the instructions below:
Click Users from the Appspace Menu navigation bar, and select a network from the Networks section.
Click the ADD button.
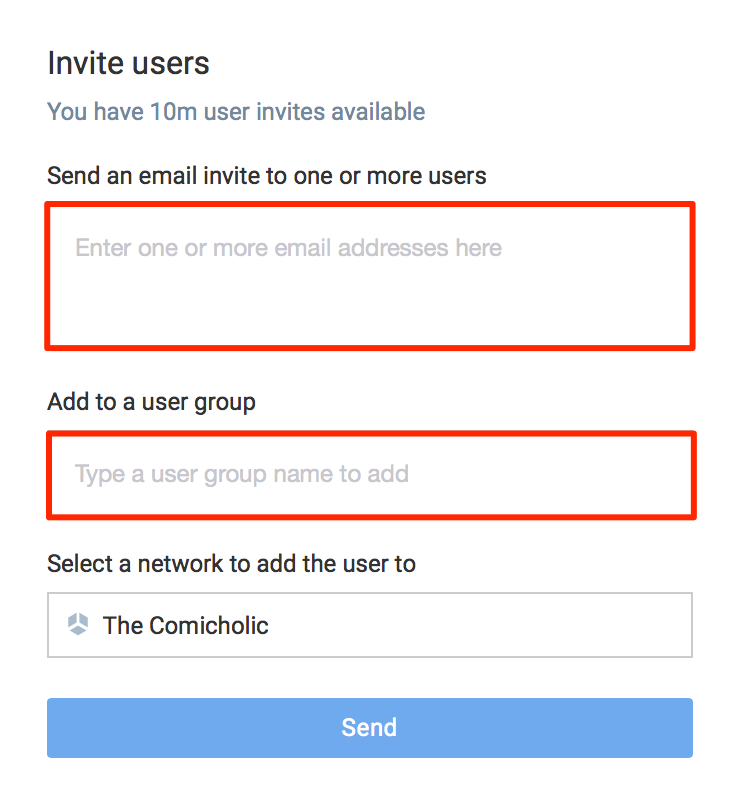
In the Invite users window, enter in the email addresses of the new user(s), and assign the user group(s).
You may choose to assign the user group(s) later.

Click Send once done.
The system will send an invitation email to the user(s)
In Users, click the user group to view the user invites that were sent. The status of the invited users will indicate Pending.
Edit and Configure a User Role
Once a user has accepted the user invitation via email, configure the role as follows:
Click Users from the Appspace Menu navigation bar, and select a network from the Networks section.
Click the desired user’s name link.
In the Edit user page, update the user’s personal details such as First and Last Name, and Email.
Select the required user roles from the Roles drop-down menu.
Add user groups in the Group Membership field. You can then view the inherited group roles below.
Note
- You can add one user to multiple user groups.
- If you selected user groups during user invitation, those groups will be listed here as well.
Additionally you may choose to suspend or delete the user. Click the Suspend user or Delete user links respectively, and follow the confirmation prompts to proceed.

Click Save once done.
Activate User Account
Once you receive the Appspace user invitation email, click the link provided in the email to accept the invitation.
Enter in your details, and follow the on-screen instructions.
Once your Appspace user account is activated, proceed to log in to Appspace.
Reactivate User
To reactivate a suspended user, follow the instructions below:
Click Users from the Appspace Menu navigation bar, and select a network from the Networks section.
Click the desired user’s name link.
In the Edit user page, click the Reactivate user link.
When prompted, click OK. The user’s status icon changes to Active, confirming a successful reactivation.
Resend Invitations
Administrators have the ability to resend invitations, in case the user has not received or has accidentally deleted the invitation email.
Click Users from the Appspace Menu navigation bar, and select a network from the Networks section.
Click the desired user’s name link.
In the Edit user page, click the Resend Invitation link.
Click Save once done.
Delete Users
To delete multiple users from a network, follow the instructions below:
Click Users from the Appspace Menu navigation bar, and select a network from the Networks section.
Click the desired user(s) name link, and click the Delete button. Multiple users can be checked.

When prompted, enter in your Appspace account password, and click OK to confirm.
Warning
Review and ensure layouts, widgets, signs, and content will not be affected when deleting the user account from the system, as deletions are permanent.