Install Appspace App on MediaVue SureVue
This article provides instructions to configure and register MediaVue SureVue devices with Appspace App.
- Configuring MediaVue SureVue
- Configuring a basic video wall setup with MediaVue devices
- MediaVue SureVue Hotkeys
Prerequisites
The device must meet the manufacturer’s minimum hardware and technical specifications, as well as the Appspace App’s minimum requirements. Please refer to Appspace App requirements.
Important
Currently, the Appspace client software for MediaVue SureVue comes preinstalled on the device.
An active Appspace account, with sufficient Device IDs to register the device.
An active Internet connection.
A USB keyboard for activation.
It is recommended that the device clock is set to automatically retrieve time from a Network Time Protocol (NTP) server, with the correct time zone, in order for it to sync correctly with the Appspace server.
Note
Appspace cloud servers by default retrieve time from a NTP server. If an Appspace on-premises server is used, ensure the server time is automatically retrieved by a NTP server.
Please ensure your network is configured to allow Appspace whitelist URLs and the relevant network ports.
On your proxy server, whitelist the hostnames listed in the ‘How to set up networks with SSL content filters’ section in the following article: https://support.google.com/chrome/a/answer/3504942#sslinspection.
Configuring MediaVue SureVue
Click the Appspace tab on the MediaVue SureVue console, and enter in the credentials and the URL for your Appspace server.

The Server URL can be obtained as follows:
Appspace Cloud: Login to your Appspace cloud account, go to System > Downloads via the Appspace menu, and copy the device registration link displayed there.
Example: https://wxyz.app1.cloud.appspace.com
Appspace On-Premises: Use the Appspace on-premises server URL.
Example: http://appspace-server-URL or https://appspace-server-URL (if using SSL).
Click the Connect To Server button.
Once successfully connected, click the Start Appspace button to launch the Appspace App.
Note
The MediaVue SureVue device supports multicast streams if H.264 codecs are used.
Configuring a basic video wall setup with MediaVue devices
Login to the MediaVue SureVue device, and click the Video Wall tab.
Select the video wall orientation and resolution.
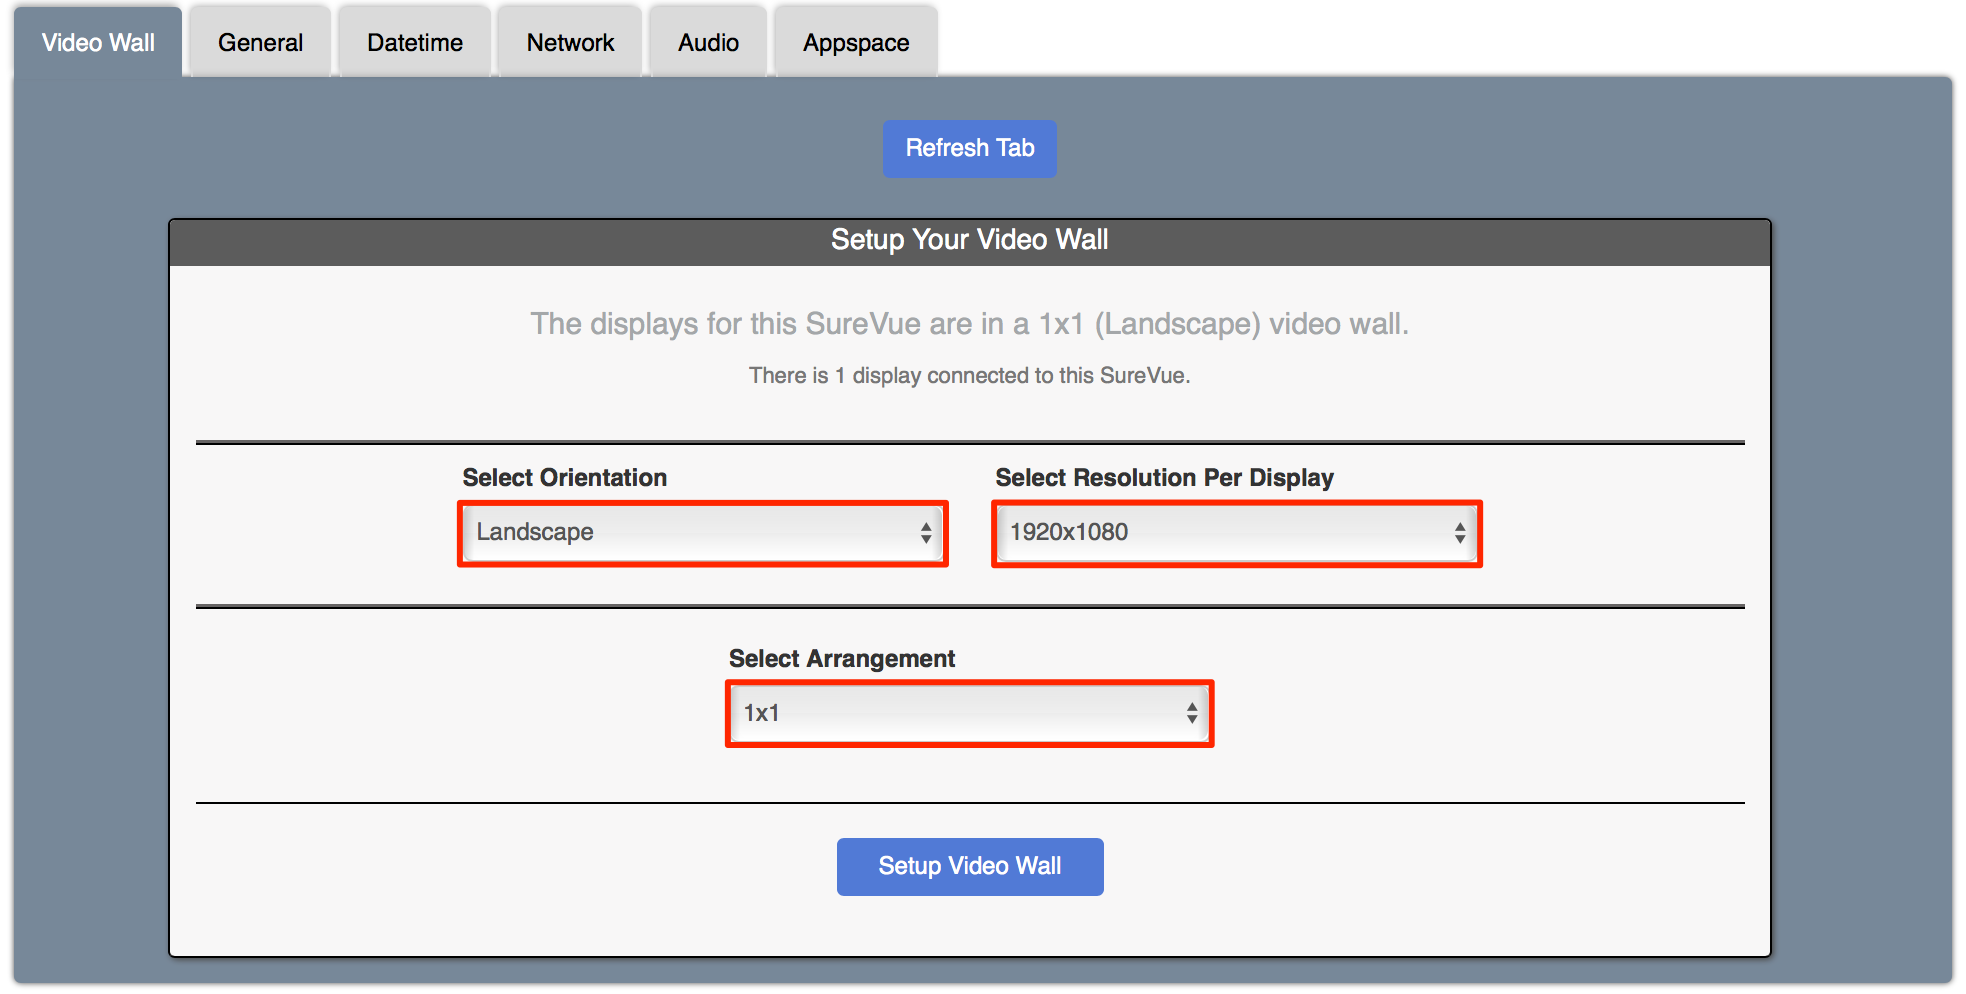
Select the video wall arrangement depending on your device and video wall setup.
Device Video Wall Arrangement SureVue D2 2x2, 1x2 SureVue D4 2x2 SureVue D6 3x2, 2x3 Click the Setup Video Wall button.
Click the Audio tab, and select Built-in Audio Digital Stereo (HDMI) from the Audio Device menu. Click Submit Changes to save.

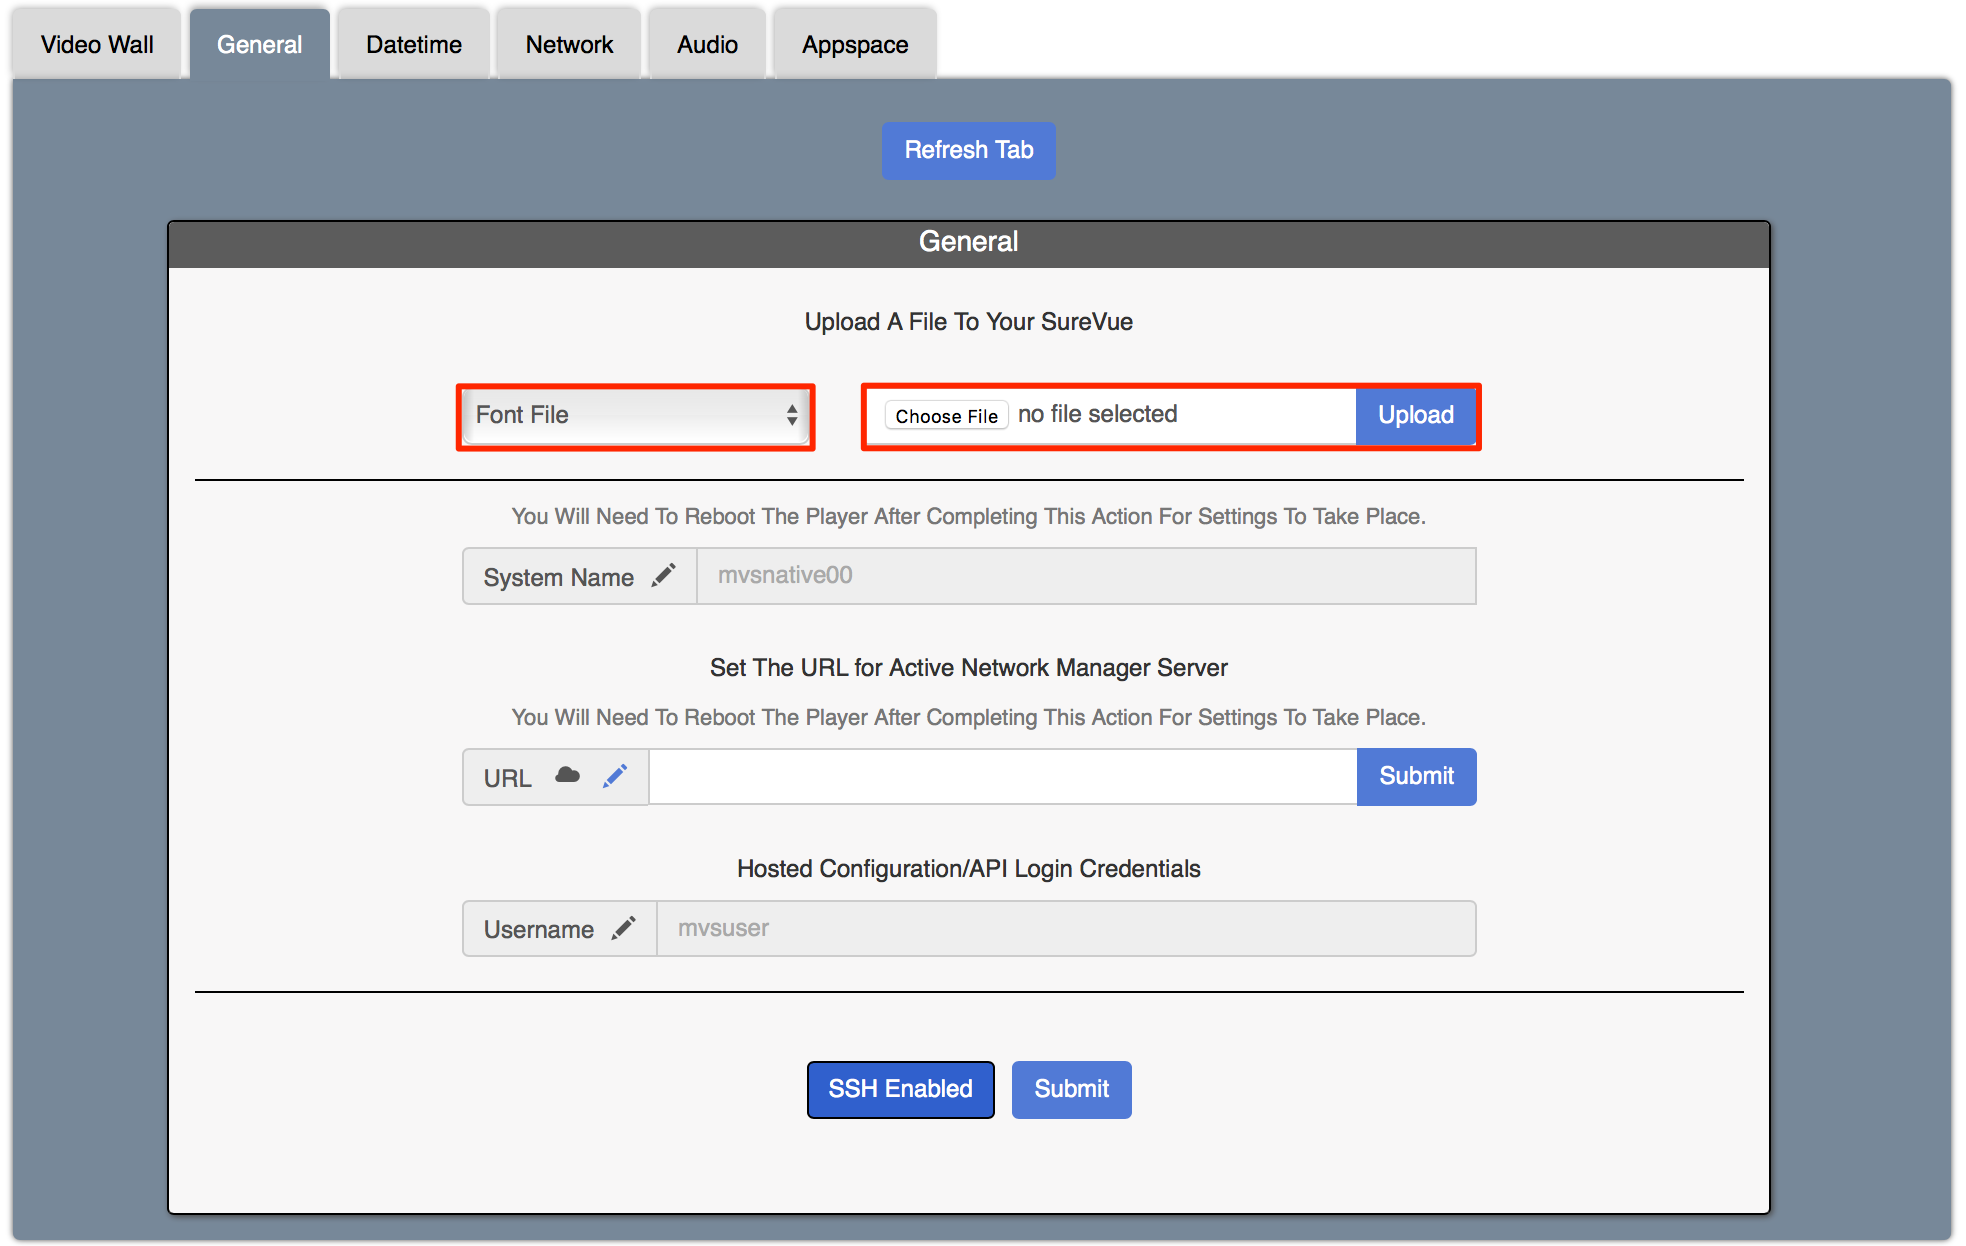
If the channel utilizes custom fonts, click the General tab, and select ‘Font File’ from the Upload A File To Your SureVue menu. Click Choose File to browse and select a font file, and click Upload.
Click the Appspace tab, and enter in the Appspace server URL and Appspace login credentials.
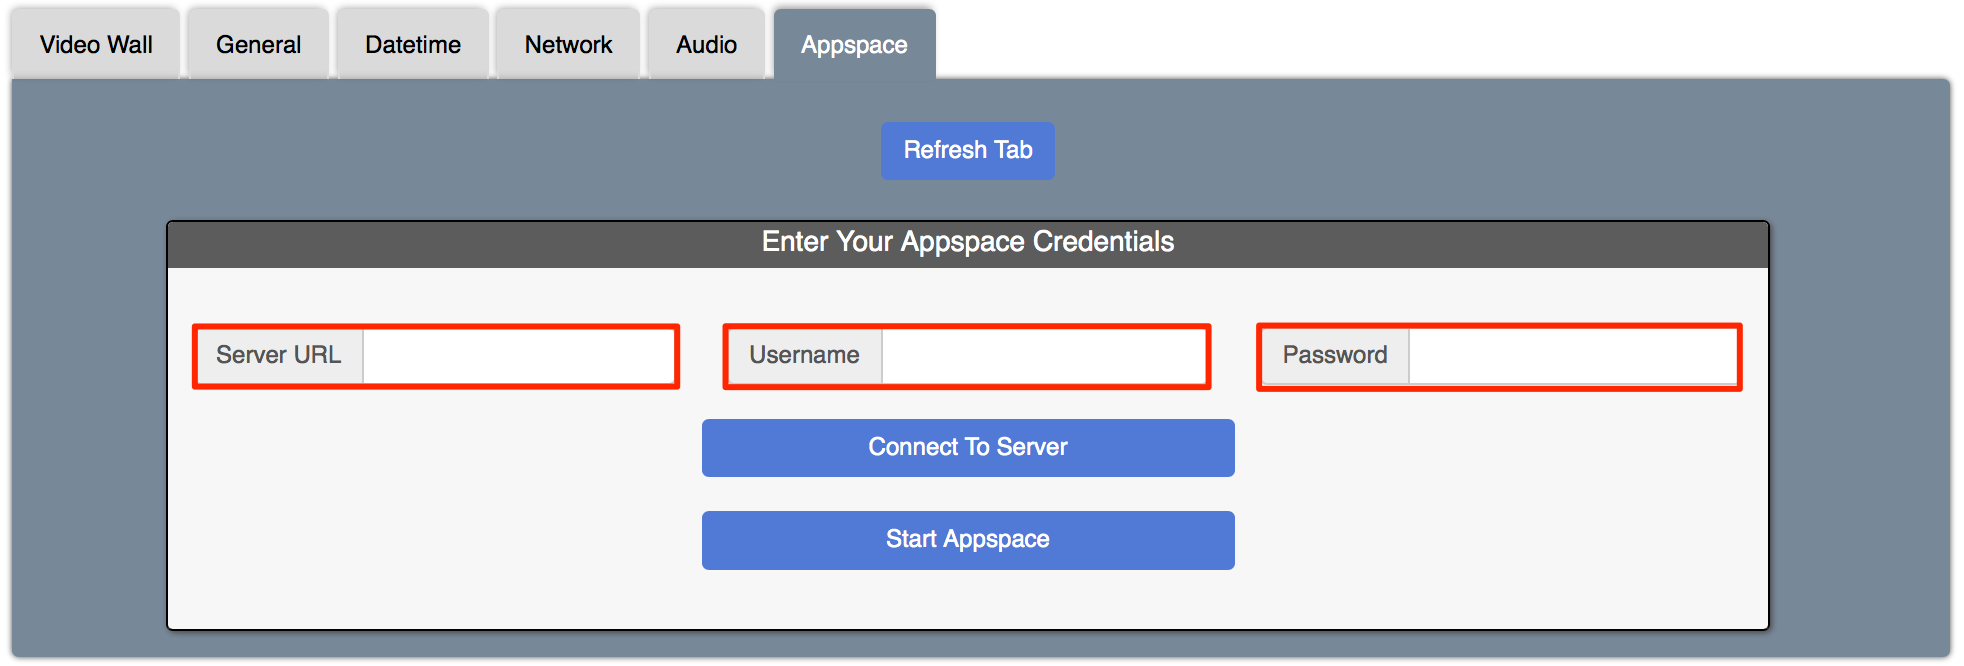
Click Connect To Server to ensure the connection to Appspace is successful.
Click Start Appspace to launch the Appspace App.
Known Issues
If the video wall arrangement appears jumbled when set to Portrait via the MediaVue configuration interface, set the video wall Sign channel resolution to match the video wall setup.

MediaVue SureVue Hotkeys
Below is a list of available hotkeys for the MediaVue SureVue device.
- Shift + Alt + C - Close Appspace and launch SureVue configuration interface.
- Shift + Alt + K - Switch to Cloned Display mode
- Shift + Ctrl + Alt + R - Reboot Player
- Shift + Ctrl + Alt + O - Poweroff Player
- Alt + Ctrl + M - Bring up Appspace menu
Note
Please contact MediaVue for remote control support: http://mediavuesystems.com.