Manage network notifications
Appspace will send email alerts to selected users in the event of device failures, communication loss, or errors during content download or syncing.
When a failure is detected and no response is made within 15 minutes, a failure alert email will be sent to the user list. The system will continue to monitor the device and if the failure persists, email alerts will be sent at 15-minute, 45-minute, 1-hour, 3-hour, 6-hour, and 24-hour intervals.
There are two types of device failures:
Communication Lost – This indicates that the device has lost its network connection with the server. The device will still be playing the application but any updates made will not be received.
Failed – This status requires urgent attention as it may be critical failures such as power or hardware failure, and can result in the app not being displayed on screen.
This article provides the instructions to add, edit, and manage network notifications.
Prerequisites
One of the following user roles:
- Portal Administrator
- Account Administrator
- Account Owner
- Network Administrator
Device Alerts must be enabled on the player.
Note
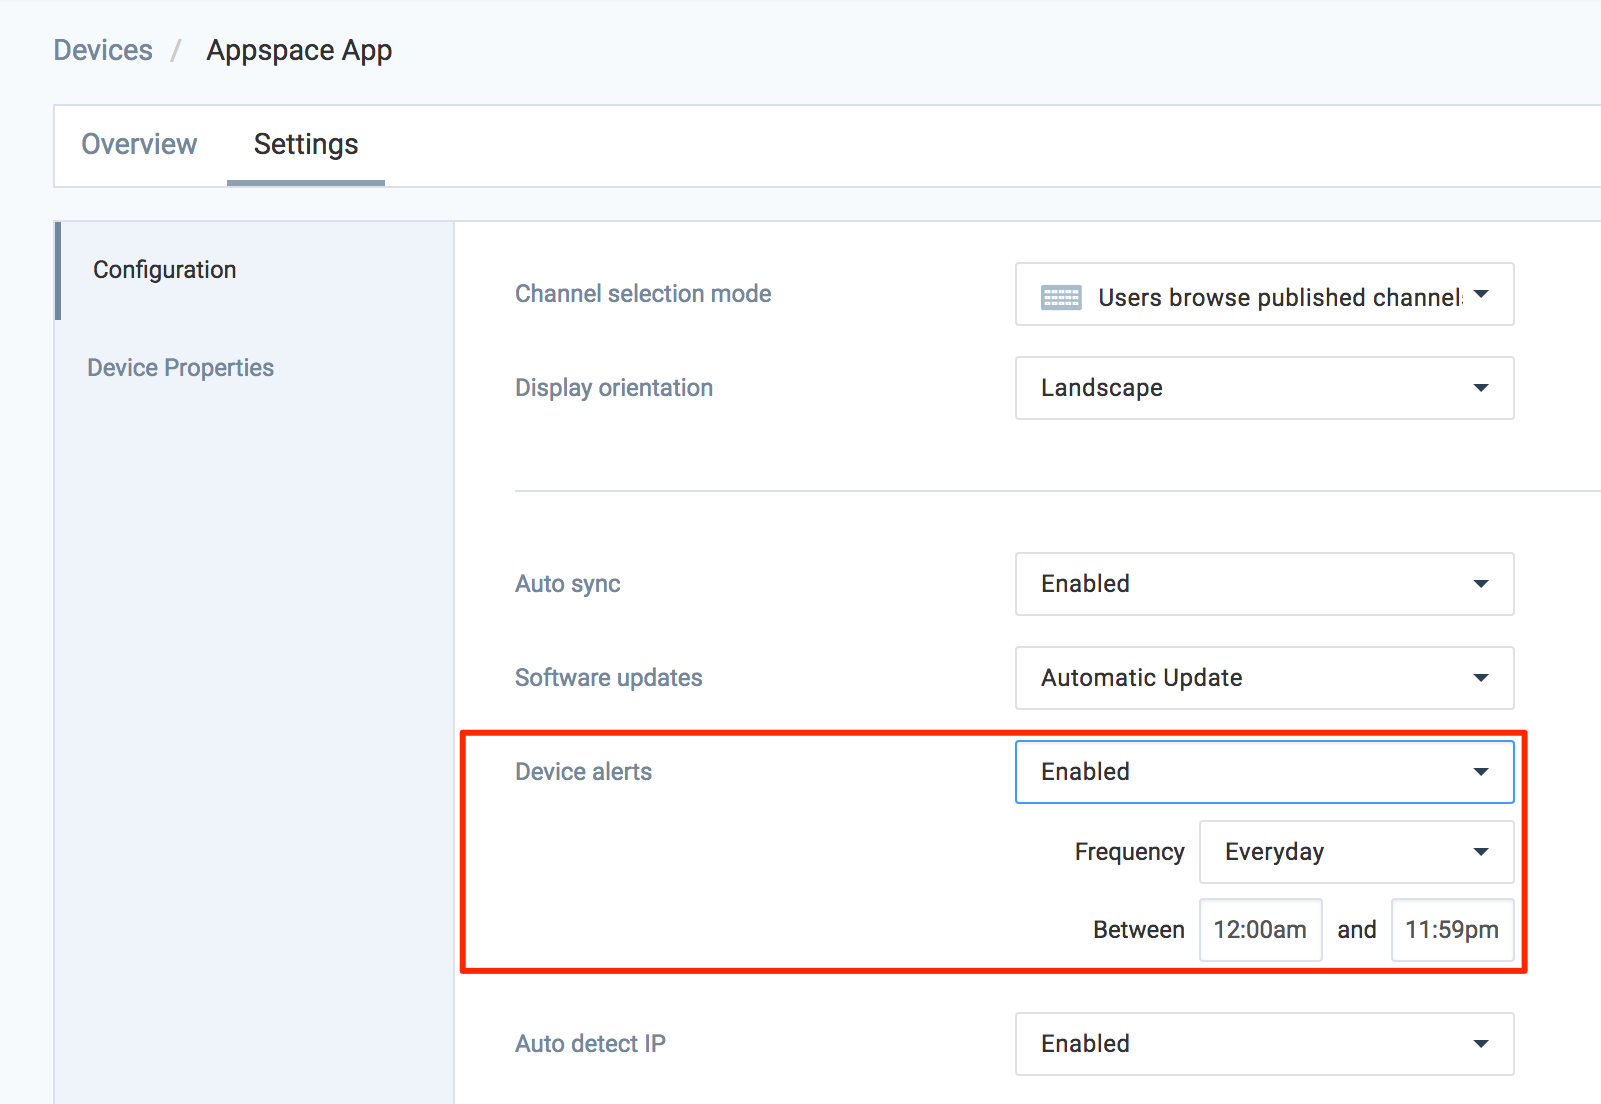
To enable Device Alerts
Click Devices from the Appspace Menu navigation bar.
Click the desired device’s name link you wish to enable Device Alerts on.
Click the Settings tab, and select Enabled from the Device alerts drop-down menu. Click Save once done.
Creating a Network Notification
Click Devices from the Appspace Menu navigation bar, and click the Networks tab.
Click the Notifications tab, and select the network the device is registered on. and click the ADD button.

In the Network Notifications Details page, select the Notification Type:
- Live Alert - Live Alert notifications trigger immediately after an event happens (e.g. device loses communication or fails).
- Summary - Summary notifications provides timely reports on your network status.
The Network lists down the default network the device is monitored on. To change networks, click the Change Network link, and select the desired network the device to monitor is on from the network tree.
Enter in a Name for this notification.

Configure the Trigger for the notification, depending on the Notification Type selected earlier.
Live Alert notifications only allow you to configure the trigger window and timezone.

Summary notifications allow you to configure the report recurrence.

The Enforce Time Zone Configuration is enabled by default, which forces notifications to be pushed to recipients based on the trigger time zone.
The Recipients section lists down users subscribed to the notification.
To add a user, search for the user’s name, and click the Add recipient button.

To remove a user, select the users, and click Delete recipient(s) button.
Note
The Set time zone button is only enabled when the Enforce Time Zone Configuration is disabled.
Click Save once done.
To delete a network notification, select the desired network notification, and click the Delete network notification button.

Changing the Time Zone for a Network Notification
In the Networks tab, click the Notifications sub-tab, and select the notifications you wish to change time zones.
Click the Set time zone button, and select the new time zone from the drop-down menu. Click Proceed to confirm changes.
