Enable content scheduling in an advanced channel
Appspace provides the ability to create scheduling information at various levels. These levels may increase in complexity such as: scheduling a single piece of content, followed by the scheduling of a playlist of content in a media zone widget, and finally scheduling layouts within a sign. Appspace provides flexible scheduling features such as date ranges, exclusive schedules, repeat patterns, and day parting.
This article provides the instructions to create and delete content scheduling.
Creating a Content Schedule
To create a content schedule, please follow the instructions below:
Click Channels from the Appspace Menu navigation bar, and click the Channels tab.
Select the desired advanced channel.
Click the Edit tab and select a layout from the Layouts section on the left.
Double-click a widget.

In the Widget Properties window, click the CONTENT tab, and click the Enable Scheduling Mode link.

Click OK when prompted for confirmation.
Click the CONTENT tab. Playlist schedules are playlists that contain one or more content files that will be displayed at a specific date and time. Once scheduling mode is enabled, the View drop-down menu will be visible in the top right section of the window.

Note
The Default Schedule is always active and cannot be deleted. This Schedule is provided so that administrators can allocate fallback content when there are no active schedules.
To add a new schedule, click the ADD button.
Enter in the Name and Description of the schedule.
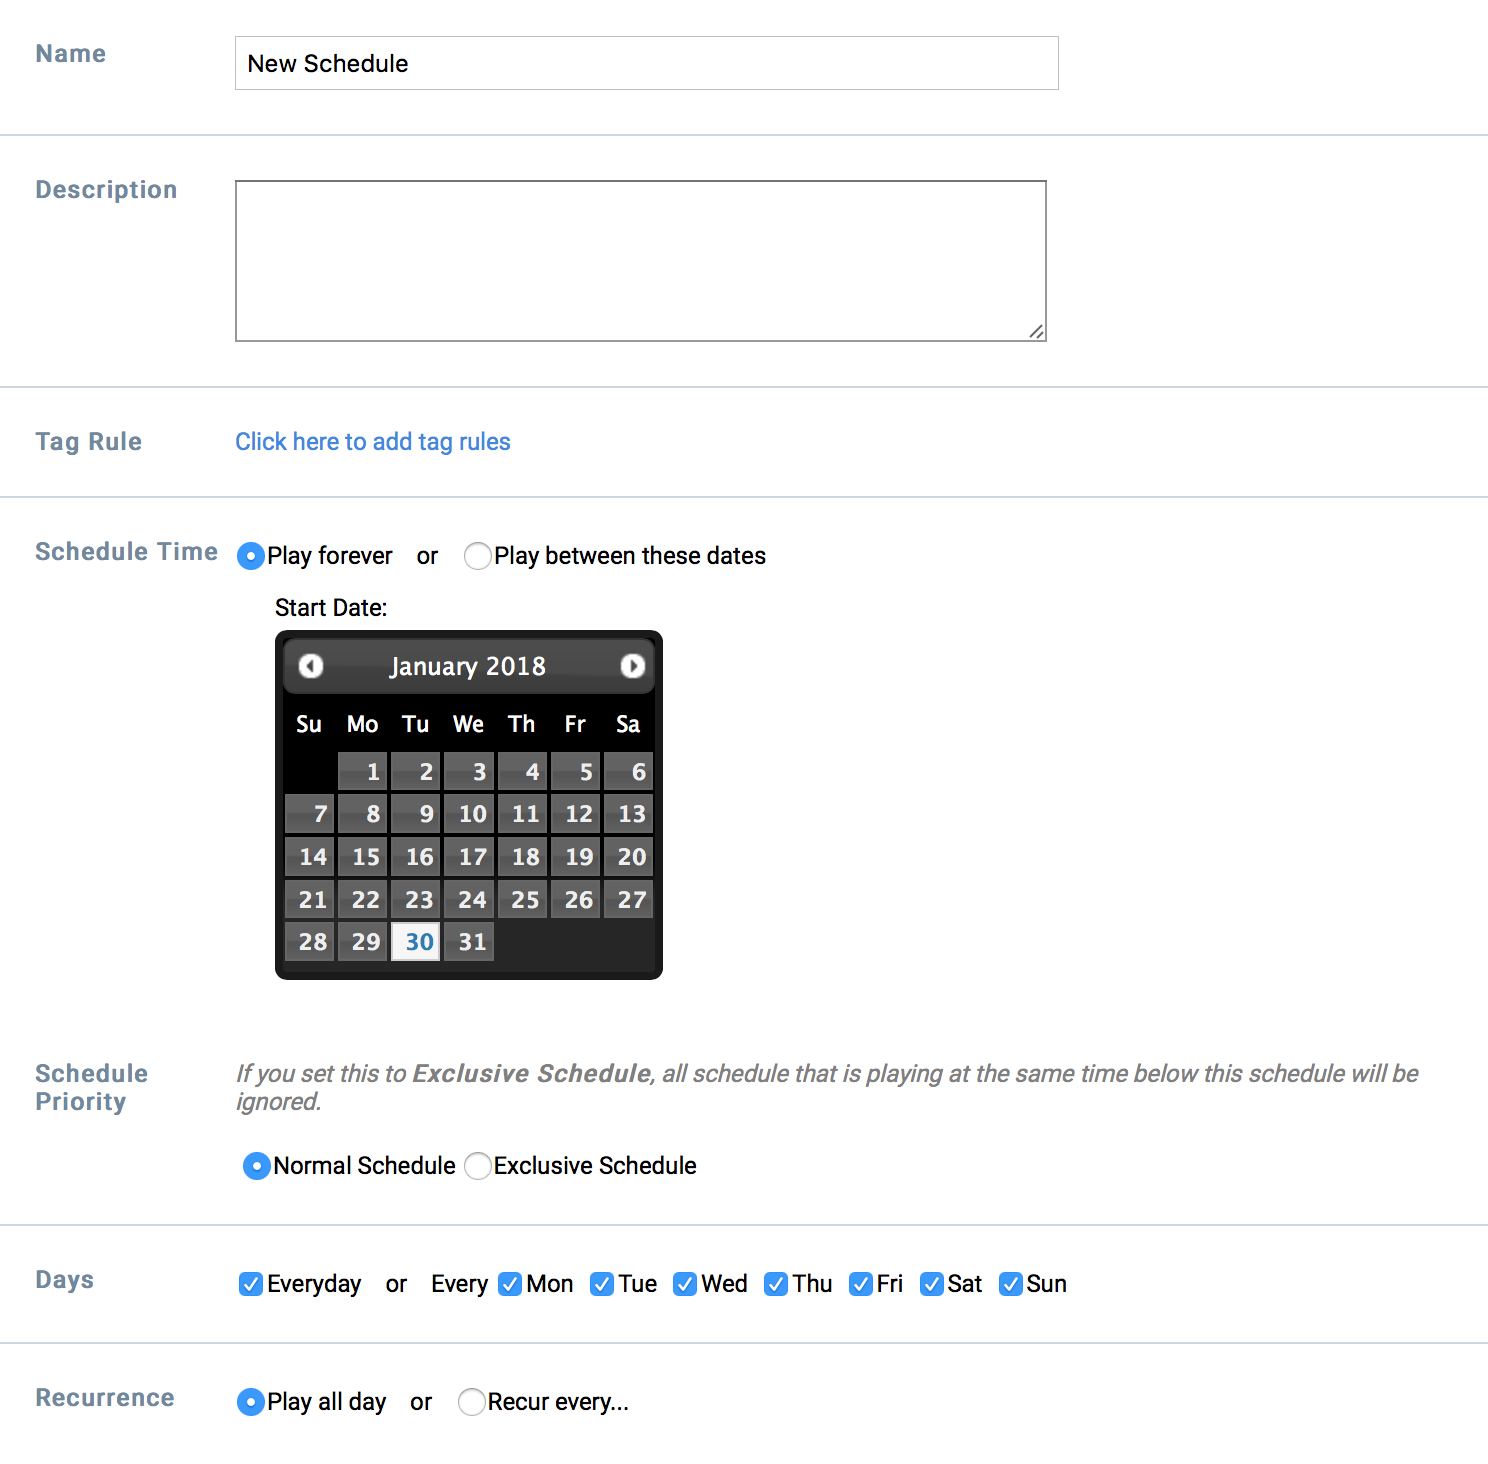
Use Tag Rules to restrict playback of the schedule to specific players then proceed to select the schedule time. Play forever loops the schedule, where else play between these dates allows you to configure a start and end date for the schedule.
Important
You must turn on Automatic Sync in an advanced channel, in order to enable content tagging and layout tagging functionality.
Select the Schedule Priority.
Note
- Normal Schedule – the sign will play content from the schedule when it is active, and content from any lower priority schedules that are active.
- Exclusive Schedule – the sign will play content from the schedule when it is active and block the playout of content from all lower priority schedules.
Select the days the schedule will be active.
Set the Recurrence. Clicking the Add To List to add all recurrences to the list.
Click Apply when finished.
Click the newly created schedule name link.
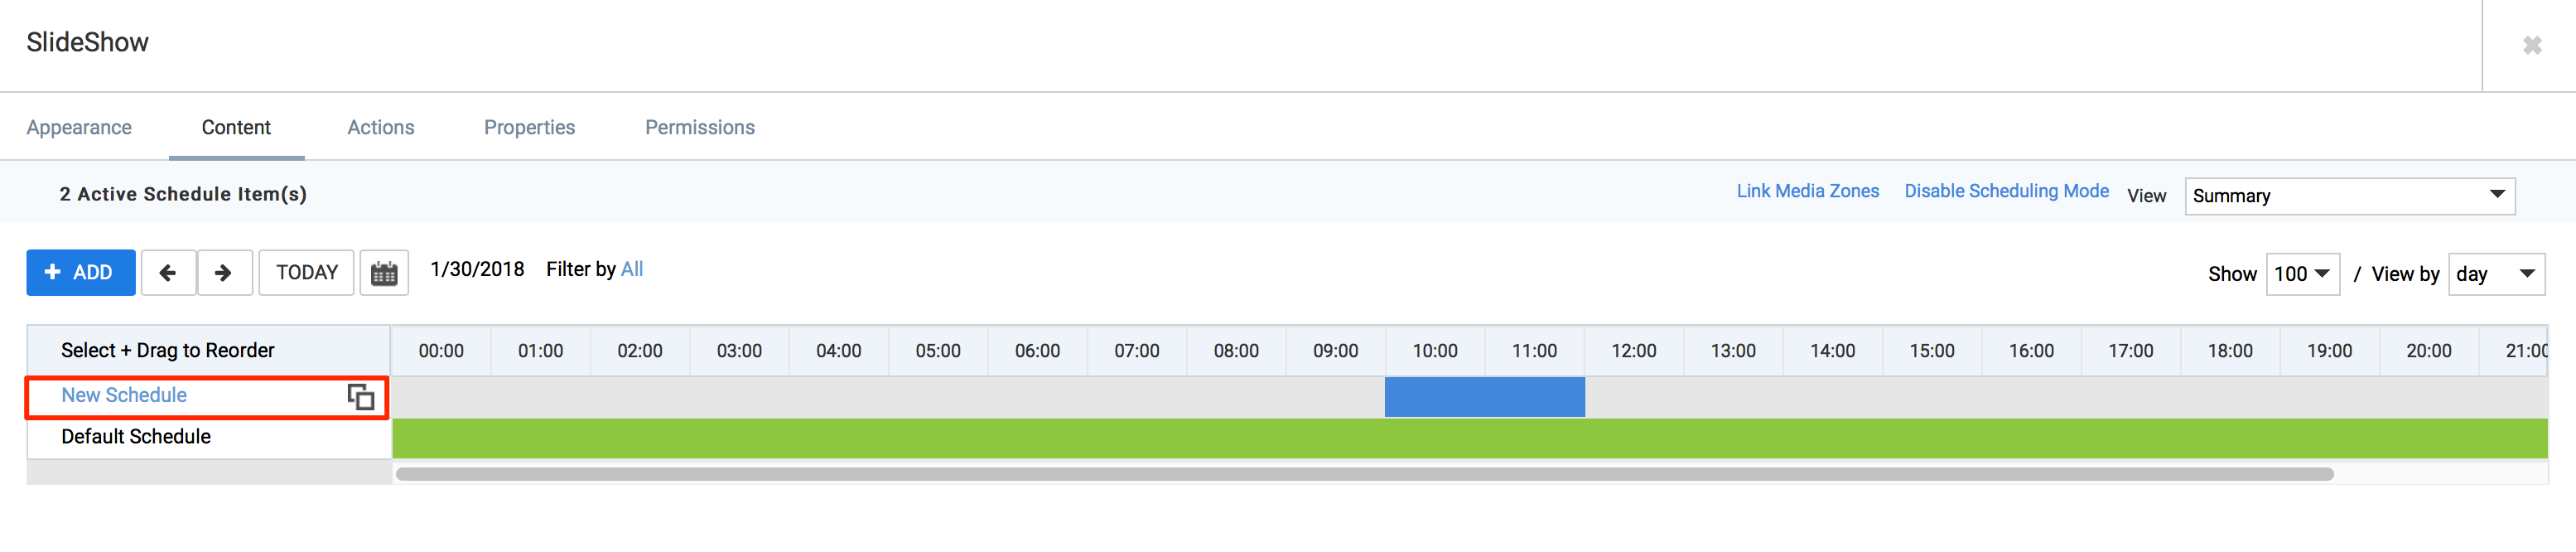
Click Add Media.
Select the desired content from the Library, and click Apply.
Note
To edit the content properties, please refer to the Configuring content properties article.
Allocated media items will appear inside the scheduled playlist. You can remove your content items from this page if required.
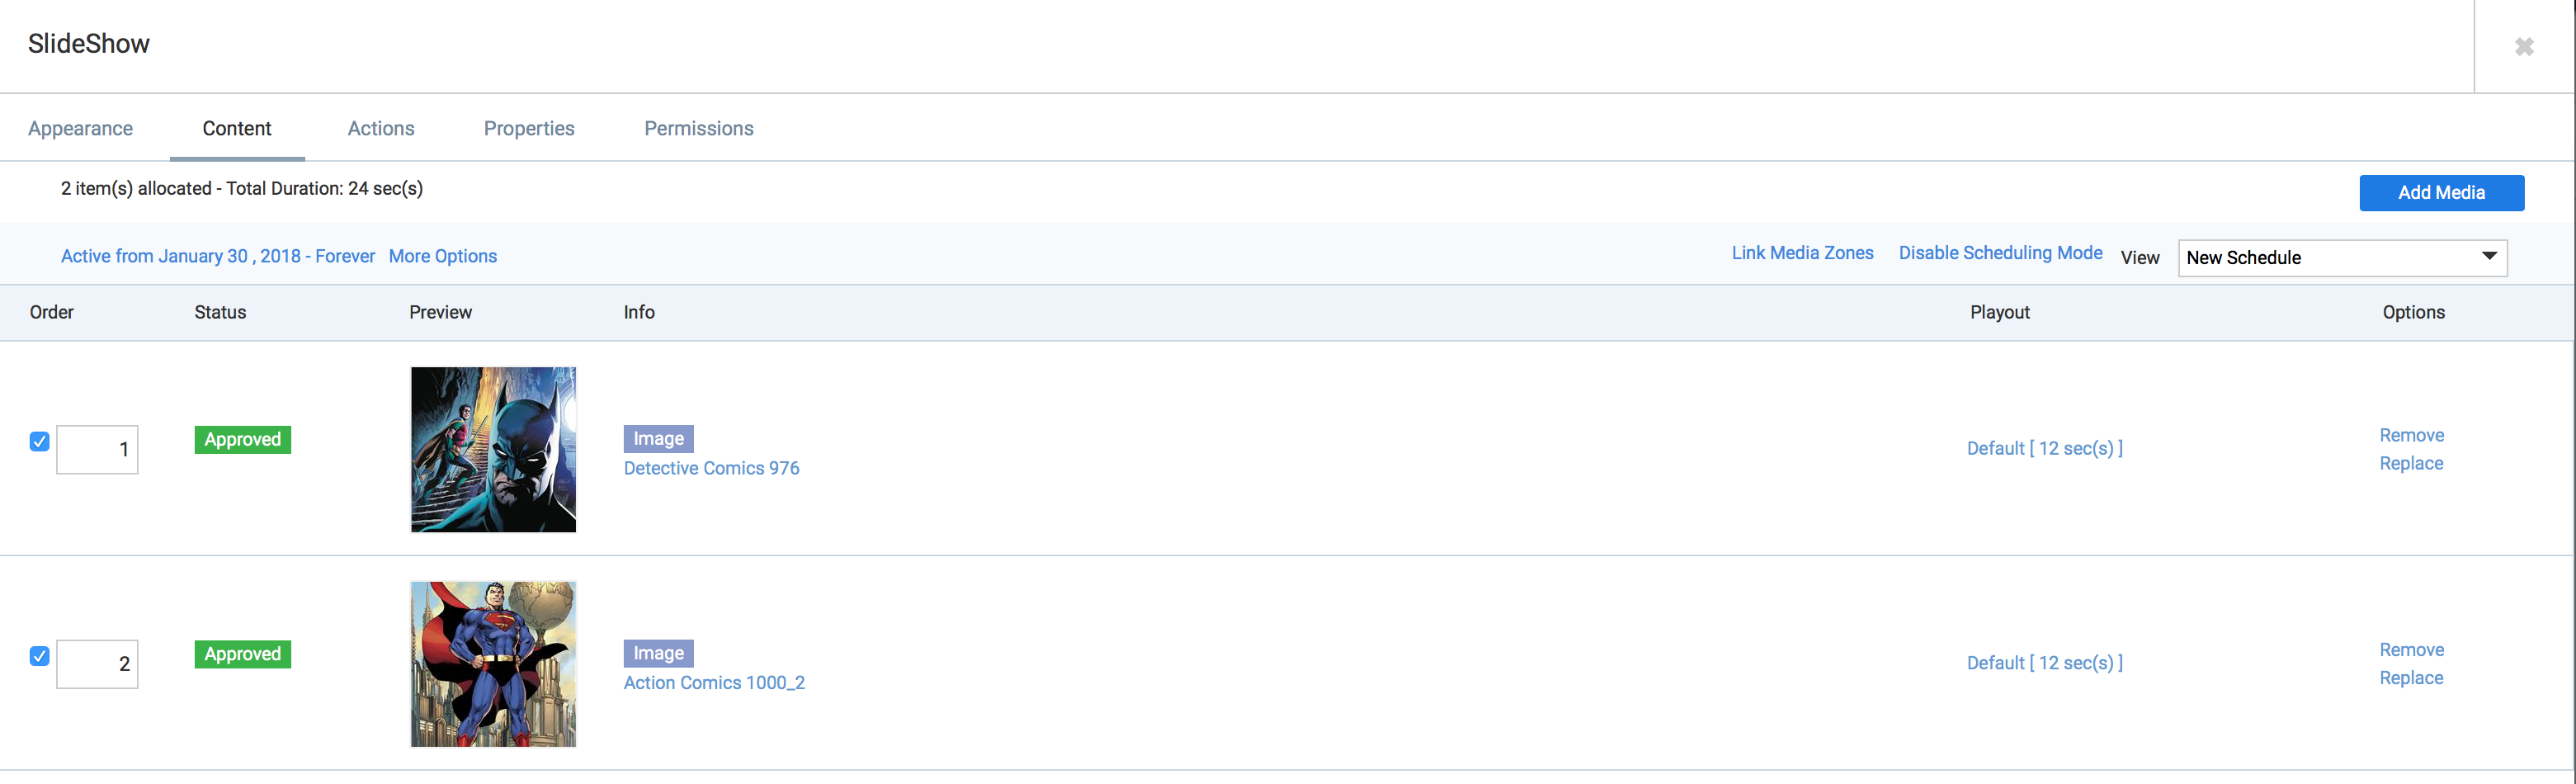
Click ‘close window’ to return to the layout.
Content interleave property
If multiple playlist schedules are used, the default content playback behavior is to play all content in one schedule before proceeding to the next playlist.
To set the playback behavior to interleave between schedules, the user must use the widget property “custom.playlist.interleave = true” in the Media Zone widget. This will make the content play one item from a schedule and move to the next schedule.
Example:
- Schedule A: Content A1, Content A2, Content A3
- Schedule B: Content B1, Content B2. Content B3
Default playout order: A1, A2, A3, B1, B2, B3
Interleave playout order: A1, B1, A2, B2, A3, B3
Note
To set this property, please refer to the Adding Widget Property section.
Deleting a Content Schedule
To delete a content schedule, please follow the instructions below.
Click Channels from the Appspace Menu navigation bar, and click the Channels tab.
Select the desired advanced channel.
Click the Edit tab and select a layout from the Layouts section on the left.
Double-click a widget.
In the Widget Properties window, click the CONTENT tab, and click the More Options link.
Click the delete link.

Click OK when prompted to confirm deletion of the content schedule.