Transcoding content
Content transcoding is an optional service in Appspace that will provide you an easy way to convert media files to different formats or to apply transformations (e.g. rotating video orientation). The transcoding process relies on using transcoding plugins that are installed on the Appspace instance. The plugins are typically community developed and available for download from the Downloads page.
Prerequisites
Your Appspace instance must have the required transcoding plugins installed. Appspace instances do not come with transcoding plugins by default.
Transcode Content
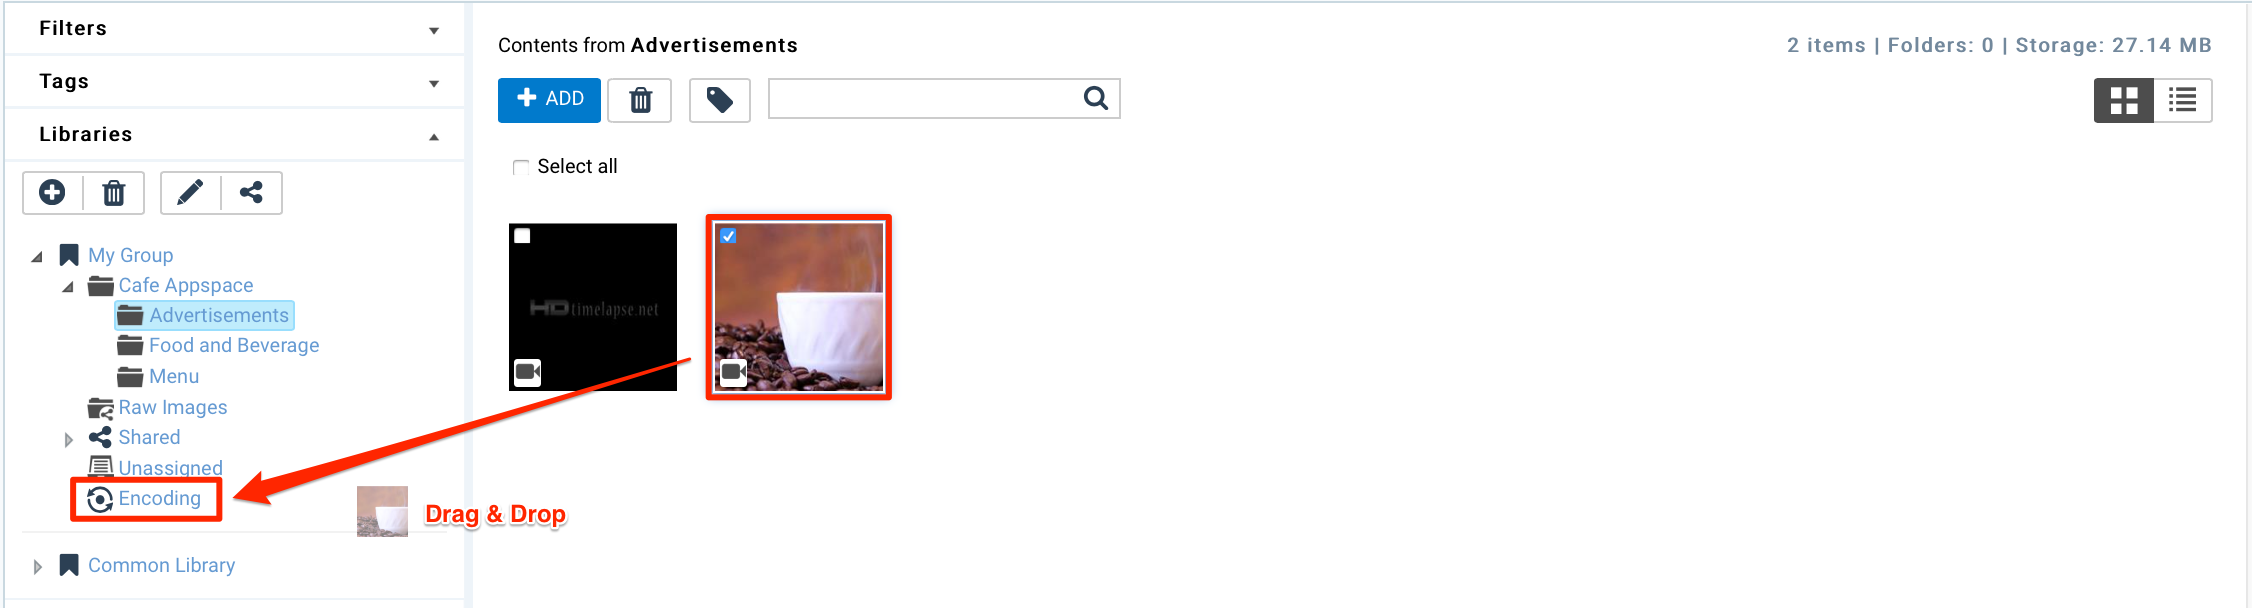
In Library, select the source folder of the desired content, and select the content(s) to be transcoded.
Drag-and-drop the selected content to the Encoding folder.
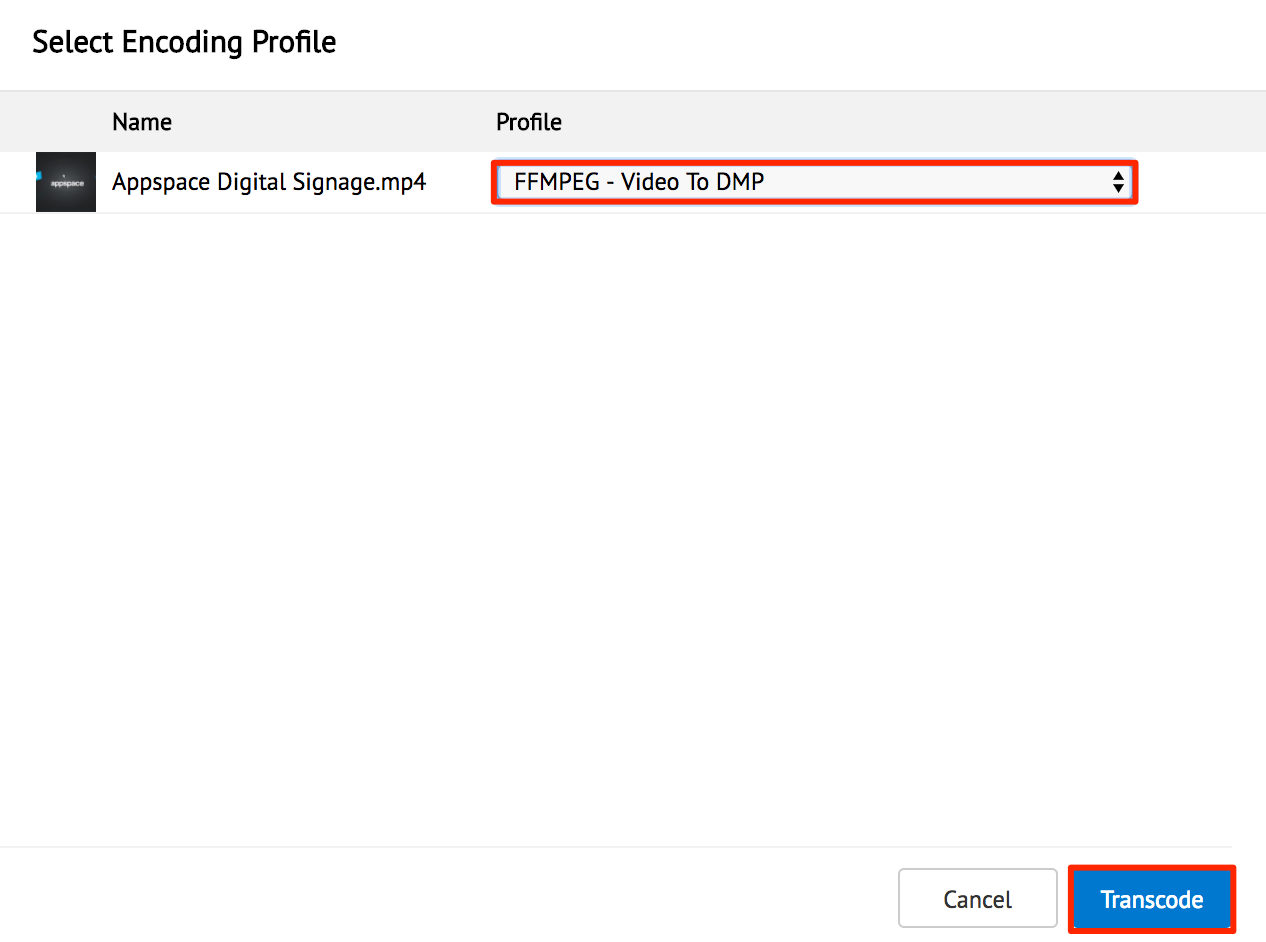
If the transcoder plugin is available, a pop-up dialog will then display the transcoder profile options. Select a profile from the drop-down list to encode the media file and click Transcode to begin the process.
Note
- Appspace will check the installed transcoders in the system to decide if there are transcoders available to handle the selected media file (based on file extension).
- The transcoding job is placed in a queue and happens in the background. The duration will depend on the size of the queue and the complexity of the file being processed.
Once the transcoding job has completed, you will find the newly generated media file in the same folder as the original content. The new media file’s name will be identical to the original content’s name but with the words *_transcoded appended.