Organize channels in channel groups
Once you have created channels, you may organize these channels into different channel groups. This article provides the instructions to create, edit, and delete channel groups within Channels.
Creating Channel Groups
Click Channels from the Appspace Menu navigation bar, and click the Channel Groups tab.
Click the CREATE button.
Enter in the channel group name, and click Create.
In the Edit tab, click ADD CHANNELS to add the desired channels to the channel group.
Select the desired channel(s), and click the Add icon. To remove selected channel(s), click the Remove icon.
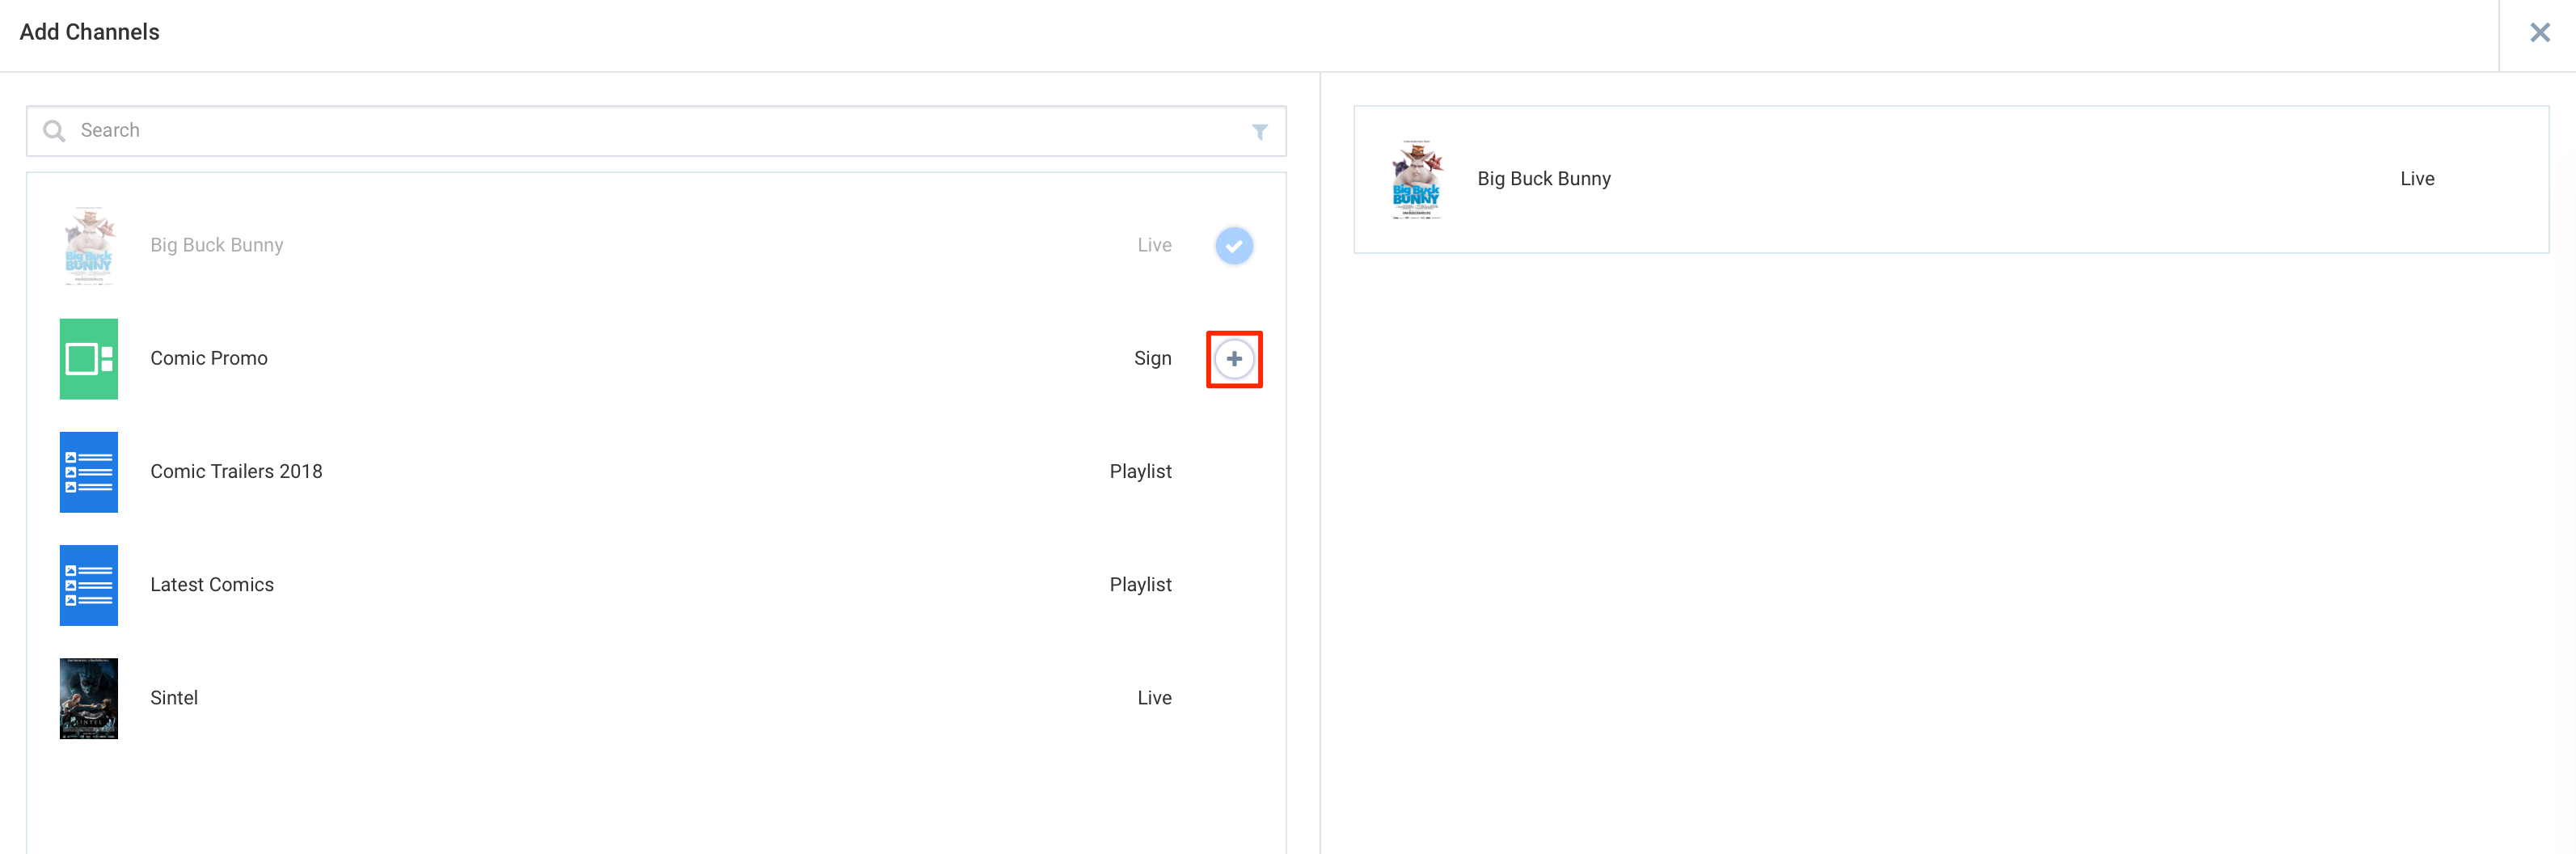
Click Apply once done.
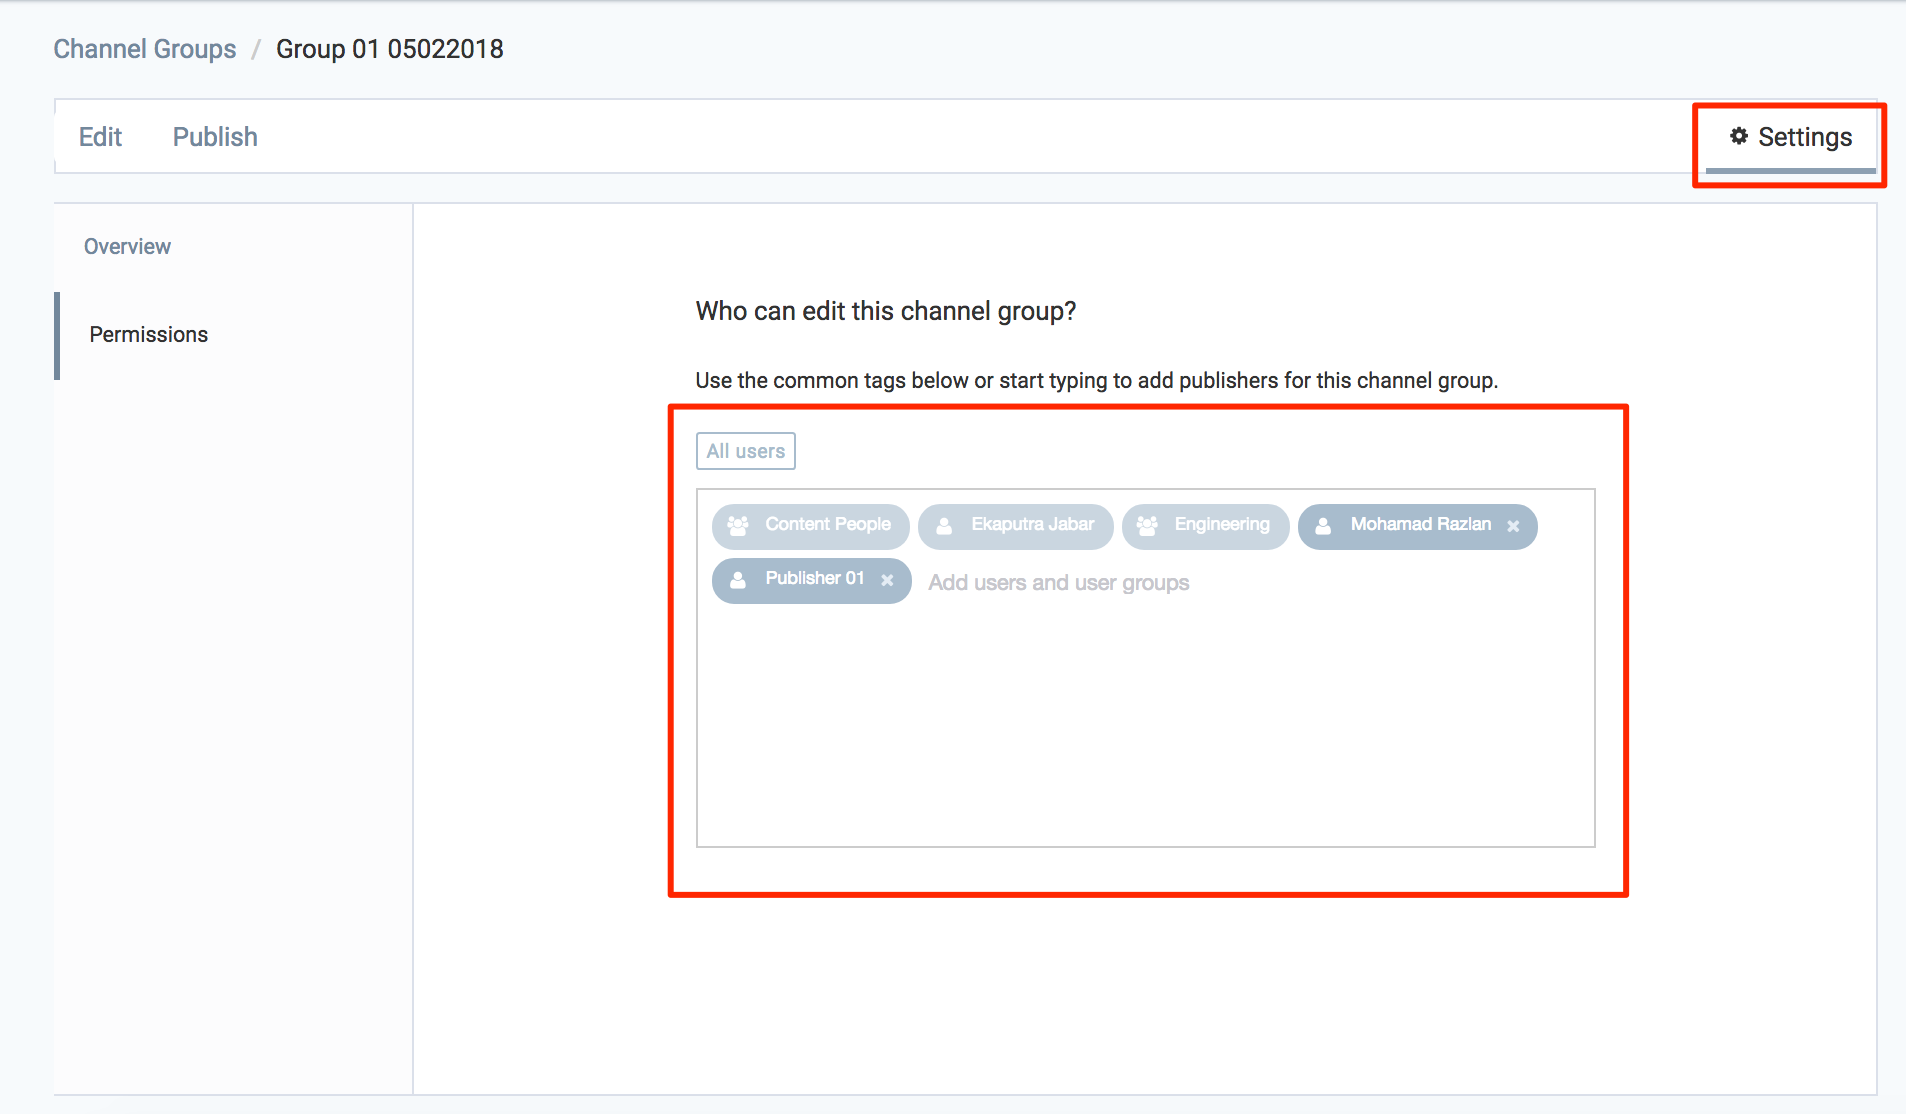
Click Settings to configure channel group permissions, as follows:
In the Overview tab, you can:
- Edit the Name of the channel group.
- Enter in a Caption for the channel group.
- Upload a custom image, or select an icon or color for the channel group.
- Delete the channel group.

Note
Custom thumbnail images should ideally have a 16:9 aspect ratio for the best display results.
In the Permissions tab, you can:
Grant user(s) with publishing permissions for this channel group.