Create networks and assign permissions
Manage your networks and sub-networks here. Assign a default channel to each network, or set permissions. All users, user groups, channels, and content and inherited from the network(s) you are assigned to.
This article provides the instructions to create and manage your networks.
Prerequisites
Administrator privileges required. Please refer to the table in the What are the user roles in Appspace? article.
Create a Network
Click Devices from the Appspace Menu navigation bar, and click the Networks tab.
Click the New Network button, and enter in the name of the network. Click OK.
Note
A new network can be added to any existing node.
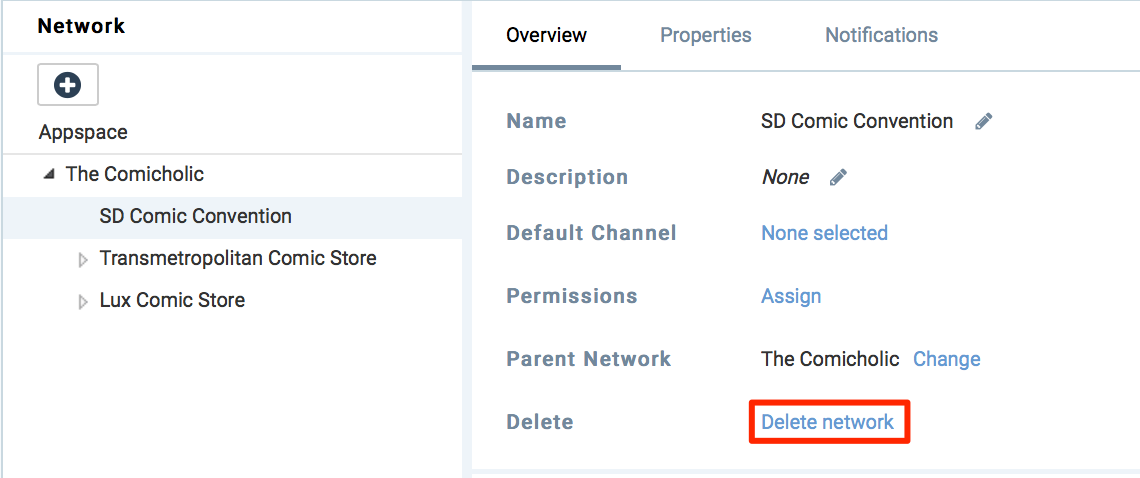
Click the Overview tab to view or edit network details.
To rename or add a description for the network, click the Edit icons beside the Name and Description fields.
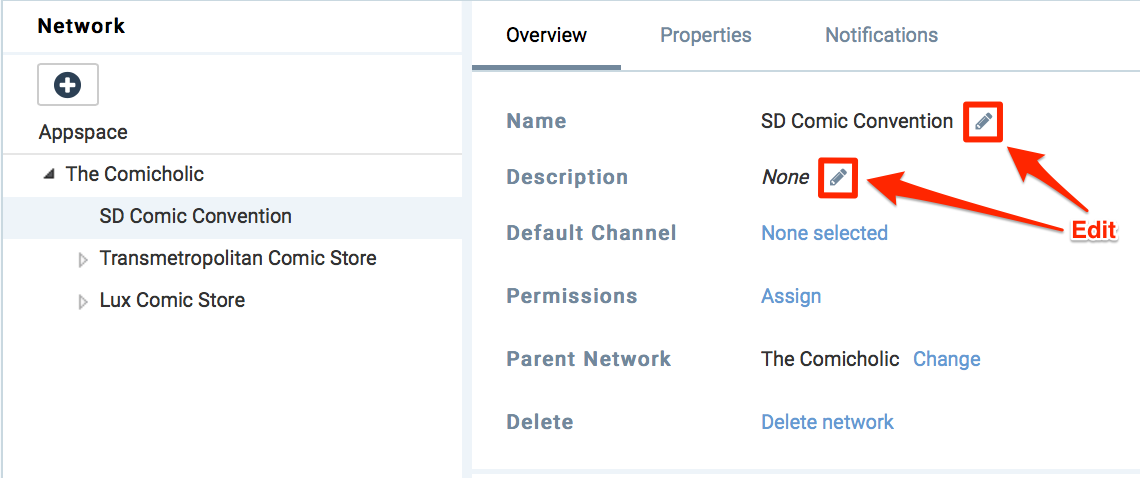
To assign a default channel to the network:
Click the Default Channel channel link.

Select a channel:
- Click Users can browse published channels for Interactive mode.
- Click Channels will autoplay sequentially for playing published channels automatically.
- Click Administrator can select a single channel for Device mode.
- Select the desired channel to be displayed.
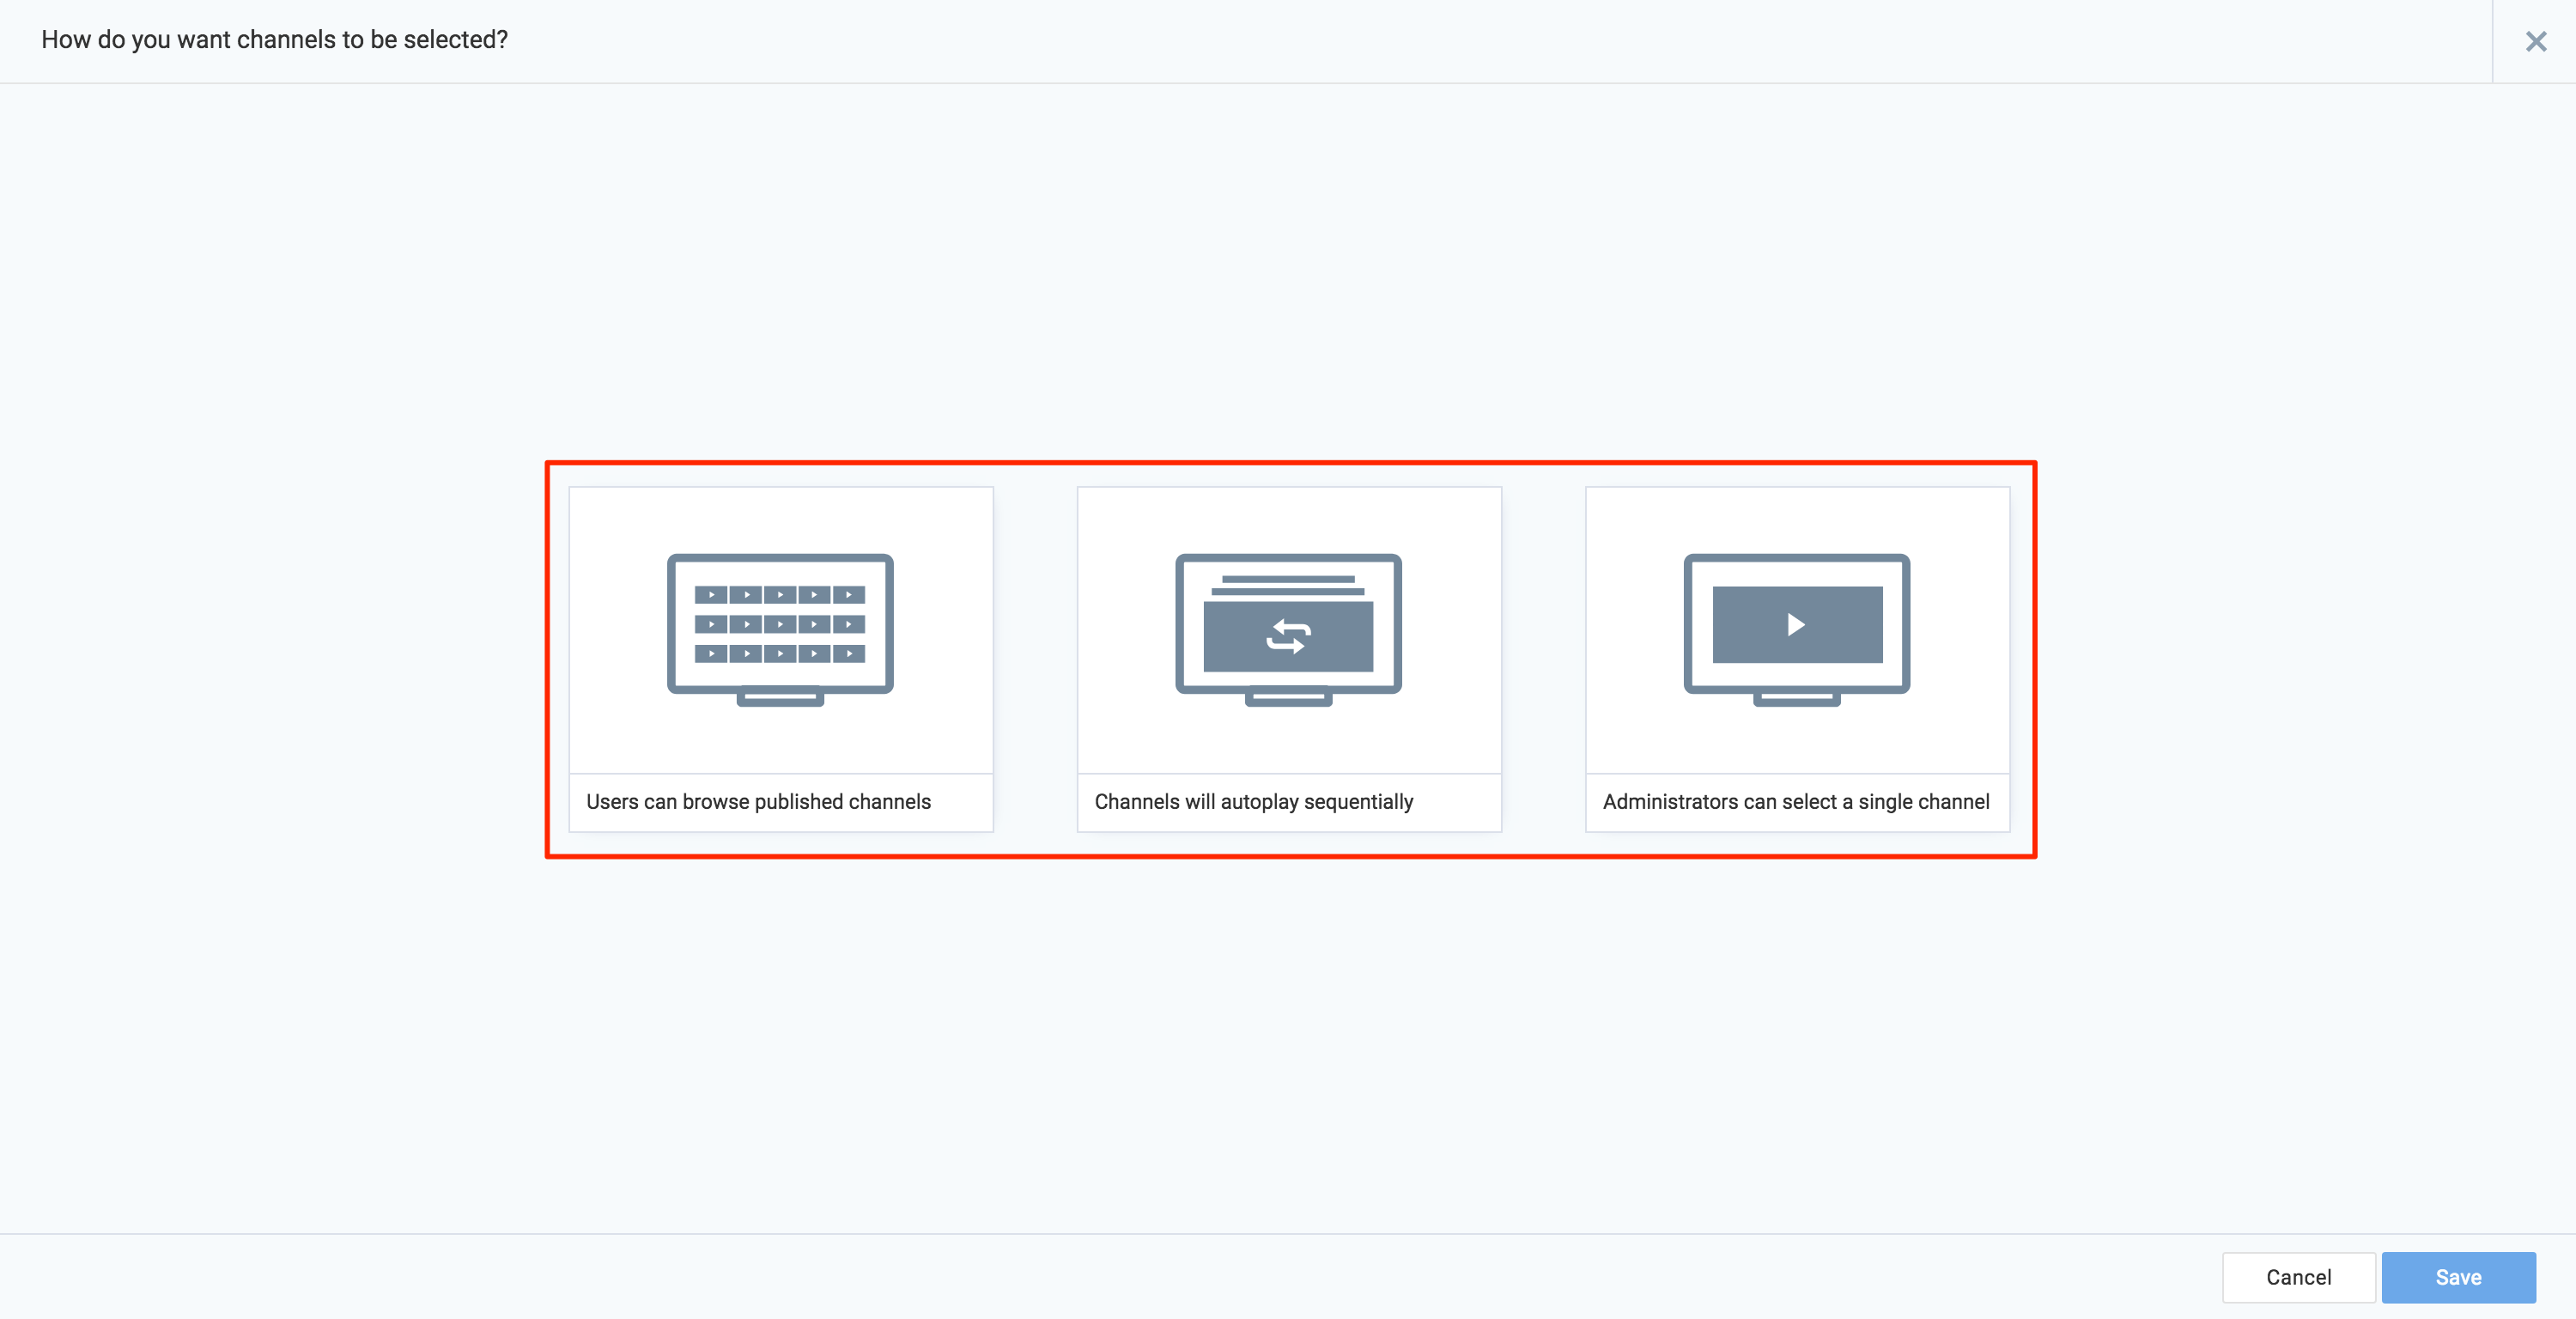
Click Save once done.
Note
You can set a Channels or Signs channel as the default channel. However, you must create the channel in the same network or move an existing channel to the network before you can set it as the default channel.
To assign users or user groups with Network Administrator, or Content Administrator permissions in the network:
In the Permissions section, click the Assign link.

Enter in the desired user, or user groups to the Network Administrator or Content Administrator fields, and click OK to assign permissions.

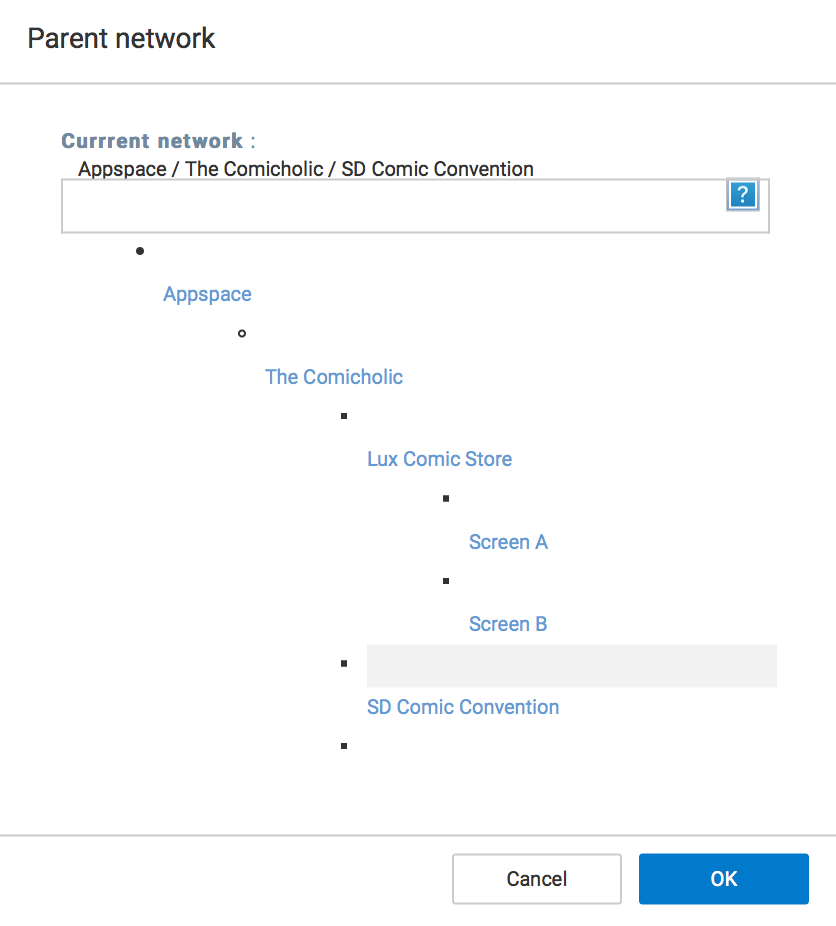
To move the network to another parent network:
In the Parent Network section, click the Change link.

Select the desired parent network, and click OK to move the network to the new parent network.
To delete a network, click the Delete network link, and click OK to confirm deletion.
Warning
You may select a network which contains sub-networks. Upon deleting a parent network, all sub-networks and related assets (user groups, users, media assets, applications) will also be deleted from the system.
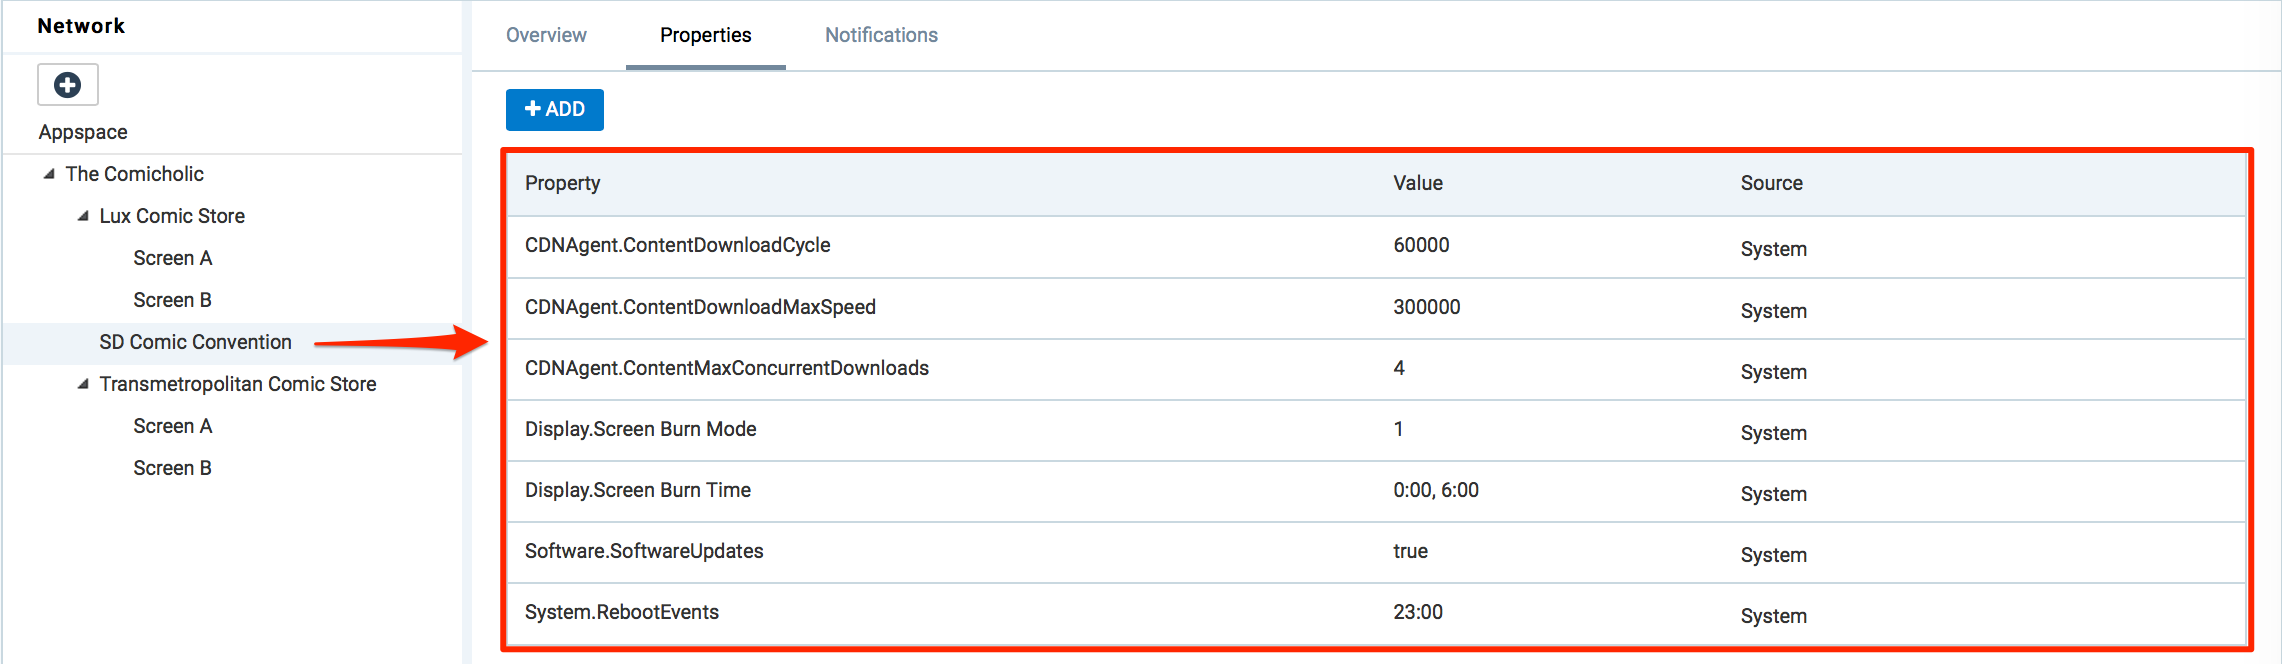
Add Network Properties
Network properties are typically non-visual settings that include screen burn time, player credentials, or software update configurations. Network properties listed and defined at each level of the network will be applied to all players within the network as well as any of its sub-networks.
Select the desired network, and click the Properties tab.
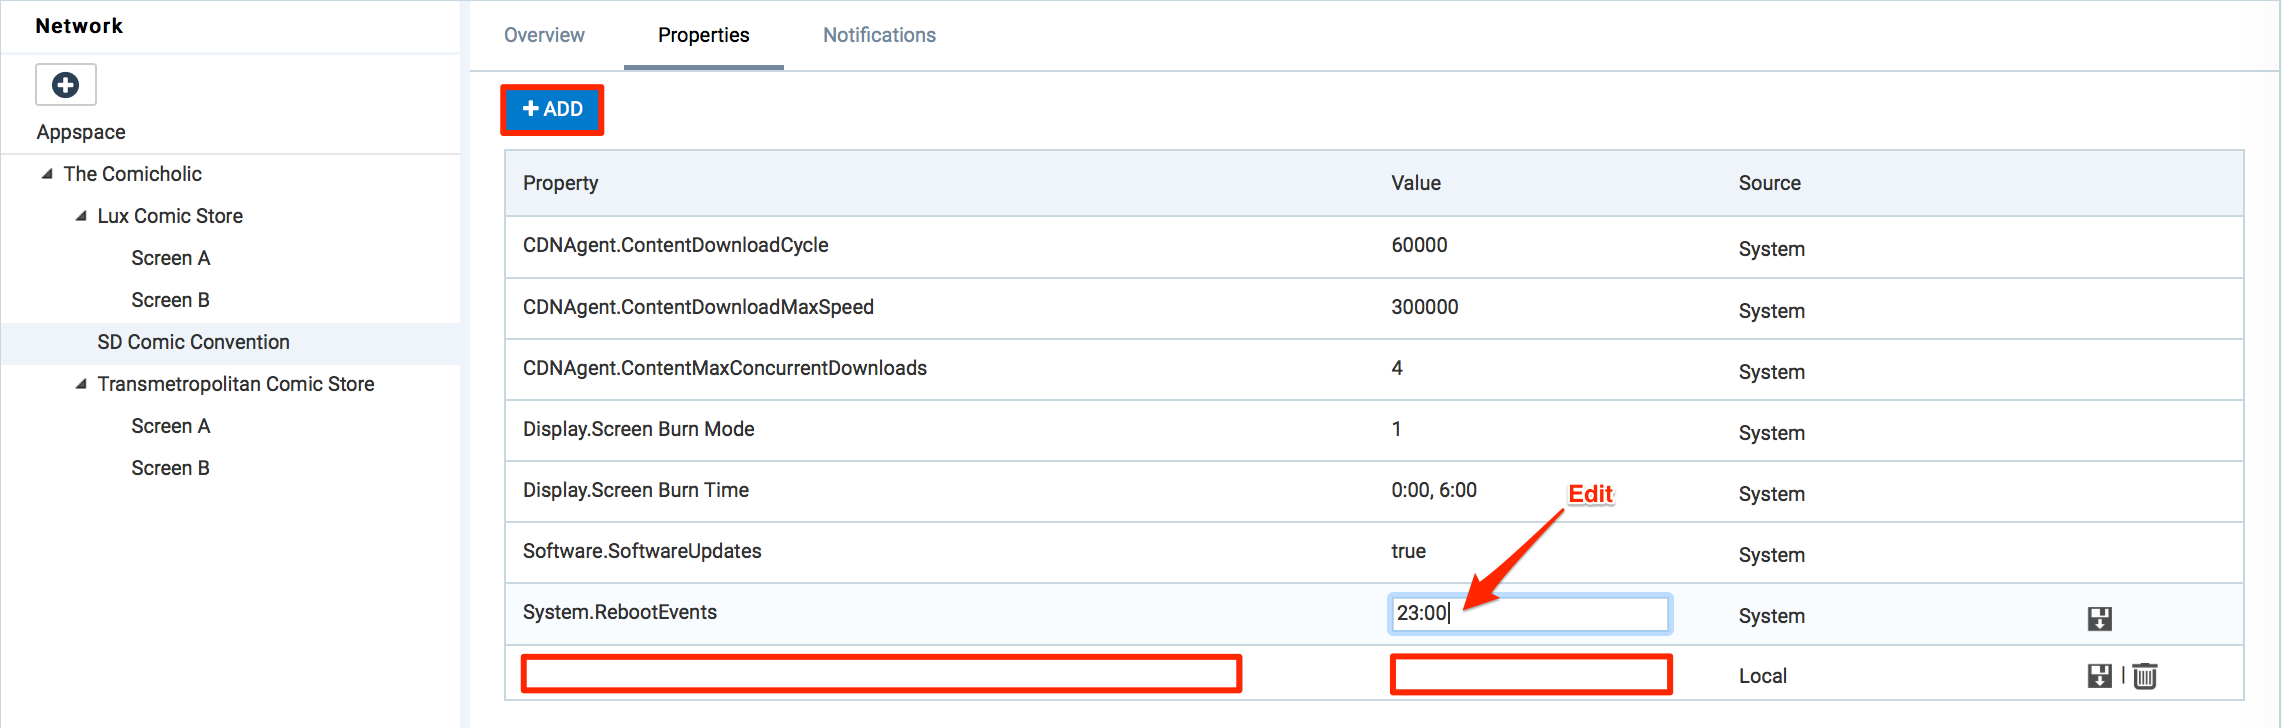
Click the ADD button to add a new network property for this network node. You should see a new row appear that allows you to enter the Property and Value of this entry. When finished, click the Save icon.
Note
- You can also edit any existing property by clicking the property row.
- All players in this network and its sub-networks will inherit these properties.