Installing the Appspace App on BrightSign
This article provides the instructions to configure and register BrightSign devices for Appspace.
- Configure BrightSign
- Configure BrightSign with Local Policy File
- Update Appspace App on BrightSign
- Update BrightSign firmware via Device Tasks
- Enable Text Overlay over Video
Important
BrightSign devices are unable to update the Appspace App versions automatically. Please refer to the Update Appspace App on BrightSign section below for workarounds.
Prerequisites
The device must meet the manufacturer’s minimum hardware and technical specifications, as well as the Appspace App’s minimum requirements. Please refer to Appspace App requirements.
An active Appspace account, with sufficient Device IDs to register the device.
An active Internet connection.
Ensure the device has been installed with the latest firmware (v 6.1.76 or higher). Download here: https://www.brightsign.biz/downloads/overview.
Ensure the device clock has been set. Please refer to http://support.brightsign.biz/hc/en-us/articles/218066677.
A BrightSign compatible SD card.
Ensure your network/firewall/anti-virus software is configured to allow access to the following:
- Network port 80 (HTTP)
- Network port 443 (HTTPS)
A USB keyboard for activation.
Note
If you need to reset the device to the default factory settings, please refer to the vendor’s Support forum here: http://support.brightsign.biz/entries/21796878-How-do-I-restore-reset-a-unit-to-Factory-Default-settings-
Configure BrightSign
Important
The device must be installed with firmware v 6.1.76 or higher, before you proceed.
Follow the instructions below to setup the BrightSign device:
In the Appspace console, navigate to System > Downloads, and download the Appspace App for BrightSign client (autorun.zip).
Copy the autorun.zip file to an SD card.
Insert the SD card into the BrightSign device.
Connect the device to a display screen.
Ensure network connectivity is active, and switch on the BrightSign device. Wait for the device to boot-up and display the Device registration page.
Note
The BrightSign device may need to be restarted a couple of times if the device registration page does not show up.
Launch the Appspace App. Register your device using one of the many options listed in the Introduction to registering a device with the Appspace App article.
Configure BrightSign with Local Policy File
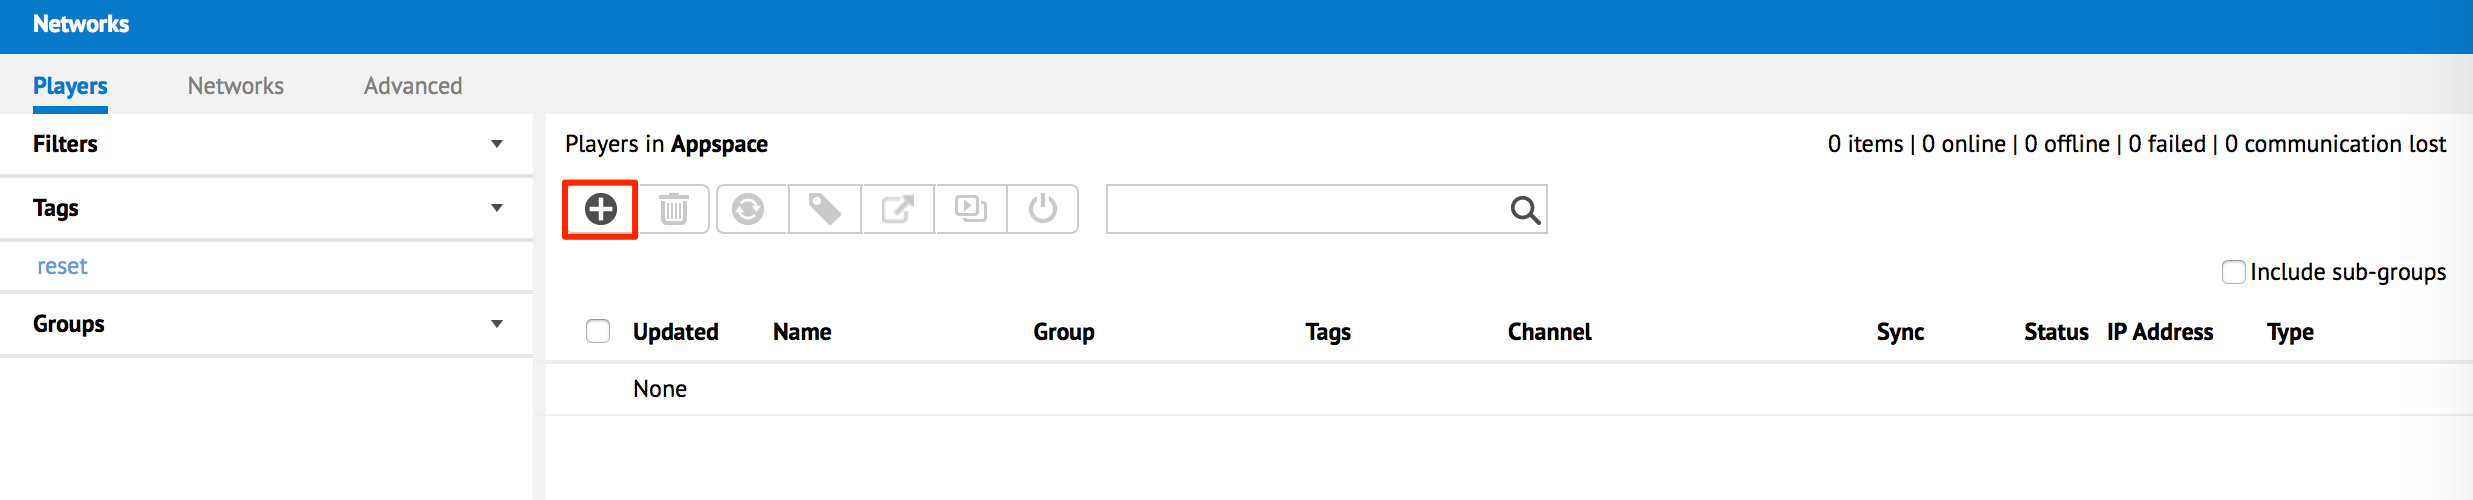
Log on to your Appspace account, and navigate to Admin > Networks in the Appspace menu.
Select the Players tab and click the Add button.
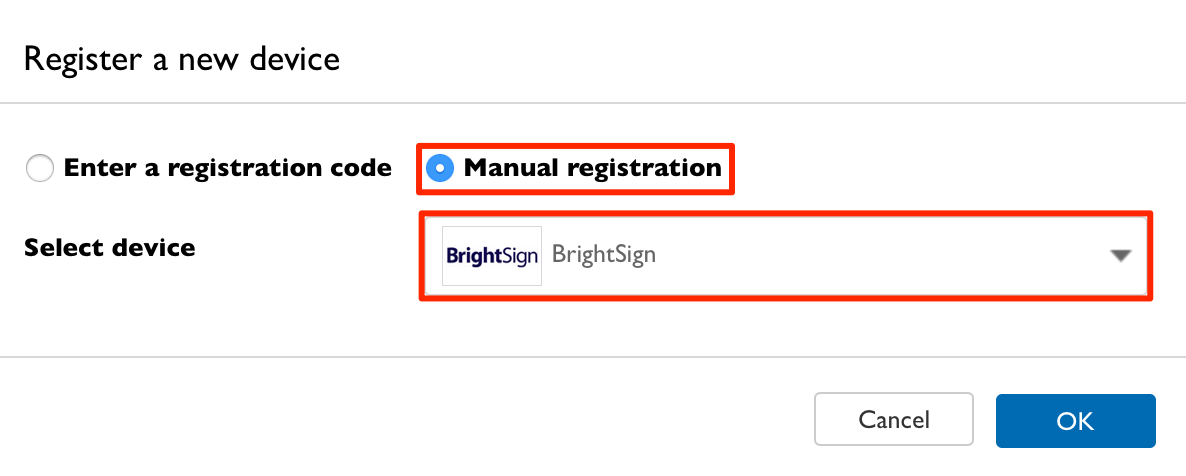
In the Register a new device screen, select Manual registration, and select BrightSign from the Select device menu. Click OK.
In the Register Player window, select the desired channel, and days to expiration in the BrightSign Registration section.
Additionally you can configure fields such as DHCP, NTP server, Timezone, and Proxy Server. You can also perform custom scripting in the Script Configuration section.
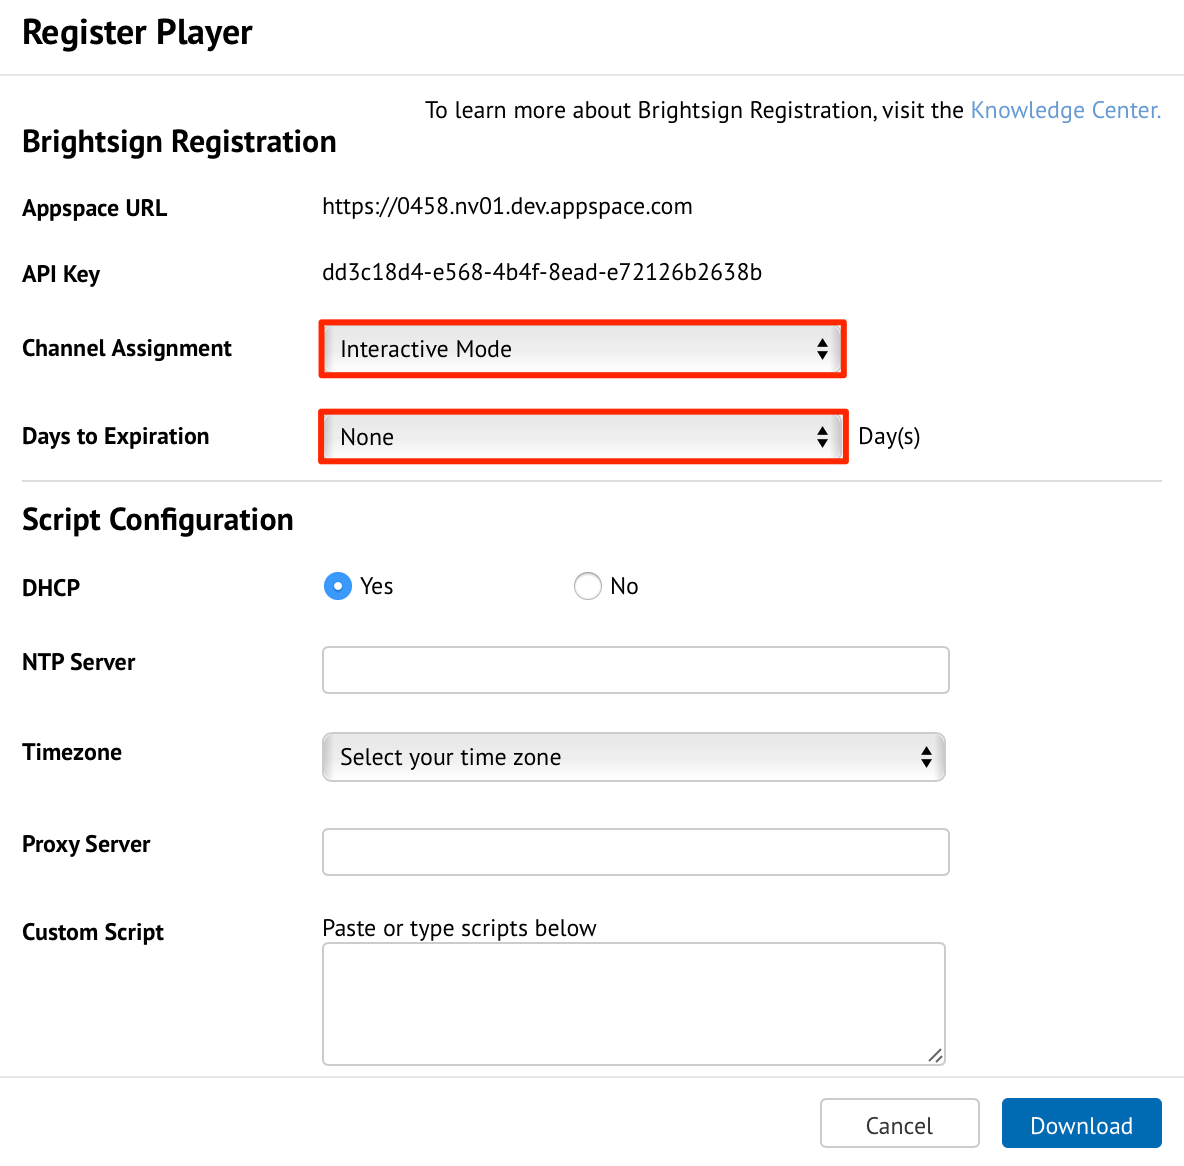
Click Download to download the autorun.zip file.
Save the autorun.zip file to an SD card.
Insert the SD card into the BrightSign device.
Connect the device to a display screen.
Ensure network connectivity is active, and switch on the BrightSign device.
Wait for the device to boot-up. The Appspace App will begin registering the device, and the selected channel will be displayed.
Update Appspace App on BrightSign
Note
This is applicable to Appspace App version 1.13 and above.
To ensure the Appspace App is automatically updated on all supported BrightSign devices, follow the instructions below to update your Appspace App.
Navigate to Admin > Networks, and set the Software.SoftwareUpdates player property value to TRUE. For instructions on how to add these player properties in the Appspace console, please refer to Managing media player properties article.
Navigate to System > Downloads in your Appspace Cloud account, and download the latest Appspace App for BrightSign package, and save it to a hosted folder.
Navigate to Admin > Device Tasks in the Appspace menu.
Select the Advanced Tasks tab, and add the Appspace App : Brightsign App Updater task.
Configure the task and deploy to your desired network where the BrightSign devices are registered.
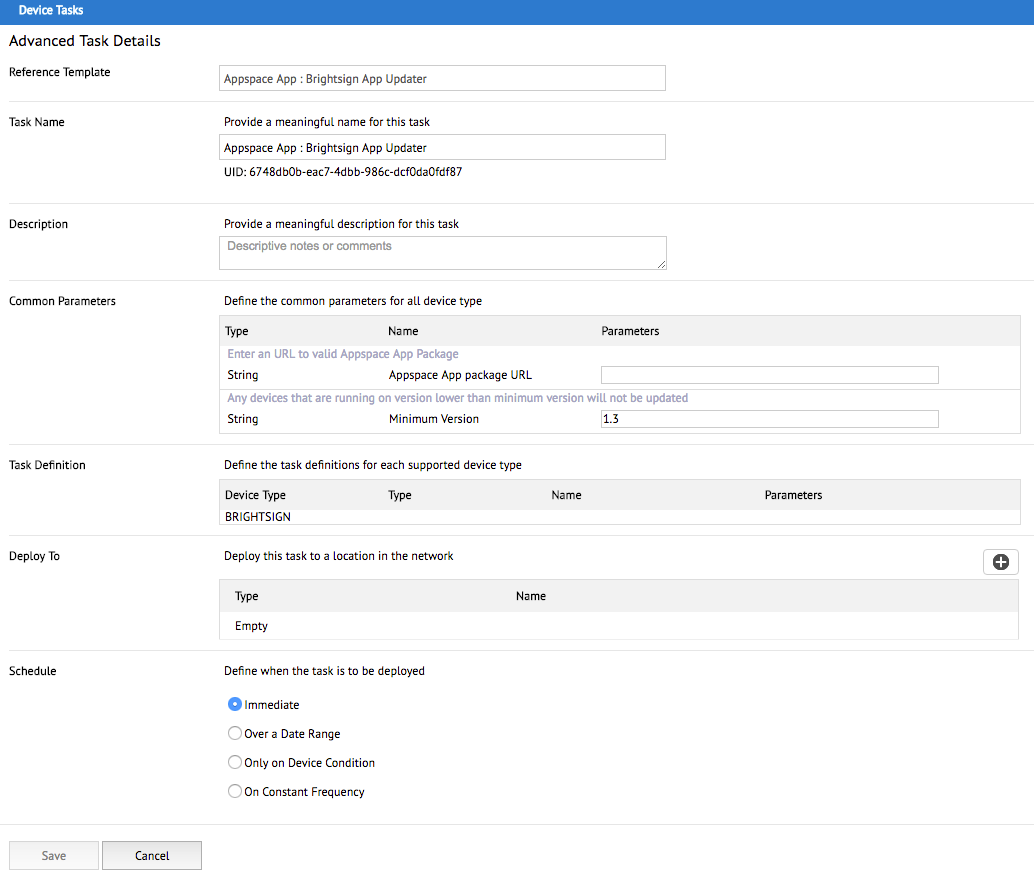
Click Save.
Update BrightSign firmware via Device Tasks
Download the BrightSign firmware of your device from the BrightSign Downloads site at: https://www.brightsign.biz/downloads/overview
Extract the BrightSign firmware .zip file.
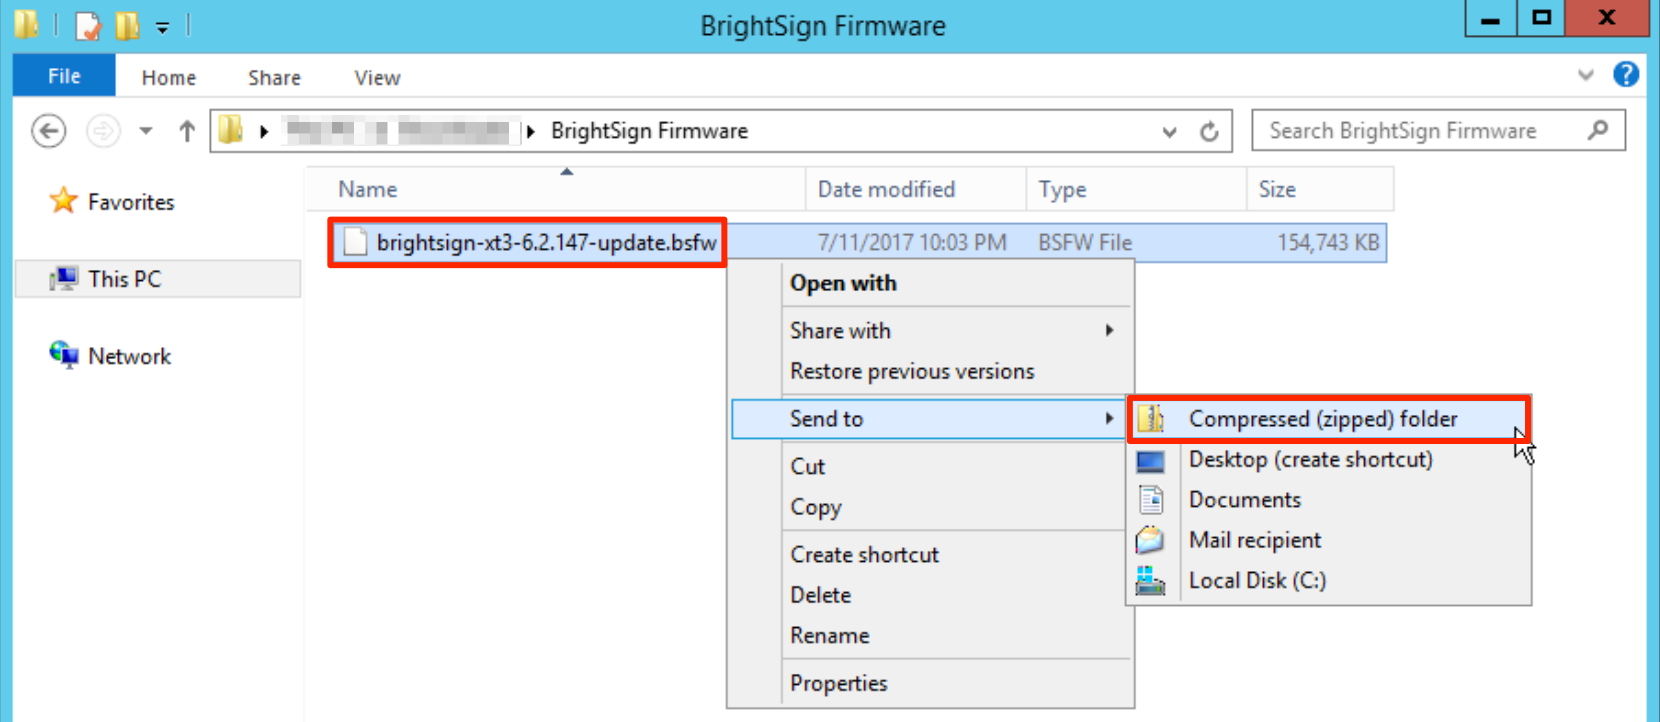
Copy only the .bsfw file and paste it in a folder on the local web server.
Right-click and compress the .bsfw file.
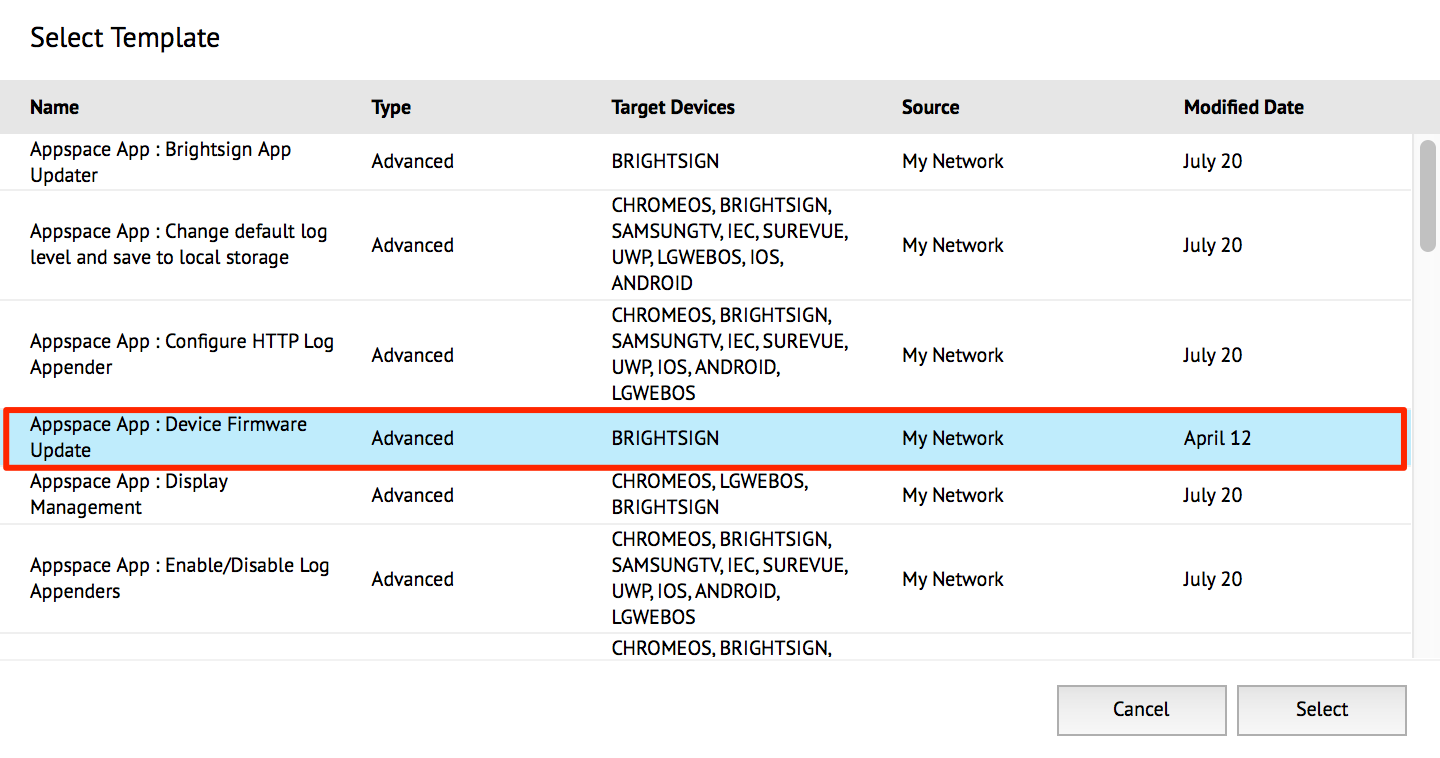
On the Appspace console, navigate to Admin > Device Tasks, and click the Advanced Tasks tab.
Click the Add button, and select the Appspace App : Device Firmware Update task.
In the Common Parameters section, enter in the URL to the BrightSign firmware package on your local web server (from Step 3 above).

In the Deploy To section, select the desired network to deploy the task to.
In the Schedule section, select the desired deployment option.
Click Save.
Enable Text Overlay over Video
To enable text overlay over video in BrightSign devices, you must add the following device property:
Custom.media.video.layerindex
Value Range:
- -2: Places the video behind all graphics, as well as a second video element.
- -1: Places the video behind all graphics.
- 0: Disables “hwz” mode completely.
- 1: Places the video in front of all graphics (the default setting).
- 2: Places the video in front of all graphics, as well as a second video element.
Note
When “hwz” is enabled, the video is rendered as a video element, ensuring the highest possible frame rate and video quality. When “hwz” is disabled, the video is rendered as a graphics element.
For instruction to add a device property, please refer to the Adding New Player Properties section.