Managing user groups
This article provides the instructions to create a user group, move the group to a different network, and assign existing users to individual or multiple user groups.
- Create a User Group
- Assign User(s) to User Group(s)
- Move User Group across a Network
- Delete a User Group
Prerequisites
You must be one of the following users:
- Portal Administrator
- Account Administrator
- Network Administrator
- Account Owner
Create a User Group
Select a network or sub-network and click the ‘Add user group’ button in the Groups section.
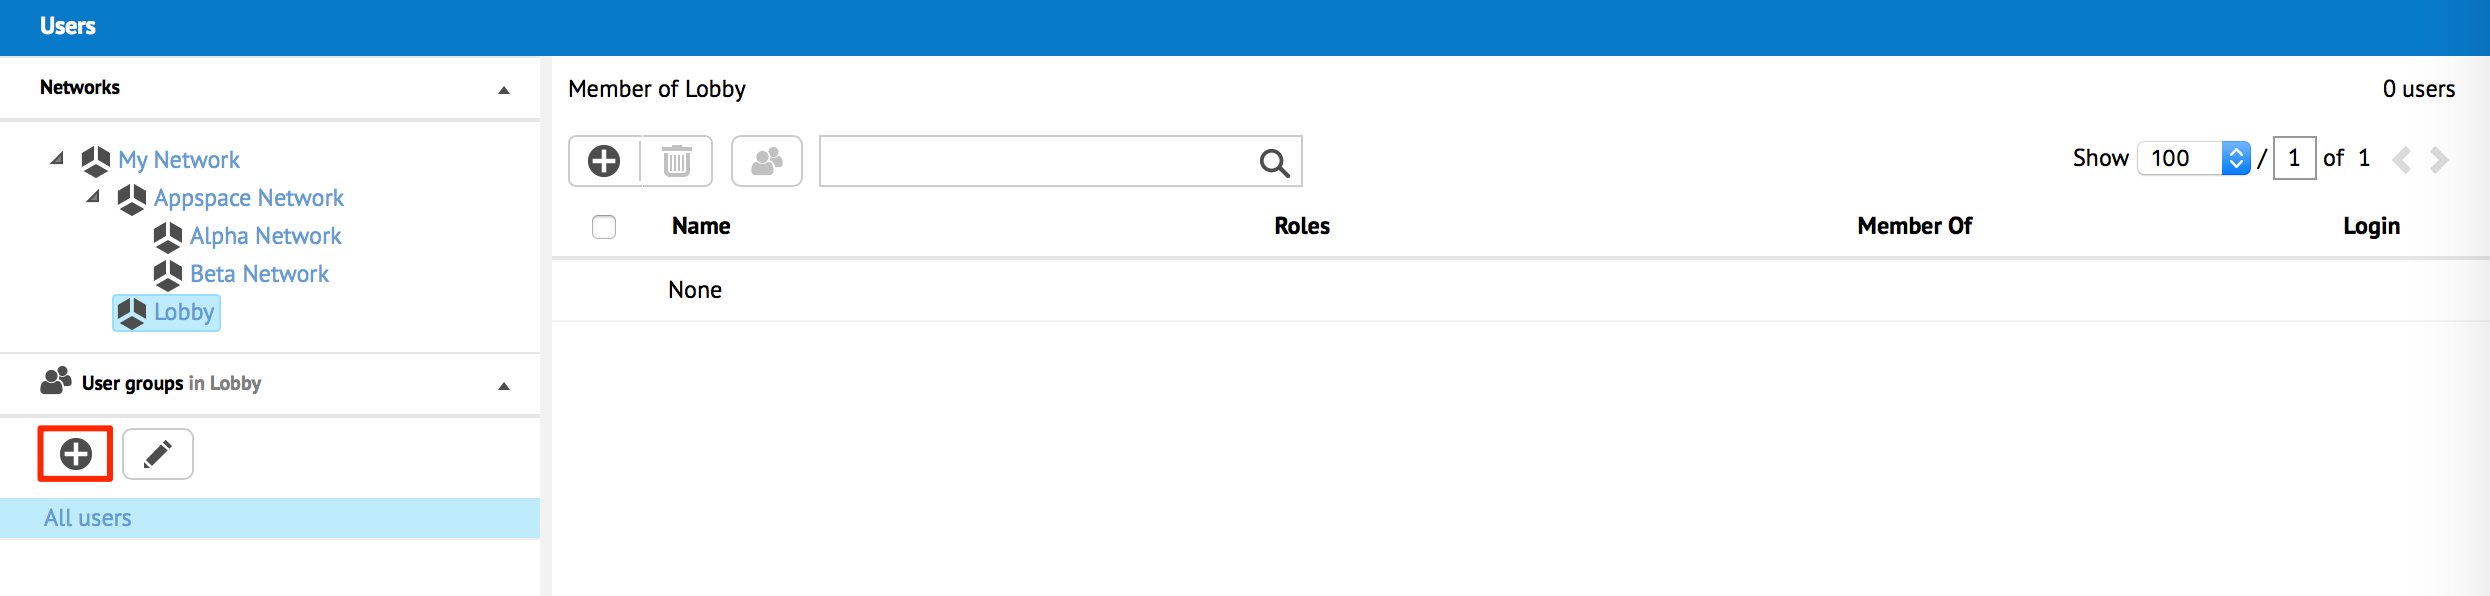
In the ‘Create a new group’ page, enter in the Name and Description of the group.
In the Roles section, select the desired roles which would be inherited to all users within this user group. Multiple roles may be selected for the group.

If you wish to enable the group library, check the ‘Enable this group’s library’ option.
Click Save to create the user group.
Back in the Users landing page, the newly created user group is visible when the network it belongs to is selected.
Assign User(s) to User Group(s)
Note
The user must already exist in the system. To add a new user, please refer to Managing Users and User Roles.
Select a network or sub-network.
Select a user and click the ‘Assign user groups’ button. You may select multiple users.
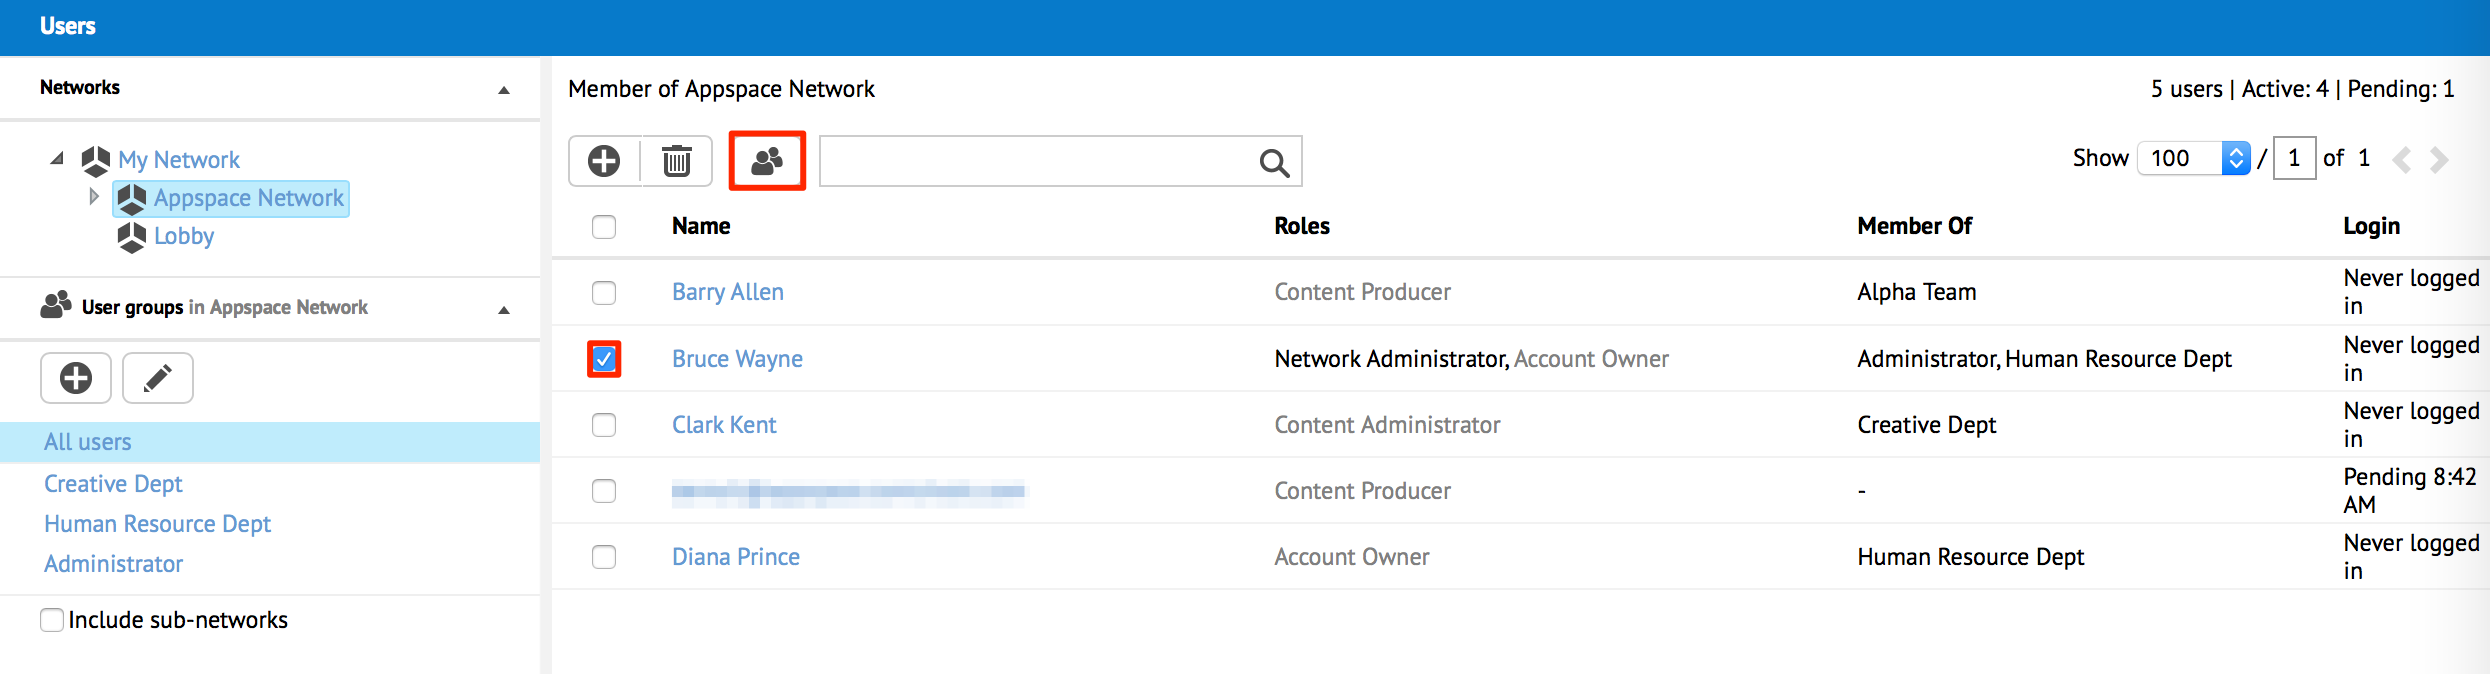
In the ‘Assign user groups’ window, type and select the user group name. You may assign more than one group.
Click Save.
Move User Group across a Network
Select the user group you wish to move and click the ‘Edit user group’ button.
In the Edit user group page, click the ‘Change Network’ link.

In the Network window, select the destination network to move the user group to, and click OK. You can use the search bar to locate the desired network.
The Confirmation window displays the number of users, content, and signs that would be affected by the move. Click Confirm.
Back in the Edit user group page, the newly selected network appears in the network field. Click Save to apply changes.
Back in the Users dashboard, the user group will appear in the new network.
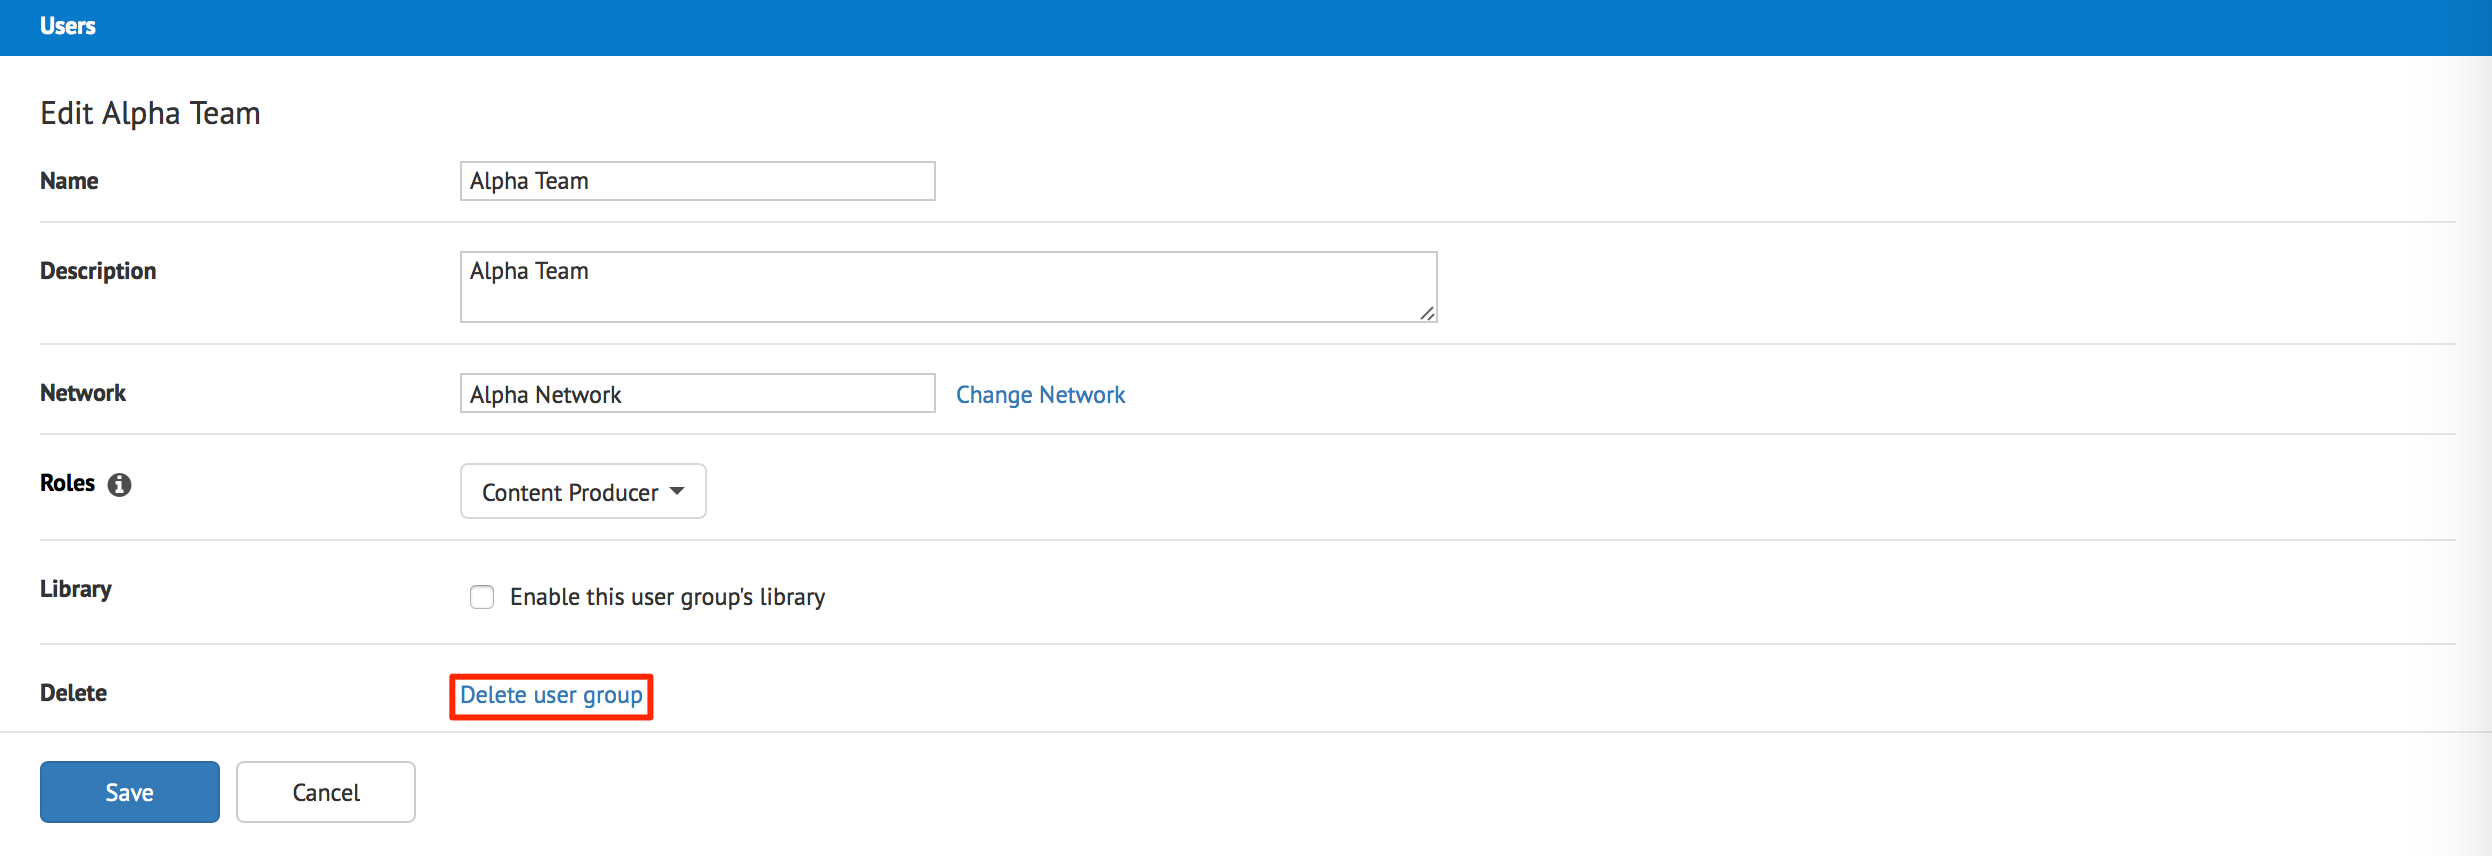
Delete a User Group
Warning
When you delete a user group, the group’s library and all its content will be deleted. However, the user will not be deleted.
Select the user group you wish to delete, and click the ‘Edit user group’ button.
In the Edit user group page, click the ‘Delete user group’ link.
Click OK in the ‘Delete user group’ window.
In the ‘Confirm delete user group’ window, enter in your Appspace account password and click Confirm.