Creating a sign
This article provides the instructions to create, edit, and manage your signs within the Signs extension.
- Creating Basic Signs
- Channel Linking in Basic Signs
- Creating Advanced Signs
- Making Signs Interactive
- Creating Data Only Signs
- Adding Custom Thumbnail for Appspace App
- Importing a Sign
- Exporting a Sign
- Deleting a Sign
Creating Basic Signs
To create a Basic sign, please follow the instructions below:
Note
The default content resolution for a Basic sign is set at 1080p (1920 x 1080), and always appears as fullscreen. It is recommended to use high resolution content of 1080p at all times.
Click the New button in the Sign Library.

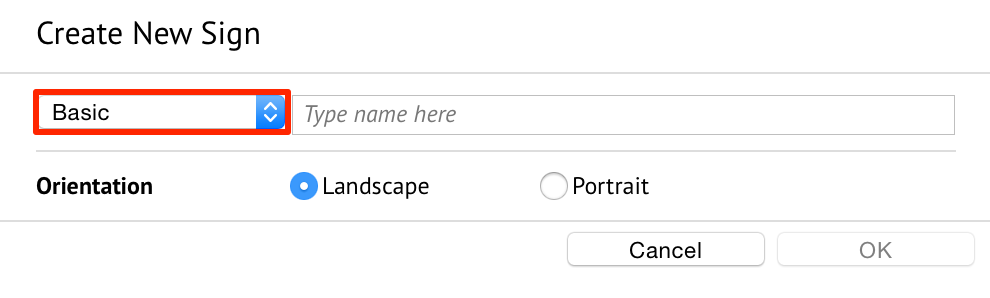
In the Create New Sign window, select Basic from the drop-down menu, type in the Sign name, and select the orientation of the sign.
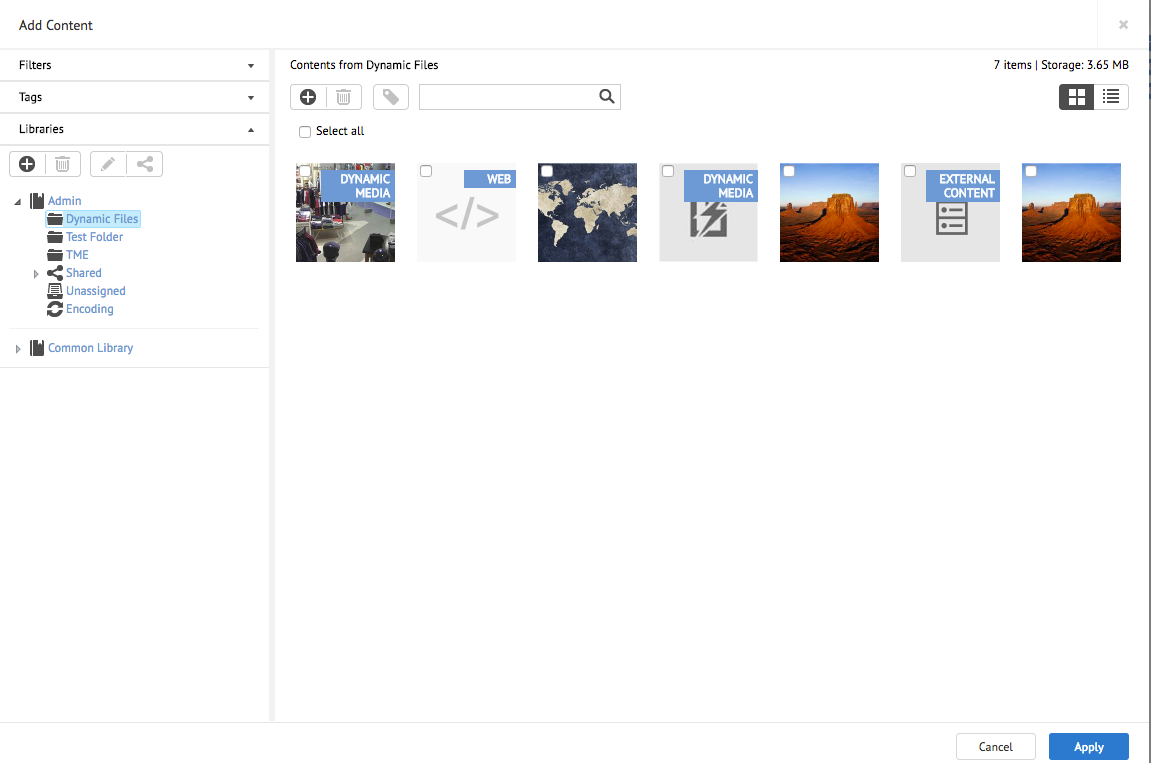
In the Overview tab, click the Add Media button, or the ‘Select content from library, upload files’ link.

Select the desired content from the Appspace Library, and click Apply.
Note
To edit the content properties, please refer to the Configuring content properties article.
Once the content has been added, proceed to rearrange the content in the desired order of appearance by dragging the content, or by changing the content order number.
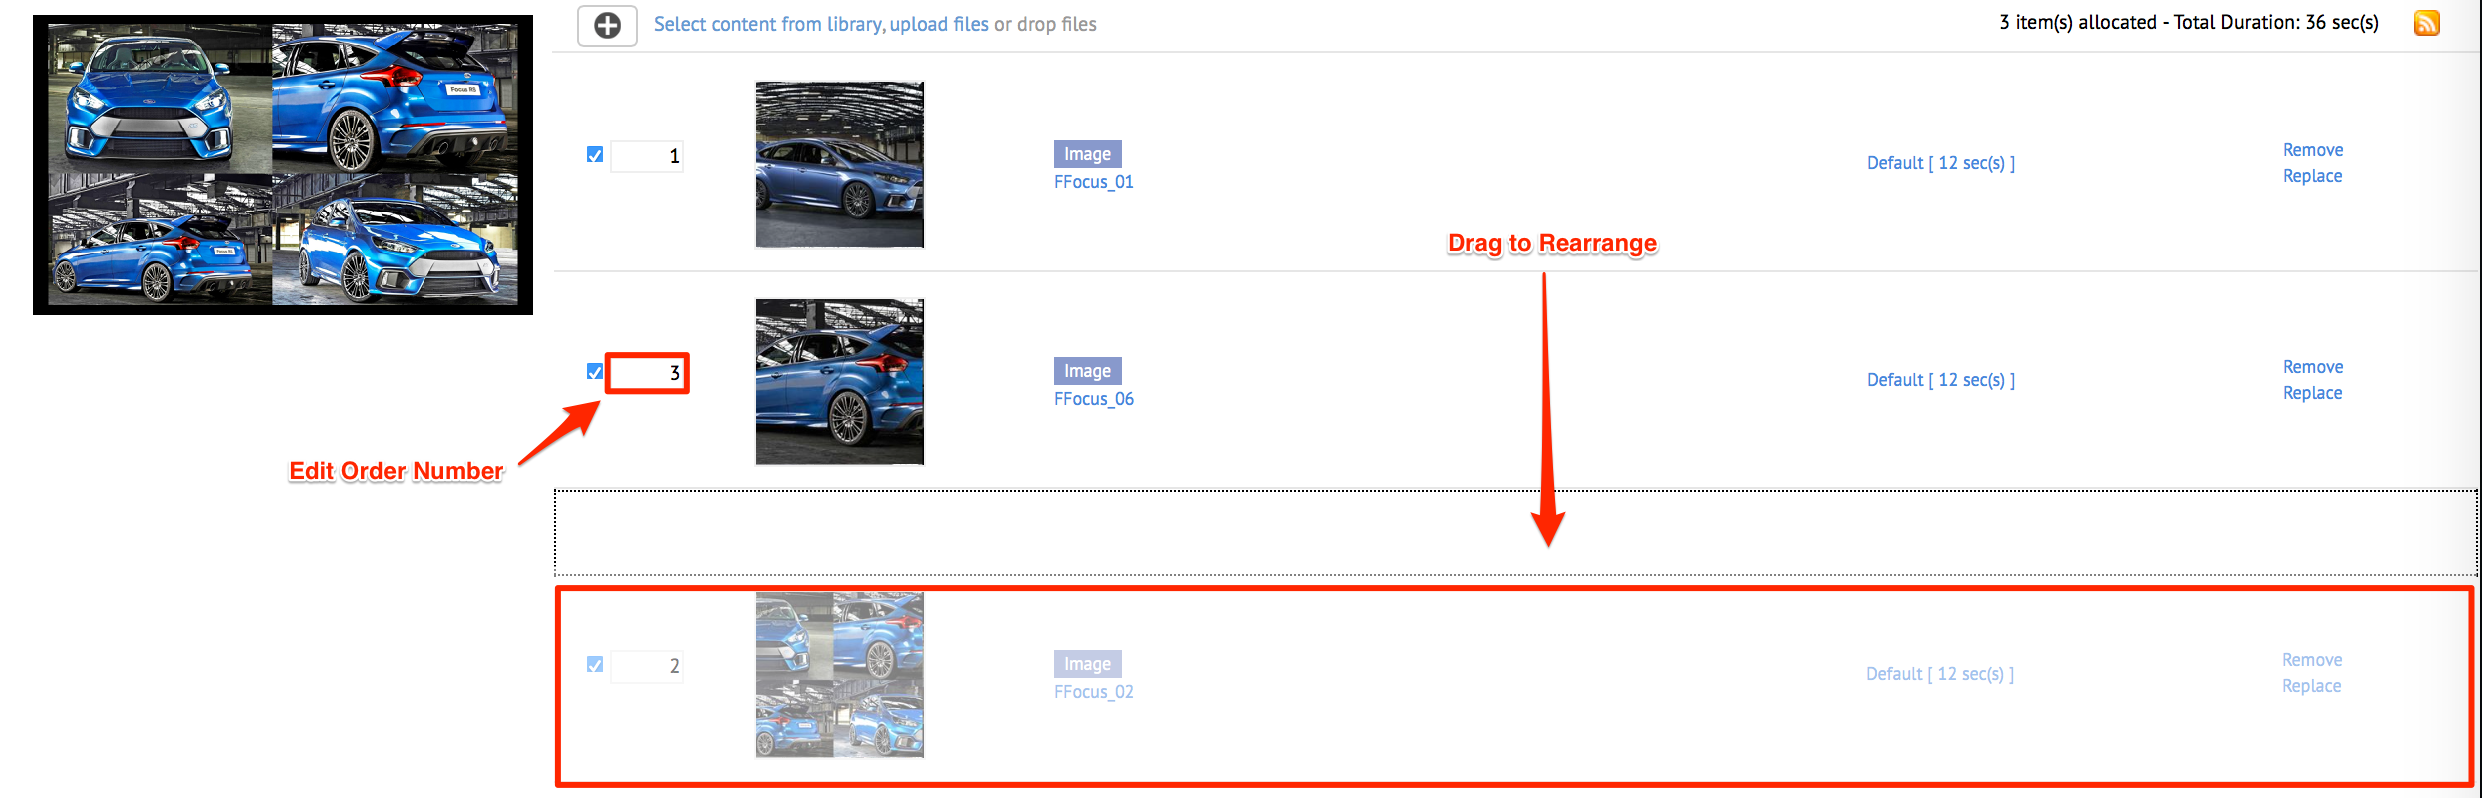
Remove or replace content by clicking the appropriate links on the right.

Channel Linking in Basic Signs
Users can now link one basic sign channel to another, that allows content users to join the playlists of multiple basic signs together.
Click your basic sign in the Sign Library and select the Settings tab.
Click the ‘No linked channels’ link.
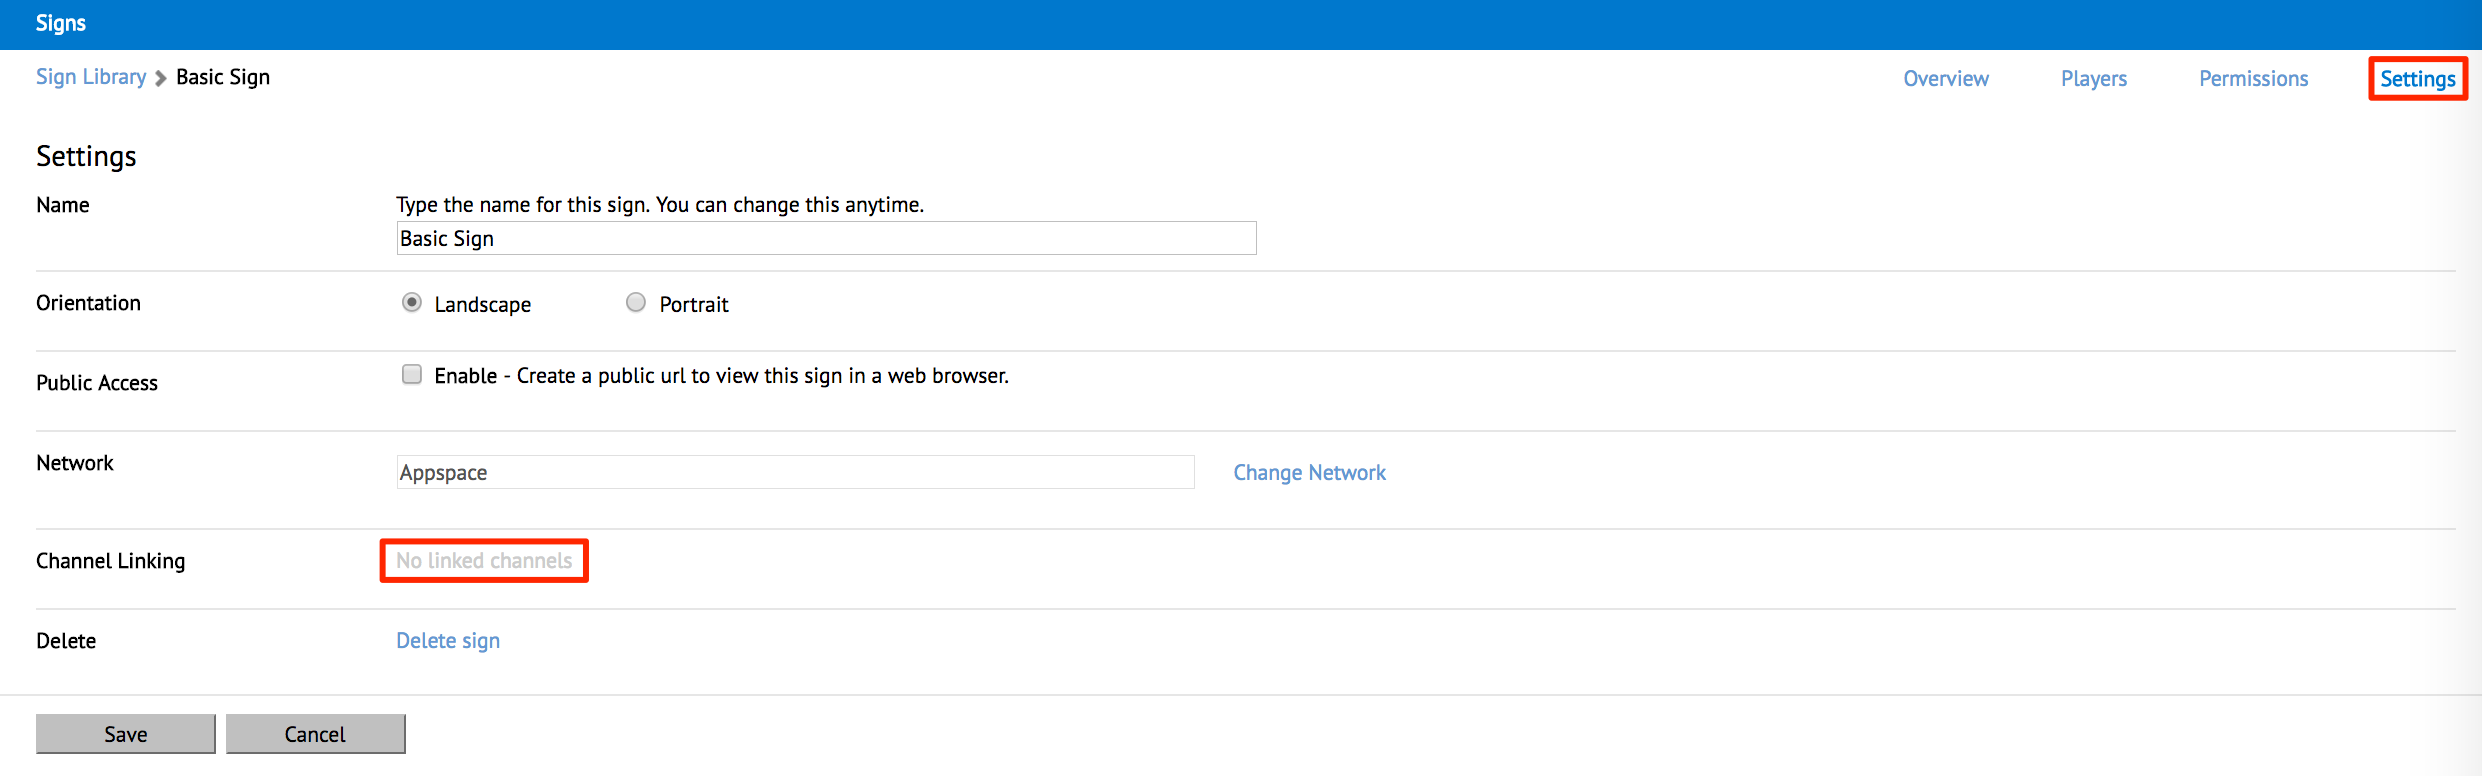
Select the Network, and select one or more basic sign channels to link, and click Apply.
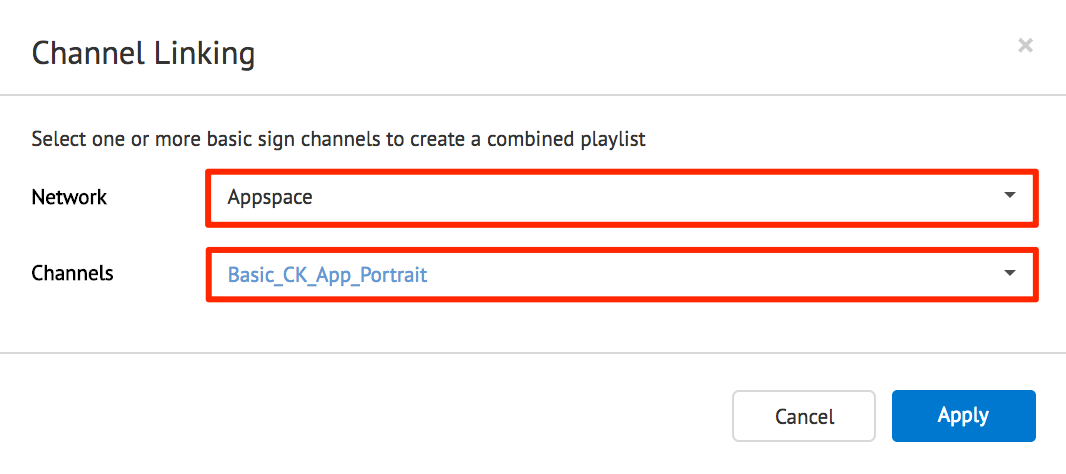
Click Save.
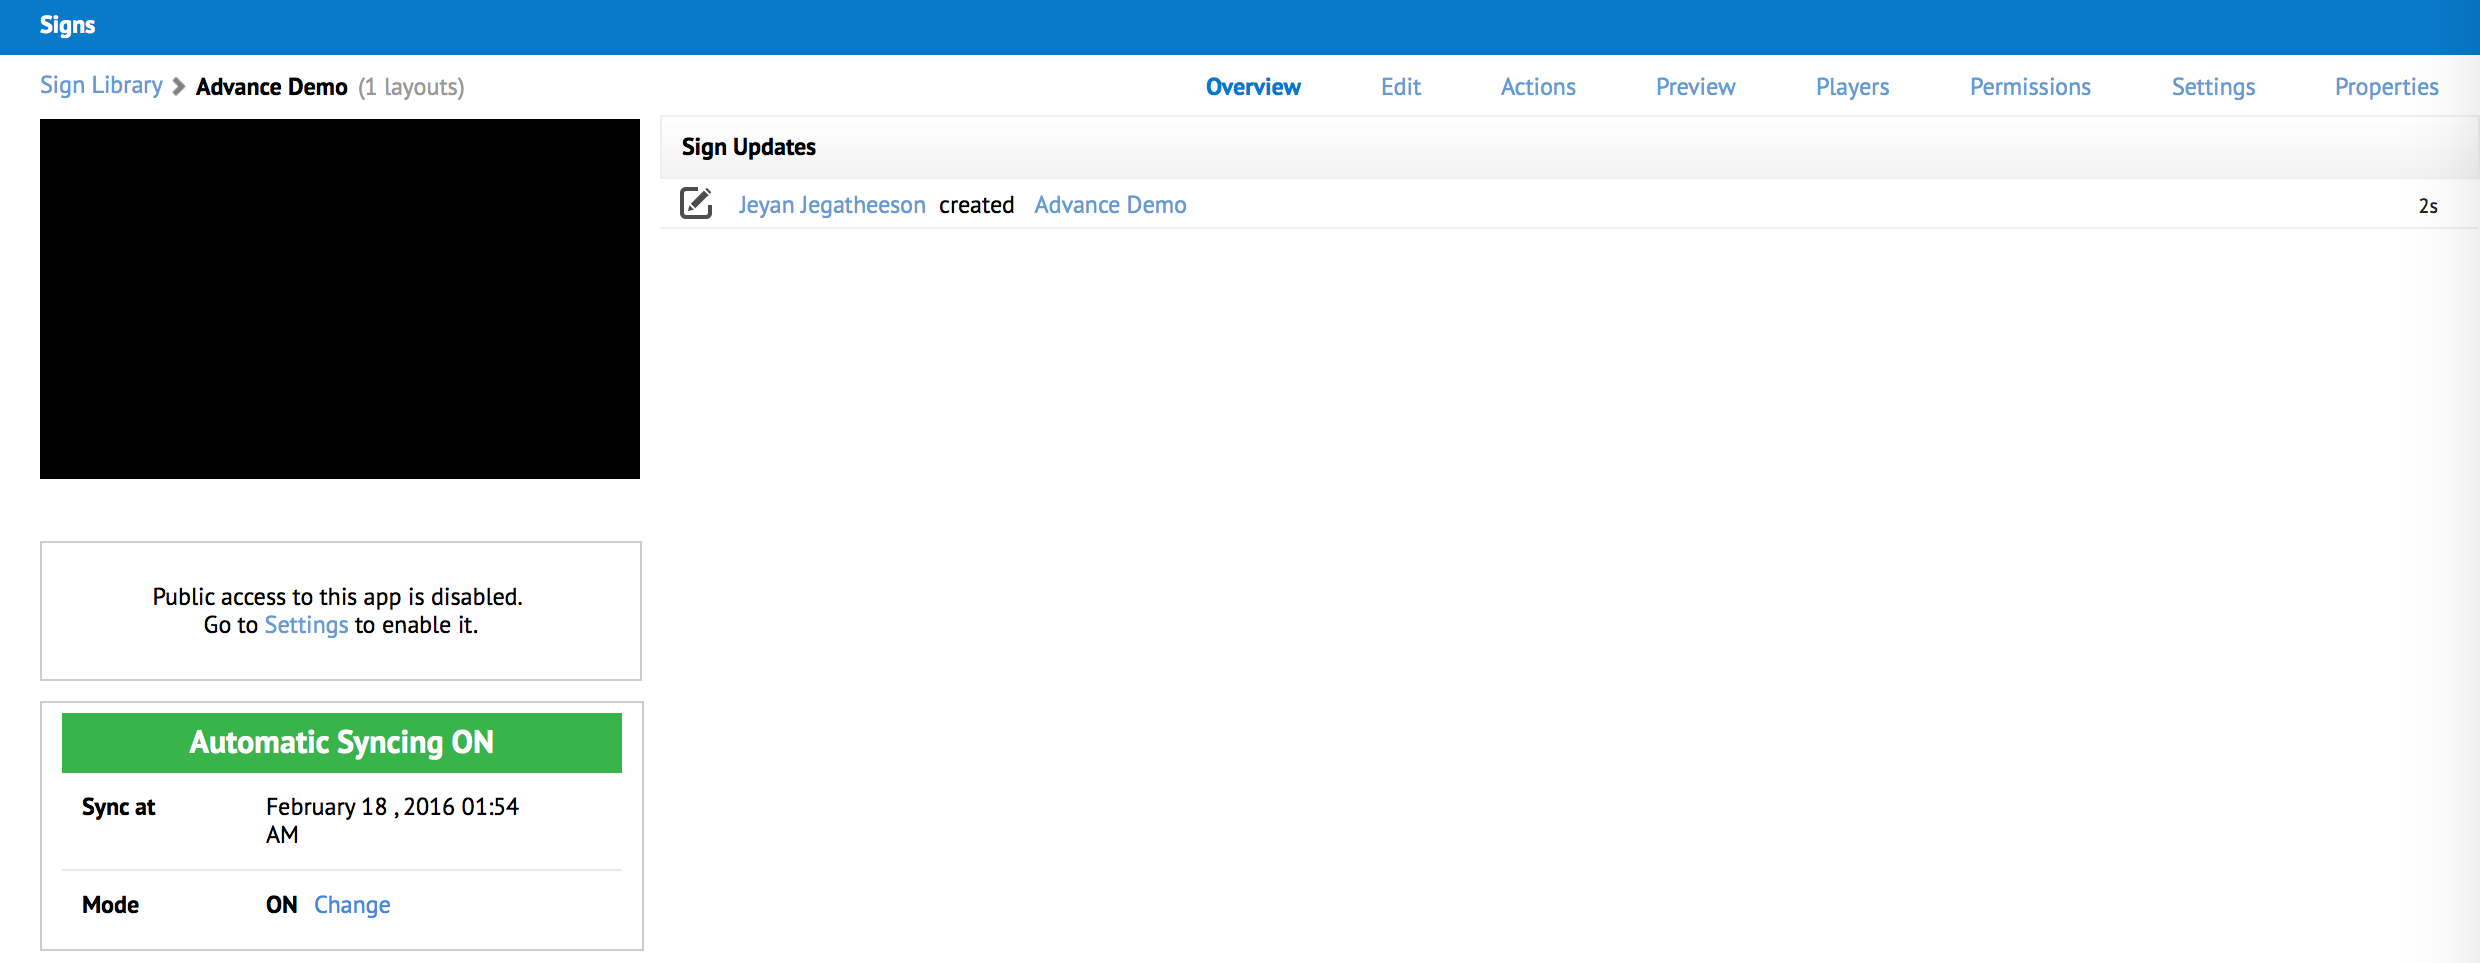
Creating Advanced Signs
To create an Advanced sign, please follow the instructions below:
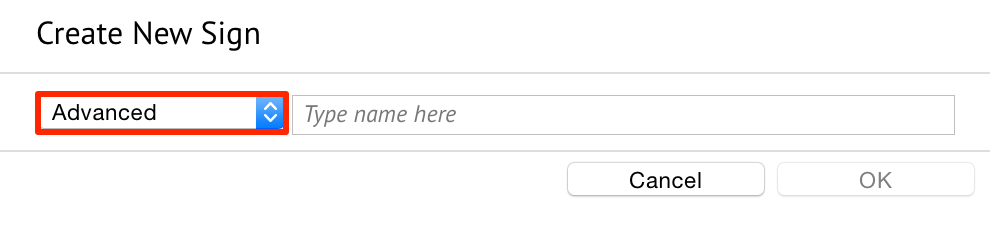
Click the New button in the Sign Library.

In the Create New Sign window, select Advanced from the drop-down menu and type a Sign name.
Note
Sign names can fit up to 255 characters.
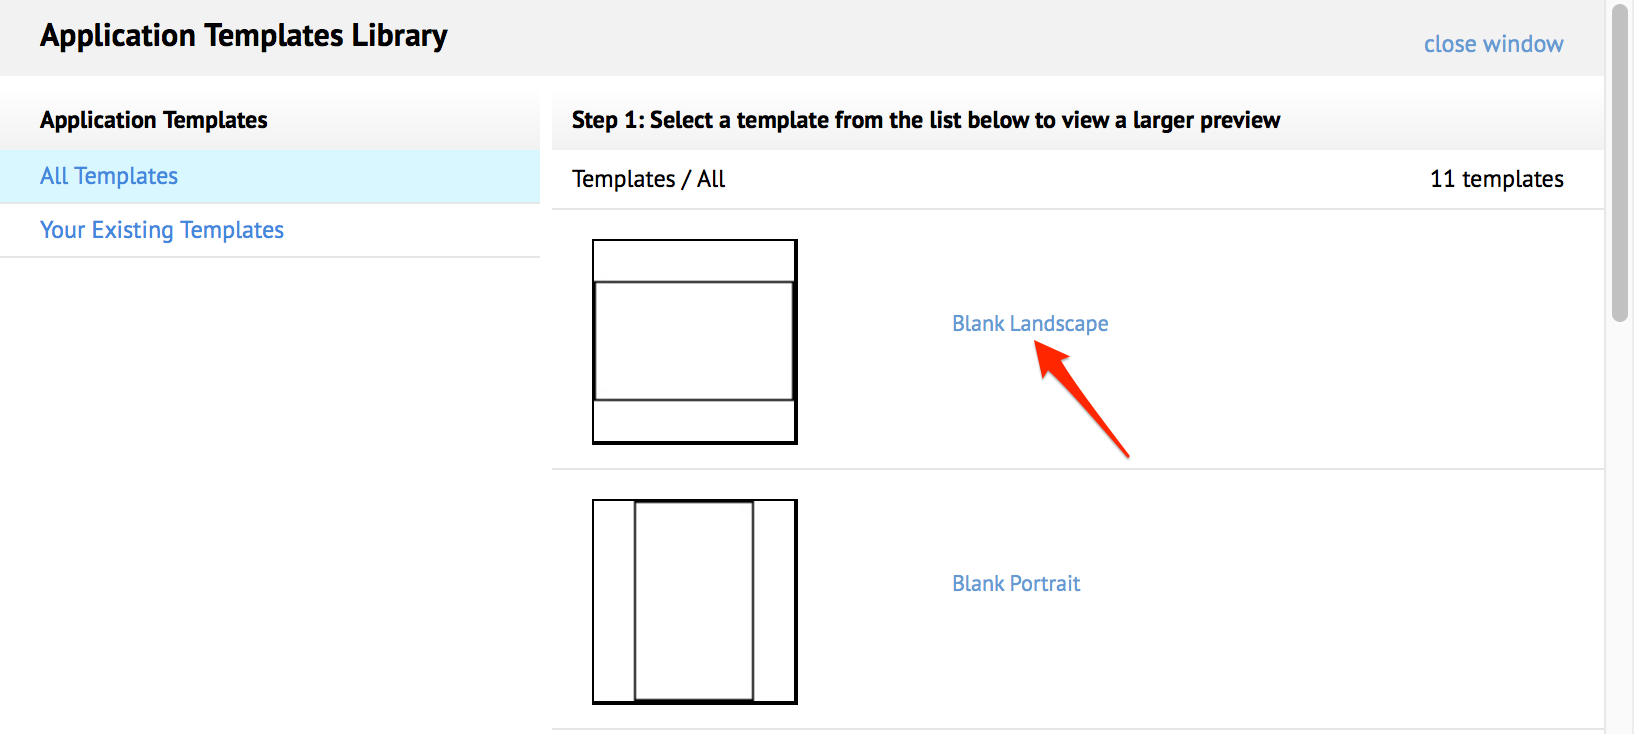
In the Sign Templates Library window, select a template. Click the name link of the desired template for a preview of the Sign.
Note
The Sign Templates Library contains a collection of predesigned custom templates and your existing templates. Select the categories in the left to view them.
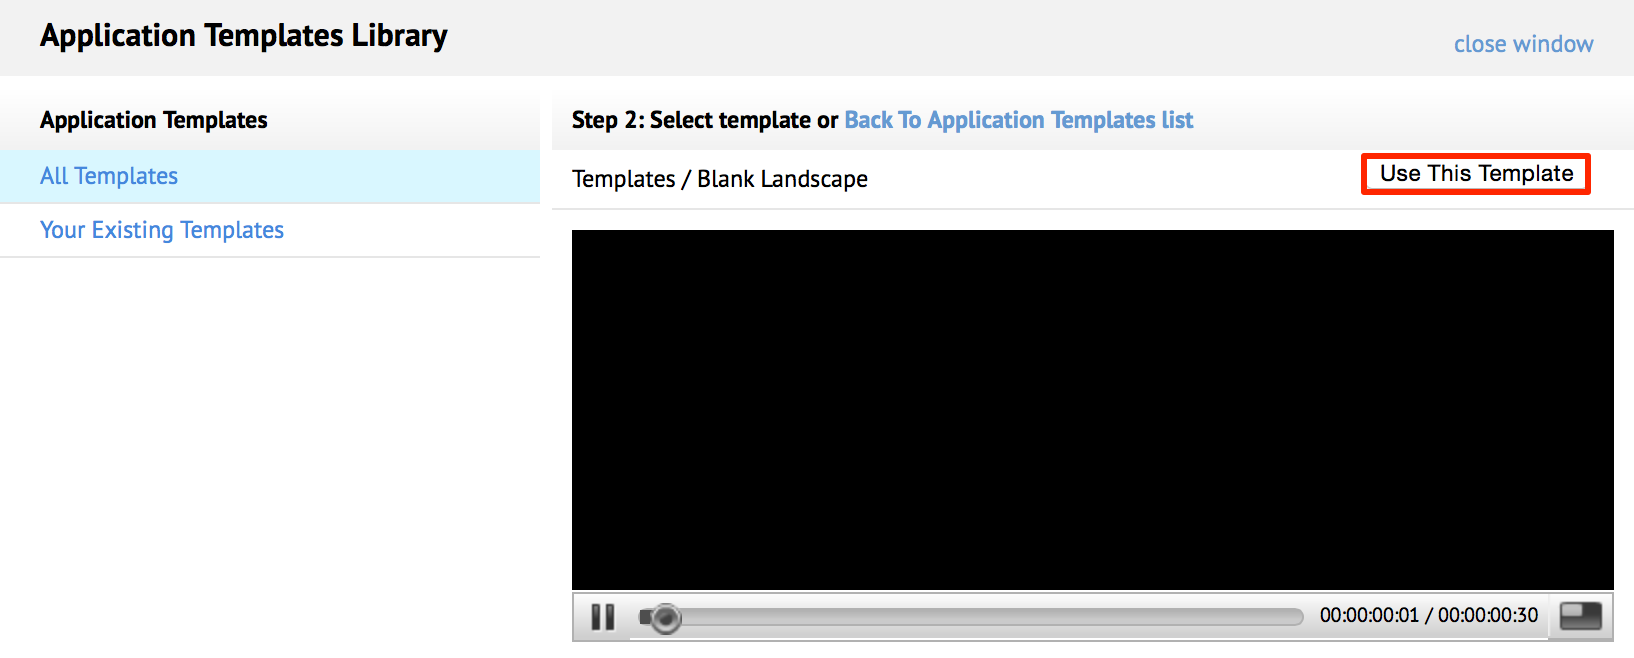
Click the ‘Back to Applications Templates list’ link to view another template, or click the Use This Template button to select the current template.
Note
The playback bar below the live preview of the sign allows you to play, pause, seek, and go to windowed mode to review the overall behavior and look of the template as time elapses.
The new Sign is created.
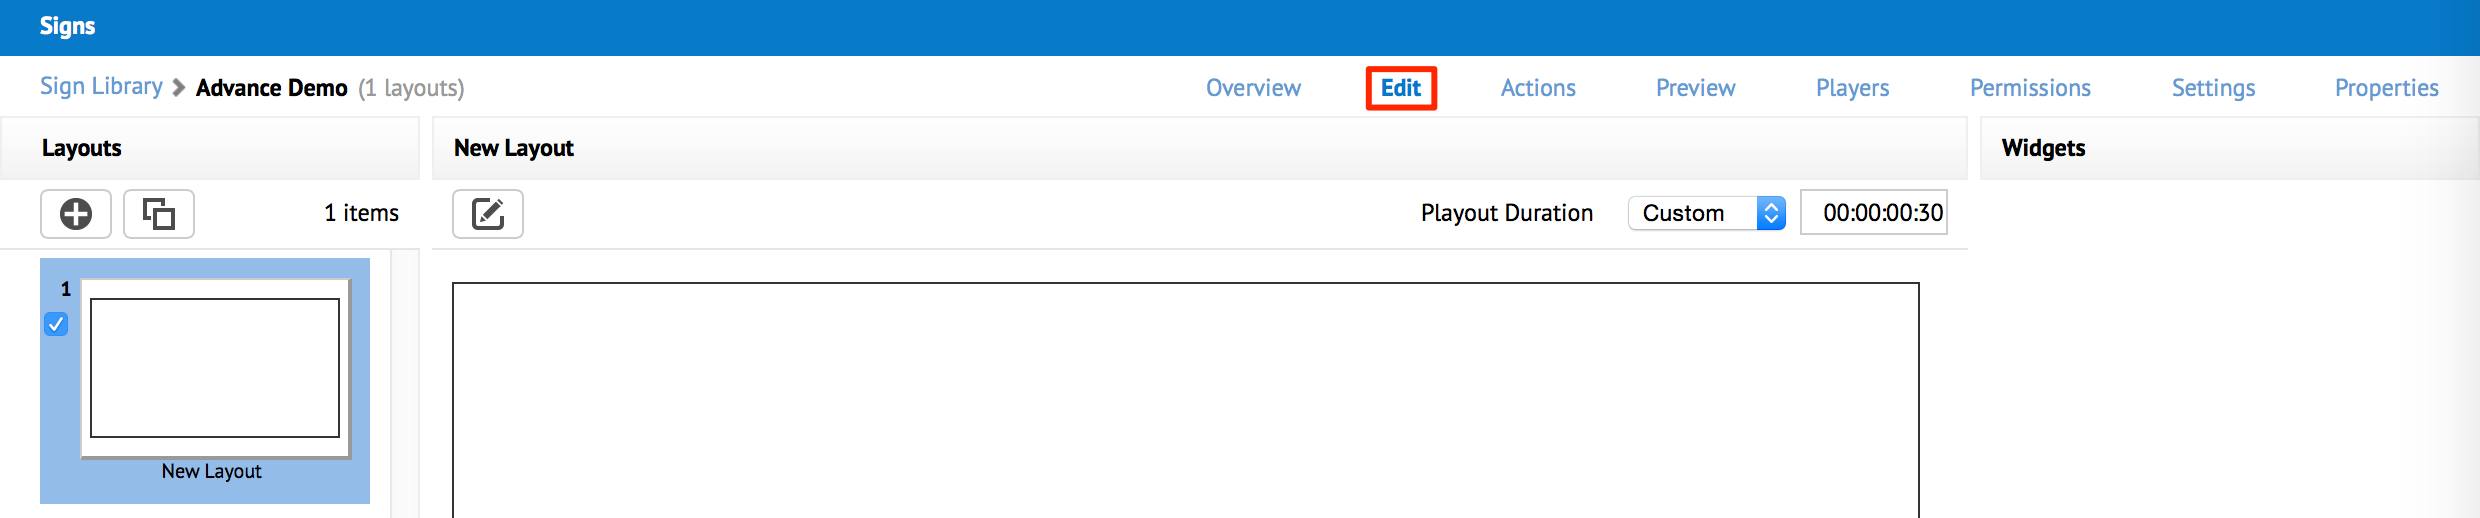
Click the Edit tab, and access the dashboard to edit the layout(s) for this sign.
Note
To add an additional layout, click the New Layout button and input the layout name.
Click the Visual Editor button to launch the Visual Editor.

Click the Add Media button.
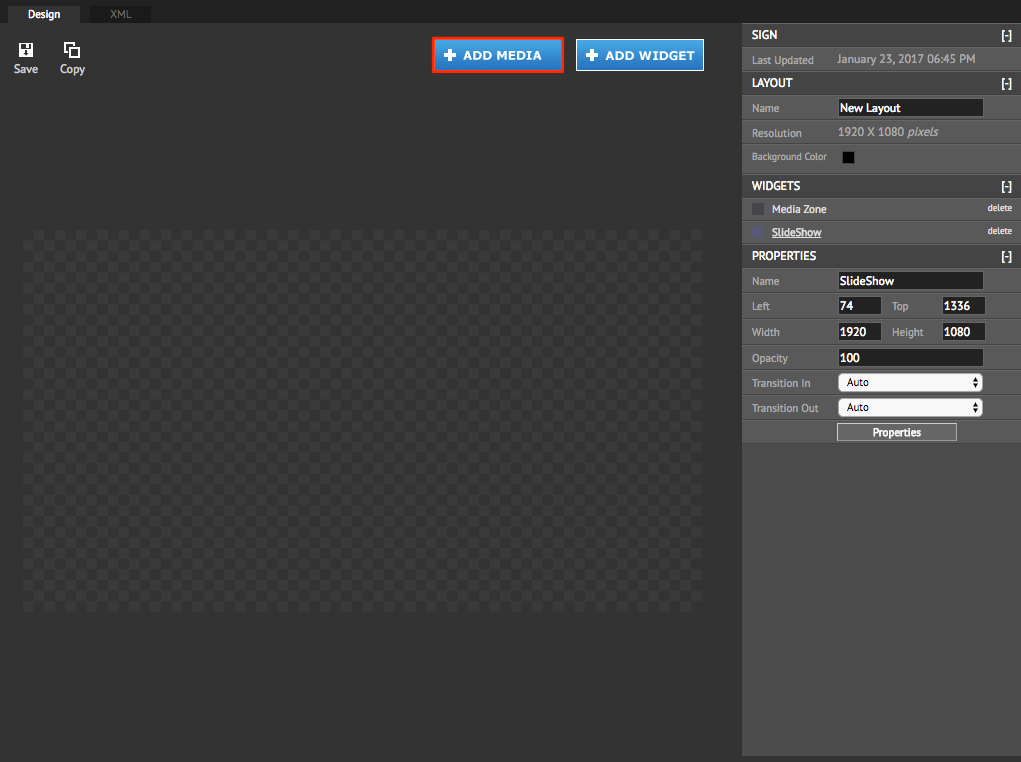
Select the desired content from the Appspace Library, and click Apply.
Note
To edit the content properties, please refer to the Configuring content properties article.
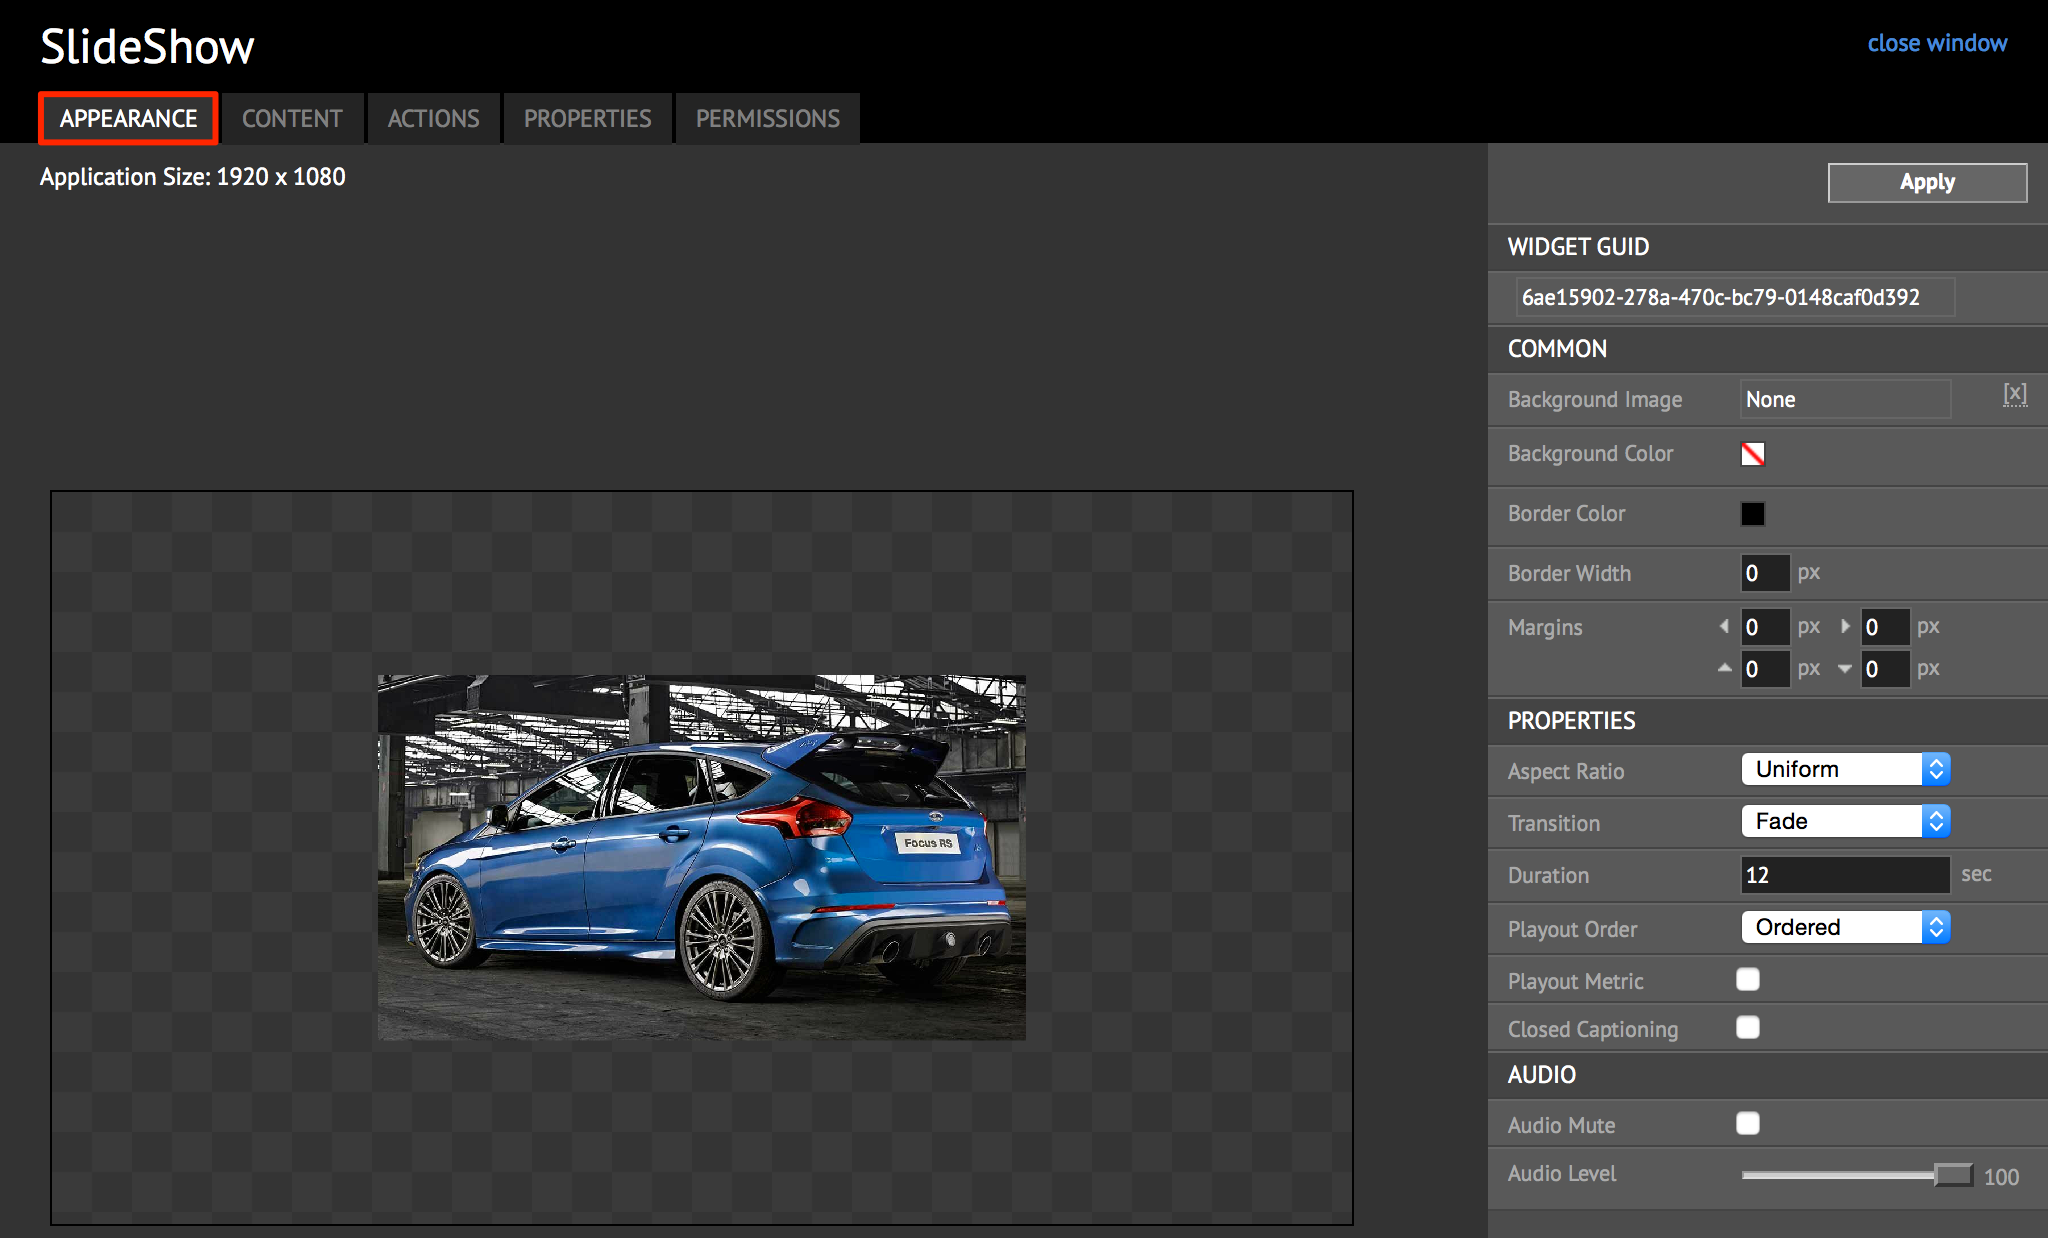
Add widgets to your Sign. Please refer to the Managing Widgets article.

Configure the widget properties and permissions, and add content or event actions. Please refer to the Configuring Widget Properties article.
Schedule your layouts. Please refer to the Scheduling Layouts article.

Add an event action to your Sign. Please refer to the Adding a New Action section in the Managing Event Actions in Applications article.

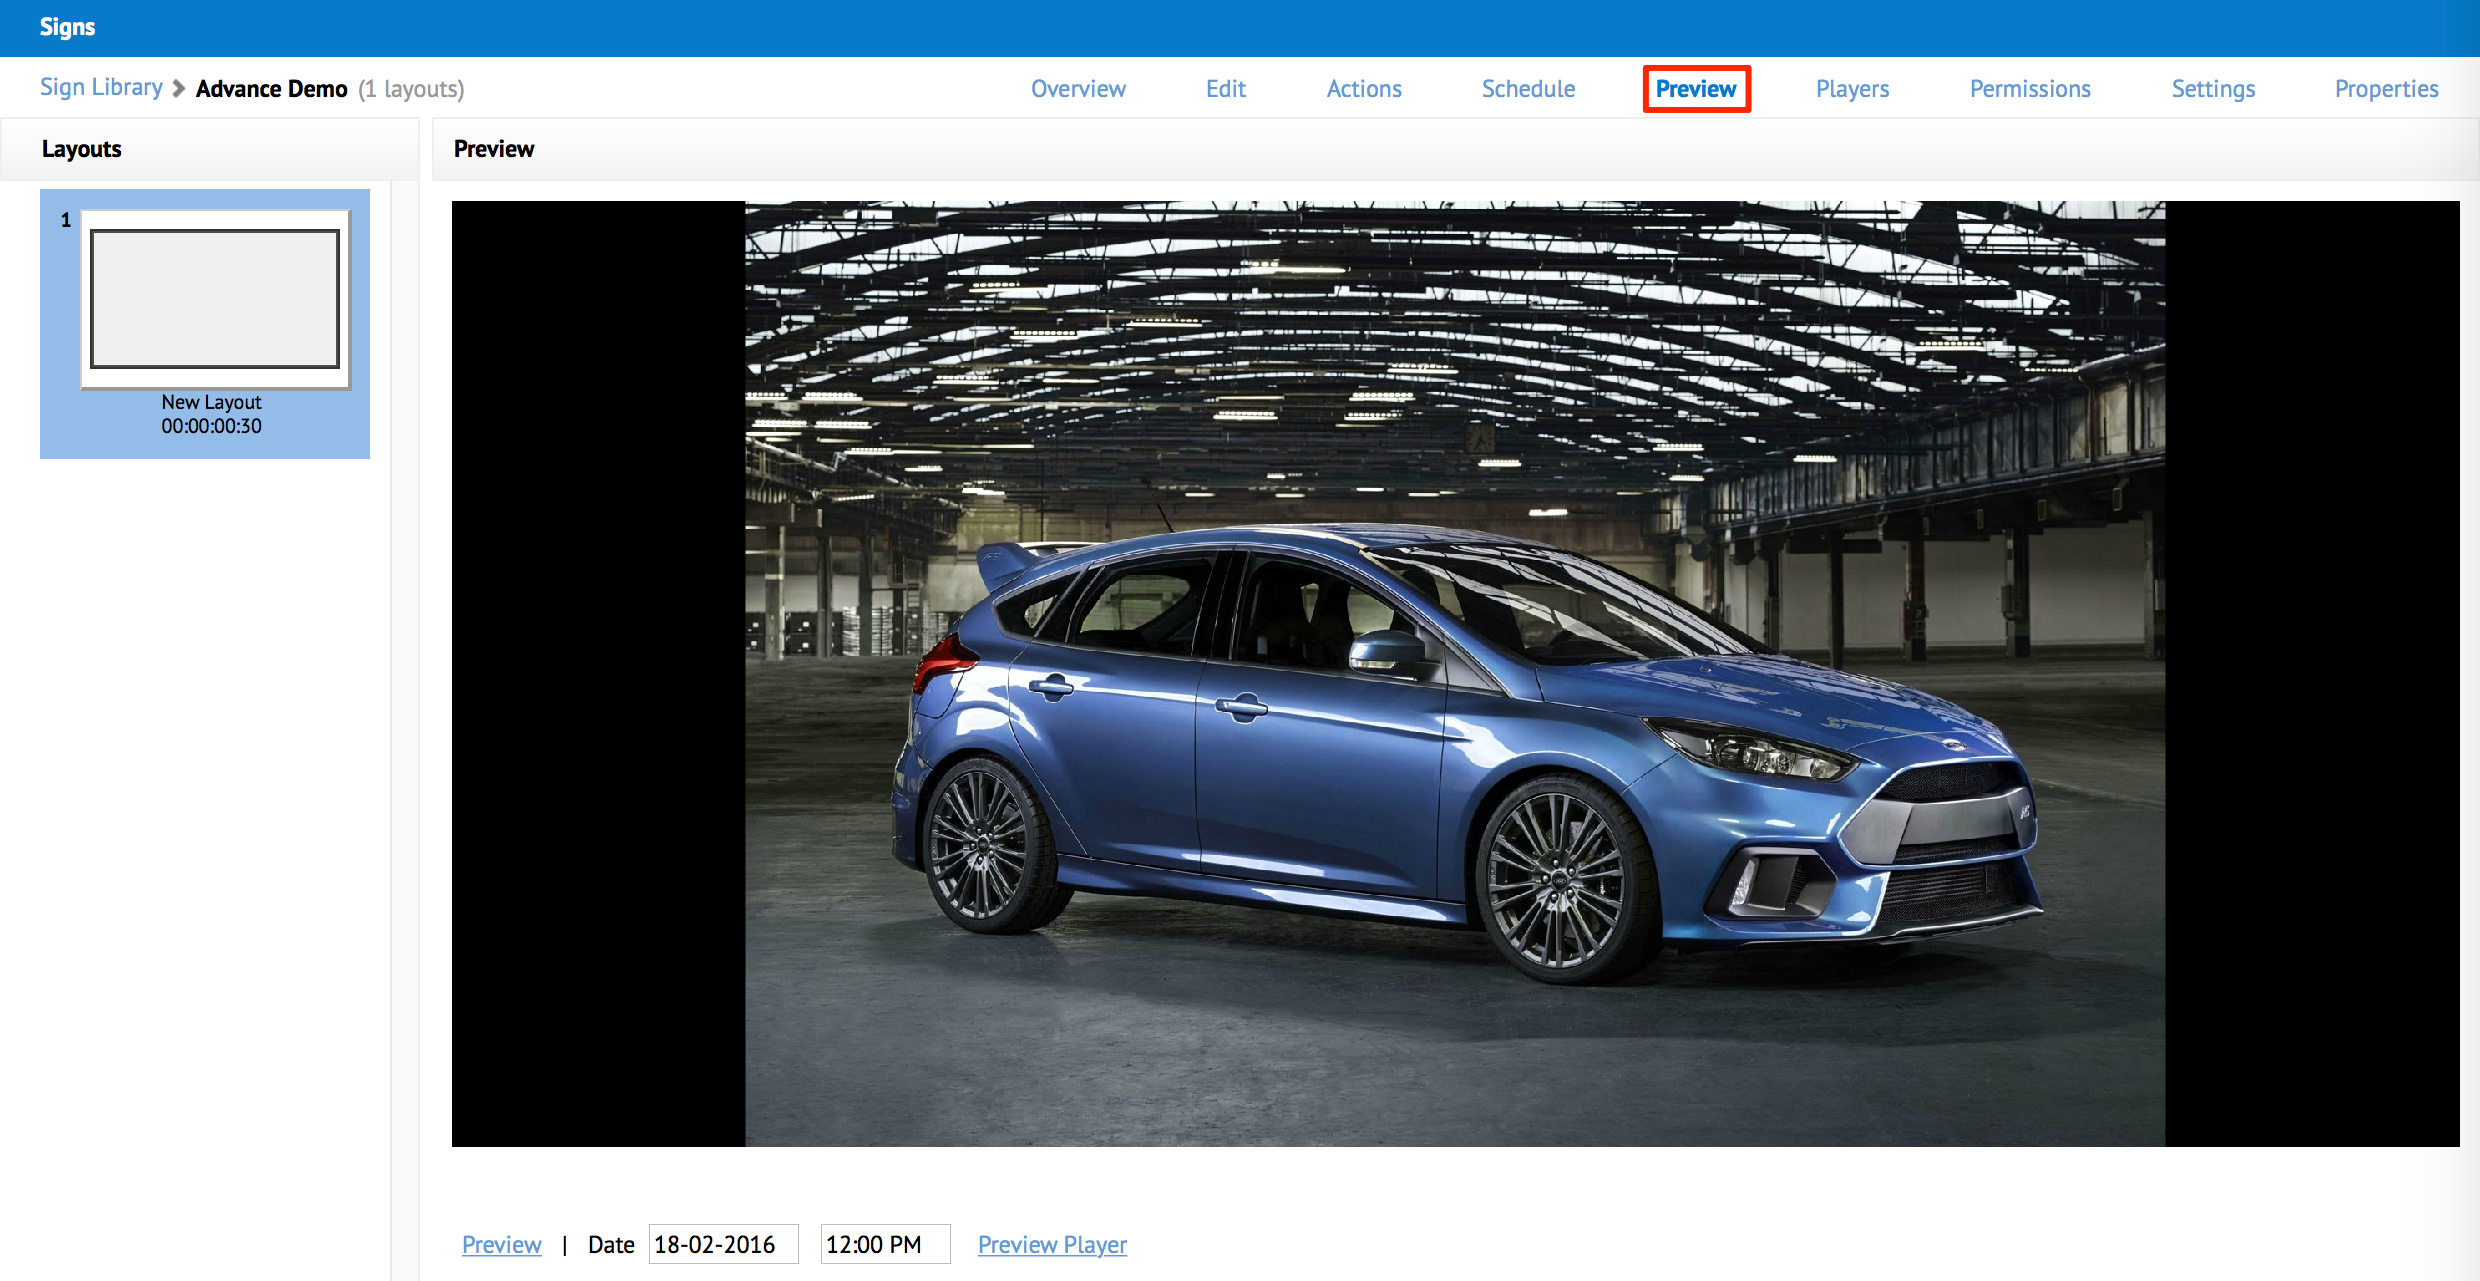
Click the Preview tab to preview your sign. You may click the Preview Player for a full screen preview with a better quality and resolution.
Note
Select a desired date and time to preview the layouts scheduled on the selected date and time. Click the date calendar and clock slider respectively.
Making Signs Interactive
Note
Not applicable for Basic signs.
To make a sign interactive, you can create an event that is triggered upon an action, from a widget or on a sign layer. For example, when you click a button on your app, the action triggers a switch to the next layout.
To set these actions and conditions, please follow the instructions in the following articles:
Add an Event Action (action script) to your widget. Please refer to the Adding a New Action section in the Managing Event Actions in Widgets article.
Add an Event Action (action script) to your sign. Please refer to the Adding a New Action section in the Managing Event Actions in Applications article.

Creating Data Only Signs
The ‘Data-only’ channel allows an advanced user the ability to connect to data sources via API and via media-zone linking.
Note
This option contains only data-source widgets, such as media playlists, tables and calendars. Data Only signage do not have any layouts or visual elements, but instead contain purely data sources.
To create a Data Only sign, please follow the instructions below:
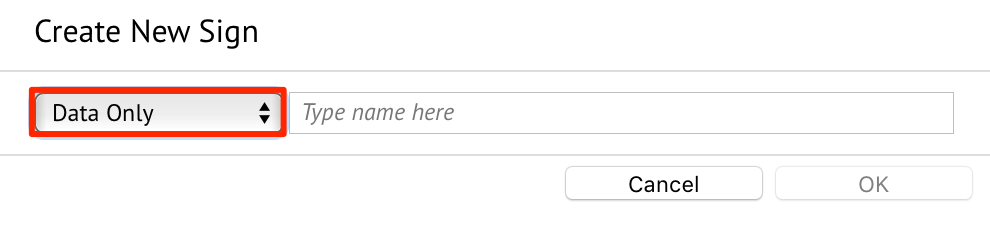
Click the New button in the Sign Library.
In the Create New Sign window, select ‘Data Only’ from the drop-down menu, type in the Sign name, and select the orientation of the sign.
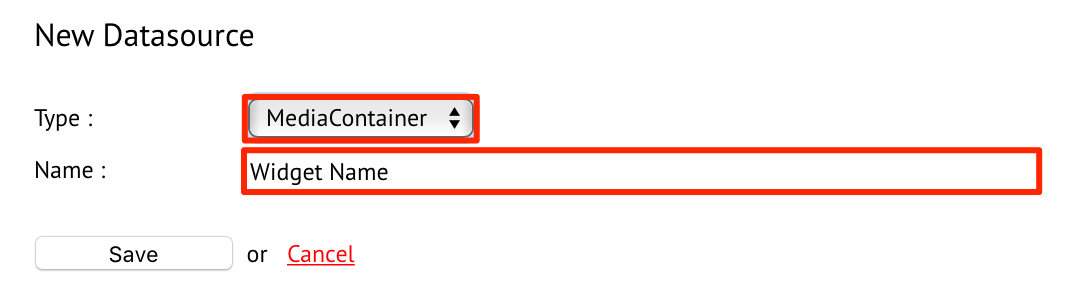
Click the Edit tab, and click the New Datasource link to add a widget.

Select the desired widget from the drop-down menu, and enter in the datasource widget’s name. Click Save once done.
To edit the datasource widget, click the name link of the datasource widget.
Adding Custom Thumbnail for Appspace App
To specify a custom thumbnail for a sign in a channel that appears on the Appspace App, please follow the instructions below:
Important
Existing sign channels that have been previously assigned in channel groups, must be removed from the channel group and then re-added after the thumbnail is updated.
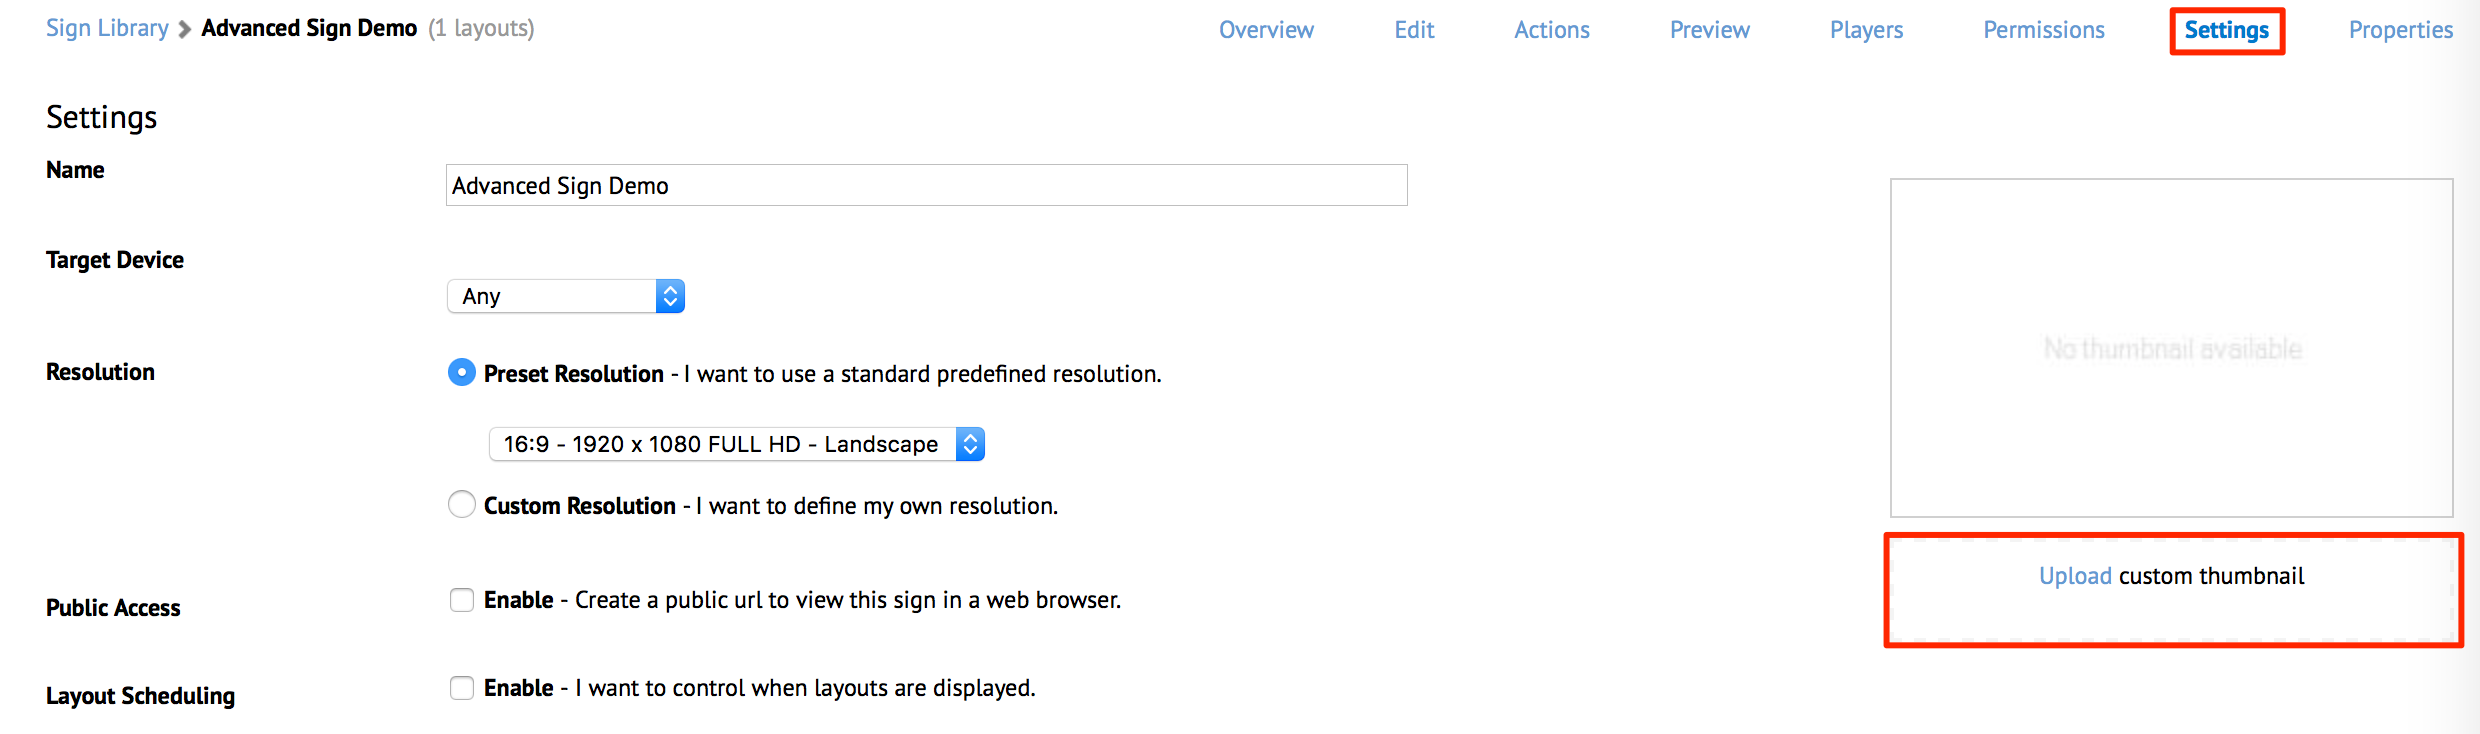
Select the desired sign, and click the Settings tab.
In the thumbnail section, click the upload link, and select the desired image.
Note
Custom thumbnail images should ideally have a 16:9 aspect ratio for the best display results.
Click Save.
Importing a Sign
Note
You can only import a sign within the same Appspace version, or from an older version to a new version. The import function is not backward compatible between major releases. For example, you cannot import a sign from Appspace 6.2 into Appspace 5.8, but you can import a sign from Appspace 5.8 into Appspace 6.2.
Webpage and card content types are currently not supported when importing a sign.
To import a sign, please follow the instructions below:
Click the ‘Import new sign’ button in the Sign Library to import a sign.

In the Import Sign window, click the folder button to browse and select the sign to import. The default file type is .aspkg. Name the sign, and click OK.
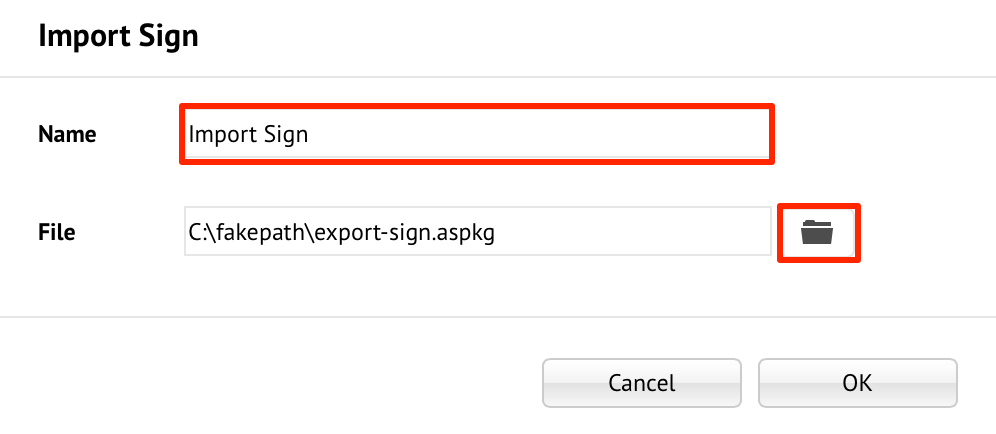
The sign should now be listed in the Sign Library.

Exporting a Sign
To export a sign, follow the instructions below:
Important
Linked media zones, webpages, and cards, are currently not supported when exporting a sign channel.
Select the desired sign in the Sign Library. When the sign row is highlighted, click the ‘Export sign’ button.

In the Export window, click OK. The sign is exported as .aspkg by default.
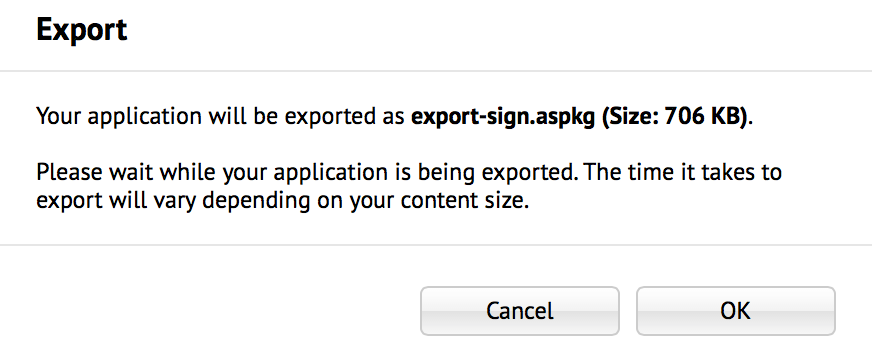
If prompted to save the file on your computer, choose a desired folder and save the file.
Deleting a Sign
To delete a sign, please follow the instructions below:
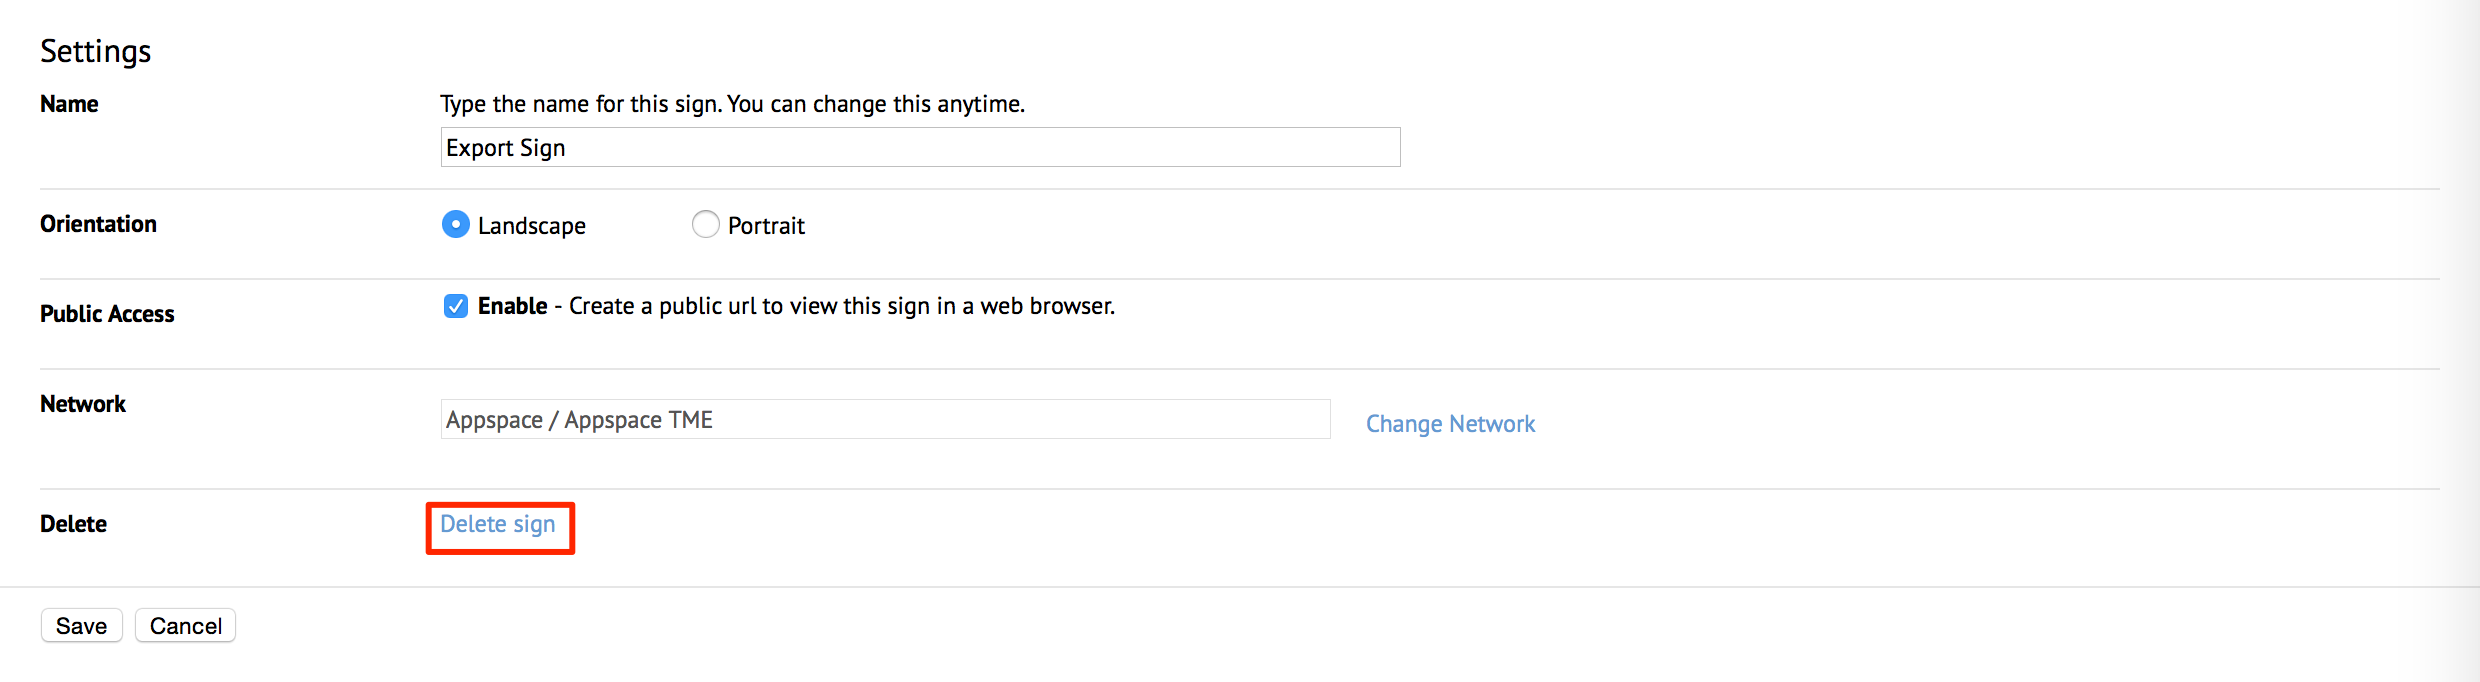
Click the sign name link in the Sign Library.
Click the Settings tab.

In the Settings page, click ‘Delete sign’.
In the Confirmation window, click the OK button to confirm deletion.
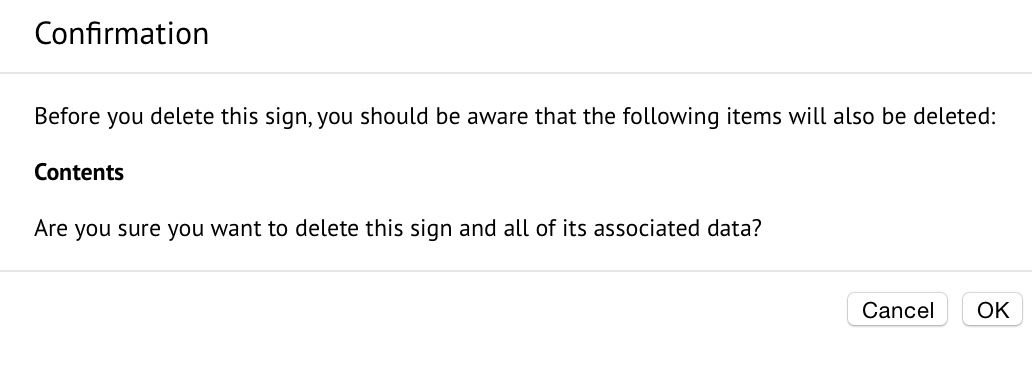
Warning
Once signs are deleted, the action cannot be undone.
You are automatically redirected to the Signs Library, and the deleted sign is no longer listed.