AD/LDAP authentication over SSL
This article provides the instructions to configure AD or LDAP over SSL. Note that this configuration is portal-wide and affects all tenants (accounts) within Appspace.
We will be covering three key sections:
- Downloading the SSL certificate
- Importing a Self-Signed/Private CA-Signed SSL Certificate
- Configuring AD Authentication Over SSL
Before we start, here are a few types of certification that are relevant for this guide:
- Self-Signed – The certificate is self-signed and needs to be imported into the trust store of the Appspace server.
- Private CA-Signed (Trusted) – The certificate is signed by a trusted private authority therefore no manual configuration is needed.
- Private CA-Signed (Untrusted) – The certificate is signed by an untrusted private authority therefore that authority’s certificate needs to be imported into the trust store of the Appspace server.
- CA-Signed – The certificate is signed by a trusted CA therefore no manual configuration is needed.
Prerequisites
Important
This feature has been designed to work with a flat Active Directory structure.
- An AD or LDAP server with SSL enabled.
- The SSL certificate CN must match the FQDN of the AD or LDAP server.
- The SSL certificate must be valid and be certified from a trusted Certificate Authority (CA).
- Windows Server user credential on the Appspace server with local administrator privileges.
- Appspace user credential with Portal Administrator role.
- Basic knowledge of navigating Windows Server 2012 and IIS (Internet Information Services).
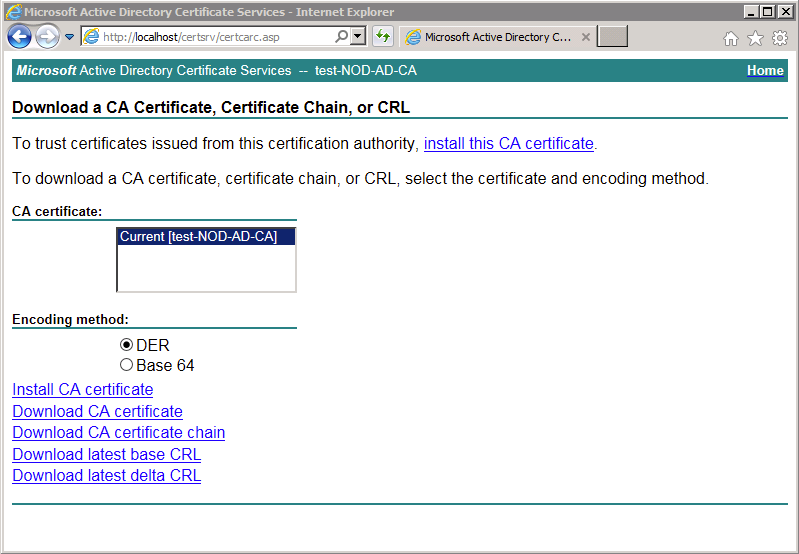
Downloading the SSL certificate
Download the SSL certificate (encoded in DER or Base_64) from the AD server as per instructions from the Microsoft website: https://support.microsoft.com/en-us/help/555252
Note
Your IT administrator will be able to retrieve the certificate from the AD server.
Importing a Self-Signed/Private CA-Signed SSL Certificate
Follow these steps to import a self-signed/private CA-signed SSL certificate into Appspace Server’s trust store:
Launch the Microsoft Management Console (MMC), by clicking the Windows icon, and entering ‘mmc’ in the run window.
Click File, and select Add/Remove Snap-in.
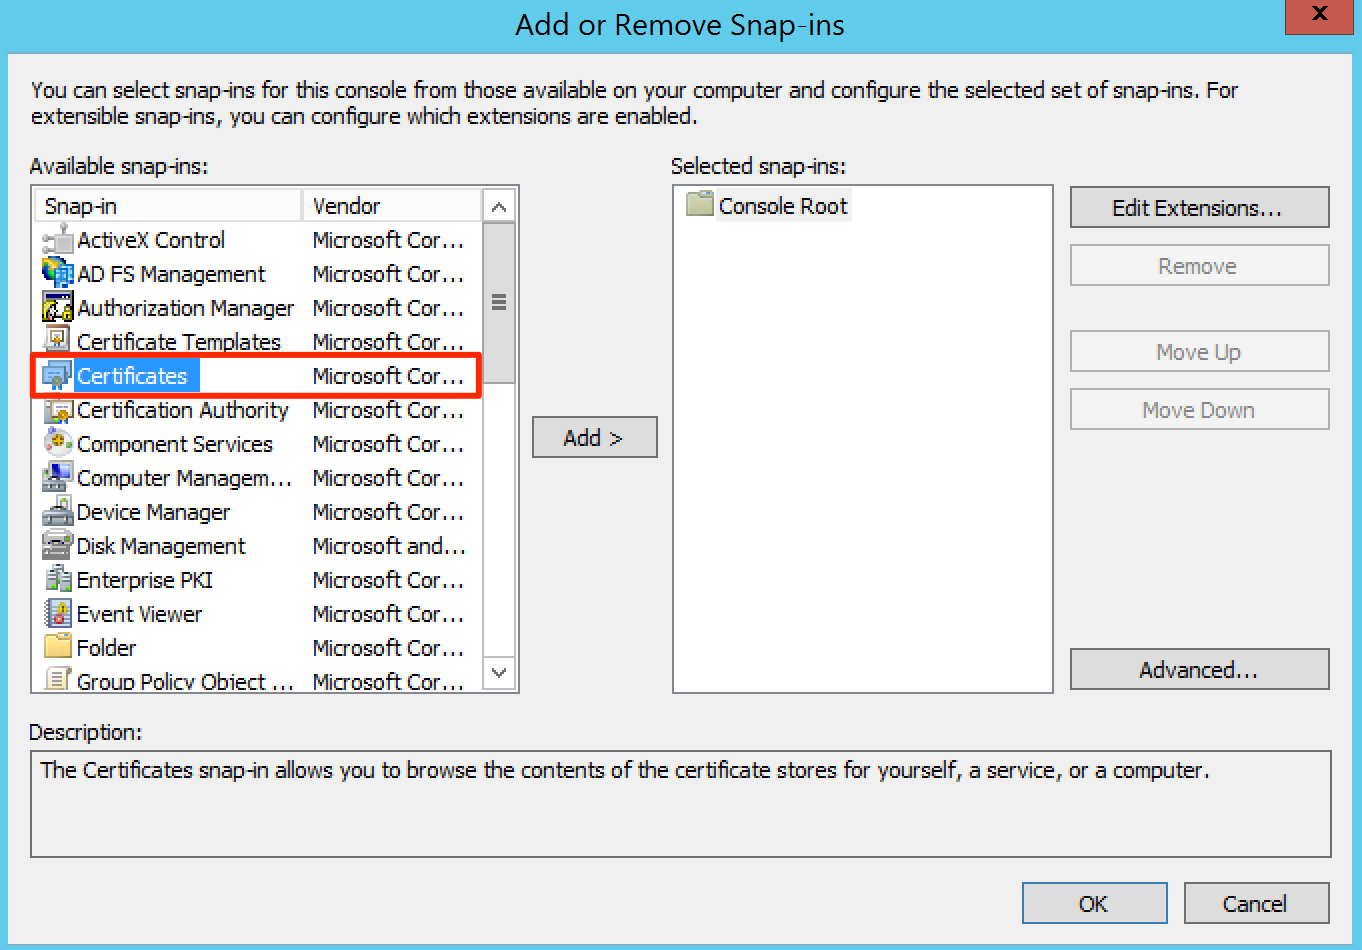
In the Add or Remove Snap-ins window, Select “Certificates” from the Available Snap-in window, and click Add.
In the Certificates snap-in window, select ‘Computer account’ and click Next.
Select ‘Local computer’ and click Finish. Click OK to add the new snap-in.
In the Console Root tree, expand Certificates (Local Computer) > Trusted Root Certification Authorities, and click Certificates. All the trusted certifications are displayed in the details pane.
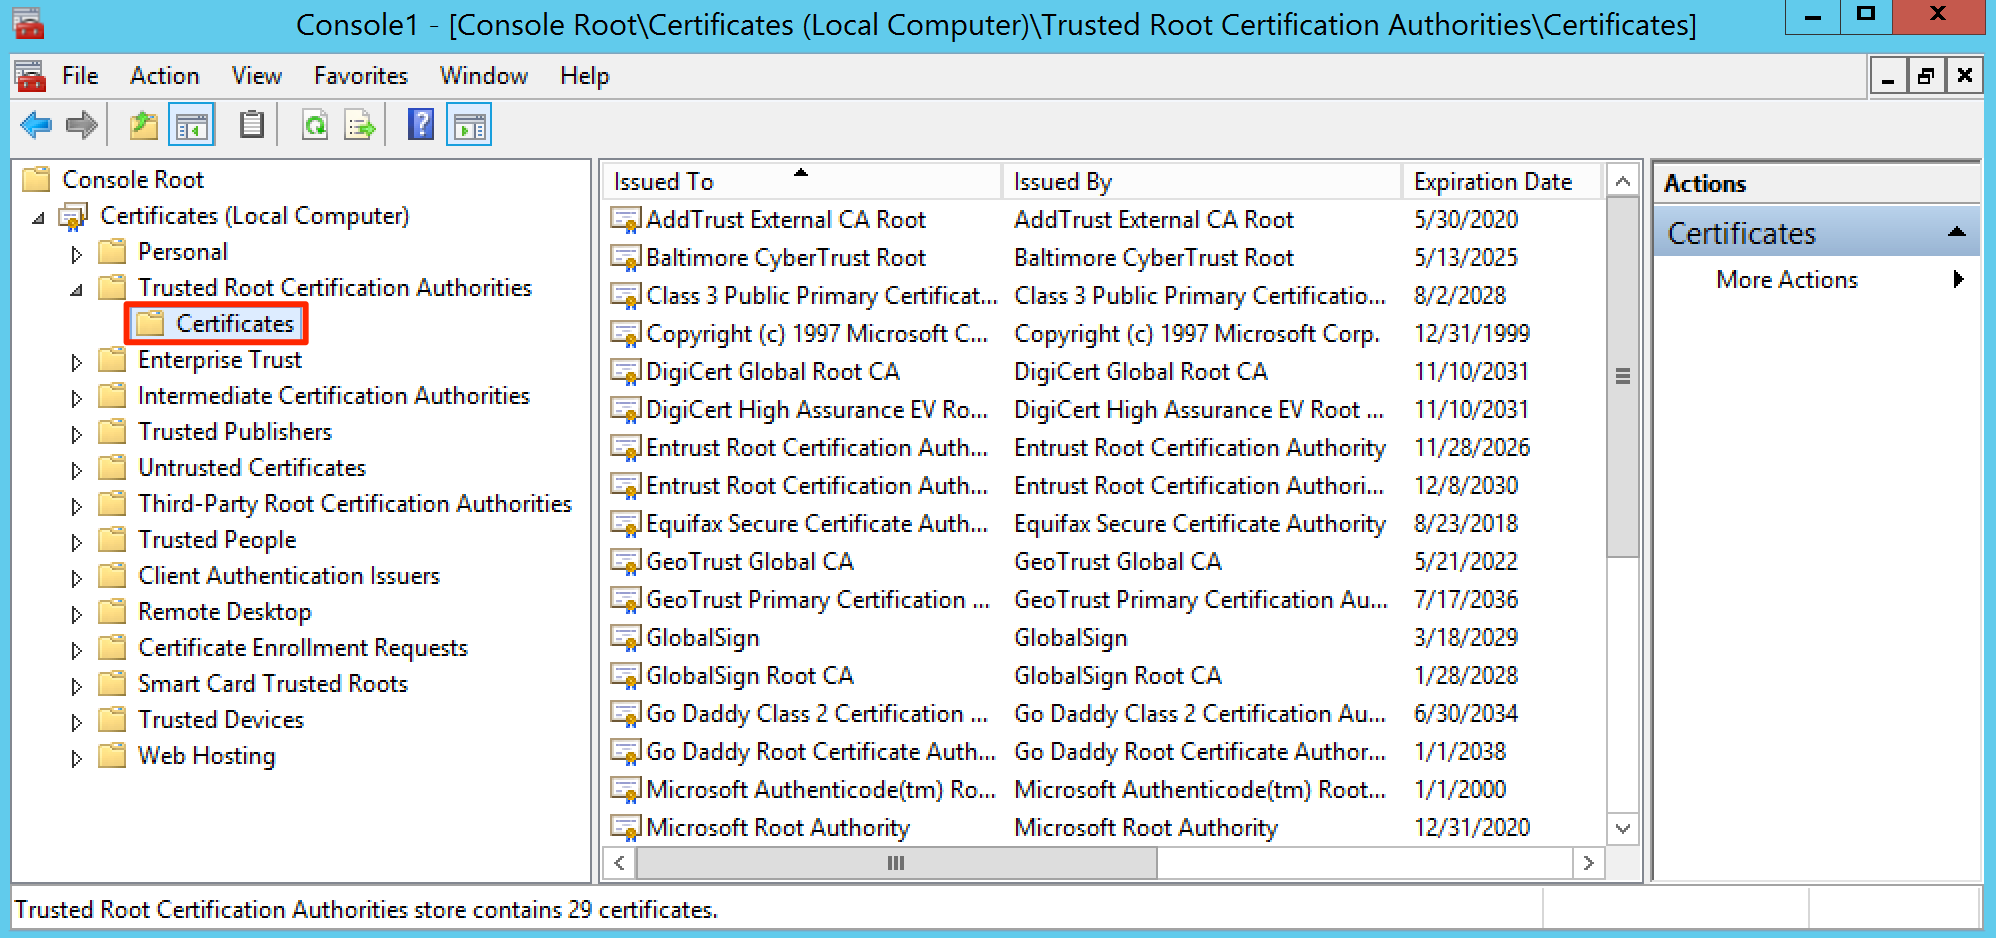
Click More Actions, and select All Tasks > Imports.
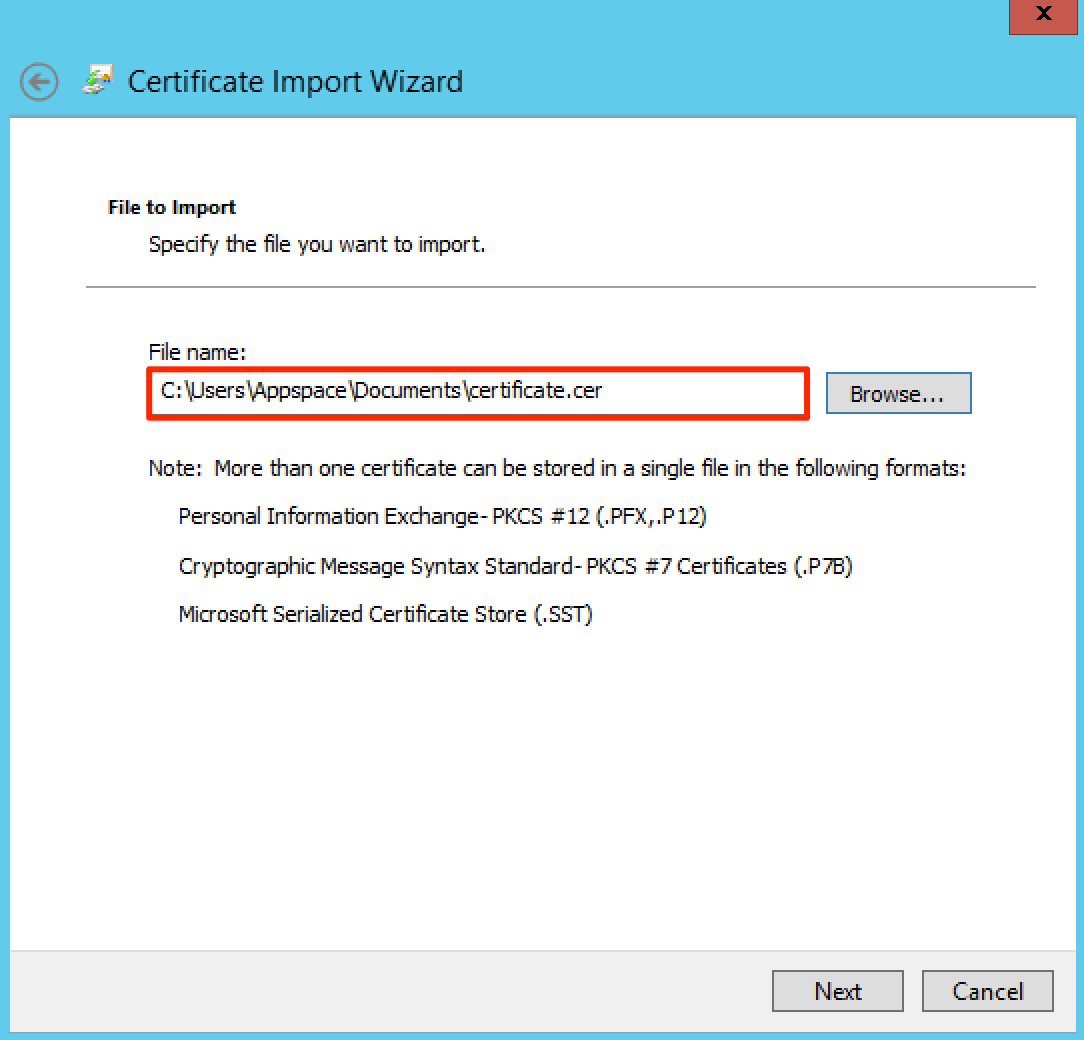
In the Certificate Import Wizard, click Next, and browse for the certificate downloaded earlier from the AD server. Click Next.
Leave the Certificate Store default option at ‘Place all certificates in the following store’. Click Next.
Review, and click Finish. Click OK for the successful import notification.
The certificate is displayed in the details pane.
Configuring AD Authentication Over SSL
Now that you’ve imported your SSL certificate into the Appspace server, you can now proceed to configure AD authentication. To do so, refer to the AD/LDAP Authentication Guide.