License Activation (Omni Subscribers)
Introduction
Important
This article is only applicable to Omni plan subscribers (i.e. Omni-D, Omni-E, Omni-F, or Omni-G) that are deploying an on-premise instance of Appspace server. If you are a traditional subscriber (i.e. Pro, Pro+, or Enterprise) – please refer to the License Activation (Traditional) article.
This article will guide you through the activation and licensing process of an on-premise Appspace server instance. The steps in this guide will go through the overall process starting immediately after you have accessed your Appspace server for the first time after a full installation has been successfully completed.
Prerequisites
- Your Cloud user account must be upgraded to one of the Omni subscription plans
- You must have Portal Administrator privileges on your Appspace server
Note
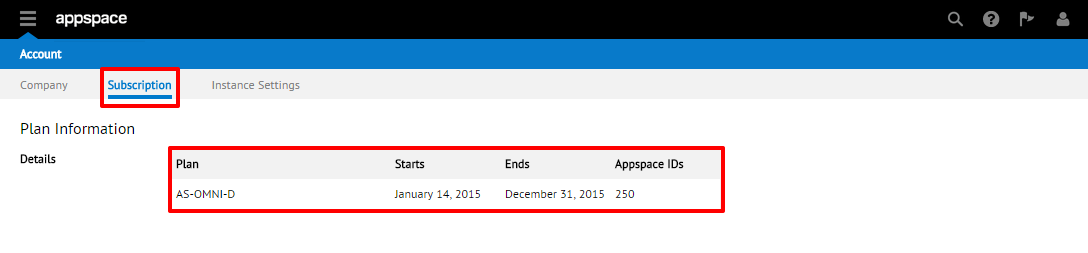
You can check your currently Cloud subscription by logging into your Cloud account and going to the Subscription tab (extensions drop-down menu, System > Account > Subscription) as seen in the image below. If you need to have your account upgraded to the proper Omni subscription level, please contact your local Appspace sales or support teams.
Licensing Your Appspace Server
Warning
If your on-premise Appspace server does not have an active Internet connection or have security policies/measures that prevent full Internet access, please scroll down and follow the instructions for Offline Appspace Server Licensing.
Step 1
Once your on-premise Appspace server instance has been successfully installed and accessed for the first time, the system will detect that the server needs to be activated. At the License Activation screen, enter your Cloud account credentials in the username (typically an e-mail) and password fields. Click Next to continue.

Step 2
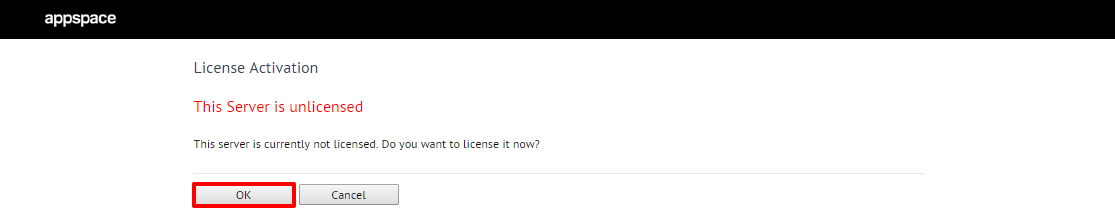
The server should then confirm that it has not yet been licensed. Continue by pressing the OK button to begin the automatic licensing and activation process.
Step 3
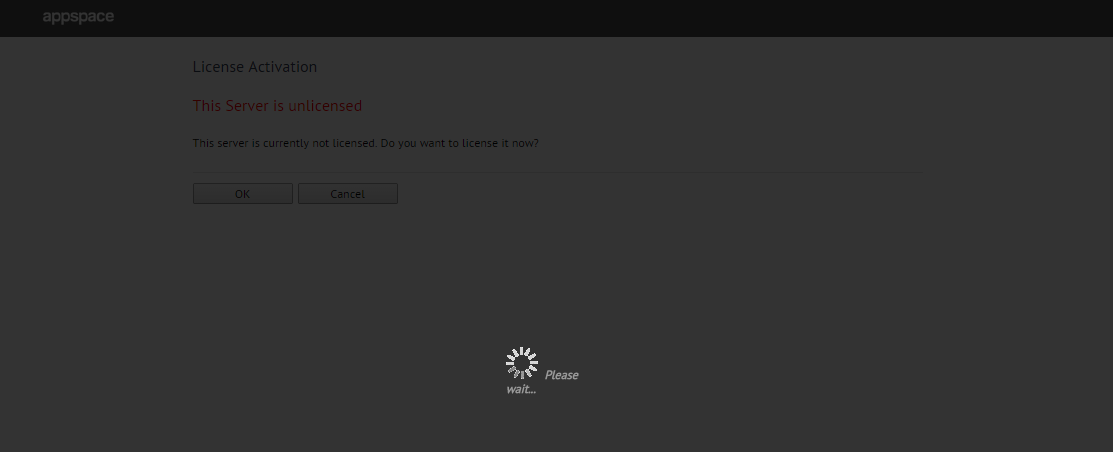
You may see a “Please wait…” message for a minute or two. During this time, your Appspace server is communicating with the Cloud server database perform several actions that include checking your latest Omni subscription plan, generating a license key, downloading the key itself, and server activation.
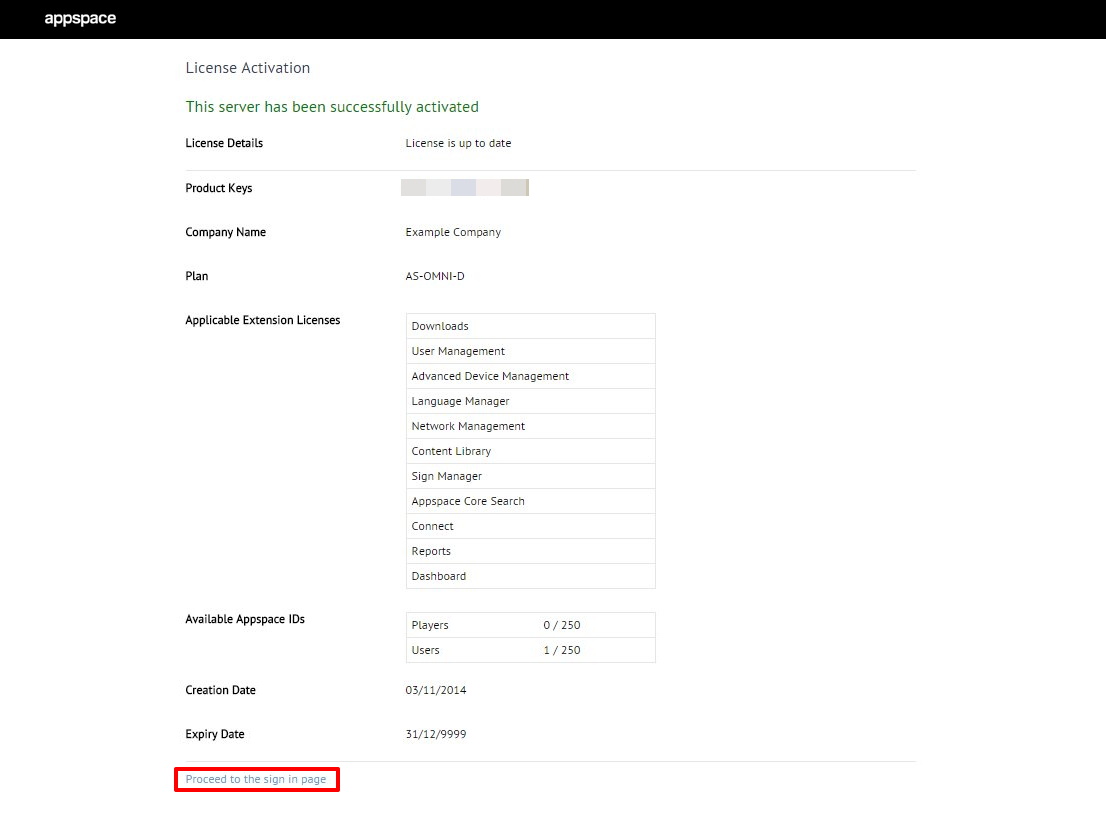
Step 4
If everything is successful, you should see a confirmation message at the top of the next page. The details for your on-premise Appspace server instance should now be listed on this page that covers everything including your current Omni subscription plan, applicable extension licenses, as well as your available Appspace IDs. When you have finished reviewing this page, you may continue to sign into your server by clicking on the ‘Proceed to the sign in page’ link on the bottom of the page. You may now proceed to follow the steps in the Accessing Appspace (On-Premise) article.
Offline Appspace Server Licensing
The steps outlined in this section are specific to on-premise Appspace servers that do not have active Internet connections (or have security policies/measures that prevent full Internet access). It is an alternative method of licensing your server but requires more steps to complete the overall process.
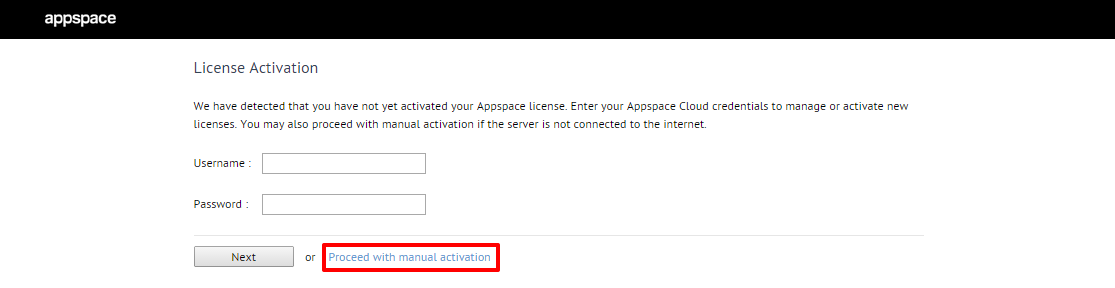
Step 1
Once your on-premise Appspace server instance has been successfully installed and accessed for the first time, the system will detect that the server needs to be activated. At the License Activation screen, click the ‘Proceed to Manual Activation’ link to continue.
Step 2
On the Manual License Activation screen, retrieving your Server Profile by clicking the Download File button under Step 1. Save the file (ServerProfile.xml) to a suitable location on your local machine.

Step 3
Log into your Appspace Cloud account (https://cloud.appspace.com) and access the System > Account page from the extension drop-down menu in the upper-left corner.

Step 4
On the Subscription tab, find and click on ‘Generate Offline License’ in the Offline Instances section of the page.

Step 5
On the Generate Offline License window, click on the folder icon to browse/select the previously saved Server Profile (ServerProfile.xml) from the appropriate location on your local machine. Once selected, click Next to continue.

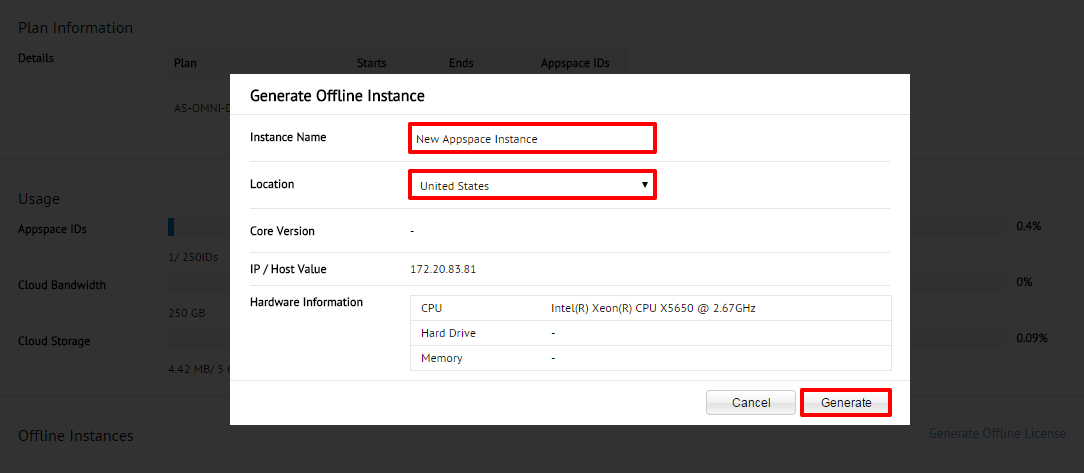
Step 6
Proceed to give fill in the Instance Name field and select the Location from the drop-down menu. When finished, click the Generate button.
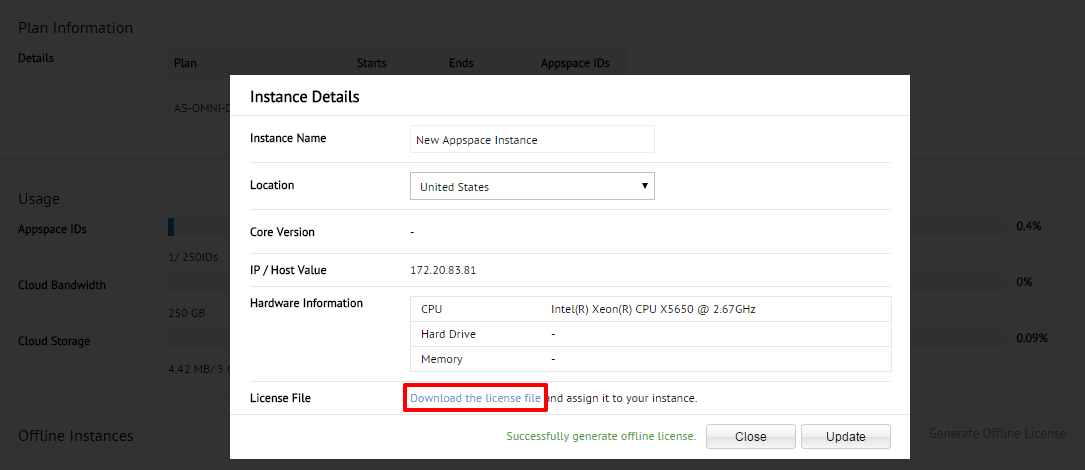
Step 7
If successful, you should see a confirmation notification in the window. Click on the ‘Download the license file’ link in the window.
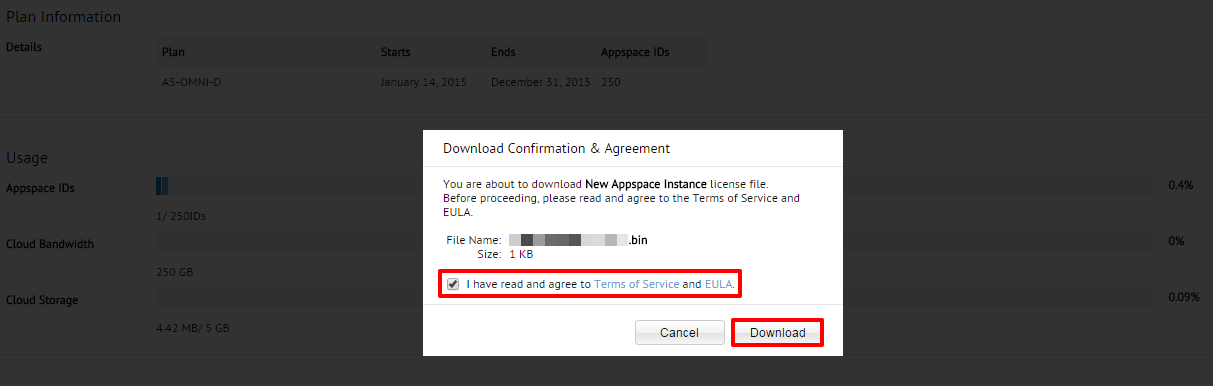
Step 8
A final Download Confirmation & Agreement window will prompt you to agree to the Terms of Service and EULA. Once you have read and agreed, check this box and click Download. This will download the Product Activation File (usually named <Product Key Number>.bin). Save this file to an easily accessible location on your local machine.
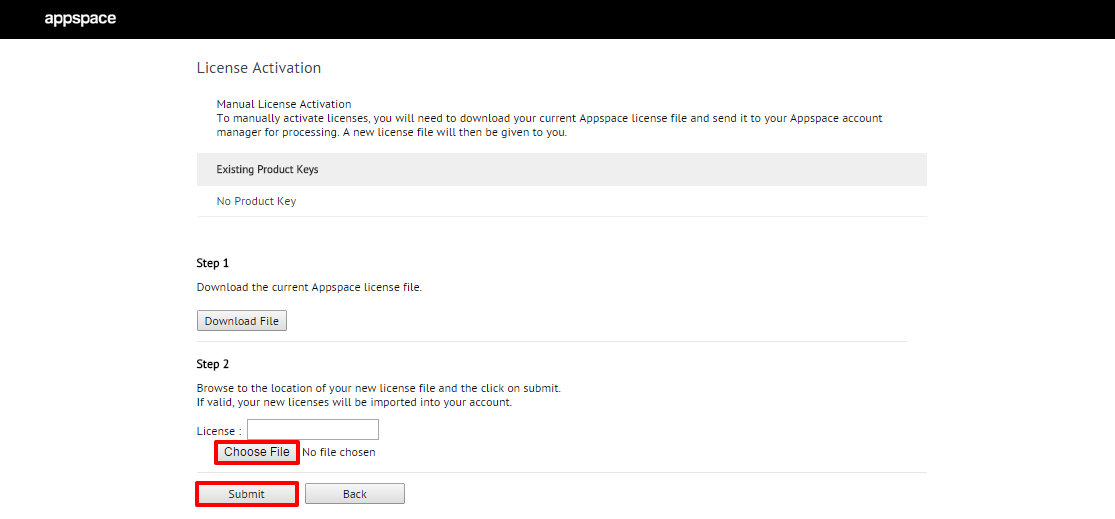
Step 9
Back on the Manual License Activation page of your on-premise Appspace server instance, proceed to Step 2. Click the Choose File button to browse/select the previously saved Product Activation File (<Product Key Number>.bin) from your local machine. Once selected, click the Submit button to continue.
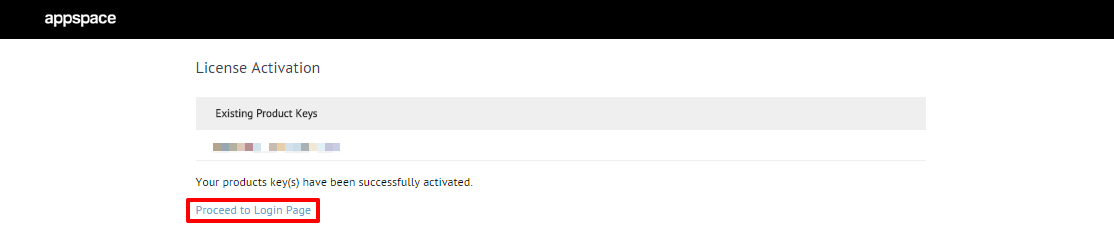
Step 10
If successful, you should be prompted with a confirmation message. You may continue to sign into your server by clicking on the ‘Proceed to Login Page’ link. You may now proceed to follow the steps in the Accessing Appspace (On-Premise) article.