Backup and Restoring SmartHub ASE
Introduction
This guide is intended for IT Administrators who wish to manually backup and/or restore their SmartHub ASE. It should be noted that this guide is intended to be used in conjunction with your organization’s general IT polices for server backups.
Prerequisites
- IT Administrator level credentials and access to the Windows server environment
- Appspace credentials to access and maintain the SmartHub ASE instance
Backing Up the PostgreSQL Database and the SmartHub ASE Directory
The backup process involves making a backup of the PostgreSQL database as well as the SmartHub ASE directory/folder. These steps are necessary and important in order to preserve any/all configurations and content before executing any SmartHub ASE re-installation procedures.
Step 1
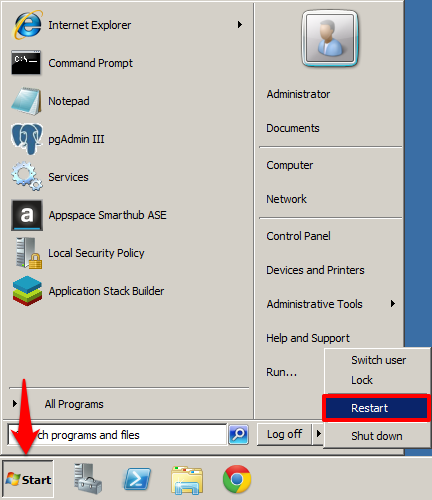
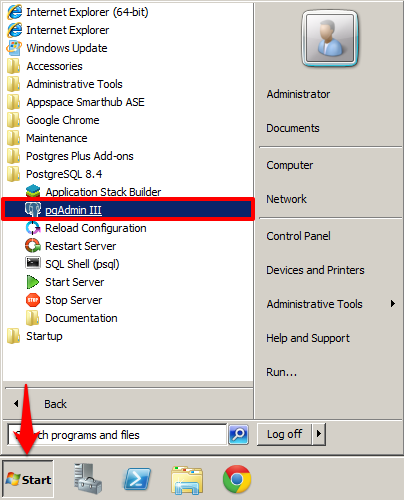
Begin by launching the pgAdmin III application - typically this is accessed through the Windows Start menu > All Programs > and located under the PostgreSQL menu.

Step 2
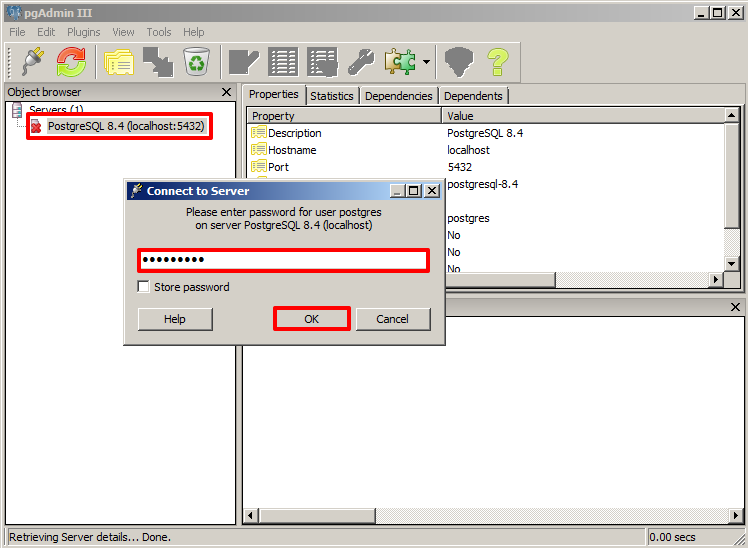
Within the pgAdmin III interface, double-click on the PostgreSQL server in the Object browser pane to establish a connection. Enter the password and click OK to continue.
Note
The typical (default) PostgreSQL server password is E16!1!M34 - please consult with your organization’s IT administrator in case this has been changed.
Step 3
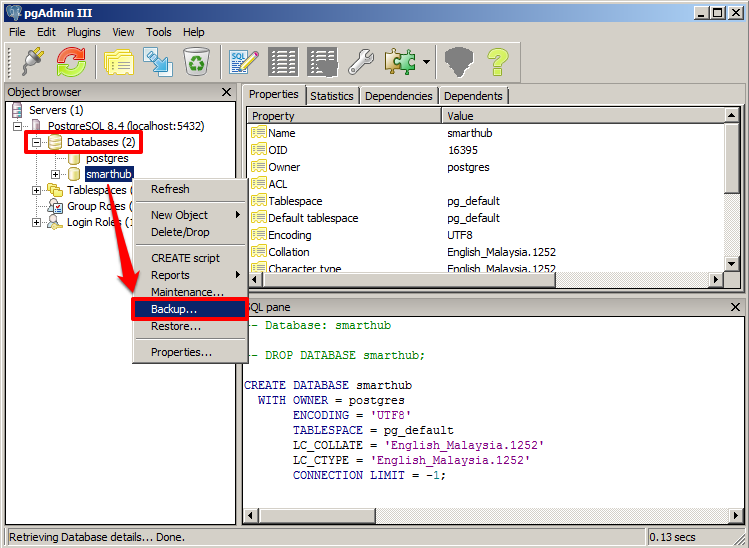
Once connected, expand the Database tree branch in the Object browser pane and right click smarthub to bring up additional menu options. Select ‘Backup...’ to continue.
Step 4
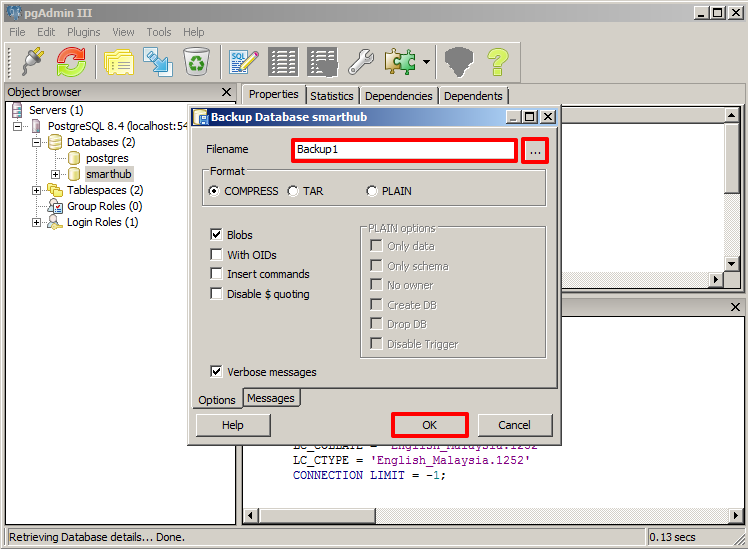
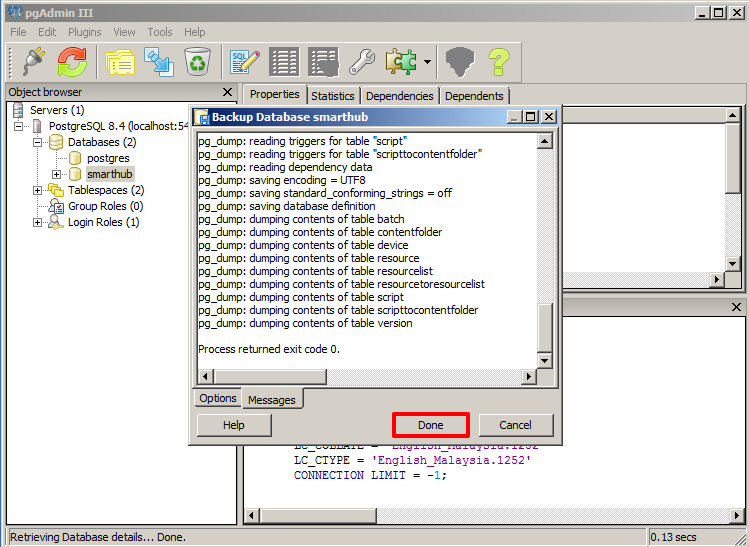
On the Backup Database window, provide a name for the backup file in the Filename field. Click on the ”...” button to select the desired location that you would like to save the backup file and click Save. Finally, click the OK button to initiate the backup.
When finished, click Done to complete the process. You may now exit and close the pgAdmin III application.
Step 5
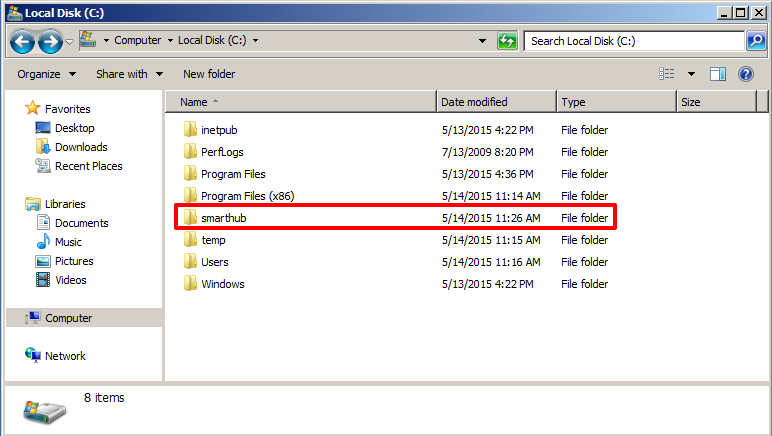
Navigate to the SmartHub ASE directory on your Windows server environment. Unless it was changed during installation, the SmartHub ASE directory is typically (by default) located directly within the main local disk (i.e. C:/smarthub). Make a backup copy of this entire folder/directory. You may choose to store this backup at your desired location.
Restoring the PostgreSQL Database and the SmartHub ASE Directory
The process to restore the PostgreSQL and SmartHub ASE folder directory will typically take place after one of the following two scenarios has taken place:
- A SmartHub has been installed (and registered) on a new server
- A SmartHub has been uninstalled and then rebuilt (and reregistered) on the same server
Note
For detailed steps and instructions on SmartHub ASE installation, please see the article Installing and Registering SmartHub ASE. You can also find detailed steps and instructions on uninstalling SmartHub ASE on the Uninstalling SmartHub ASE article.
Step 1
Begin by launching the pgAdmin III application - typically this is accessed through the Windows Start menu > All Programs > and located under the PostgreSQL menu.
Step 2
Within the pgAdmin III interface, double-click on the PostgreSQL server in the Object browser pane to establish a connection. Enter the password and click OK to continue.
Note
The typical (default) PostgreSQL server password is E16!1!M34 - please consult with your organization’s IT administrator in case this has been changed.

Step 3
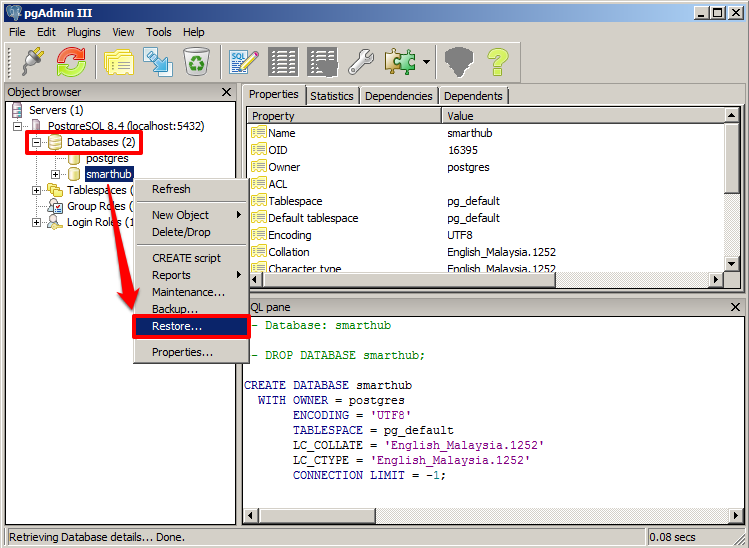
Once connected, expand the Database tree branch in the Object browser pane and right click smarthub to bring up additional menu options. Select ‘Restore...’ to continue.
Step 4
On the Restore Database window, click on the ”...” button to browse/locate the desired SmartHub backup file and click Open. Proceed by clicking OK. Once the restore process has completed, you may exit and close the pgAdmin III application.

Step 5
Before restoring the SmartHub ASE directory, you will have to first stop the related services for the restoration to e successful. From the Windows Start menu, access Services from within the Administrative Tools.

Step 6
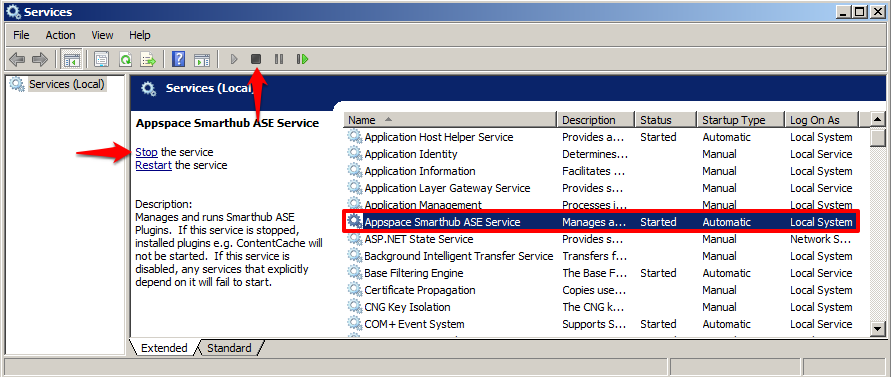
Find and stop the ‘Appspace Smarthub ASE Service’ from the Services listing.
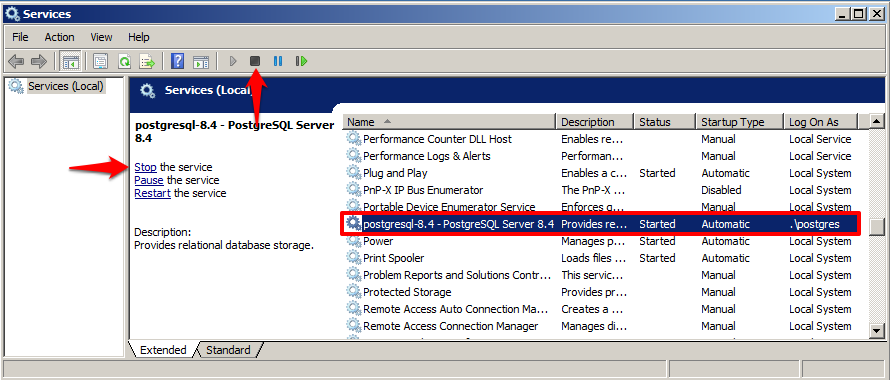
Also stop the ‘postgresql-8.4’ service from the same listing.
Step 7
Once both services have been stopped, navigate to the SmartHub ASE directory. Unless it was changed during installation, the SmartHub ASE directory is typically (by default) located directly within the main local disk (i.e. C:/smarthub). Replace the smarthub folder with your backup of this entire folder/directory.

Step 8
When finished, perform a server restart to apply all changes and to ensure that all services are resumed to fully complete the restore process.