Widget: Event Calendar
Overview
This widget displays user-defined calendar data in chronological order. The scheduled information can be presented in hour, day, week, or month format. It is commonly used for:
- Displaying the agenda of the current day/week/month for a specific event or location.
- Enabling easy, instant announcements on changes to events scheduled during a particular time-period.
- Sharing of new content and updates for rapid deployment to event participants / viewers of the widget.
Editing An Event Calendar Widget
Step 1
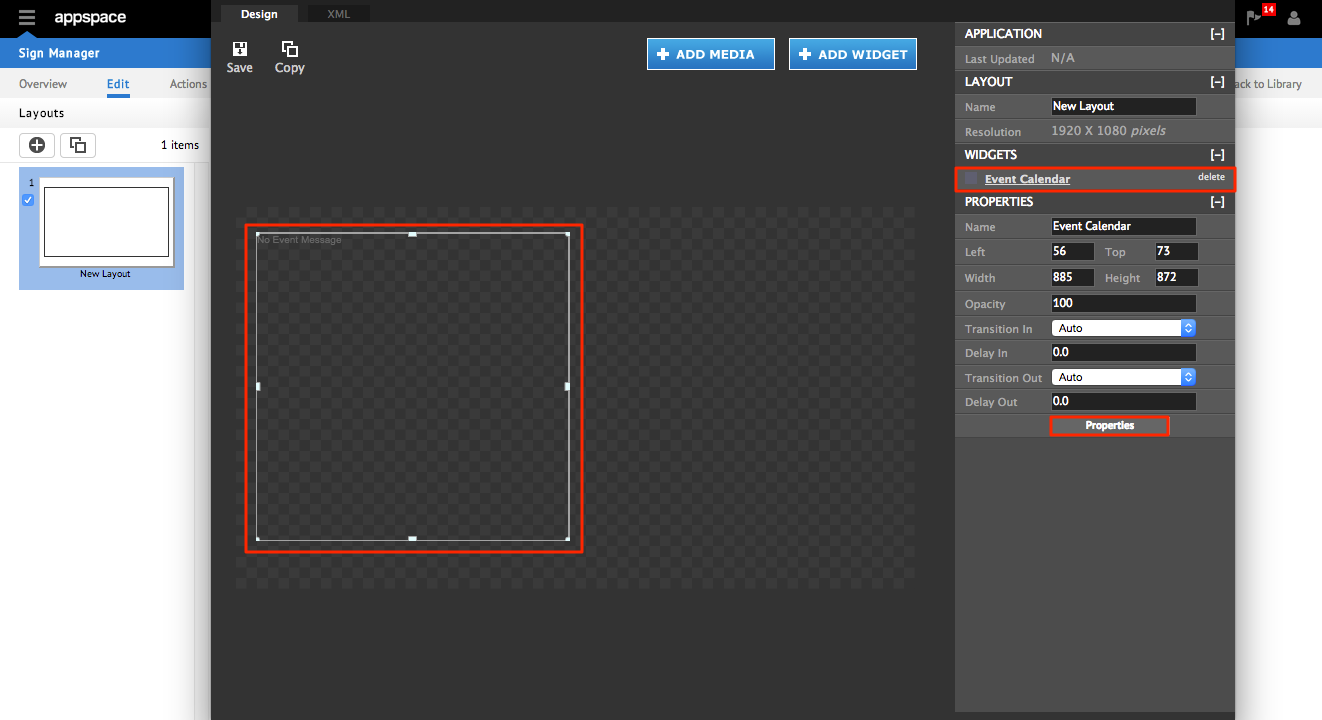
From an existing application, click on the Event Calendar widget from the selected layout or select it from the list of widgets on the right. To edit the widget in the Visual Editor, click on the Properties button at the bottom right. This will bring up the widget properties dialog.
Step 2
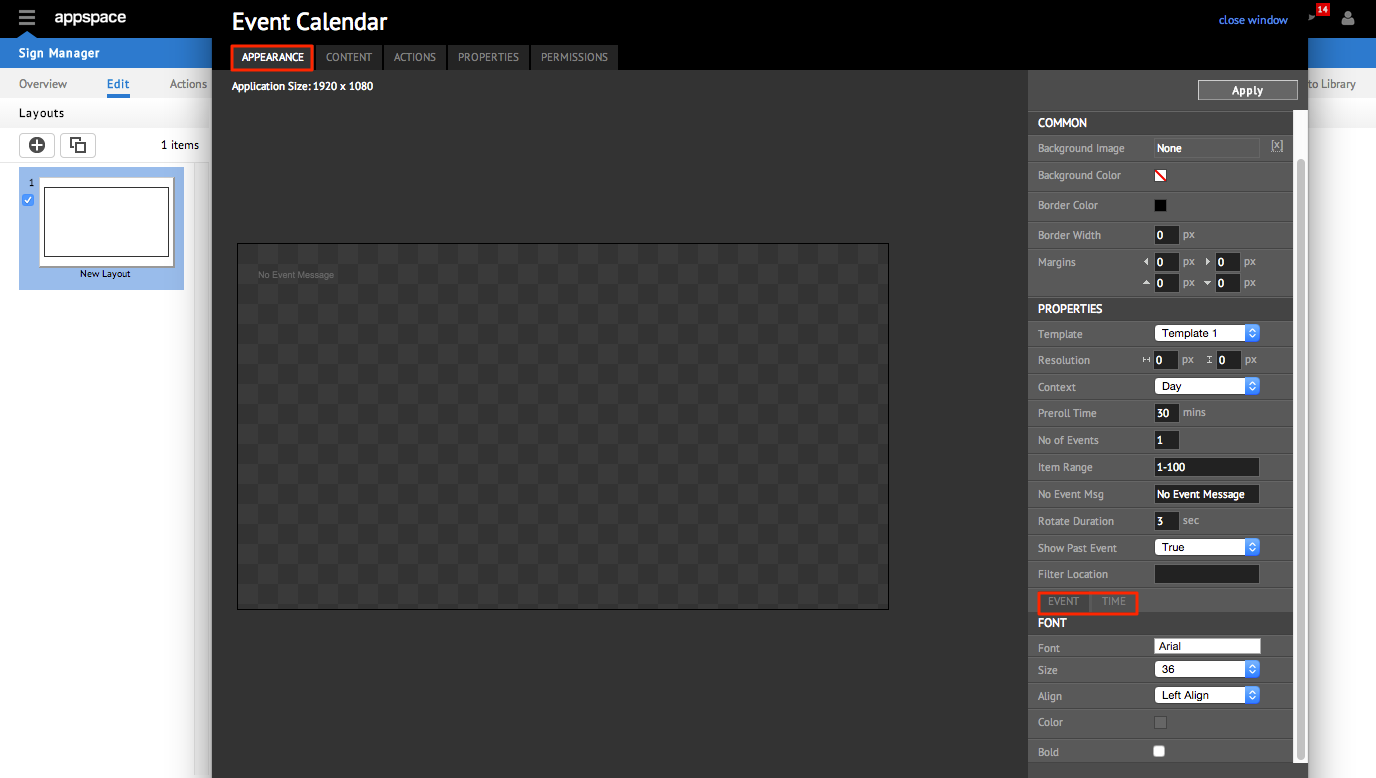
On the APPEARANCE tab, you will be able to view the layout of the widget. The right hand side of the page contains all the editable properties of the widget itself.
Note
The PROPERTIES section allows you to alter the behaviour of the events being displayed, which includes:
- Template: Preset layouts to display the event information.
- Resolution: The dimensions of the text.ContextThe option to display events in the current hour, the current day, current week or current month.
- Preroll Time: How long before the start of an event will the event be displayed, expressed in minutes. For example if the event starts at 9am, specifying 30 minutes as Preroll Time means that the event will be displayed starting at 8.30am.
- No. of Events: Number of events to display per paging. If there are more events the widget will cycle through all the events.Item RangeThe total range of calendar items to display.
- No Event Msg: What message to display when there are no events scheduled in the calendar.Rotate DurationDuration to display each page of calendar events.
- Show Past Event: The option of displaying past events.
- Filter Location: The ability to display events based on the location property. (Location names must not have spaces).
- FONT: Utilizes tabs for customizing the look of the calendar.
- EVENT and TIME: using a variety of formatting options, including font type, size, alignment and color.
Adding A New Event
Step 1
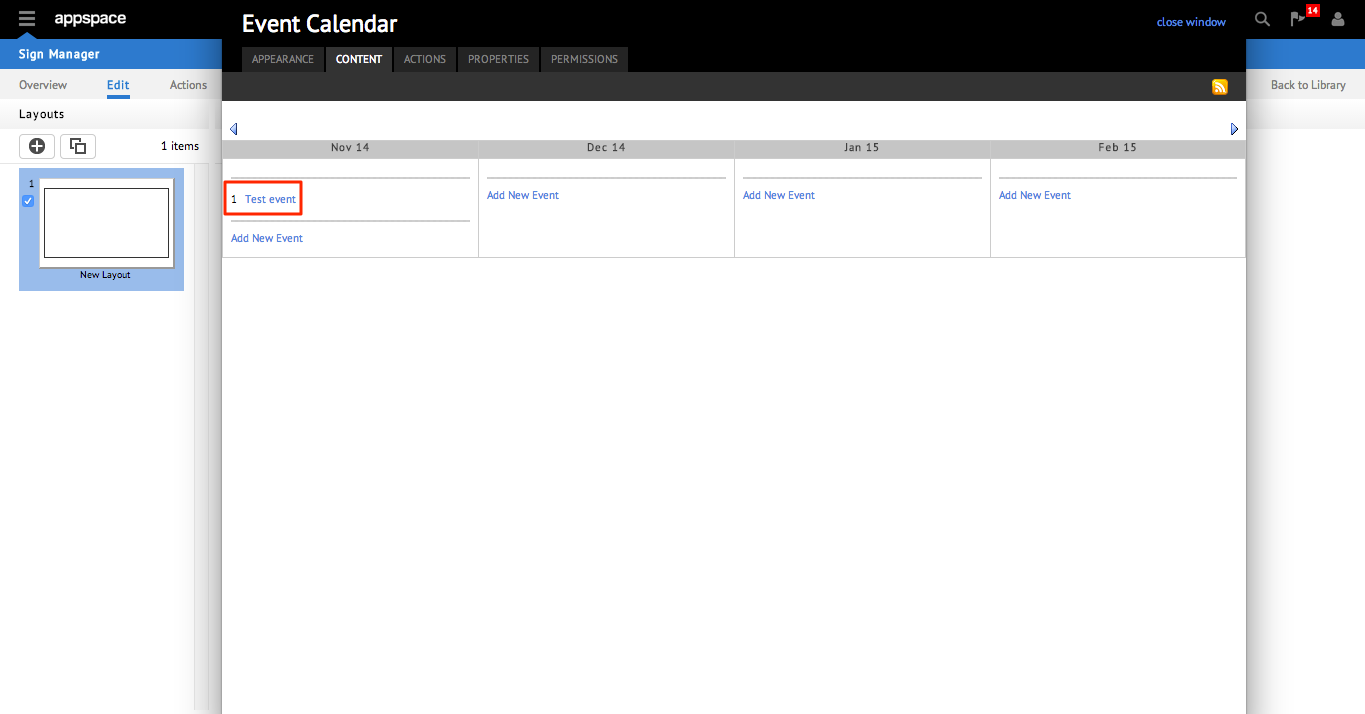
Click the CONTENT tab, where you will be able to view the table of calendar events you have added followed by the Add New Event button, located in every month column.

Step 2
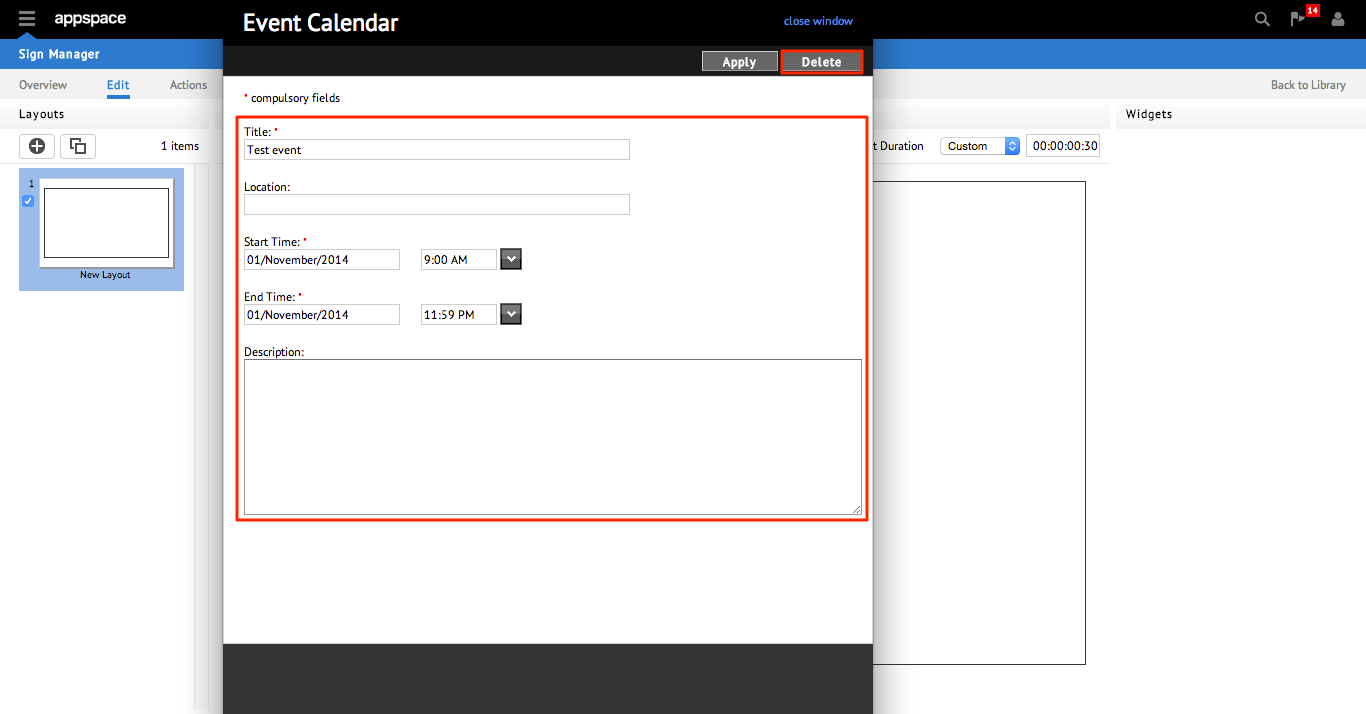
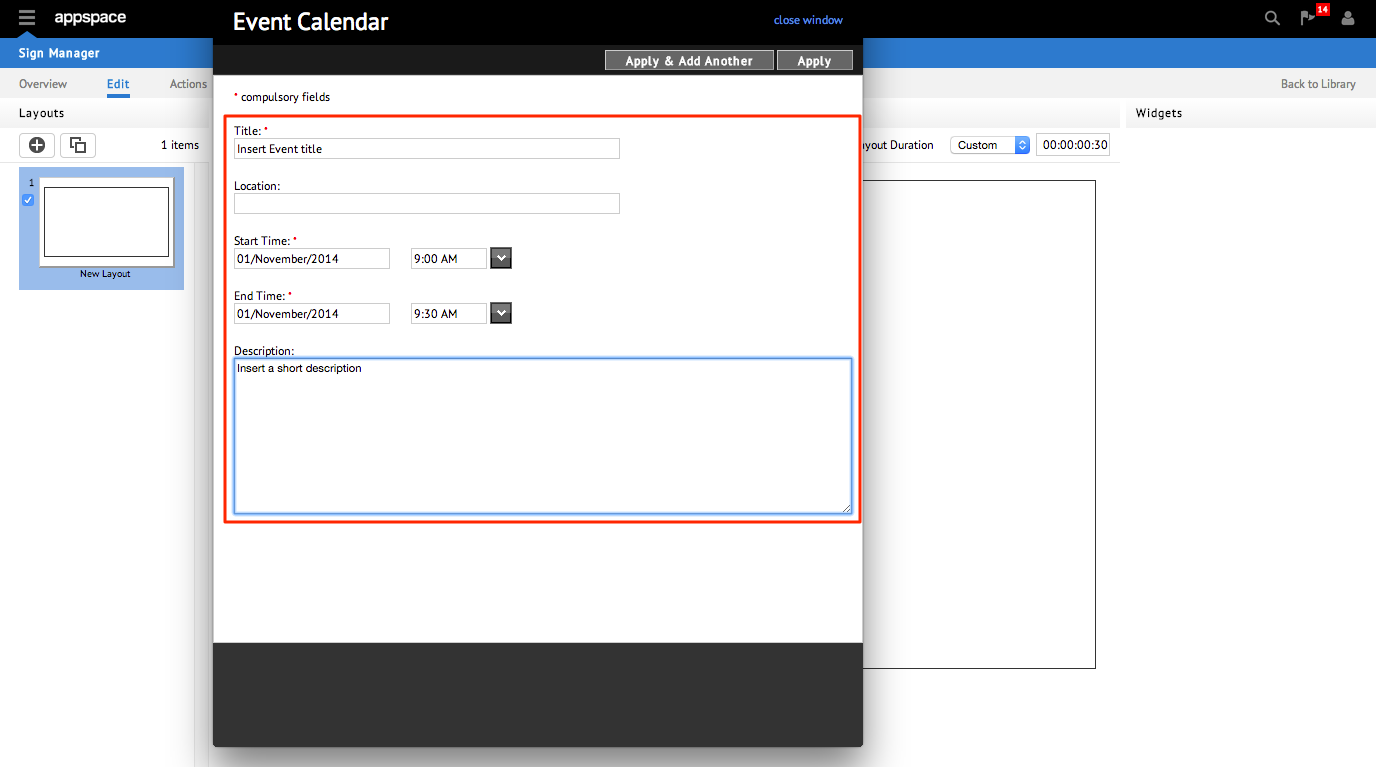
Enter the details of the event in the appropriate sections. Click Apply once you have completed your entry or Apply & Add Another if you want to continue with another entry and click close window once you have finished.
Note
Fields with the * symbol must be filled in order to complete the calendar entry registration process.
Editing and Delete an Event
Integrating with External Data Sources
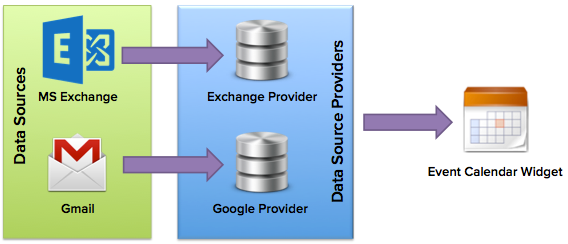
You can integrate the Event Calendar Widget with external data sources such as Microsoft Exchange and Google Mail. Event calendar maps the calendar data sources to its internal representation of calendar data as illustrated in the following diagram.
Step 1
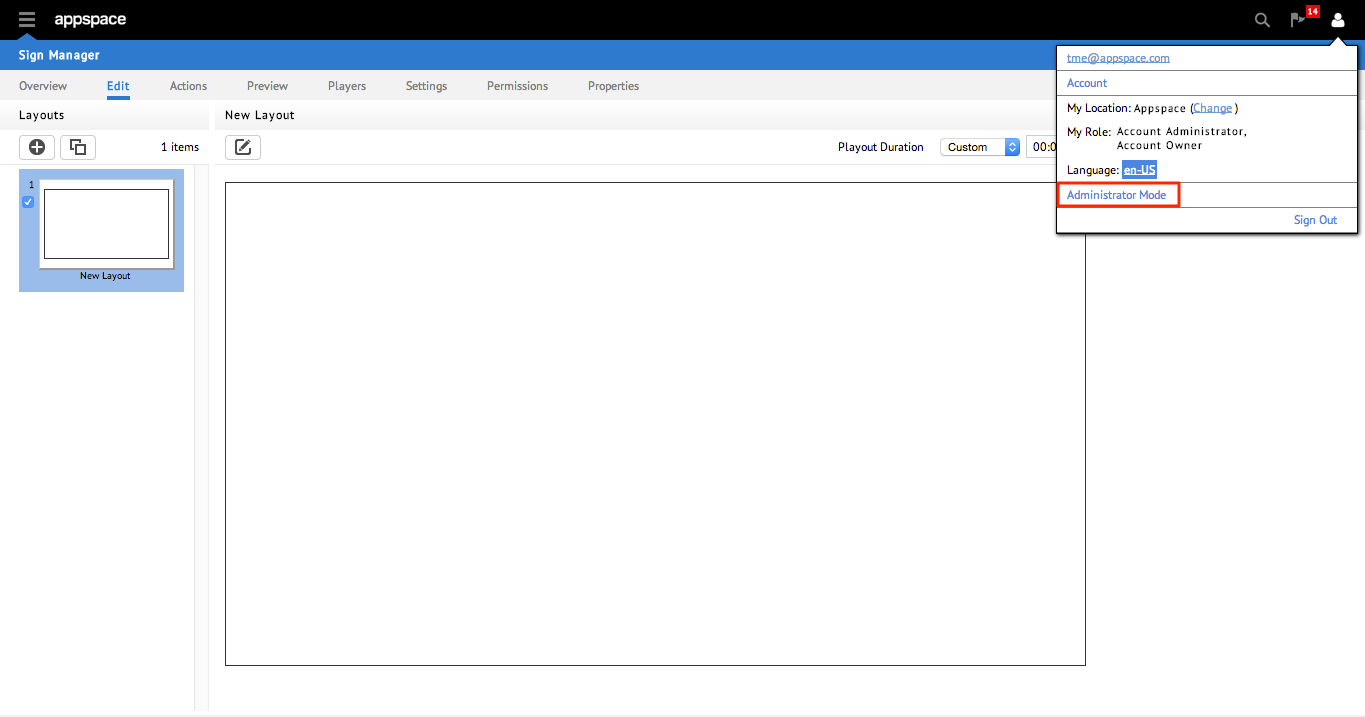
Click on the profile icon on the right side of Appspace page. From the drop-down list, select Administrator Mode and click Yes to confirm the transition to Administrator mode.
Note
The Administrator Interface works best on Internet Explorer 7 and above.
